Extruder Turtle Library
Getting Started
This page introduces you to the library by working through a series of example Grasshopper programs. We recommend that you work through them in order. The examples can be found in the examples/basic_turtle_examples directory. Click on a link below to jump to an example.
Starting Example
Polygon Prism
Turtle Shapes
Euclidean Geometry
| Starting Example | ||||||
| ||||||
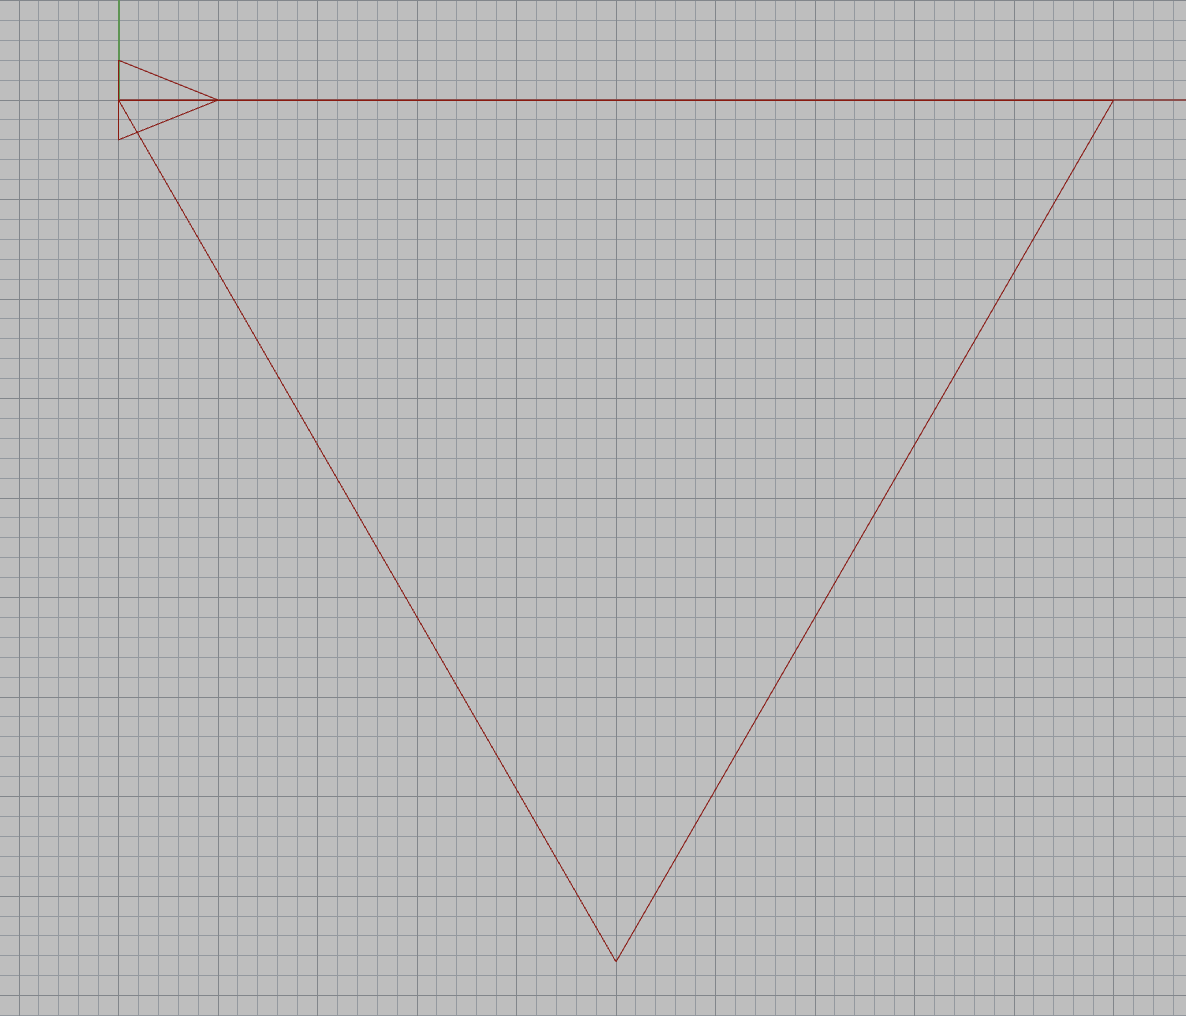
| This simple example is designed to help you understand the basic components of an extruder turtle program. It draws and generates gcode for a simple 2D triangle.
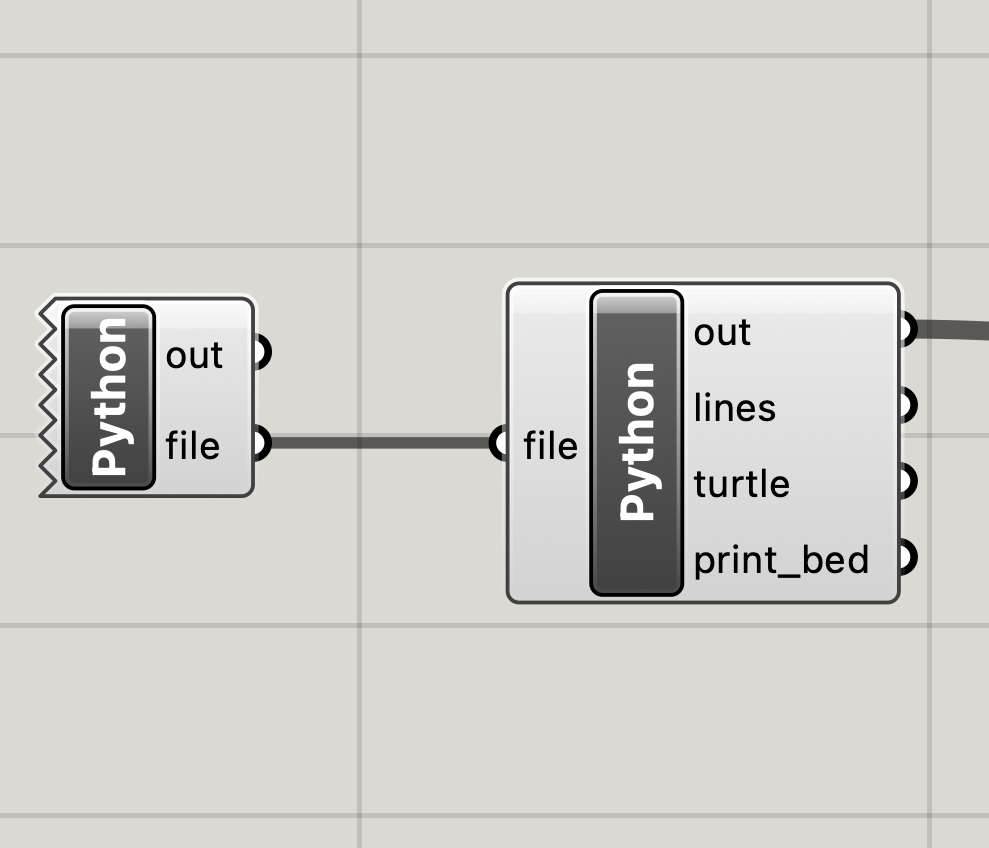
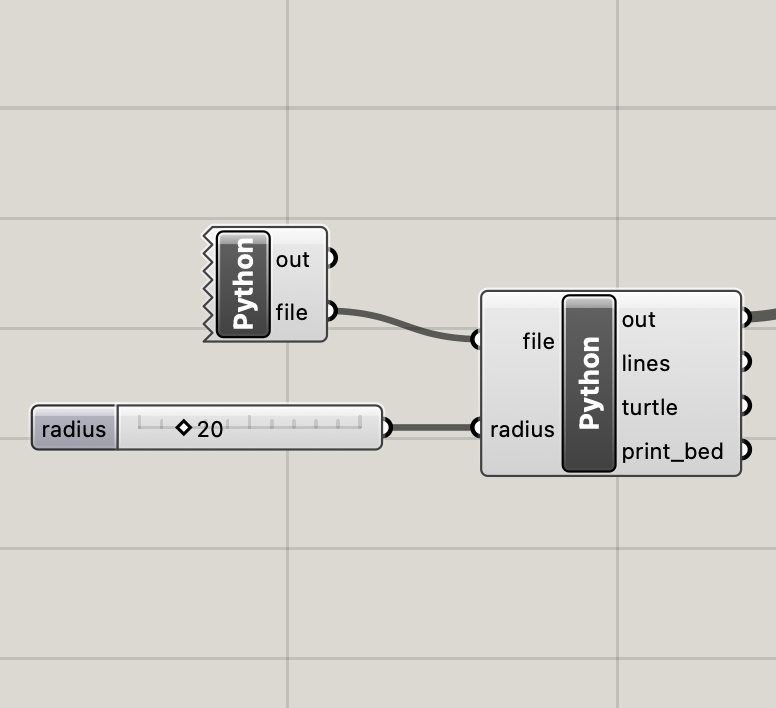
In the Grasshopper program, above middle, the left Python block is used to open up a file to write gcode to. When you compile this block, a Save File dialog box will open, prompting you to save a file. Choose a location and name for your .gcode file. The name of this file is passed to the second Python block. This block is where Extruder Turtle code is written. Note: the second python block will continute writing to the specified .gcode file until the first python block is recompiled. In the main Python block, first the library is imported and a Turtle object is created and associated with a 3D printer--the Eazao Zero, "eazao". The important parameters for this printer are printed to the console. Then, a triangle with 50mm side lengths is generated--the turtle moves forward 50mm and turns right 120° three times. At the end of the program, output variables are generated that enable you to visualize the turtle path ( lines), the location and orientation of the turtle (turtle), and the boundaries of the print bed (print_bed) in Rhino. Here is all of the code in the main Python block: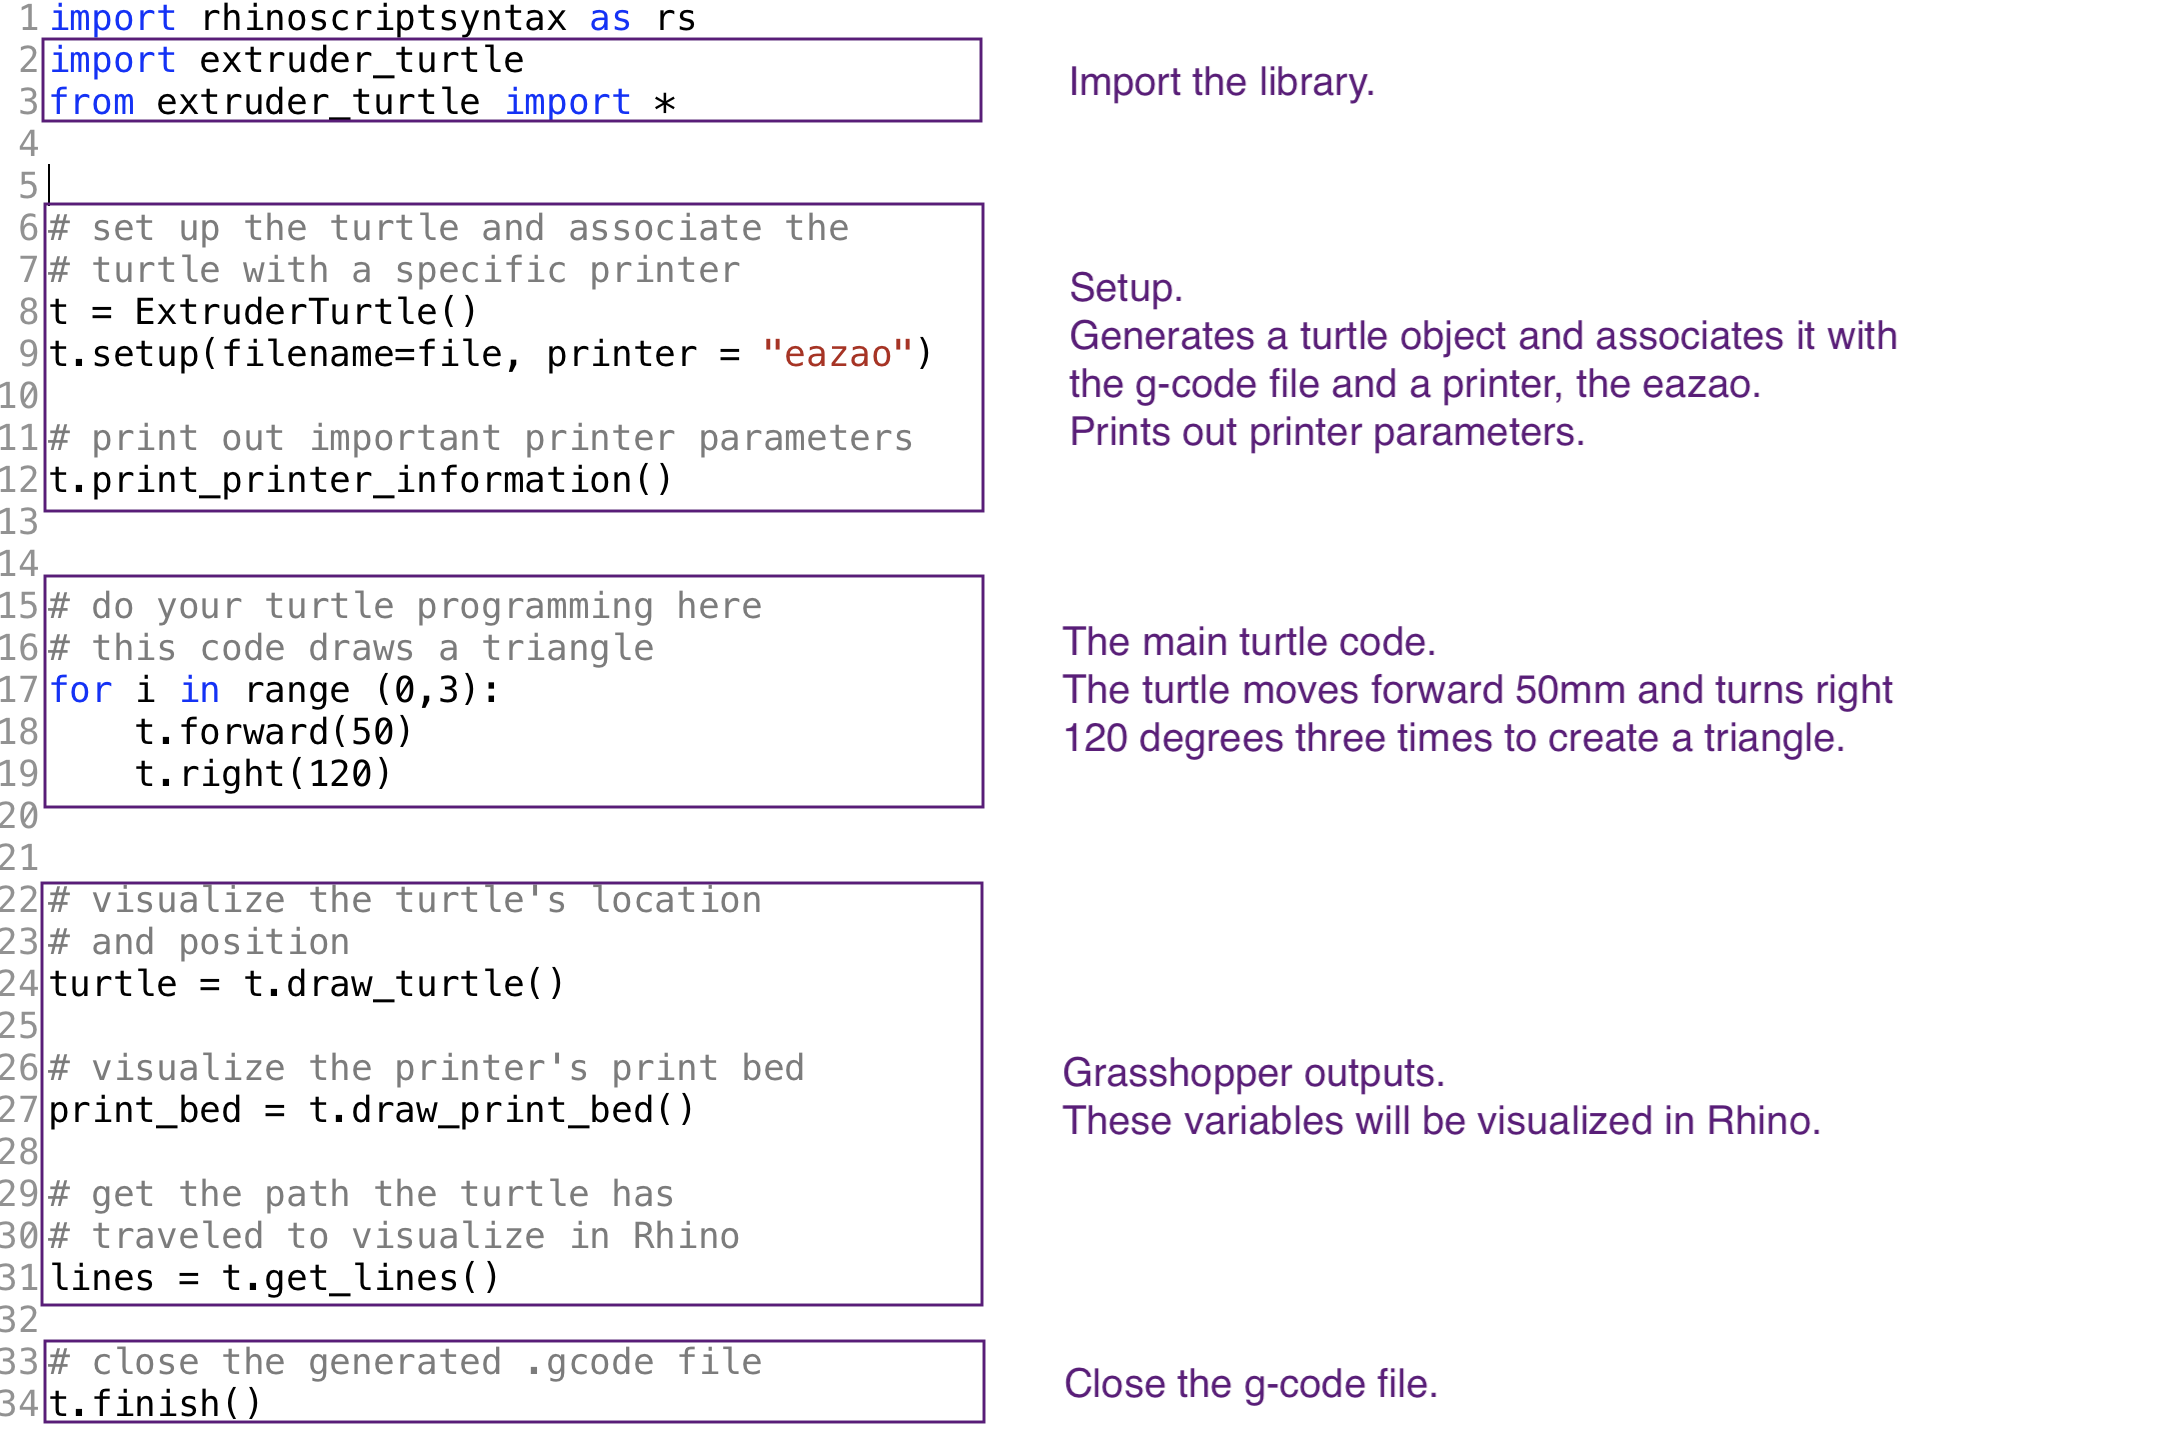 The full output in Rhino is shown below. The large triangle is the turtle path ( lines). The small triangle represents the turtle (turtle), and the large square represents the Eazao Zero's print bed (print_bed). Your turtle path should not extend outside of the print bed.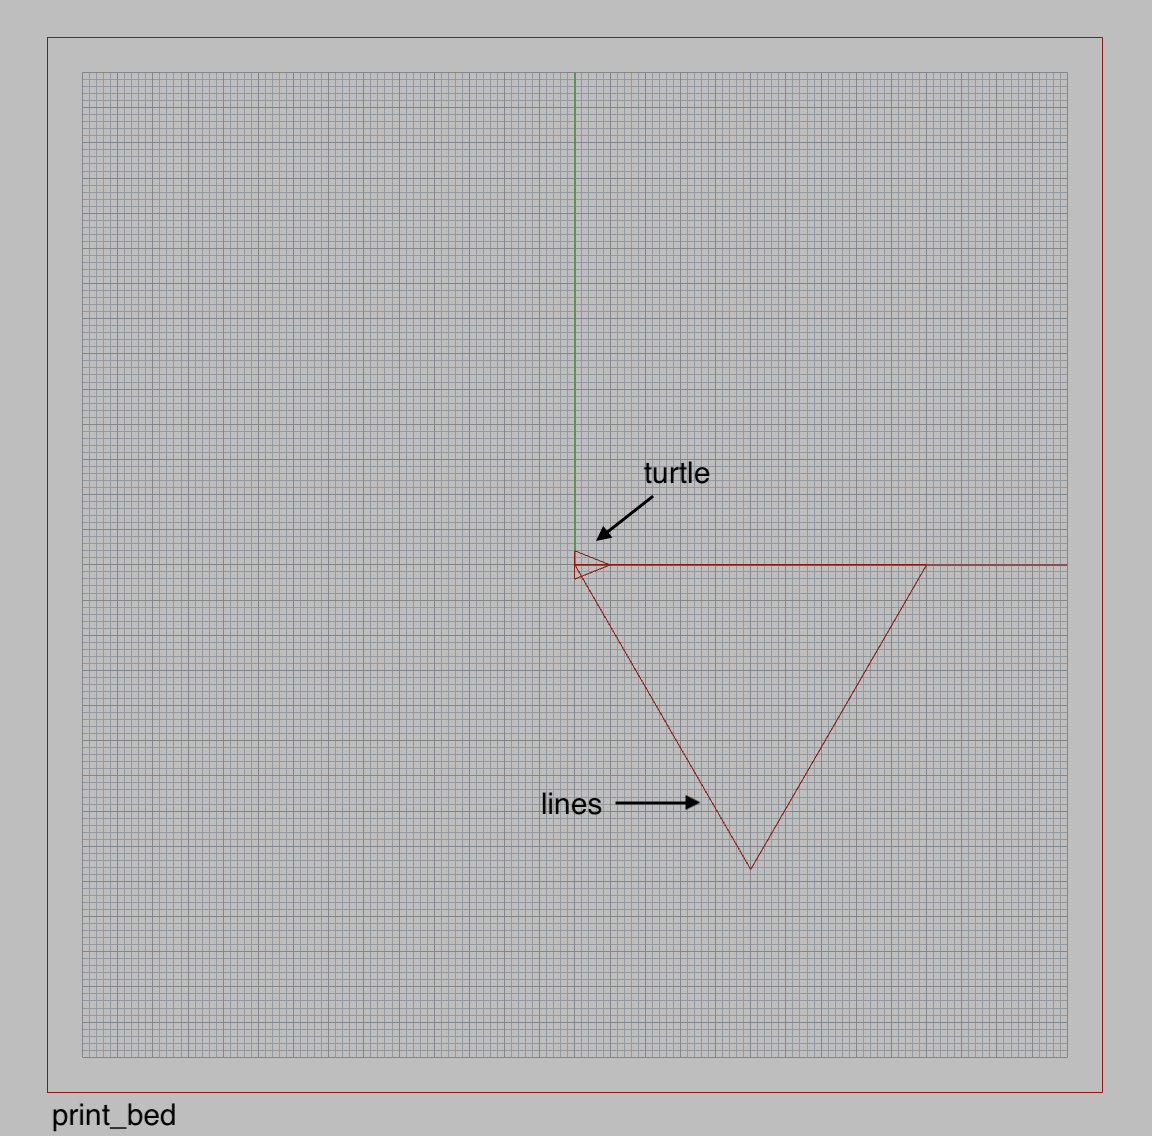 This program generates the g-code shown below. The amount of extrusion for each travel movement is determined by a turtle/printer associated variable called extrude_rate, which can be adjusted. See the Reference . All movements and extrusion are in relative mode. If you open up the .gcode file you saved, you can see the code below preceded by a library generated header. For more information about gcode, see the excellent RepRap wiki.
| ||||||
| Polygon Prism | ||||||
| ||||||
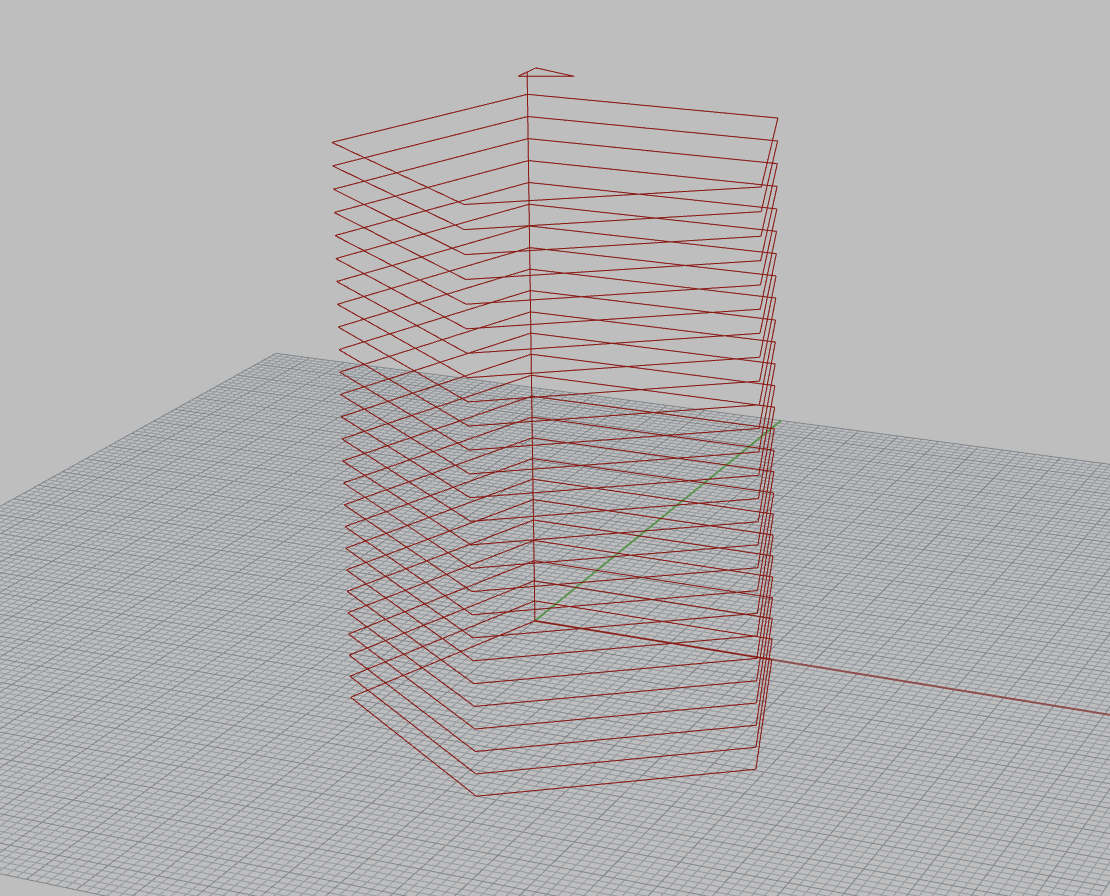
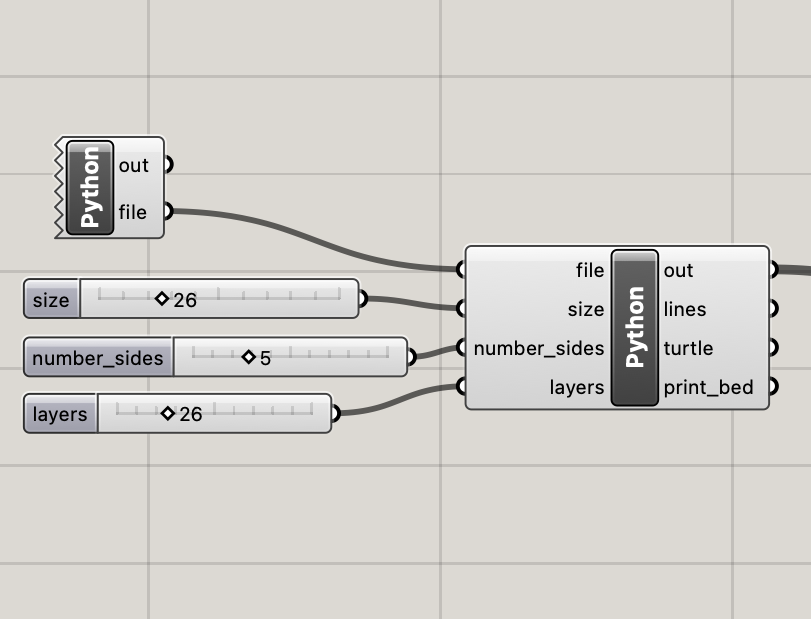
This program generates a 3D shape by stacking a series of polygons. The example demonstrates how to generate 3D paths using the t.lift() command. See more information about this and other turtle movement commands in the Reference. The example also shows how to use Grasshopper inputs in your Python code. The size and shape of the polygonal prism is set with Grasshopper number sliders. The size variable sets the length of each side of the polygon, the number_sides variable sets the polygon's number of sides, and the layer variable sets the number of vertical layers in the prism. As you change the sliders in Grasshopper, you can see your shape change in Rhino. Important: you must set a type for every Grasshopper variable passed to a Python block. Your Python code will not compile until the type for each input variable is set. Set the type for each variable by right clicking on the variable name on the Python block, selecting Type Hint, and then selecting the appropriate type. You can see the type set for each variable in this example by looking at its Type Hint setting. 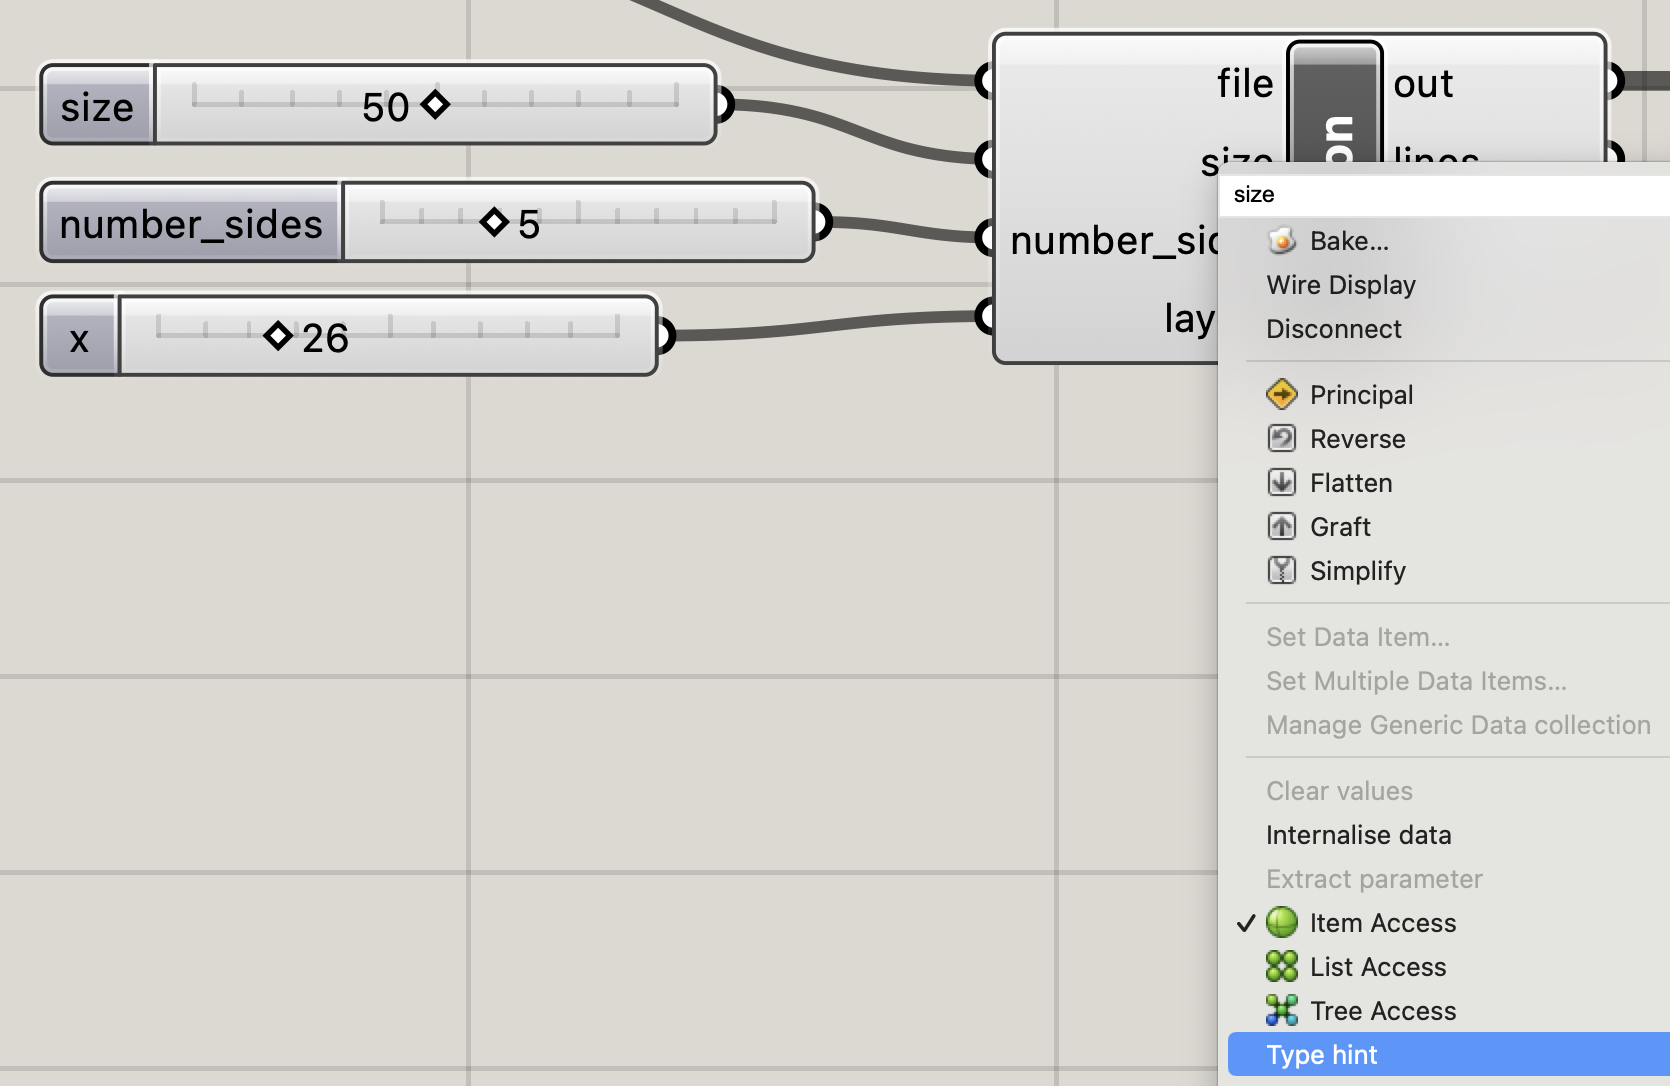 | ||||||
| Turtle Shapes | ||||||
| ||||||
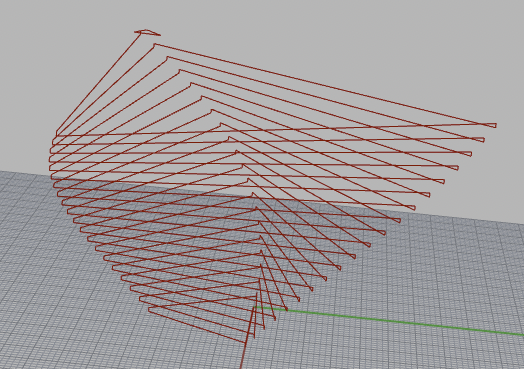
This program creates a set of more complex and interesting 3D shapes with the turtle. The shapes are classic spirograph-like patterns extended into 3D that are easy to create with Turtle Geometry, see the image below. For the center triangular shape (shape0), note how the size variable is gradually implemented, to create a spiral out effect. Also note how the angle variable is set to slightly less than 120°, creating a triangle that overlaps itself slightly at each corner turn. Experiment with the size and angle variables to get interesting shape variations.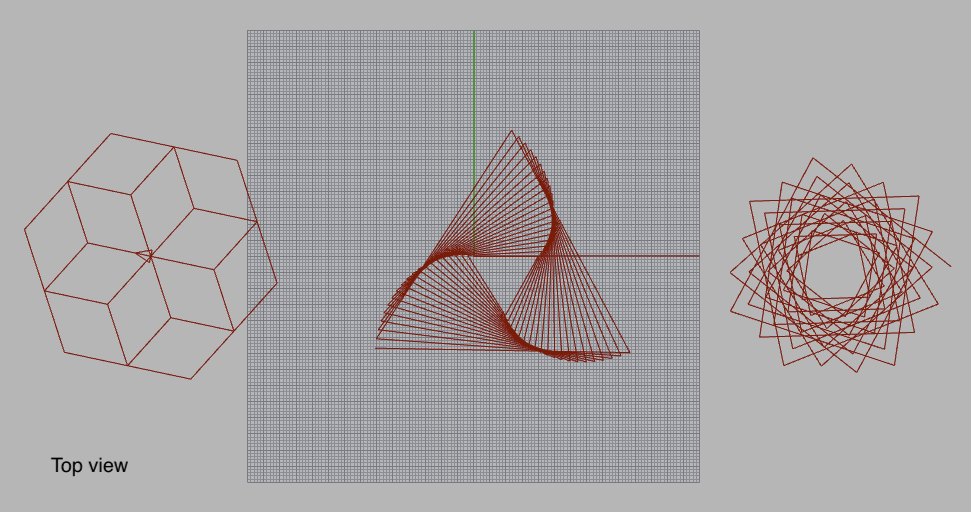 This example also demonstrates function definitions and the use of pen_up() and pen_down(), as well as the Euclidean command set_position(x,y,z). | ||||||
| Euclidean Geometry | ||||||
| ||||||
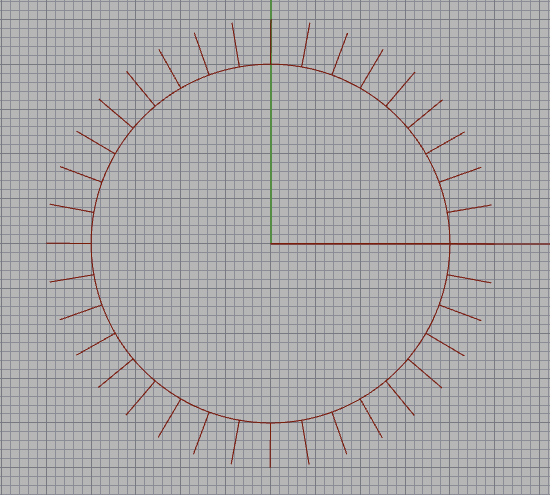
This program demonstrates how to combine traditional euclidean geometry and turtle geometry. The circle is generated using polar coordinates and traditional trigonometry. The radius variable determines the radius of the circle. The angle variable (i) ranges from 0 to 360, (361 to close the circle). x and y coordinates are computed from the radius and i variables. The turtle's position is then set using the set_position(x,y) command. Every 10°, the turtle draws a line perpindicular/normal to the surface of the circle. It can often be useful to combine Turtle geometry with Euclidean geometry to computer normals (as in this example) and do a variety of other things. | ||||||
| More Information | ||||||
| Before you start writing your own programs, you should look through the Reference Page to get a sense of the library's full capabilities. There are a range of turtle movements that our examples have not covered, including setting the turtle's orientation in 3D. The library also gives you fine-grained control over 3D printer parameters like speed, extrude rate, nozzle size, and layer height. You can use the library to generate gcode for any printer, but it includes support (in the form of useful predefined parameters) for several printers including the Eazao Zero, PotterBot Micro, PotterBot Super, and Ender 3. | ||||||
Installation
Getting Started
Reference