Introduction:
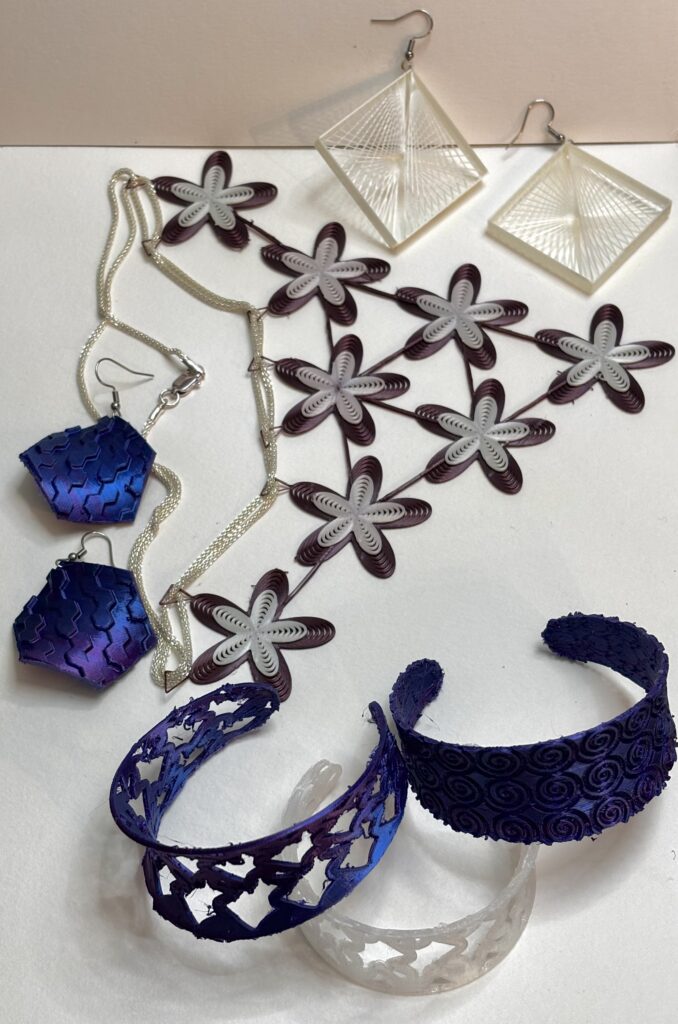
This final project consisted of designing and creating jewelry using several different computational elements from previous large projects. Not only was there a computational aspect associated with the actual modeling of the base component for each piece, most of the computation came from incorporating patterns onto a surface that was created, or finding a way to simultaneously program the model and pattern (e.g. using the GCODE large project). This meant visually expressing patterns in different ways, using concepts from the GCODE and Tiling projects. As was previously mentioned in the final project proposal, Mexican jewelry is typically heavily patterned, “traditional,” and much more unique compared to something that is commonly found or worn in the US, which was the inspiration behind the final project idea. That being said, there was an additional portion to this project that would have provided the ability to explore with different materials purposed to bring out the cultural features. Due to time constraints, the inability to complete all the patterns in a week after the Tiling project, and the cost and time required to go through with the fabrication services, this became unfeasible.
Background Research:
This project relates to previous work in a way that uses ideas and inspiration from the physical or conceptual world and is translated into wearable objects, such as jewelry. For example, a non-computational or 3D printing related work involves the exploration of fitting unique expectations regarding style, patterns, shape, and unconventional materials for jewelry. Though this project didn’t quite reach its full extent by incorporating the particular material idea, most inspiration from related work came from the design aspect. Research in this area involves the creation of flexible textile structures that hold various properties, such as bending, adaptability, flexibility, textures, etc. for 3D printed garments specifically. From a design perspective, using computational and technical approaches offers the freedom to create and manufacture jewelry that would be difficult to produce using traditional techniques. In a much broader sense, most research in jewelry design in the 3D printing environment has found that demand for jewelry is gradually increasing and evolving towards pieces that can be personalized, customized, and hold intricate designs. In order to achieve the ability, there remains an extensive need explore design efficacy and methodologies, model quality, modeling processes and success rates of personalized, customized jewelry produced through 3D printing.
Three academic papers that encompass the target of the related work are:
- 3D Printed Textile Fabrics Structures by Partsch, Vassiliadis, and Papageorgas;
- Research on Key Technologies of Jewelry Design and Manufacturing Based on 3D Printing Technology by Guoqing Zhang, Jiangtao Wang, Junxin Li, Xiaoyu Zhou and Yongsheng Zhou;
- 3D Printed Jewelry Design Process Based on Sculpture Inspiration by Karin Košak, Deja Muck , Marjeta Čuk , and Tanja Nuša Kočevar.
In 3D Printed Textile Fabrics Structures, the researchers focused on the design and the structure of textiles for applications suitable to personalization and fashion. This paper was initially intended to drive the computational element of this project that involved the use of a fabric-like material. However, this research also pertained to the flexibility of models so that they can adapt to movement behaviors’, which was incorporated in some of the GCODE logic in this project.
The secondary academic paper, Research on Key Technologies of Jewelry Design and Manufacturing Based on 3D Printing Technology, was more closely related to this project, where these researchers were driven by design freedom and the constraints of molding in 3D printing innovative jewelry. One example mentioned in the paper discusses the design approaches used to achieve the desired aesthetic appeal of a necklace. This final project used this idea of “design freedom” and design-specific modeling/techniques to create functional and personalized jewelry.
Lastly, 3D Printed Jewelry Design Process Based on Sculpture Inspiration, focuses on research surrounding 3D print design – fashion accessories that are inspired by selected visuals and conceptual content. This paper focuses on expanding design knowledge in 3D printing and modeling, which is essentially the intention behind the entirety of the final project.
Process:
Since each jewelry piece was designed uniquely, there were different approaches taken for each one.
Hexagon Earrings:
These earrings were clearly inspired by the Tiling project. As for the computational elements, I first created a hexagonal shape by defining the six corner points of the shape, connecting them using a polyline, adding a surface, and slightly twisting the shape. For the tiling pattern, I decided on the use of a hexagonal pattern since it was the one pattern I did not work with. Similarly as before, I created a hexagon as a base shape, because I had a really difficult time tiling it the way we had originally did in class. Instead of creating this lattice of hexagons using 3 “curves,” I instead created the shape, copied, and moved it across the given row and column length. Once I essentially created this tiling pattern, I created a separate python block that extruded each one of these hexagons at different heights (using the modulus function) and capped them. Once this brep object was created, I merged and “solid-unioned” the hexagons together to create one complete object. Due to the difficulty of surface morphing this pattern through Grasshopper, I found an alternative technique that essentially did the same effect. Although, in order to perform this technique, I had to bake both the hexagonal surface and the finished tiling (this work had to be done in Rhino itself). I created a UV Curve from the hexagonal base shape, used this object to cut the tiling into the base shape and used the “Flow Along Curve” command to morph this object into the original surface base shape.
Cut-Out Patterned Bracelet:
This piece was the first of the jewelry that I created, and was also the most time consuming. I began this bracelet by first designing the base shape. Since I didn’t quite have the knowledge or idea on where to begin, I instead wrote the program for the Rhino steps that were used in the following video: I used the original programs we had used in the following video: https://www.youtube.com/watch?v=22VllkNdhYg. Since this video doesn’t explain any of the steps computationally, it took some trial and error to get the correct surface shape I was going for. As for the tiling, I used the exact program from my Tiling final project to create the pattern where I essentially added a copy of the blocks an additional time and added a parameter to shift the extrusion up and down the z-axis slightly more than the first shape. I also ensured that this part had a negative offset smaller than any of the other layer to avoid any unusual holes when taking the two differences. To create the opening in the final object, I added a Solid Difference block in Grasshopper and connected the “two objects.” Once I had the tiling and surface completed, I followed a similar idea as the earrings above where I created a UV Curve off the surface shape, cut the tiling, and flowed the cut along the surface shape of the bracelet.


Spiral Bracelet:
The process to design this bracelet was very similar to the cut-out patterned bracelet. I used the same process to create the bracelet surface, except added minor adjustments so that it didn’t quite take on a harsh inner curve. As for the pattern itself, I created a spiral by writing a program that creates a list of points and connects them using InterpCrv. Since the tiling for this pattern would have had to differ slightly than what we used in class due to the open curves, I used two loops, made a copy of the curve, translated it across a translation vector according to its position in the row column, and piped the final outcome to create a 3D object. Now using the surface of the bracelet, I again created a UV Curve. However, I added the additional step of adding a surface to this UV Curve, extruding it, and aligning a baked version of the tiling pattern, and taking the differences between the two objects to create the carved pattern. Once doing so, I used the “Flow Along Curve” to morph this final product into the shape of the bracelet.

Diamond Earrings:
Of all the pieces, this diamond earring was the easiest to design. It used the ExtruderTurtle library from the GCODE project to create a diamond (or square depending on how you want to look at it) by adding the shapes points to a list and moving the nozzle across each one of the points. For each of the 25 layers, I moved the nozzle to the point across the current and returned back to the starting position to create the inside pattern. The hardest part about this piece was the tweaking of the printer settings to get the filament to extrude just right.

Flower Necklace:
Lastly, the necklace was not too difficult to create, but very complicated to print. This piece also used the ExtruderTurtle library from the GCODE project, using the sine and cosine functions, and an angle to adjust the radius of each petal for a given amount of outward layers. I created each flower in a pyramid like structure, and added two more, slightly offsett-ed flowers at the bottom corners. Once the first 5 layers were created, I had the nozzle extrude a string of filament across the centers of all flowers over 3 iterations to create a connection between them. I called the flower function again for the final 5 layers, however, decreased the radius slightly so that it added more visual to the pattern. Though the program was fairly straightforward to create, it took several adjustments to fix random filament retraction between flowers, or ensuring that the stringing that did connect them was strong enough.

Outcome:
Each of the following jewelry items used different techniques to create patterns that are recognized by the human eye despite being printed in a single filament color.
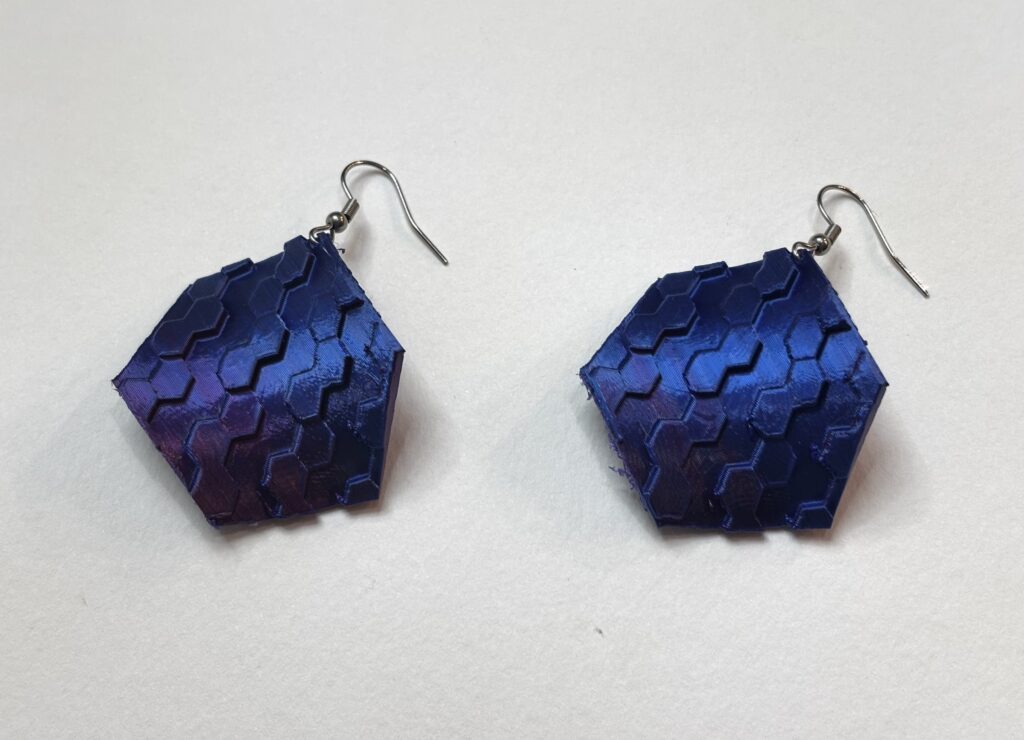
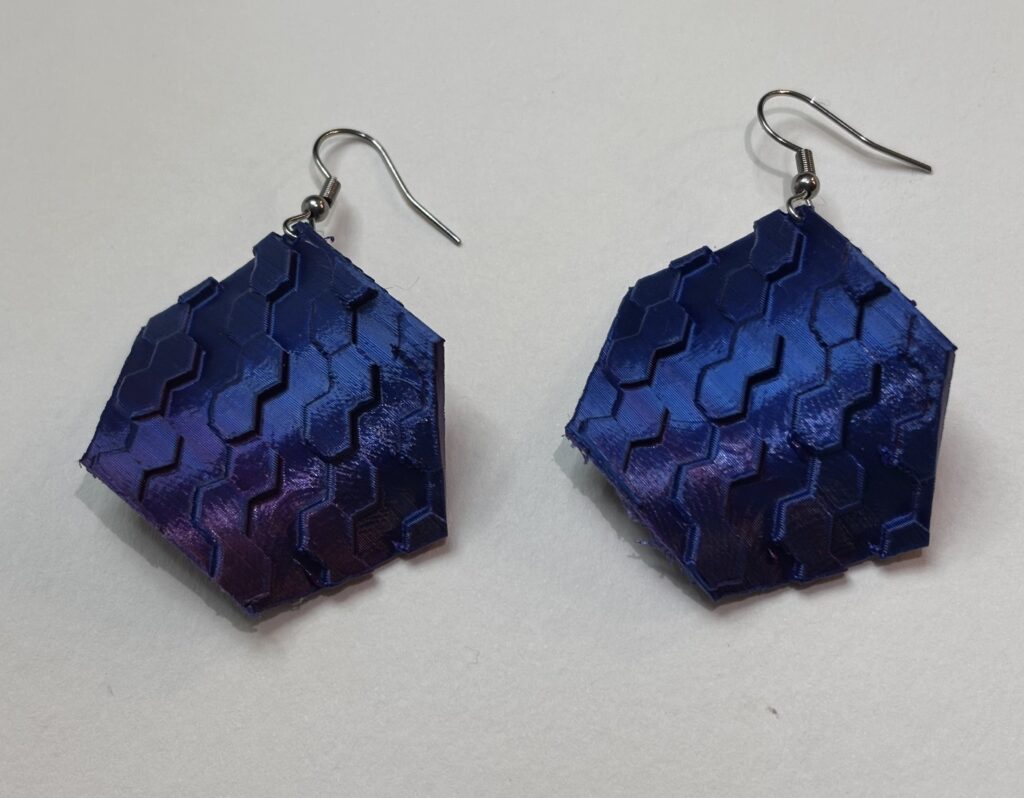
These earrings were created using a hexagon base shape, with a hexagon tiling. To visualize the tiling pattern, different extrusion lengths were used.
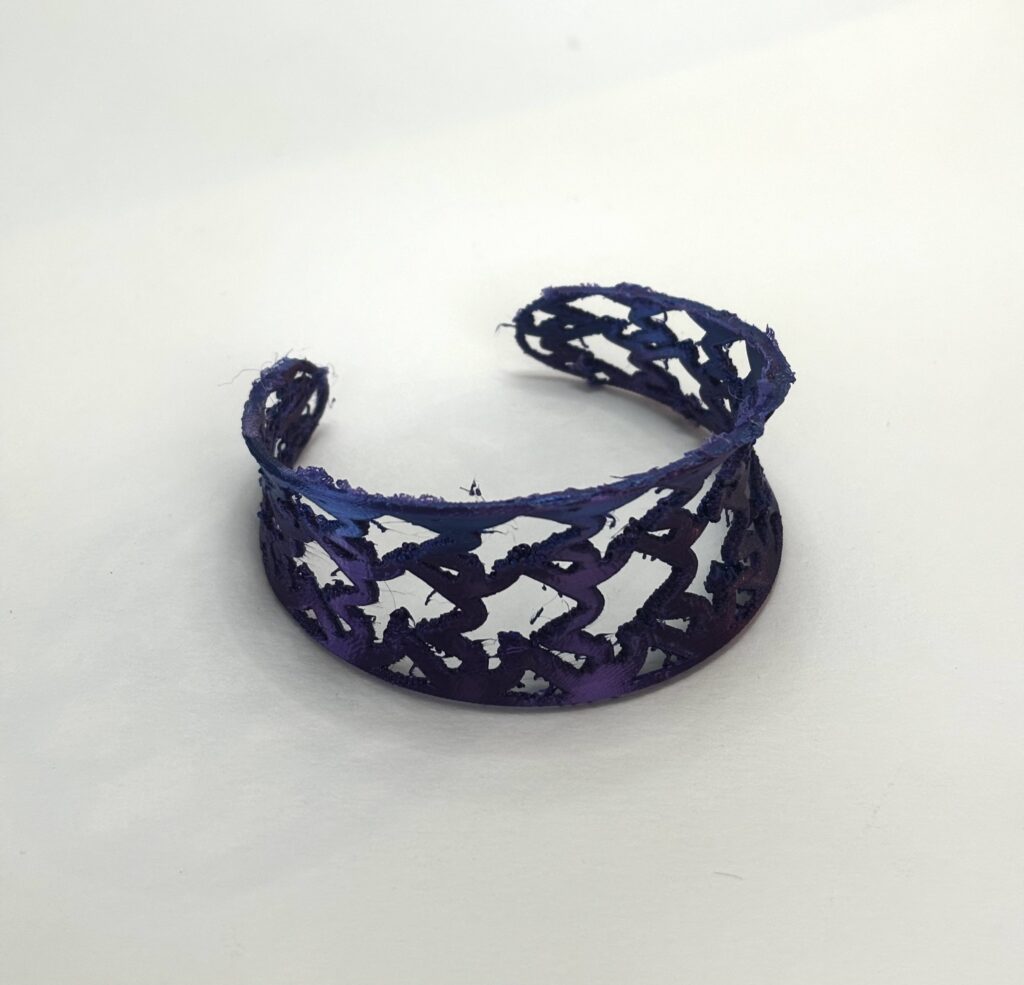
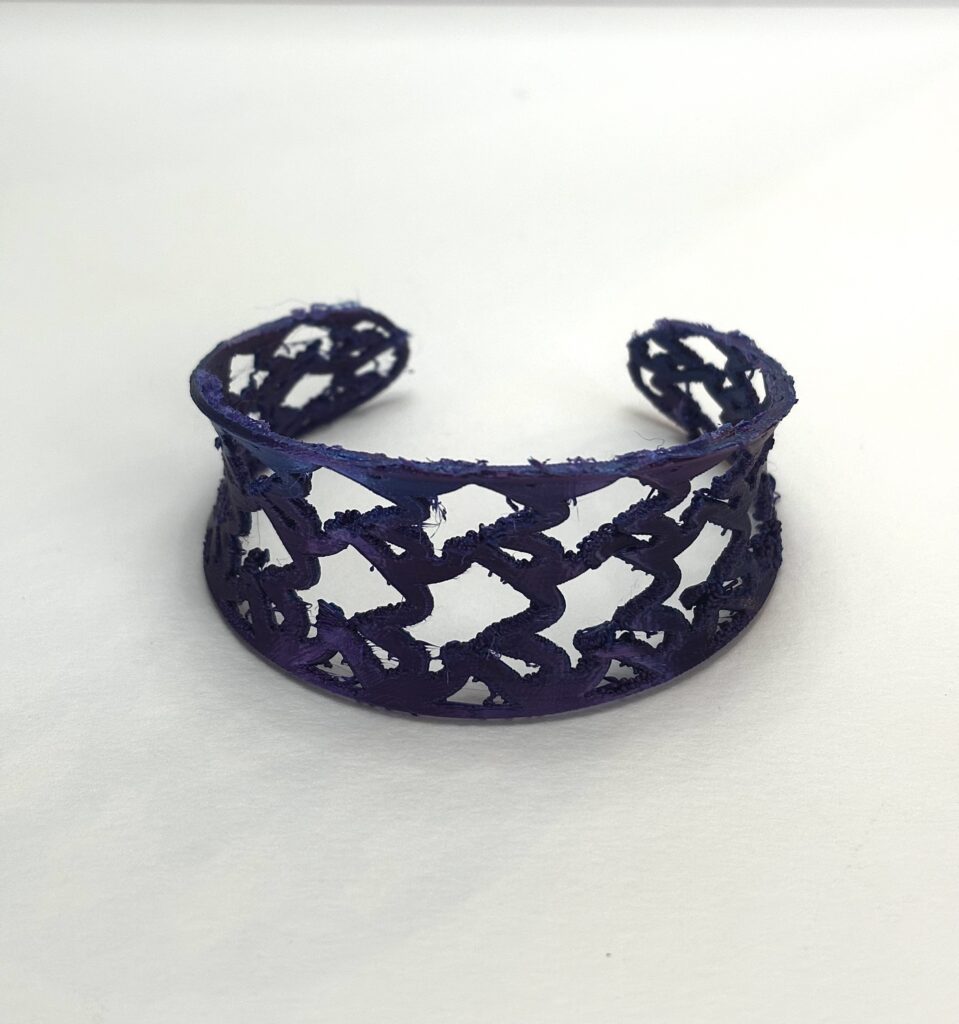
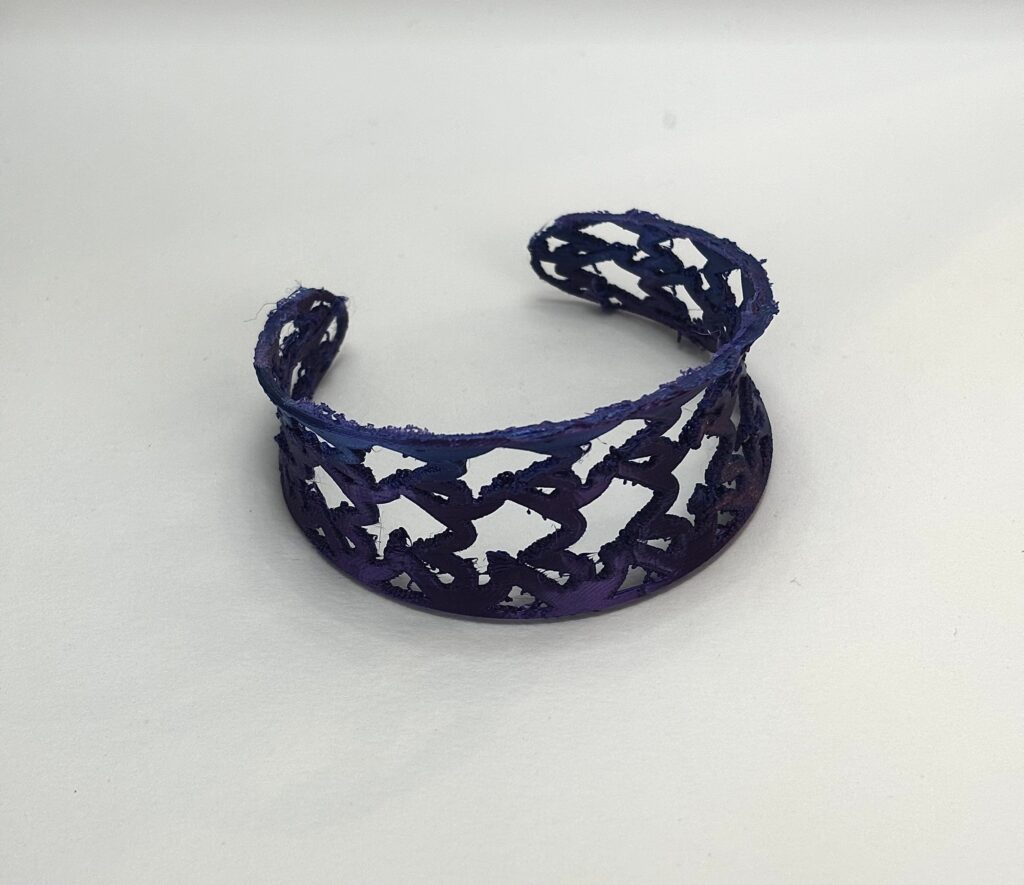
This was the first bracelet that was designed, encompassing a random, but unique, pattern. To visualize the tiling pattern for this bracelet, the shapes were instead cut out of the bracelet’s main surface.
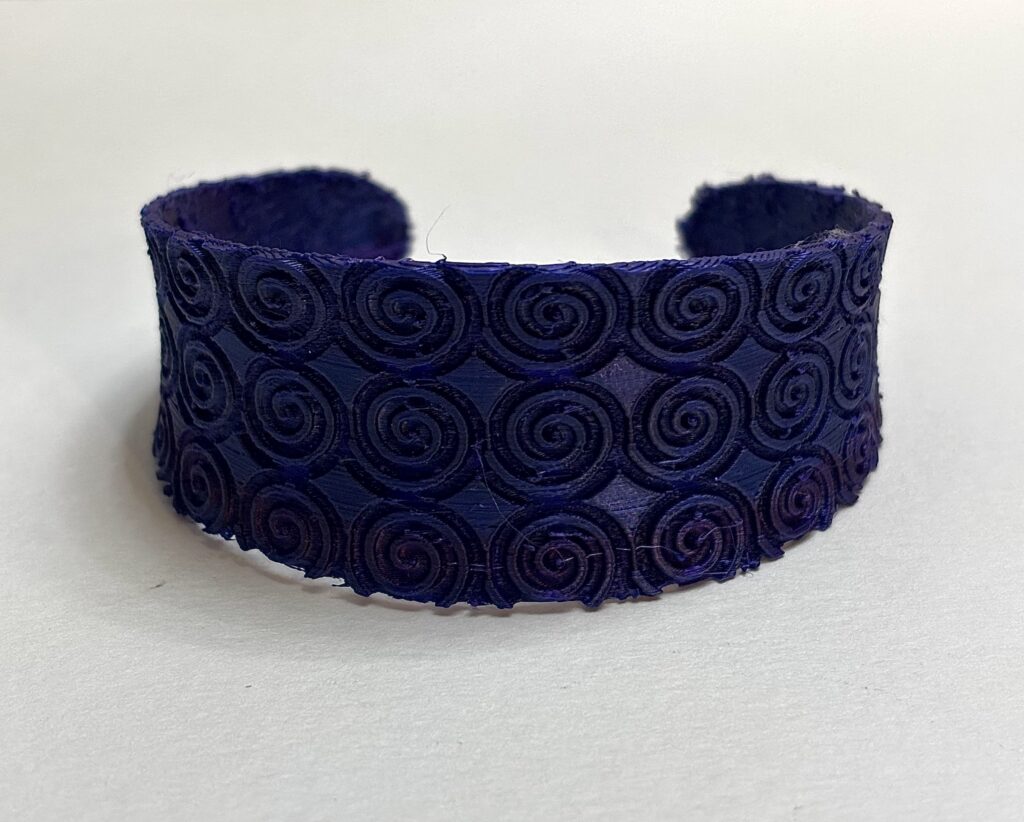
A secondary bracelet, like the first one, uses a very similar technique, however, with a different pattern and expression. Instead of visualizing the tiling by cutting the shape out of the bracelet surface completely, this bracelet ensures the entire surface remains enclosed and has the spiral design engraved into it.
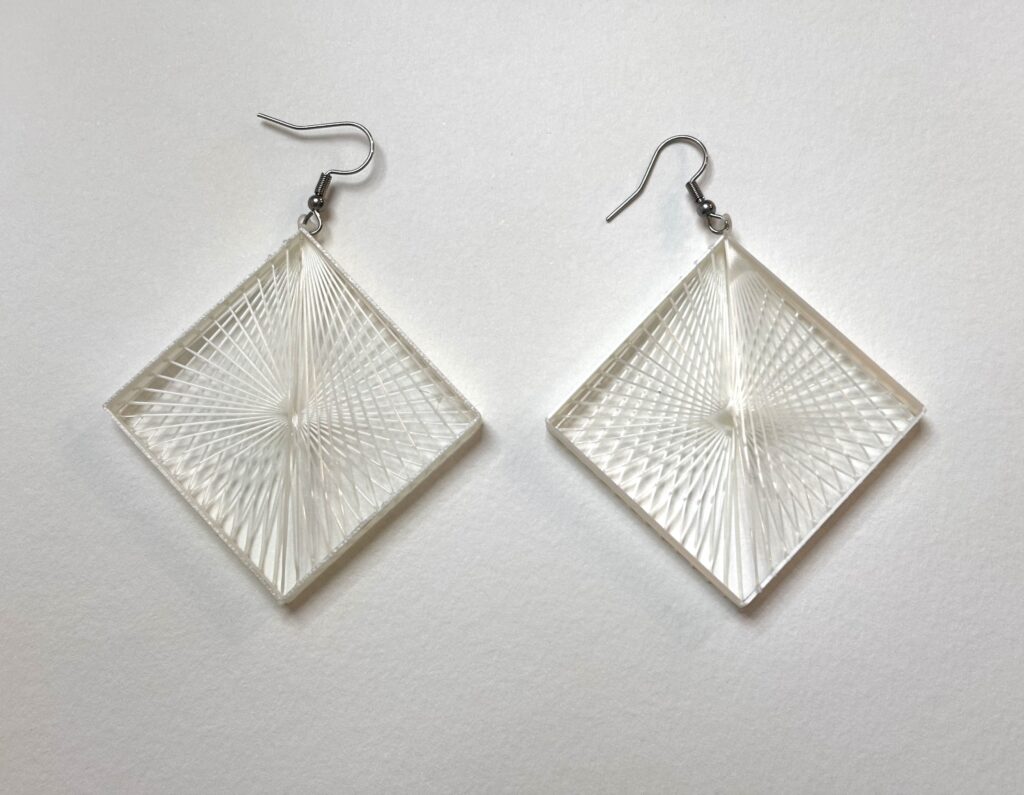
Similar to some of the designs that were seen during the GCODE large project, this diamond earring visualized its’ pattern by incorporating horizontal movements across the diamond for each of its layers.
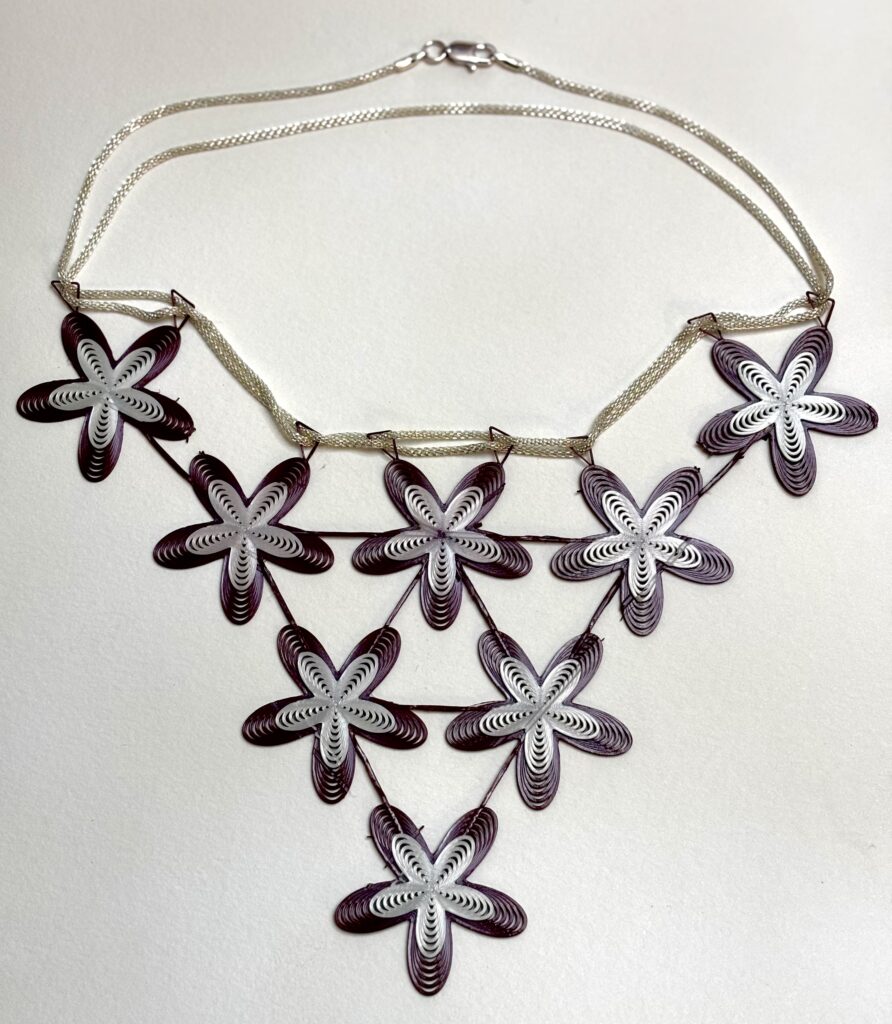
This final item does incorporate multiple colors to help visualize a pattern individual to each flower, though the primary pattern intended to show through this necklace is the placement of each one. Also using concepts from the GCODE project, this necklace was generated entirely using the ExtruderTurtle library.
Future Work:
As I had mentioned previously, one particular way I would have liked to expand on this project was by experimenting with different materials. Though I was able print with TPU, the project would have been much more complete if I would have been able to send my pieces out to a printing service to print in metal and a fabric materials. Another way I would have liked to iterate on this project if I had more time was working with more complex patterns, especially using concepts from the tiling project. This project focused on creating a handful of different jewelries that it did ultimately take time away from designing intricate designs that would have stood out more.
Reflection:
There were several take-aways from this project, though the most important being that often times the hardest part about 3D printing isn’t always writing the program, but instead adjusting it to fit the printer. In all seriousness, I learned how to use the concepts from two of our large projects as a base starting idea to design more convoluted patterns and create unique statement items. Most of the time spent working on this final project was debugging through what seemed like an infinite amount of obstacles and learning how to change the programs from class to fit the outcome I was going for. Though it was difficult to create each pattern differently, I experimented and discovered new geometric ways to accomplish some of the ideas I had in mind. Another big take-away was learning how to print with TPU. This material is much softer and caused a lot of trouble by clogging up the nozzle. The entire process for this finally project was initially difficult, but eased up slightly towards the end. I am very pleased with my artifacts, and still have intentions on sending some of them out to printing services to print them in silver and other materials so that they are wearable. Not only do I plan on doing so with the pieces I had already created, a few friends have already asked for their own personalized jewelry that I plan on designing in the near future.
Failed Attempts:
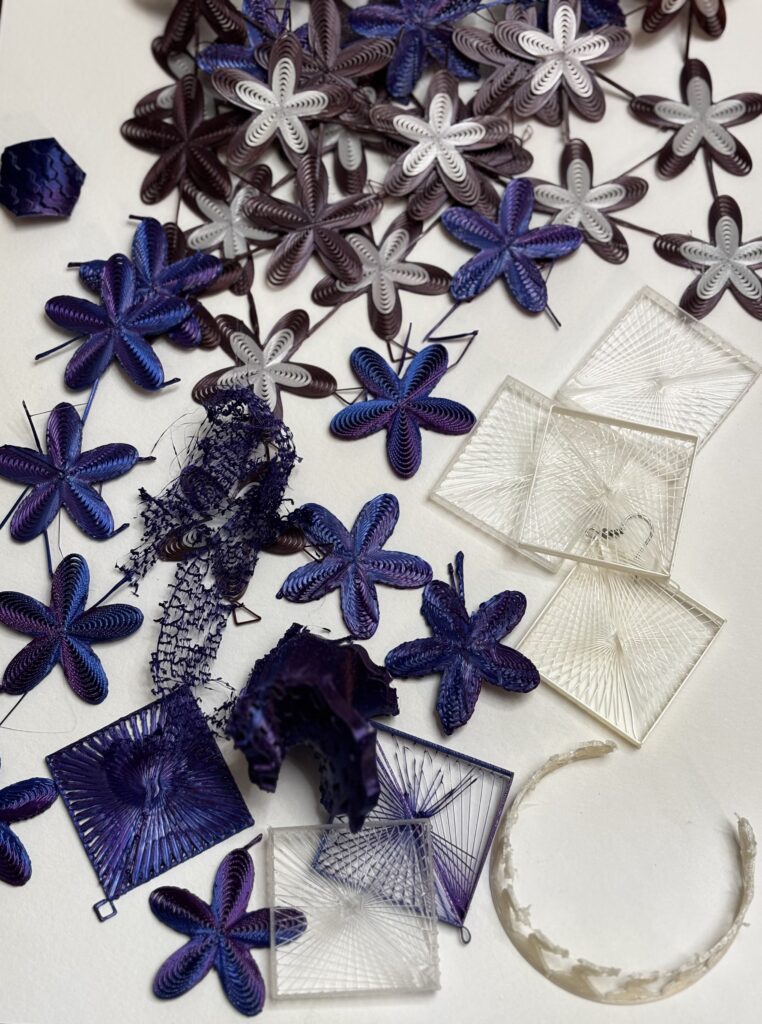
There are many more than what is pictured….