Project Description:
For my final project, I want to integrate my past usage of Robotics, Programming, and Embedded Systems. I want to further my knowledge when it comes to mobile robotic arm usage and servo-based projects. I have identified two ideas, my first primary project will be making a mobile robotic arm that can be used for pick-and-place tasks or for my back-up idea I want to make a servo-based assistive glove to help with hand impairment. Both of these projects will leverage Rhino, GrassHopper, an Arduino, Python programming and the usage of my Ender 3 3D Printer. Both will harness the ideas of 3D printing, algorithmic design, and the integration of hardware to make functional and practical solutions to past projects that I had when I was in high school.
Mobile Robotic Arm (Primary Idea)
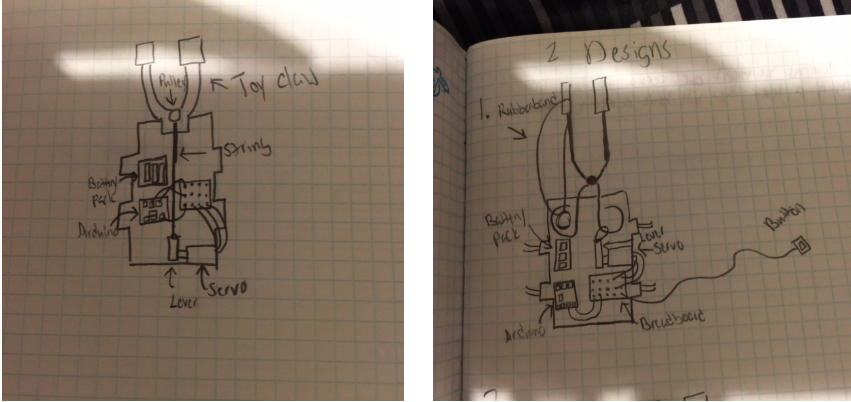
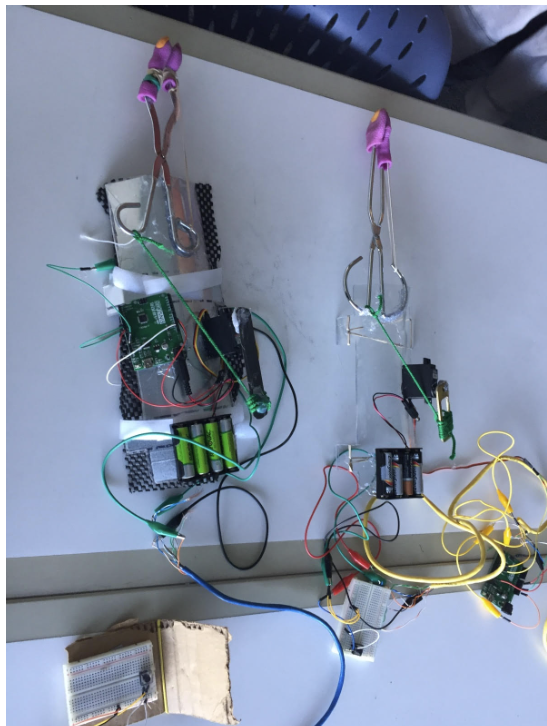
This project involves designing and building a mobile robotic arm, utilizing PLA components for the base and housing and TPU for grippers to enhance the arm’s grip. The robotic arm would be mounted on a human arm, enabling interactive pick-and-place operations. I’ll use a servo motor controlled by an Arduino with a button, recycling components from my previous ECE Modern Digital Systems Design class. This project builds on work I did at Los Alamos labs with a pick-and-place arm, and it enhances a DIY version I made in high school by refining the design with more durable, 3D-printed parts.
Deliverables:
- Base Used to Attach to Human Arm
- End Effector (Gripper)
- Arduino with Wiring and Button Connection
- Battery Pack Connection
- Base to hold End Effector Attached to Arm Base
Ideas from High School Fall 2016:


Servo-Based Glove for Hand Mobility (Back-Up Idea)
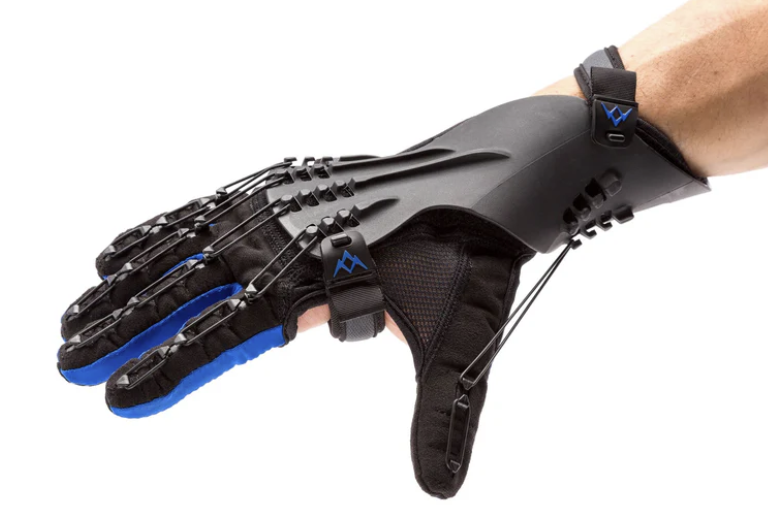
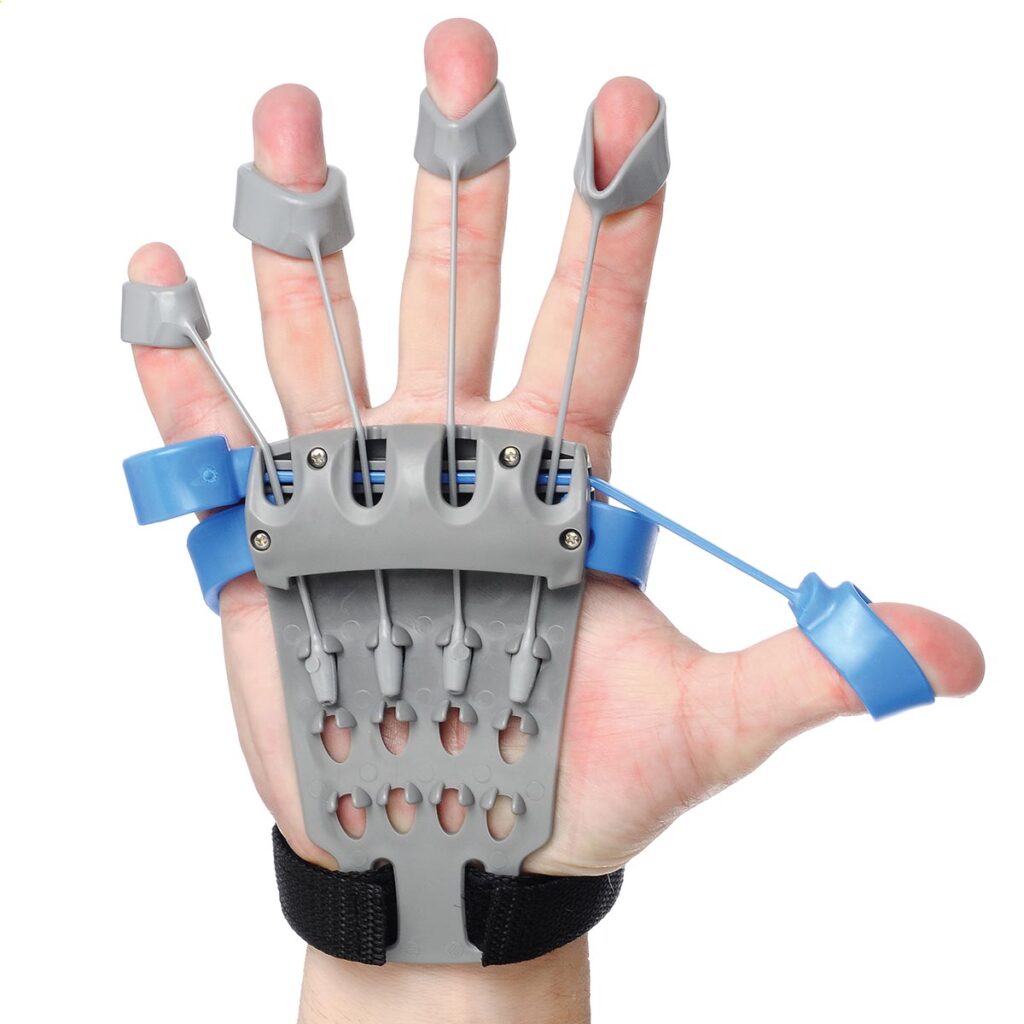
My second idea is to create a servo-drive glove using similar components to my primary idea to help individuals with conditions like Dupuytren’s Contracture or Stroke Victims whose finger movement is restricted or stuck in a closed position. The glove will have 3D-printed TPU bands that connect to the servo, and the ends of a 3D-printed piece that connects to the fingertips of the individual to allow the servo to pull open the hands and, when released, let them close their hands. The servo will open and close using a button mechanism, and the servo movement helps with standard hand mechanics.
Deliverables:
- TPU Tendon Based Bands
- Glove/Hand Attachment Base
- 3D Printed Finger Covers with Loop To Connect TPU Bands
- Arduino, Battery Pack Connection, and Button Attachment
Inspiration:


Team Members:
- Just me! 🙂
Timeline
November 1 – November 12: Design & Prototyping Phase
Robotic Arm:
- Base Design: Model the base attachment in Rhino/Grasshopper, designed for secure mounting to the arm.
- Gripper Design: Design the end effector with TPU padding for better grip.
- Servo Layout: Plan servo placements for optimal movement, working with the Arduino to configure basic control functionality.
Servo-Glove:
- Glove Base: Model and test the glove base in Rhino for easy attachment to the hand.
- Finger Covers & TPU Bands: Design finger covers with loops for TPU tendon attachment, including measurements for finger flexibility.
- Wiring Layout: Plan Arduino wiring for servo activation and button control.
November 13 – November 20: Assembly & Testing Phase
Robotic Arm:
- 3D Printing: Print the base and gripper parts, ensuring durability and accurate fit.
- Servo & Arduino Assembly: Connect servos to the gripper and integrate with the Arduino to test initial movements and gripping capabilities.
- Mounting Adjustment: Refine the arm base design for better fit and comfort, making any necessary adjustments.
Servo-Glove:
- 3D Printing: Print the glove base and finger covers; test TPU tendons for flexibility and durability.
- Electronics Assembly: Attach Arduino, servos, and button, testing connections with the TPU bands to ensure movement.
- Glove Fit Testing: Attach parts to the glove base and check for comfort and finger motion range.
November 21 – December 3: Finalization & Testing Phase
Robotic Arm:
- Integration Testing: Run movement tests on the arm with different objects, checking for stability and range.
- Optimization: Fine-tune servo responsiveness and grip strength on various test objects, refining Arduino code as needed.
- Final Adjustments: Adjust fit and weight distribution of the base for comfort
Servo-Glove:
- System Integration Testing: Test servo and Arduino integration with TPU bands, checking that button triggers work smoothly.
- Optimization: Adjust the length/tension of TPU bands for smooth finger movement and reliability.
- Final Assembly: Attach battery pack securely, with final checks on wiring and button placement for ease of use.
Academic References
Robotic Arm Pick and Place: There are a lot of academic papers that have been done on pick-and-place robotic arms. A lot of these ideas are simply for immobile devices that sit on a desk, but I want to take those ideas and implement them with the mobile robotic arm design that I first created in high school. With these papers I have a more refined and technical approach that I can utilize in tandem with my 3D printer to give me a greater sense of efficiency when creating my robotic arm. Both of these papers improve upon the ideas that I initially had for my robotic arm and gave more in-depth specifications and details that will be greatly useful for creating my design and understanding the more mechanical components of the arm that I bypassed in my previous years using existing tools and components.
Servo-Based Glove for Hand Mobility: When it comes to implementing the Servo-Based Glove my intial ideas even from my robotic arm were to use rubber bands for the tendons, but with the use of TPU I can 3D print those tendons to utilize for my glove. By looking into these papers they use cables and artificials to aid with the hand mobility and this is just the idea that I was brainstorming and being able to take the movement and implement it in a similar way to a robotic arm where servos pull and release cords to allow opening and closing movements for a hand. My design won’t be as sophisticated as these two since I want the materials to be more simple in manner so that the idea could be replicated for any student or anyone that is looking to try a device of this sort. I didn’t think about actually attaching all the components to a material glove, I thought of it as more of an exo-skeleton design where I print interconnecting parts that connect the fingers to the base that would be located on the top of the hand. This may allow for more ease and simplify the hand measurements and designs necessary for a more universal fit. The academic papers are for people who want to increase their finger strength where my design looks more to aid them in opening their hands, however, if it becomes more prevalent to go with their method I may use it as more of a rehabilitation device instead of an assisting device.
Hello Andrew,
This looks very ambitious and I wish you all the luck in the world. I cant wait for the final product.
Thank you I’m hoping that all the time I spent my freshman year brainstorming different ideas for a robotic arm will pay off, but I can incorporate some formalized prints now that I have the resources and the 3D printer to have free reign when it comes to designing the base and the effector.
Hey Andrew,
Like Nick said in the last post, this is really ambitious! Very cool though, I hope the project comes a long how you are envisioning it. It seems very exciting and I look forward to seeing the final product. Projects like these are so fascinating and are definitely the type to leave an impression on people in the class. I wish you all the luck on this endeavor.
Justin
This does seem like a somewhat ambitious plan, but that’s why I had my backup plan since it would utilize very similar aspects if I can’t get the design for the robotic arm effector to be strong enough to effectively conduct pick and place movements. I’m just glad Amazon is more accessible now than it was when I was first making ideas in high school to get all the electrical and hardware to make it work!
Wow, this looks like a lot. I’m very impressed by the scale and practicality of your final project. While I am concerned with how much time and resources making a build like this would be, it looks like you do have some experience with similar projects. Best of luck, I’m eager to see how it all shakes out.
Yes thank you, the original project was a month or so project and the majority of the time was spent learning how to put everything together with all the random items we could find, documenting, and preparing to enter it into a competition. I’m hoping the 3D printer will lessen that time and my current knowledge will decrease the time it takes to get it fully assembled and wired together.
Andrew,
This sounds like an awesome final project! I think it’s really cool that you’re using some of your high school projects from 2016 and work that you did at Los Alamos as inspiration for this final project. Looking forward to the final product! Good luck!
I’m looking forward to it being an awesome one that can incorporate my work with robotics with my new knowledge of 3D printing! I’m really glad I had the opportunity to take this class so I could put everything I knew up until this point together and combine all of it to make a more formalized design from what I did back in 2016!