Part 1: Curves
- Make the specific footprint below
- Commands: Polyline
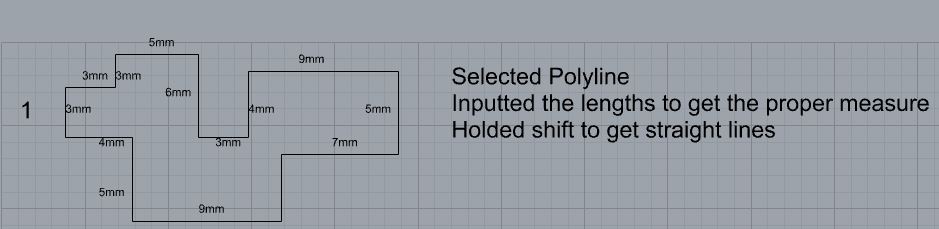
- Commands: Polyline
- Make 2 closed rounded curves using the various curve commands
- Commands: Curve, InterpCurve, HandleCurve

- Commands: Curve, InterpCurve, HandleCurve
- Make 2 closed curves using polygon, ellipse, or circle
- Commands: Circle, Ellipse, Polygon

- Commands: Circle, Ellipse, Polygon
- Make 2 open curves
- Commands: Curve, InterCurve, HandleCurve, Sketch

- Commands: Curve, InterCurve, HandleCurve, Sketch
- Import a picture and trace an image
- Commands: Picture, InterCurve
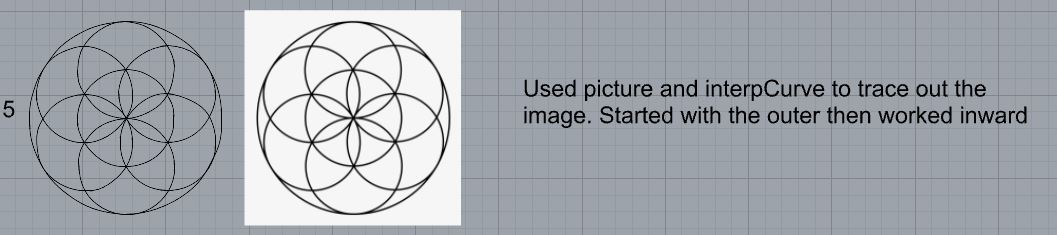
- Commands: Picture, InterCurve
- Pick one open curve, and one closed rounded curve and make three copies of each
- Commands: Copy

- Commands: Copy
- Take at least 3 of your closed curves and overlap them to create a new shape
- Commands: Move

- Commands: Move
- Use split, delete, and trim to combine these curves into one open curve
- Commands: Split, Delete, Trim, Join, Explode

- Commands: Split, Delete, Trim, Join, Explode
- Take at least two curves and use various transformations make a pattern or composition
- Commands: Move, Copy, Rotate, Mirror, Array, Scale, Offset, Fillet, FilletCorners

- Commands: Move, Copy, Rotate, Mirror, Array, Scale, Offset, Fillet, FilletCorners
- Organize your Rhino file so each step is clear. Use the Text command to label each step and the commands you used. Add a link to your FirstnameLastname_Curves file at this point in your post.
File: https://handandmachine.org/classes/computational_fabrication/wp-content/uploads/2024/09/RicardoPonce_Curves.3dm
Part 2: Surfaces
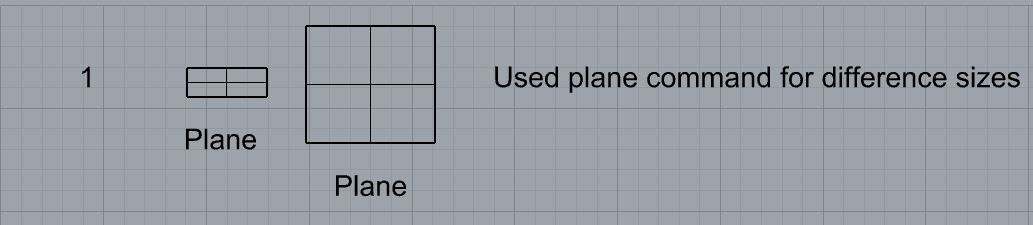
- Plane
- PlanarSrf

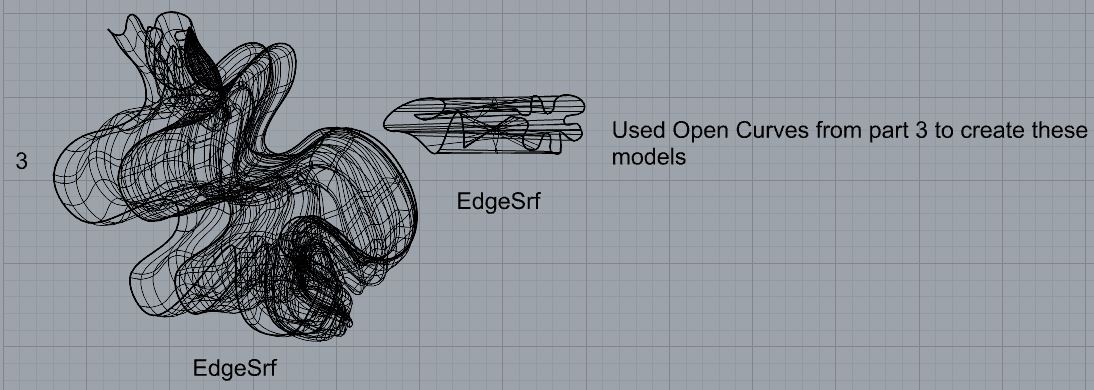
- EdgeSrf
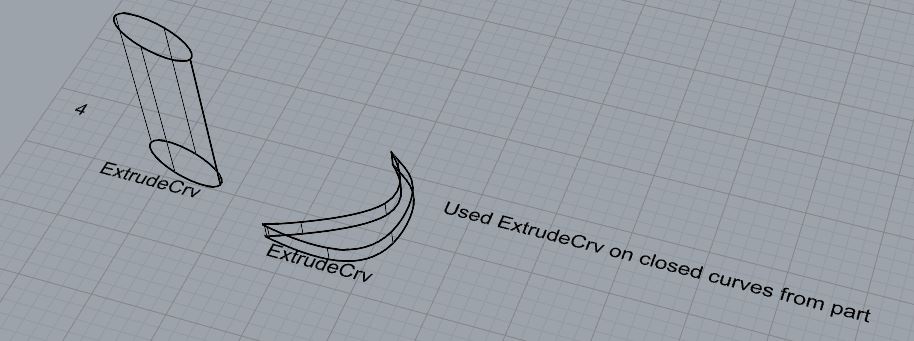
- ExtrudeCrv
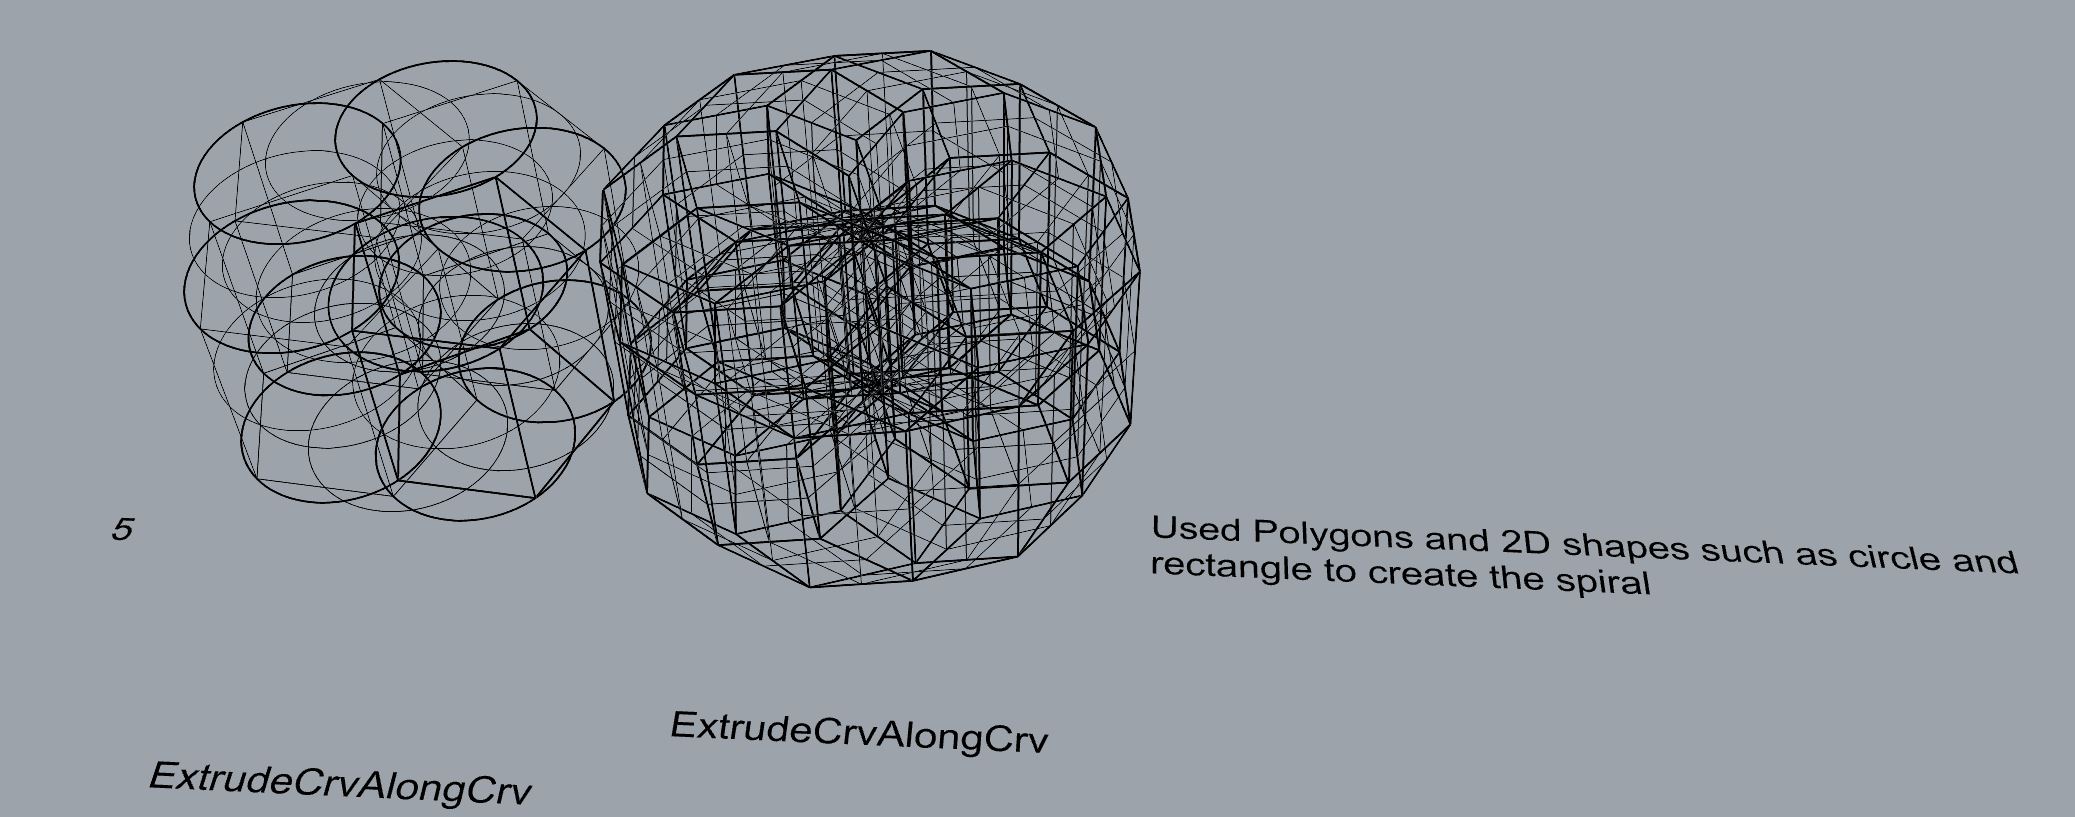
- ExtrudeCrvAlongCrv
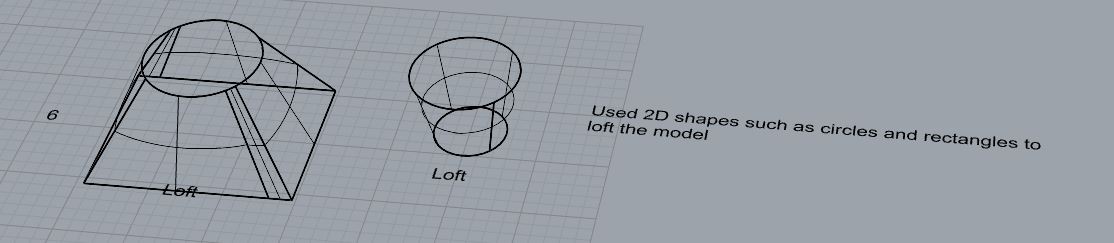
- Loft
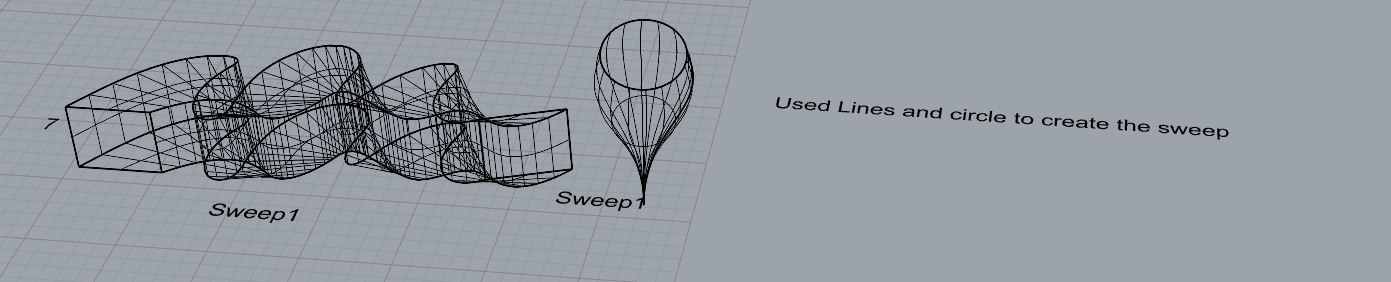
- Sweep1
- Sweep2

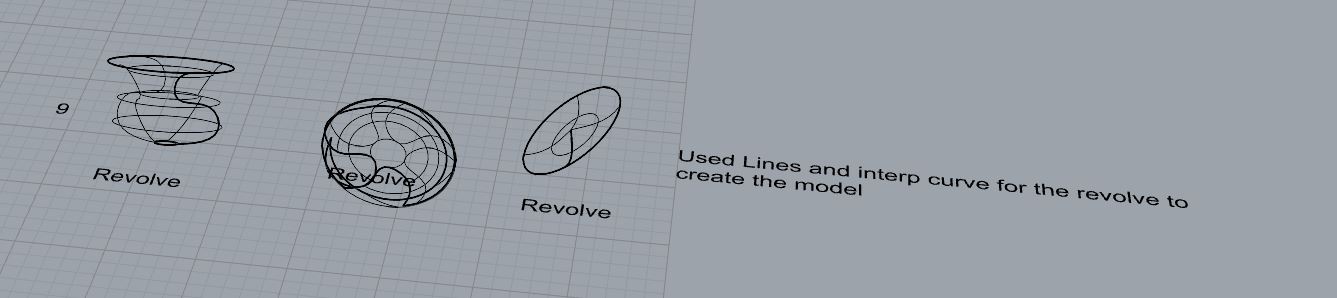
- Revolve
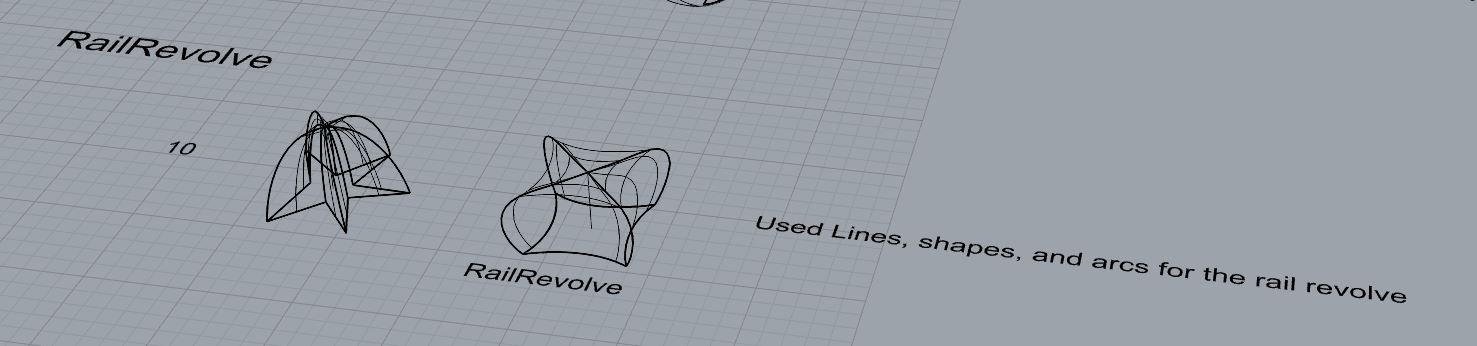
- RailRevolve
- Add a link to your FirstnameLastname_Surfaces file at this point in your post.
File: https://handandmachine.org/classes/computational_fabrication/wp-content/uploads/2024/09/RicardoPonce_Surfaces.3dm
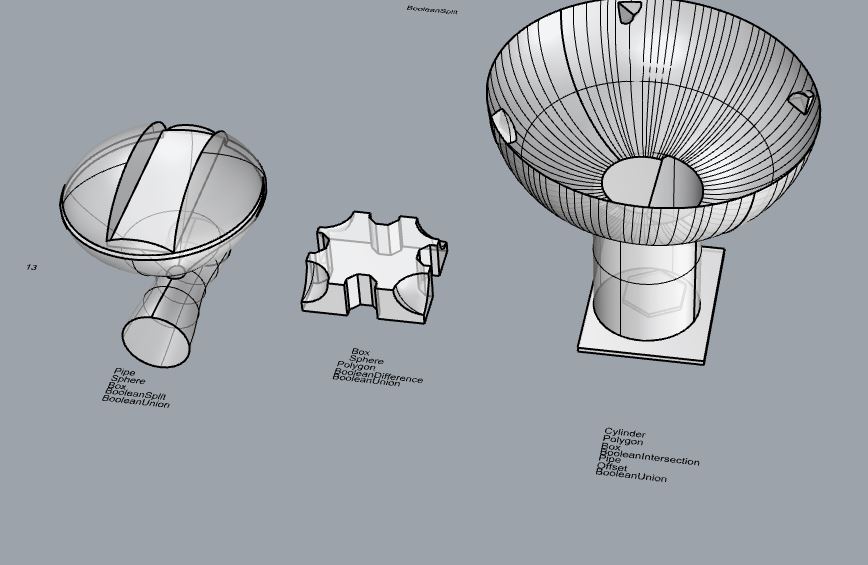
Part 3: Solids
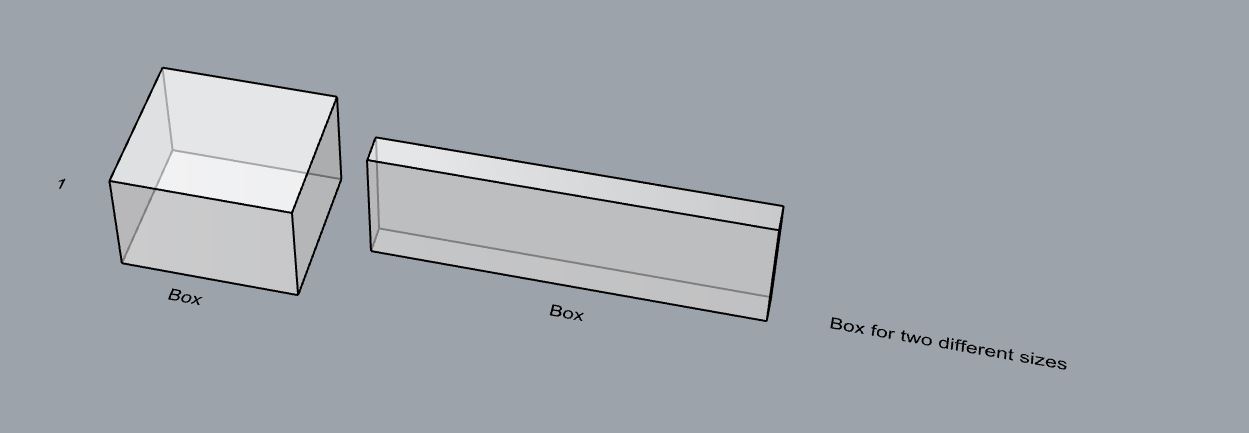
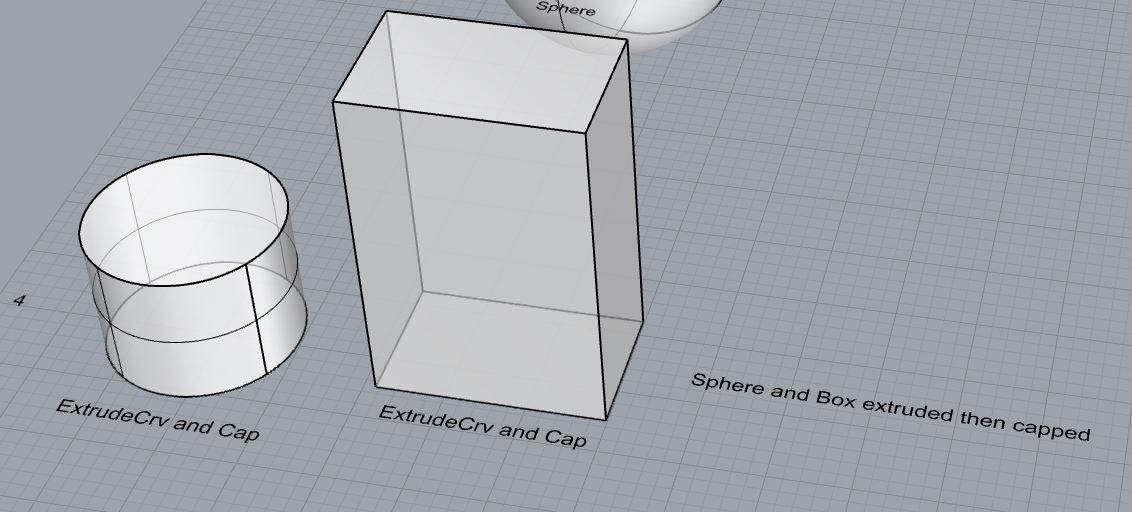
- Box
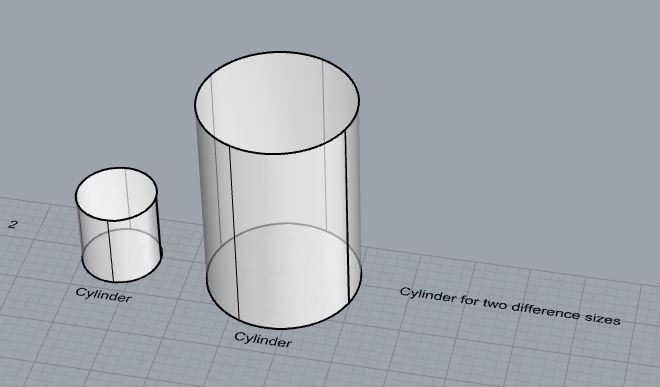
- Cylinder
- Sphere

- ExtrudeCrv and Cap
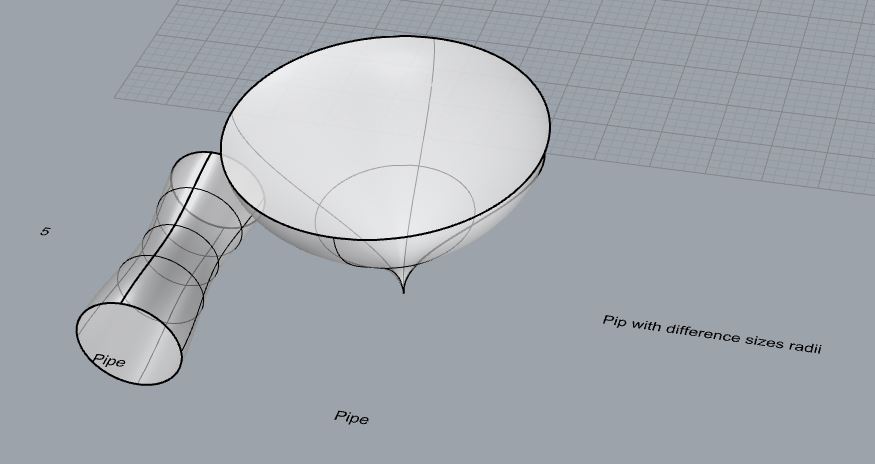
- Pipe
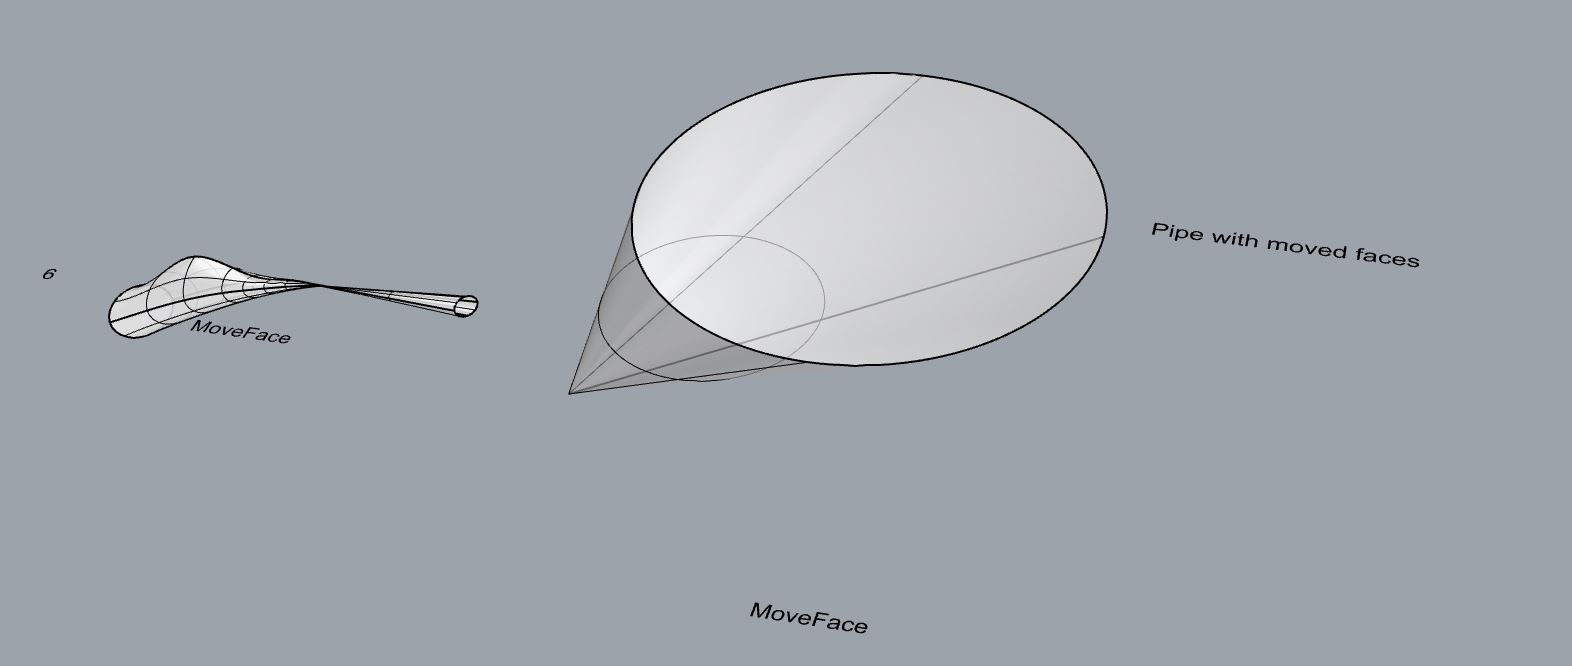
- MoveFace
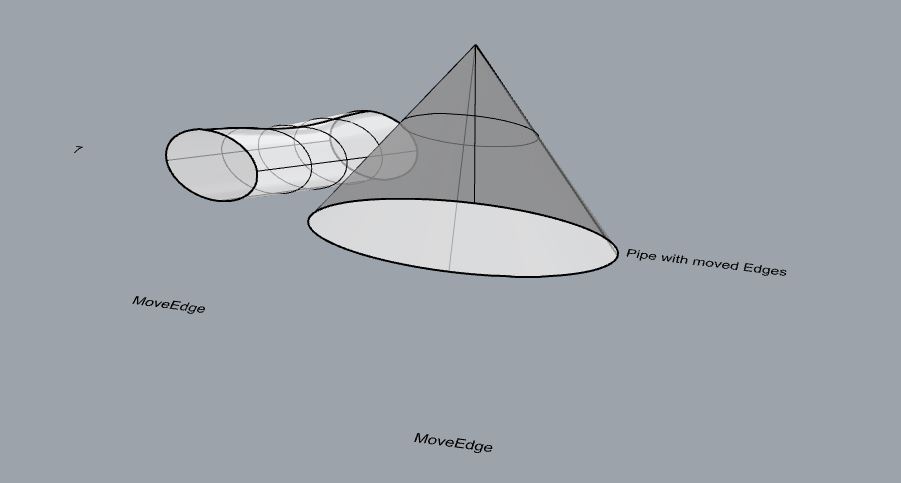
- MoveEdge
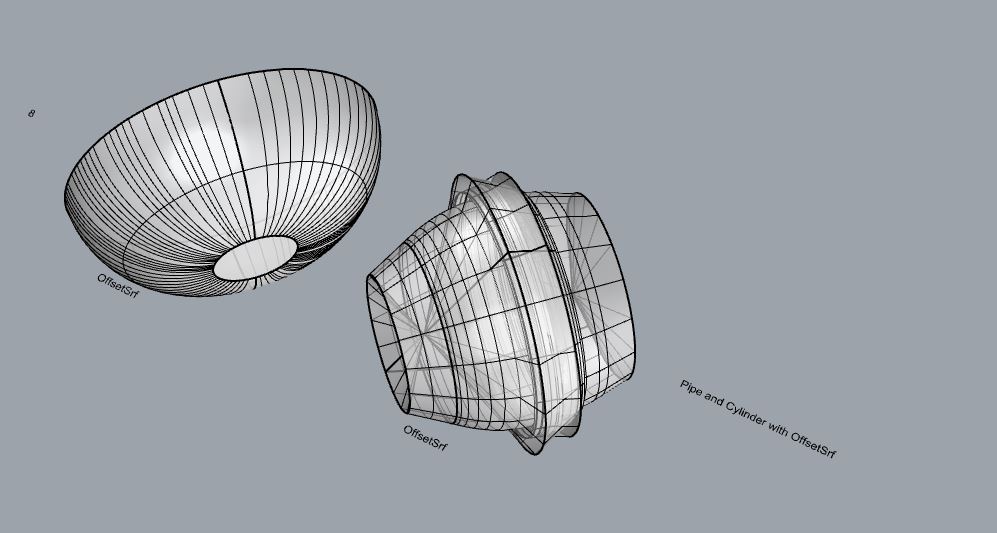
- OffsetSrf
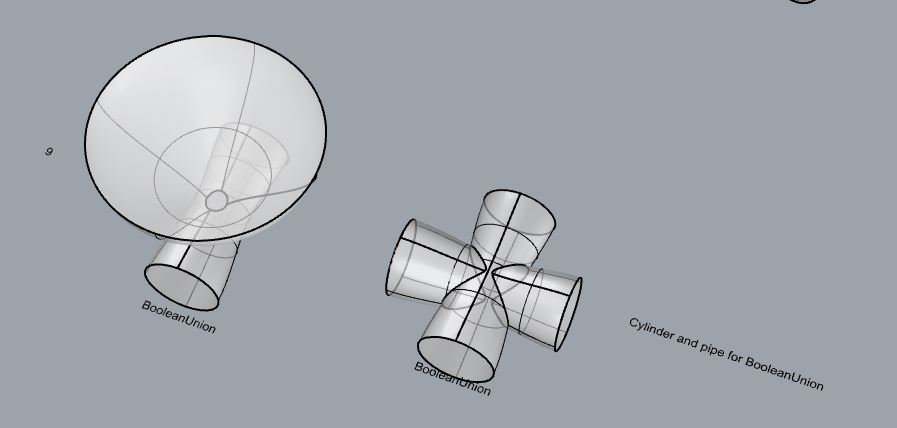
- BooleanUnion
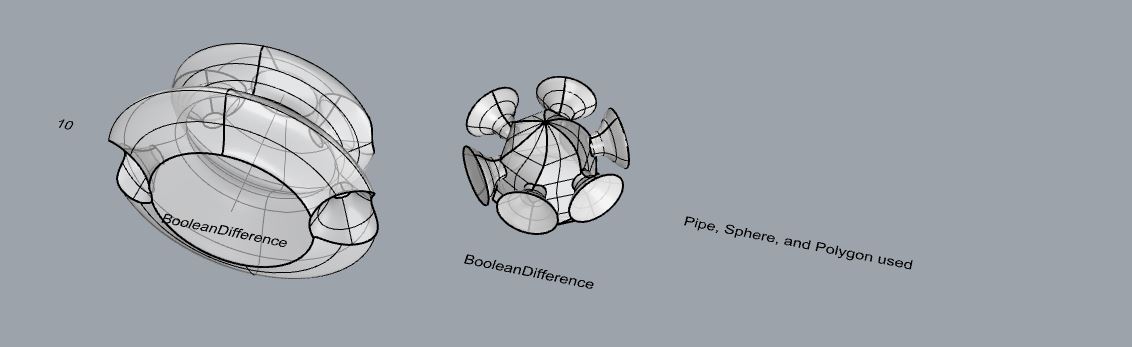
- BooleanDifference
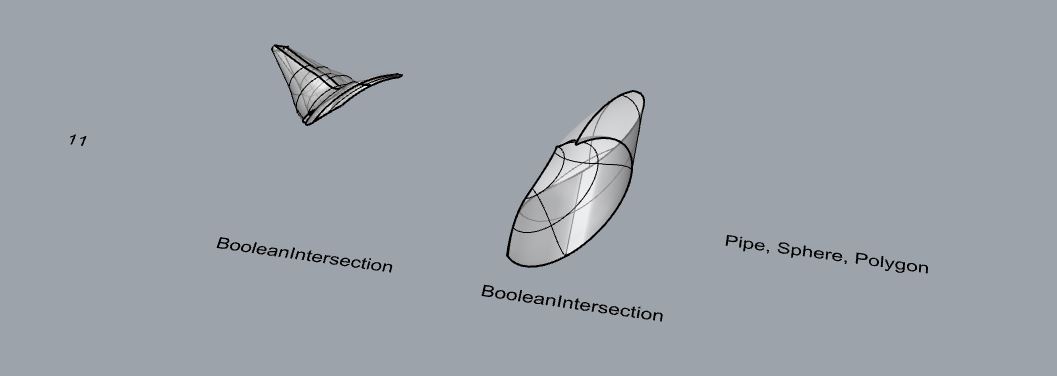
- Boolean Inersection
- BooleanSplit
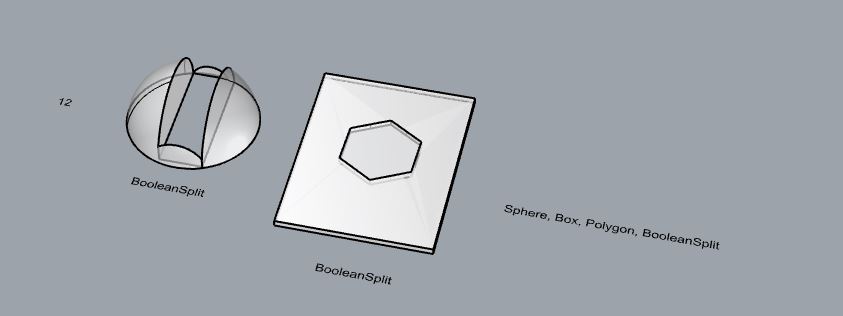
- Using the surfaces and solids you modeled and the Boolean tools, make three solid shapes you find interesting.
- Add a link to your FirstnameLastname_Solids file at this point in your post.
File: https://handandmachine.org/classes/computational_fabrication/wp-content/uploads/2024/09/RicardoPonce_Solids.3dm
Part 4: 3D Printing
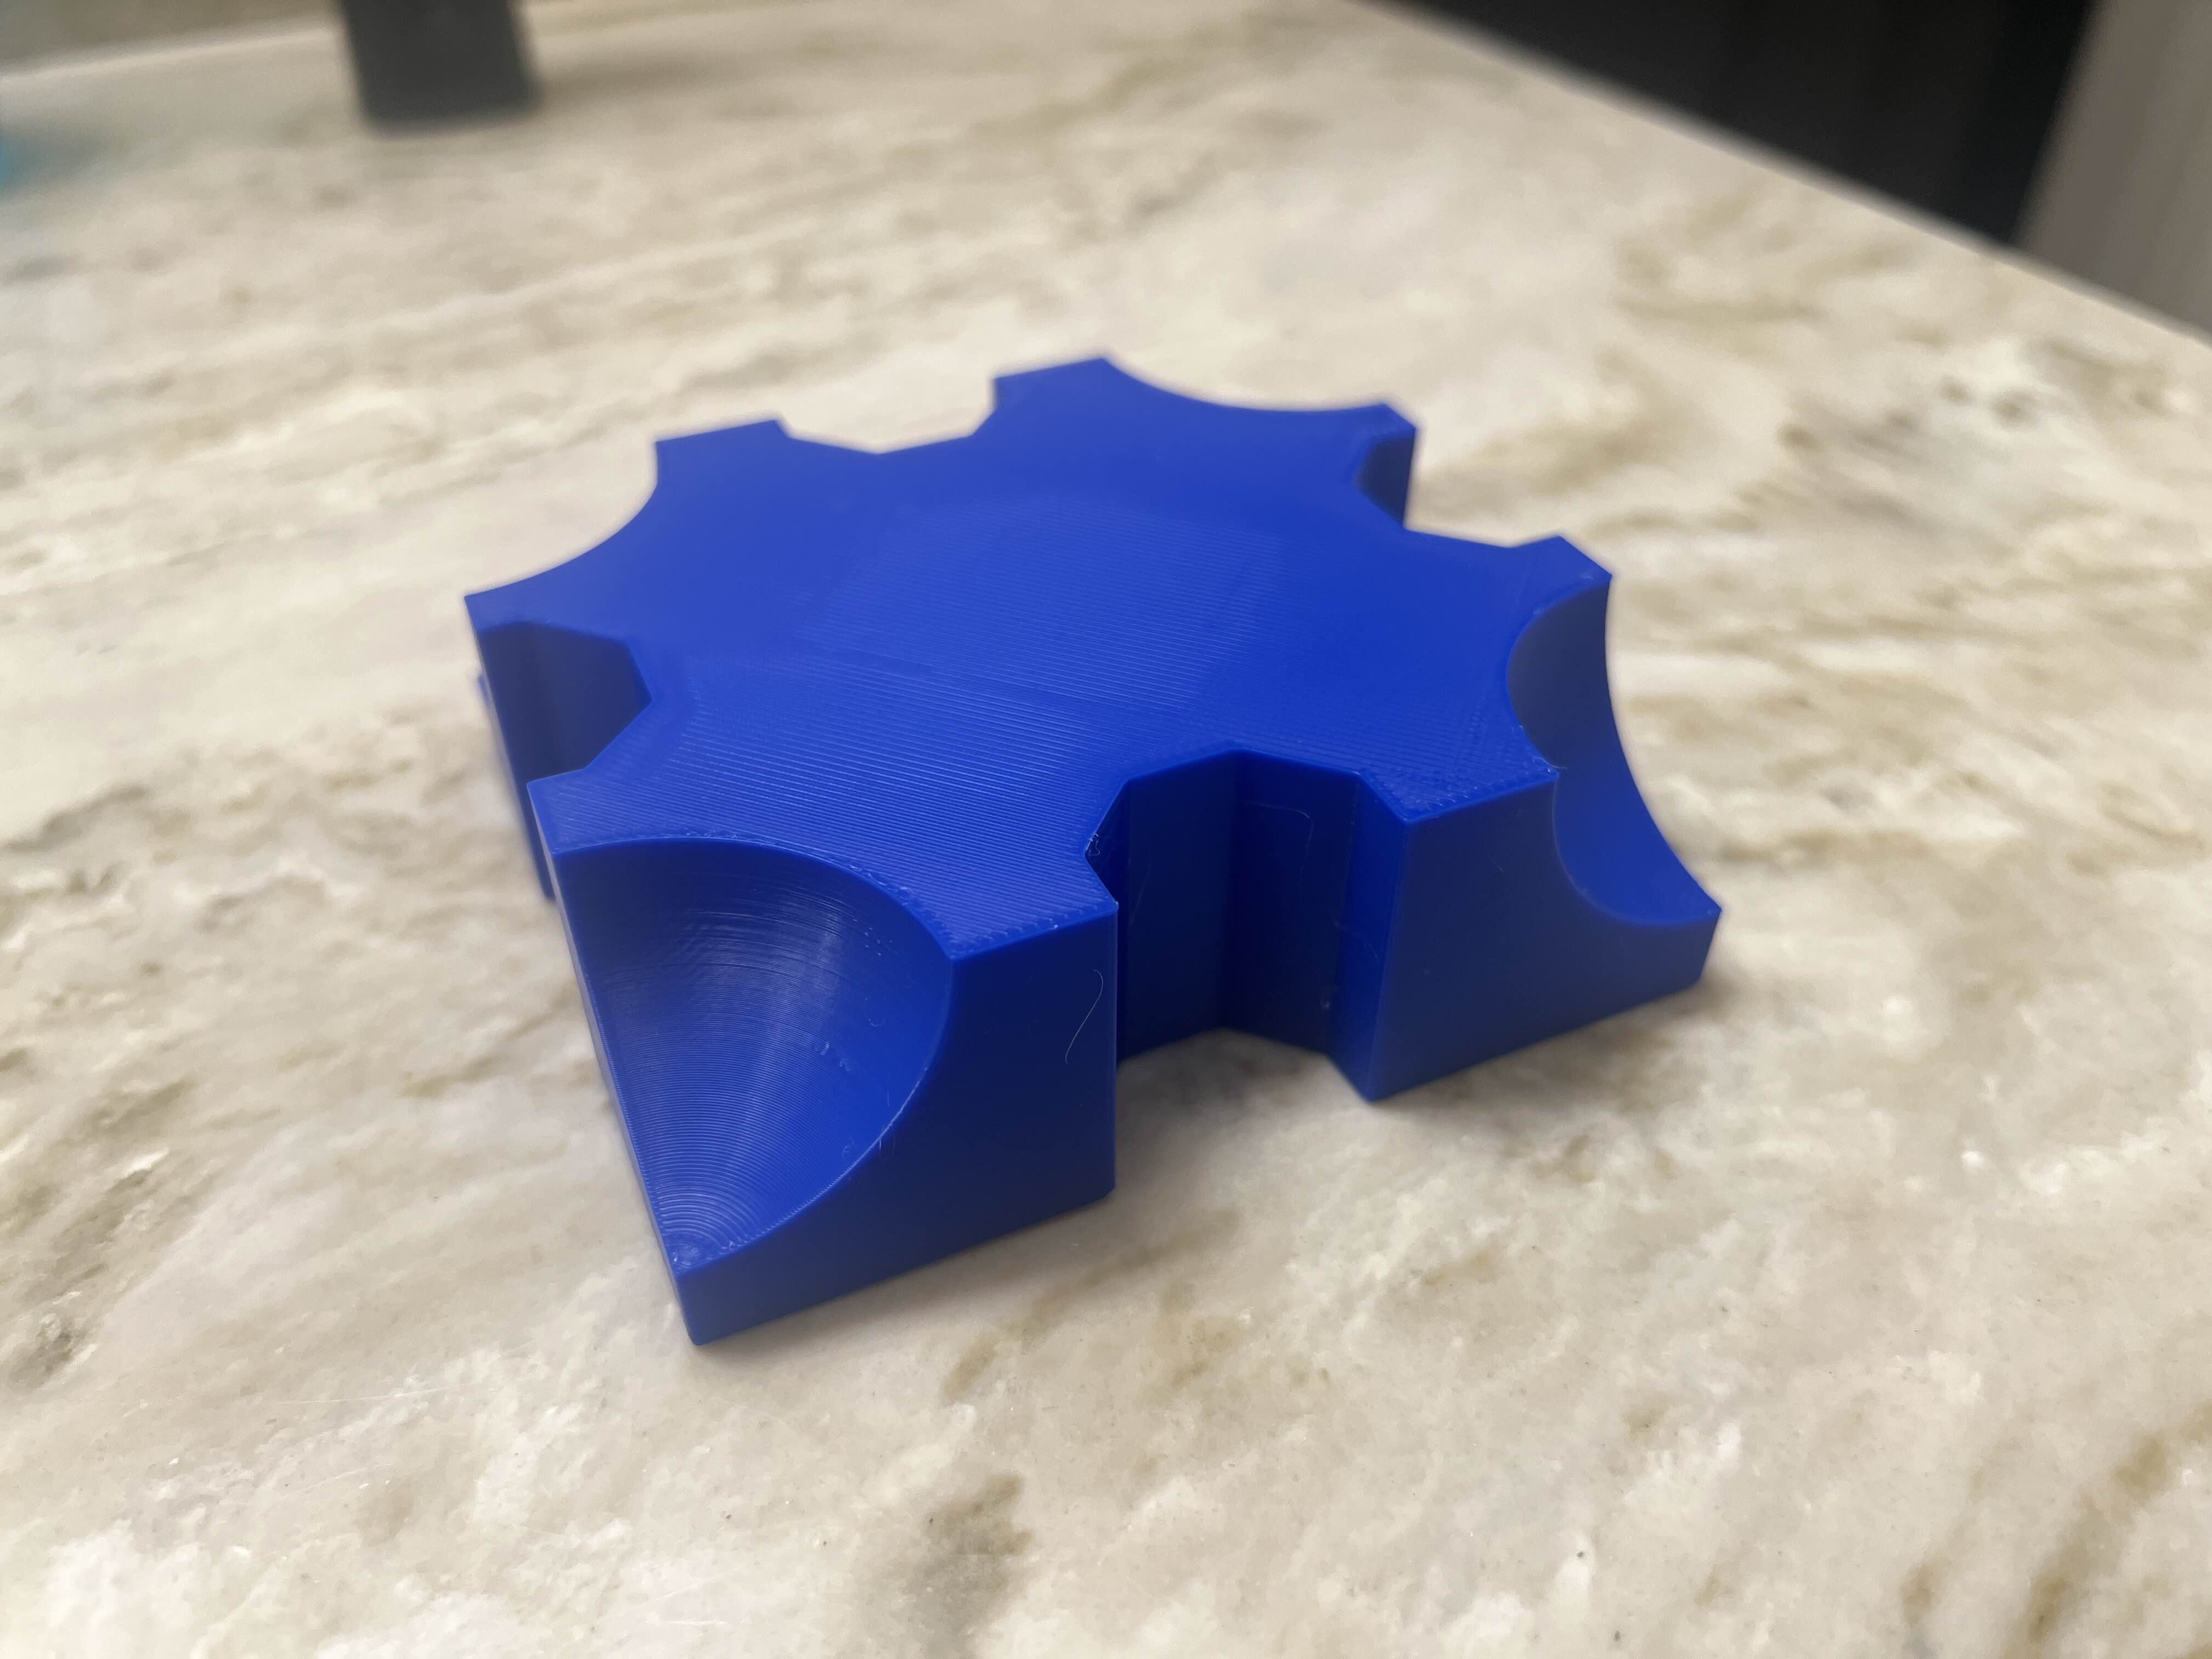
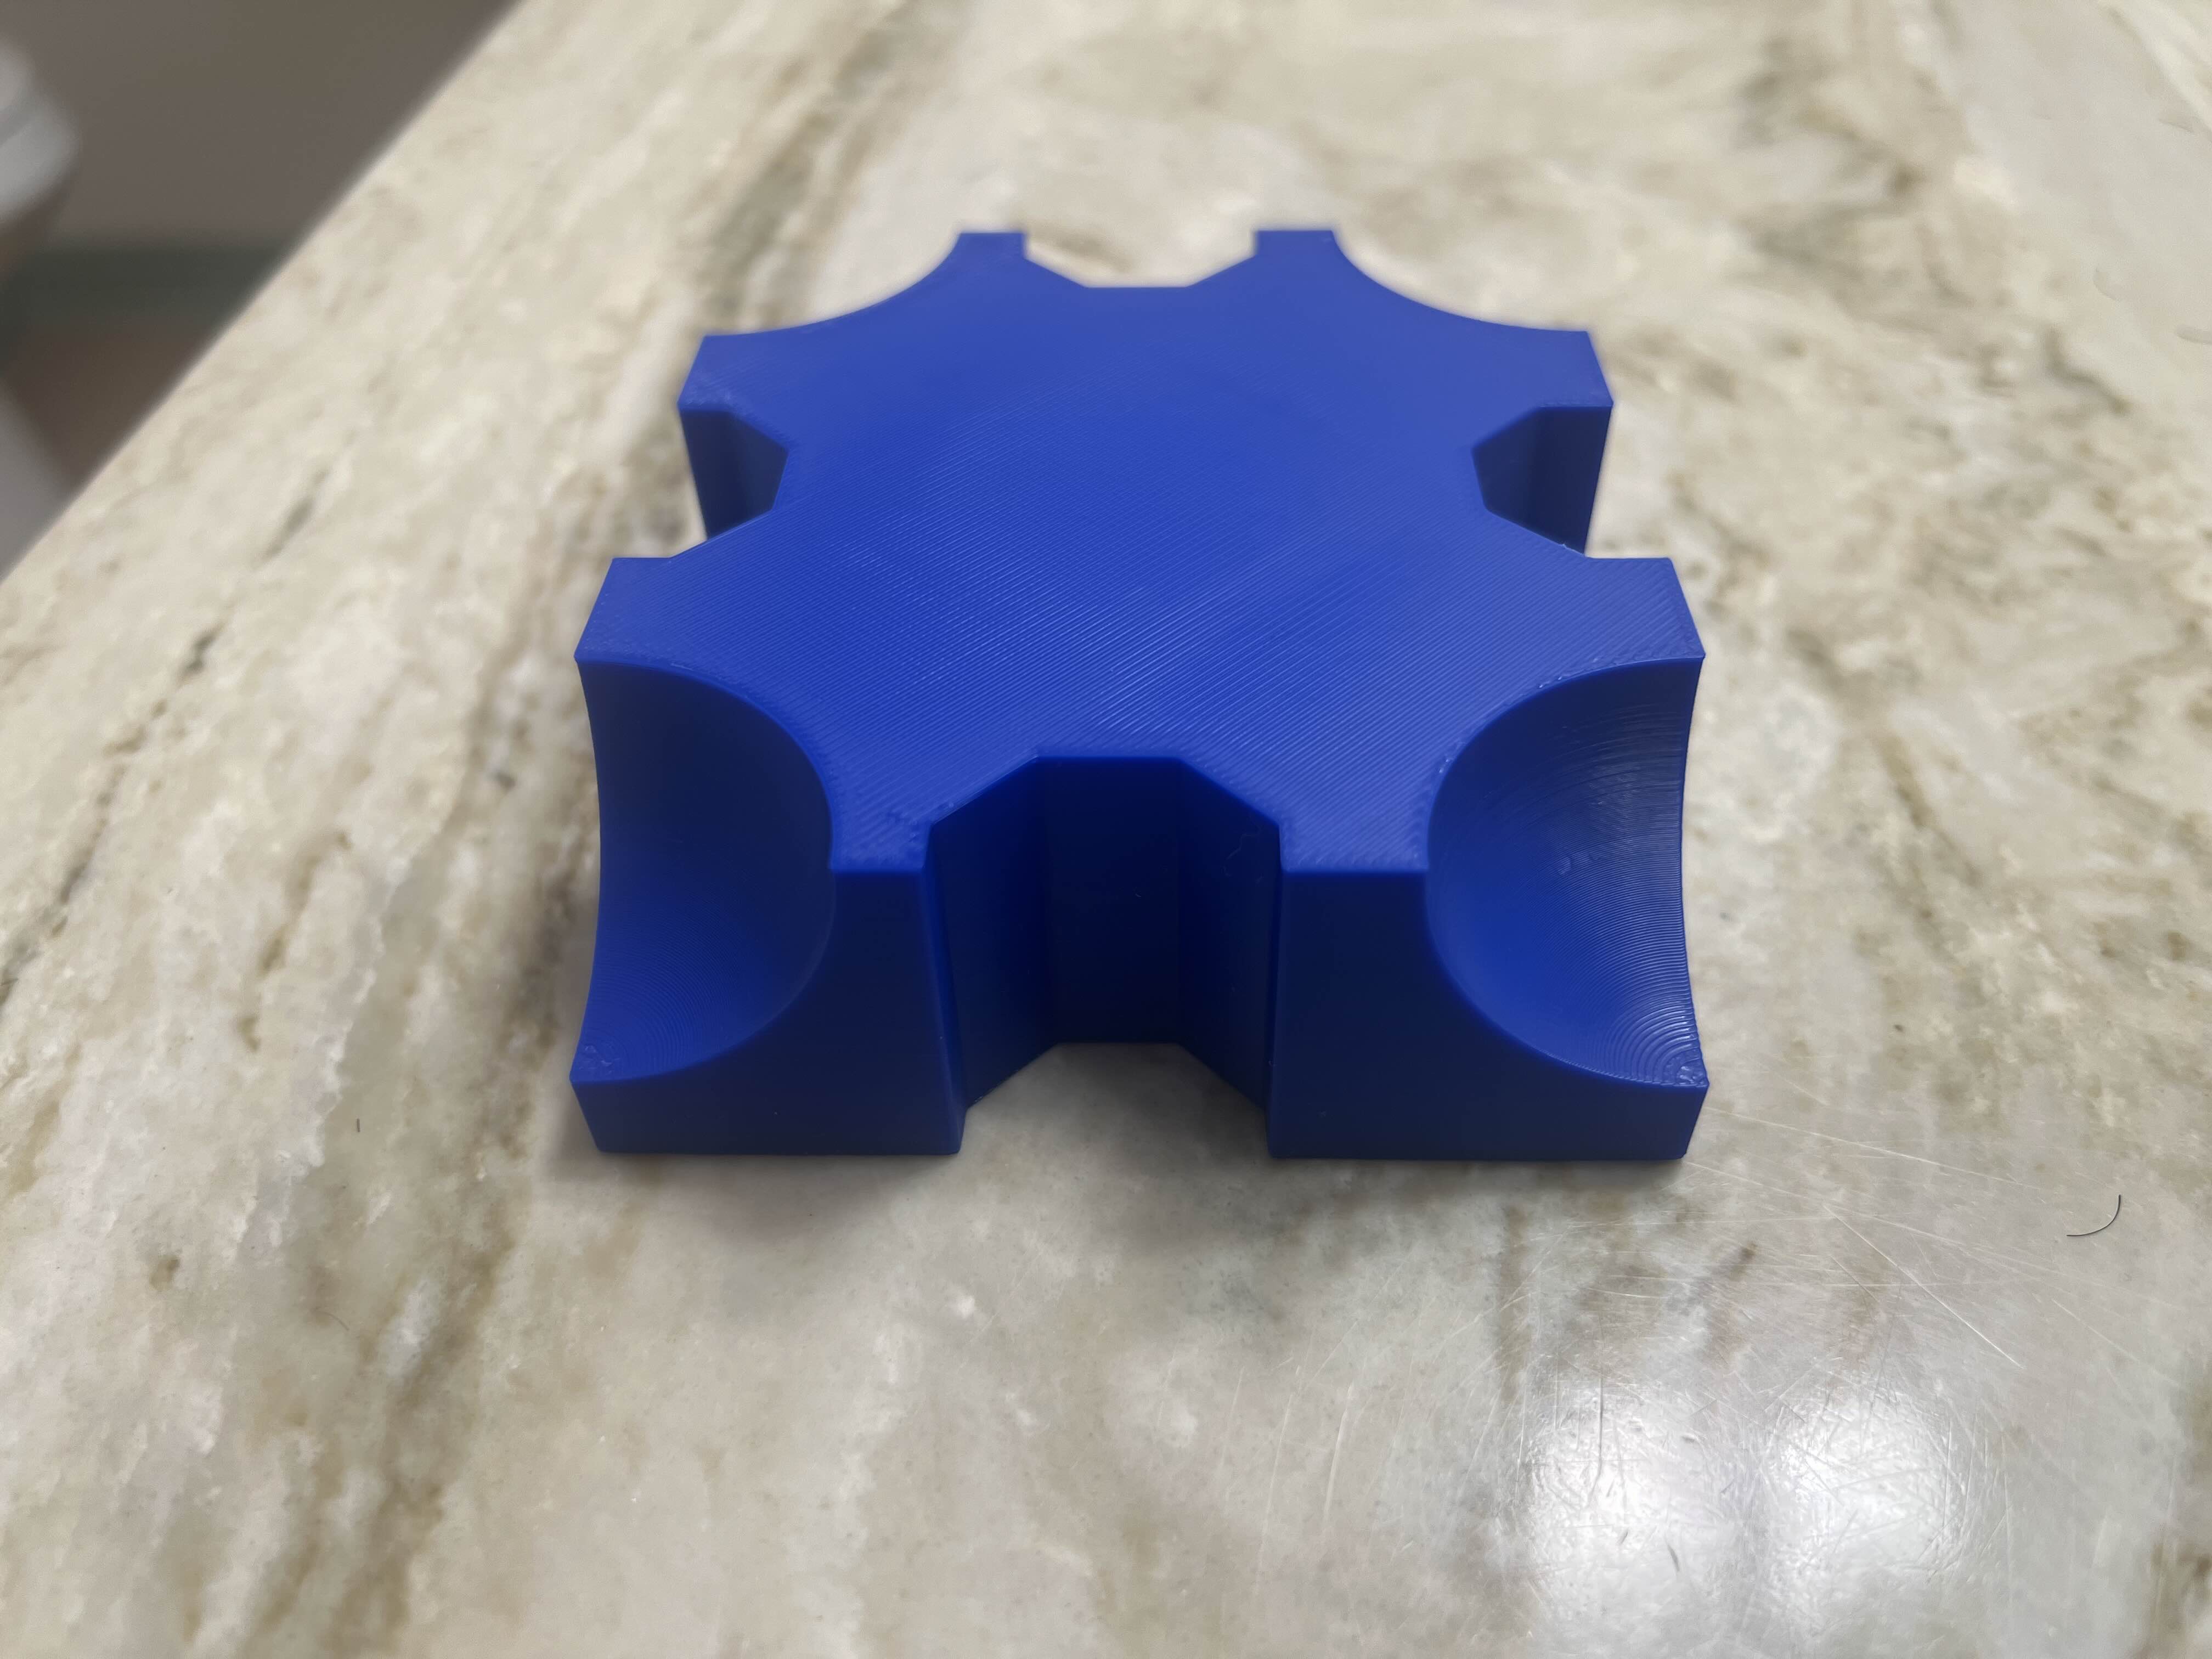
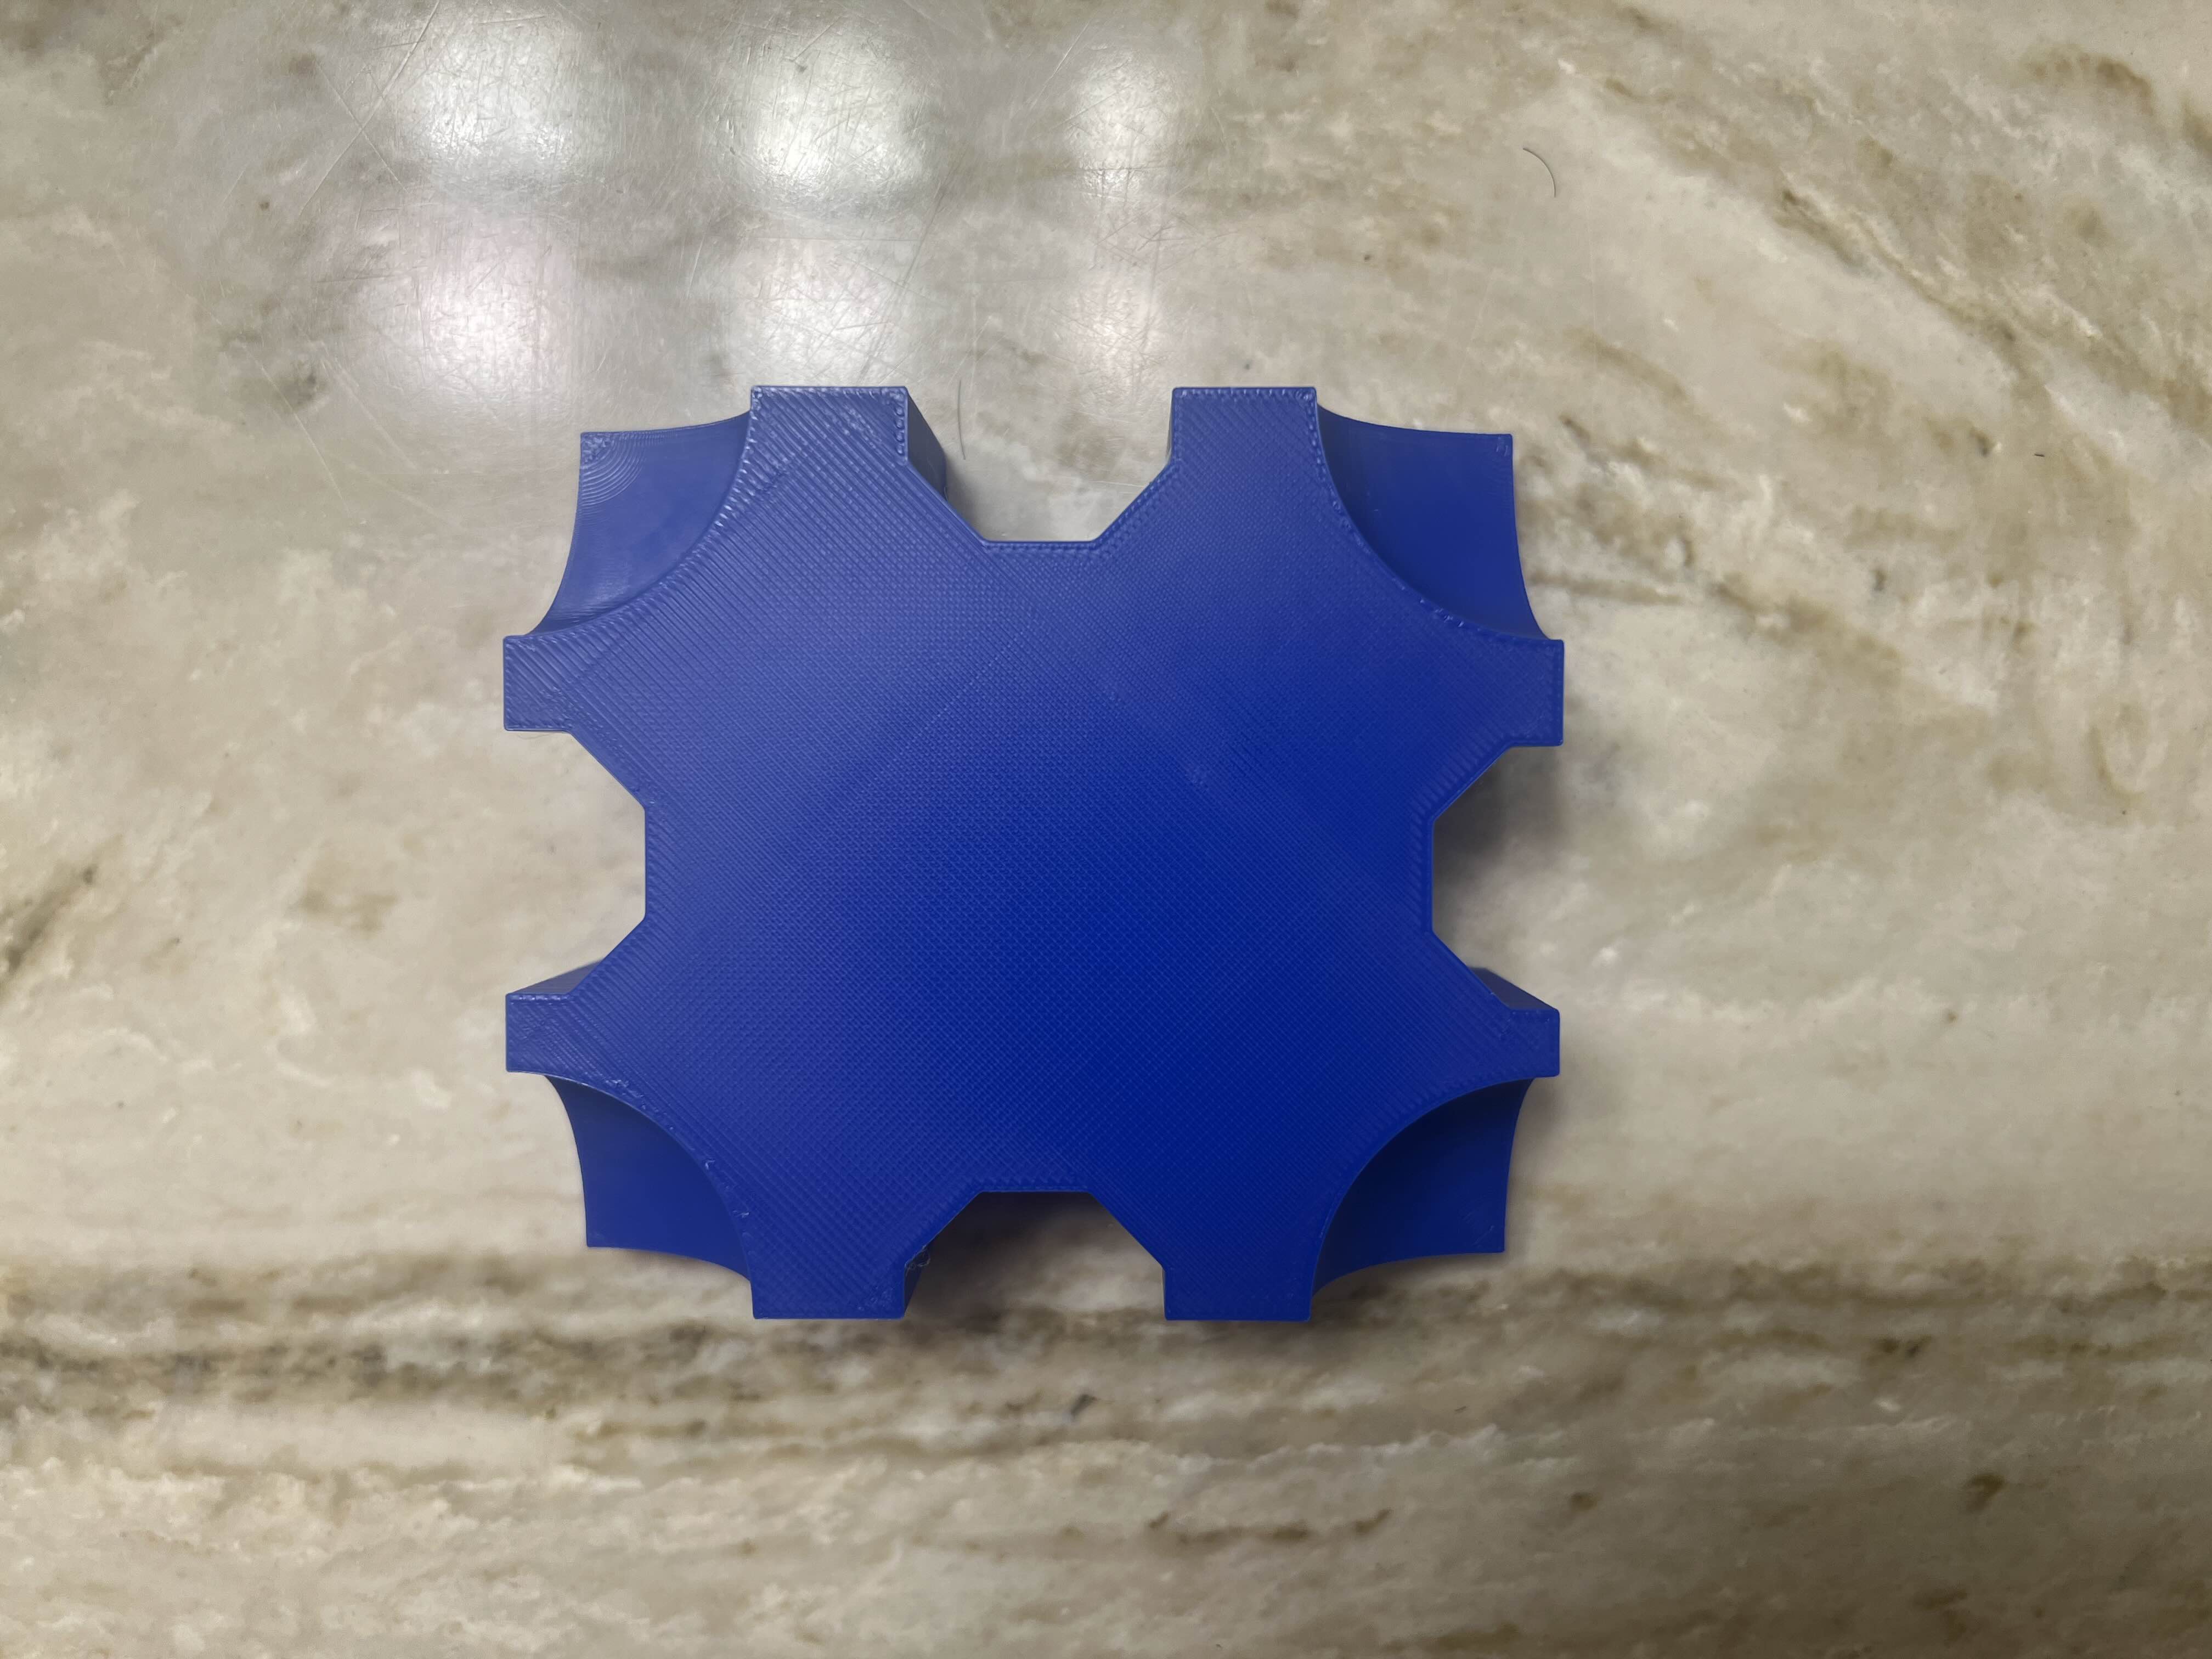
I chose the image below as my 3D print. I chose the model due to its curves and sharp angles. I wanted to see how sharp my 3D printer could get on the polygon shapes and how smooth the curves edges could get. I had a lot of issues with adhesion either due to the model or the type of filament I was using. The edges of the print kept getting rolled and sometimes the structure wouldn’t hold. I tried different settings on my printer and changed the layer height to get a detailed print. Changing the layer height really helped with the curves due to their angle. The print reminds me of a puzzle and its curious to see if the cut outs would slide in. Plus I think it would be a good way to see the tolerance of the machine. 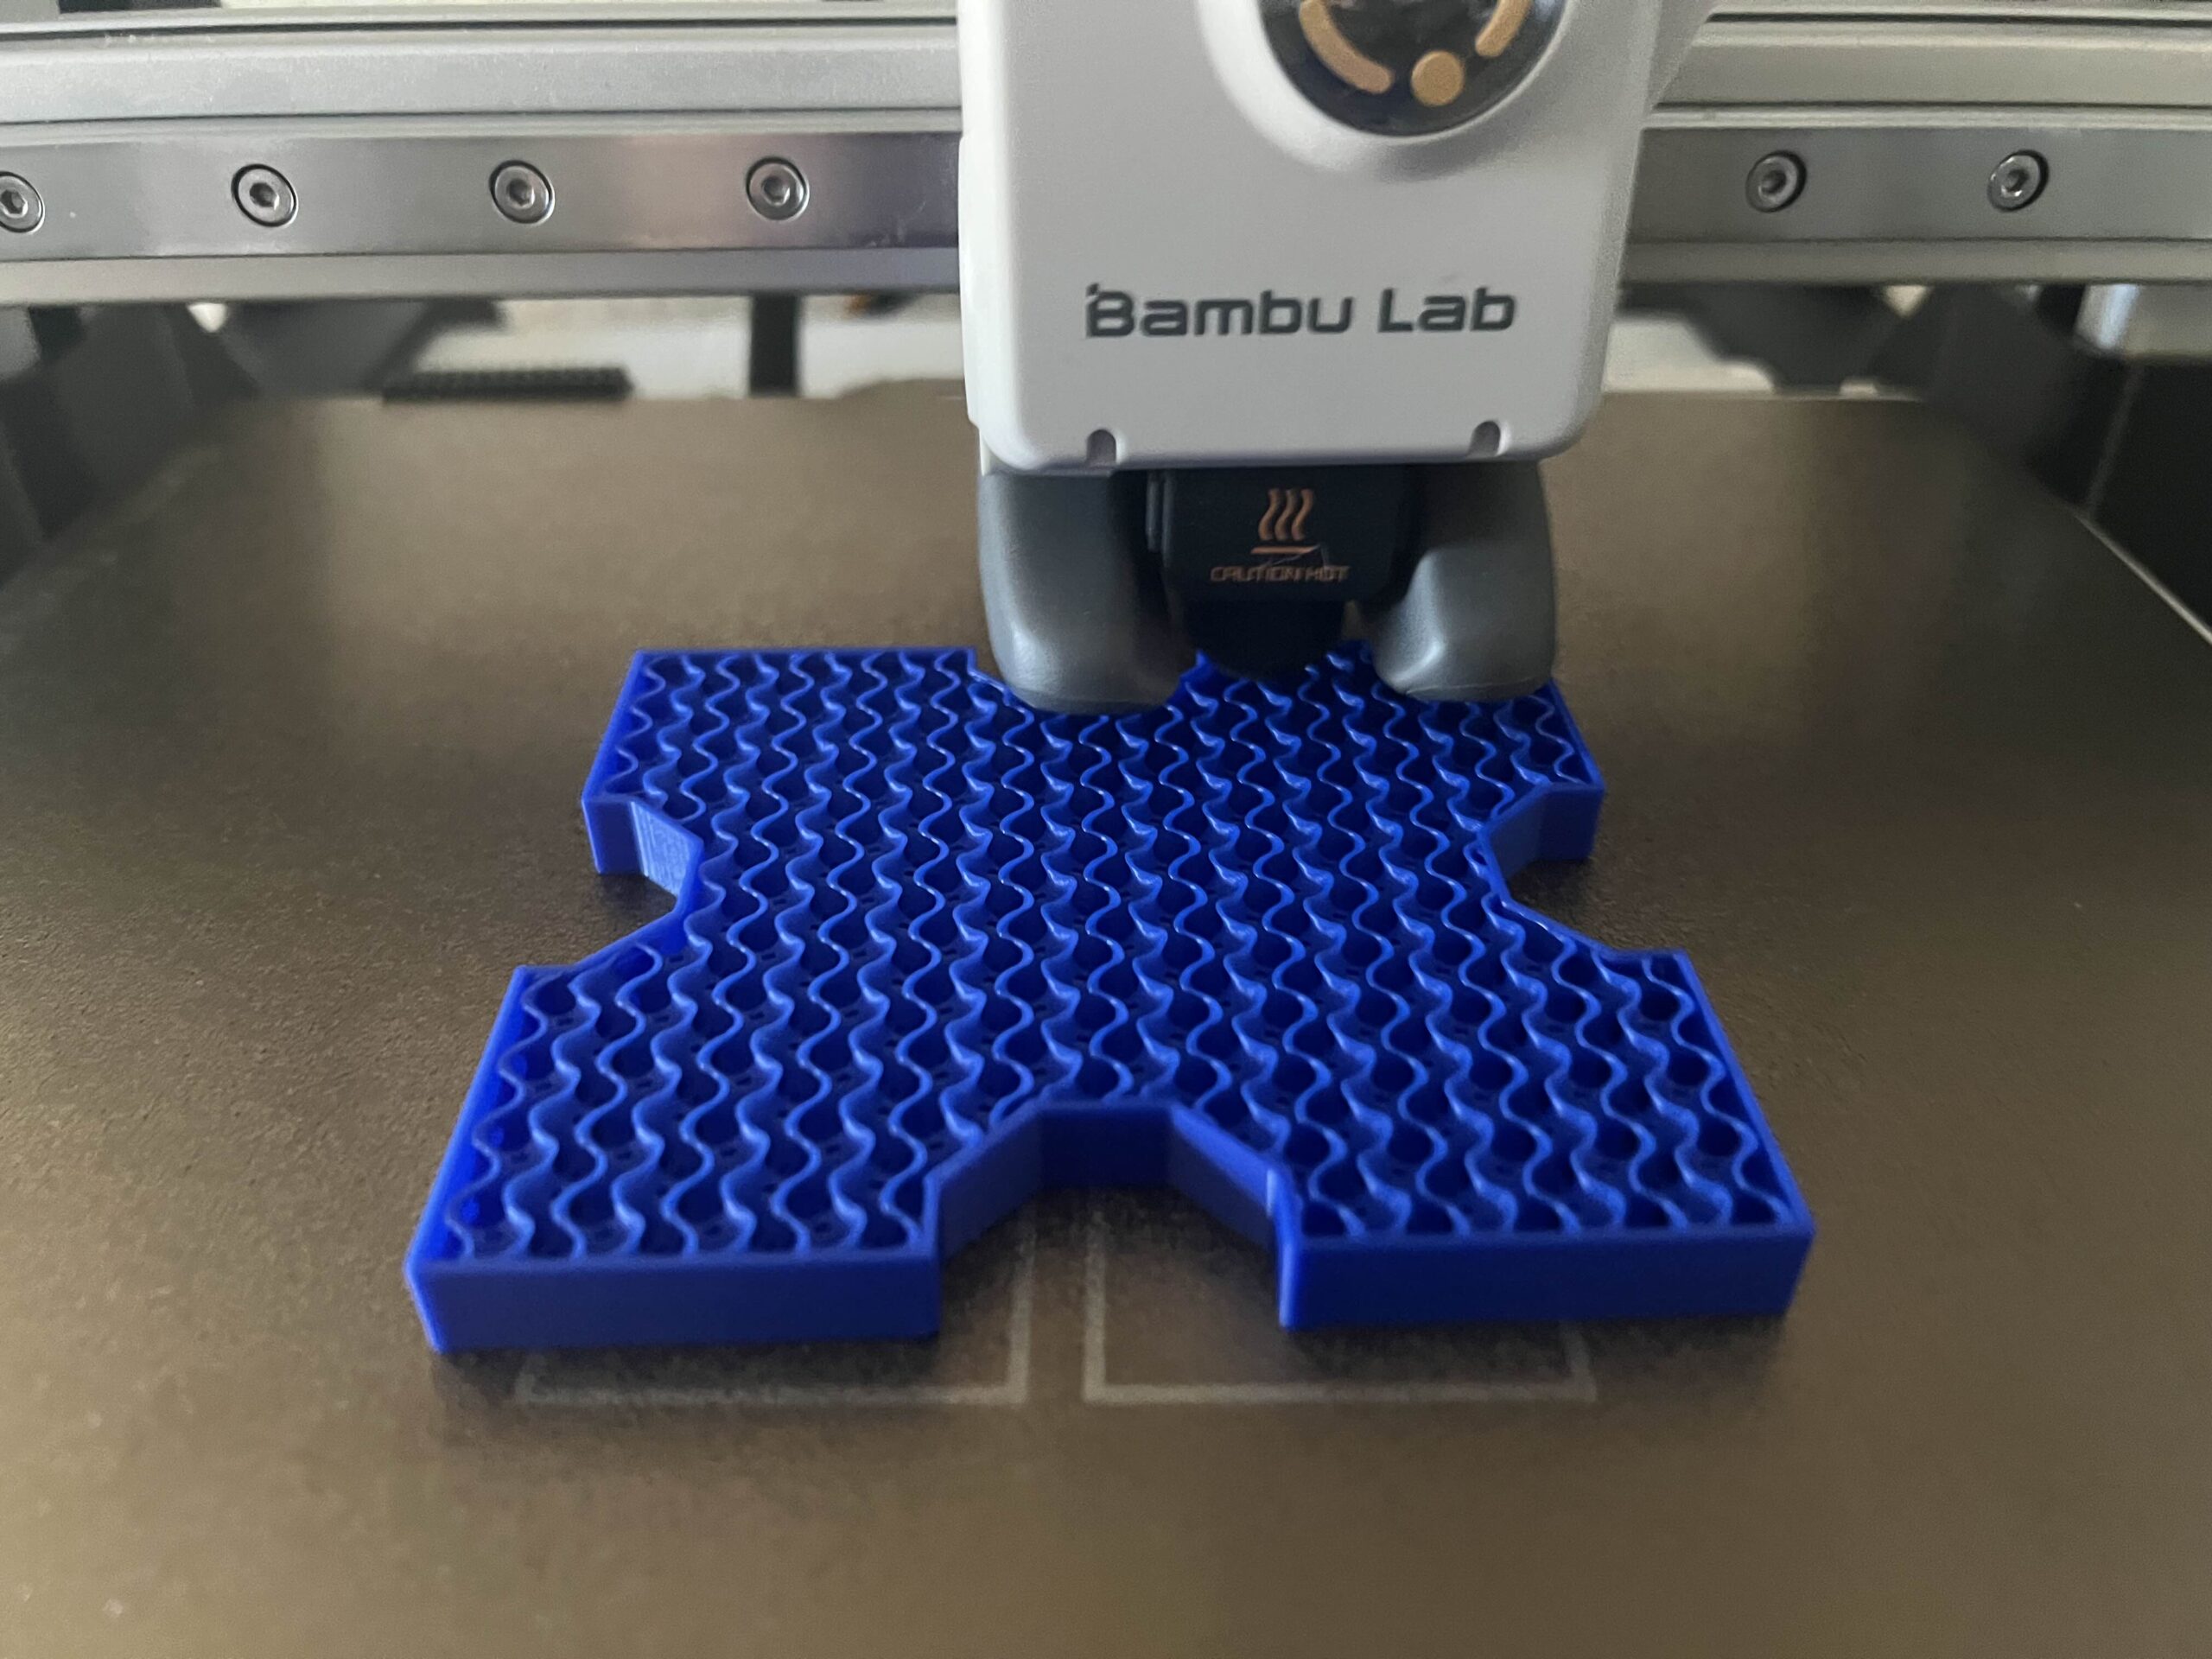
Hi Ricardo,
I am amazed at how you managed to make such a smooth trace of the picture you used, when I was tracing my picture the lines ended looking uneven. The object you printed looks like a puzzle piece to me as well. It also looks like it came out really good, I can’t see any defects or weirdness.
Hi Ricardo,
I think the shapes you made for the boolean-difference step are cool! Your print turned out very neatly, with very sharp looking corners and edges. And although it’s not visible from the outside, I think the squiggly infill is a fun touch.