Part 1: Curves
Open a new Rhino File and practice the curves commands by completing the following steps. Organize your Rhino file so each step is clear. Use the Text command to label each step and the commands you used.
- Make the specific footprint below.
- Commands: Polyline
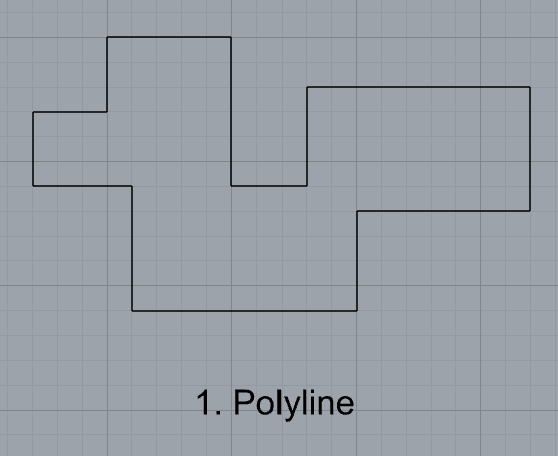
- Commands: Polyline
- Make 2 closed rounded curves using the various curve commands.
- Commands: Curve, InterpCurve, HandleCurve
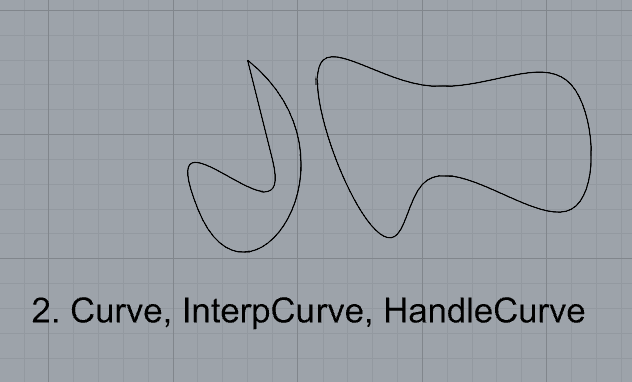
- Commands: Curve, InterpCurve, HandleCurve
- Make 2 closed curves using polygon, ellipse, or circle
- Commands: Circle, Ellipse, Polygon
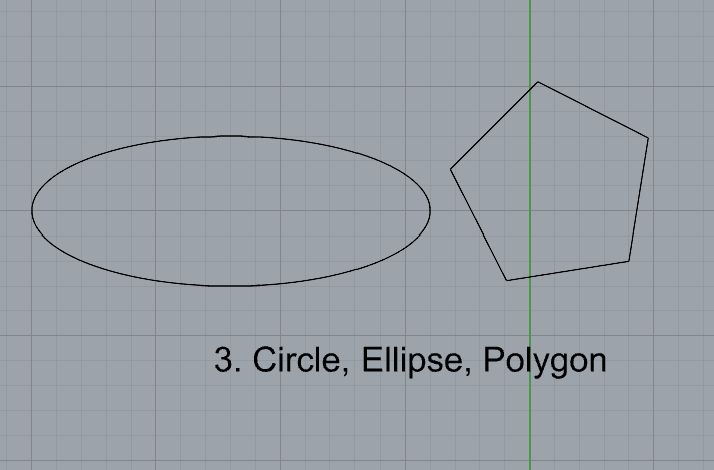
- Commands: Circle, Ellipse, Polygon
- Make 2 open curves
- Commands: Curve, InterpCurve, HandleCurve, Sketch
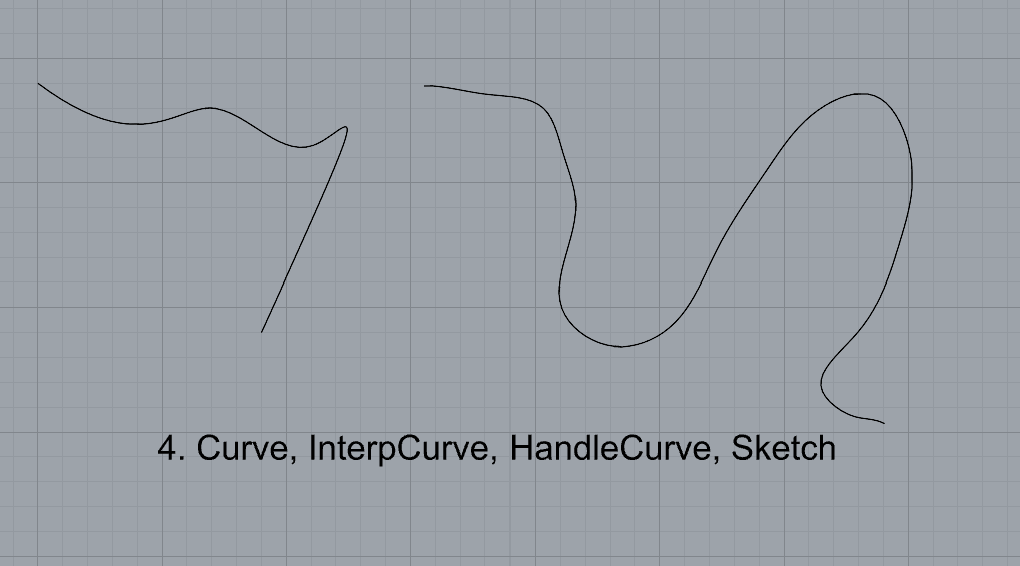
- Commands: Curve, InterpCurve, HandleCurve, Sketch
- Import a picture and trace an image
- Commands: Picture, InterpCurve

- Commands: Picture, InterpCurve
- Pick one open curve, and one closed rounded curve and make three copies of each.
- Commands: Copy
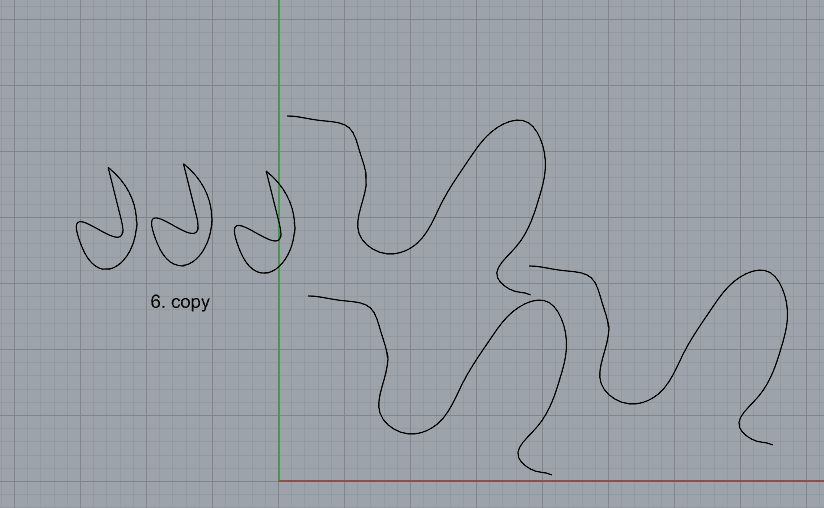
- Commands: Copy
- Take at least 3 of your closed curves and overlap them to create a new shape
- Commands: Move
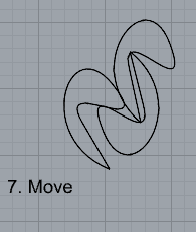
- Commands: Move
- Use split, delete, and trim to combine these curves into one open curve
- Commands: Split, Delete, Trim, Join, Explode

- Commands: Split, Delete, Trim, Join, Explode
- Take at least two curves and use various transformations make a pattern or composition.
- Commands: Move, Copy, Rotate, Mirror, Array, Scale, Offset, Fillet, FilletCorners
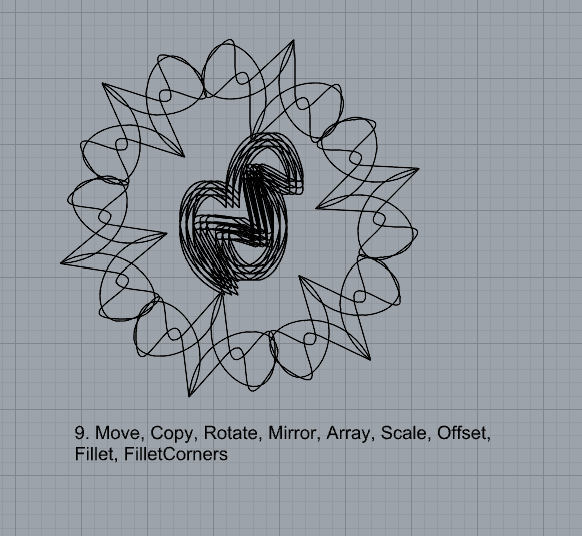
- Commands: Move, Copy, Rotate, Mirror, Array, Scale, Offset, Fillet, FilletCorners
- Organize your Rhino file so each step is clear. Use the Text command to label each step and the commands you used. Add a link to your FirstnameLastname_Curves file at this point in your post.
Part 2: Surfaces
Open a new Rhino File and practice the surfaces commands below by making two different surfaces for each command. Organize your Rhino file so each step is clear. You may want to use some of the curves you modeled in Part 1. Use the Text command to label each step and the commands you used.
- Plane
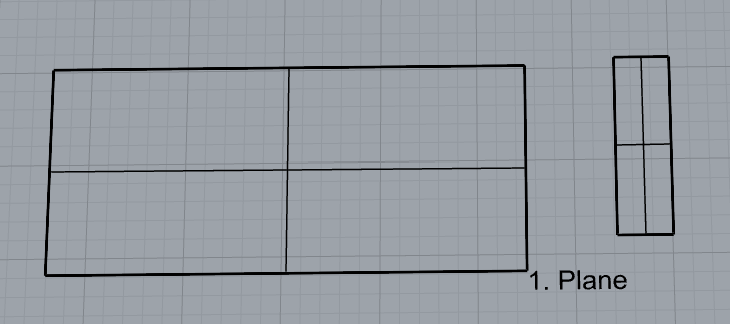
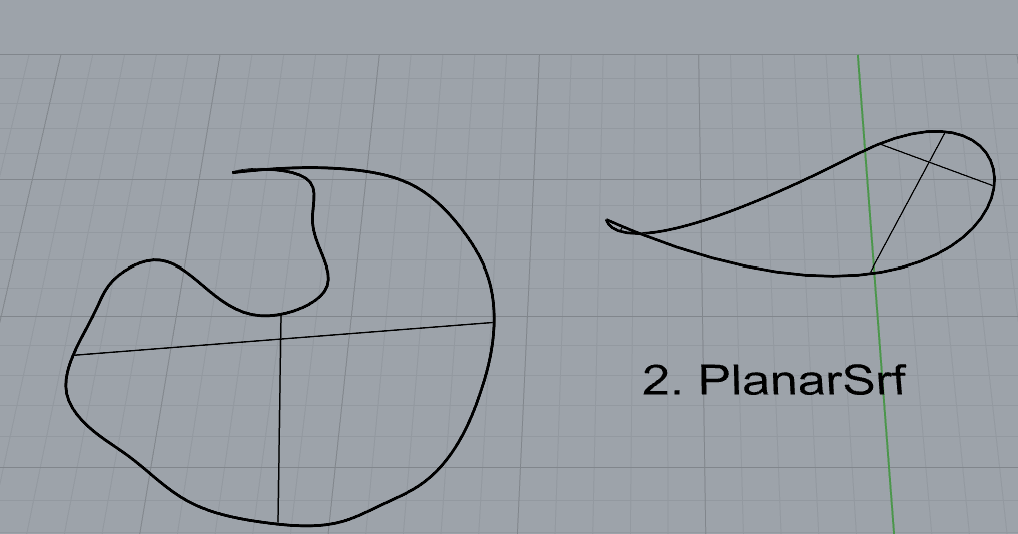
- PlanarSrf
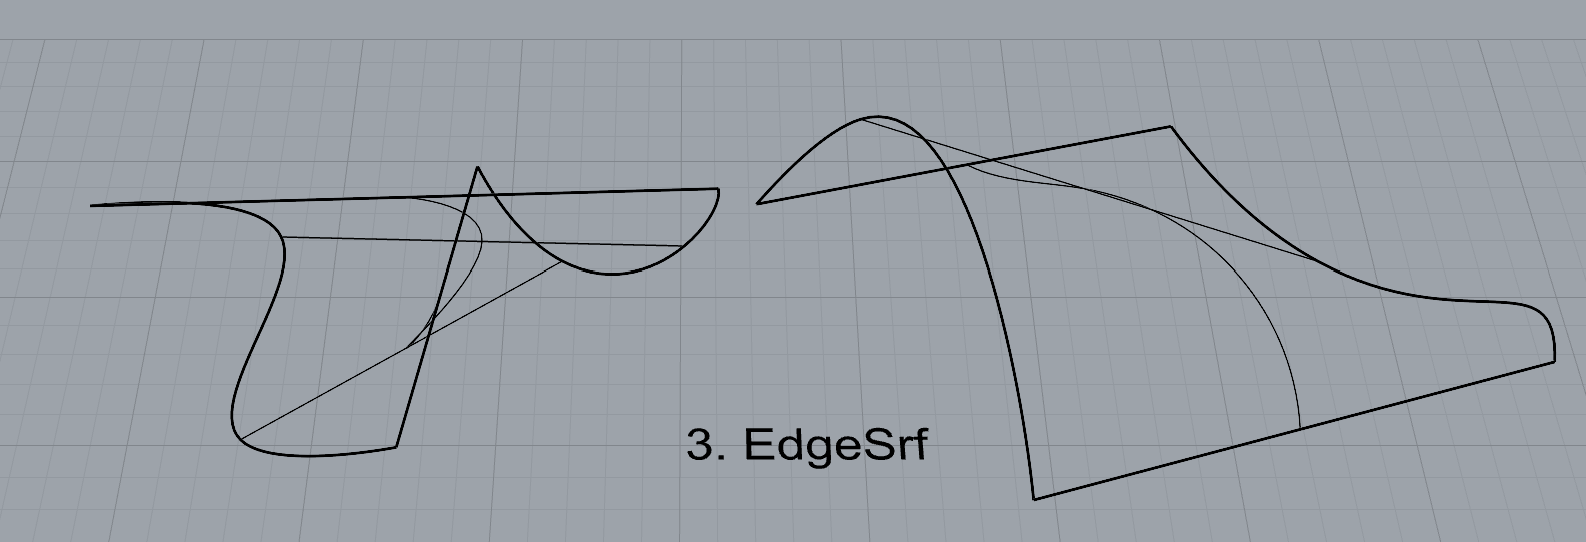
- EdgeSrf
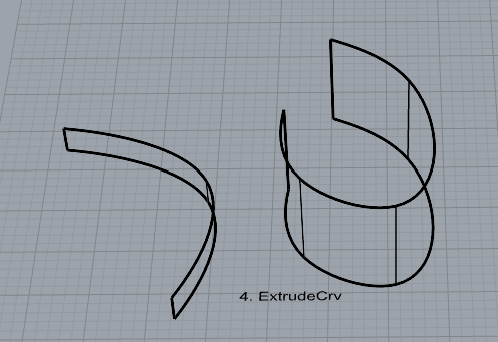
- ExtrudeCrv
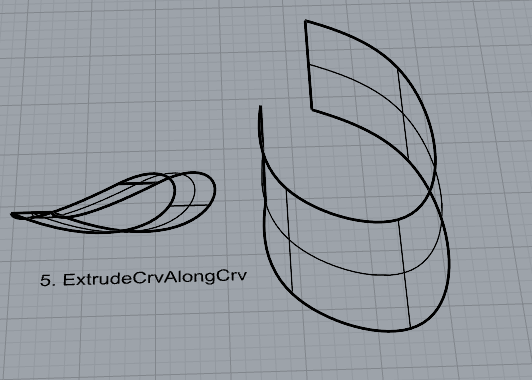
- ExtrudeCrvAlongCrv
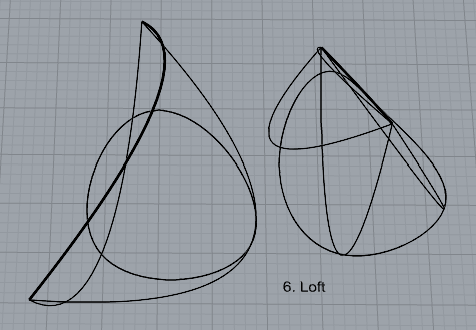
- Loft
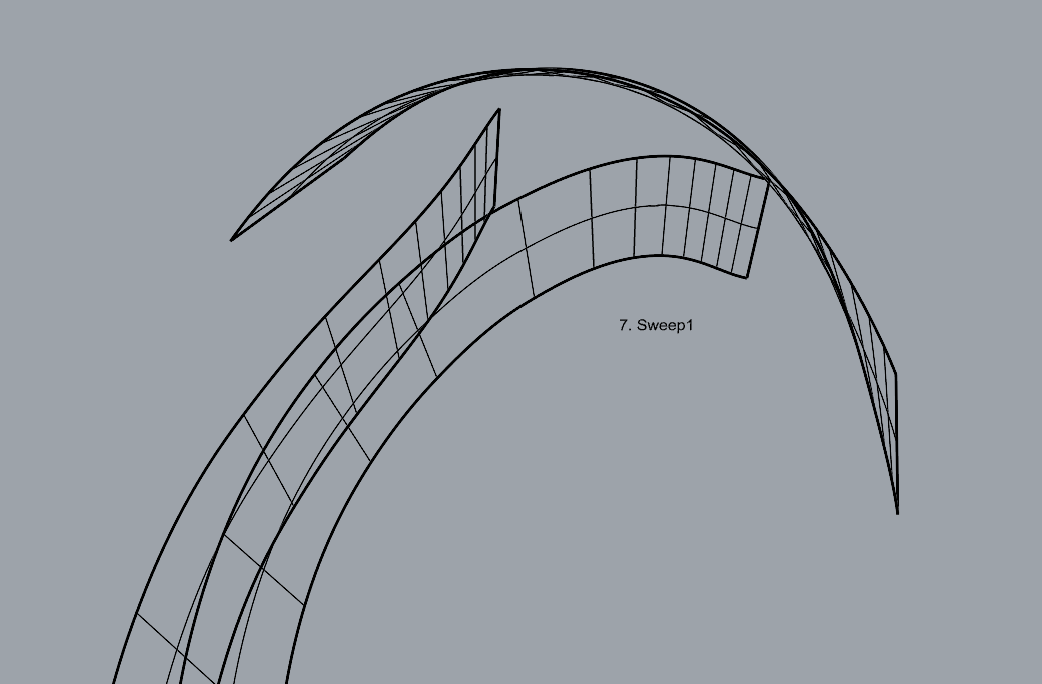
- Sweep1
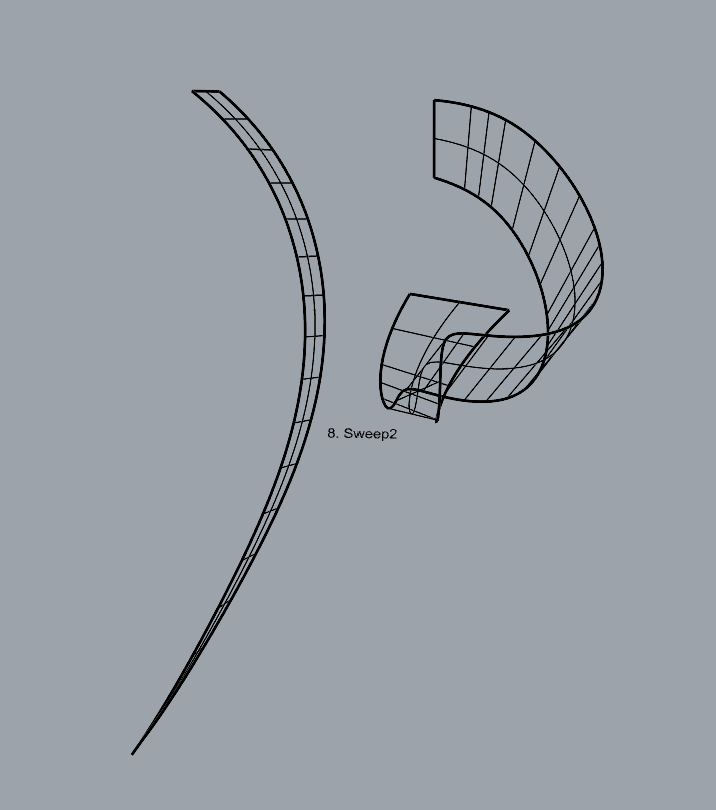
- Sweep2
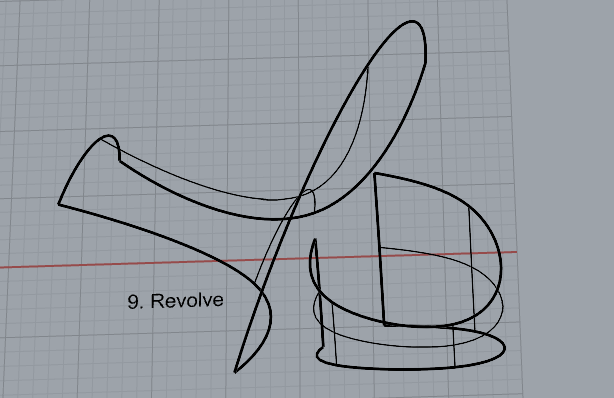
- Revolve
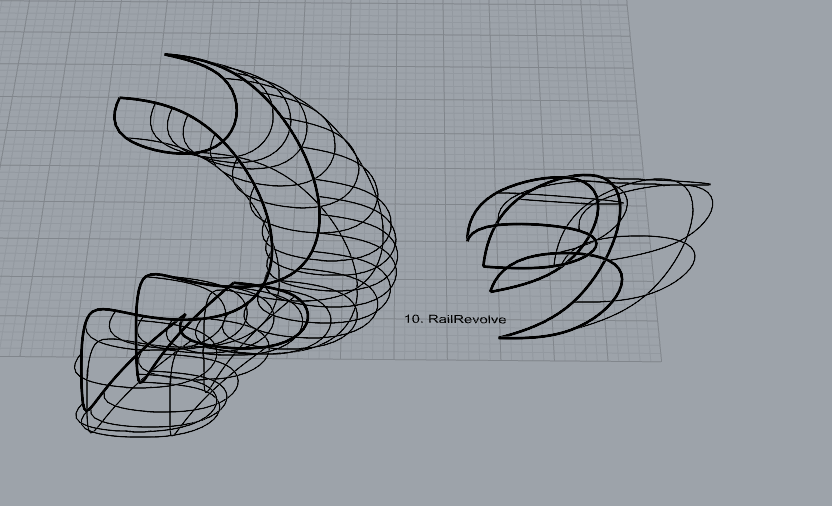
- RailRevolve
- Add a link to your FirstnameLastname_Surfaces file at this point in your post.
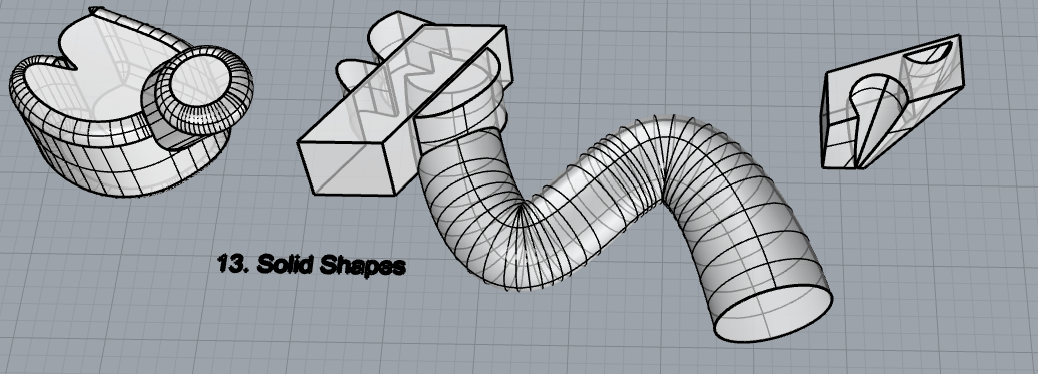
Part 3: Solids
Open a new Rhino File and practice the solids commands below by making two different solids for each command. You may want to use some of the curves and surfaces you modeled in Parts 1 and 2. Organize your Rhino file so each step is clear. Use the Text command to label each step and the commands you used.
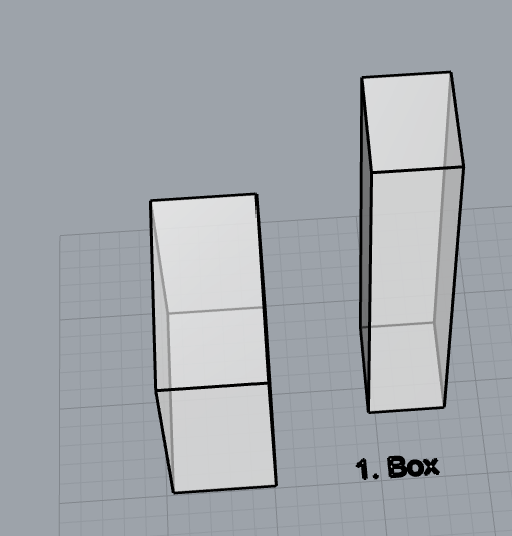
- Box
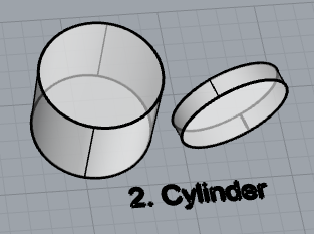
- Cylinder
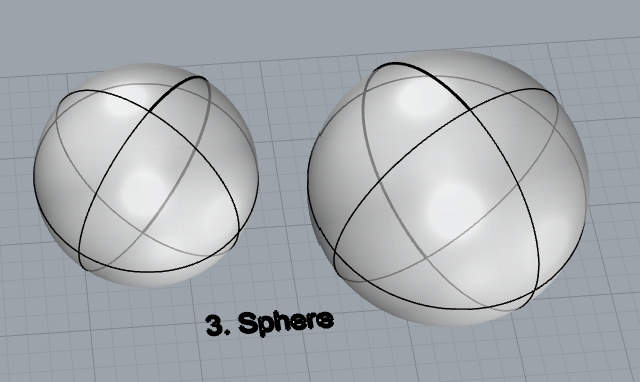
- Sphere
- ExtrudeCrv and Cap

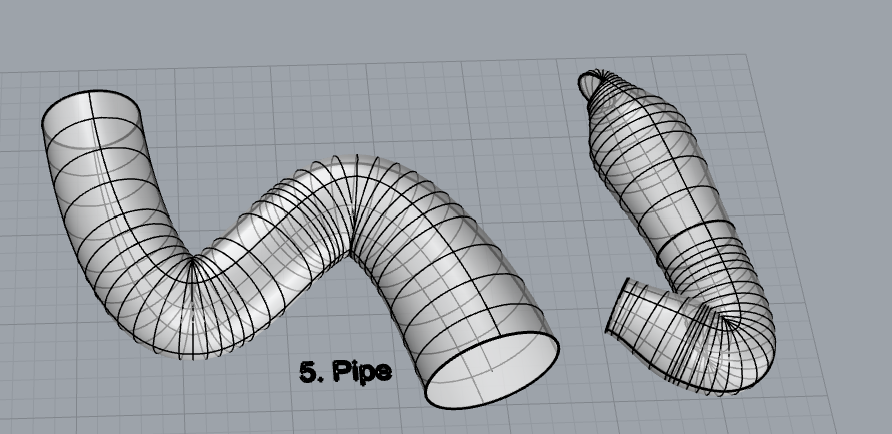
- Pipe
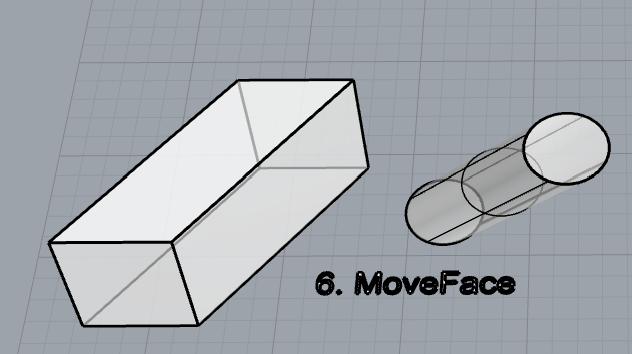
- MoveFace
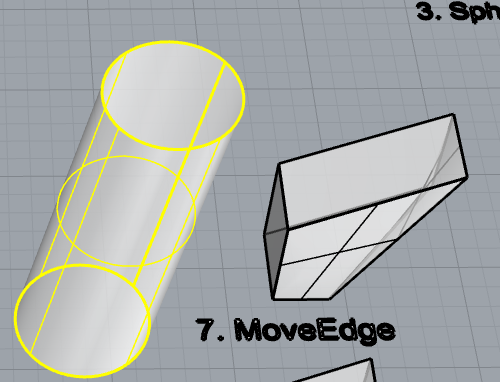
- MoveEdge
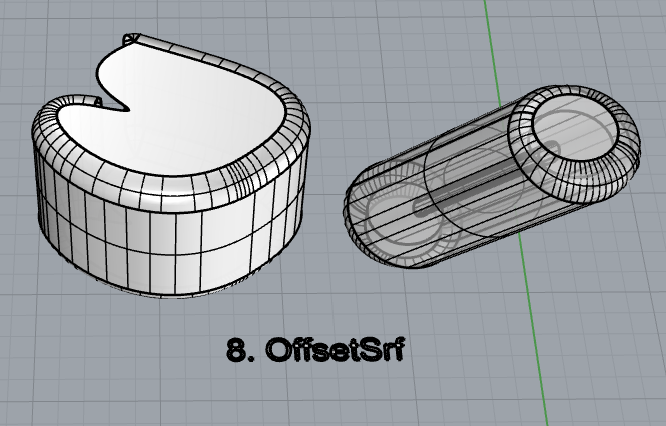
- OffsetSrf
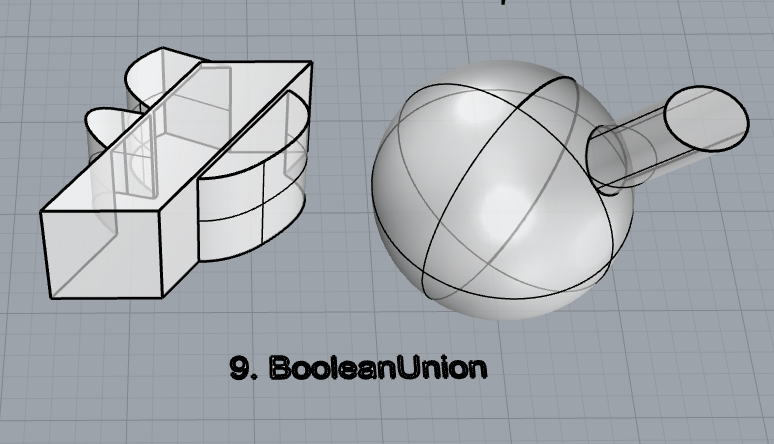
- BooleanUnion
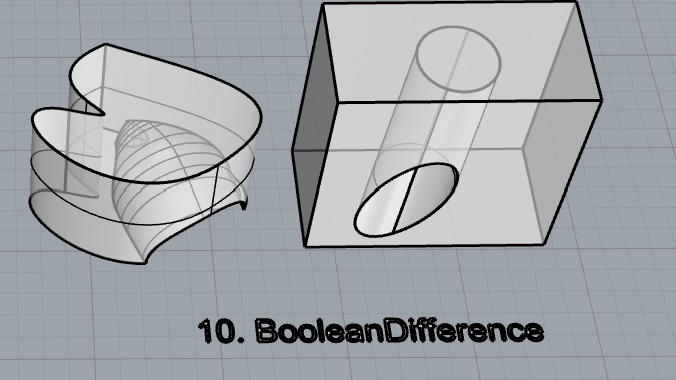
- BooleanDifference
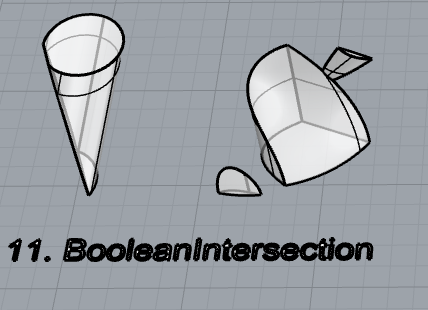
- Boolean Intersection
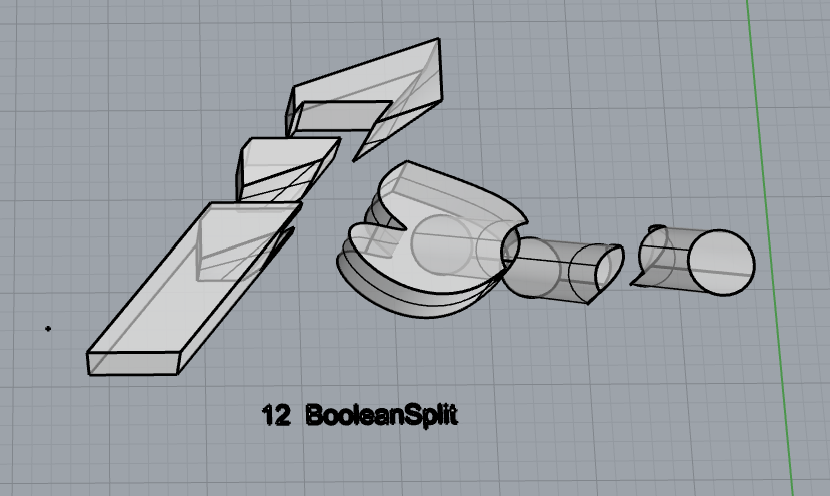
- BooleanSplit
- Using the surfaces and solids you modeled and the Boolean tools, make three solid shapes you find interesting.
- Add a link to your FirstnameLastname_Solids file at this point in your post.
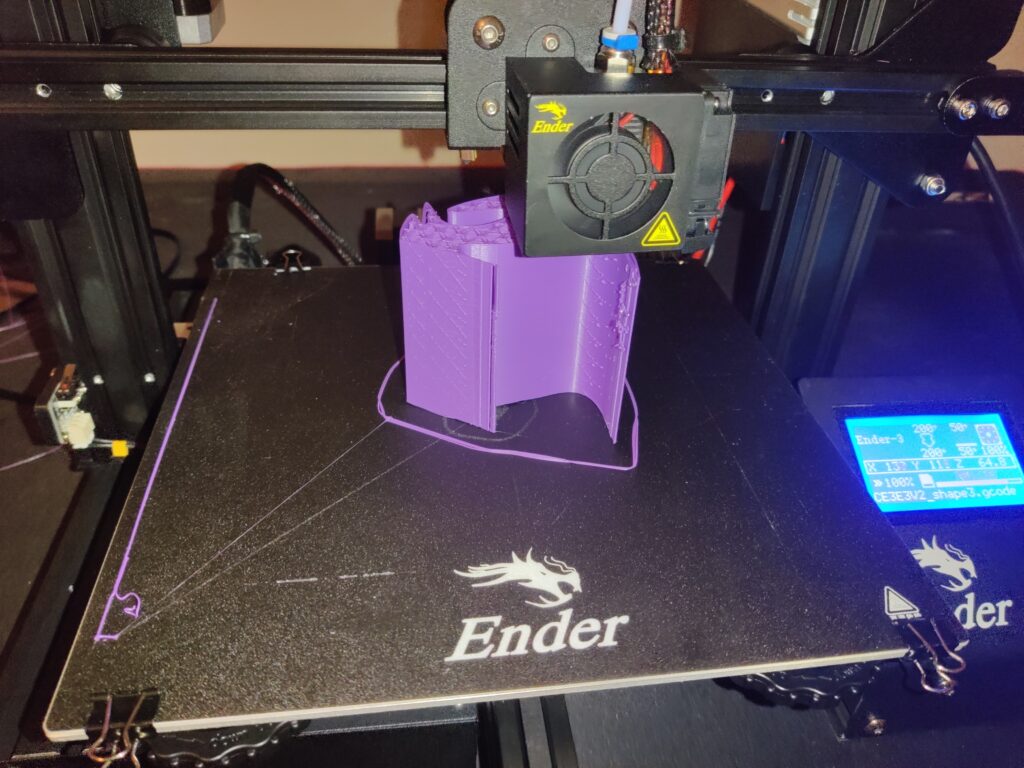
Part 4: 3D Printing
- Pick one of the shapes you created and 3D print it using your 3D printer. Note: to be able to print an object with the 3d printer, it must be watertight. That means that your shape must be a closed form with no naked edges and no holes.
- Export your model in the .stl file format. Import the .stl file into Cura and slice it, generating a .gcode file your printer can interpret.
- Your final print should be at least 3″ x 3″ x 3″ in size. Note: the print doesn’t have to be square, but the total volume should be approximately 9 in^3.

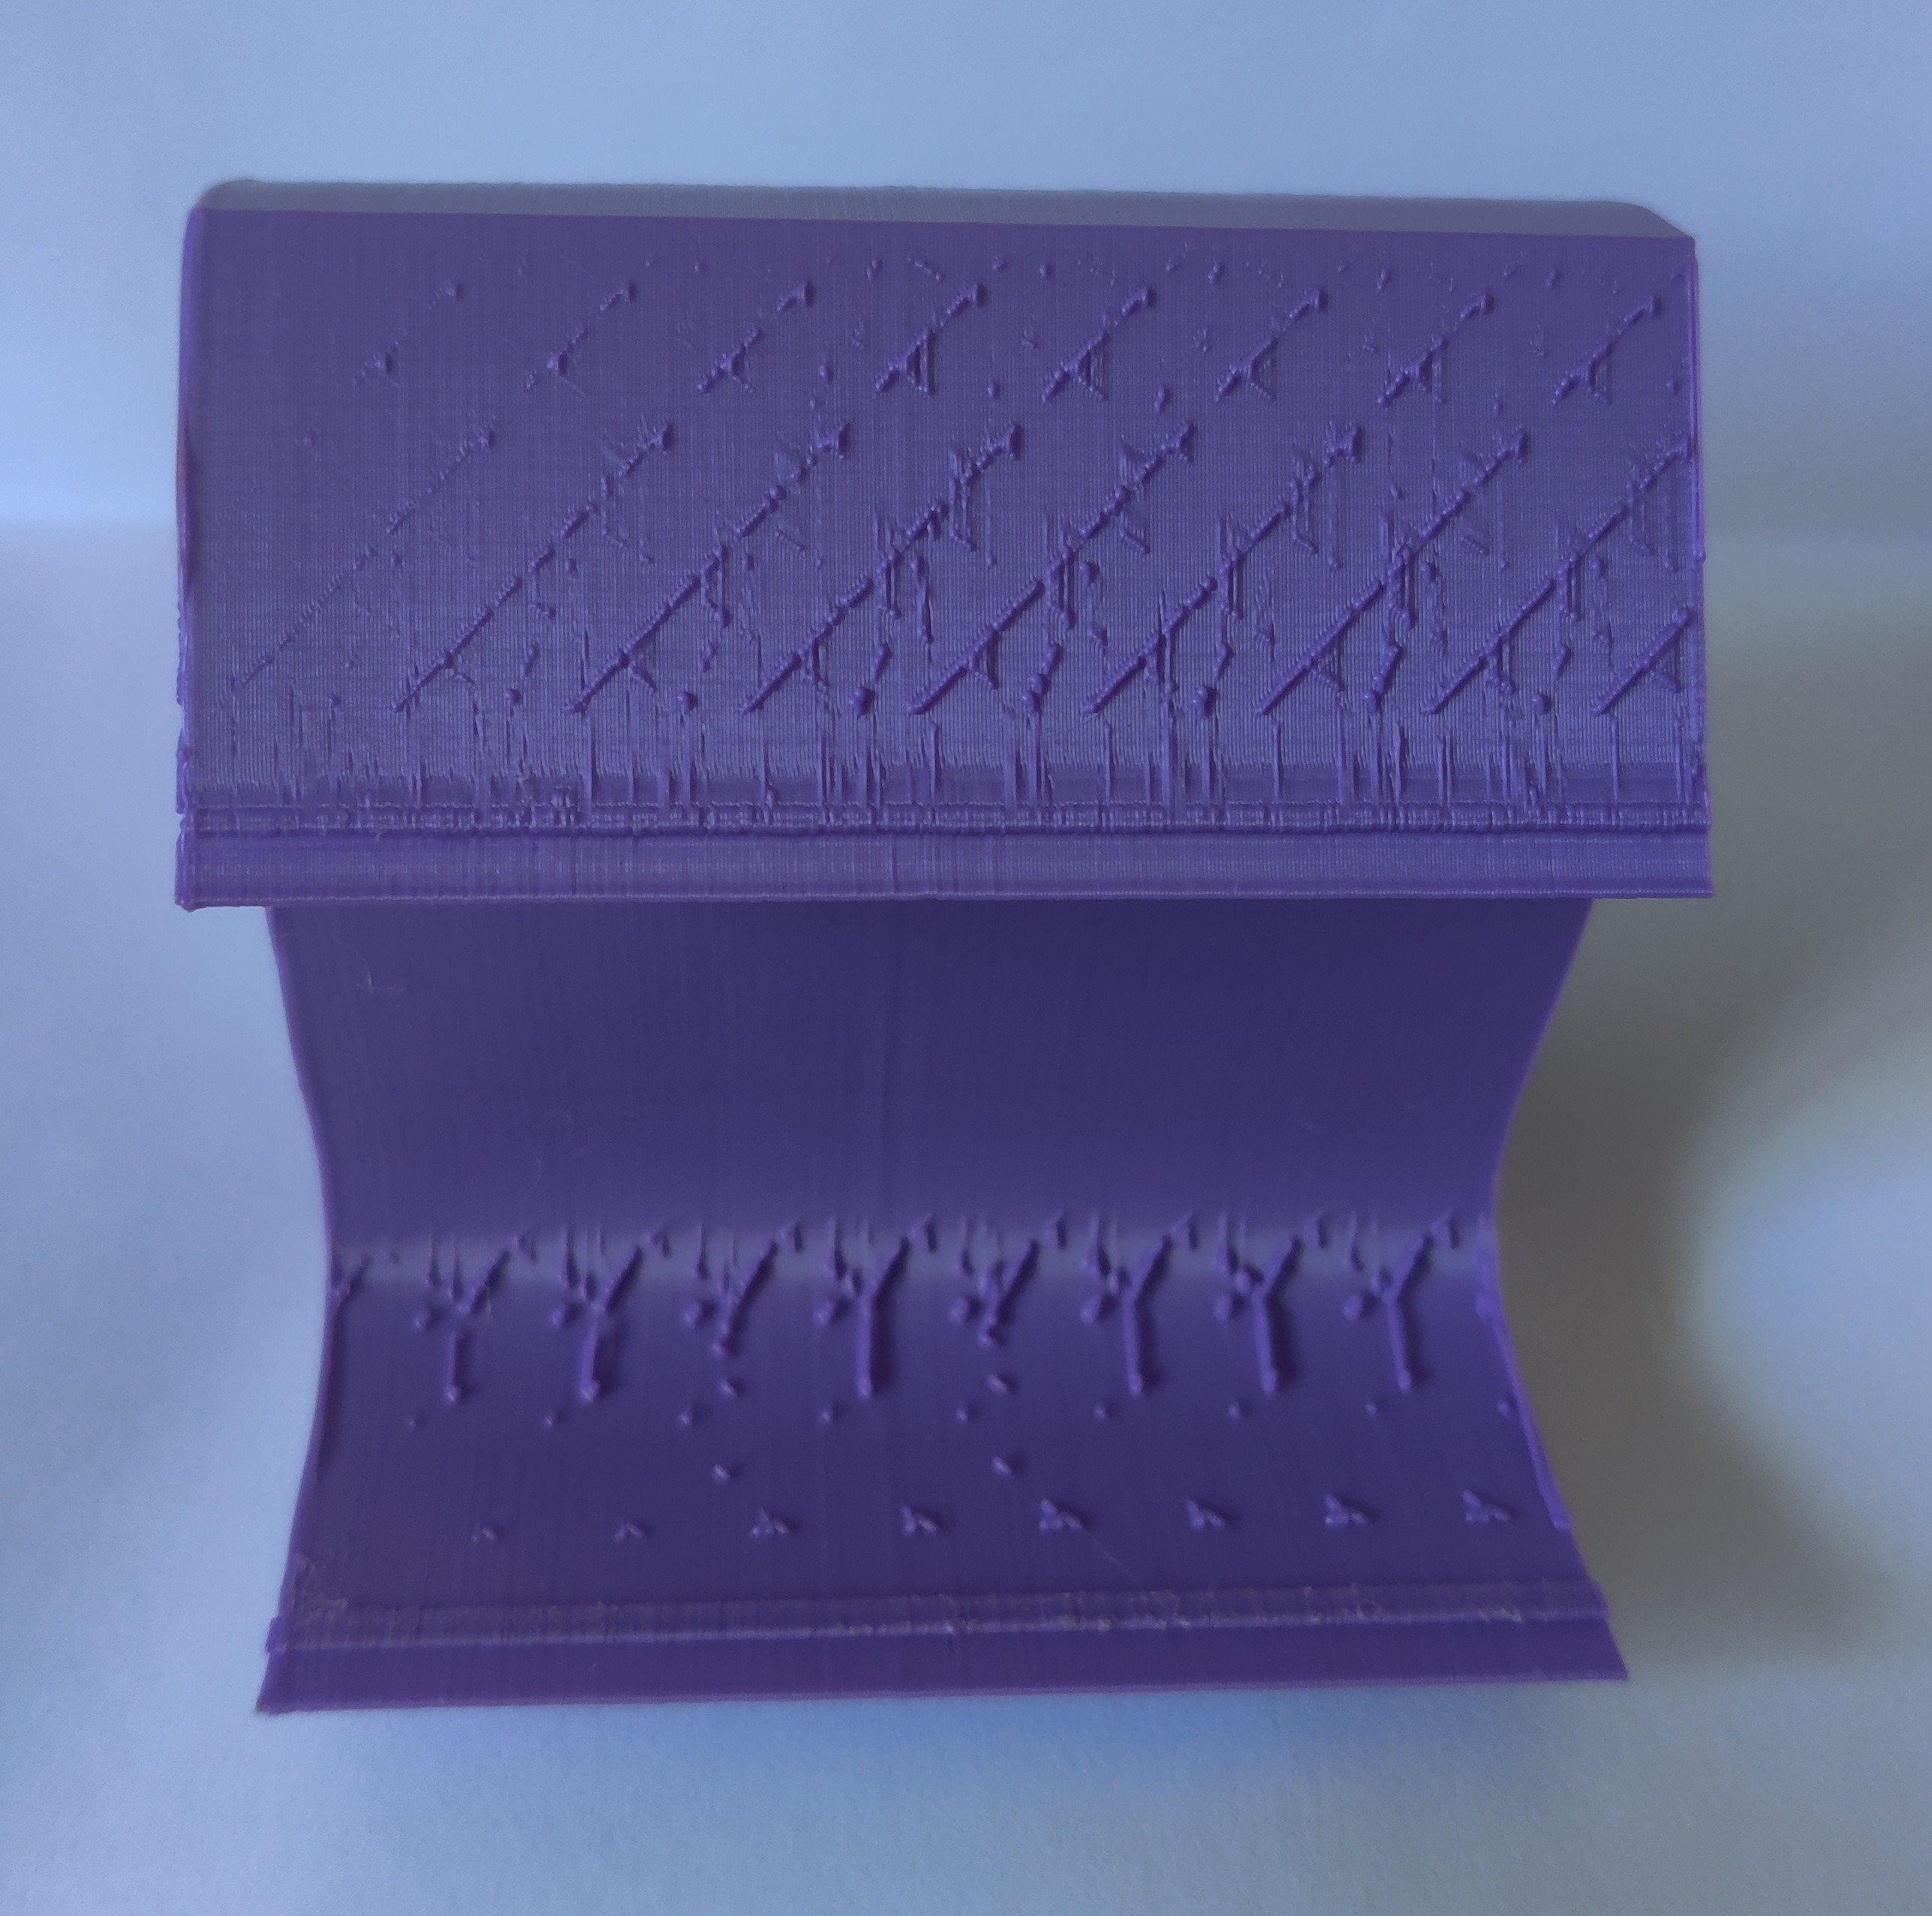

Hello! Your final print looks interesting! How did you get all those small intricate details on the print? Or was it just a byproduct of the the shape/design itself?
Hi Andrew,
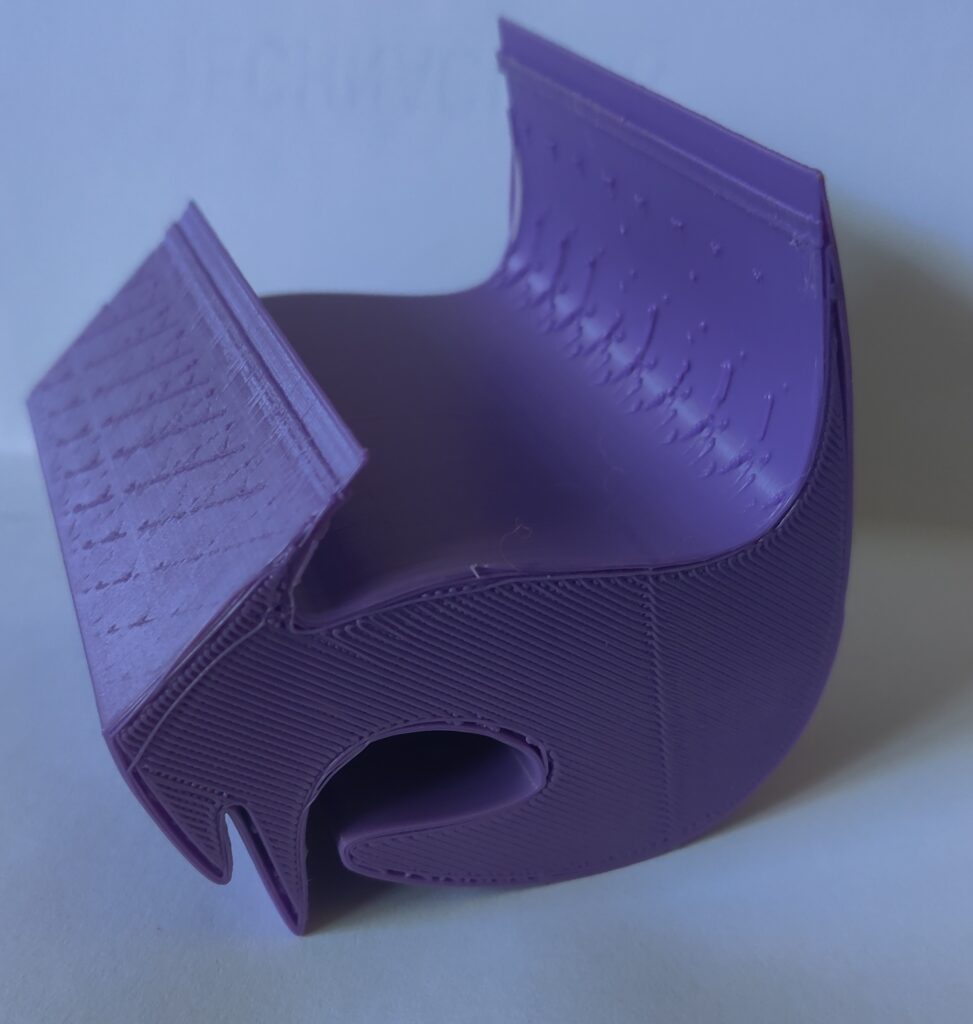
Great Print! It reminds me of a birdhouse, but with more detail. I like the position you printed it in since it seems like you didn’t need supports. I will have to remember this for my 3D prints. Lots of details and a high quality print.
Hi Andrew,
Andrew here! Your print is very abstract and original, it reminds me of a really fancy book stand or something you could put like your phone on to balance and watch videos on hands free. Seeing that it is balanced and didn’t have any supports is very surprising and is nice to see because it made me think of those balancing prints we saw in class.