Part 1: Curves
Open a new Rhino File and practice the curves commands by completing the following steps. Organize your Rhino file so each step is clear. Use the Text command to label each step and the commands you used.
- Make the specific footprint below.
- Commands: Polyline
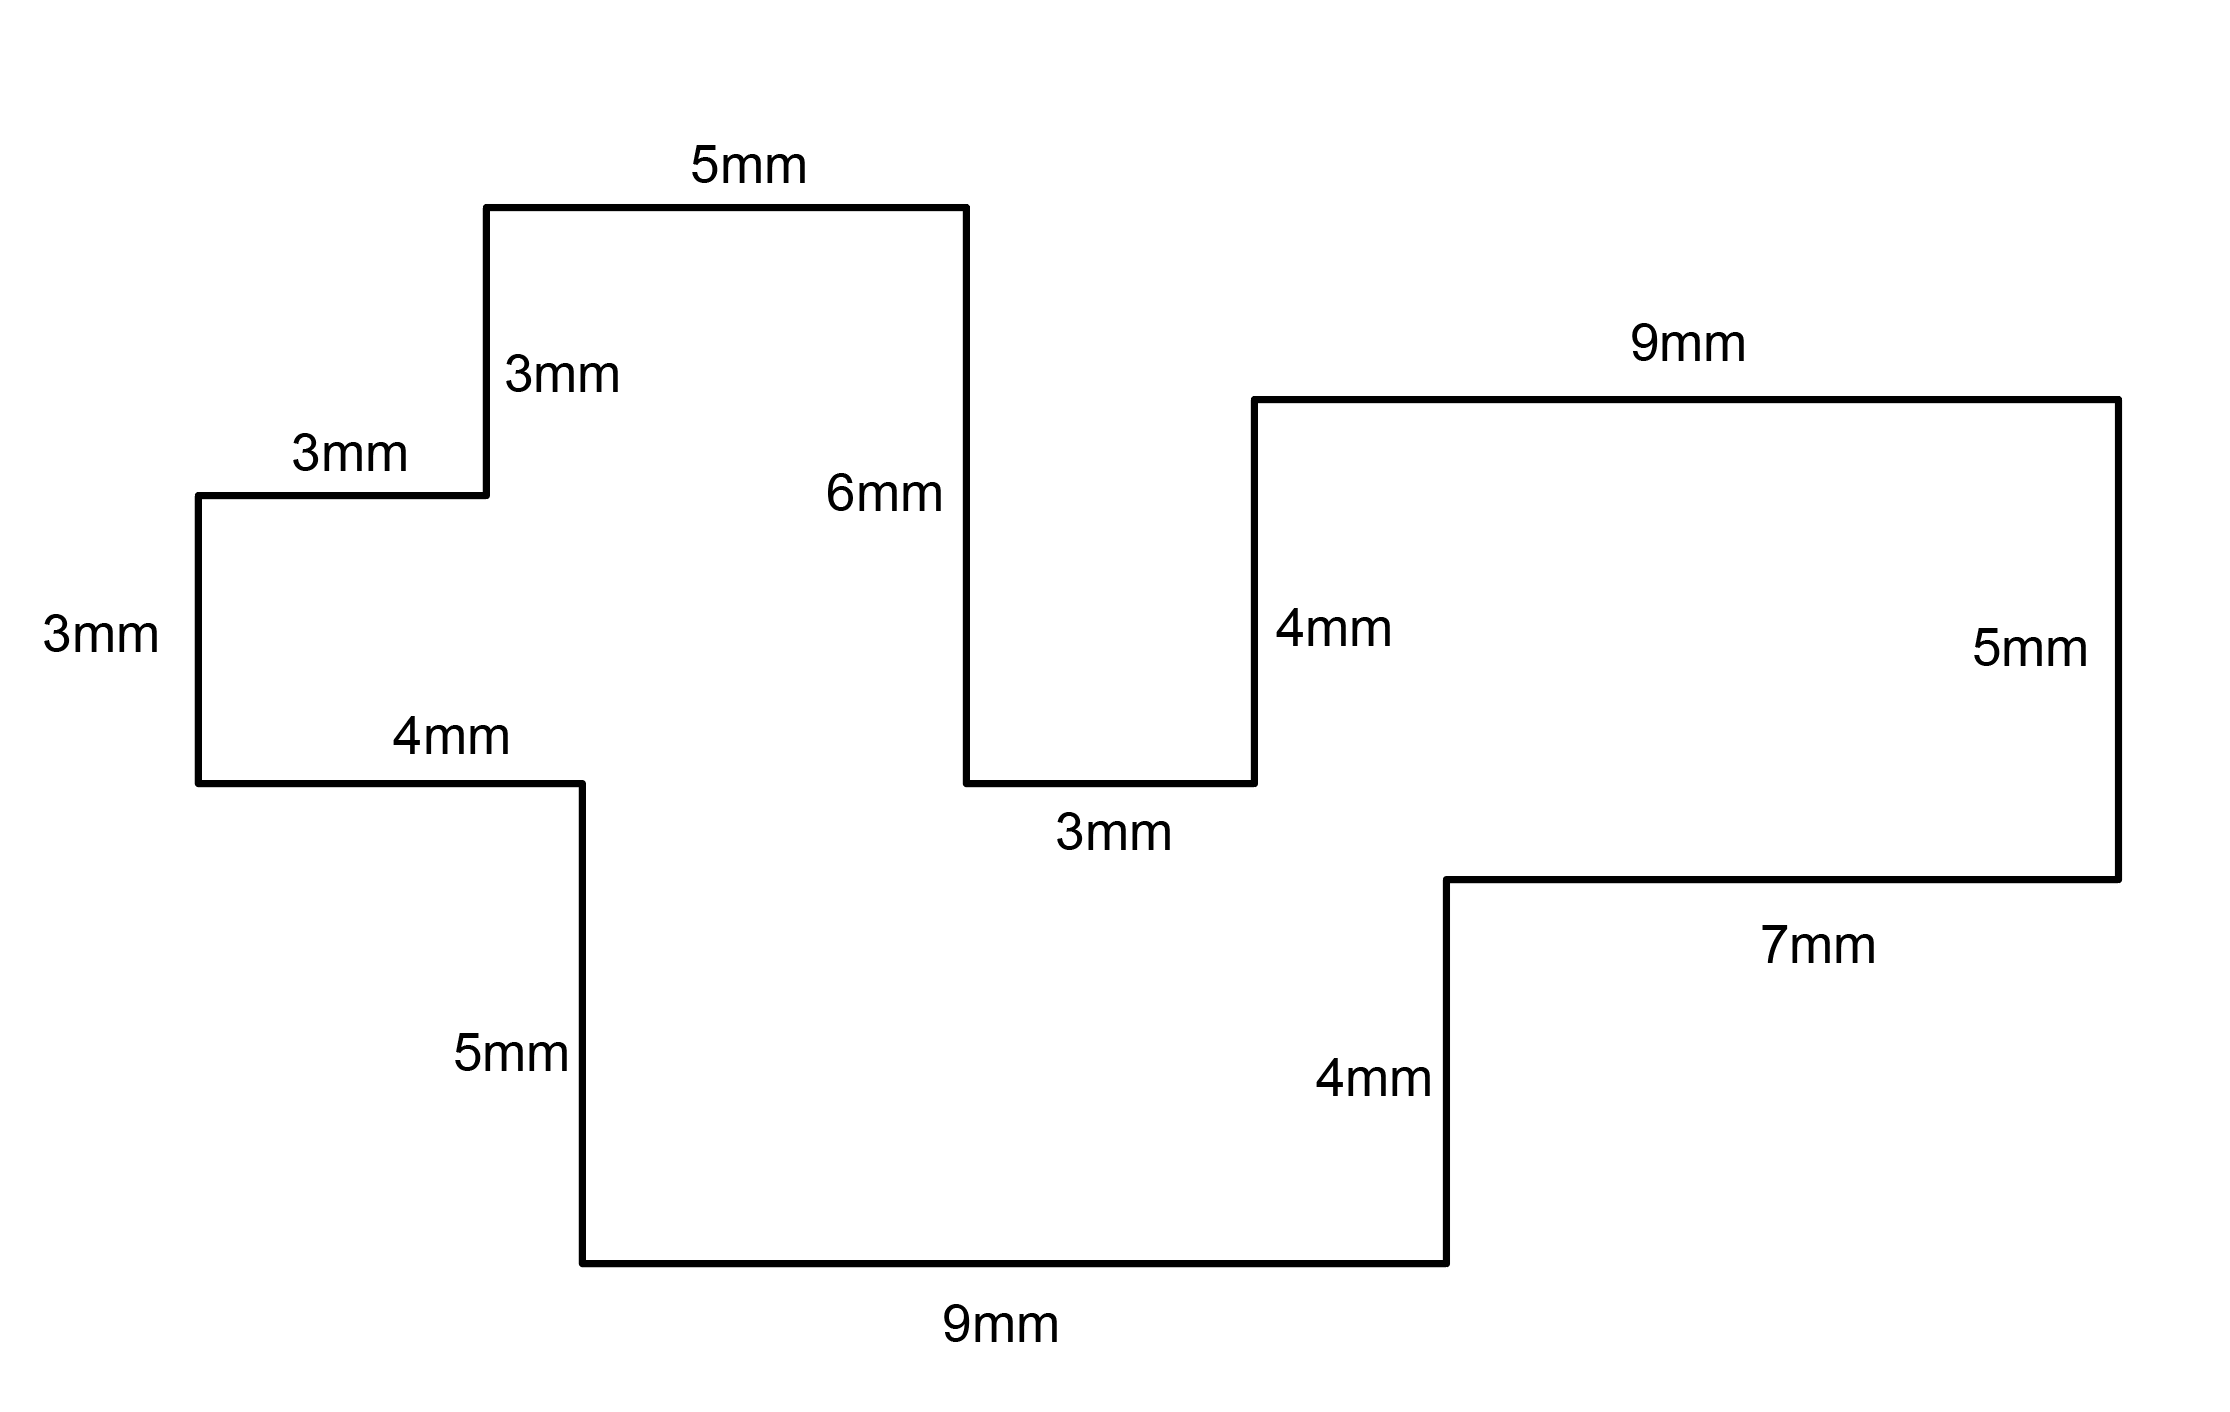
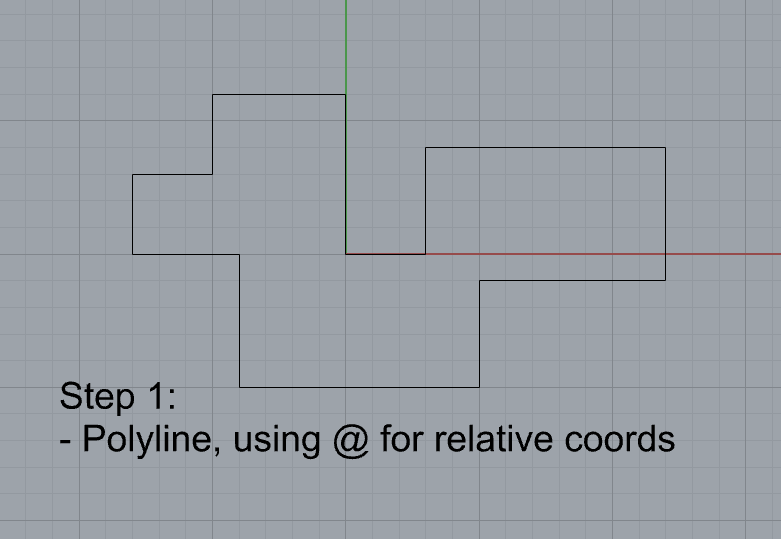
- Commands: Polyline
- Make 2 closed rounded curves using the various curve commands.
- Commands: Curve, InterpCurve, HandleCurve
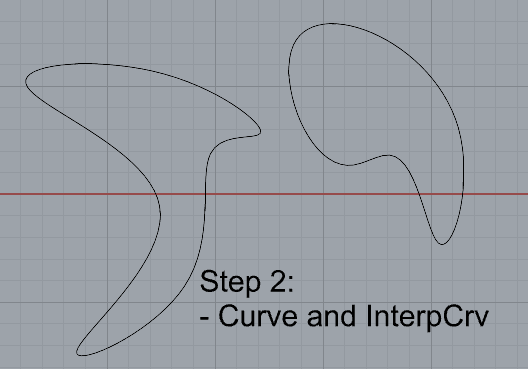
- Commands: Curve, InterpCurve, HandleCurve
- Make 2 closed curves using polygon, ellipse, or circle
- Commands: Circle, Ellipse, Polygon
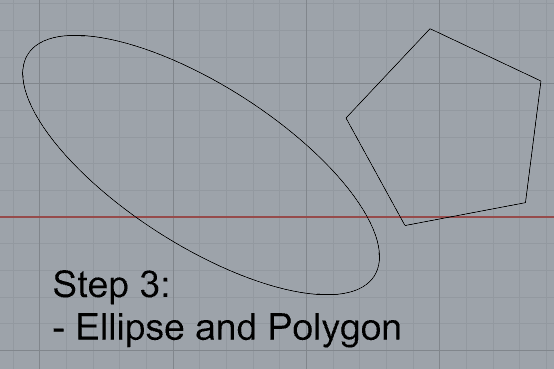
- Commands: Circle, Ellipse, Polygon
- Make 2 open curves
- Commands: Curve, InterpCurve, HandleCurve, Sketch
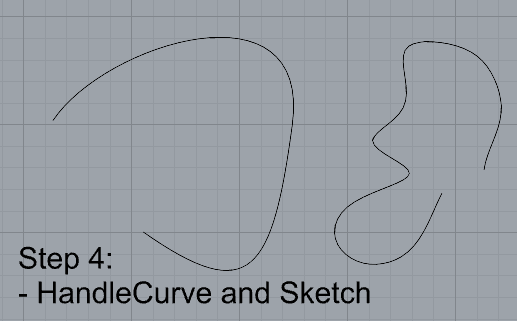
- Commands: Curve, InterpCurve, HandleCurve, Sketch
- Import a picture and trace an image
- Commands: Picture, InterpCurve
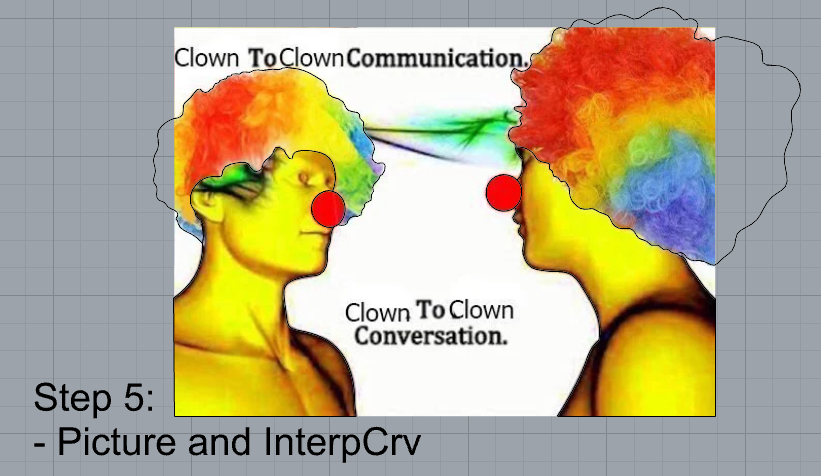
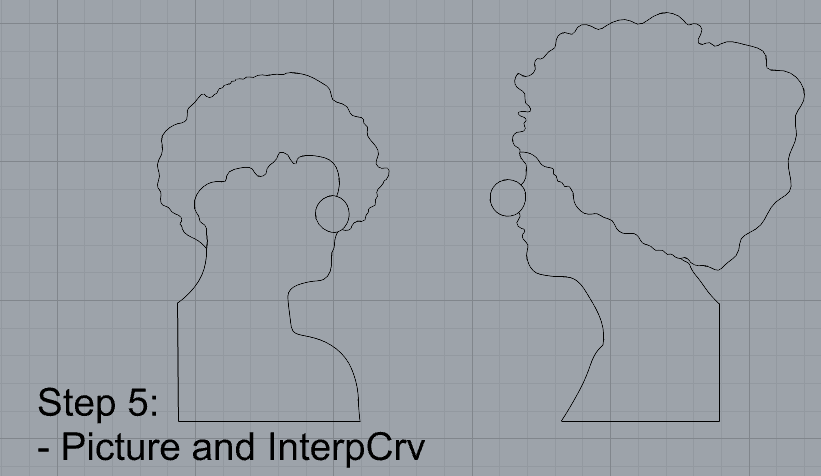
- Commands: Picture, InterpCurve
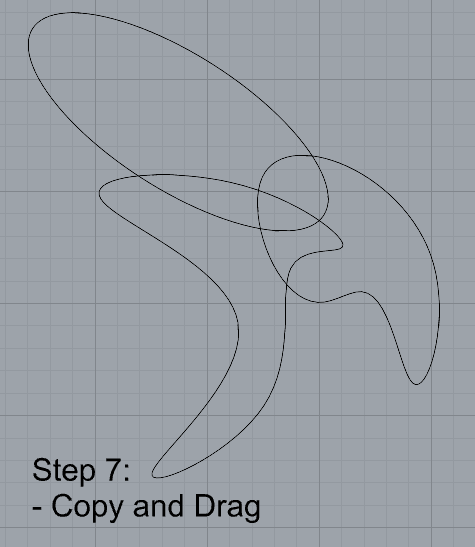
- Pick one open curve, and one closed rounded curve and make three copies of each.
- Commands: Copy
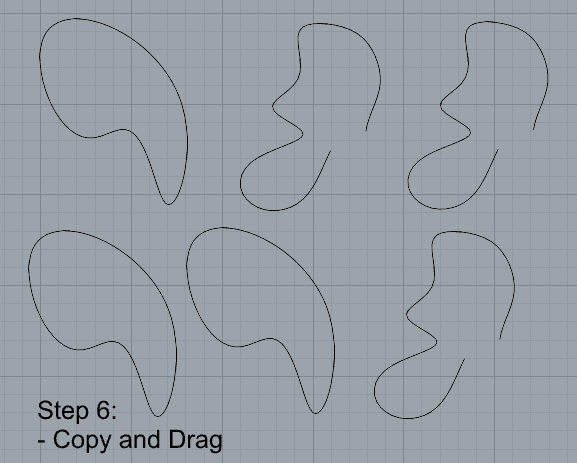
- Commands: Copy
- Take at least 3 of your closed curves and overlap them to create a new shape
- Commands: Move
- Commands: Move
- Use split, delete, and trim to combine these curves into one open curve
- Commands: Split, Delete, Trim, Join, Explode
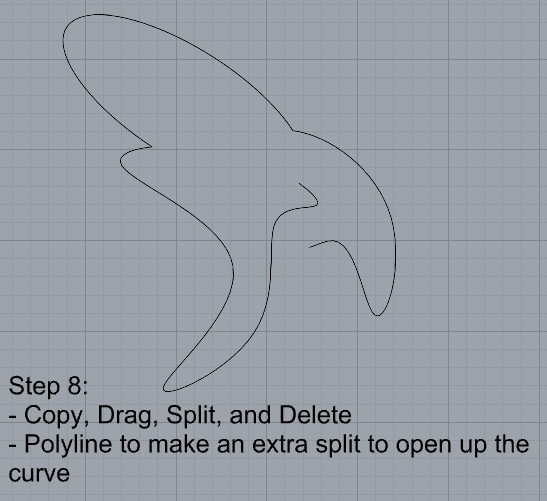
- Commands: Split, Delete, Trim, Join, Explode
- Take at least two curves and use various transformations make a pattern or composition.
- Commands: Move, Copy, Rotate, Mirror, Array, Scale, Offset, Fillet, FilletCorners
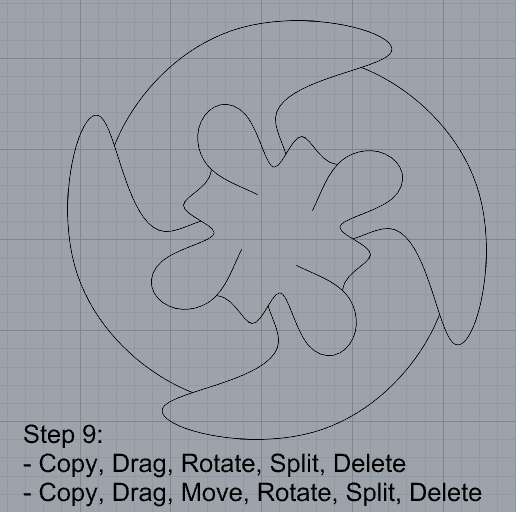
- Commands: Move, Copy, Rotate, Mirror, Array, Scale, Offset, Fillet, FilletCorners
- Organize your Rhino file so each step is clear. Use the Text command to label each step and the commands you used. Add a link to your FirstnameLastname_Curves file at this point in your post.
Part 2: Surfaces
Open a new Rhino File and practice the surfaces commands below by making two different surfaces for each command. Organize your Rhino file so each step is clear. You may want to use some of the curves you modeled in Part 1. Use the Text command to label each step and the commands you used.
- Plane
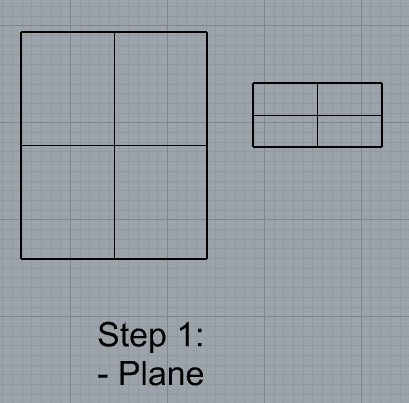
- PlanarSrf
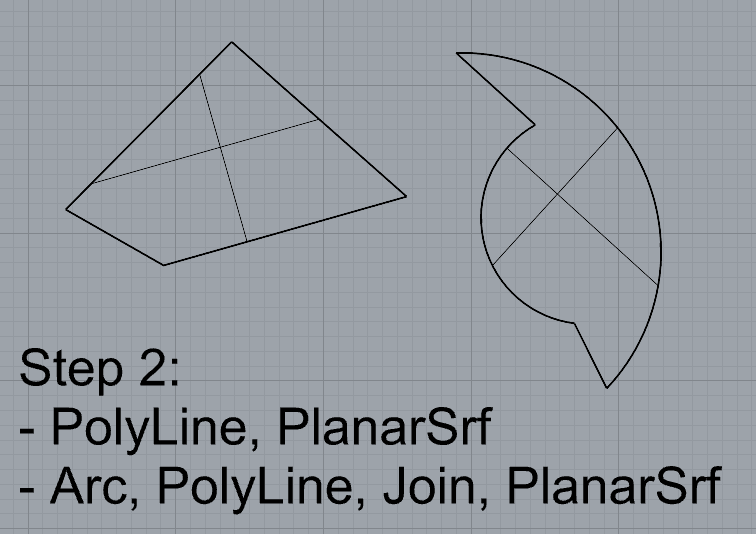
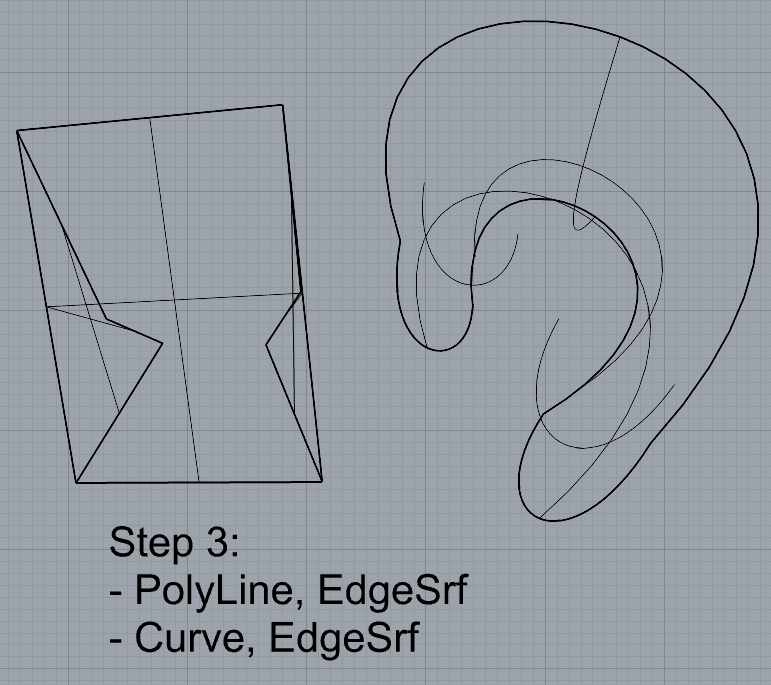
- EdgeSrf
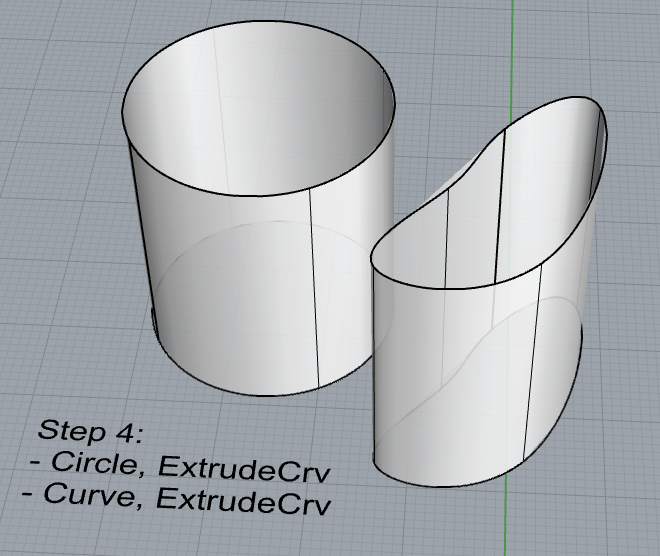
- ExtrudeCrv
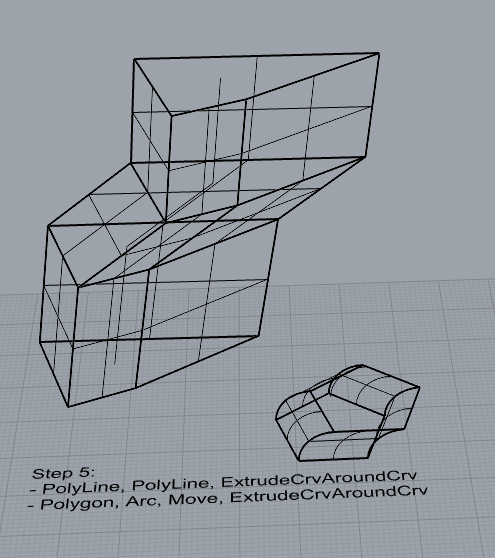
- ExtrudeCrvAlongCrv
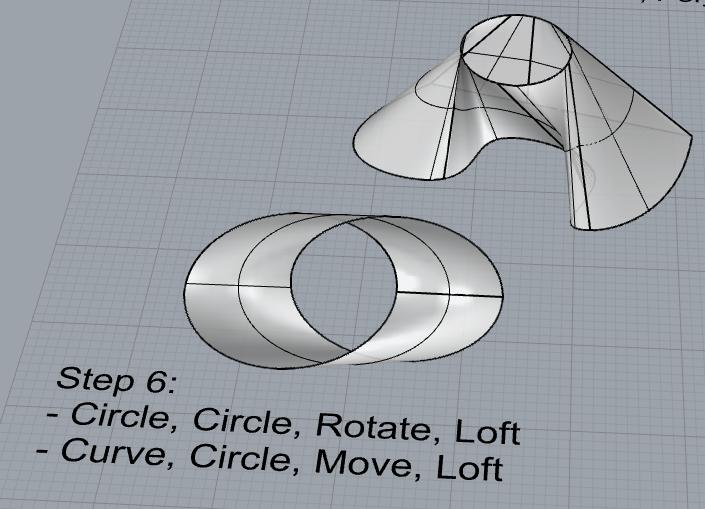
- Loft
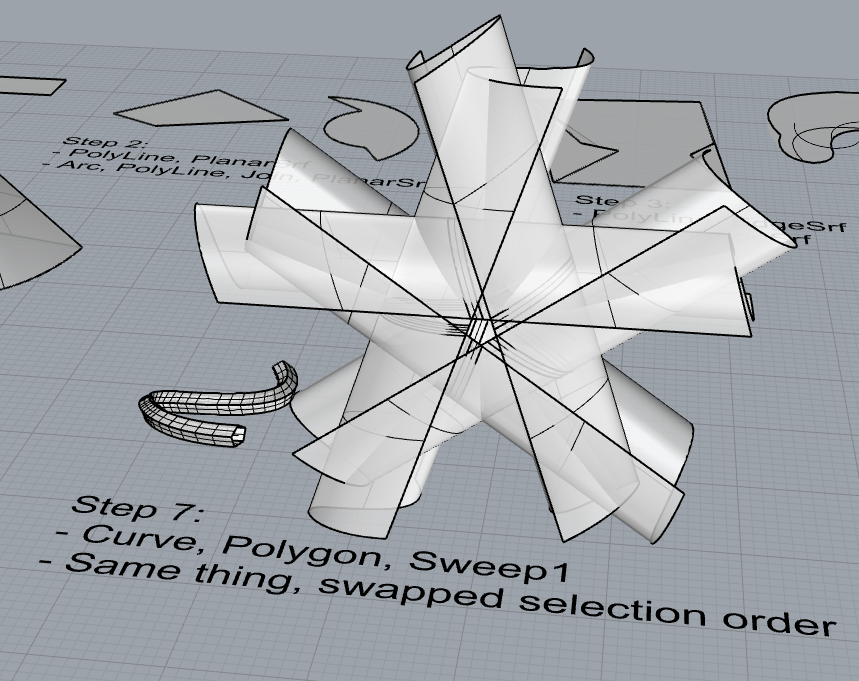
- Sweep1
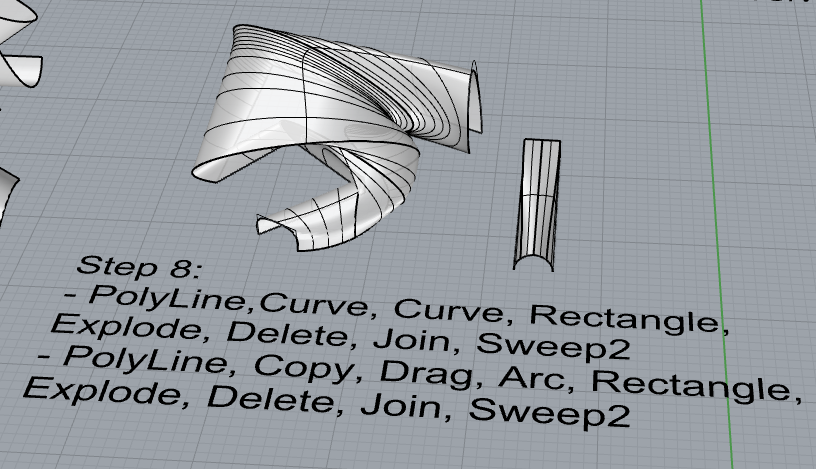
- Sweep2
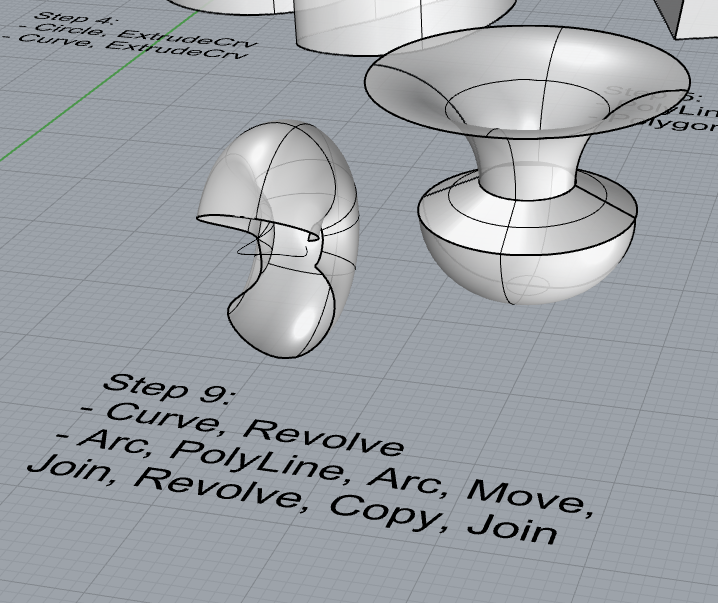
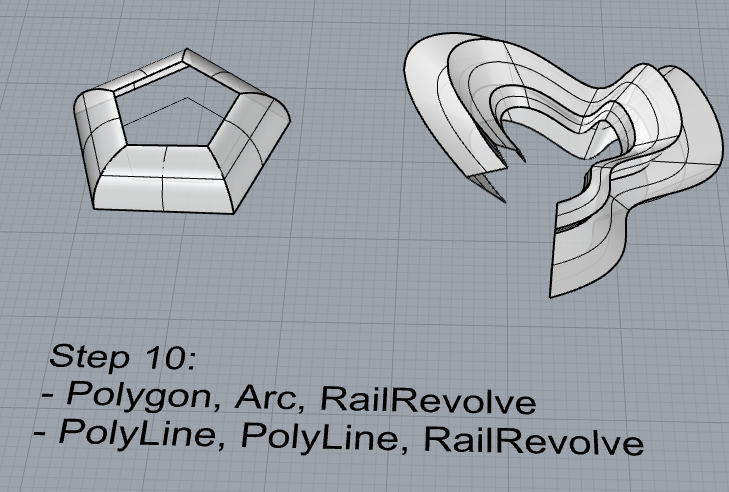
- Revolve
- RailRevolve
- Add a link to your FirstnameLastname_Surfaces file at this point in your post.
Part 3: Solids
Open a new Rhino File and practice the solids commands below by making two different solids for each command. You may want to use some of the curves and surfaces you modeled in Parts 1 and 2. Organize your Rhino file so each step is clear. Use the Text command to label each step and the commands you used.
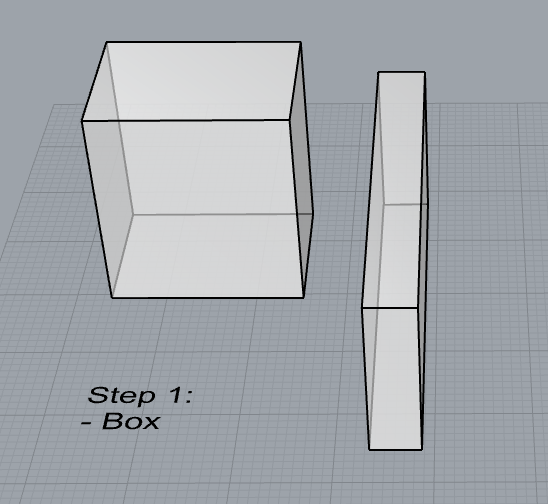
- Box
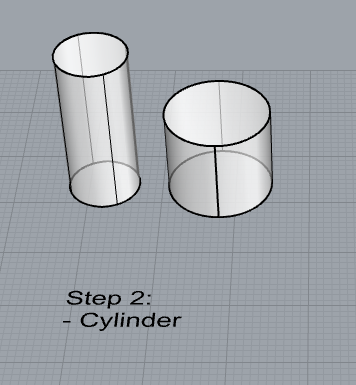
- Cylinder
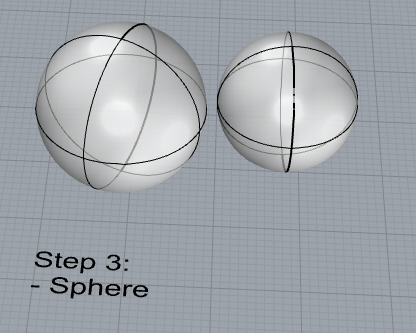
- Sphere
- ExtrudeCrv and Cap

- Pipe

- MoveFace
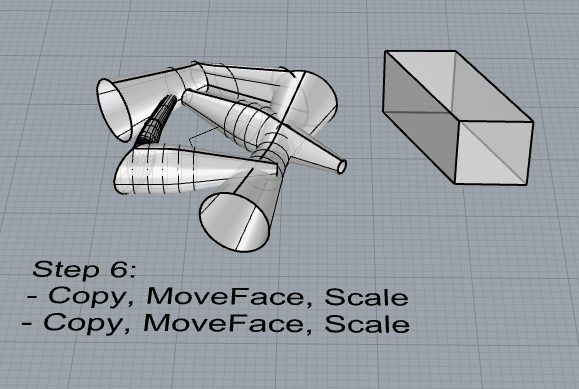
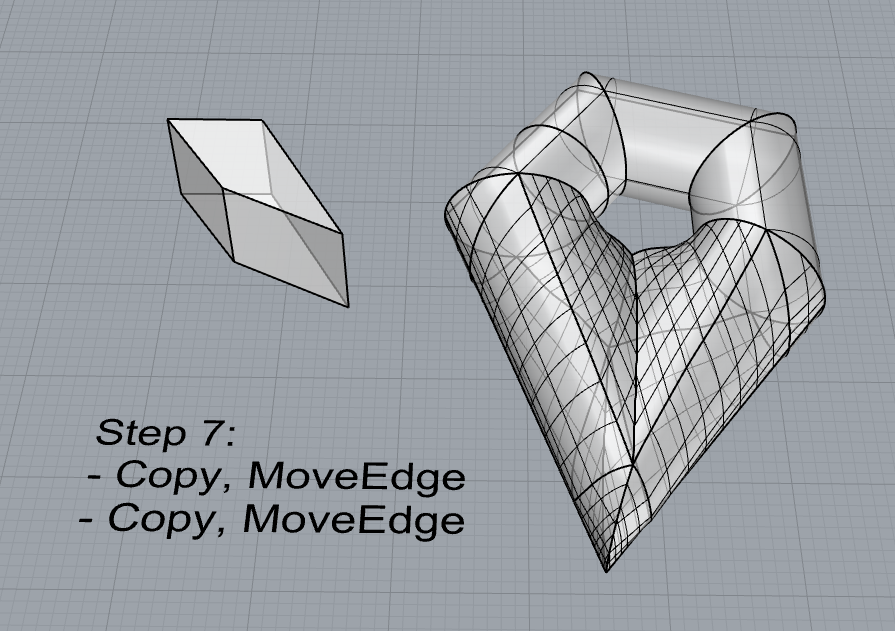
- MoveEdge
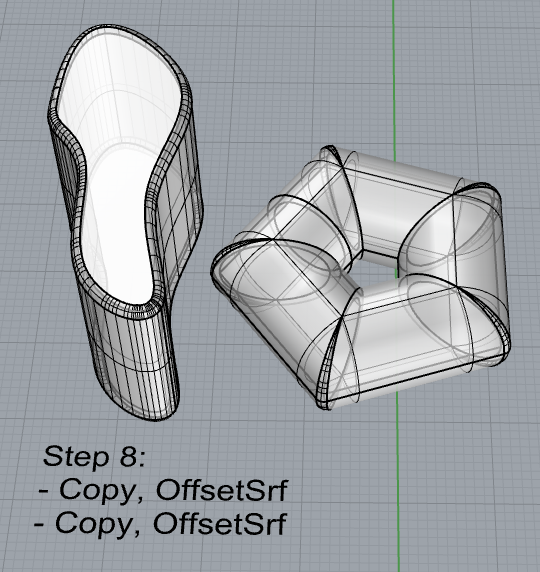
- OffsetSrf
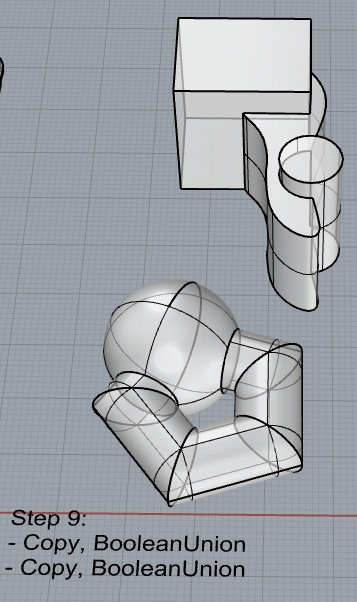
- BooleanUnion
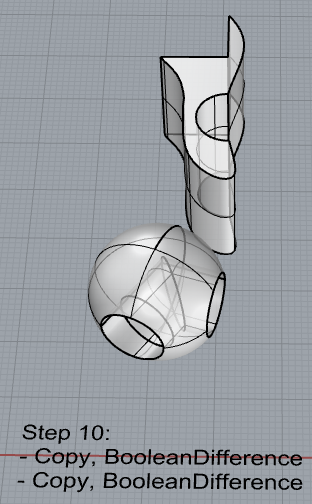
- BooleanDifference
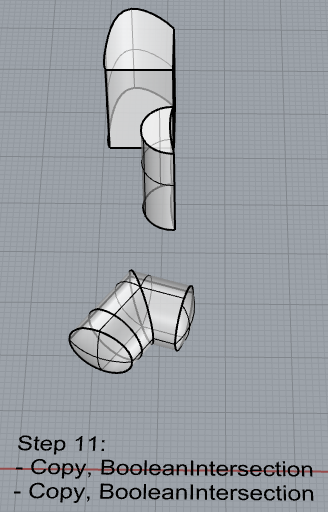
- Boolean Intersection
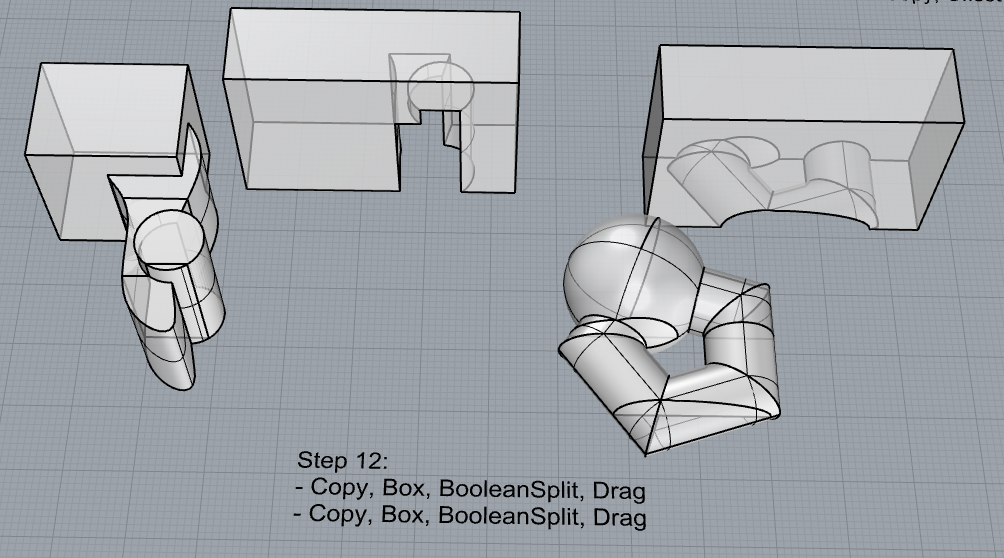
- BooleanSplit
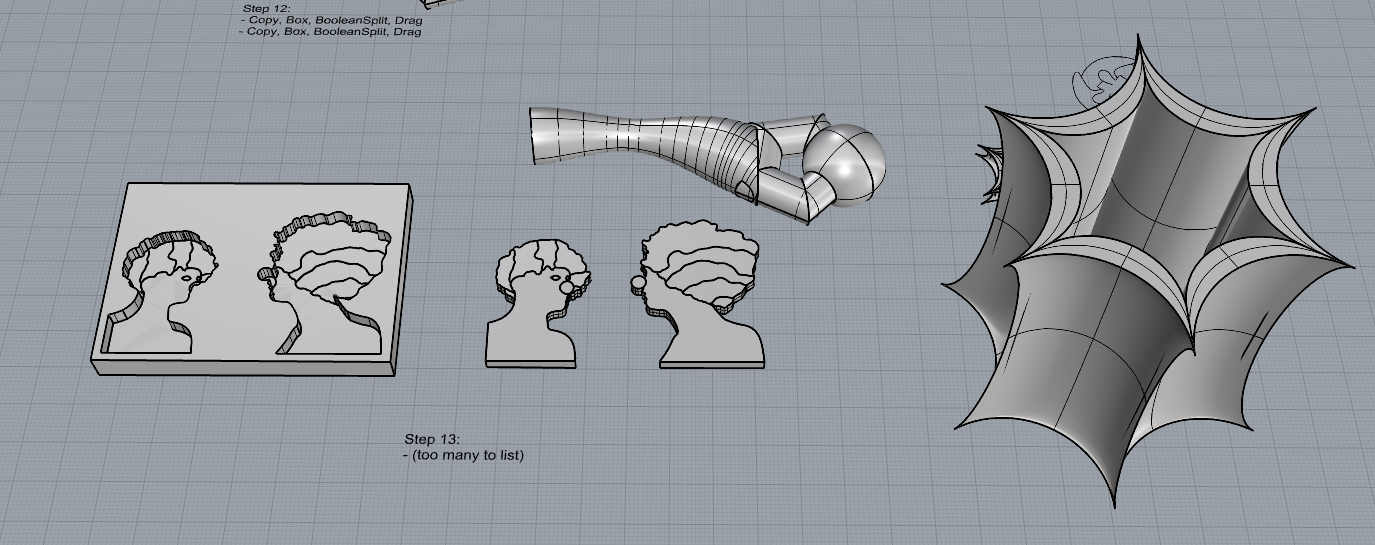
- Using the surfaces and solids you modeled and the Boolean tools, make three solid shapes you find interesting.
- Add a link to your FirstnameLastname_Solids file at this point in your post.
Part 4: 3D Printing
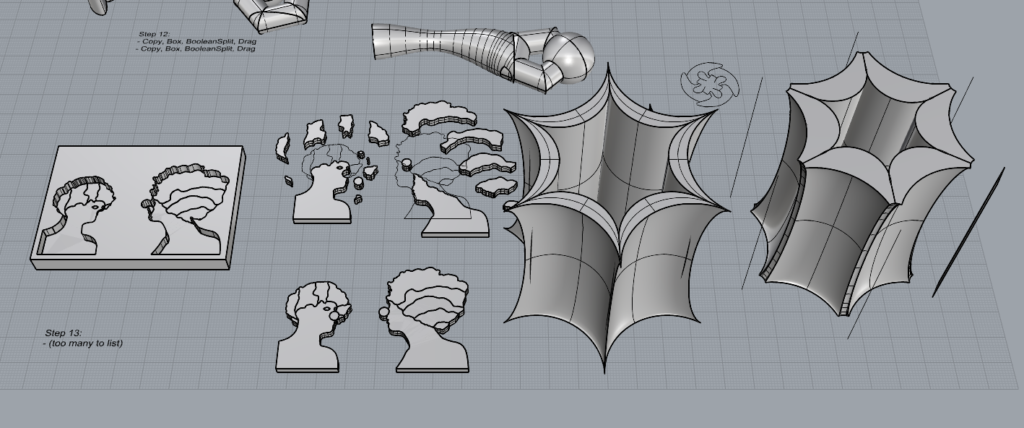
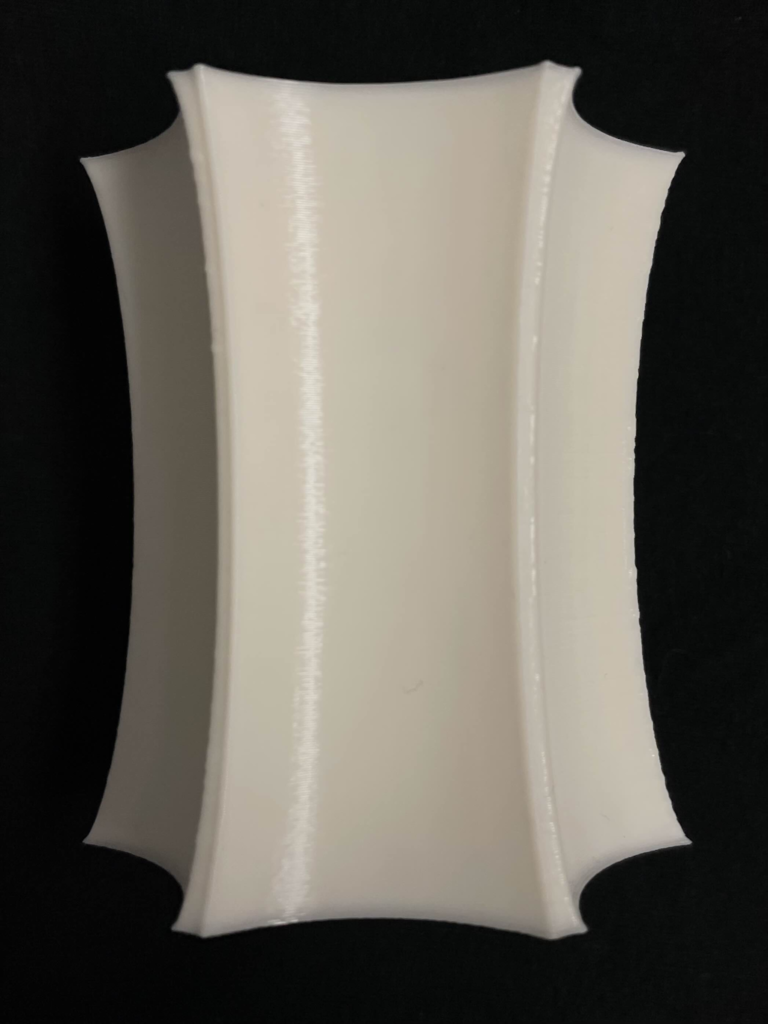
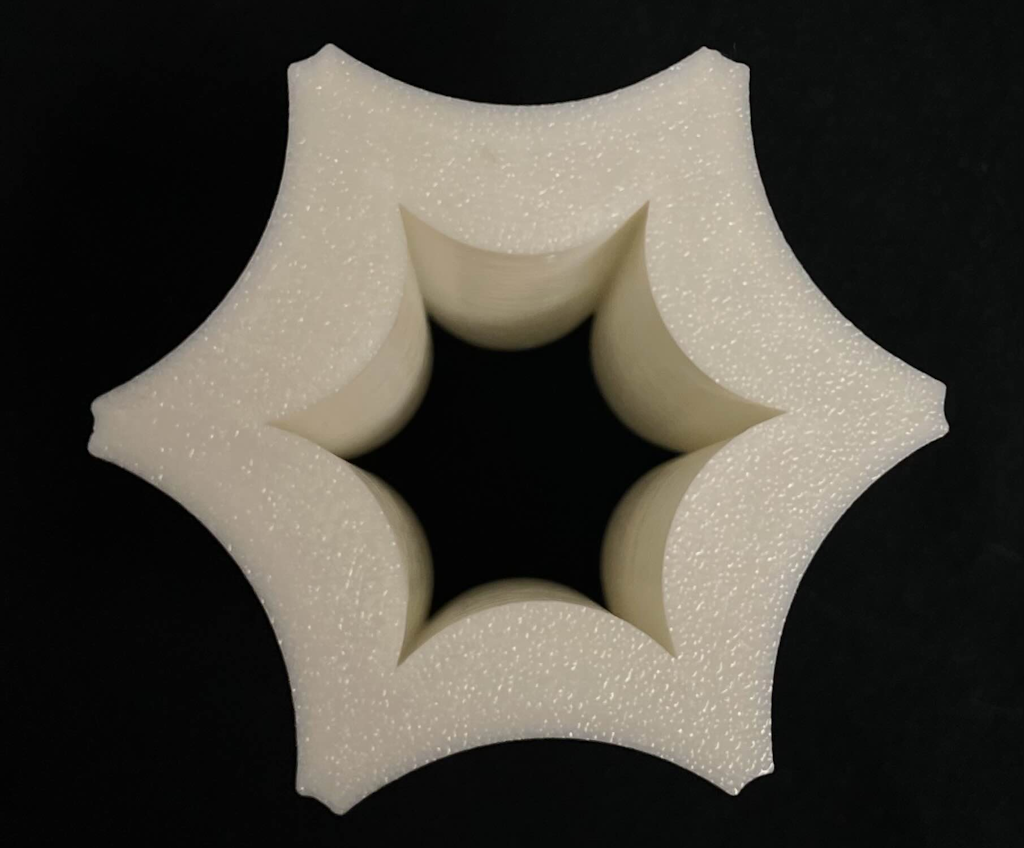
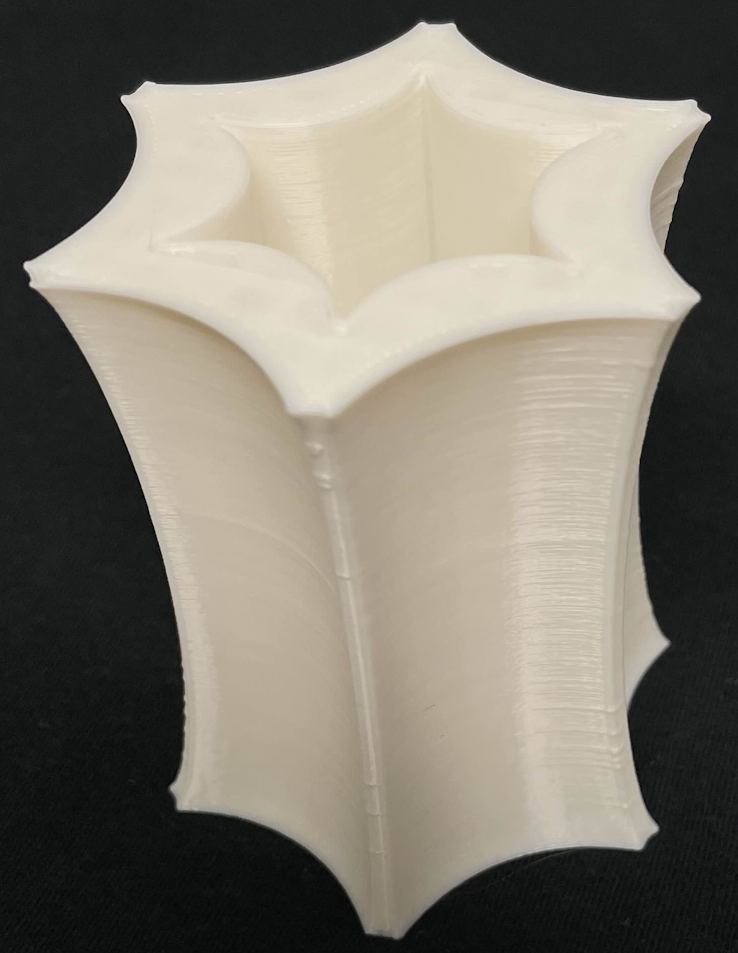
For the cylindrical, pointed hexagon, a quick look at the model in Cura shows that its 6 pointed edges ware far too sharp to get printed without a ton of artifacting. So, I had to go back in and use fillet edges, polyline, loft, and some other things here and there to cut into the corners in a nice way without destroying the curved shape. This unfortunately took about an hour or two of trial and error as fillet doesn’t give a good preview, some edits to the shape behaved differently on certain corners even when performed in the exact same way symmetrically, and boolean intersection being incredibly finnicky and giving an error message even after I gave plenty of extra room for it to detect the cuts. I had to fiddle with the shape’s interior some more, use more shaped to shave off the extremes of the corners, and mess around with the boolean tolerance option under Tools > Options > Units. But in the end, I got it to work!

Bonus Print!
I recently got a pack of assorted-color filaments, and I realized the image I traced out had a rainbow of colors, so I wanted to try recreating it. I ended up needing to do a ton of sanding, but it turned out pretty good! If you ever want to make anything like this in the future, with pieces fitting together like a puzzle, be sure to reduce the pieces by 1-0.5mm all along the perimeter, to avoid needing to sand it all.
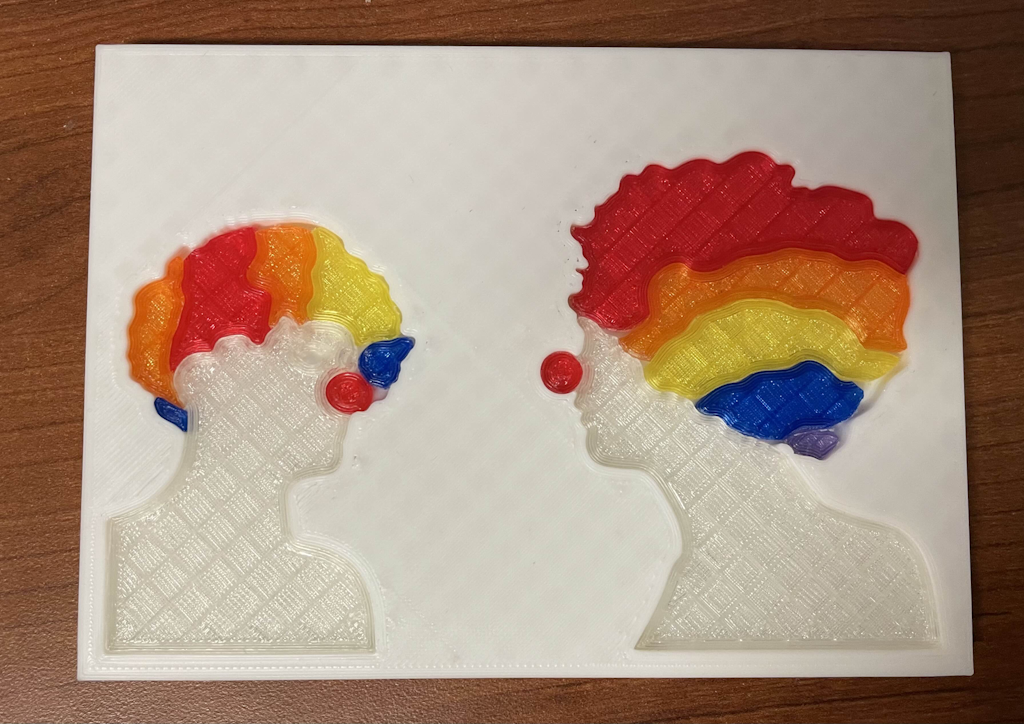
Wow, the clown-to-clown communication puzzle is fantastic! I love the idea of making a puzzle with a 3D printer. The shape you printed turned out well too! I guess all the trial and error you put into it paid off!
Hi Logan, I really like your model in section 13 for solids. Its awsome that you were able to play with various pieces and sizes of them. Your 3D print also looks really clean and your pictures are clear and show the main features of your model.