Part 1: Curves
Open a new Rhino File and practice the curves commands by completing the following steps. Organize your Rhino file so each step is clear. Use the Text command to label each step and the commands you used.
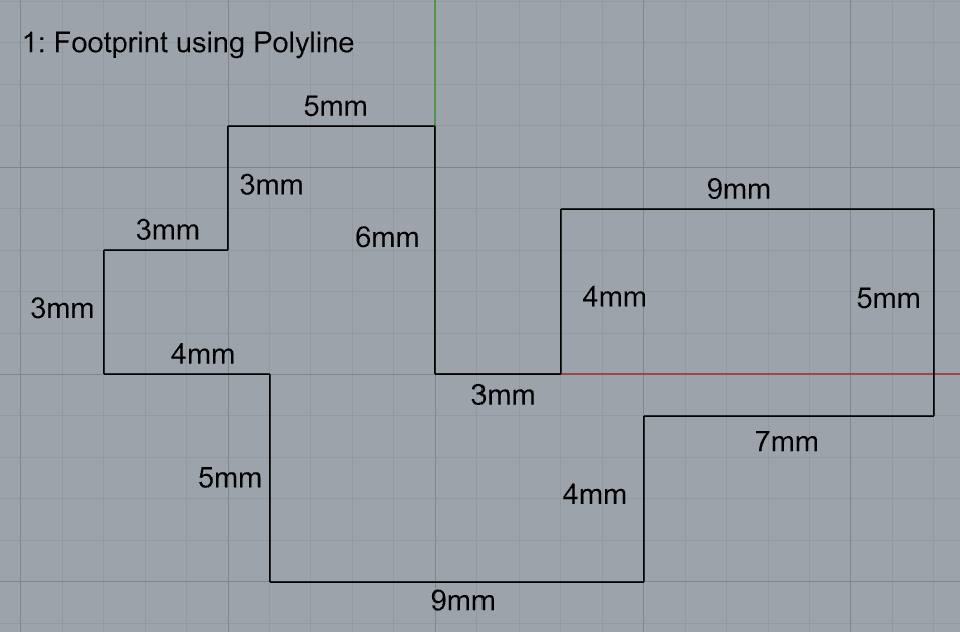
- Make the specific footprint below.
- Commands: Polyline
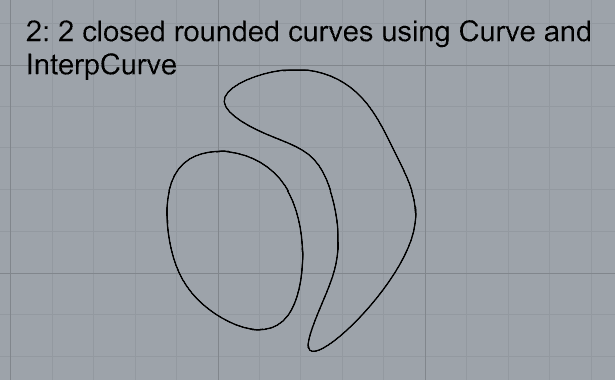
2. Make 2 closed rounded curves using the various curve commands.
- Commands: Curve, InterpCurve, HandleCurve
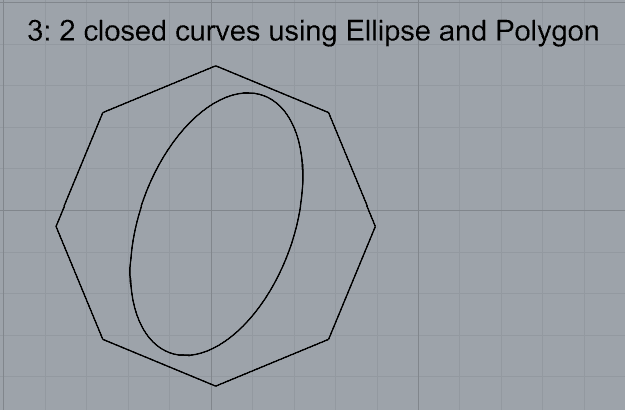
3. Make 2 closed curves using polygon, ellipse, or circle
- Commands: Circle, Ellipse, Polygon
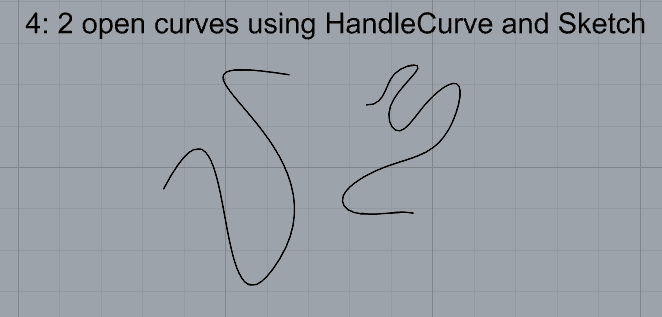
4. Make 2 open curves
- Commands: Curve, InterpCurve, HandleCurve, Sketch
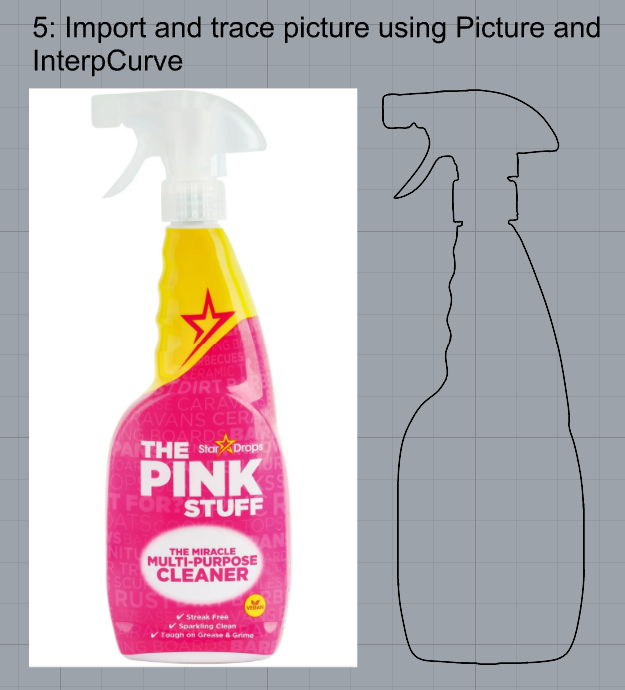
5. Import a picture and trace an image
- Commands: Picture, InterpCurve
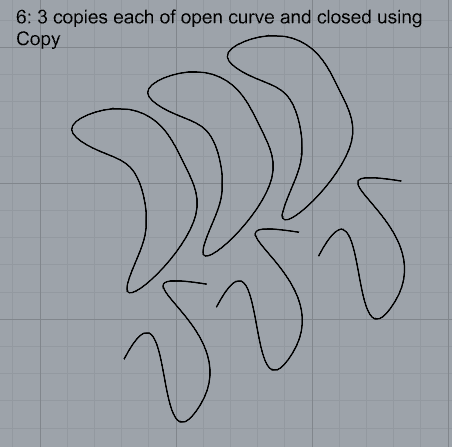
6. Pick one open curve, and one closed rounded curve and make three copies of each.
- Commands: Copy
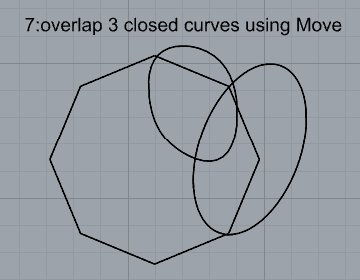
7. Take at least 3 of your closed curves and overlap them to create a new shape
- Commands: Move
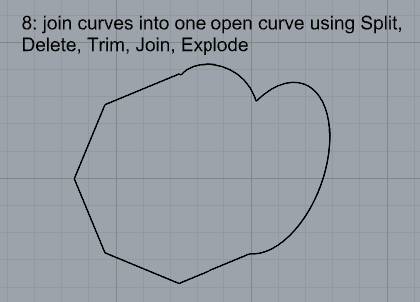
8. Use split, delete, and trim to combine these curves into one open curve
- Commands: Split, Delete, Trim, Join, Explode
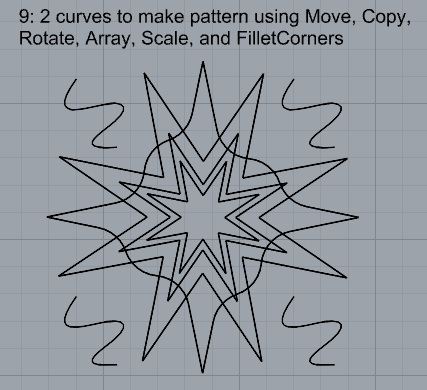
9. Take at least two curves and use various transformations make a pattern or composition.
- Commands: Move, Copy, Rotate, Mirror, Array, Scale, Offset, Fillet, FilletCorners
10. Organize your Rhino file so each step is clear. Use the Text command to label each step and the commands you used. Add a link to your FirstnameLastname_Curves file at this point in your post.
Part 2: Surfaces
Open a new Rhino File and practice the surfaces commands below by making two different surfaces for each command. Organize your Rhino file so each step is clear. You may want to use some of the curves you modeled in Part 1. Use the Text command to label each step and the commands you used.
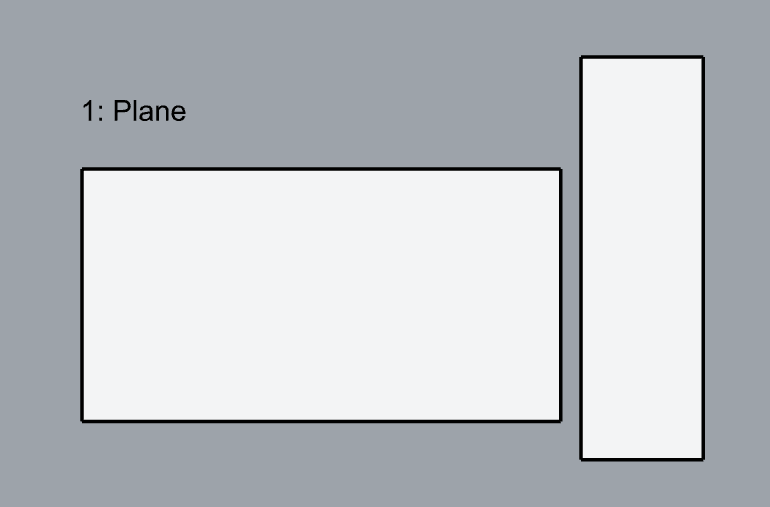
- Plane
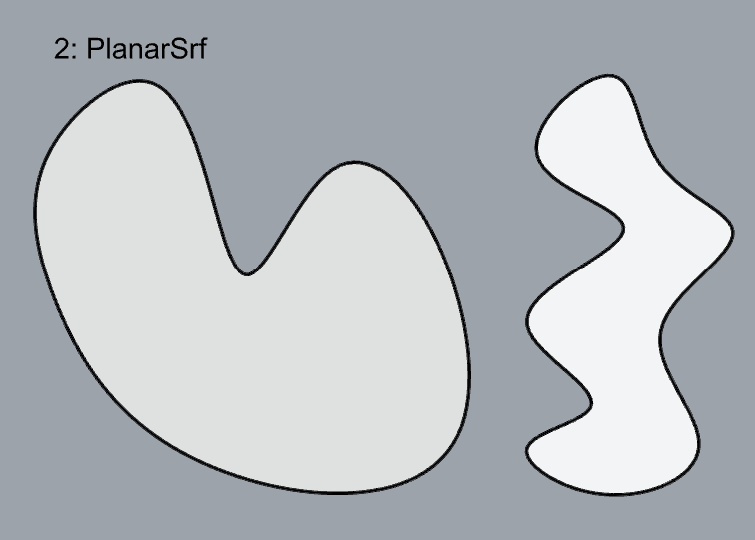
2. PlanarSrf
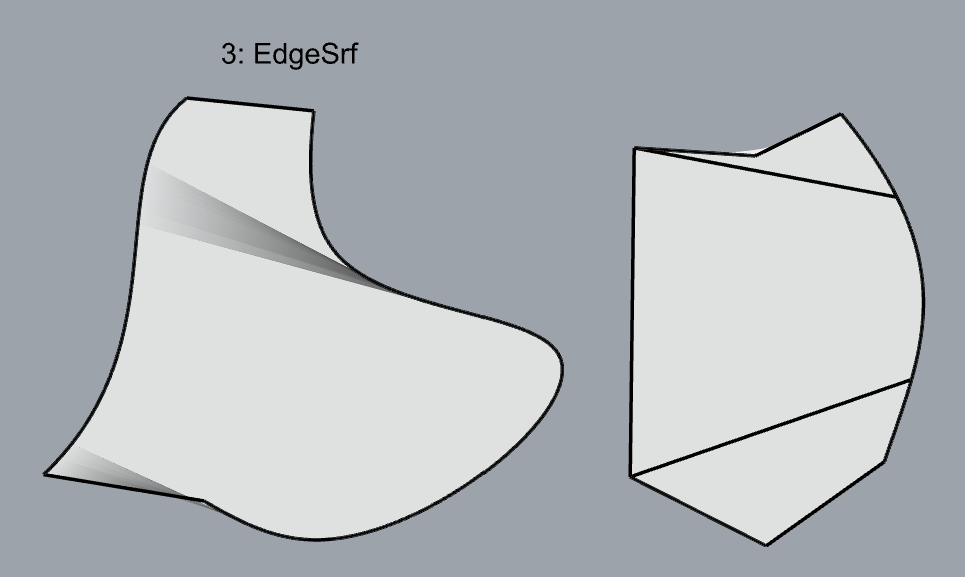
3. EdgeSrf
4. ExtrudeCrv

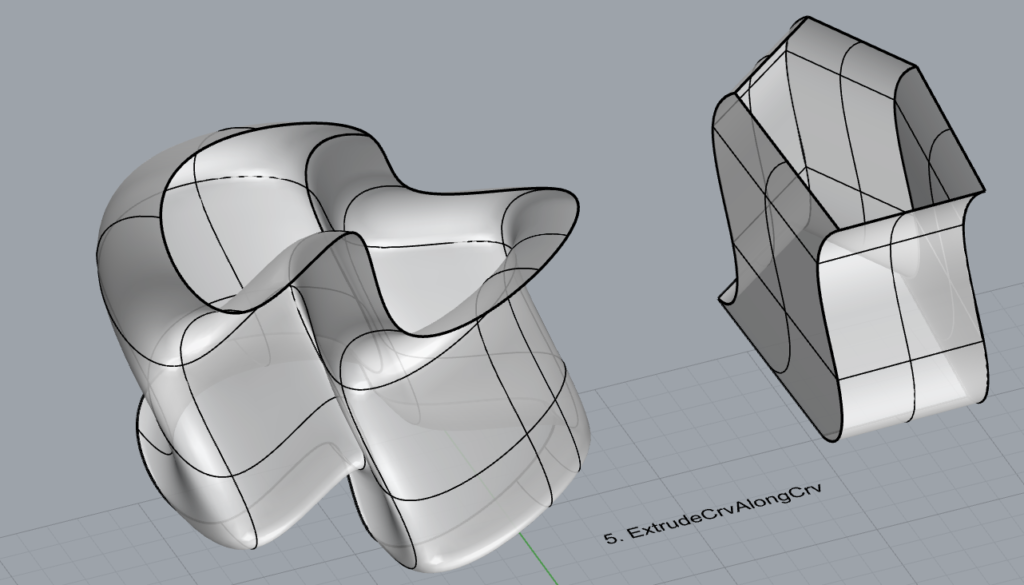
5. ExtrudeCrvAlongCrv
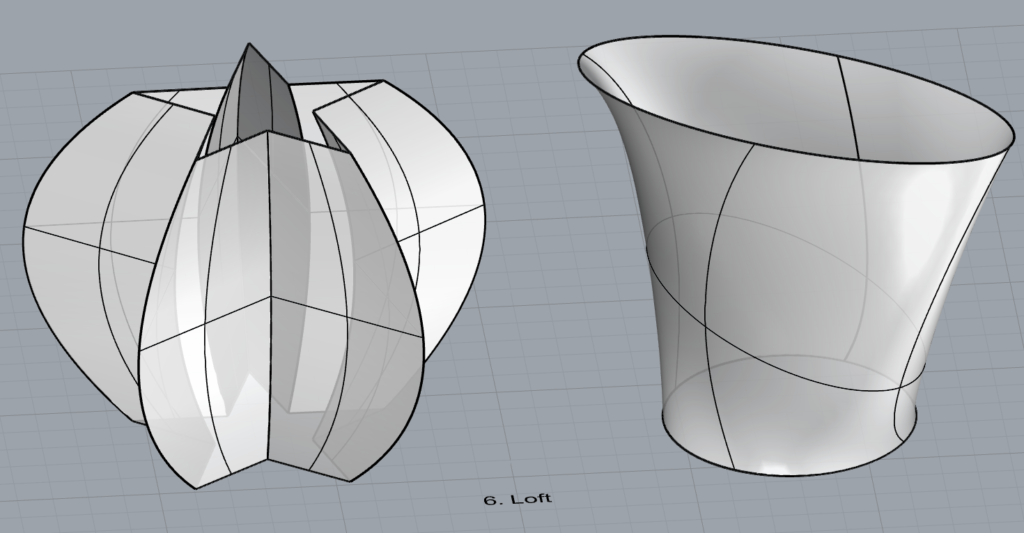
6. Loft
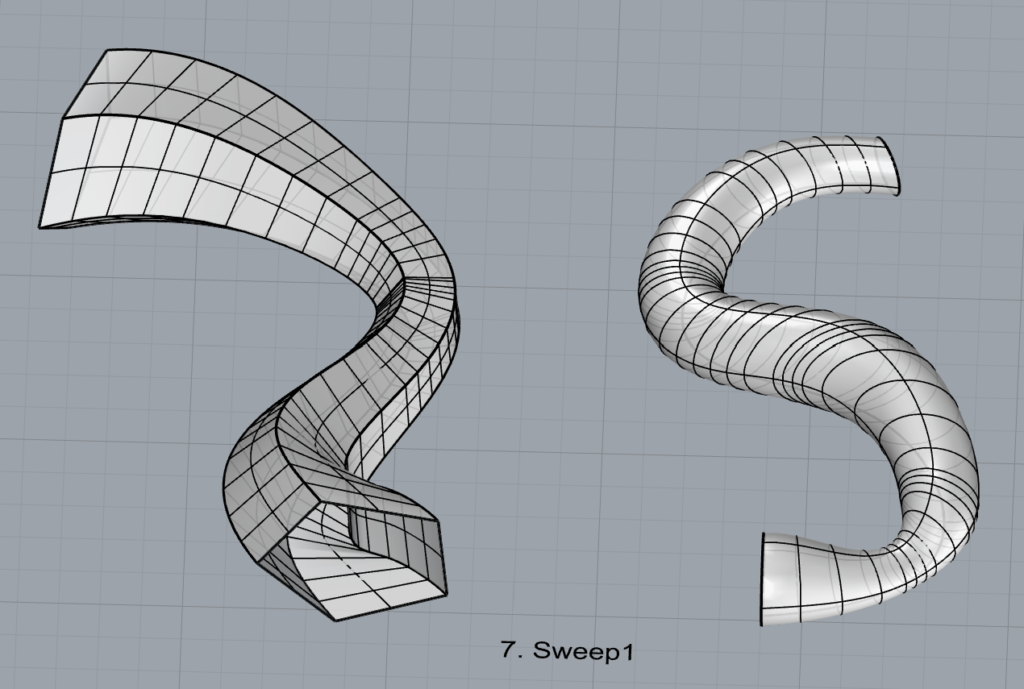
7. Sweep1
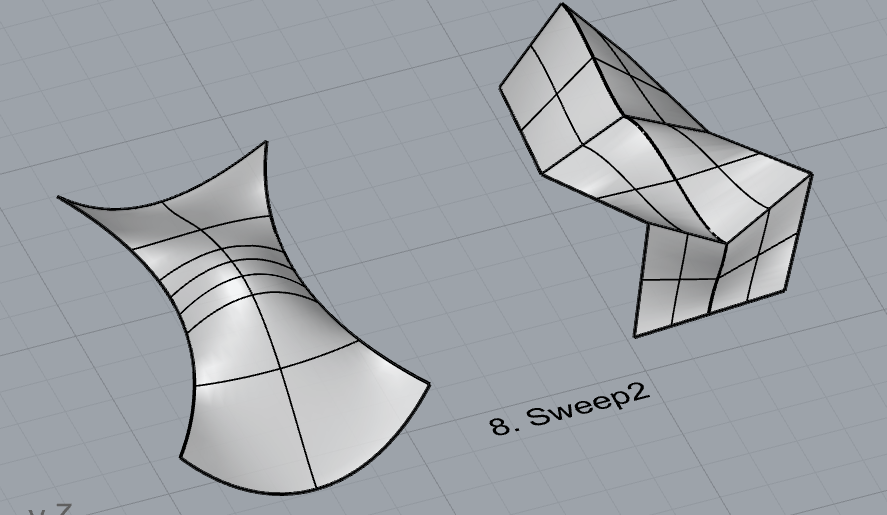
8. Sweep2
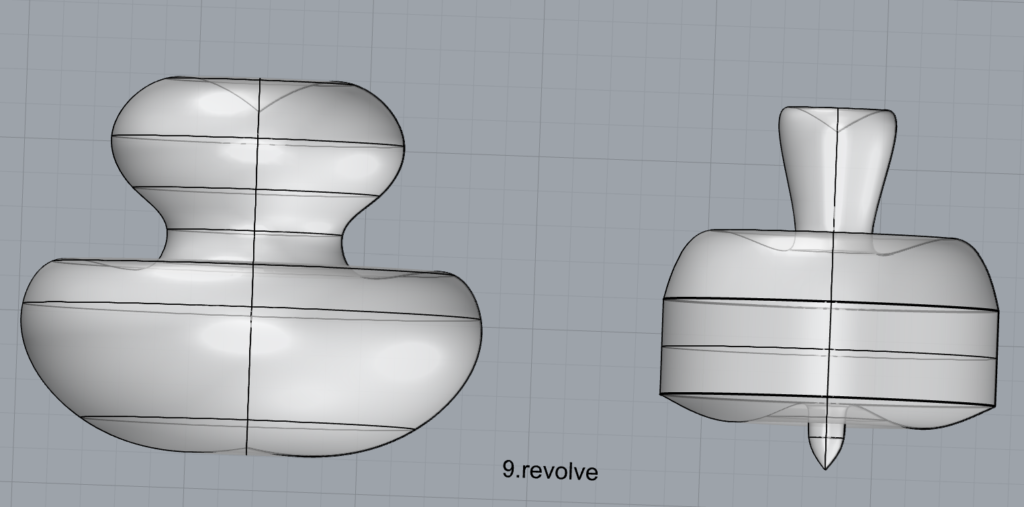
9. Revolve
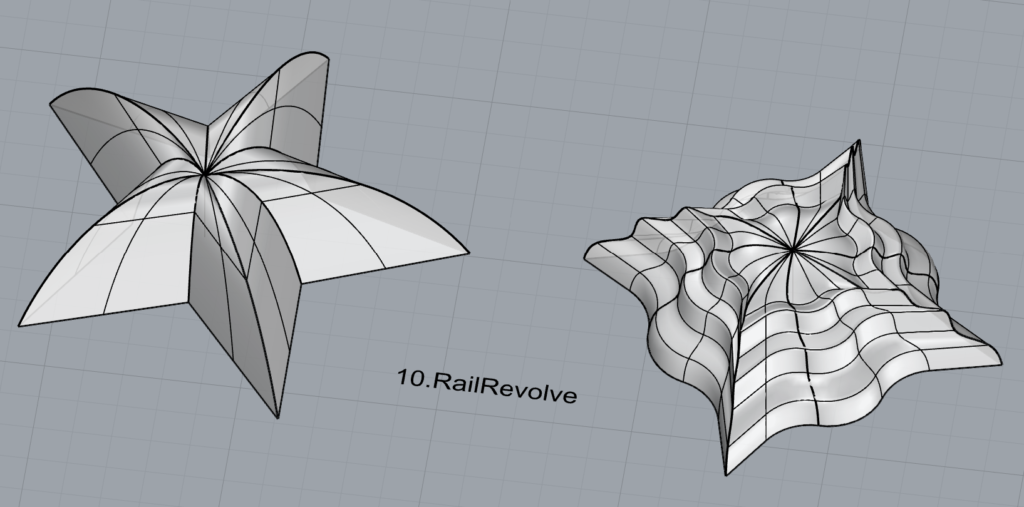
10. RailRevolve
11. Add a link to your FirstnameLastname_Surfaces file at this point in your post.
Part 3: Solids
Open a new Rhino File and practice the solids commands below by making two different solids for each command. You may want to use some of the curves and surfaces you modeled in Parts 1 and 2. Organize your Rhino file so each step is clear. Use the Text command to label each step and the commands you used.
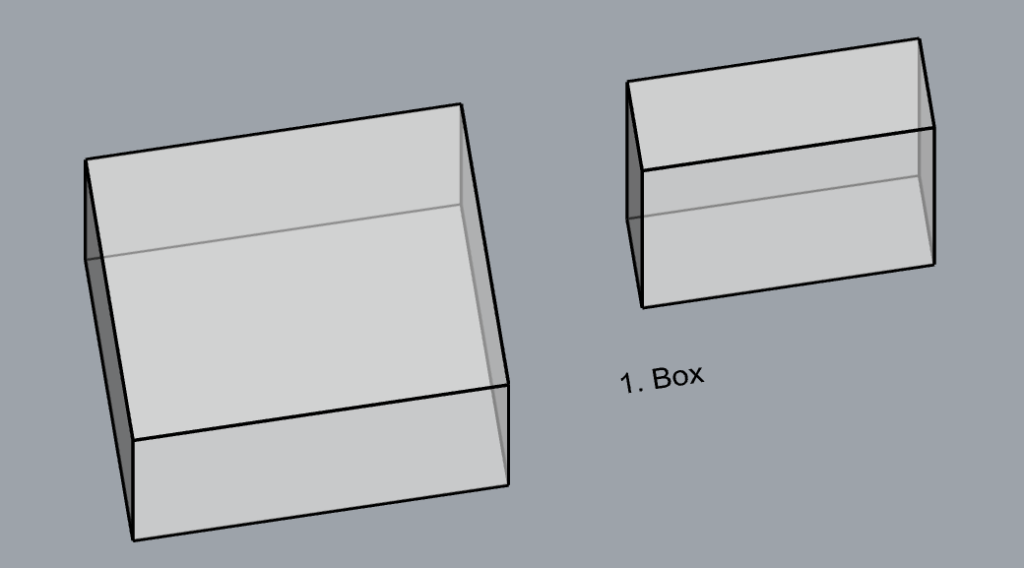
- Box
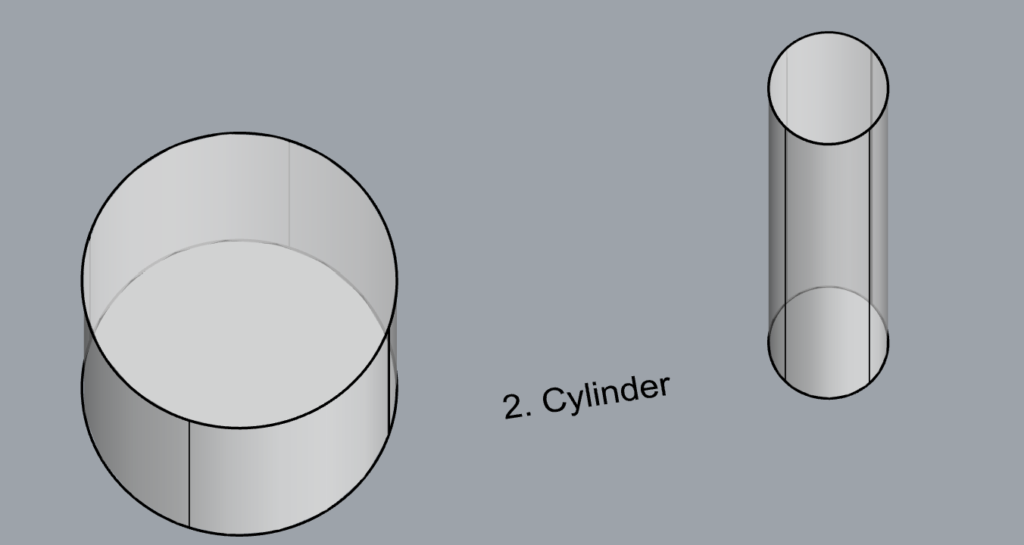
2. Cylinder
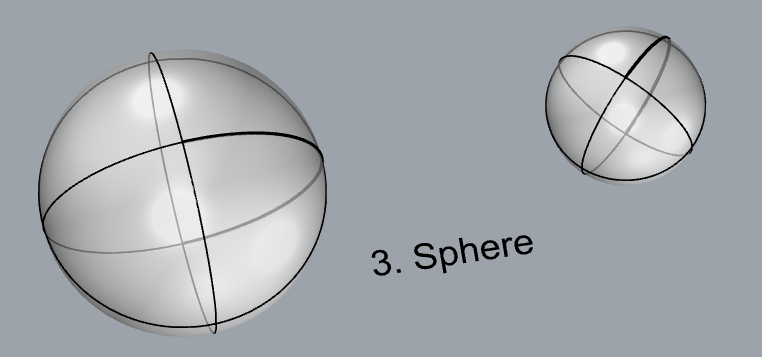
3. Sphere
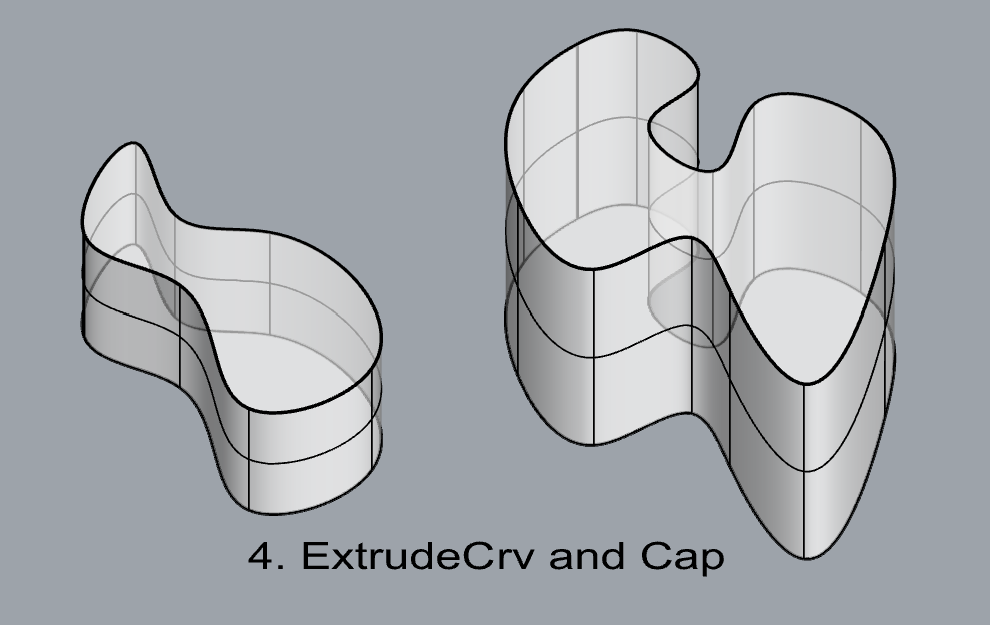
4. ExtrudeCrv and Cap
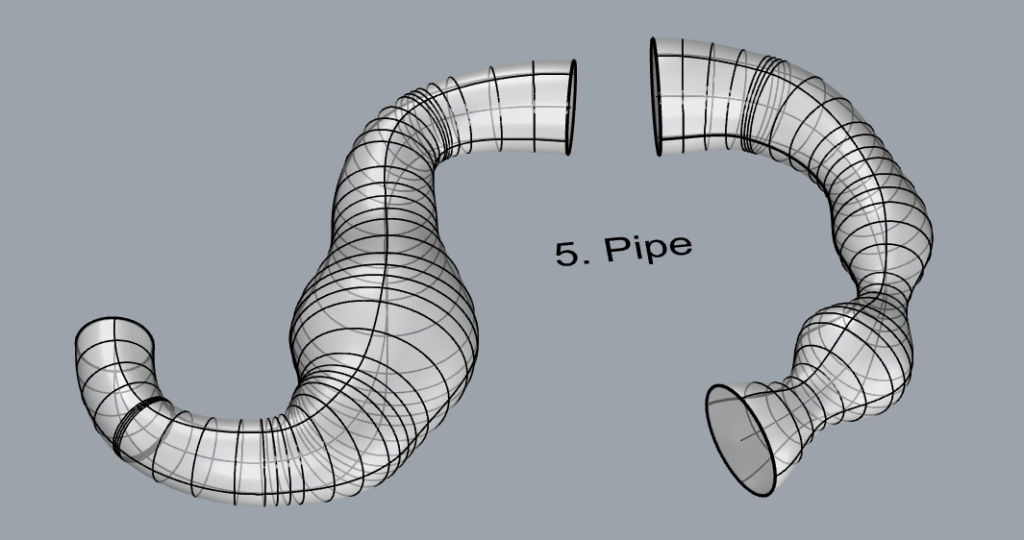
5. Pipe
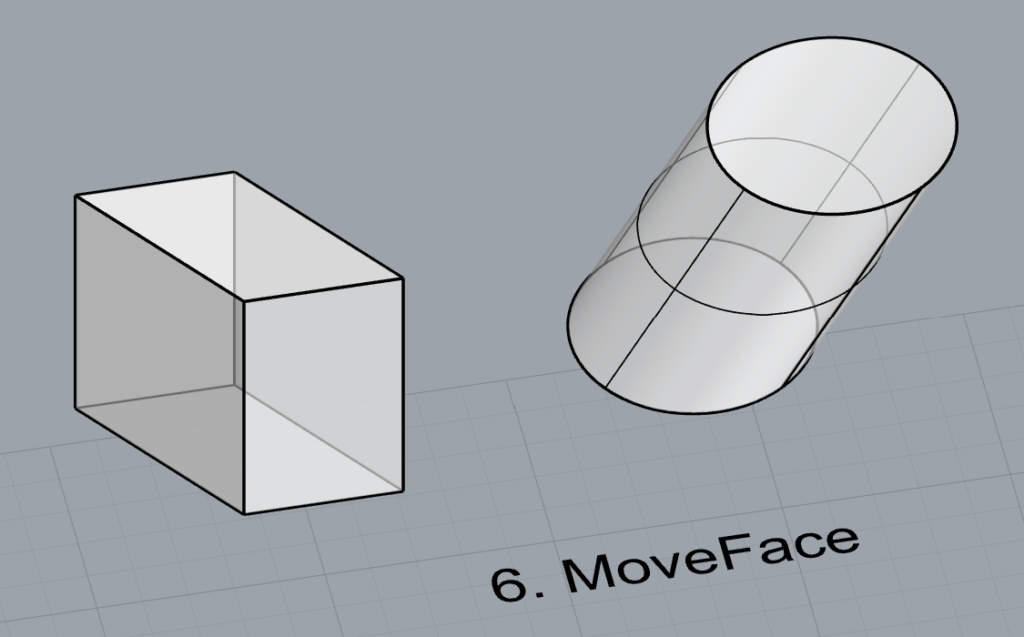
6. MoveFace
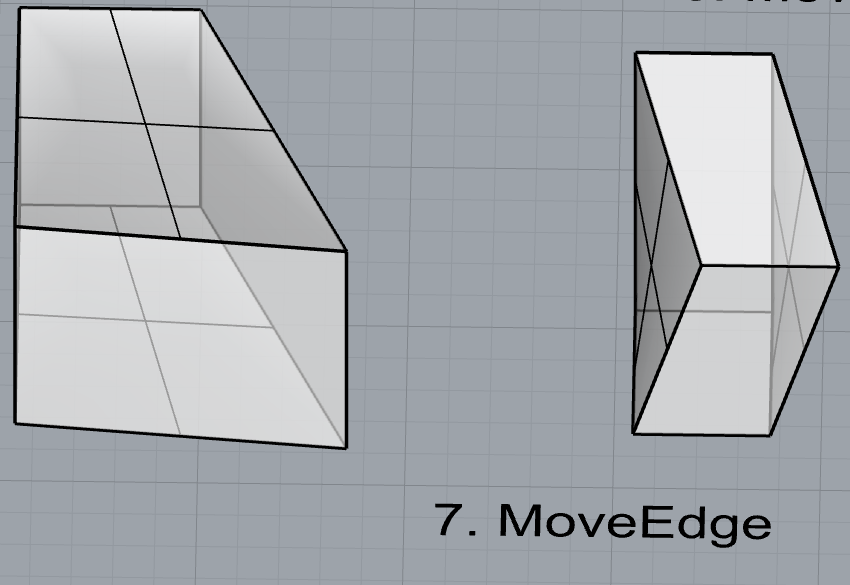
7. MoveEdge
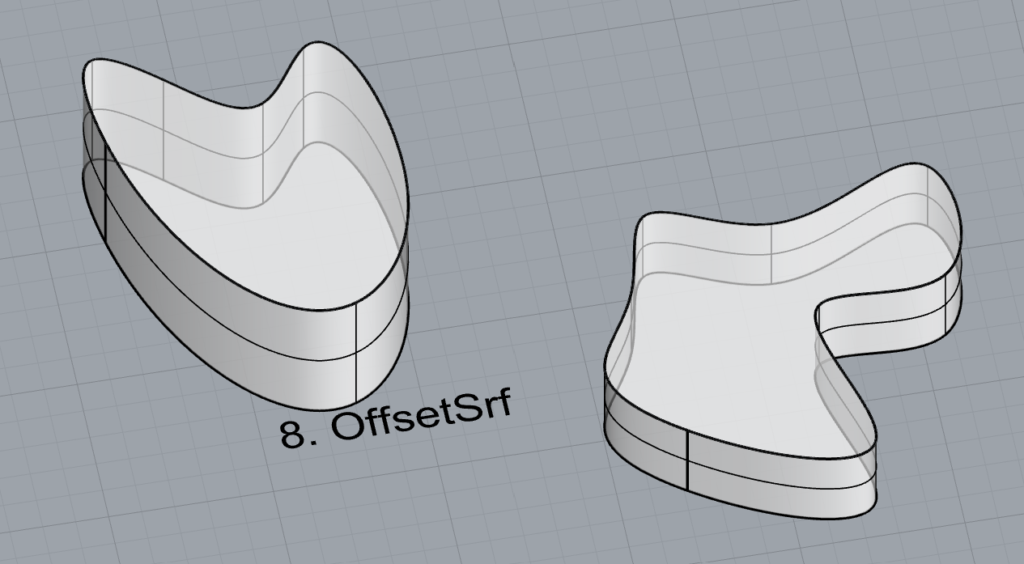
8. OffsetSrf
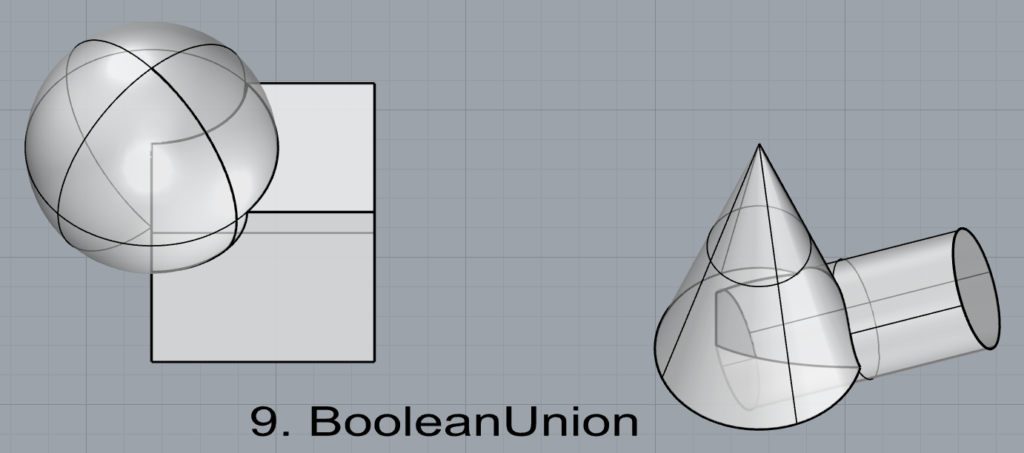
9. BooleanUnion
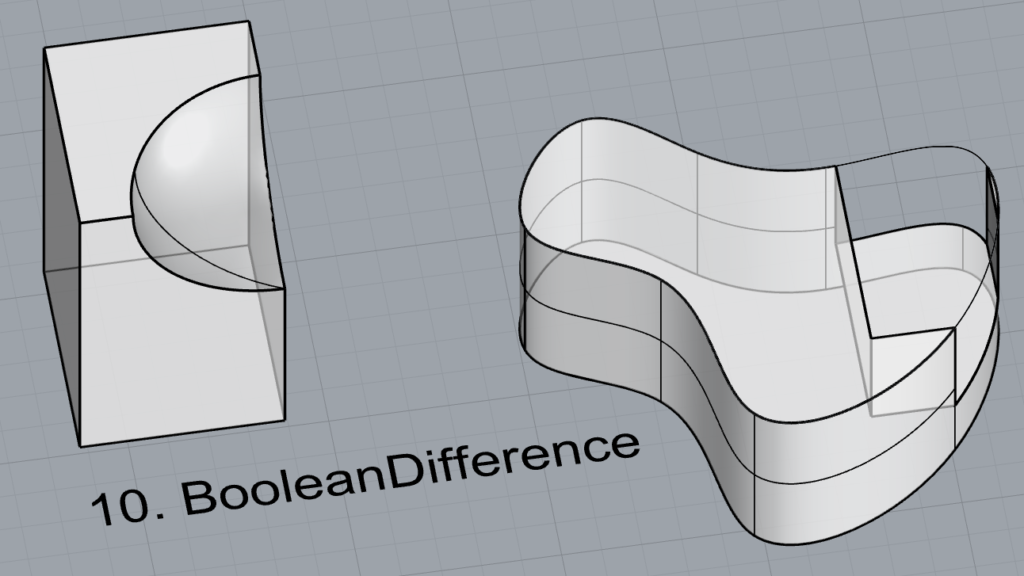
10. BooleanDifference
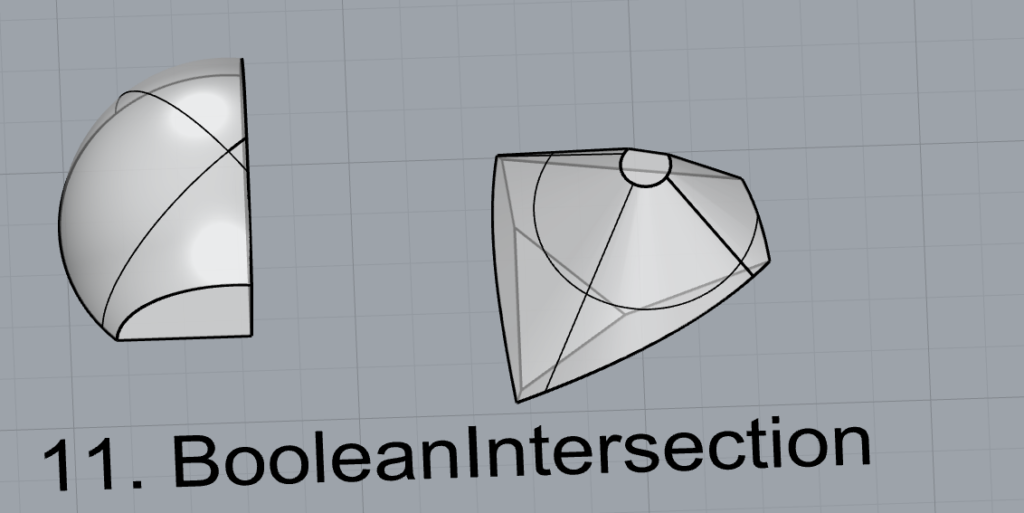
11. Boolean Intersection
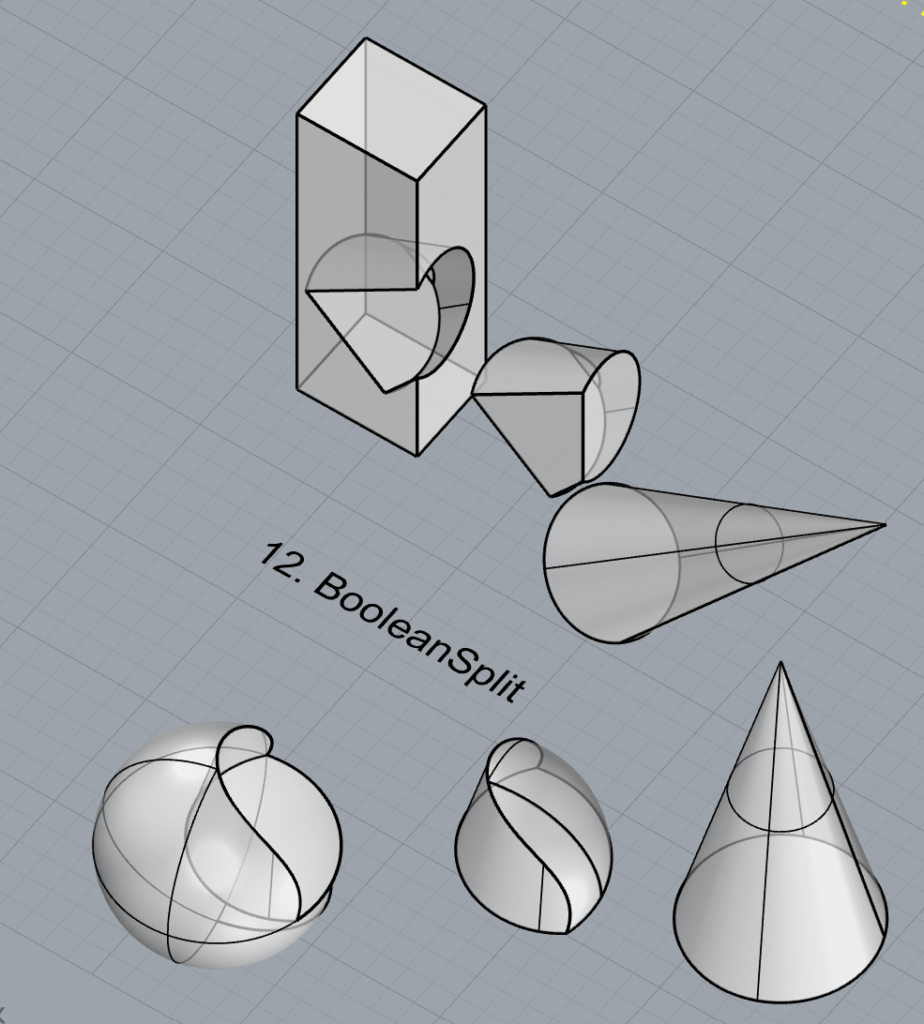
12. BooleanSplit
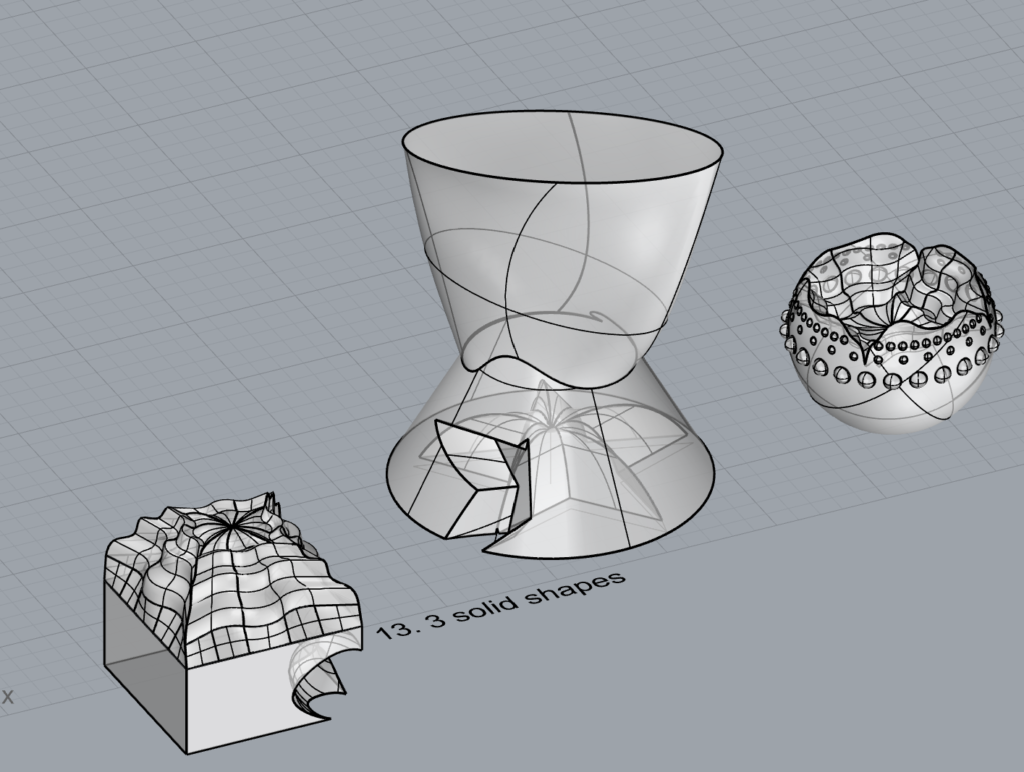
13. Using the surfaces and solids you modeled and the Boolean tools, make three solid shapes you find interesting.
14. Add a link to your FirstnameLastname_Solids file at this point in your post.
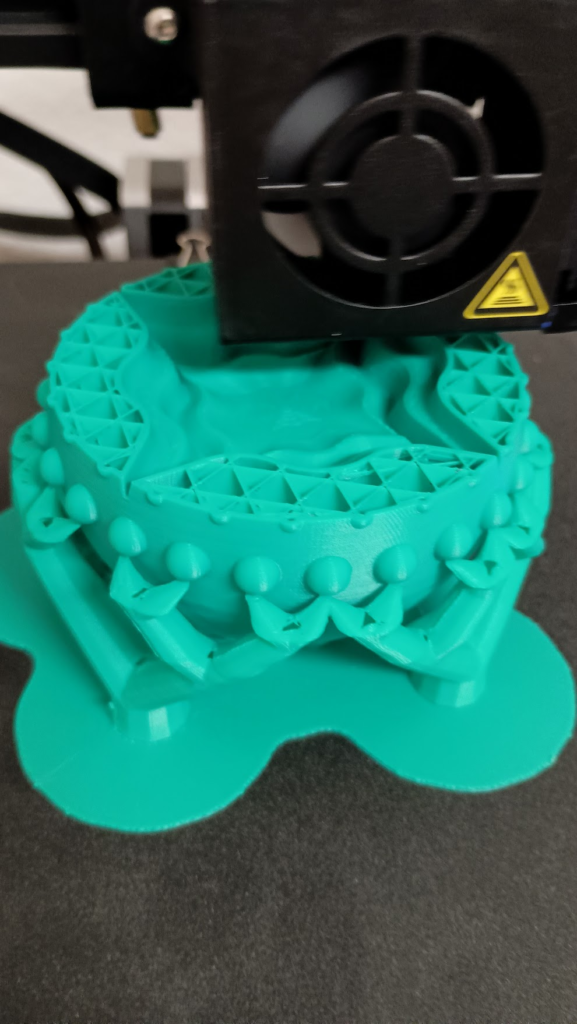
Part 4: 3D Printing
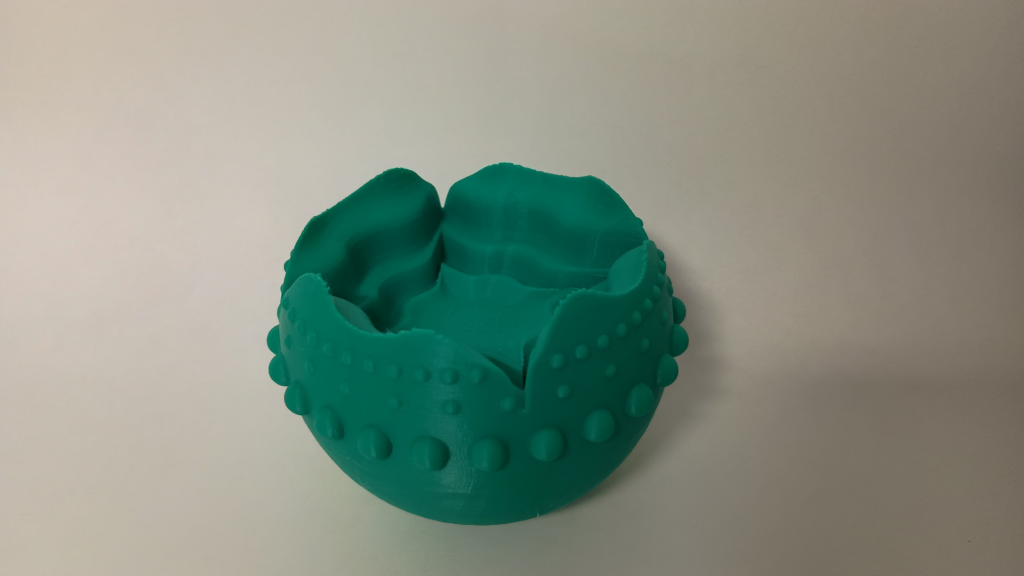
I decided to print one of the solid shapes I made in step 13 of part 3. I used a tree support structure and a raft. Total print time was about 11 hours. I had no issues with the print and am relatively happy with how it came out.
Hi! I like a lot of the examples you chose to create for the other parts of the project, especially using the RailRevolve tool. It looks like you incorporated one of those shapes in your final design as well. Your final design/print looks amazing! Have you worked with 3D prints before? How did you avoid scarring on your final object where the supports connected?
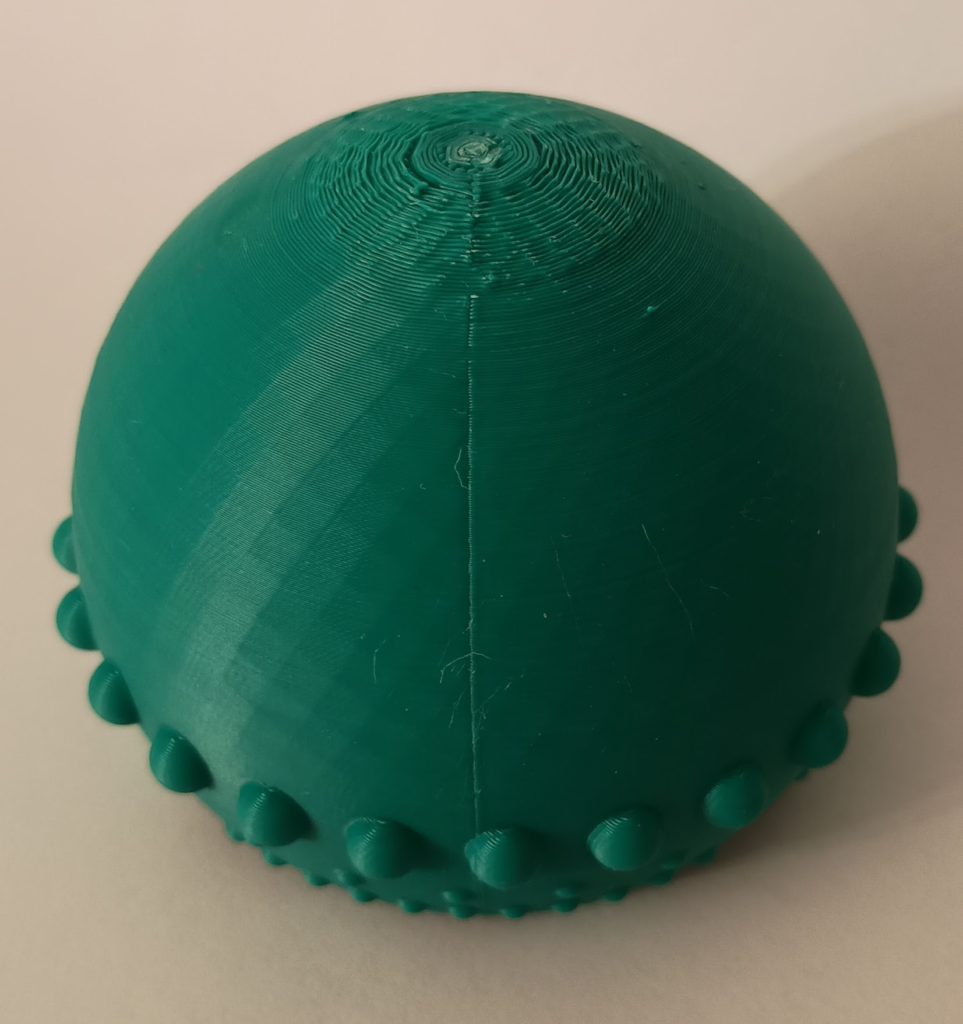
Thank you! I have never used a 3D printer before this class, but have been very lucky with no issues. The tree supports worked pretty well to avoid scarring, although I will say there is some scarring directly on the bottom of the sphere that I haven’t tried sanding down or anything yet. The scarring actually helps it to stay upright despite the spherical bottom.
The 3D print you made is really fascinating, the texture has a very interesting look, almost like a cliff side. I applaud the ambition of making a multipart print with the tree and the raft and printing them together. How well does it hold? Are all the studs on the outside of the raft meant to help it adhere to the tree?
The tree is used as support for the print because of the overhangs. There was support for the bottom of the sphere as well as for the ‘studs’ on the side of the design. The raft is a thin layer on the bed before the print starts working on your design, it helps a lot with adhesion.
Hello,
I thought that the printed item in real life was so impressive. I wish you took pictures of the of the bottom. I also like the RailRevolve 2nd object and wish to know how you did that.
Ah, that is a good idea, I will add a picture of the bottom to my post. The 2nd railrevolve started as a star, then fillet, then I made a little squiggle to follow the star-ish shape in the railrevolve.
Hi Elektra,
Your 3D print is really cool, especially how it bobbles back to the upright position. I also really like the design you made for the last item in the curves section.
Hey Elektra! I really love your print- when I was looking to see what other people had done it really grabbed my attention. I like how it looks like a small-scale biome. It looks like it could be a planet on Star-Wars or something. Prior to this class I also hadn’t done any work with 3D printing and so it is crazy to me that this took 11 hours to print. Hopefully the sound didn’t drive you crazy.
Thank you! I haven’t 3D printed before this class either. Unfortunately, the sound did drive me crazy haha! I also did not plan for how long it would take so it wound up still printing while I was trying to get some sleep.
Hello Elektra!
I got a short glimpse of your 3d print on Tuesday so I thought I would check it out here. The model that you printed is very impressive and is a great use of the models you designed throughout the assignment. Using the open surface you had made with rail revolve to create the wavy feature really helps it stand out.
I am curious about your other settings. The lighting from the third image appears to reveal a rectangular pattern in the print. Was there a special setting for your walls that caused this?
The pattern on the print was not intentional. I had the infill settings set to 20% density and a cubic pattern. The wall thickness was set to 0.8 mm and a line count of 2. Perhaps these settings made the infill pattern show through the outer layers. Also, when creating the STL file, I had tolerance set to 0.1mm.
Hey Elektra,
Your final print looks amazing! It was definitely worth the 11 hours of printing. You did a fantastic job on the post too—each command and shape you used was unique and really showcased the techniques effectively.
Overall, a really impressive post!