Part 1: Curves
- Make the specific footprint below
Commands: Polyline - Make 2 closed rounded curves using the various curve commands.
Commands: Curve, InterpCurve, HandleCurve - Make 2 closed curves using polygon, ellipse, or circle
- Commands: Circle, Ellipse, Polygon
- Commands: Circle, Ellipse, Polygon
- Make 2 open curves
- Commands: Curve, InterpCurve, HandleCurve, Sketch
- Commands: Curve, InterpCurve, HandleCurve, Sketch
- Import a picture and trace an image
- Commands: Picture, InterpCurve
- Commands: Picture, InterpCurve
- Pick one open curve, and one closed rounded curve and make three copies of each.
- Commands: Copy
- Commands: Copy
- Take at least 3 of your closed curves and overlap them to create a new shape
- Commands: Move
- Commands: Move
- Use split, delete, and trim to combine these curves into one open curve
- Commands: Split, Delete, Trim, Join, Explode
- Commands: Split, Delete, Trim, Join, Explode
- Take at least two curves and use various transformations make a pattern or composition.
- Commands: Move, Copy, Rotate, Mirror, Array, Scale, Offset, Fillet, FilletCorners
- Commands: Move, Copy, Rotate, Mirror, Array, Scale, Offset, Fillet, FilletCorners


Part 2: Surfaces
- Plane
- PlanarSrf
- EdgeSrf
- ExtrudeCrv
- ExtrudeCrvAlongCrv
- Loft
- Sweep1
- Sweep2
- Revolve
- RailRevolve


Part 3: Solids
- Box
- Cylinder
- Sphere
- ExtrudeCrv and Cap
- Pipe
- MoveFace
- MoveEdge
- OffsetSrf
- BooleanUnion
- BooleanDifference
- Boolean Intersection
- BooleanSplit
- Using the surfaces and solids you modeled and the Boolean tools, make three solid shapes you find interesting.


Part 4: 3D Printing

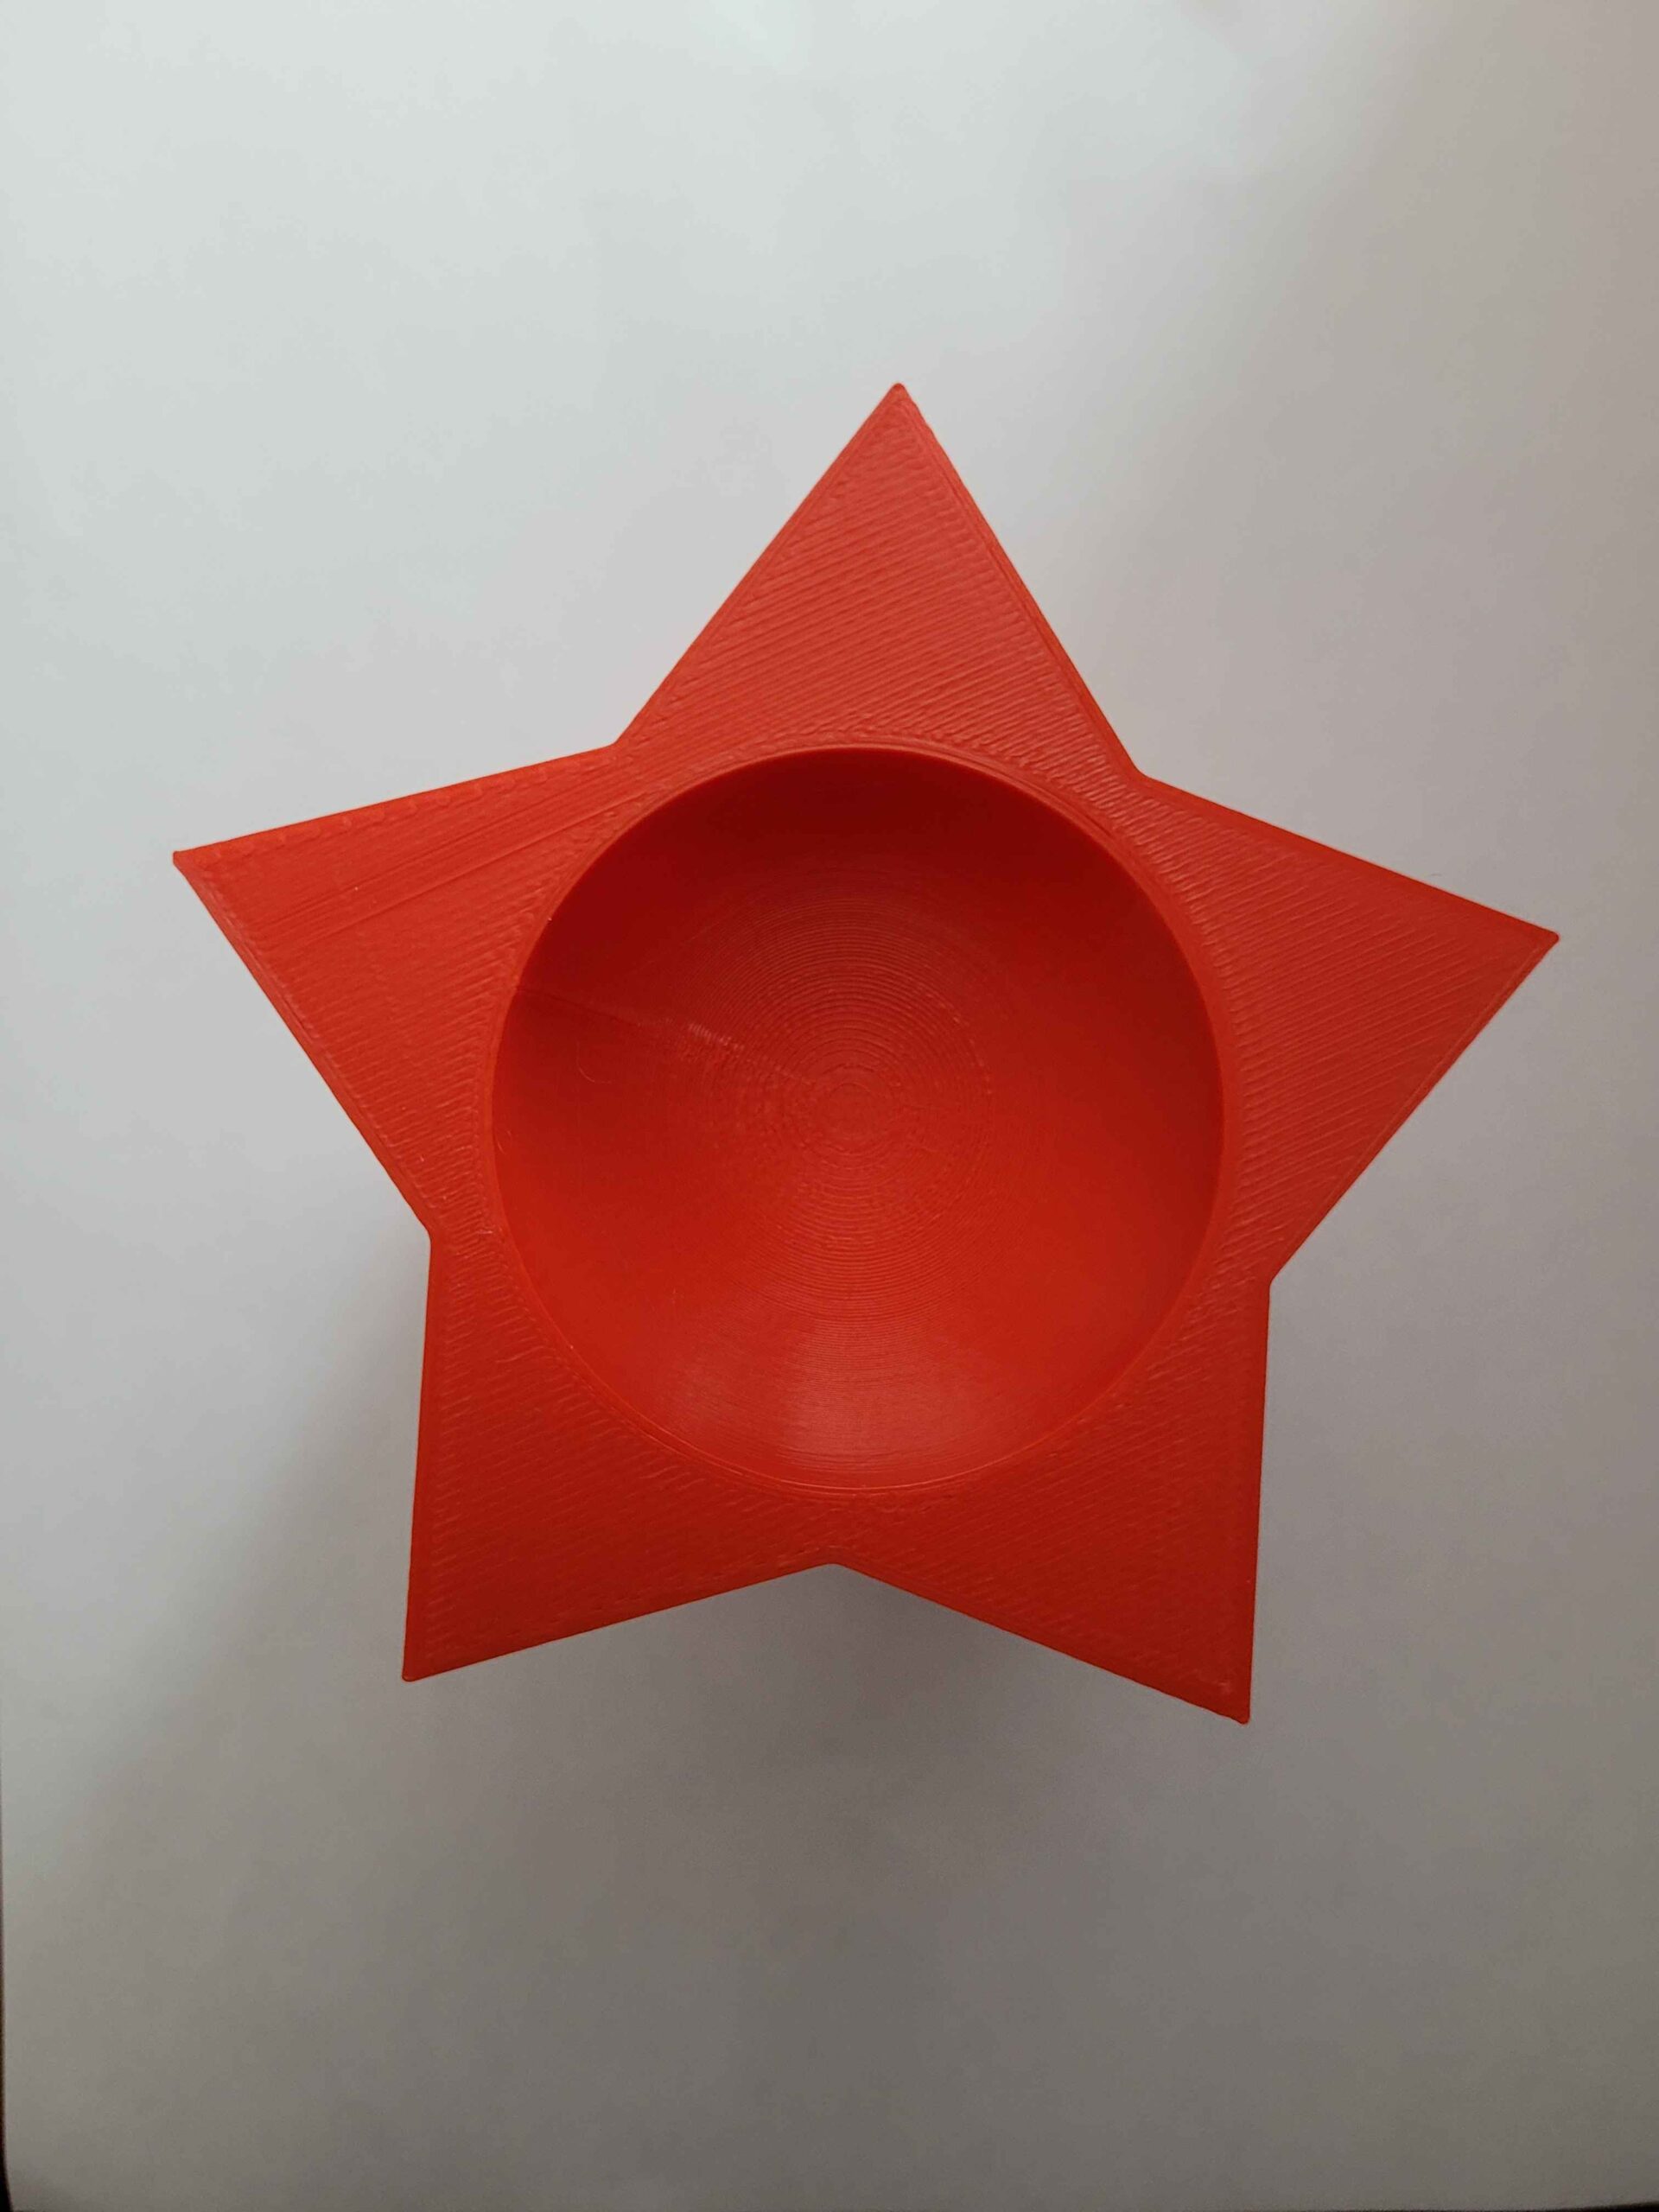
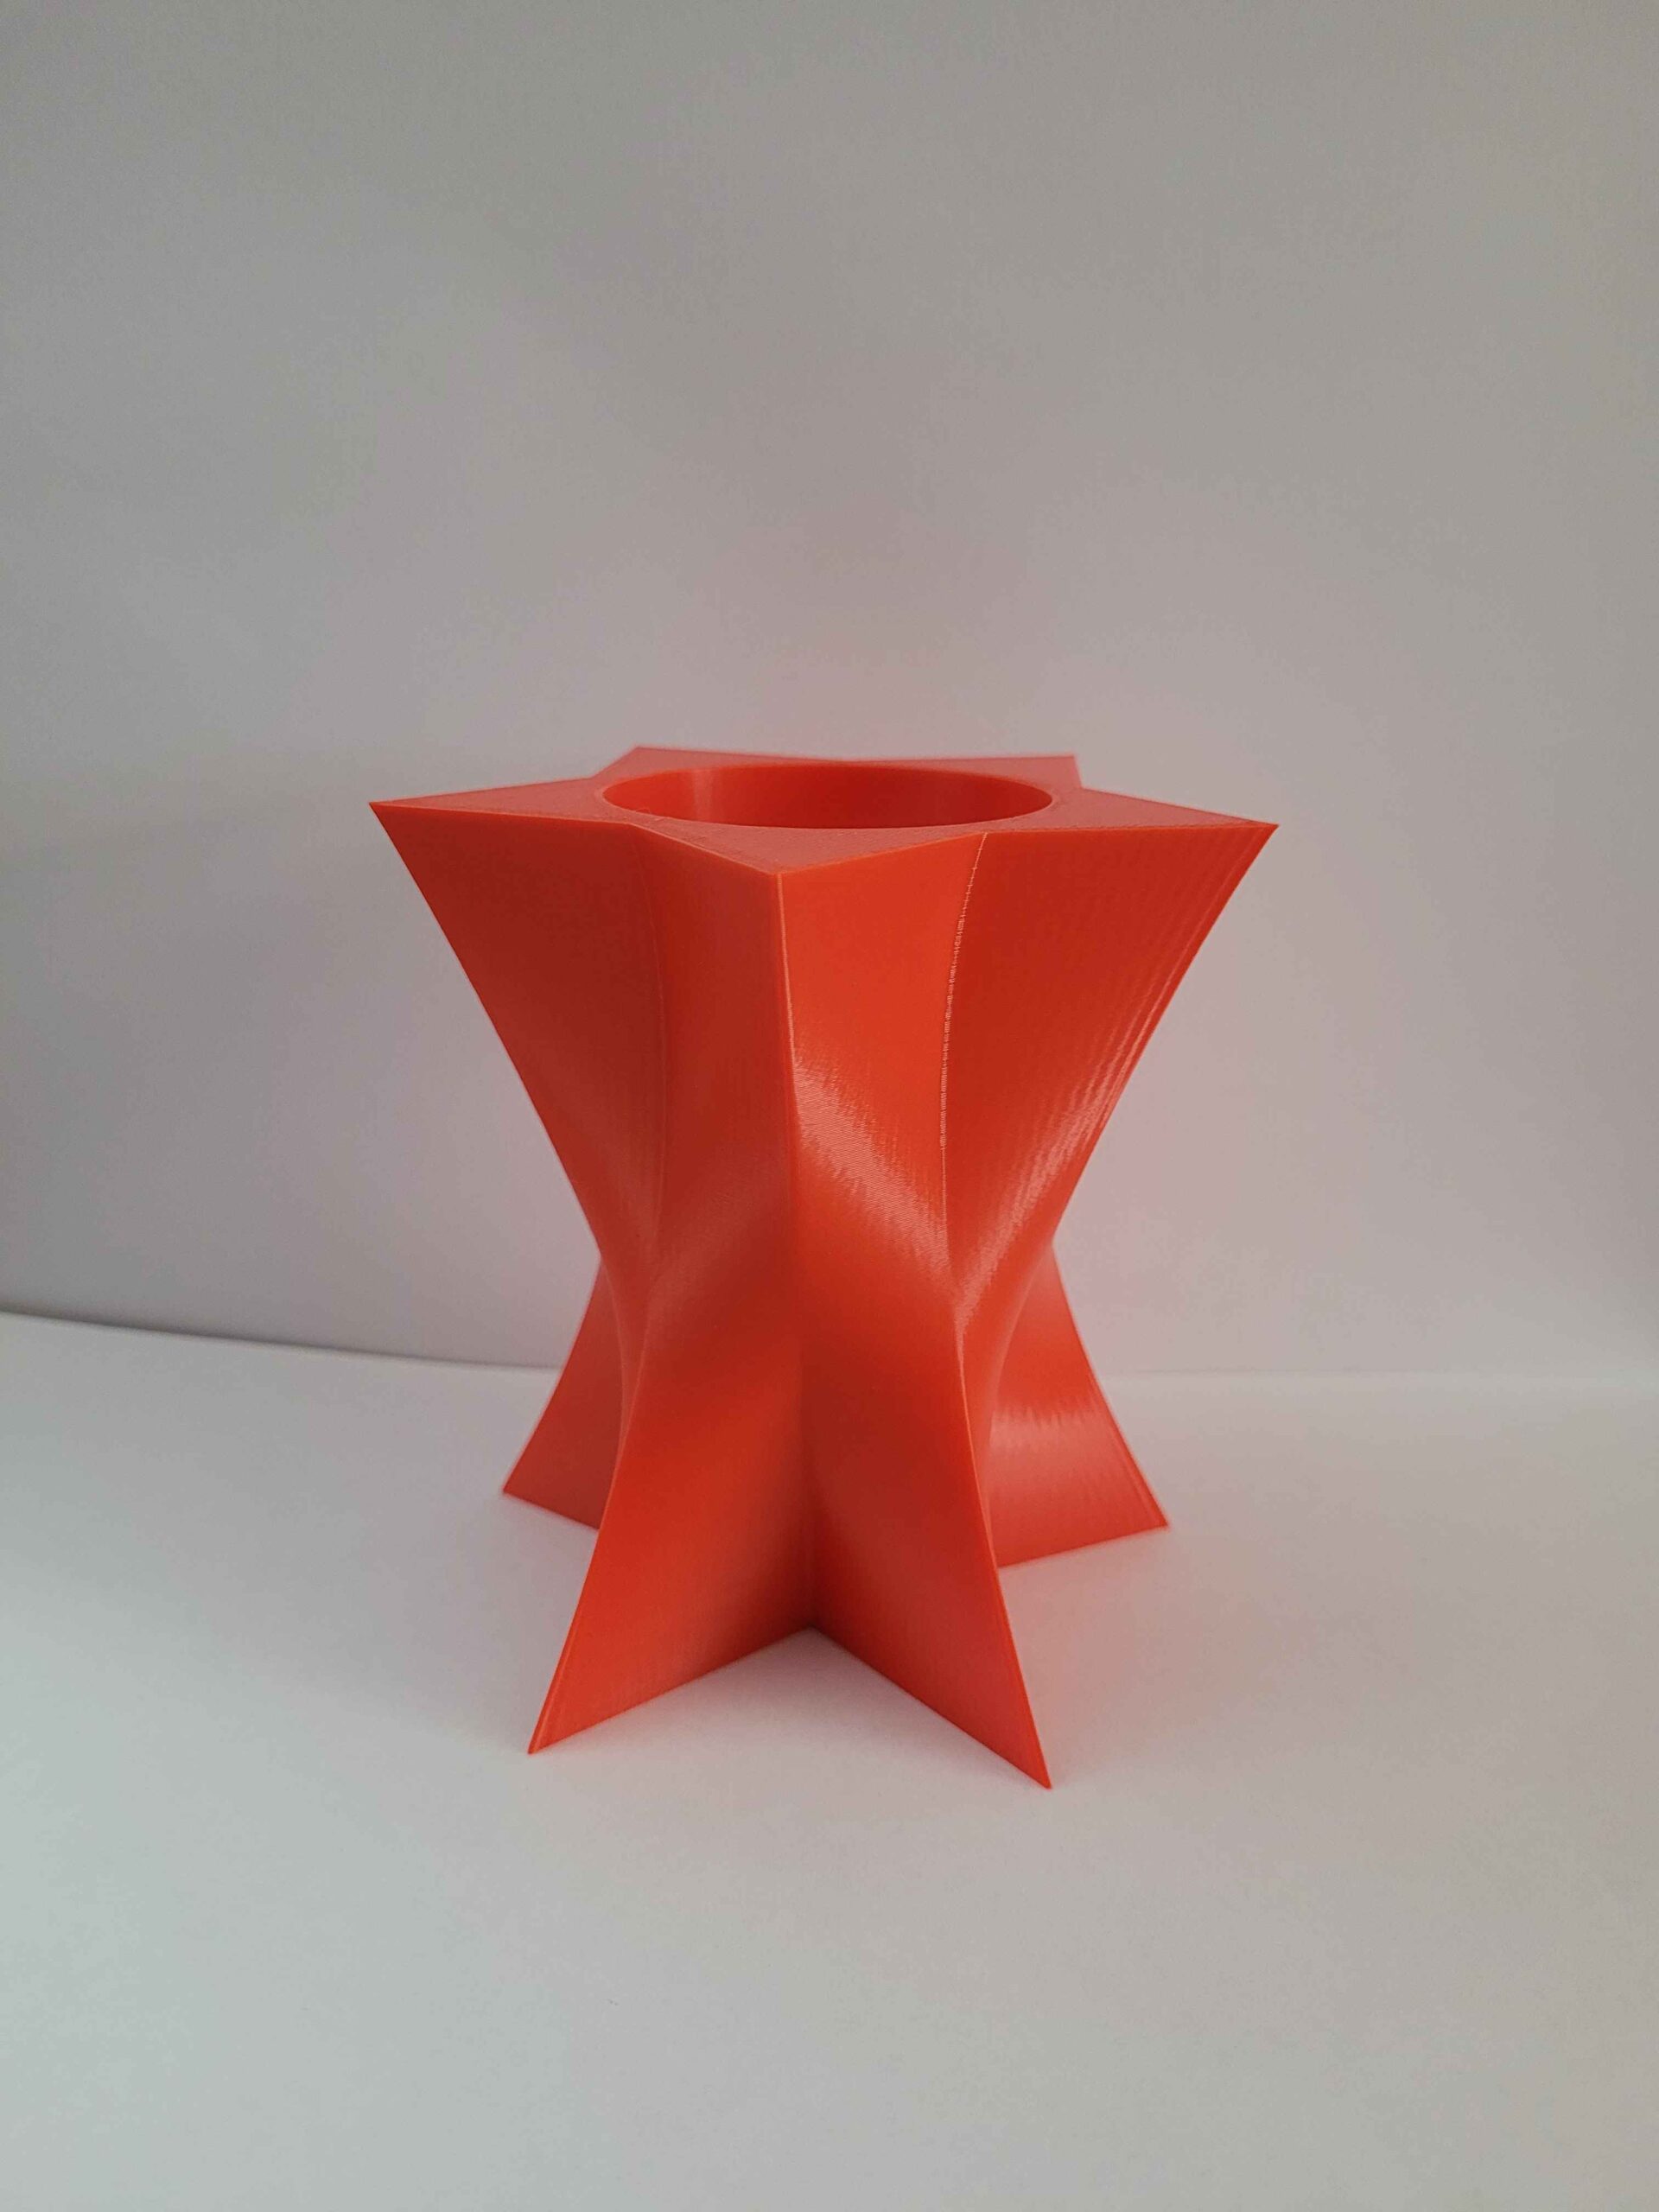
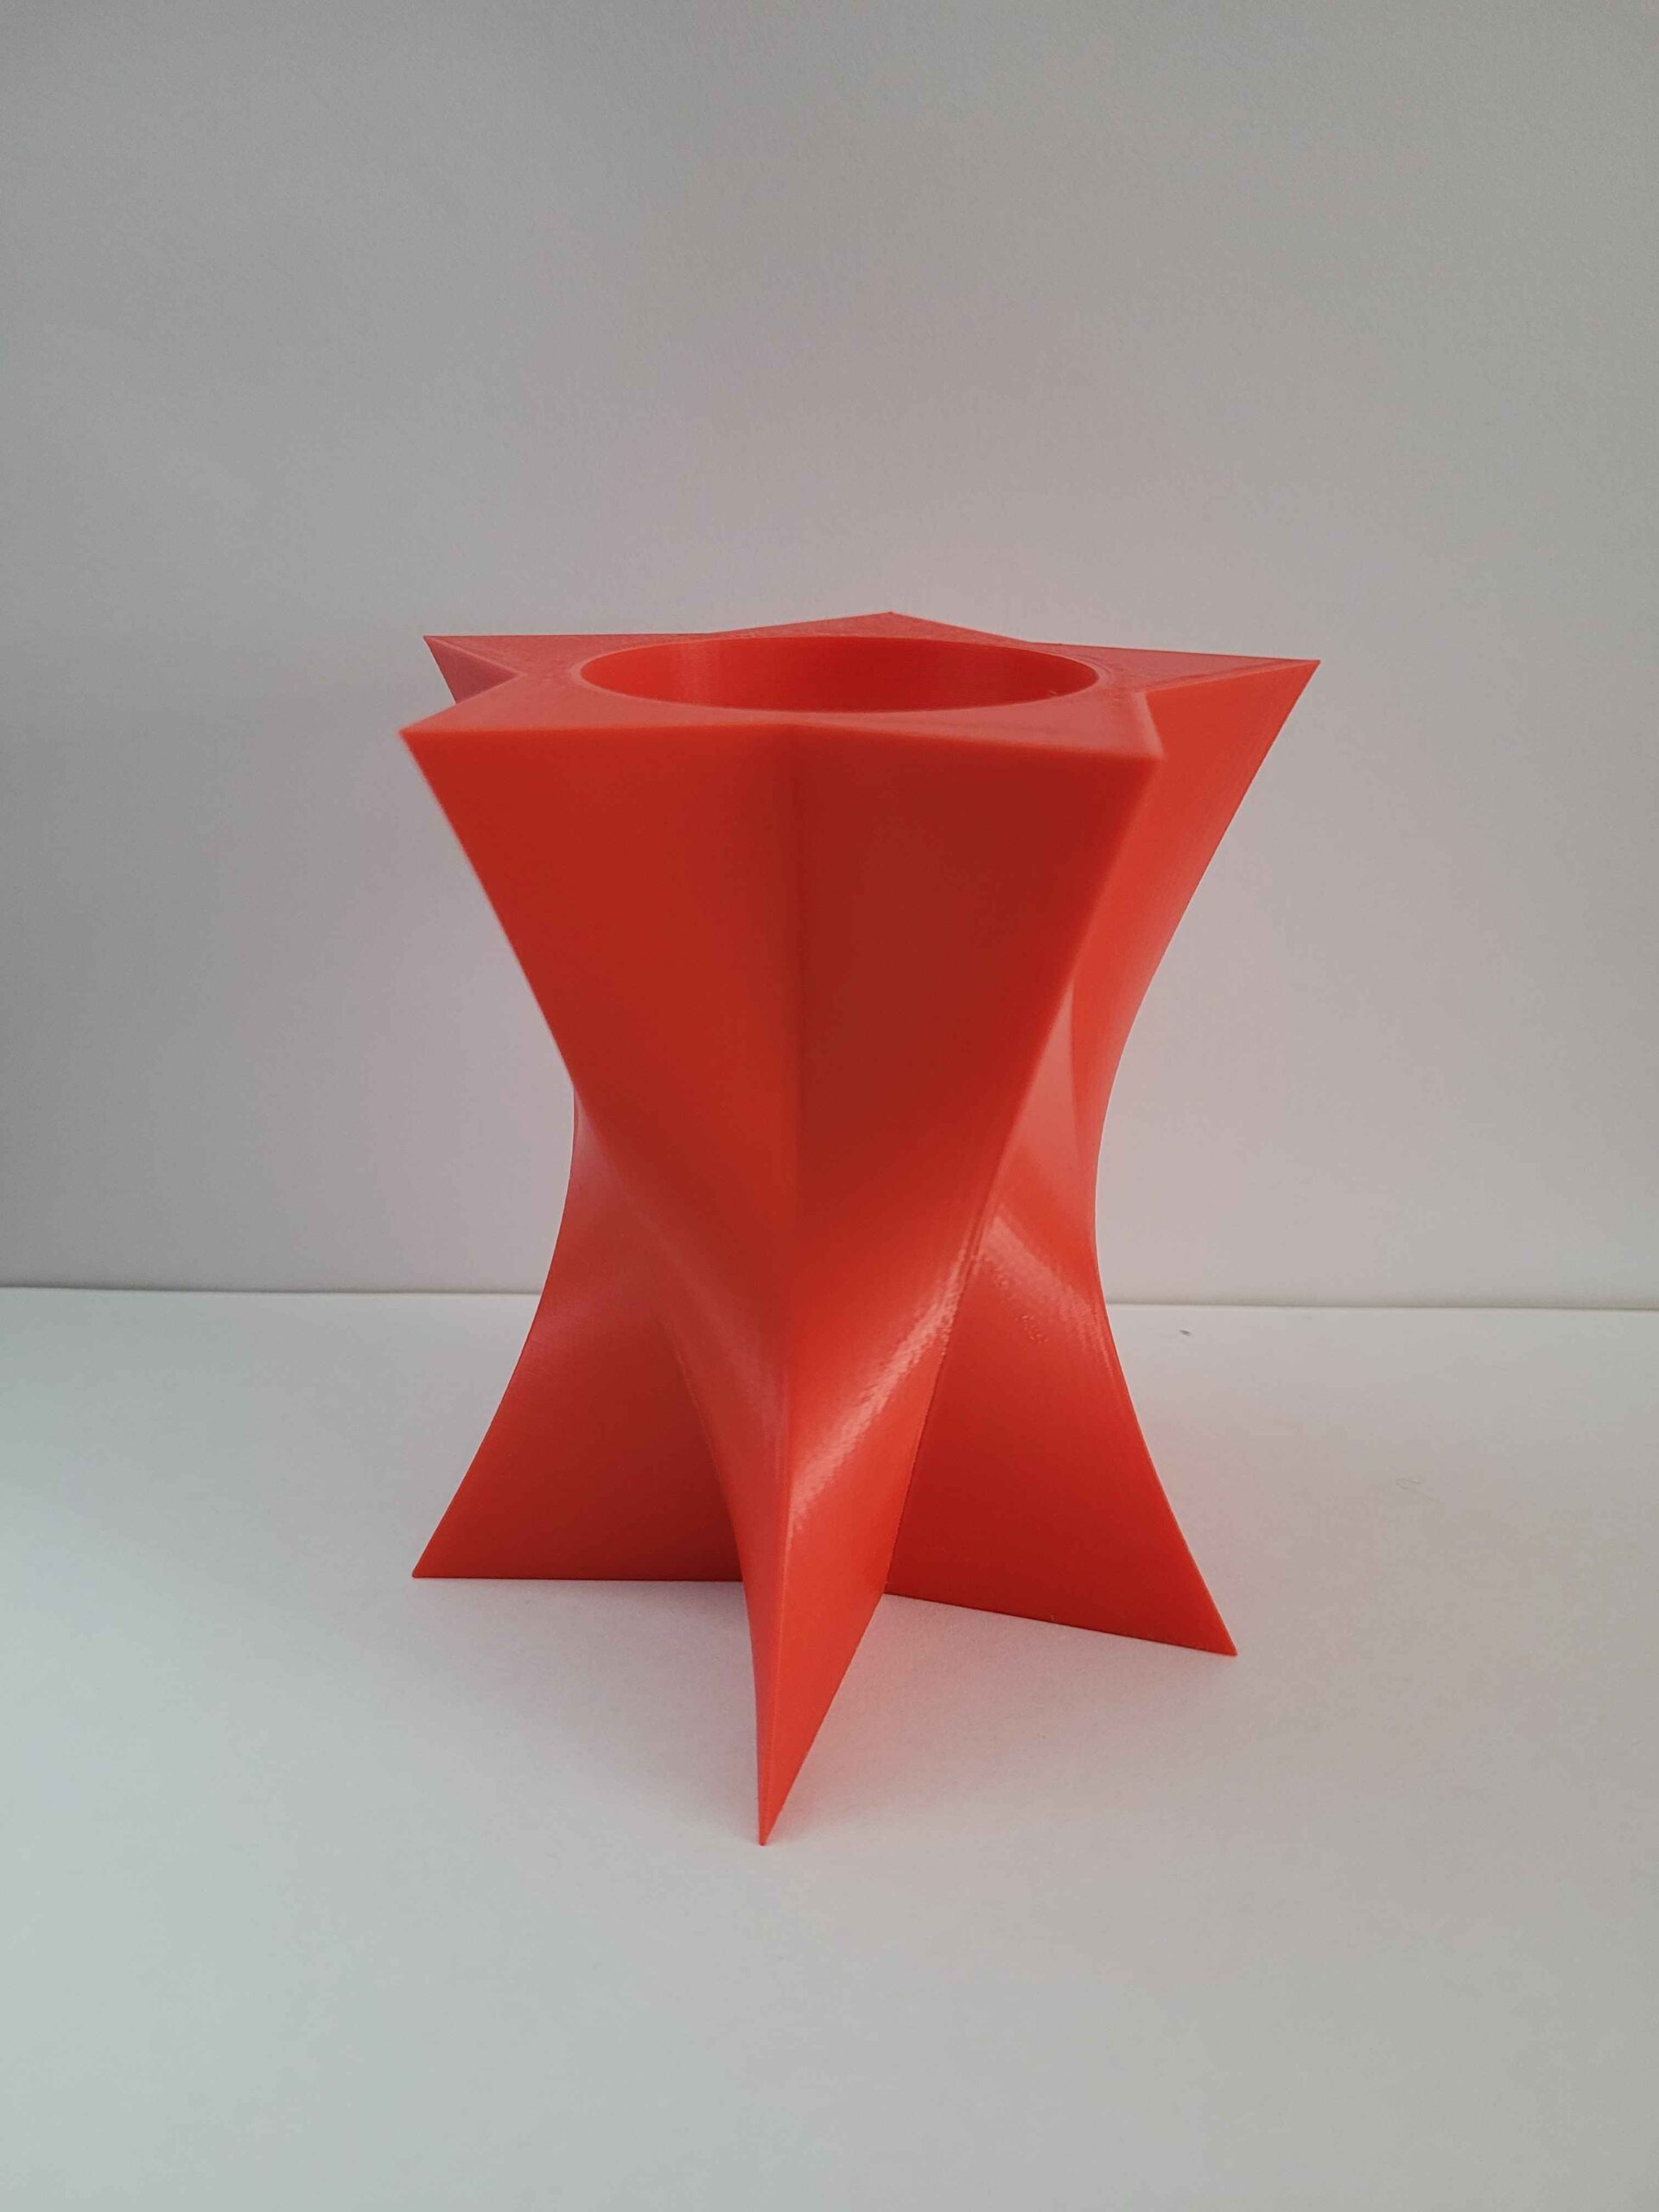
For my first 3D print, I designed a sharp star shape at the base, which I lofted into a circle that transitions into a larger star at the top. I then added a sphere and using Boolean difference it created a crater within the top of the star-shaped structure. Initially, it didn’t match my original vision, but after revisiting the design, I found it more interesting than expected. It also turned out to be functional, as it can hold the dodecahedron we printed earlier.
The printing process went smoothly. Surprisingly, the nozzle grinding issue that occurred during my first print resolved itself this time. However, since this print took around four hours, I kept an eye on it the entire time, worried that the issue might return.

Hi Daniel,
I like seeing the creativity you had in making the models for this assignment. I particularly like the the objects you made using the revolve tool, they kind of look like oil lamp chimneys. I also love the object on the right of the objects you find interesting section. It looks unsettling (in a horror movie kind of way), it reminds me of the scene from The matrix movie when the bug is removed from Neo’s belly. Your print came out really nice by the way, it looks very clean.
Hi, designing a circular concave area inside the triangle is very creative, and its “feet” part also attracts me. I like your printed object.