Introduction
Presentation slides: A Modern Olla
For my final project, I wanted to create a specific Egyptian pottery, the Olla: a clay drinking jug, with the exterior surface of Moroccan lantern geometry. My goal was to find a way, computationally, to print a vessel that merged cultures. This project is beyond forming an art piece, but to understanding the value of how civilizations before us used pottery.
Many steps were taken for the success of this piece. I first reused my previous code to create the Olla structures then I printed out a small version of the Olla without a surface design, then I created a tiling using the previous code and adopting the Morrocan details of geometry, I merged the vessel with the lattice I created, then I made other versions of the vessel, and finally, I printed the Ollal (Arabic plural of Olla) on a large scale.
Background Research
A lot of the inspiration of my project came from my cultural background. I see pottery and geometric designs to have deep roots of the Middle East and North Africa. I used past and present projects as guides to this project. Overall, this project is valuable to me as it shows origins and stories of civilization and cultural value.
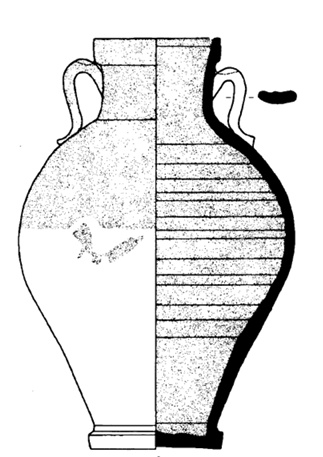
The Olla is a pottery design originating from North Africa. The purpose of the Olla is to keep the liquid (usually water) cold for a long period of time. Additionally, the mechanism of the Olla allows one to place lukewarm water which over time cools up. Although I would not make the Olla hold and keep the water cold, I still want to make a final project with the Olla shape and structure. Redmount’s research is on understanding different Egyptian ceramics and their properties. This project relates to my project as it provides an understanding of the structure of an Olla and the purpose of why it is created in such designs.
To learn more see: https://digitalassets.lib.berkeley.edu/anthpubs/ucb/proof/pdfs/arf058-011.pdf
The Morrocan lanterns emphasize a great value in the art of geometry. Understanding how the geometry is designed is reflected in the outcome when the design is complete. Additionally, the variety of patterns builds up to create an overall large-scale puzzle with unique movements. For my project, I want to highlight these patterns on the surface of the pottery using the research paper below.
See more here: https://handandmachine.org/classes/computational_fabrication/wp-content/uploads/2023/12/SymmetryGroups_Applied.pdf
This project is a collaboration between Francisco Sanchez of the Beach Lab and Ahmed Galal of the FabLab UAE in Dubai. Both teams work to develop an open source software and geometry that portrays Islamic Geometric Patterns. Their github library also consists of the software required and the computational details of creating such patterns. There work relates to my work as they used computational fabrication to create the patterns they wanted.
See more here: https://github.com/TheBeachLab/islamic-geometry#software-required
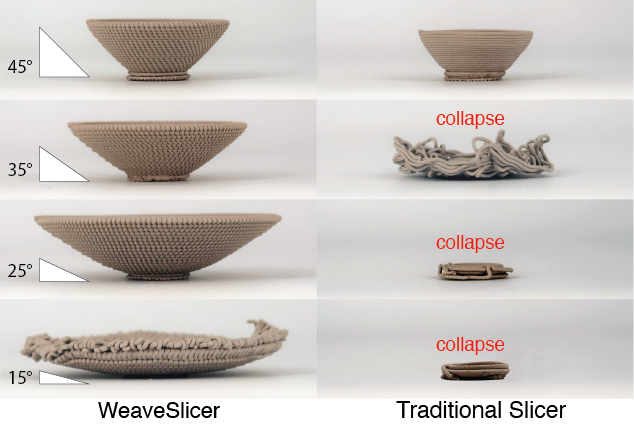
I initially wanted to print in clay but faced challenges as as I had detailed surface designs. The research project that was similar to mine is the one done at Professor Beuchey’s lab on WeaveSlicer. The algorithm assists the print to remain standing as it is wet. This project serves as an inspiration for future attempts of clay modeling. It relates to my work as I created a project that uses code to generate a vessel design.
The Process
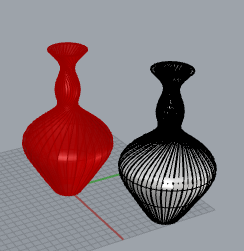
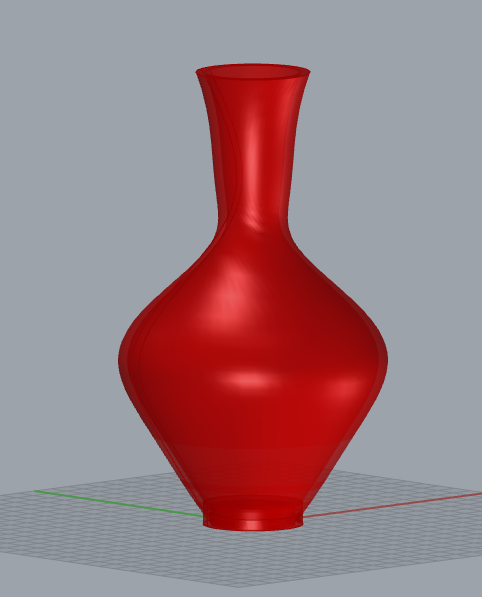
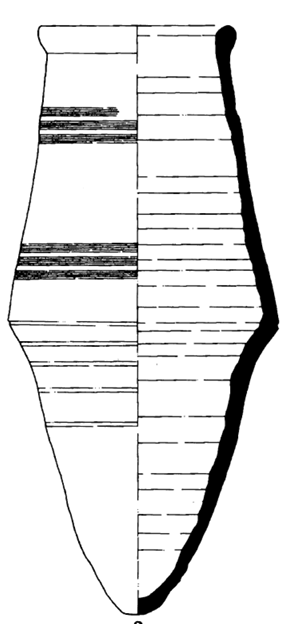
Create Olla Variations: The first part of the process was to design two Olla variations. I specifically changed the neck of the Olla by changing the angles of the twist feature in my code. For Figure A, I liked the movement of the neck and wanted to implement the twist of the angle as part of the Olla design. As for Figure B, I aimed to keep it approximately ‘flat’ (with minimum twists) to present a clearer surface shape structure.
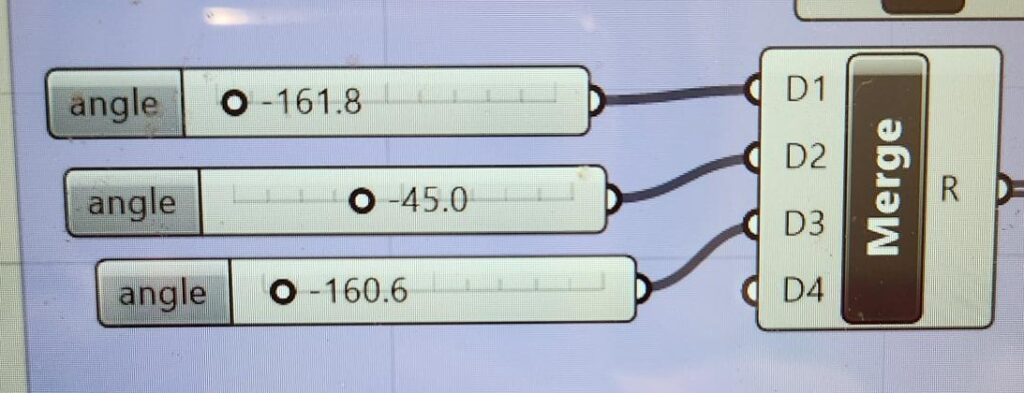
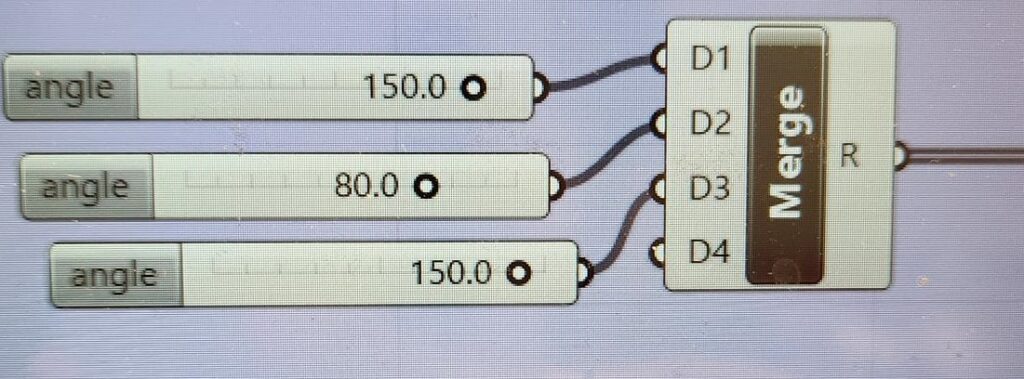
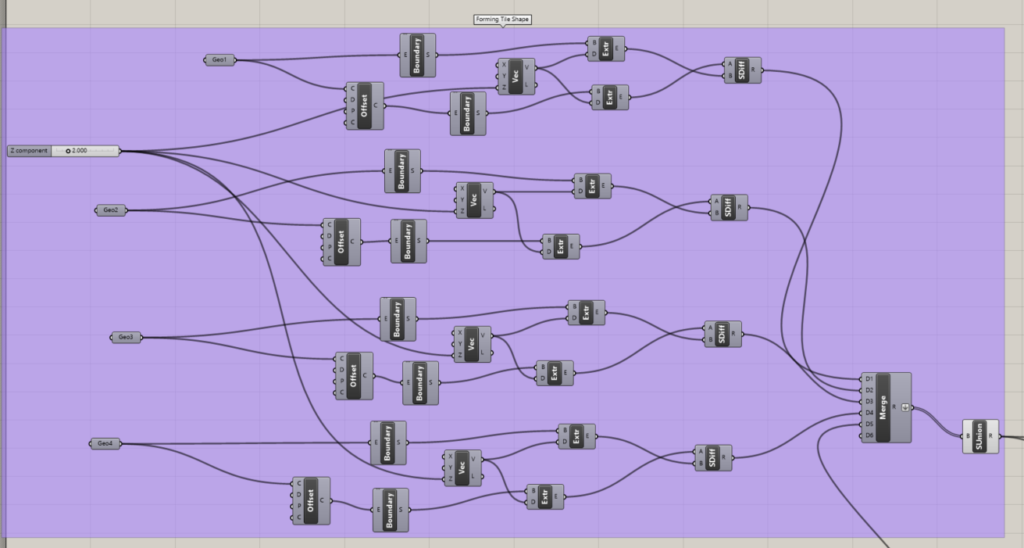
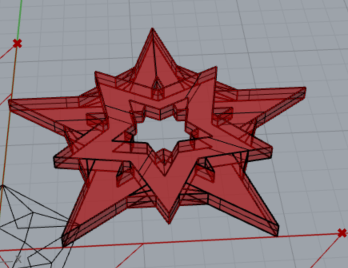
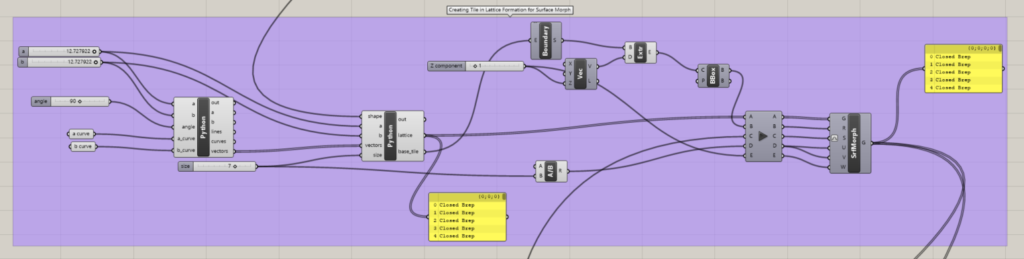
Create the Surface Shape Structure: The next part of the process was to create a detailed shape for the surface of the Olla. I did this by joining several lines (Geo#) together using the merge function and then connecting that to a solid union block to make the lines into an object. For each shape ‘line’ I used offset and extrude to help make the shape more 3d. I also used the vector block to help maintain the entire shape’s height.
Morphing the Surface Lattice with The Olla Design: This stage took the longest as it was not as straightforward as I expected. Therefore, I faced most of my challenges in this section.
The first section of morphing the lattice with the Olla was creating a square with exact dimensions around the created shape. This was one of my challenging points as I needed to use Rhino to create a square with exact dimensions. This was done by adding a polygon block and then rotating this polygon to appear as a square rather than a diamond (the original appearance). I also extruded it to be slightly shorter than the created shape so that the shape could be visible. Finally, I merged it with the shape and used a solid union to allow the shape to be one object.
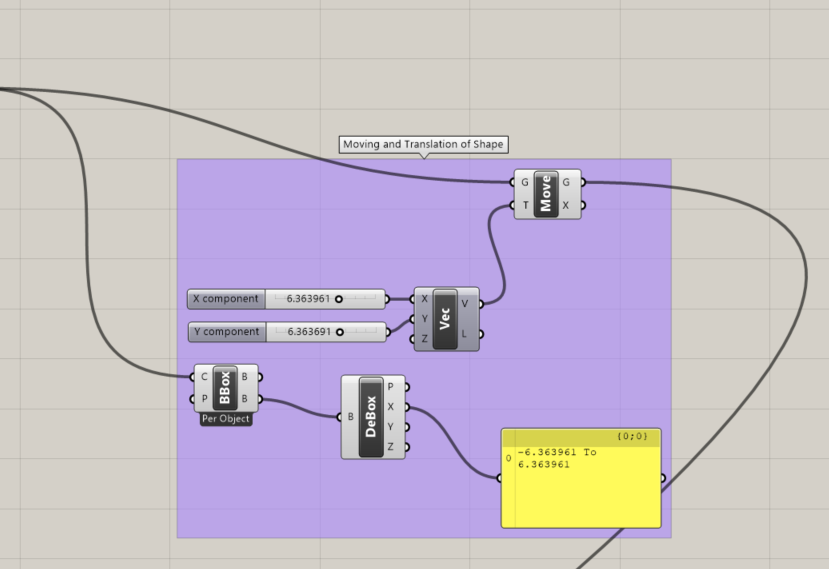
After that, I had to translate the tile from having the (0,0) coordinates from the center to the left bottom corner for ease of coding. After I moved the tile I was able to identify the length of the x and y axes and used that to set exact values for the a and b curves line the code of creating the lattice. Since it was a square both lengths were the same (12.727922). It needed to be that exact number for the success of the lattice in terms of compiling and morphing the surface onto the vessel.
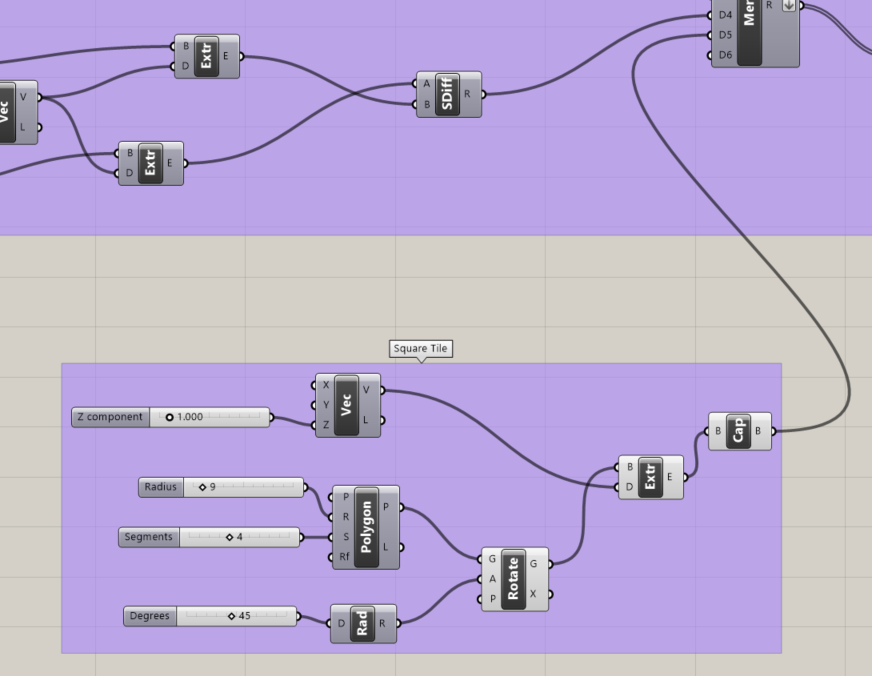
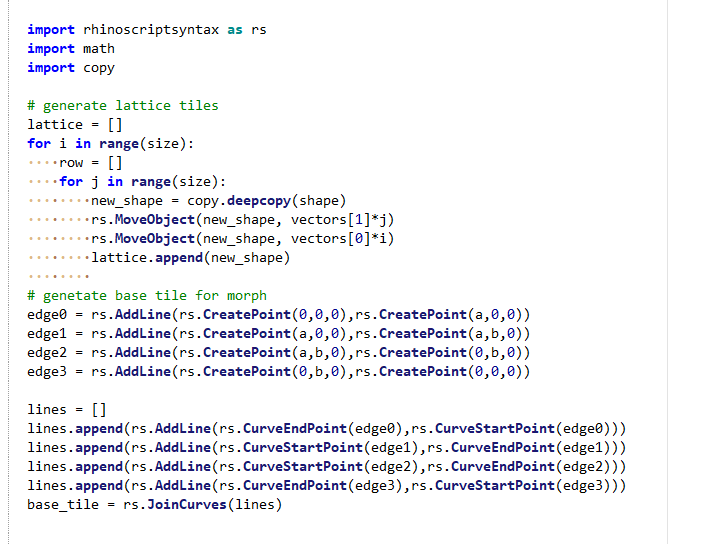
The second part of this section was to code the lattice structure by first creating a base tile. This was similar to the previous tiling project, but not the exact thing. The different approach was identifying the exact points using the a and b variables since the tile did not end at axis value 1 but rather 12.727922. Therefore, creating each point (using CreatPoint) with the a and b values helped with the accuracy of where the square corners were. Then I connected the points with a line (using AddLine) to form each edge which I used to create the base tile and the lattice. The code below shows those details. This process was a challenge as I needed to know which point was which so that the base tile could be created.
I also added a shape input in the second Python block so that I could read the surface shape I created. As mentioned earlier, I made a and b values equal to the length of the square that surrounded the star shape as seen in the left area of the Grasshopper software.
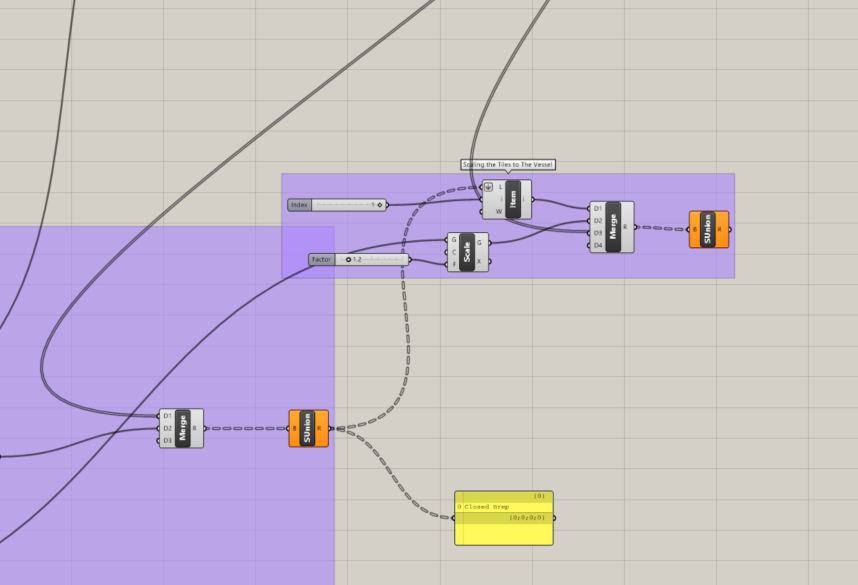
The third and last section was to merge the surface morph with the vessel so close to the base. The surface morph only created a surface so there was no base to complete the structure. Therefore I needed to solid union the solid union. This was the most challenging challenge as it needed complex connections between blocks as seen below. A lot of the connection was from Professor Buechley’s help. It mainly required that the solid union from the vessel code be inputted as a list. I then needed to scale the object to be able to allow the vessel to show the tiles as one solid and not several pieces of individual tiles. Finally, solid union all that and bake the object.
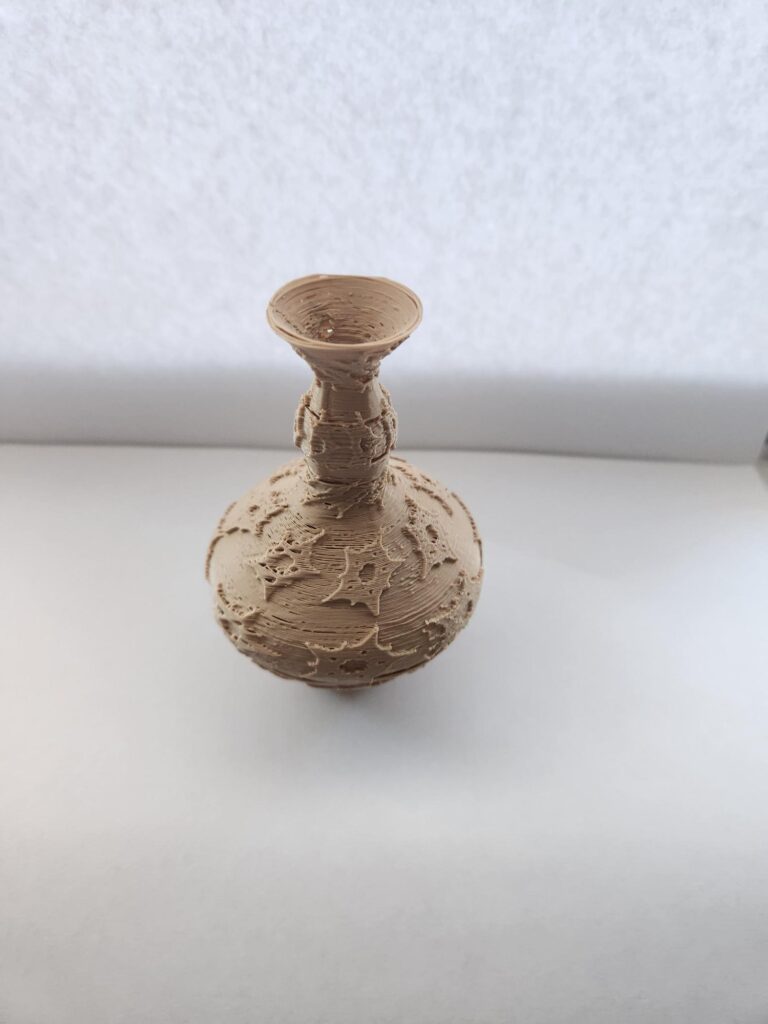
For my fabrication process of printing, I ran into a challenge as the large-scale prints stopped printing halfway as the object disconnected from the bed; nevertheless, they look similar to another genre of Egyptian pottery: bowls. To fix this I changed some Cura settings where I changed the skirt (outline that surrounds part of the object to bed) settings. I set the value of the skirt line count to 10 and the skirt distance to 0. This tip was recommended by my peer Liz Courts.
GrasshopperFile: https://handandmachine.org/classes/computational_fabrication/wp-content/uploads/2023/12/RaneemRamadanFinalProject.gh
Rhino Zip File: https://handandmachine.org/classes/computational_fabrication/wp-content/uploads/2023/12/RaneemRamadanFinalProject.zip
Outcome
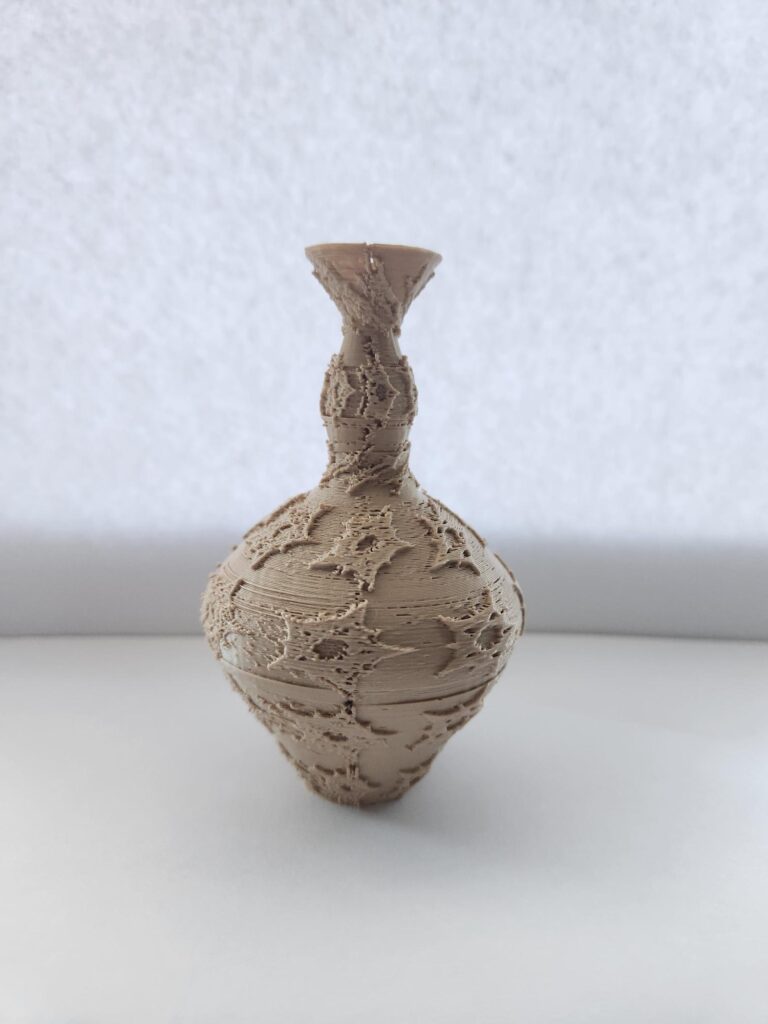
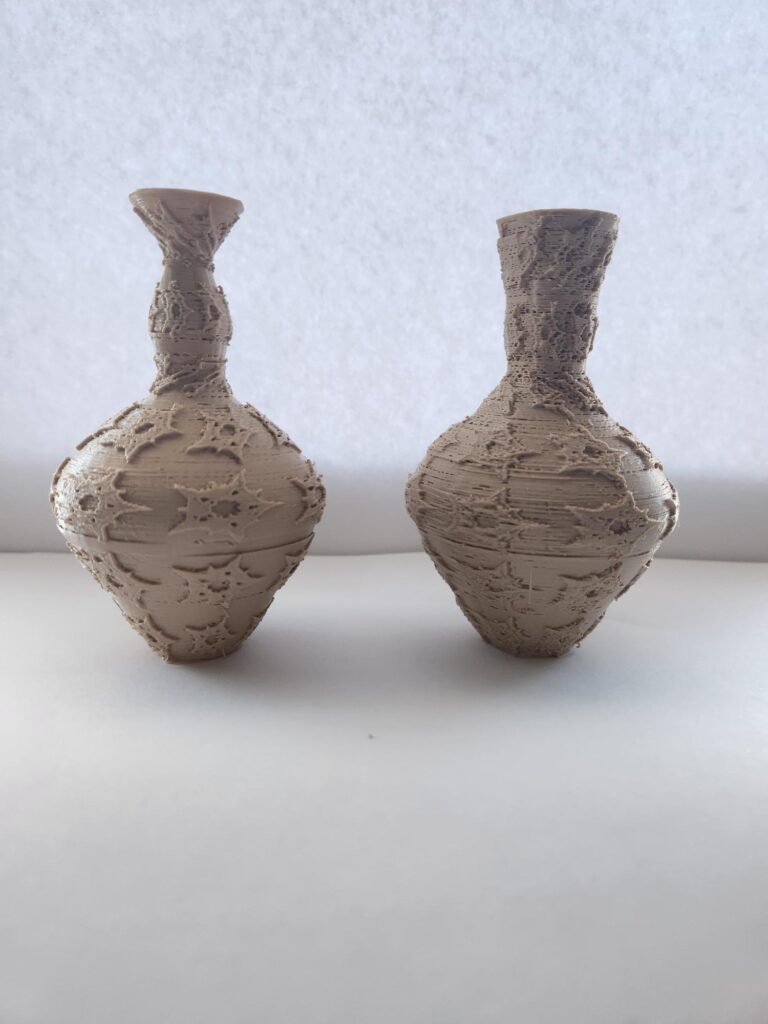
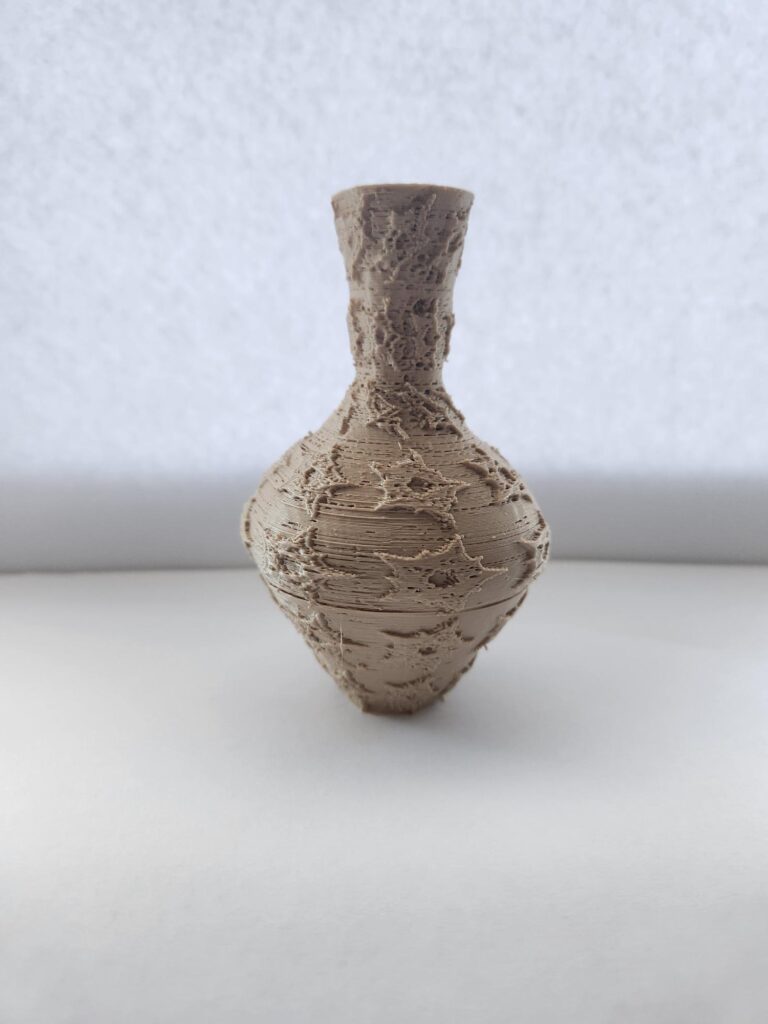
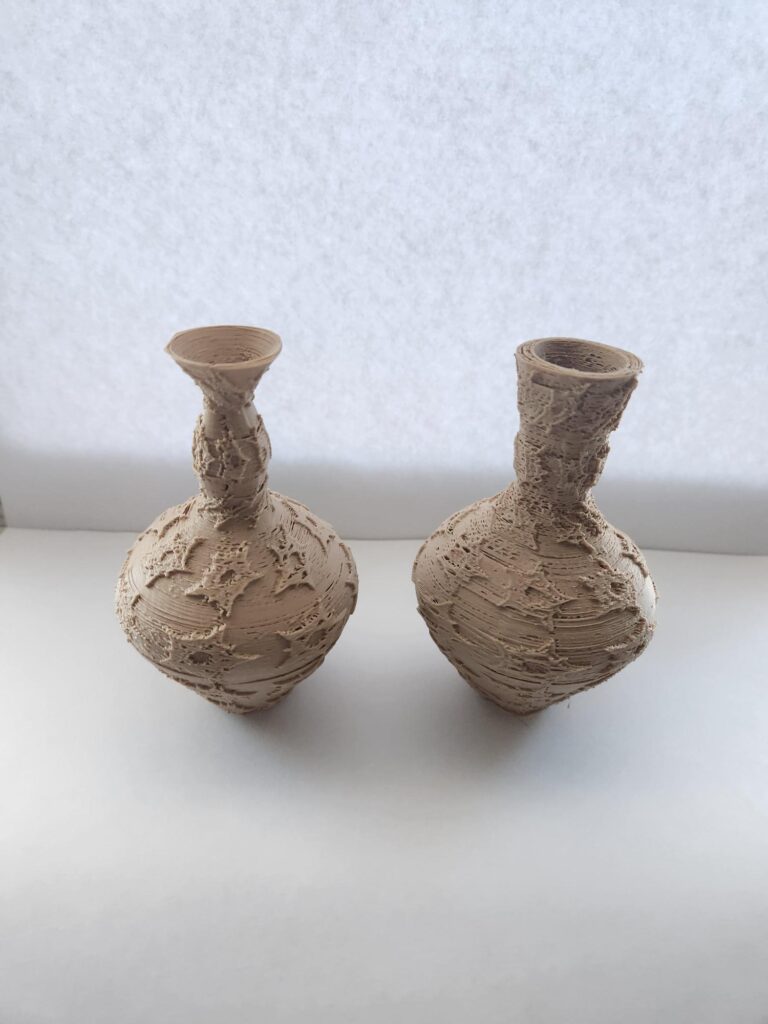
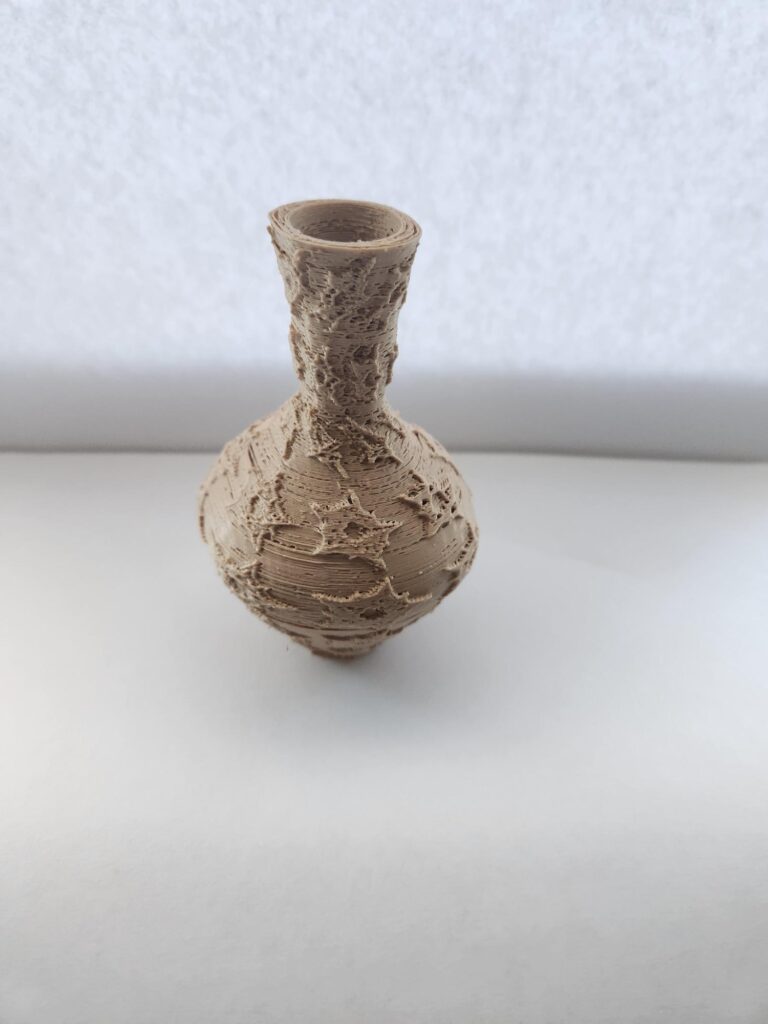
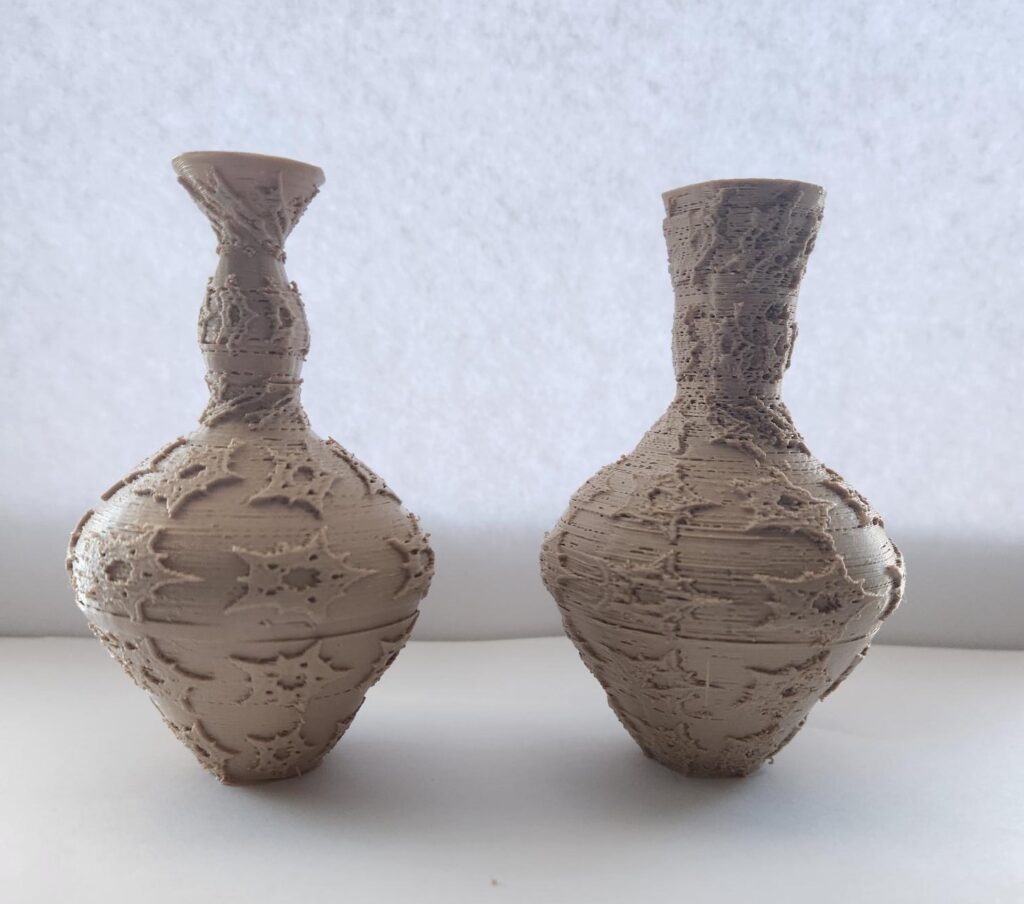
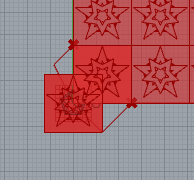
The outcomes of my project met my expectations as the star shape ended up printing clearly on the surface of the Olla in a rather lovely pattern. The prints also showed how the start pattern was printed based on the movement of the twist. Therefore the stars appear twisted on the left side of the Olla and the stars appear straight on the right side of the Olla. I ended up using my ‘failed’ prints as part of my project’s success as I liked how they turned out as seen below.

Future Work
If I had more time, I would have created more versions of the Egyptian pottery design and more Moroccan geometry surfaces. There are different varieties of what an Olla could look like, from handles to narrow bases. Additionally, there are many more Moroccan geometric designs and patterns I could make. I also want to experience printing in clay one day.
Reflection
This project was the one I enjoyed the most as it taught me a great amount of things. I especially learned that it is sometimes okay to redo/rewrite the code all over again to debug and understand it. I also learned that I, at times, need to get off the code and work on understanding the code on paper- which worked greatly.
Overall, I loved how my project turned out as it presented significant details. If I had more time I would have printed on a much larger scale but unfortunately, my printer kept messing up with the sticking on the bed process despite using a glue stick. When I finally found a solution I ran out of time. Nevertheless, I am happy with the final prints and find them really pretty.