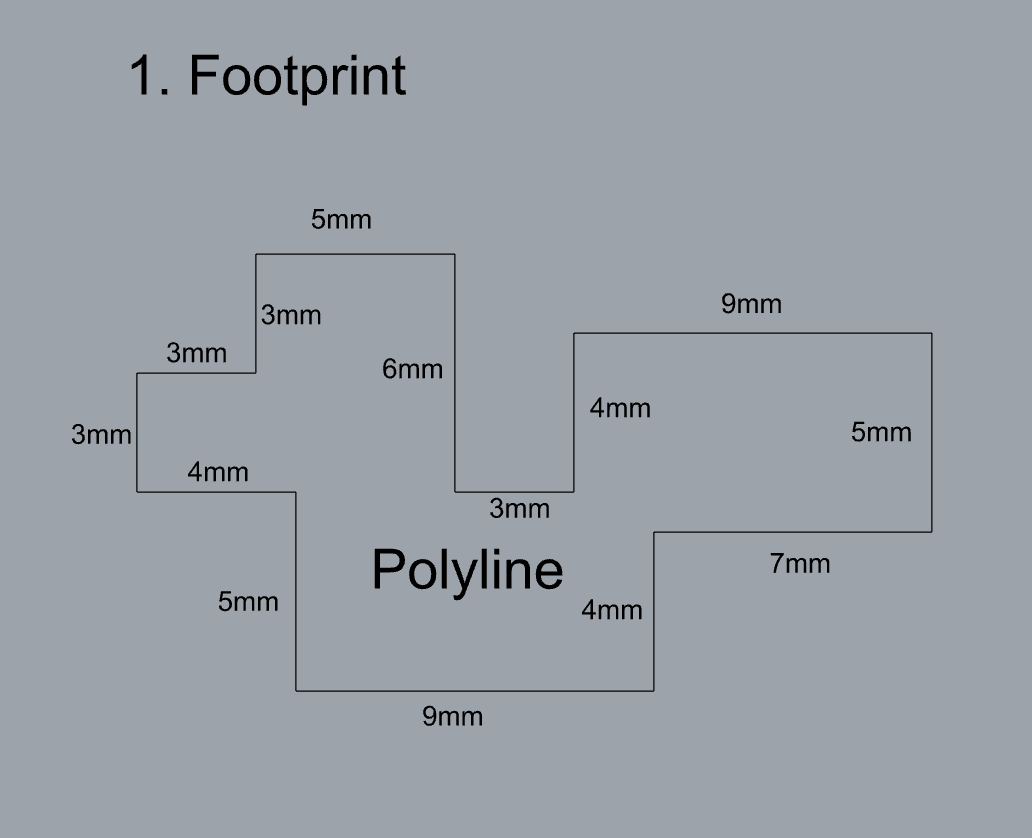
- Make the specific footprint below.
- Commands: Polyline
-
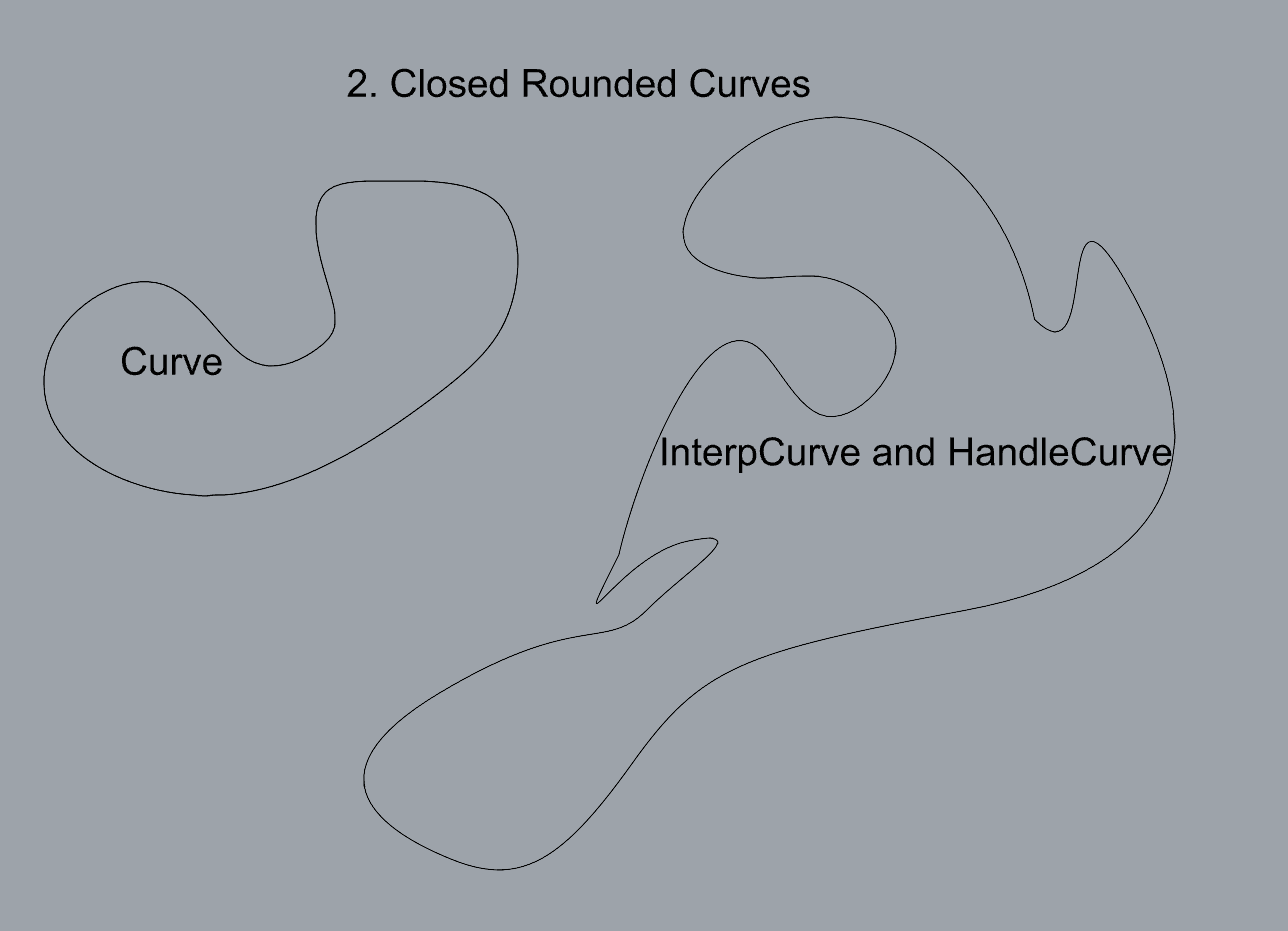
- Make 2 closed rounded curves using the various curve commands.
- Commands: Curve, InterpCurve, HandleCurve
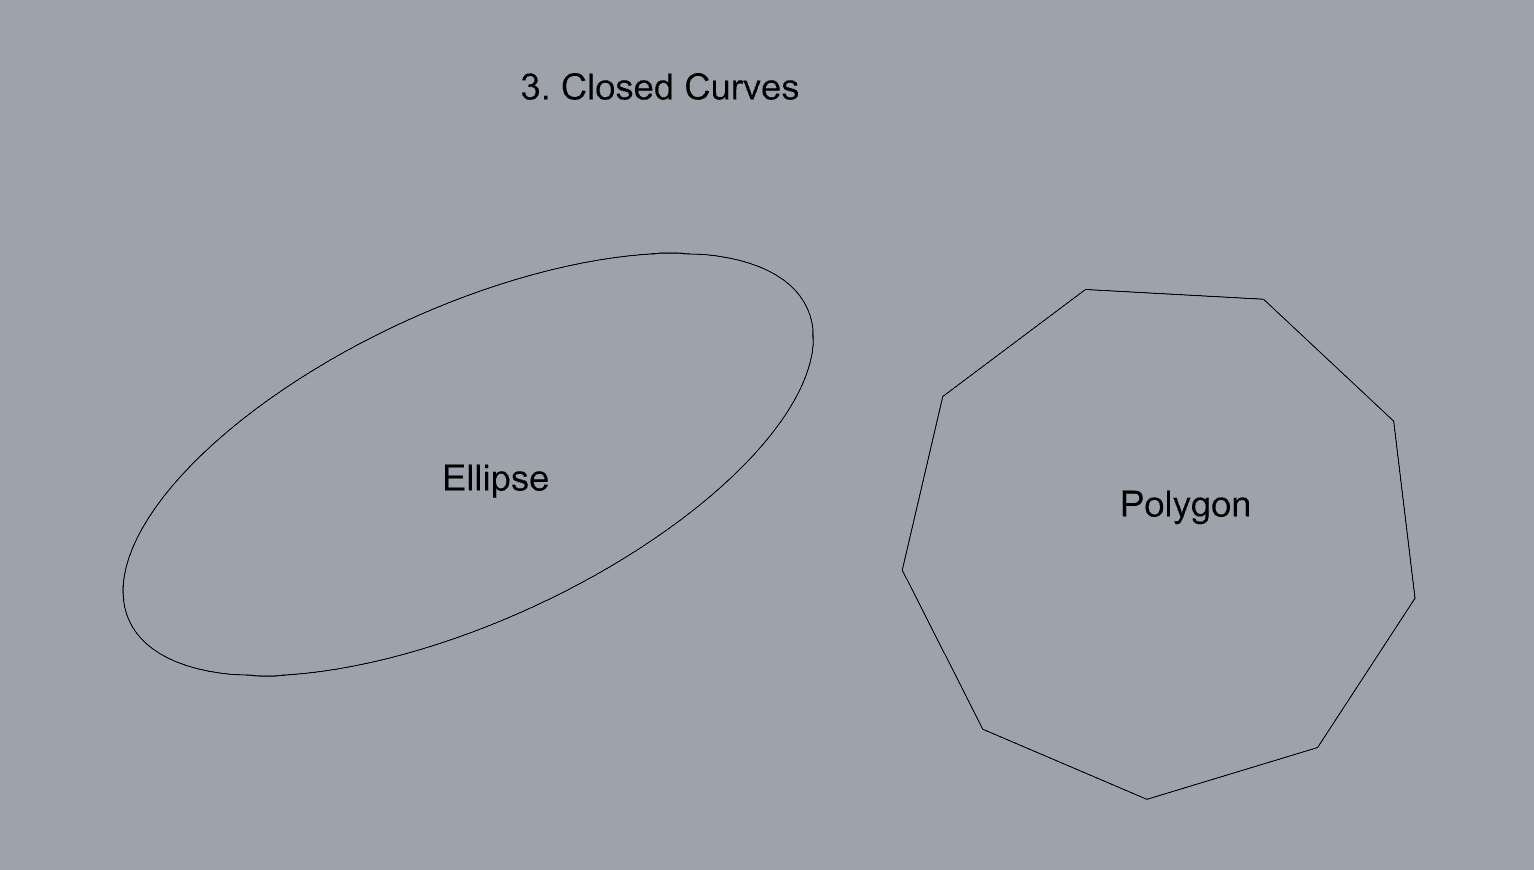
- Make 2 closed curves using polygon, ellipse, or circle
- Commands: Circle, Ellipse, Polygon
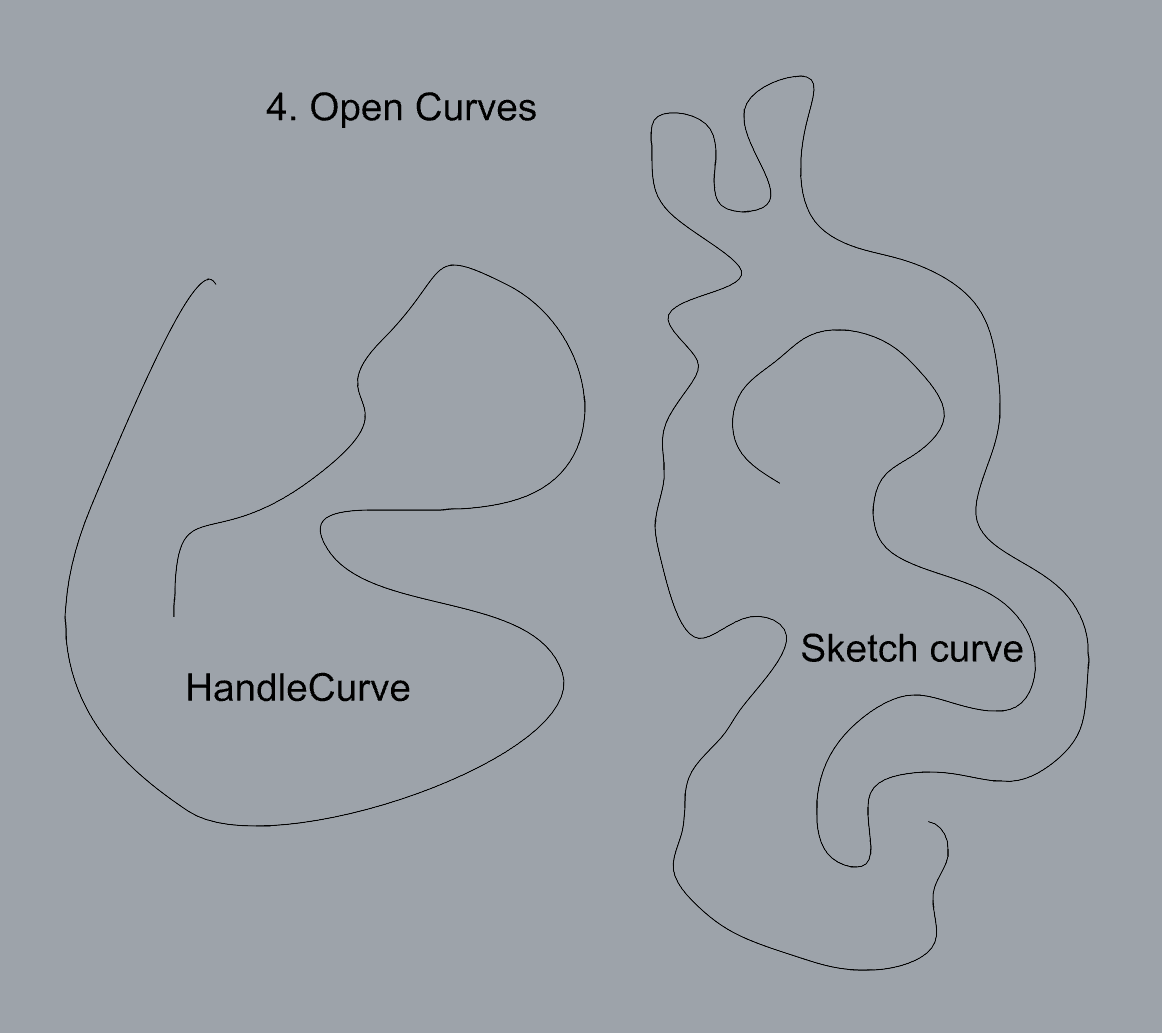
- Make 2 open curves
- Commands: Curve, InterpCurve, HandleCurve, Sketch
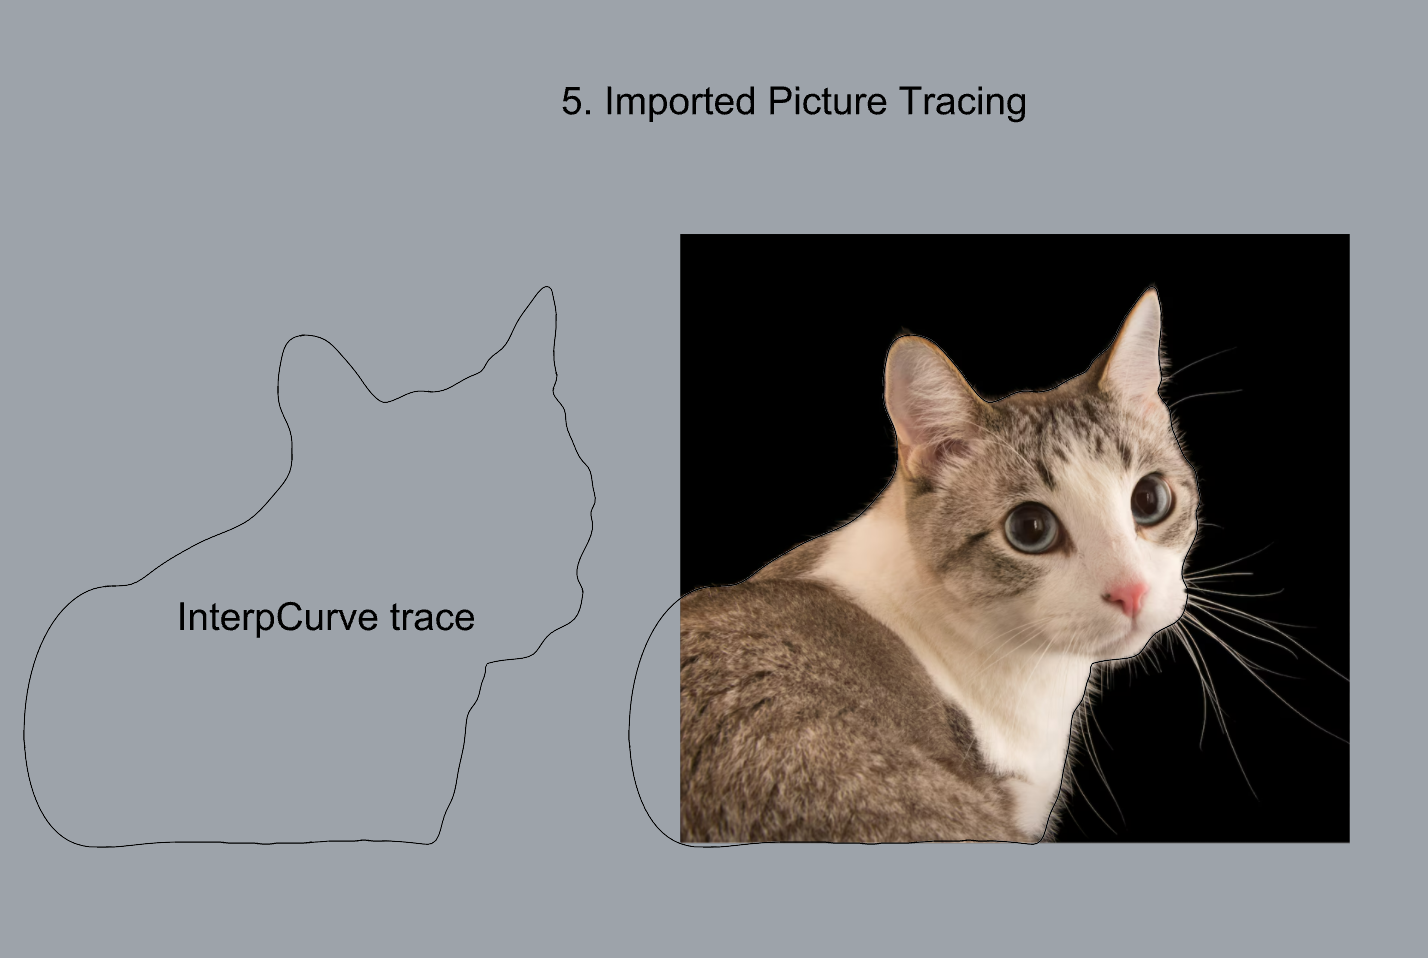
- Import a picture and trace an image
- Commands: Picture, InterpCurve
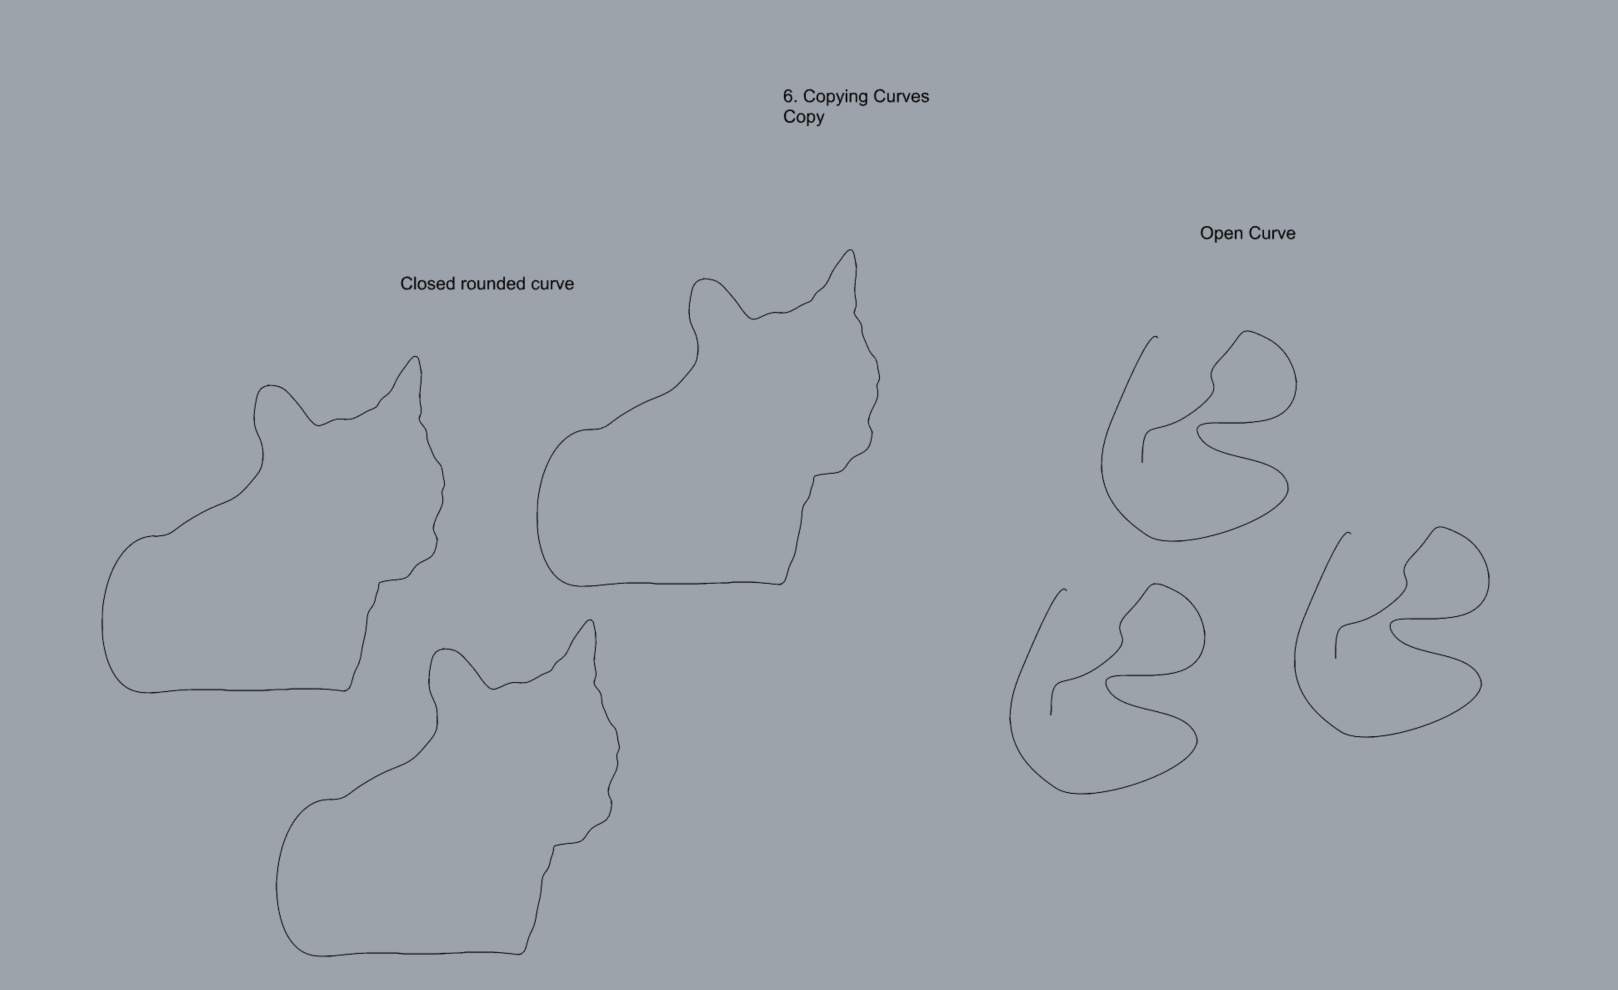
- Pick one open curve, and one closed rounded curve and make three copies of each.
- Commands: Copy
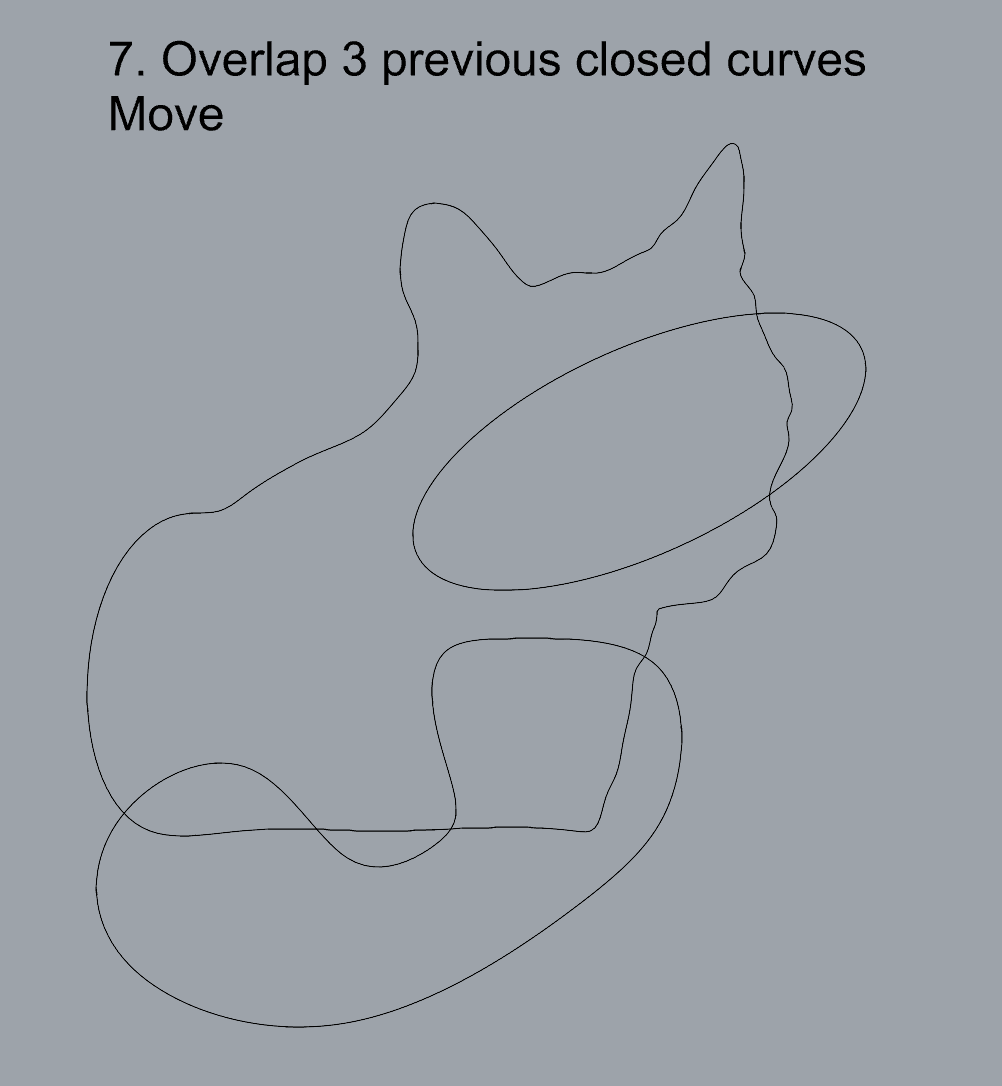
- Take at least 3 of your closed curves and overlap them to create a new shape
- Commands: Move
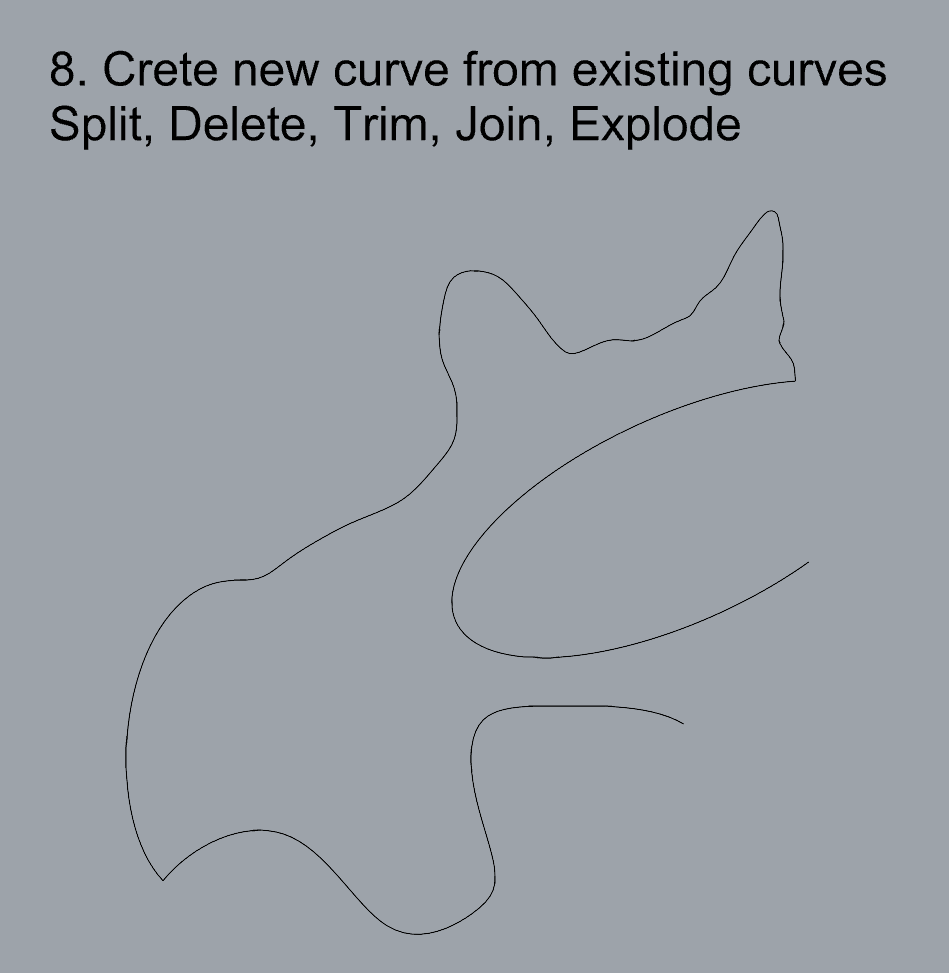
- Use split, delete, and trim to combine these curves into one open curve
- Commands: Split, Delete, Trim, Join, Explode
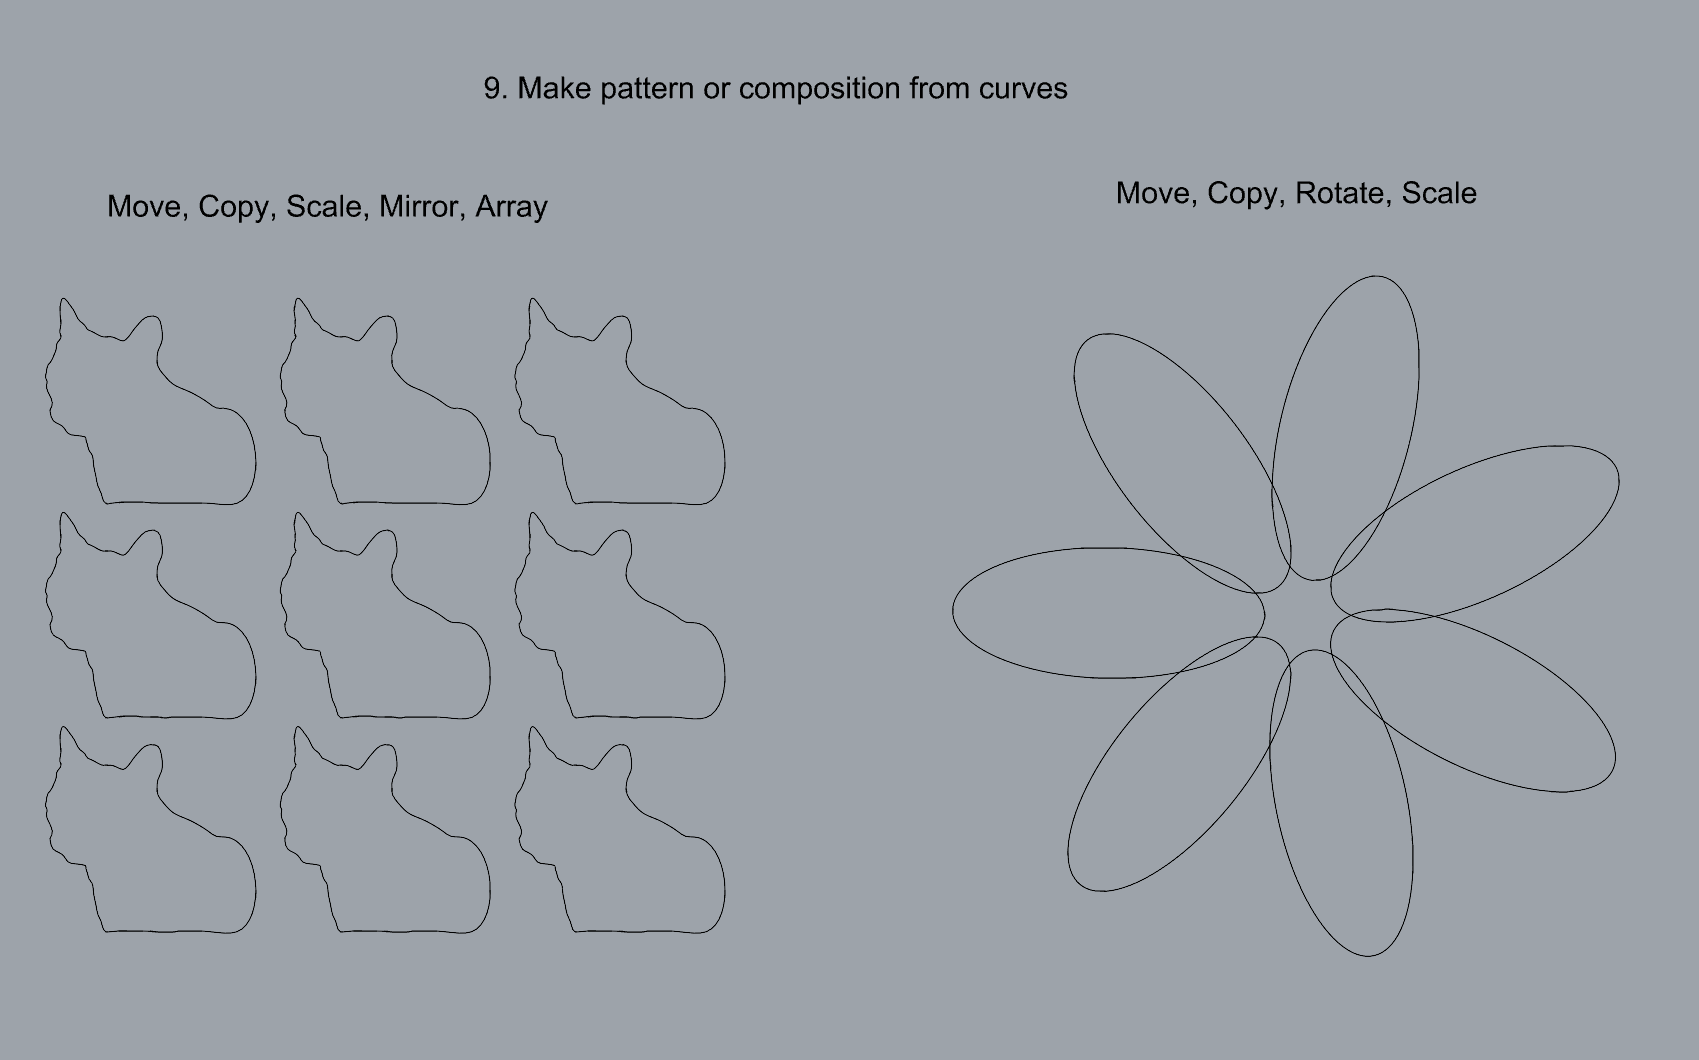
- Take at least two curves and use various transformations make a pattern or composition.
- Commands: Move, Copy, Rotate, Mirror, Array, Scale, Offset, Fillet, FilletCorners
- Organize your Rhino file so each step is clear. Use the Text command to label each step and the commands you used. Add a link to your FirstnameLastname_Curves file at this point in your post.
Part 2: Surfaces
Open a new Rhino File and practice the surfaces commands below by making two different surfaces for each command. Organize your Rhino file so each step is clear. You may want to use some of the curves you modeled in Part 1. Use the Text command to label each step and the commands you used.
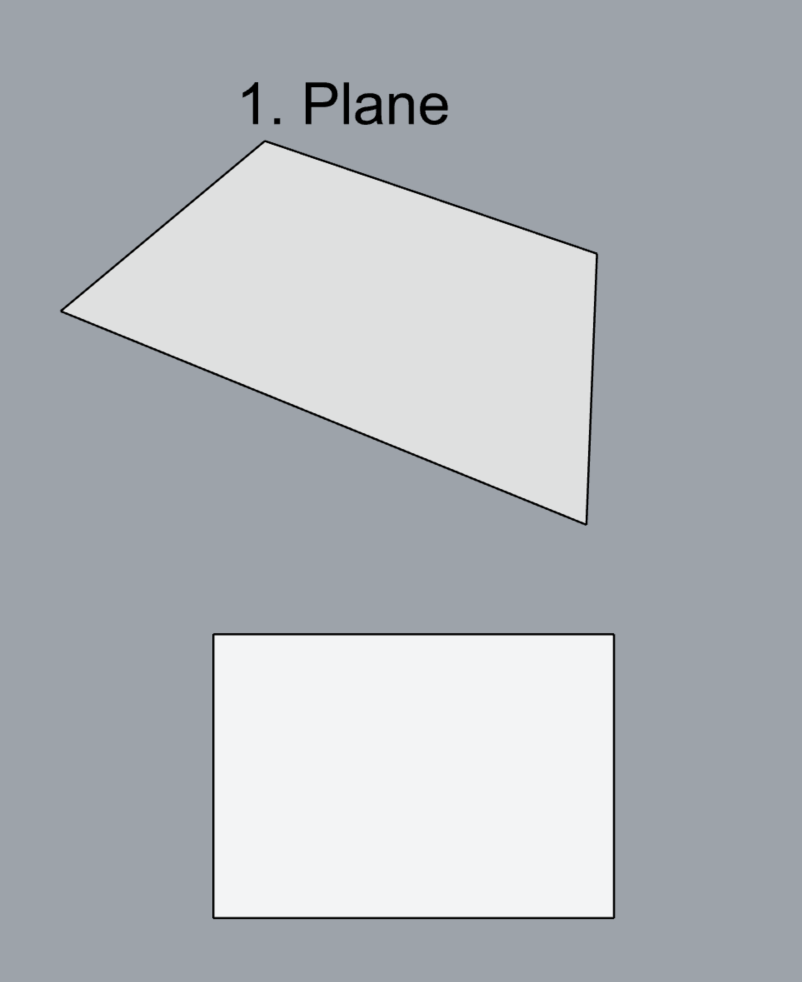
- Plane
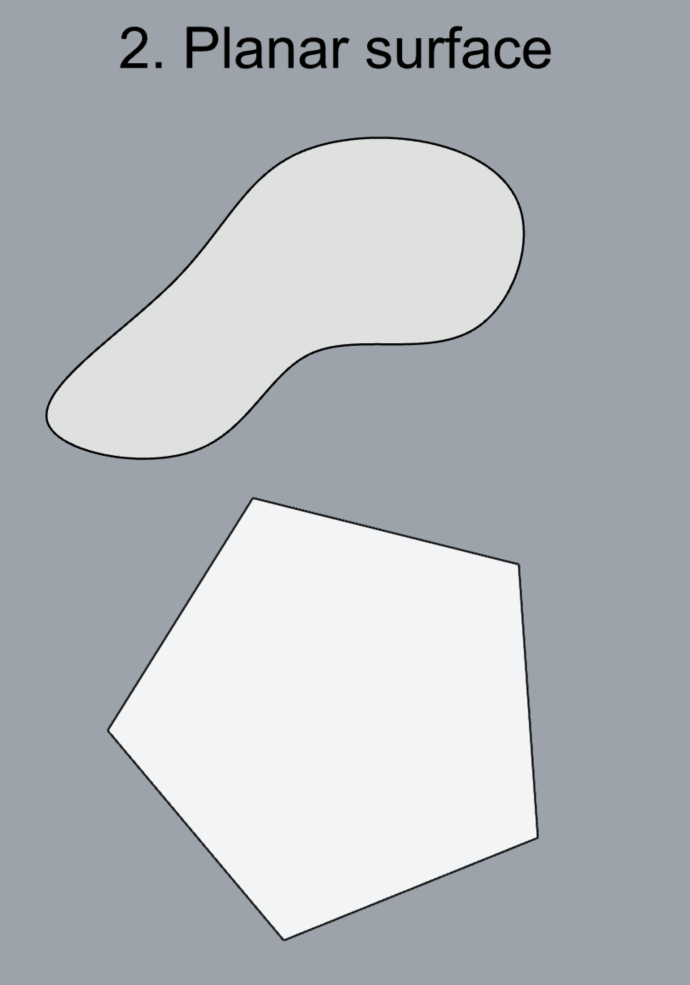
- PlanarSrf
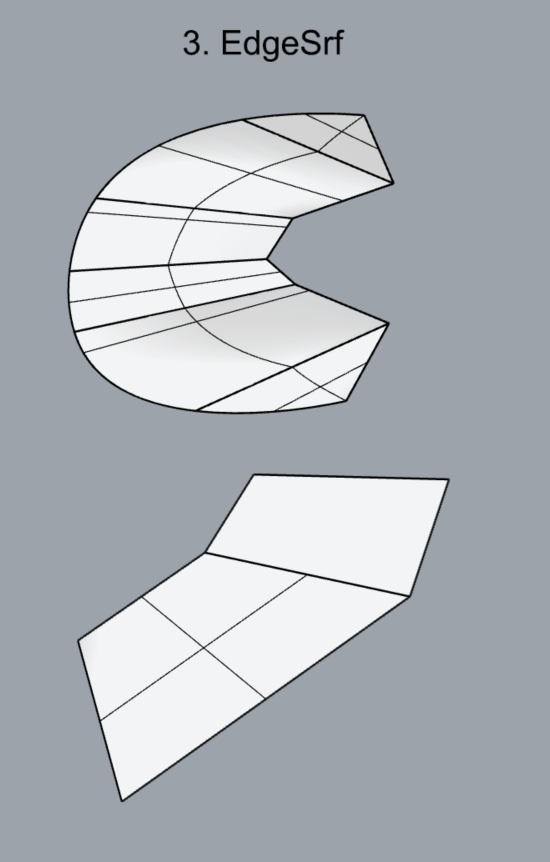
- EdgeSrf
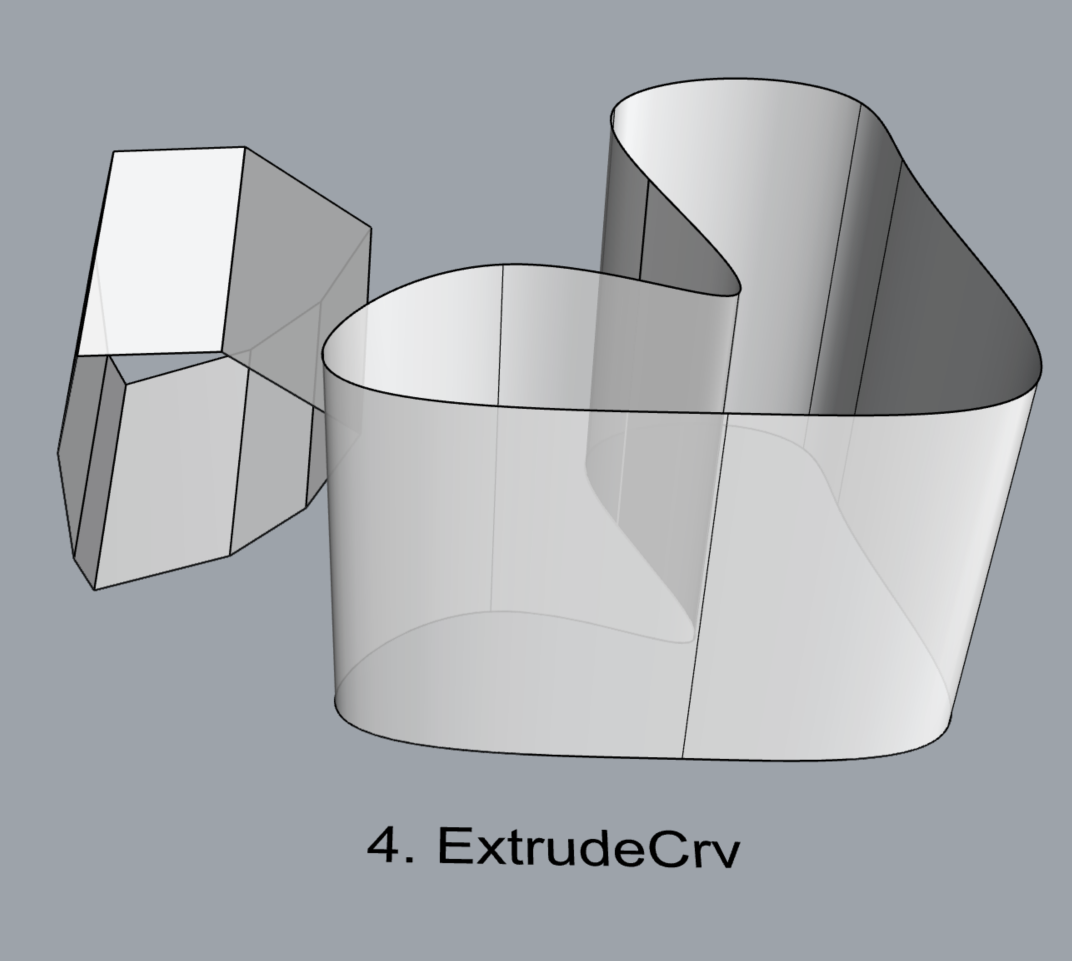
- ExtrudeCrv
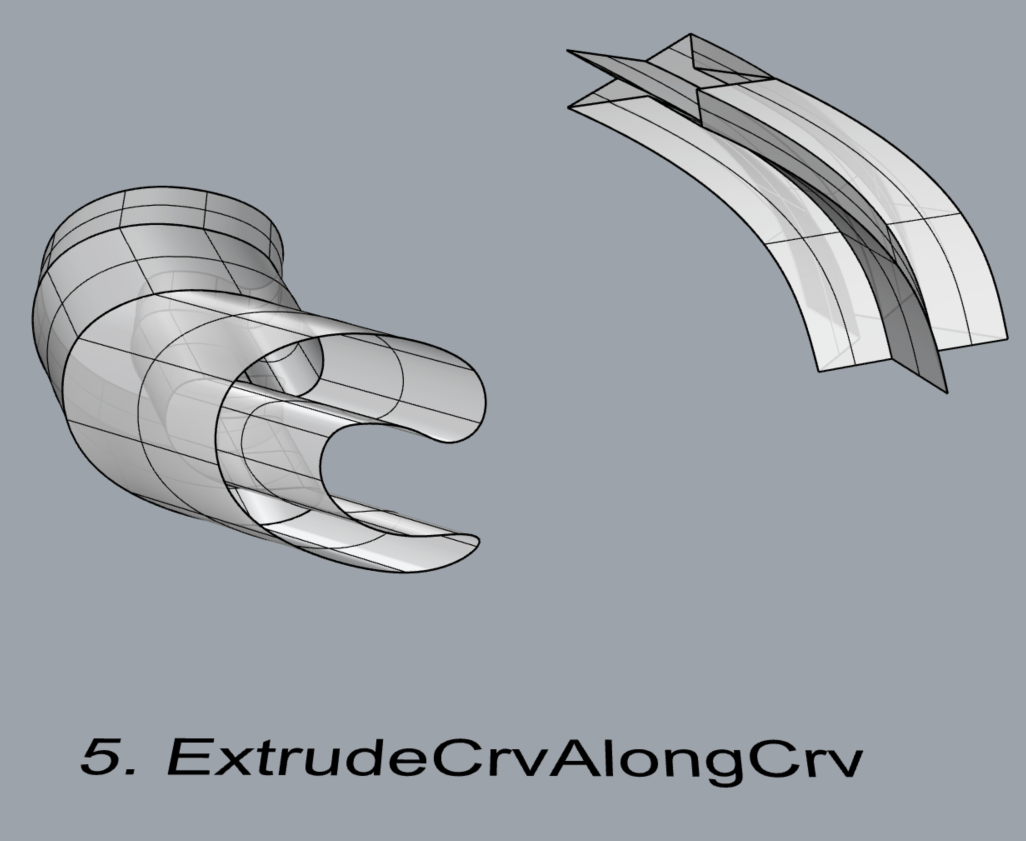
- ExtrudeCrvAlongCrv
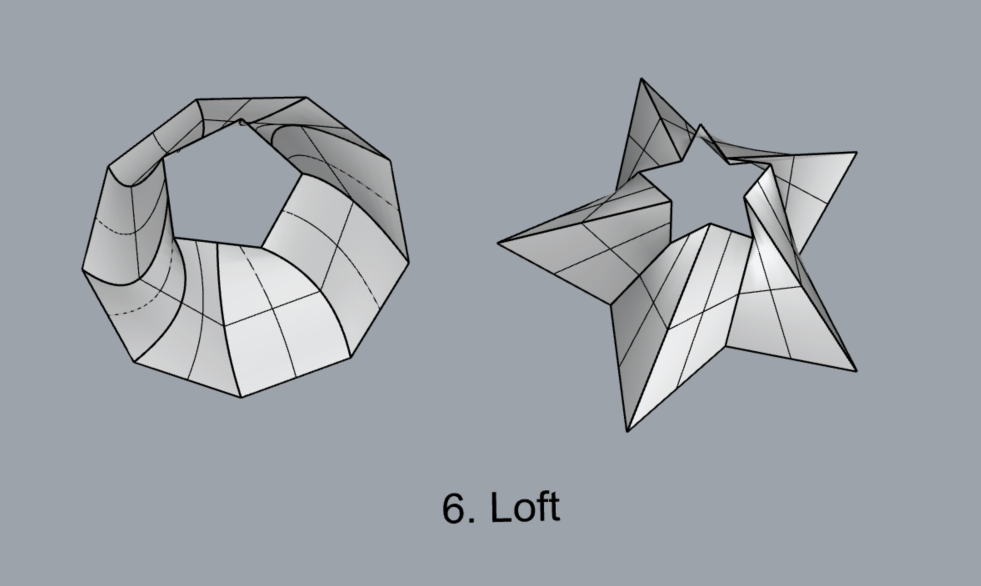
- Loft
- Sweep1

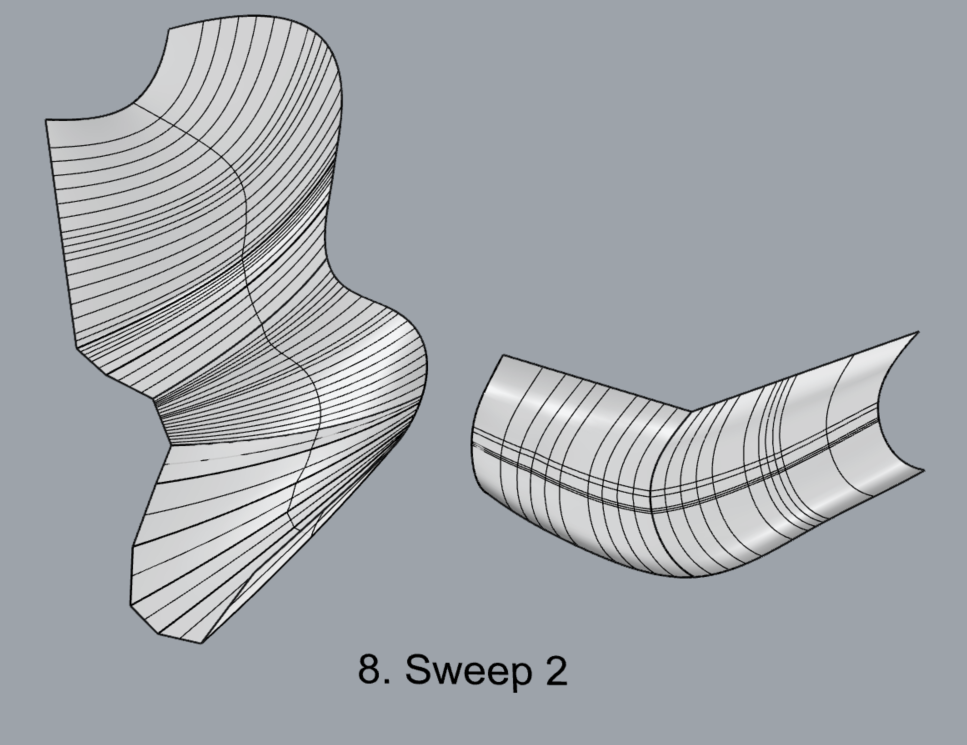
- Sweep2
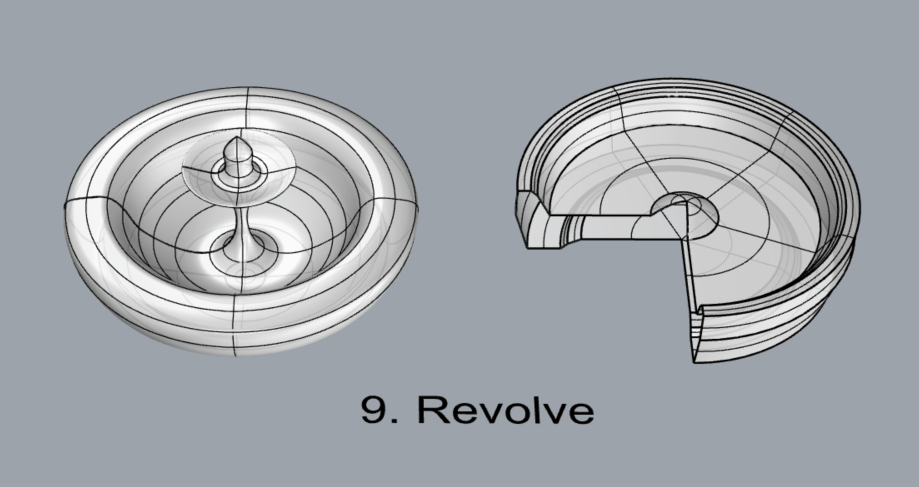
- Revolve
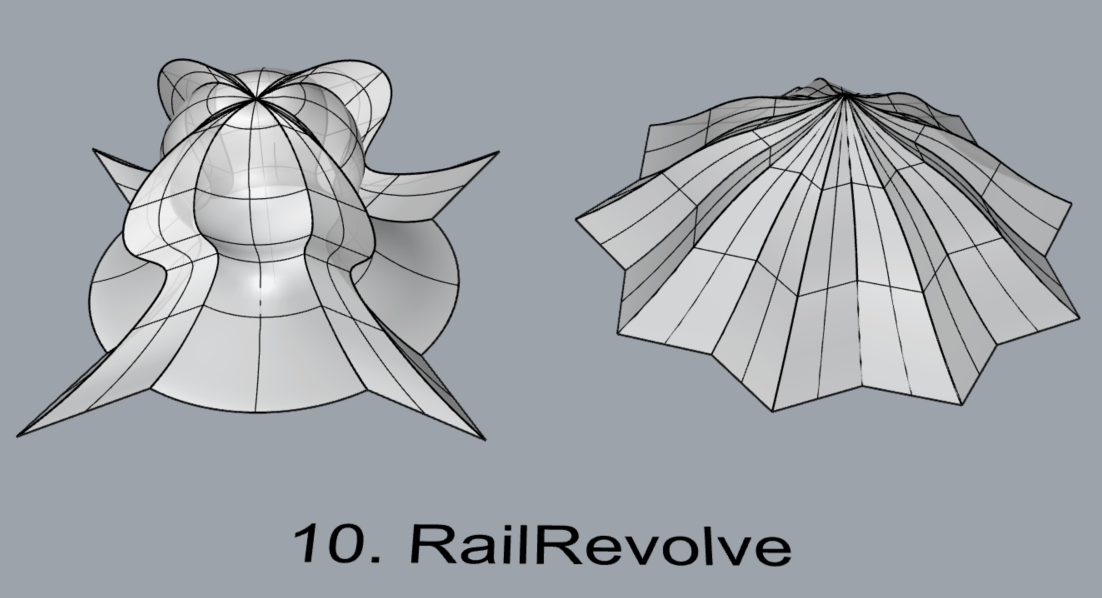
- RailRevolve
- Add a link to your FirstnameLastname_Surfaces file at this point in your post.
Part 3: Solids
Open a new Rhino File and practice the solids commands below by making two different solids for each command. You may want to use some of the curves and surfaces you modeled in Parts 1 and 2. Organize your Rhino file so each step is clear. Use the Text command to label each step and the commands you used.
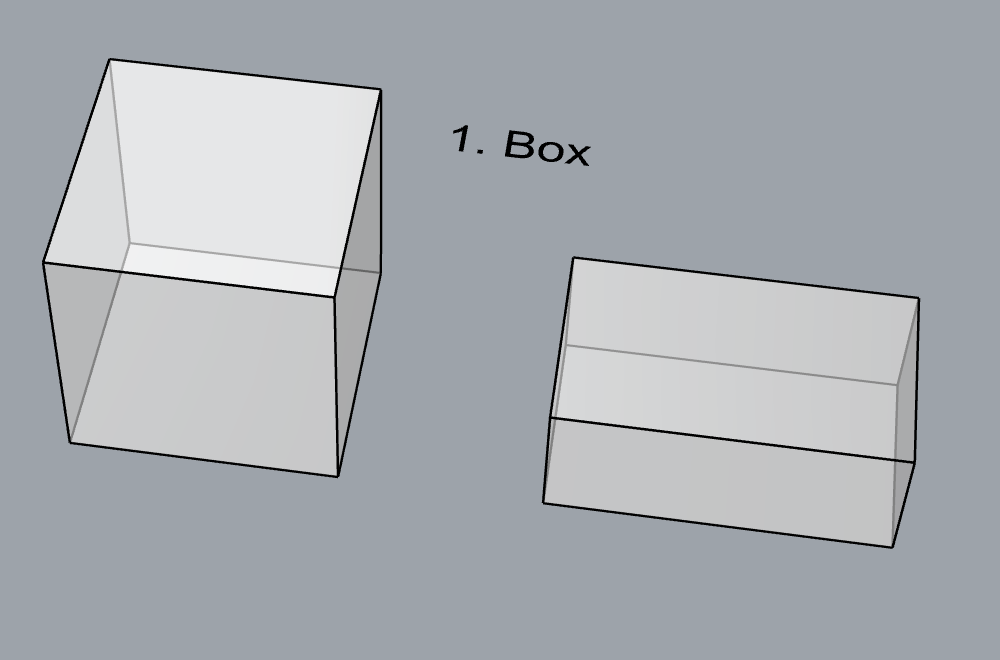
- Box
- Cylinder

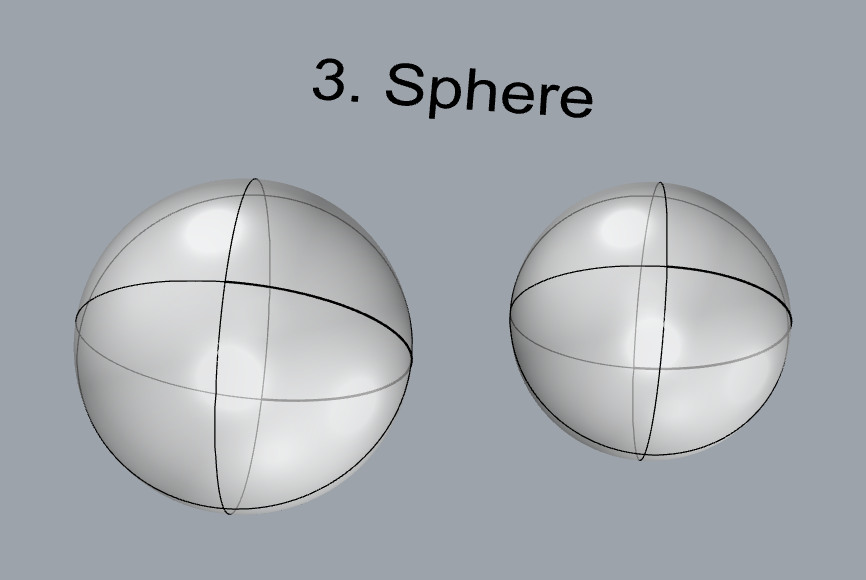
- Sphere
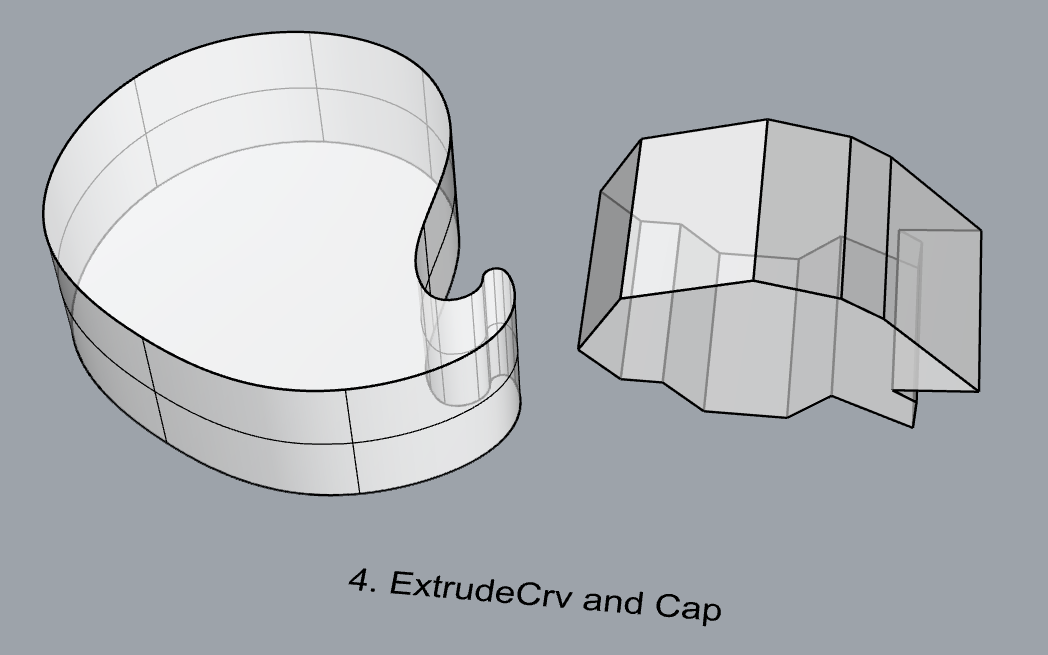
- ExtrudeCrv and Cap
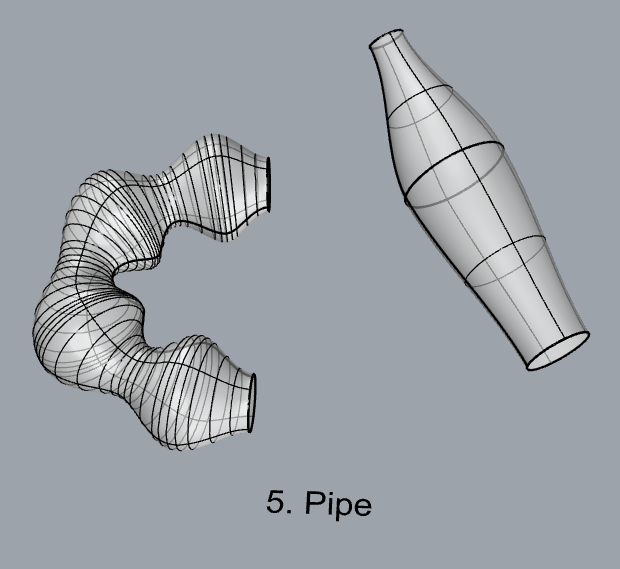
- Pipe
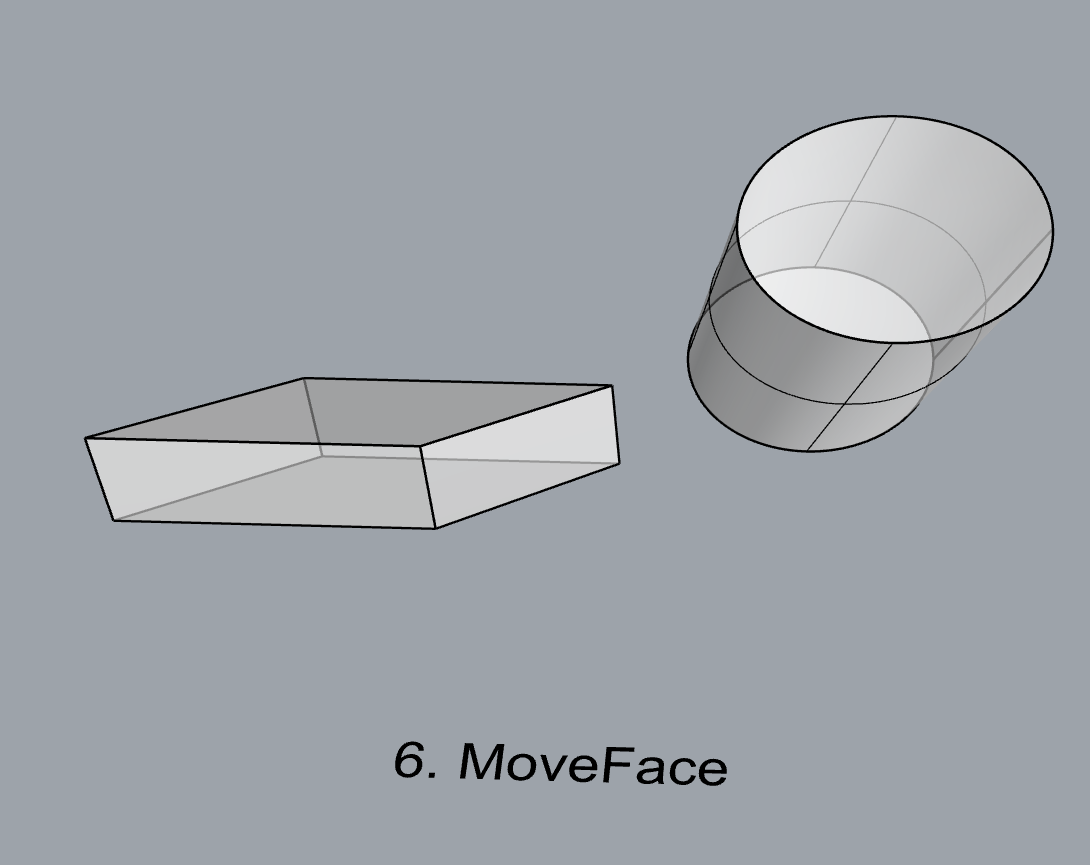
- MoveFace
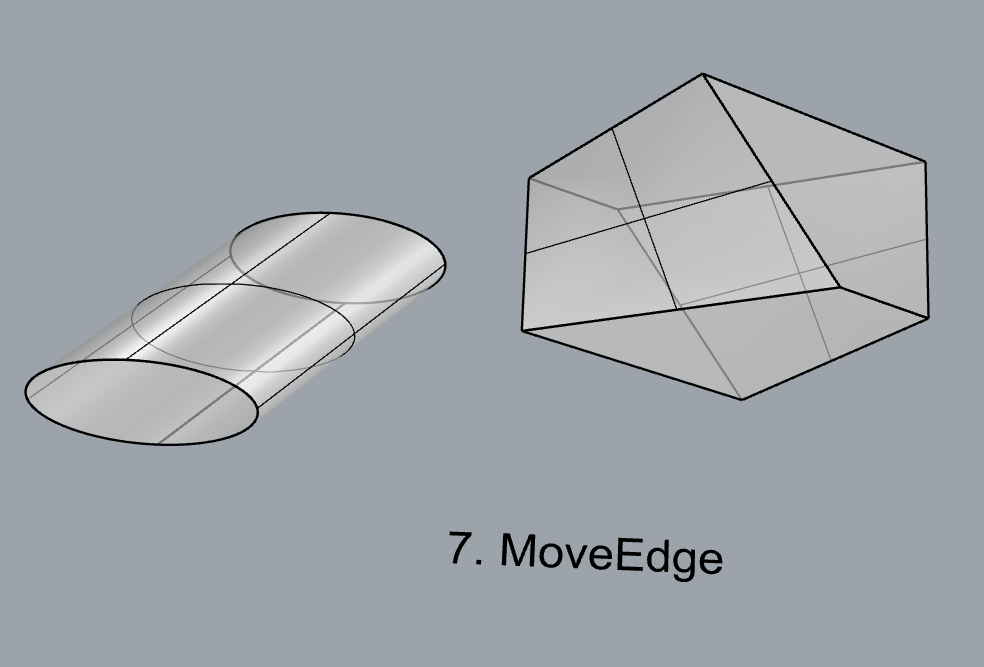
- MoveEdge
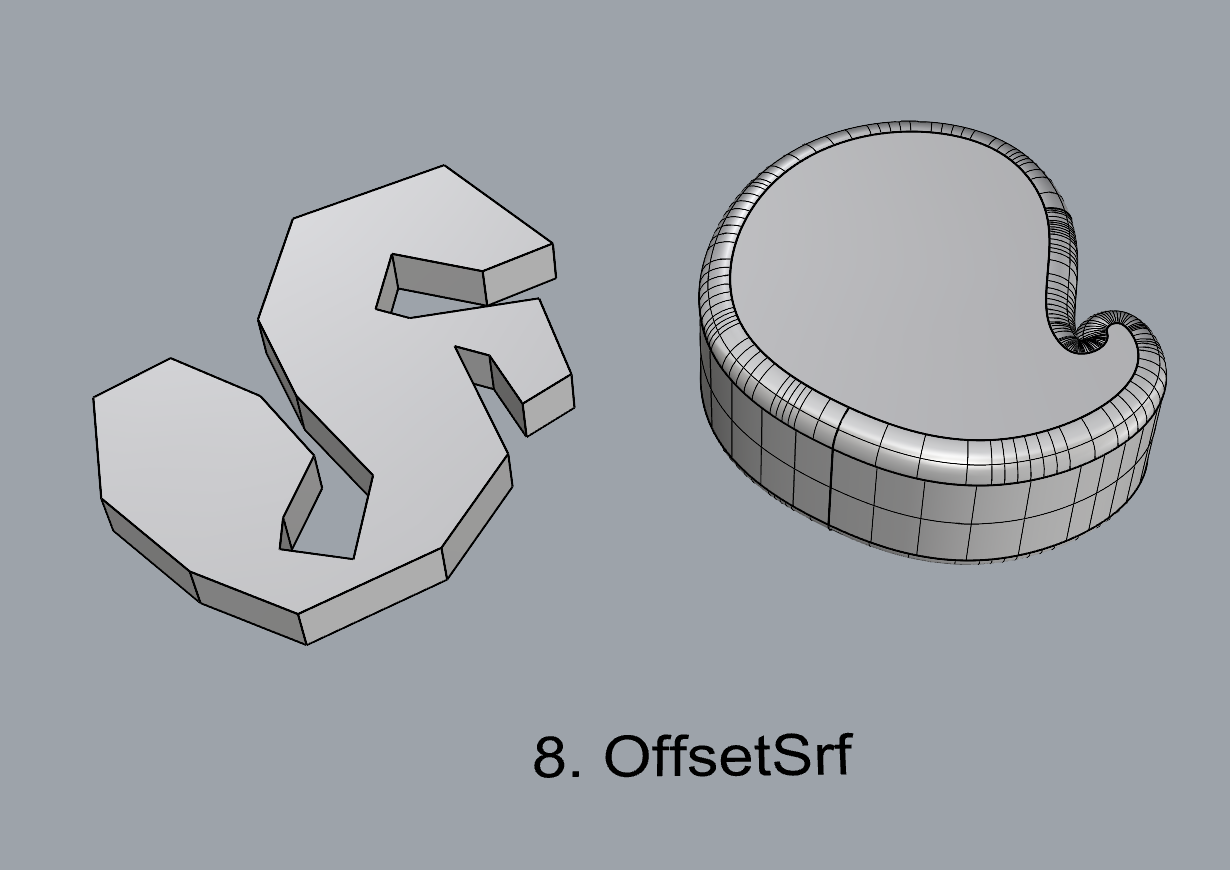
- OffsetSrf
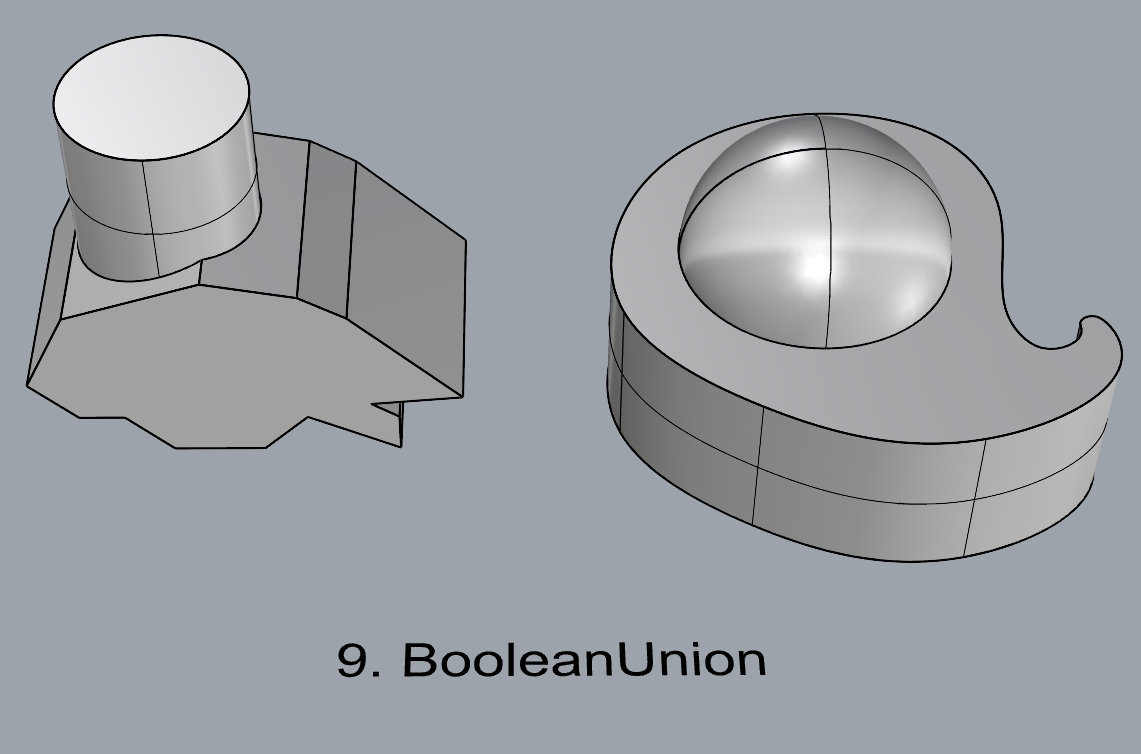
- BooleanUnion
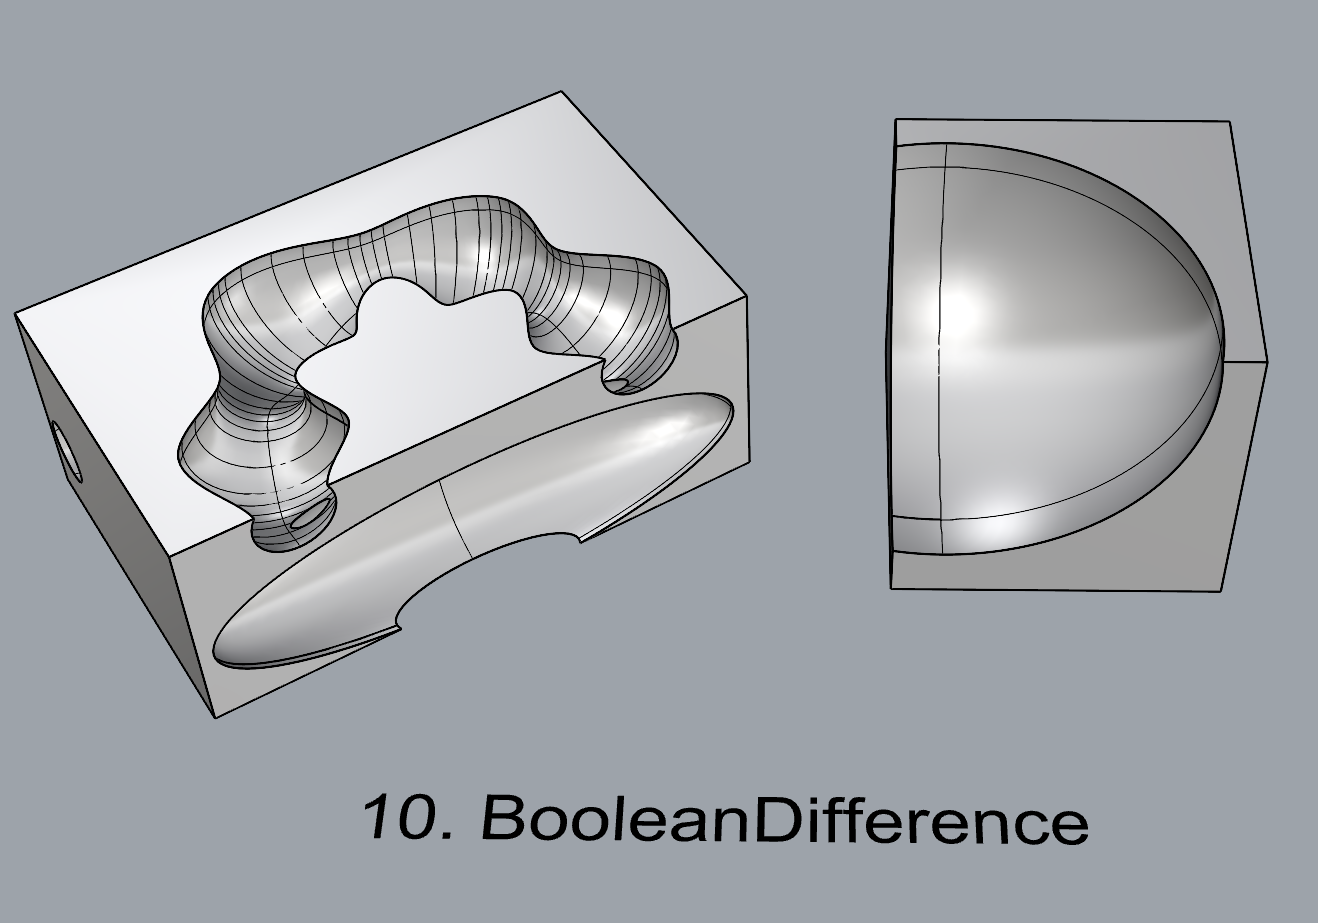
- BooleanDifference
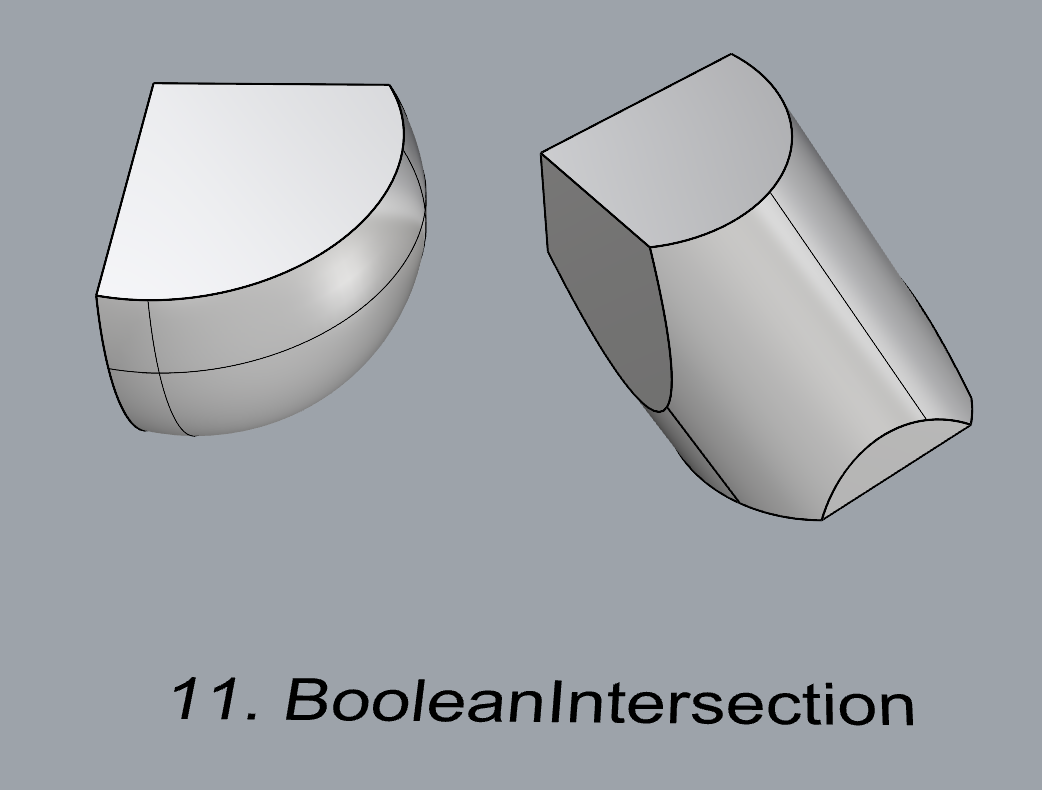
- Boolean Intersection
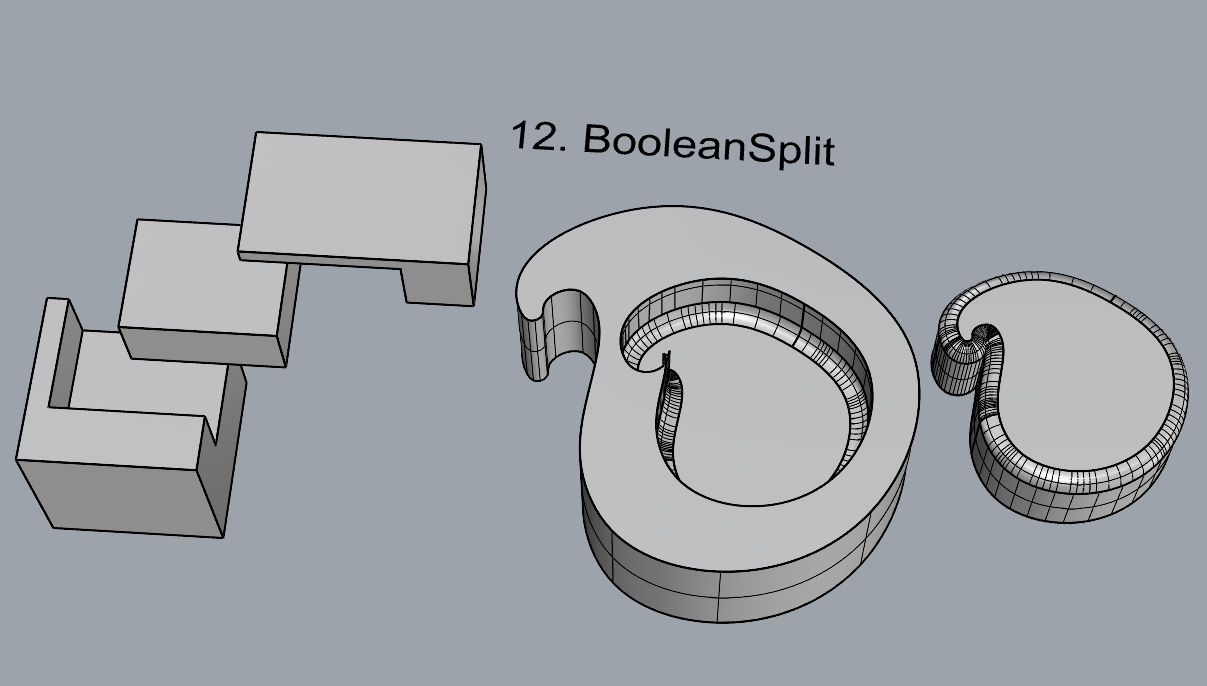
- BooleanSplit
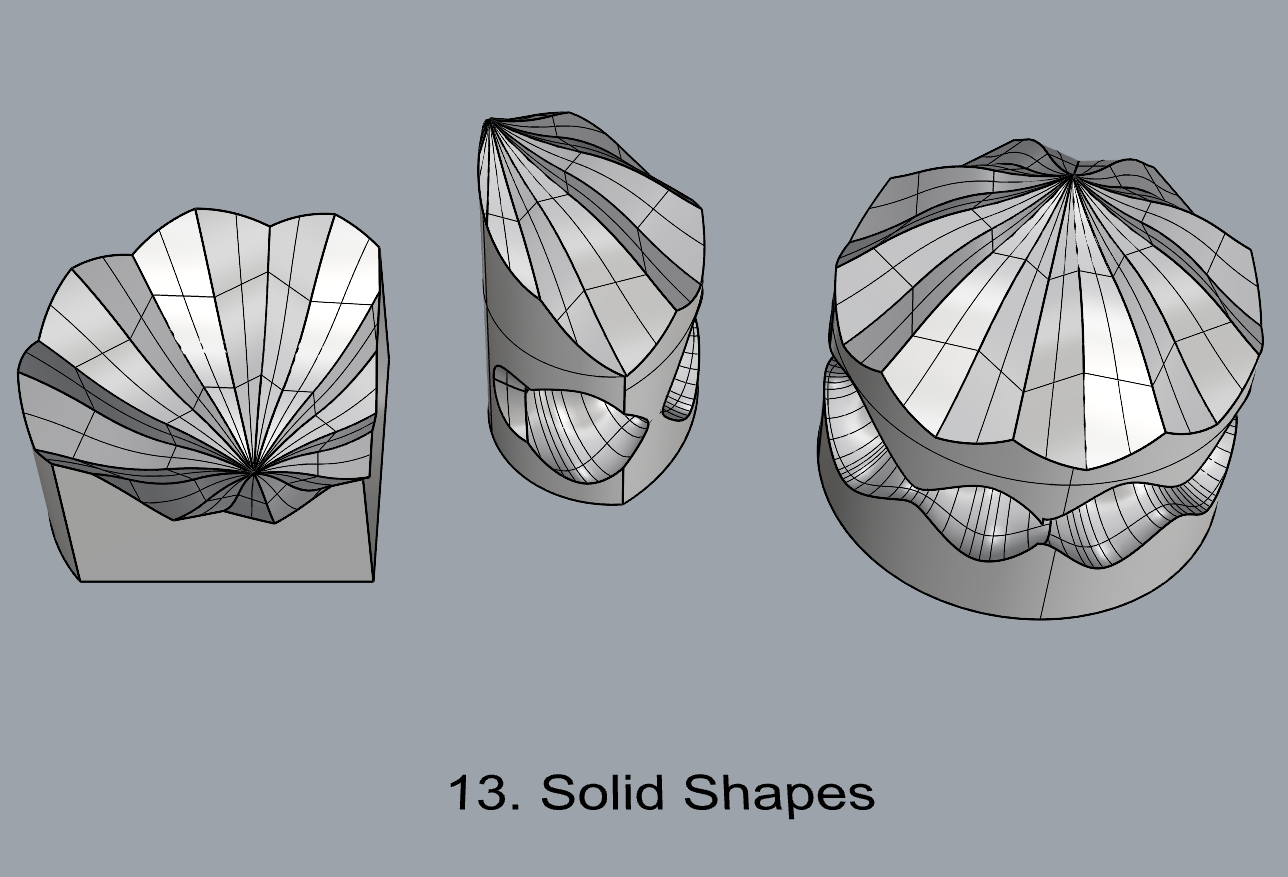
- Using the surfaces and solids you modeled and the Boolean tools, make three solid shapes you find interesting.
- Add a link to your FirstnameLastname_Solids file at this point in your post.
Part 4: 3D Printing
- Pick one of the shapes you created and 3D print it using your 3D printer. Note: to be able to print an object with the 3d printer, it must be watertight. That means that your shape must be a closed form with no naked edges and no holes.
- Export your model in the .stl file format. Import the .stl file into Cura and slice it, generating a .gcode file your printer can interpret.
- Your final print should be at least 3″ x 3″ x 3″ in size. Note: the print doesn’t have to be square, but the total volume should be approximately 9 in^3.
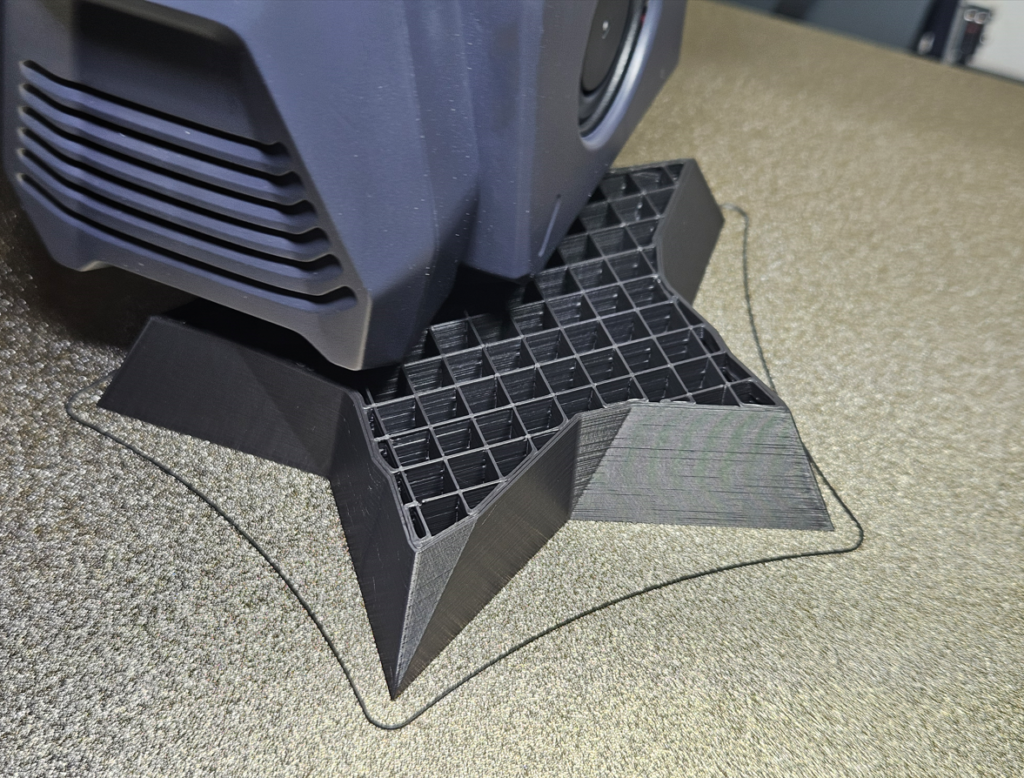
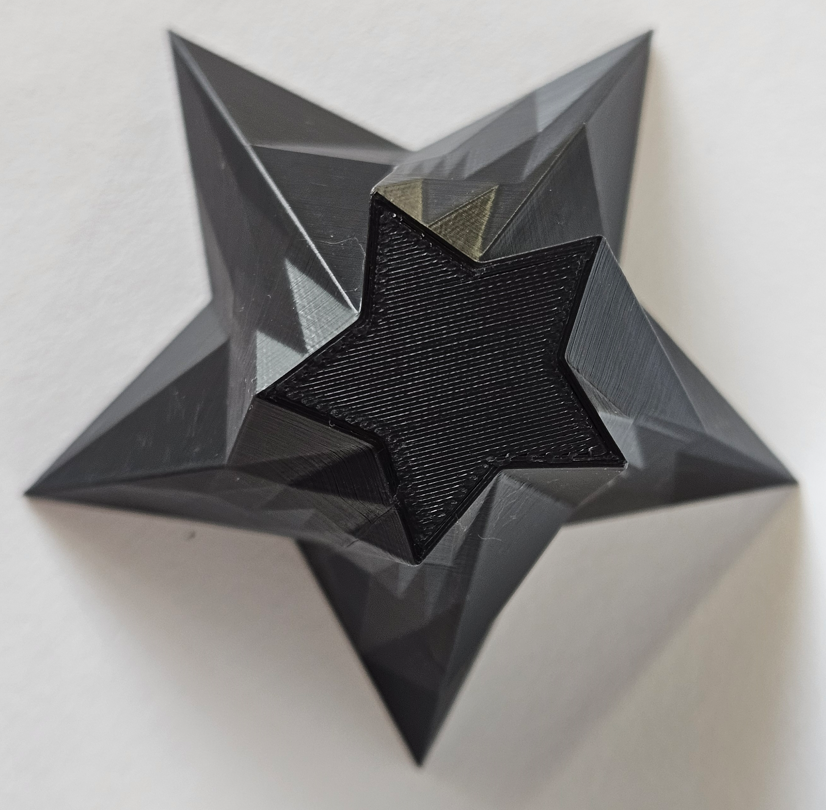
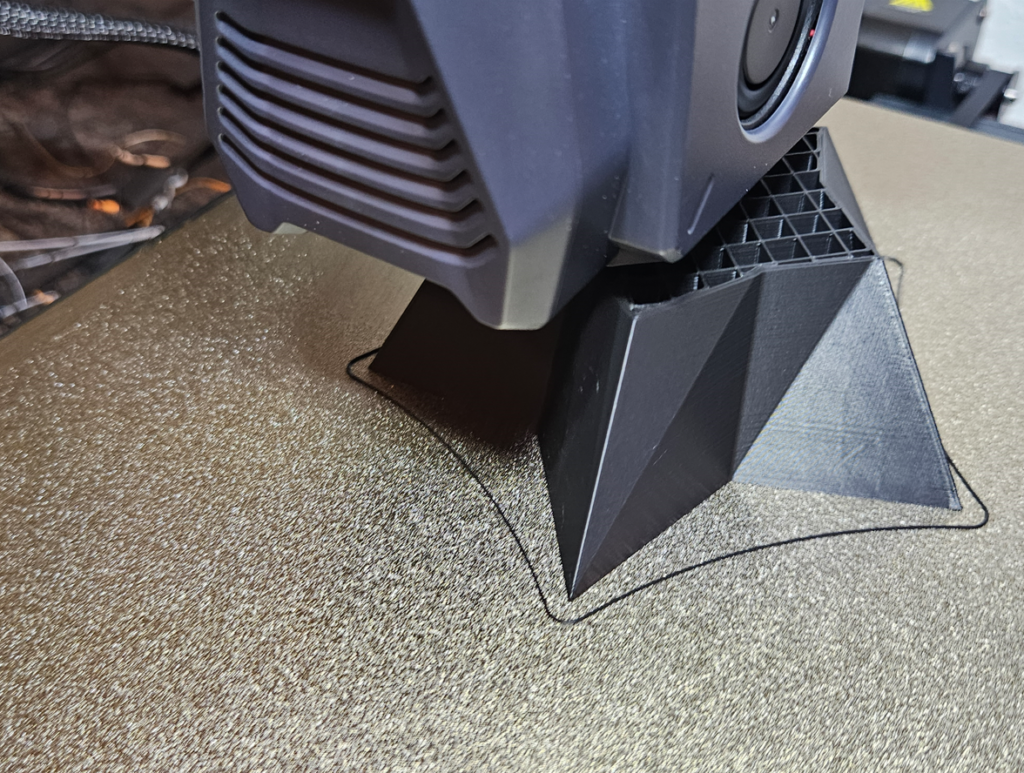
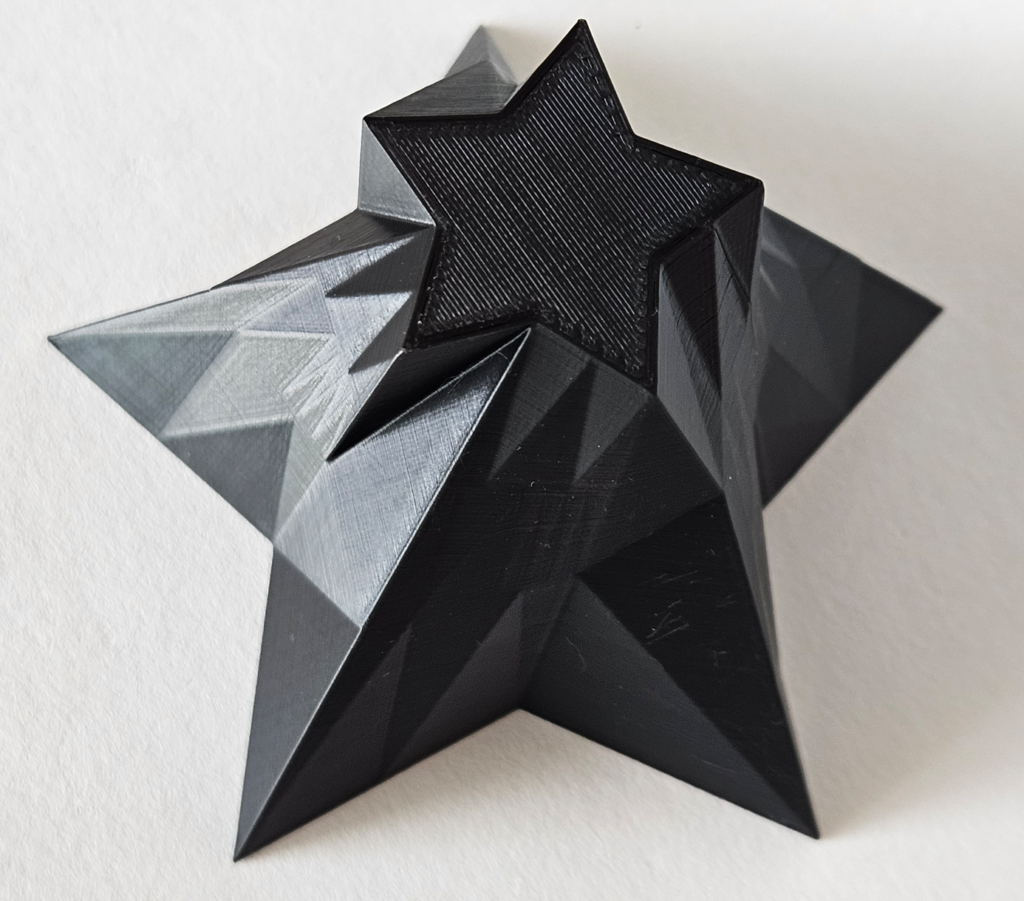
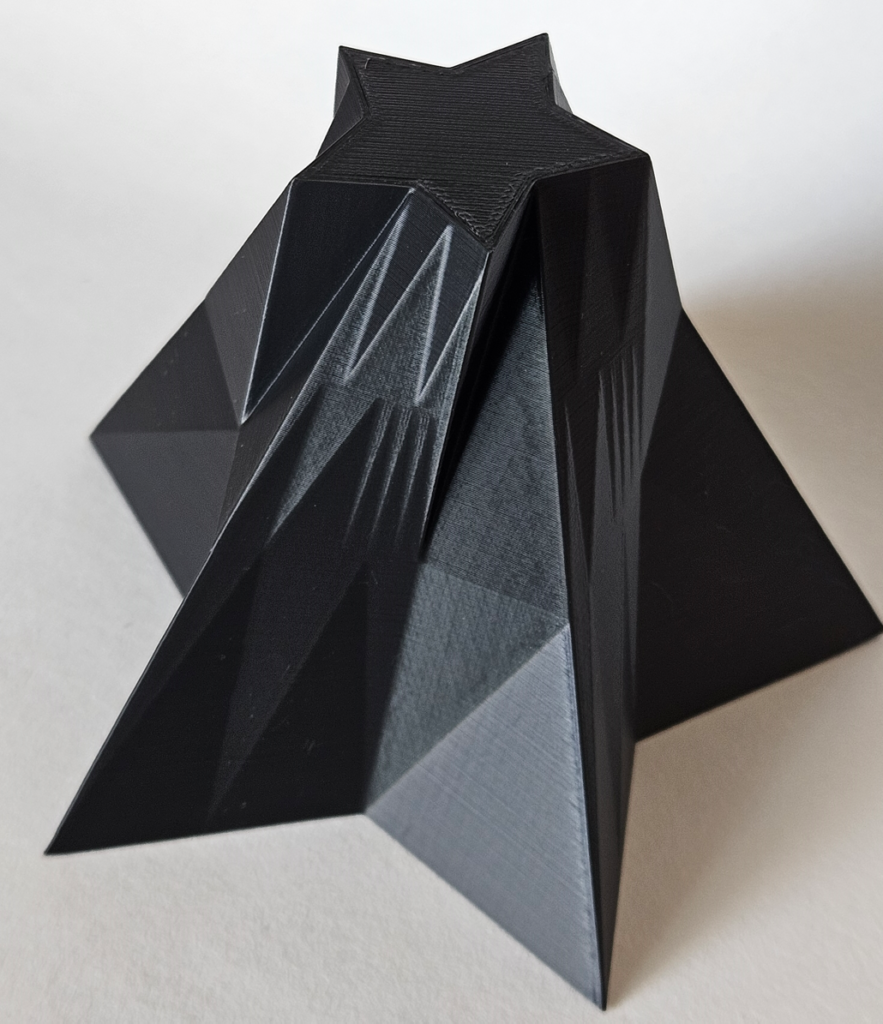
I chose the object below to print from my models. I decided to call it “Shooting Star”. I had to adjust the scale on Cura to get a larger volume on the finished print since my model was smaller than required. I also had to do some adjustments to its height, for which the move face command came in handy. The printing process took approximately 6 hours (I didn’t time it precisely), and the final object is approximately 3 7/8″ x 3 7/8″ at the base, 3 1/8″ in height. The print quality is pretty good in my opinion, though I don’t have much to compare it to for now. Printing this object made me question my choice of filament color; I assumed that black would be a good “all-purpose” filament to have, but now I wish I got something more colorful. I got a new PLA roll on order!
Hi! I liked your printed model a lot. The star shape is very unique and interesting and honestly I think it looks pretty cool in black. I also thought it was funny you also chose to trace a cat for the image trace part of the project. Is that your cat or just an image you found? Overall, cool project!
Hi Samuel. I thought it was funny too that other students used cat pictures in their projects. I actually don’t have a cat, I have a dog but I didn’t have any pictures of her on my computer. The picture is the first google image result for the word ‘cat’.
Hello, your 3D print is pretty interesting, and honestly, from the images I think the black filament looks quite nice, especially with how the light reflects on the faces. Though it might look less visually interesting in person and more colorful filament is just more fun anyway so I get why you wanted to get another roll.
Hi German,
I enjoyed going through your post! I really like what you did for your first surface on #9—it looks great. When I first saw it, I thought it could be a fountain. Also, your solid on #12 totally reminds me of the pear phones from kids’ TV shows! As for your 3D print, it turned out really well. I think the black material was a great choice—it really enhances the look. I also appreciated how you showed the printing process. The way the light reflects off the faces makes the “shooting star” design stand out even more.
The objects you printed are very cool, reminding me of some dark, scary buildings in movies, which is very cool. It really attracts me.