Mainly Brushes but also just some fun stuff
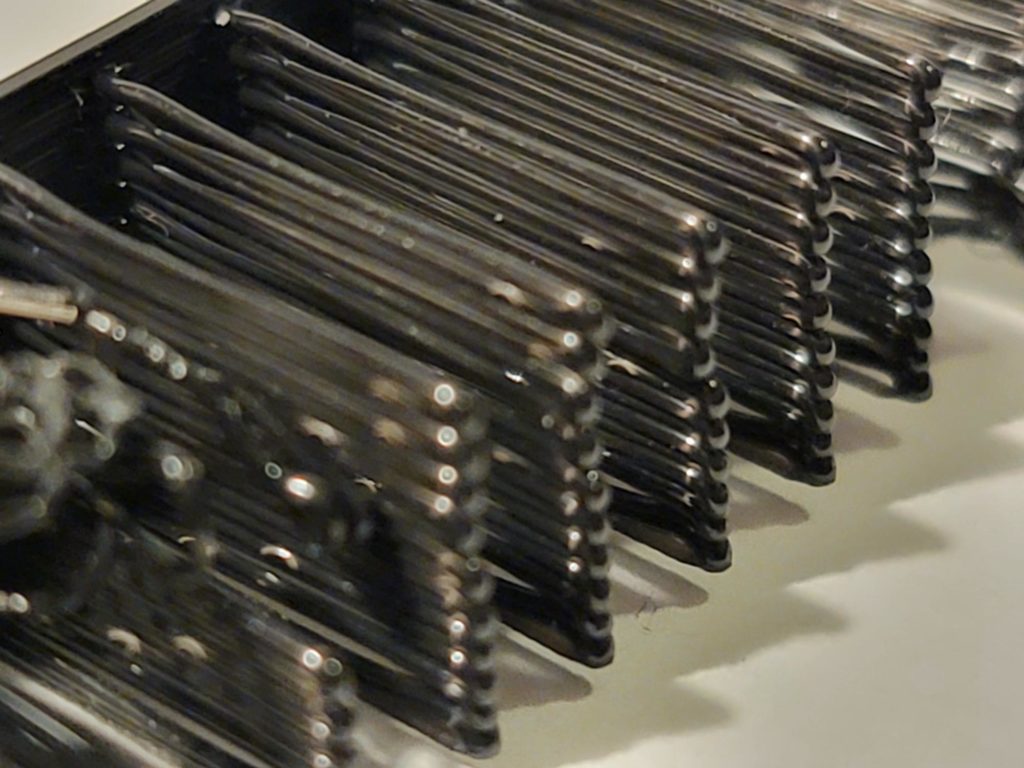
My Project mainly focused on different ways to make brushes and more specifically different ways for me to design G-Code to make the brushes. Looking at the examples given on the G-Code assignment page. I saw that they were using bridges as the main way for them to make the bristles. It worked pretty well. So I started there but I didn’t want to waste material on creating something I was just going to cut off anyway so I made my bridge one strand thick. Then I let the bristles rest on that bridge and built everything up that way.
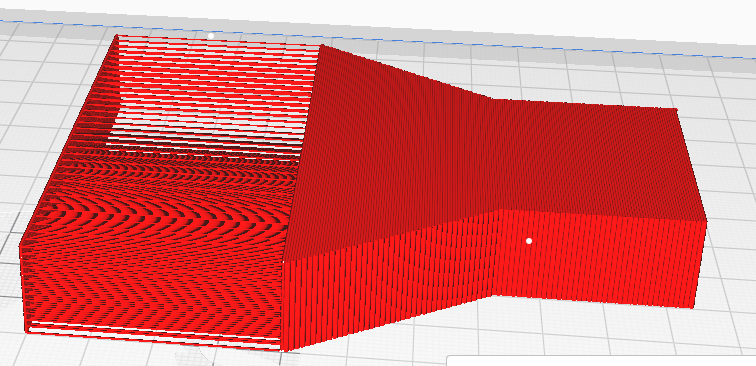
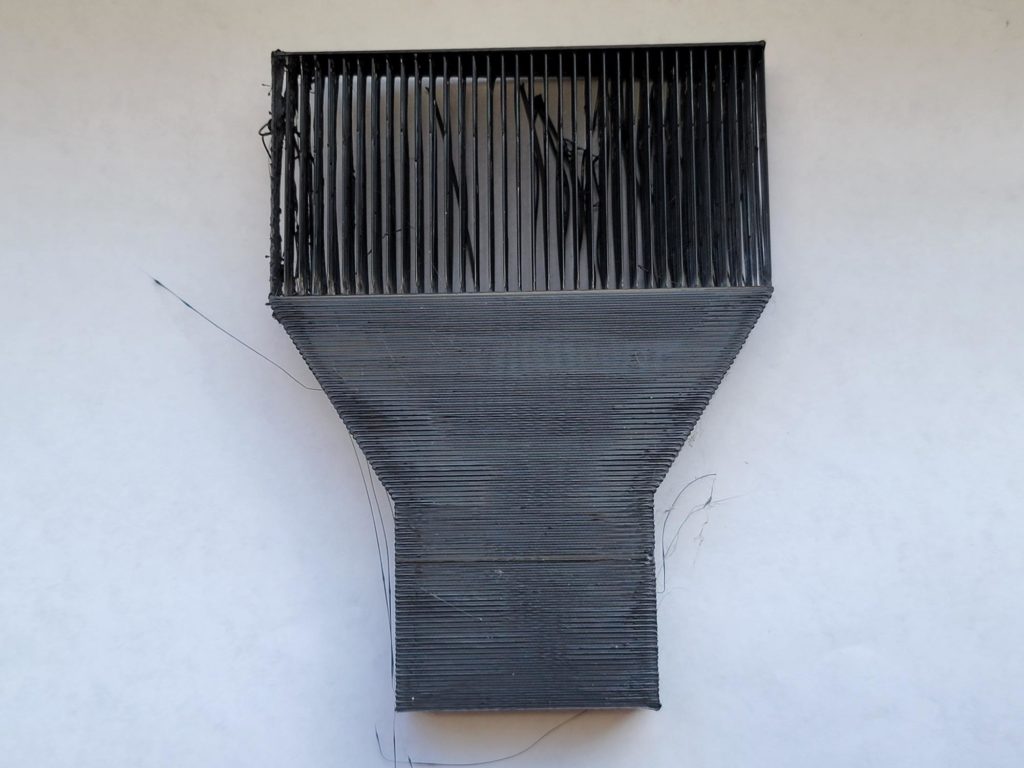
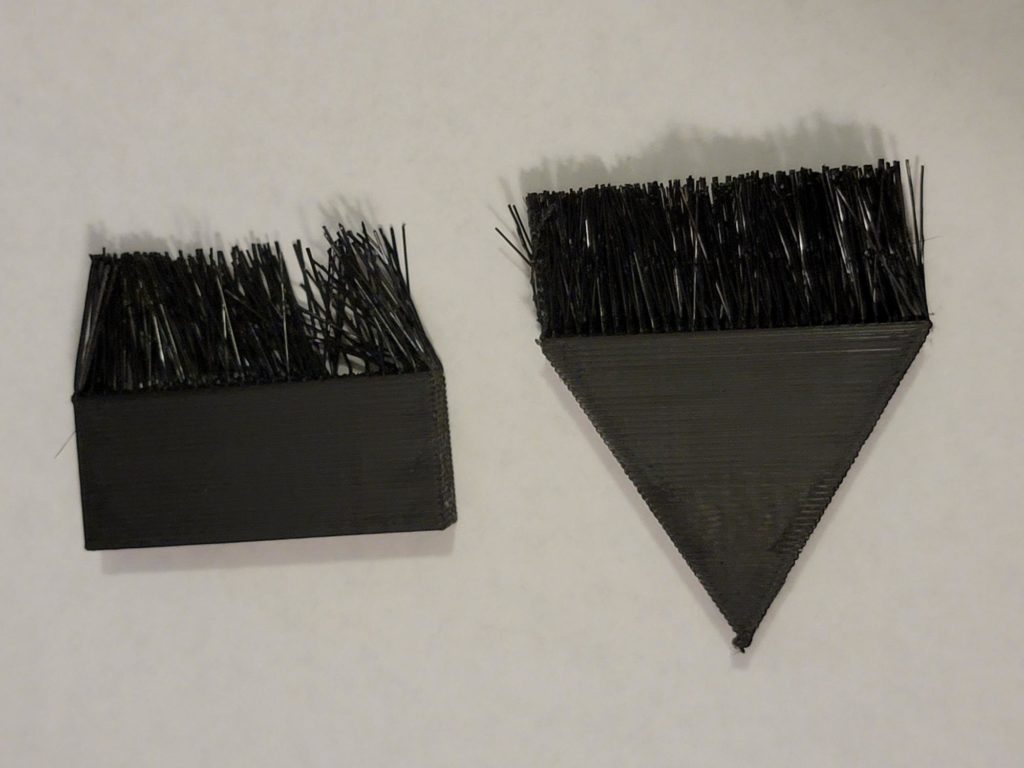
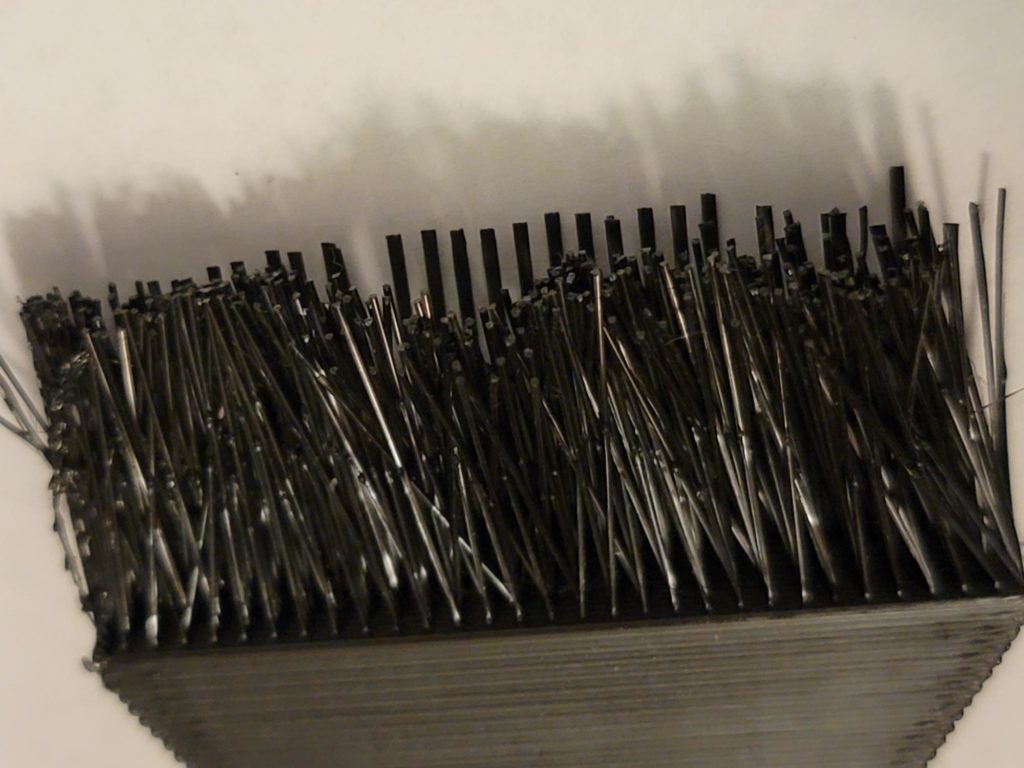
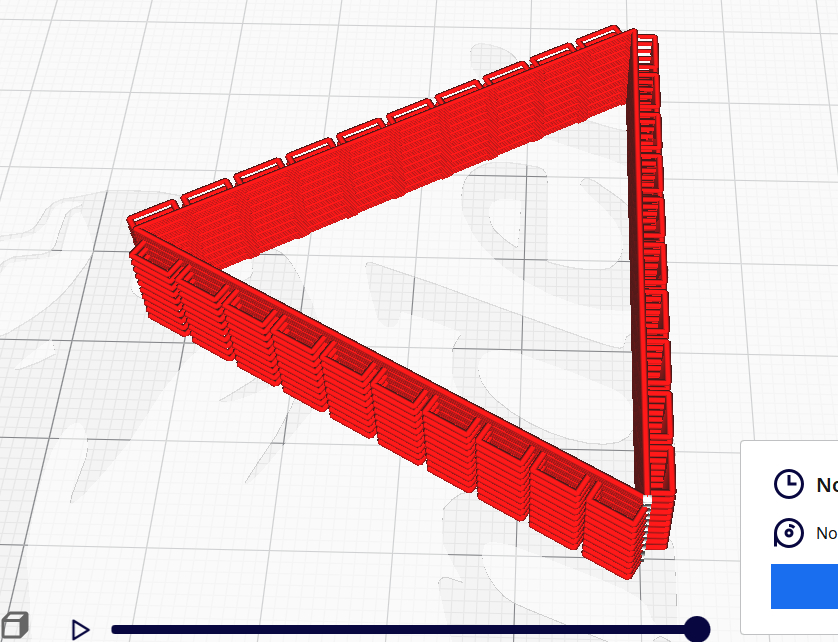
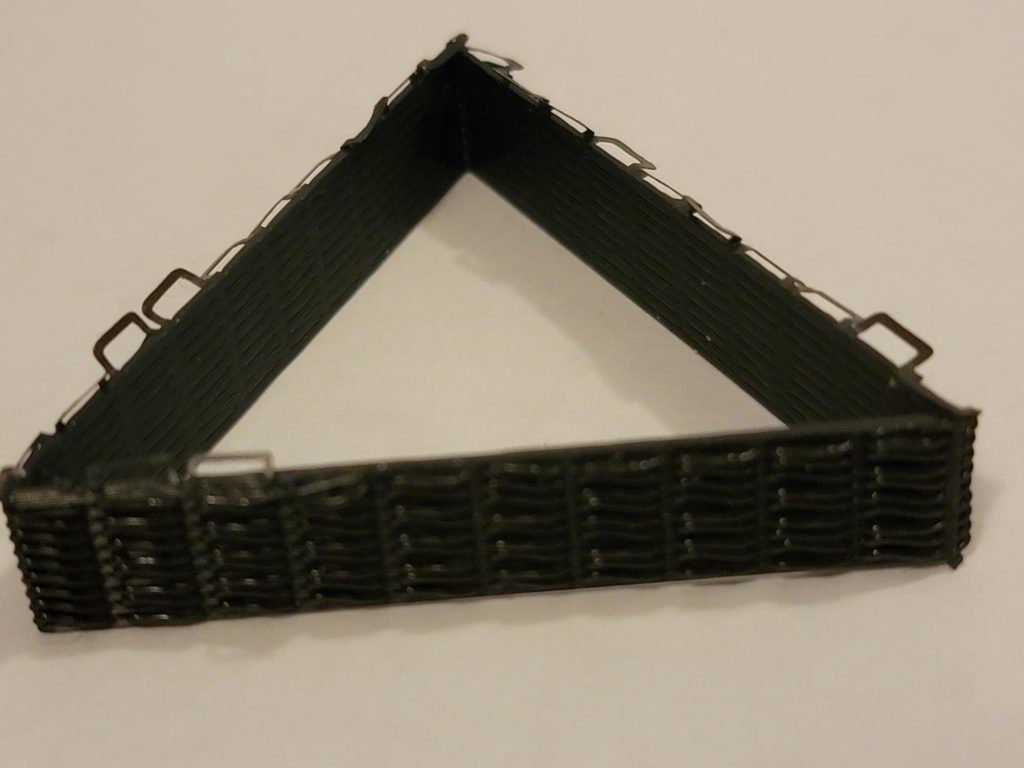
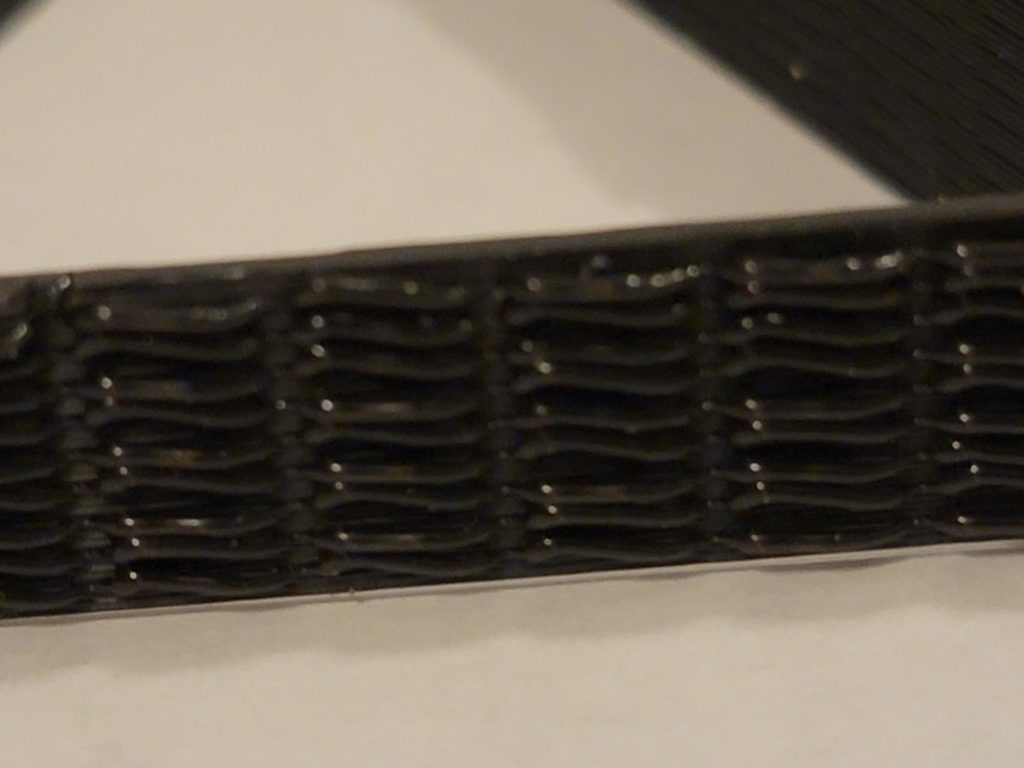
Cool, we can use a bridge but this didn’t necessarily feel like something that I couldn’t use a slicer for. I’m sure the slicer would not like what I was trying to do with as little support as I gave. But If I forced the slicer through it probably would have worked. So the next step was to create something that was more G-Code focused and had a few more interesting paths the extruder would take. I also wanted to work on the different shapes. So I modified the polygon function to create the shape but turn out and make a loop and continue the shape. It worked great! It makes a stronger brush in my opinion.

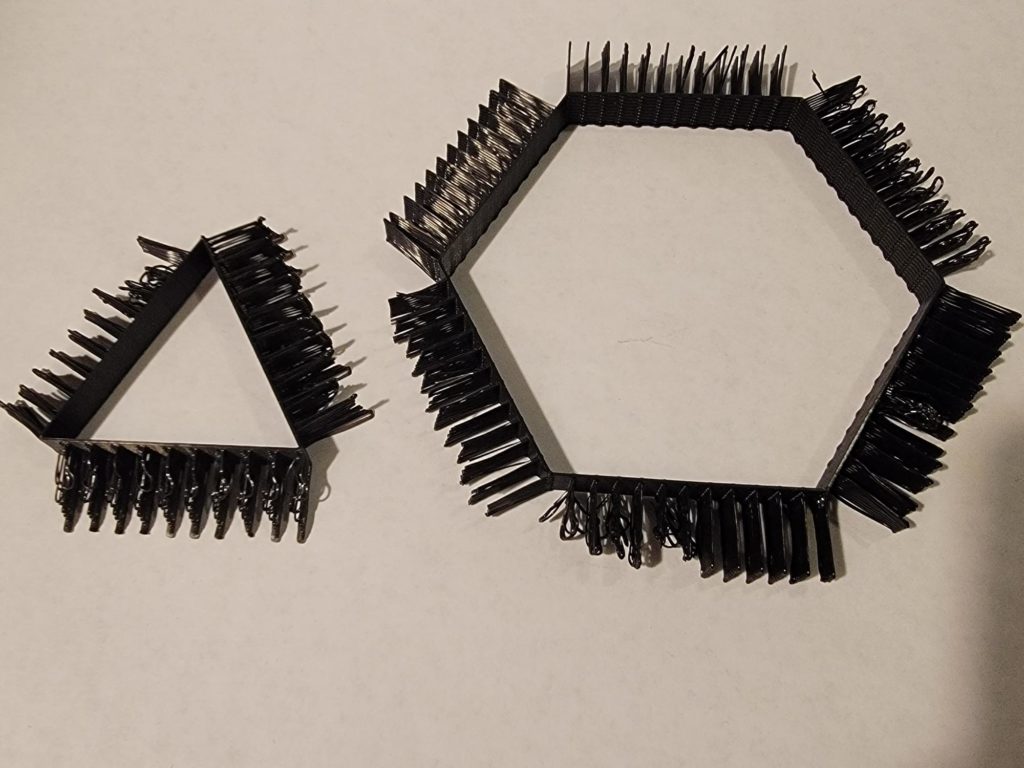
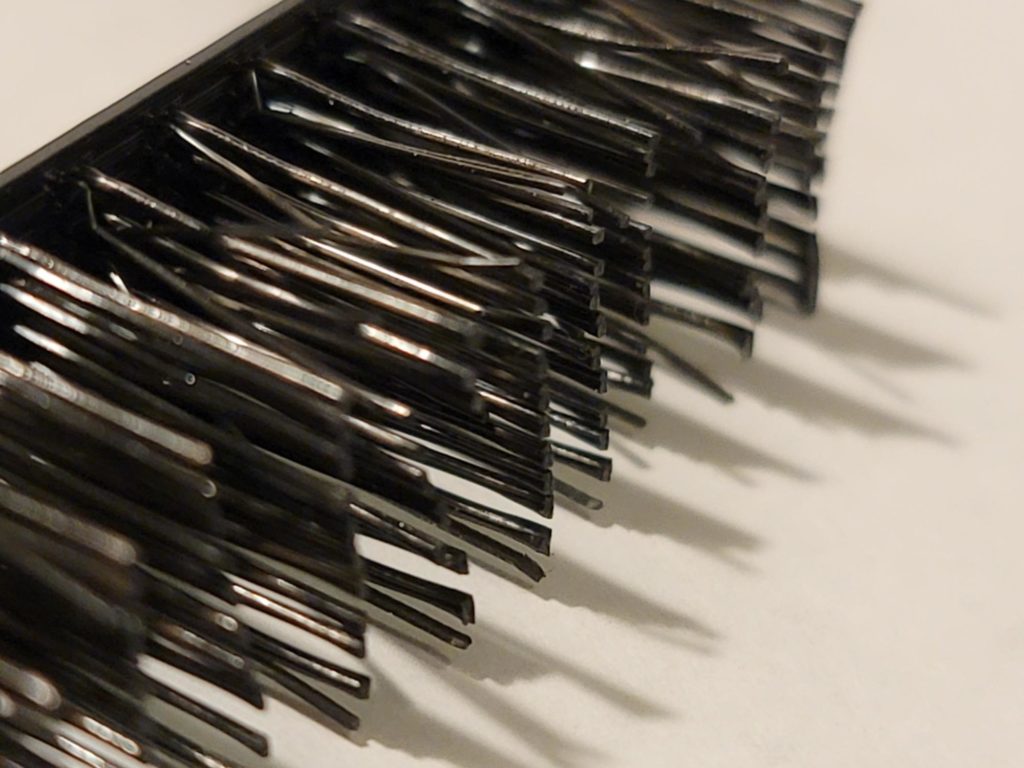
Last I created a fun little design that was small and was based on the interesting designs that the ceramic printers were doing. The goal was to create an interesting texture on the side of a 3D print. So instead of going straight out and making a loop, I would go out move over, and circle back in. It leads to a cool wire look on the surface.
Hey Marcos,
I really like how these turned out! Did you have any issues with the bridging? Seeing this immediately reminded me of a super old GIF set I saw of a lion 3D print. I found the original video.
Check this out: https://www.youtube.com/watch?v=OTXPU2P-ElE
It uses the same kind of bridging technique to make the mane, and the lion looks so goofy before he blow dries the hair into place. Anyway, nice work!
Jamini
The bridging worked surprisingly well. I had more problems when it came to the leveling of my printer (it keeps losing level for some reason). But the bridge held up but once the strands got too large it lost effectiveness. Still worked but the strands would sometimes collide with the strands below. The lion in that video looked like a chia pet at first lol. I would have never thought of using a hairdryer to post-process the strands, smart idea.
Hey Marcos,
That’s a really creative idea. I think the final models look really great.
Did you struggle a lot to print the third 3D model (triangular model)? The non-planar path alongside the lines of filament hovering over the third model seem to be challenging.
That was actually the easiest by far. The strands that moved out to make the textured surface were simple, just like a circular motion around the edge. But it fell into a nice look.
Hi Marcos,
Your works all look very interesting. I like how the brushes turned out, especially the one with the triangle handle. I also love your very last piece. The way the loops around the shape turned out made it look like the walls with interesting patterns on them.
Thanks, I really like how they came out. The brushes feel like an extension of the Real Use Project, I find myself brushing away dust on my keyboard with them with some consistency.