Part 1: Escher Tiles:
II encountered a lot of difficulties when working on this part of the project. I started creating many complicated shapes using both Processing and the sketch function available in Rhino. As the result, I couldn’t tile the plane using any of the shapes I created. I then tried to create simpler shapes using the sketch function available in Rhino first to see what the result looks like before I code it up using Processing.
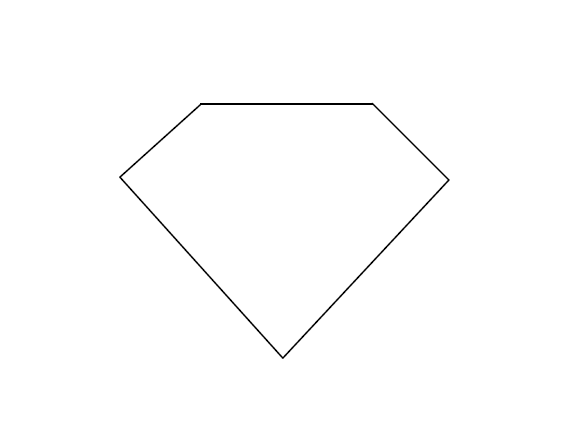
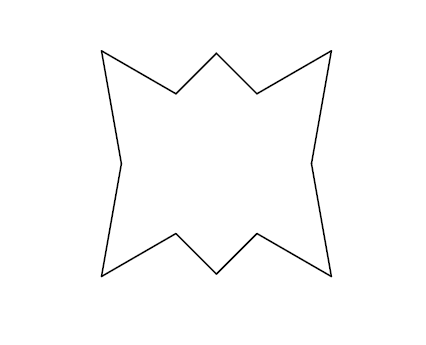
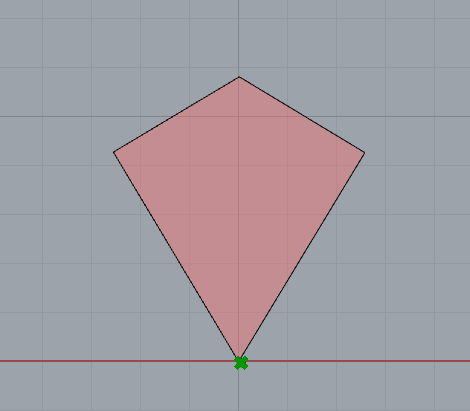
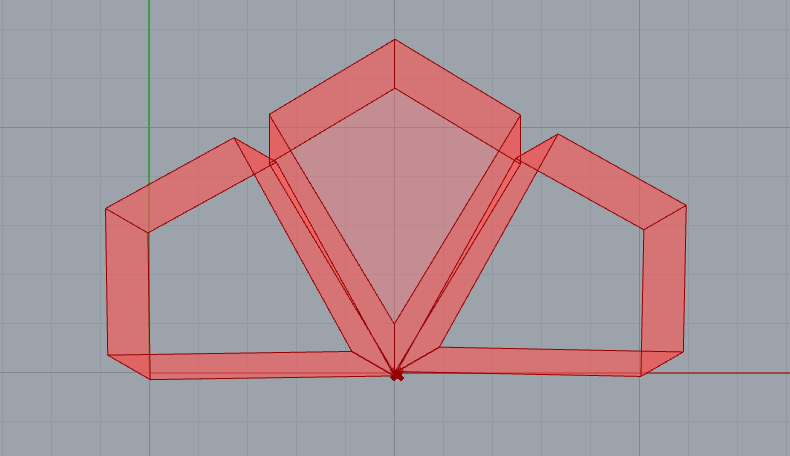
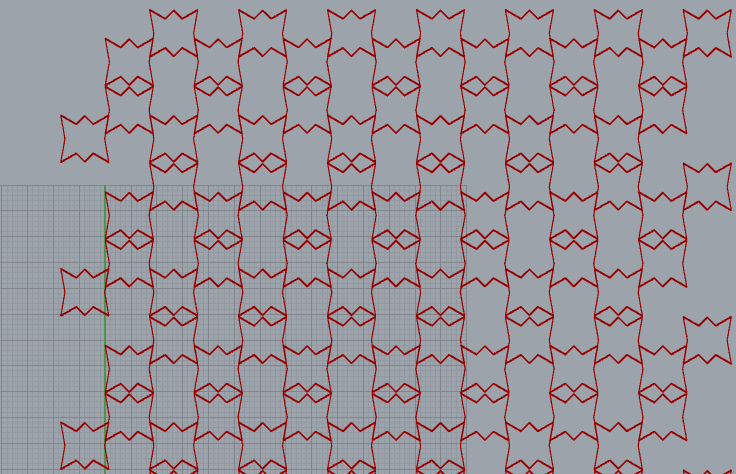
I created a few different shapes in Processing. I spent the most time figuring out the math and geometry behind the sI created a few different shapes in Processing. I spent the most time figuring out the math and geometry behind the shapes. I had to calculate the length of each edge as well as the measurement of each angle to draw the best shapes that can tile the plane. I created several shapes to test in Rhino and Grasshopper but the shapes that work the best are the three shapes I have below:


Code:
Part 2: 3D tiling across a surface:
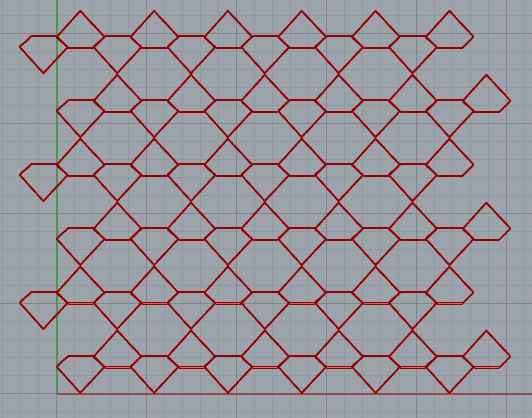

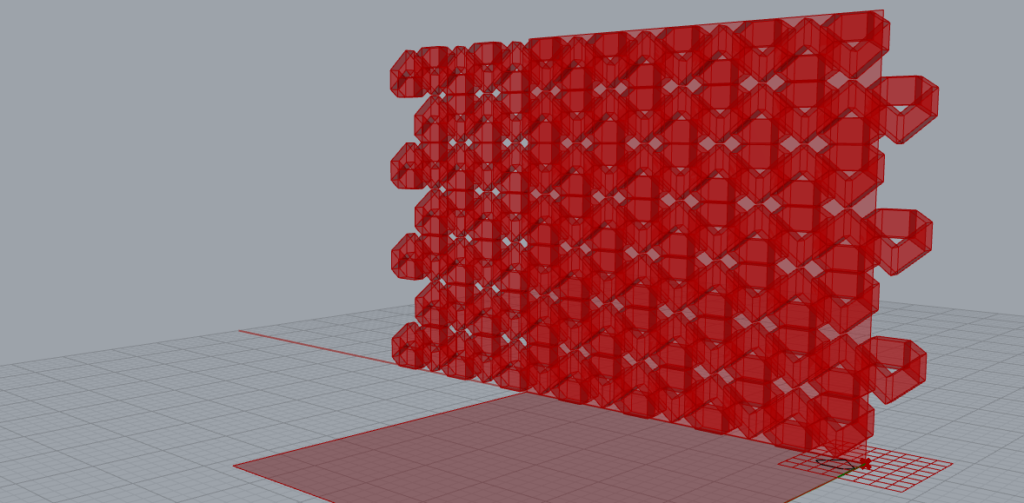
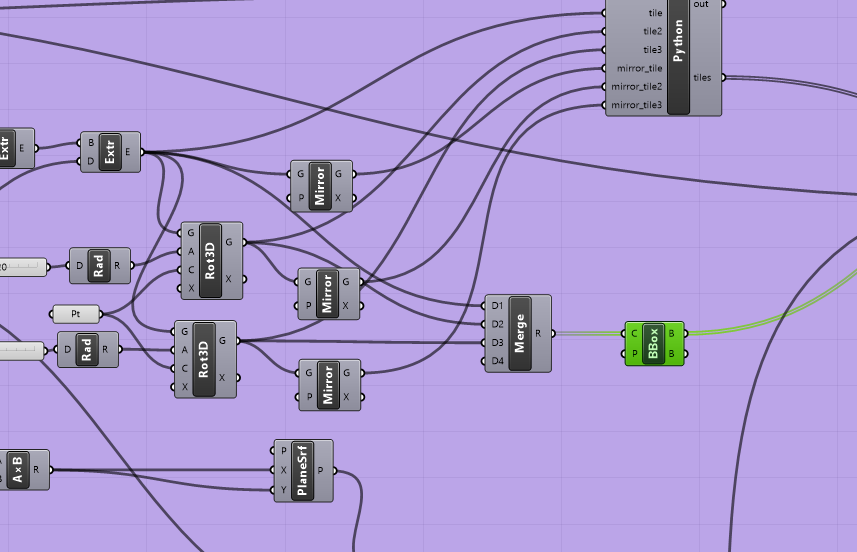
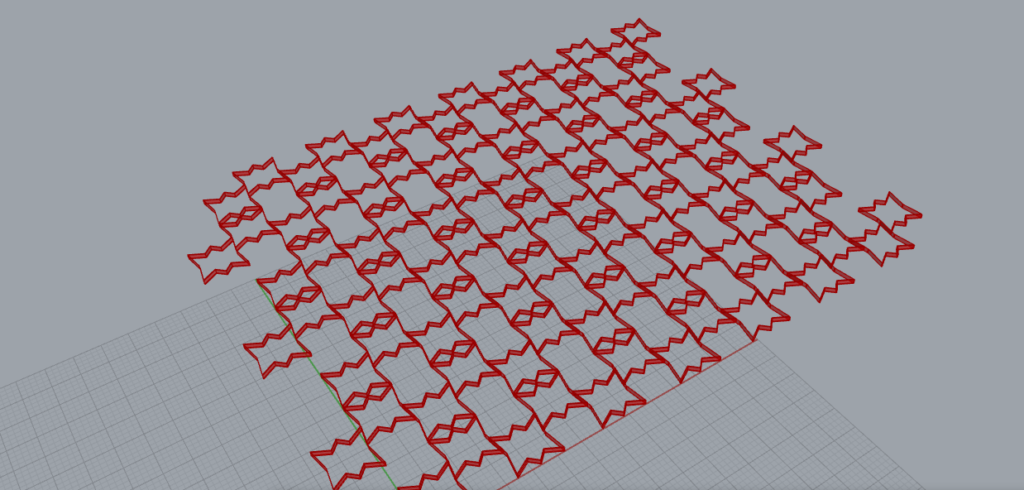
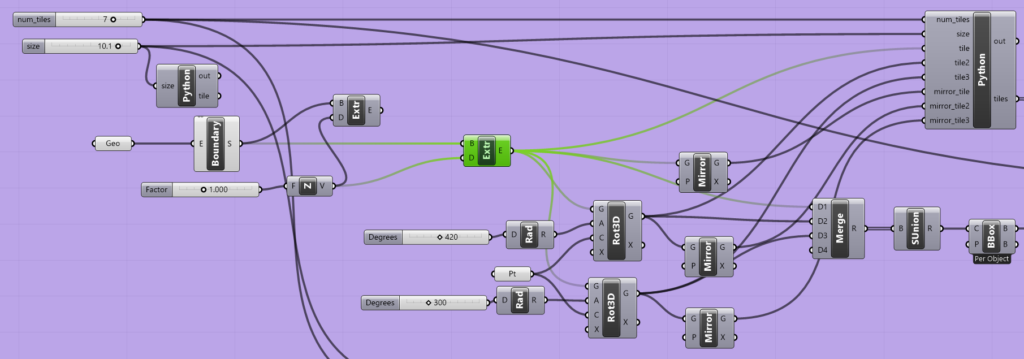
My second shape (shape 2) requires me to write a little more code to tile the plane. After the shape is imported. I connected to the geometry (geo function), extrude the shape in 3 dimensions (x, y, and z). I then created two more copies of the shape, rotate them based on one point (set at the corner with the smallest angle of the shape) using the Rotate3D function.
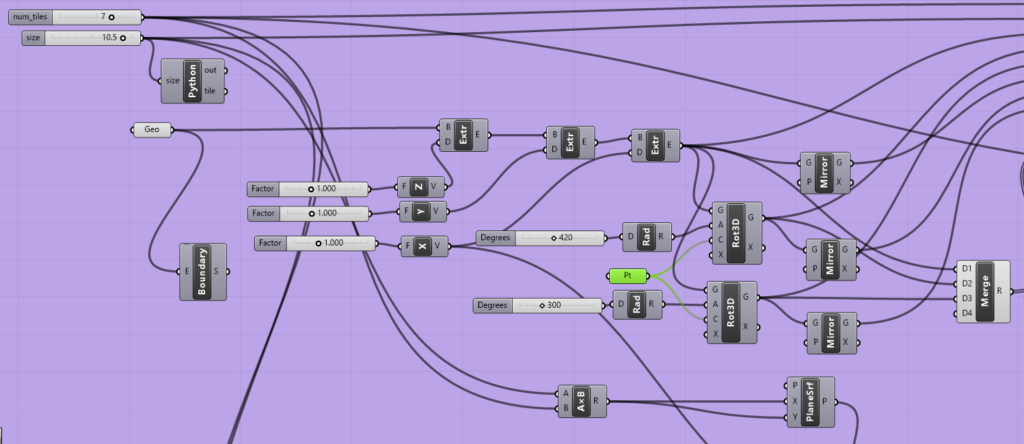
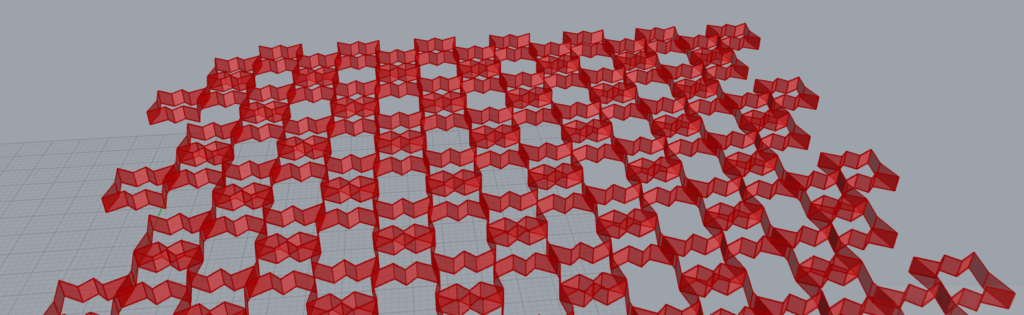
I then merged the three shapes above together and connect them to the bounding box. This bounding box is later connected to the Surface Morph function to tile the surface.

Shape 3 is a bit easier to work on compared to shape 1 and shape 2 since the it is based on the square shape.
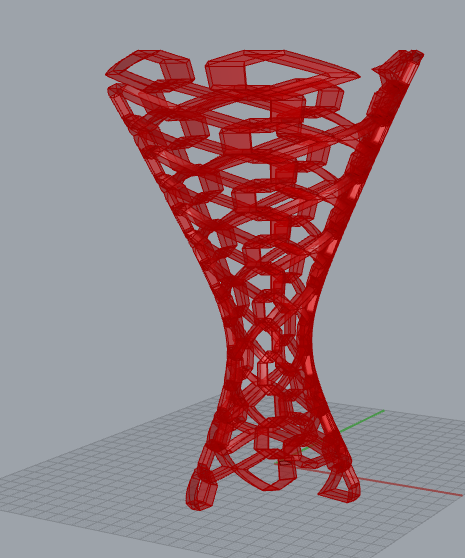
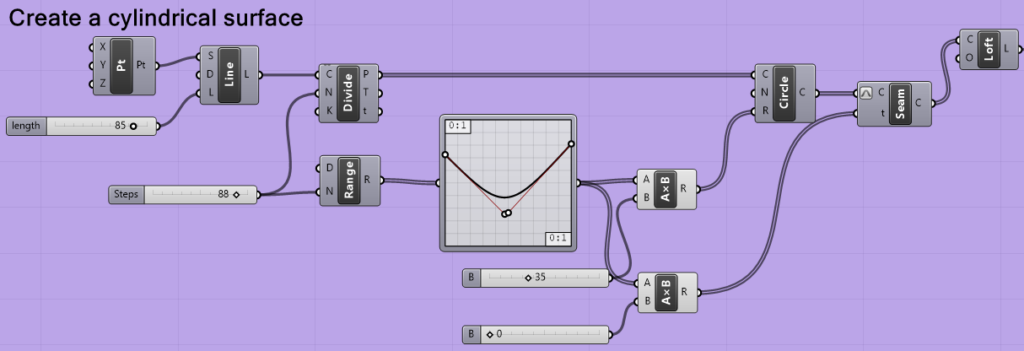
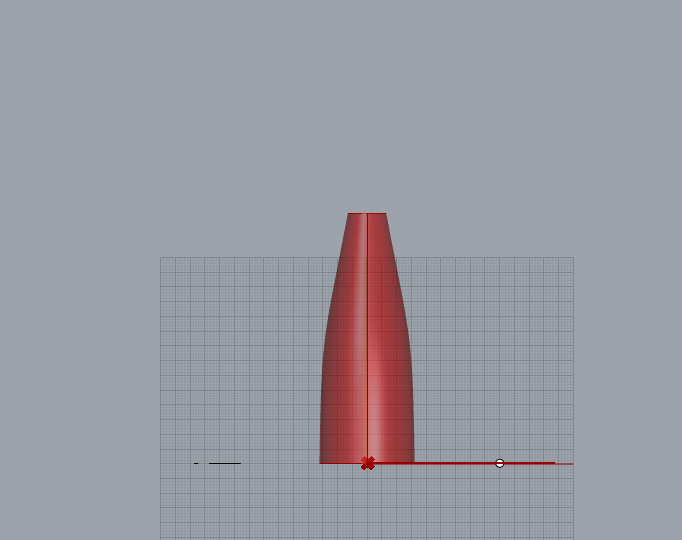
he cylindrical surfaces I have in this project were created using this piece of Grasshopper code below. This code allows me to change the height of the cylinder using the number sliders and change the shape of the surface using the four points on the Graph Mapper.
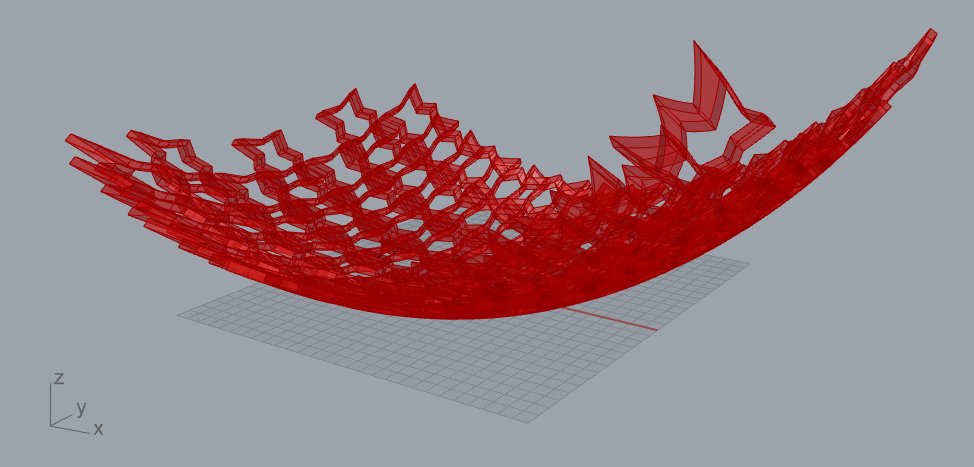
This part of the assignment was also very challenging for me. Since the code had to generate complex shapes, my computer wasn’t able to generate/create the tile or morph the surface several times. Rhino stopped responding and the program was shut down by itself so many times. I lost my code whenever that happened and had to start over again. It was very frustrating. It also took a very long time whenever I tried to use the morph function to tile the plane. Because I had to keep adjusting the number sliders (parameters) to create good base tiling, it was a pain to use the Surface Morph function since it always took a while to run.
There was an issue with tiling the cylindrical plane and I still cannot figure it out. When I used the Surface Morph function to tile my cylindrical plane, the function always tiled more than the actual surface. I have tried to adjust all the parameters, change the shape, width, and height of the plane, as well as check the Bounding Box function. However, none of that was able to help me to solve the problem.
Code:
Part 3: 3D Printed Form
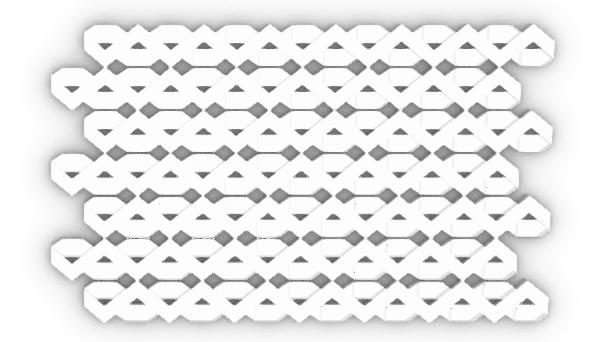
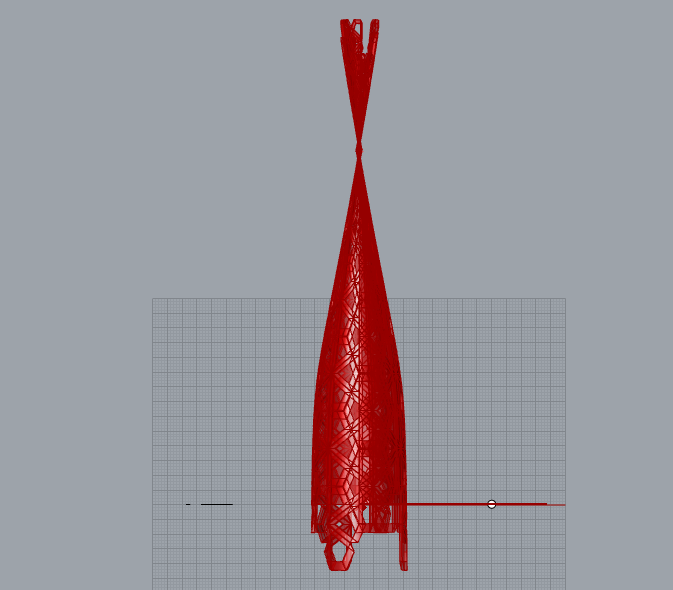
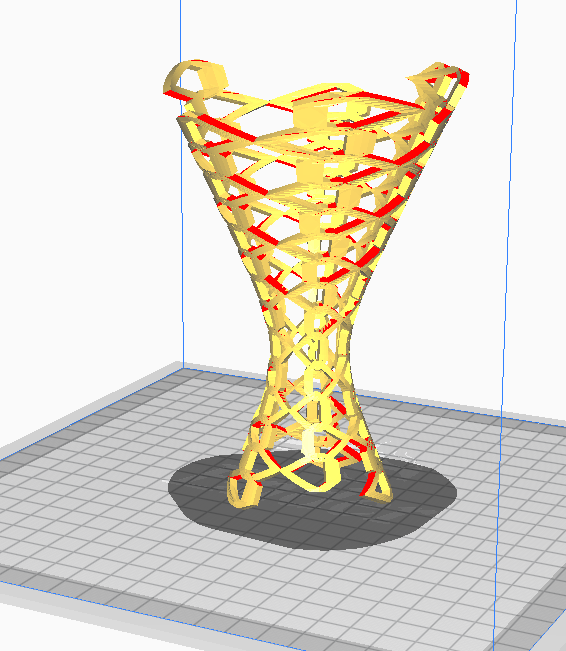
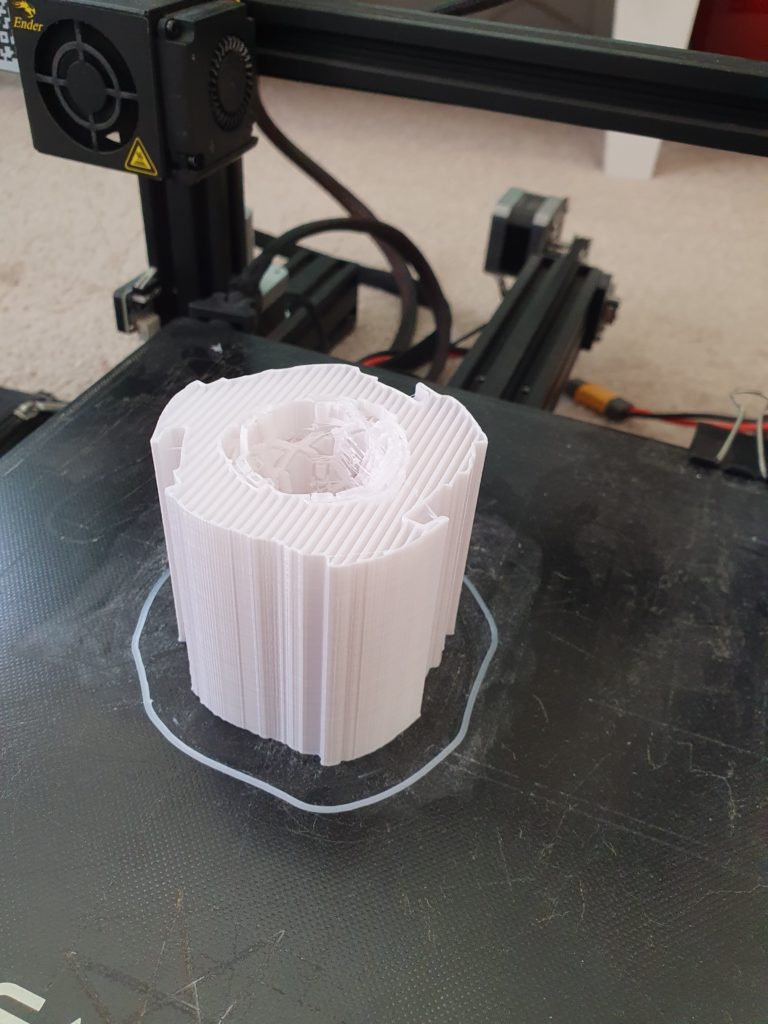
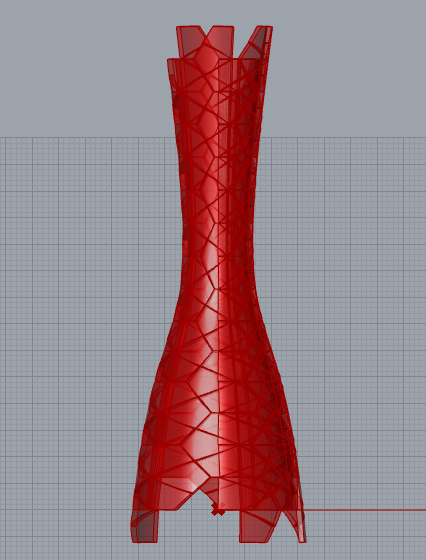
My printing process also didn’t go very well. The shape I imported to Cura appeared red in some areas indicating something is missing (like in the figure below). I later tried to fix the shape and most of the red areas disappeared; however, the shape still cannot be printed. I also tried the spiralize function in Cura but it still couldn’t solve the problem.
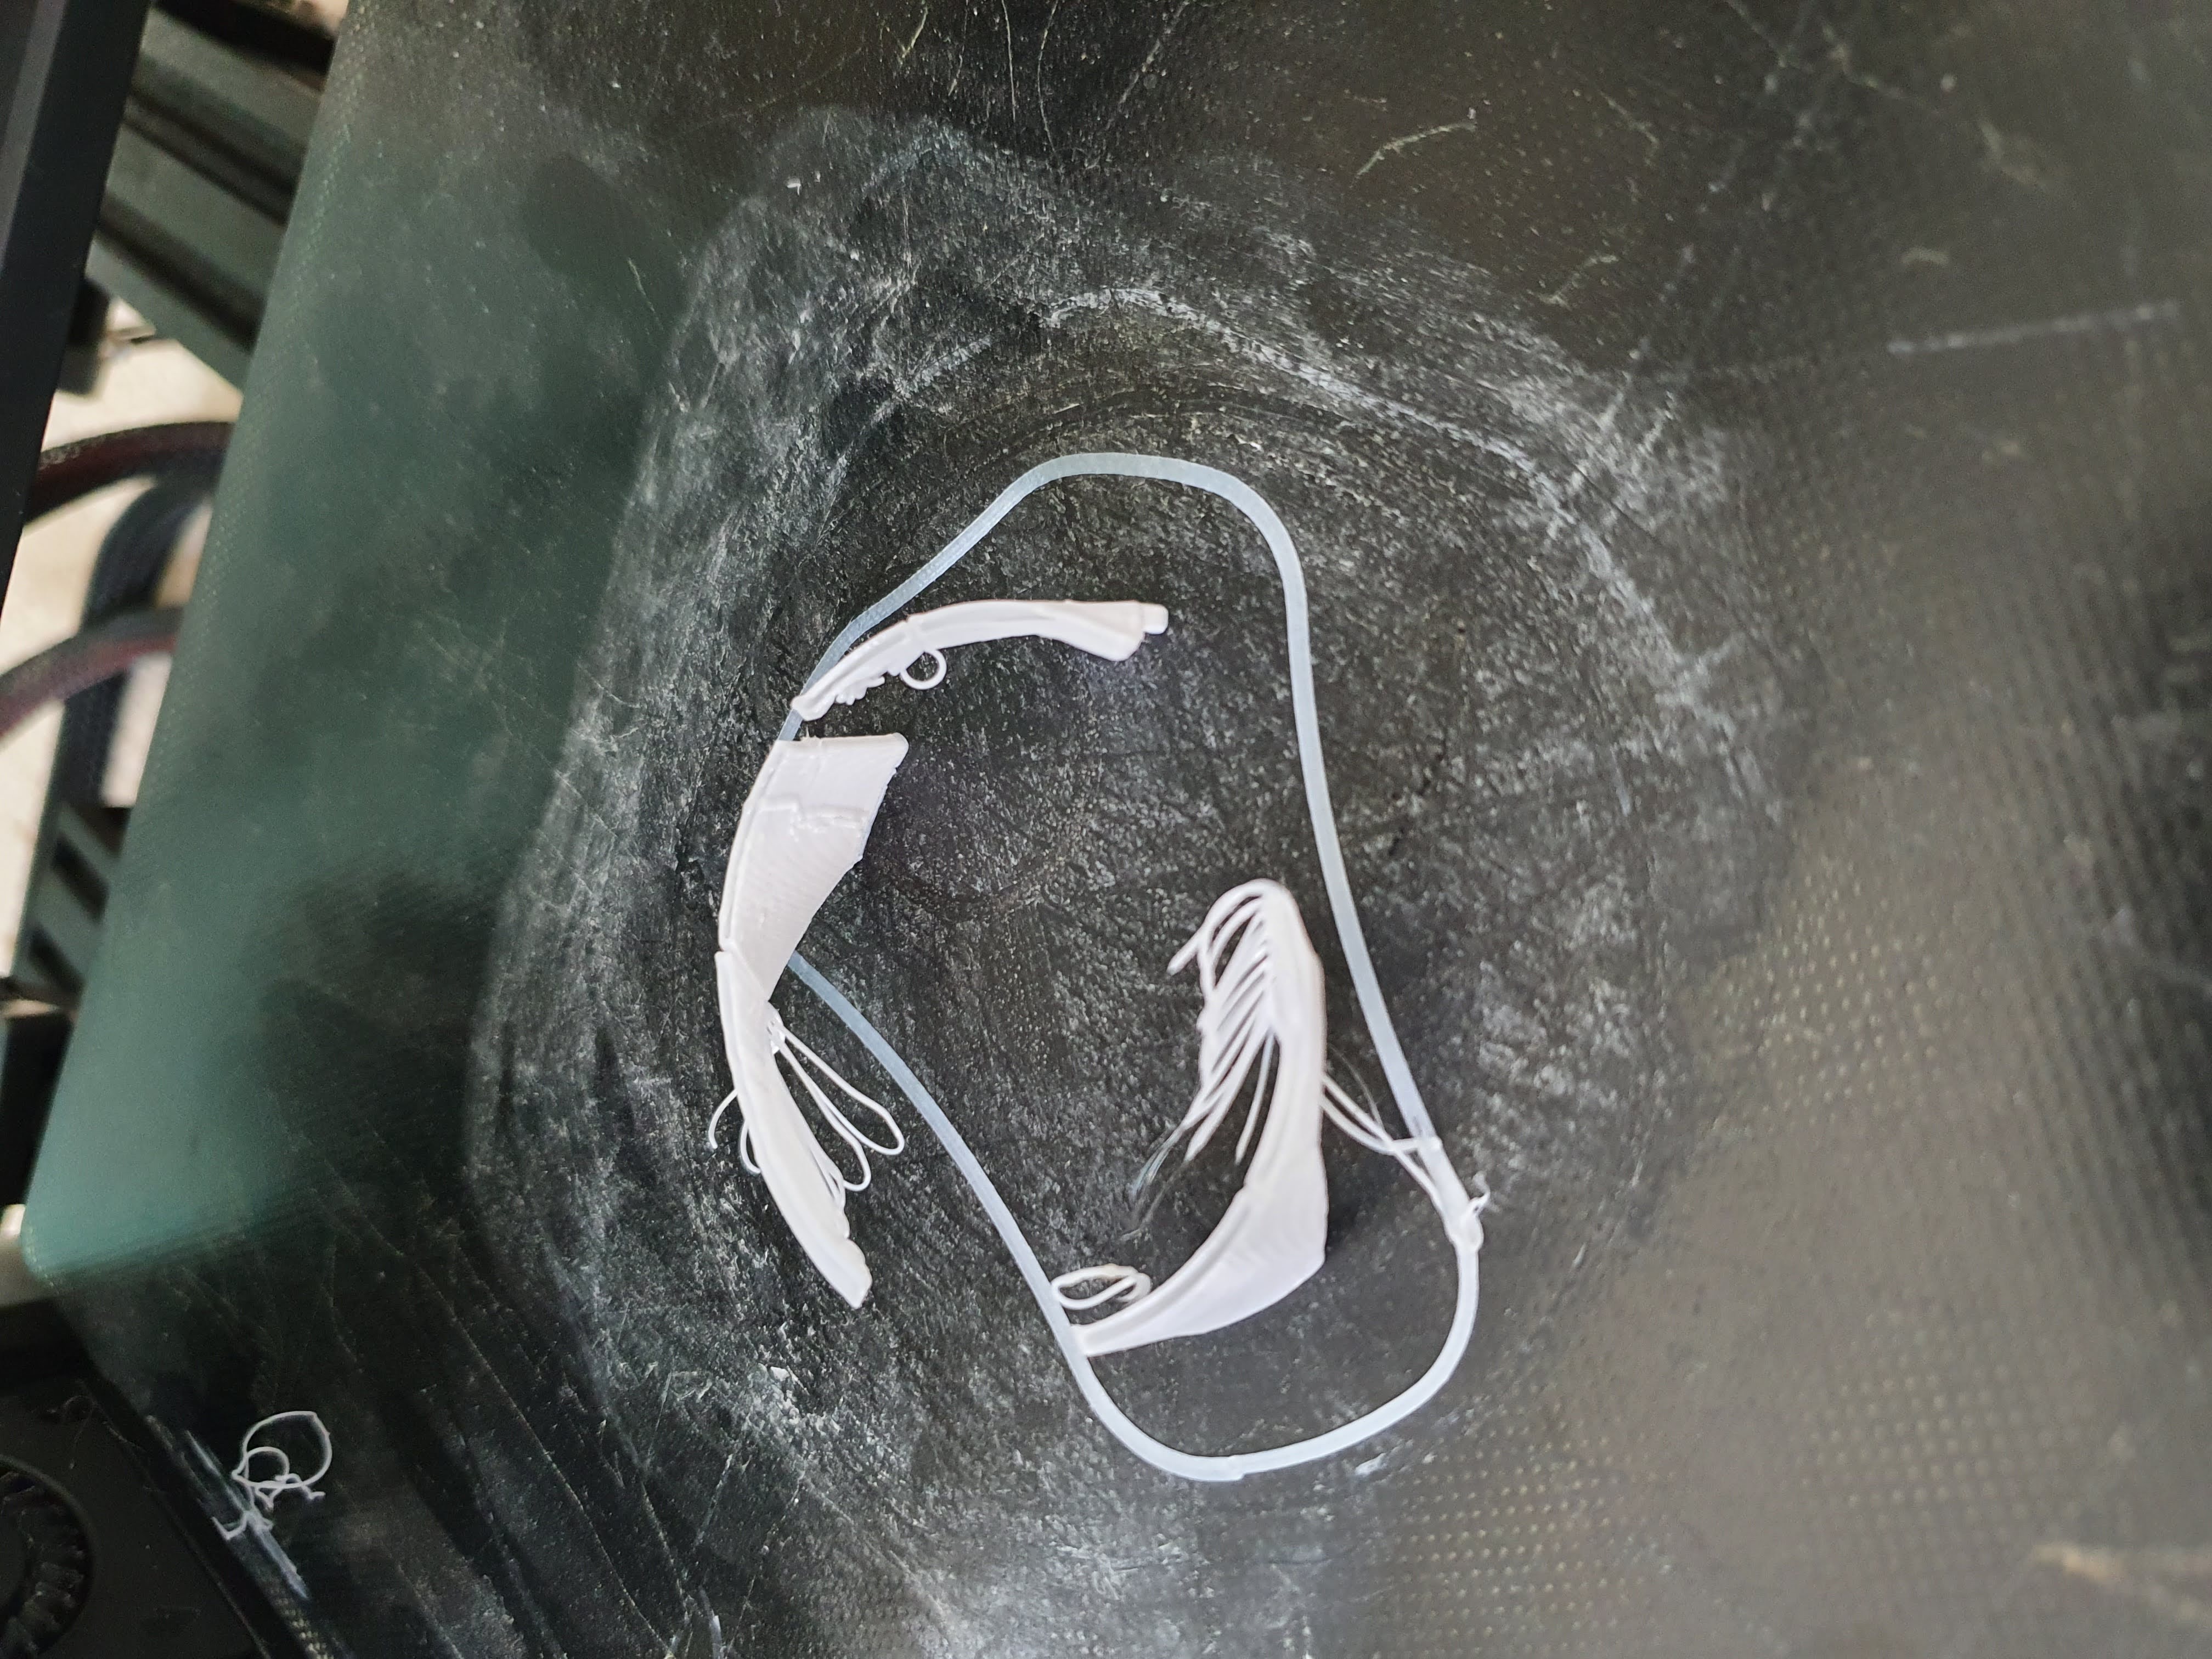
I then tried the support function in Cura and let my printer print for a while. However, it just created a very thick wall outside with many supporting walls around my shape. All the supporting walls are very thick and firm so I don’t think I can remove them from my shape.
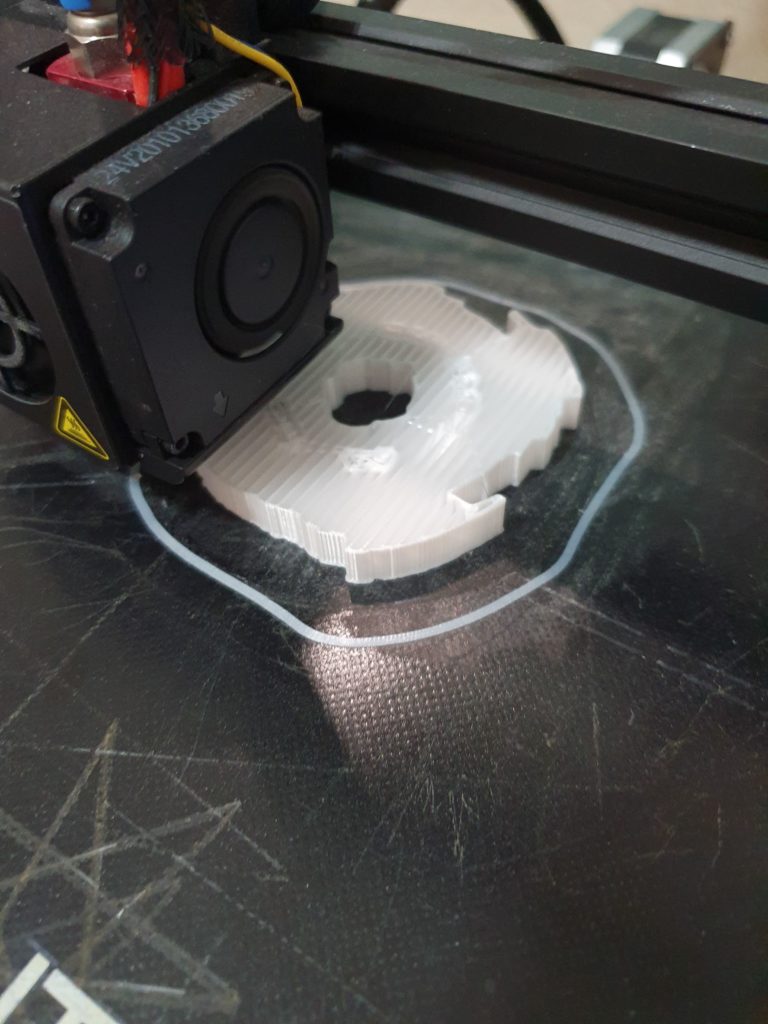
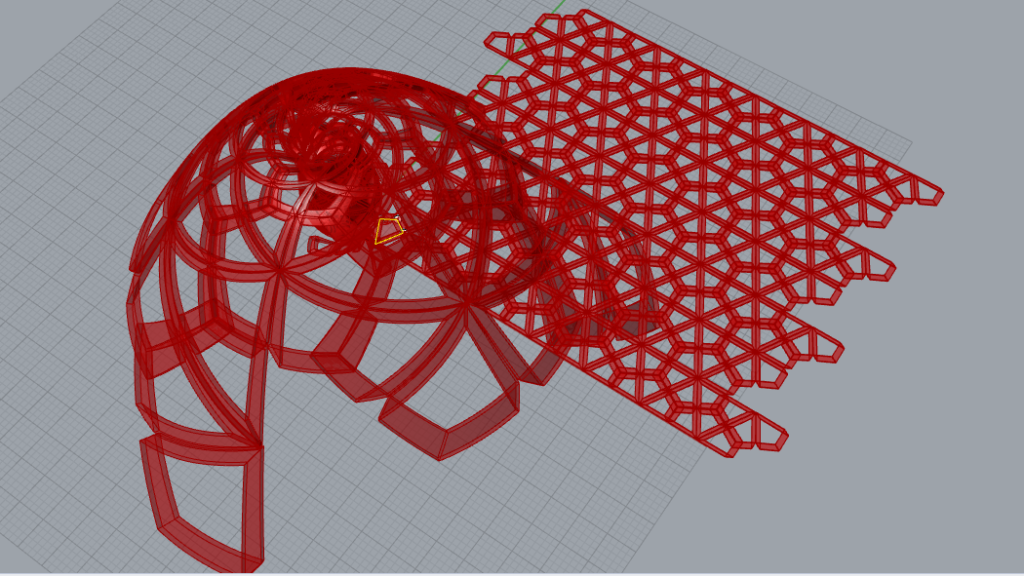
I think the delicate lines couldn’t be printed on my cylindrical surface. So, I went back to the code, and this time, instead of extruding the geometry in three different ways, I connect it to a Boundary function and extrude only the Z-direction
As the result, I was able to make this tiled surface with no holes/ cut-outs. I later used the move tool in Cura and move the shape down on the z-axis in order to get rid of the bottom of the shape since they cannot be printed properly before.
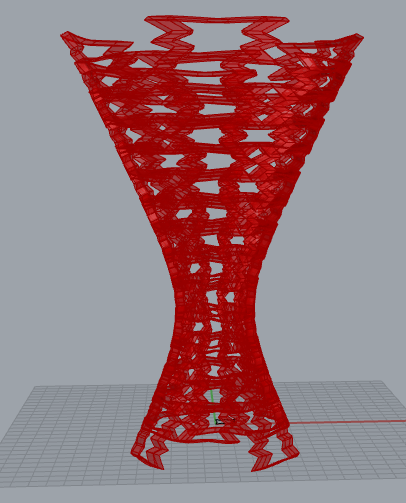
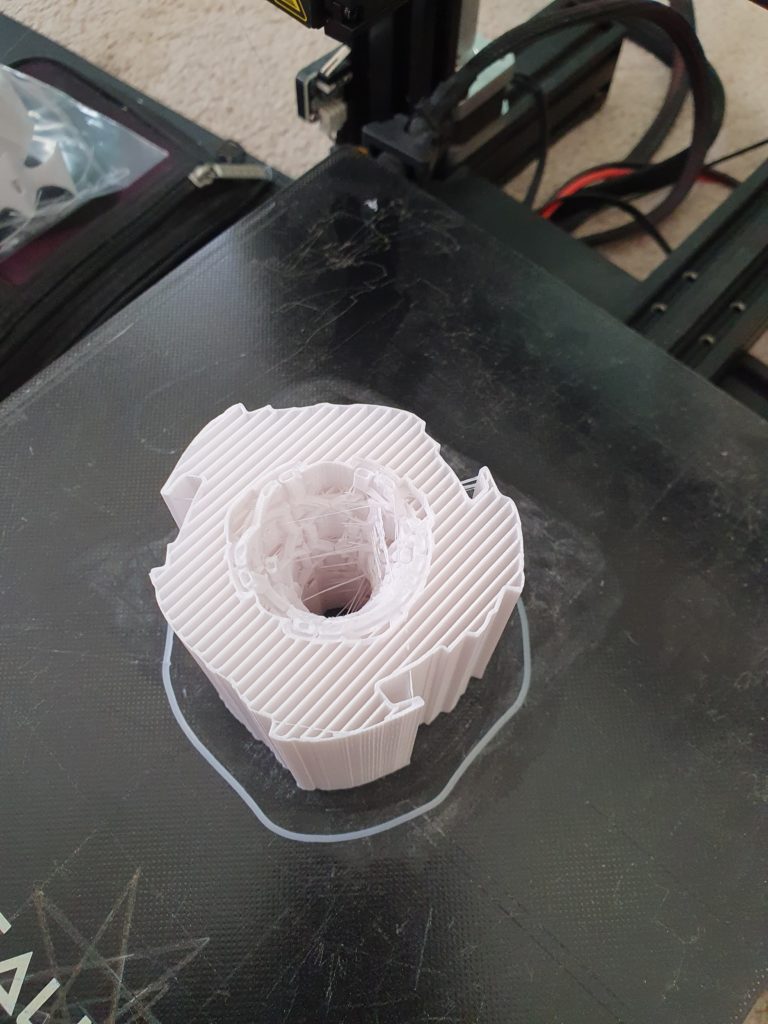
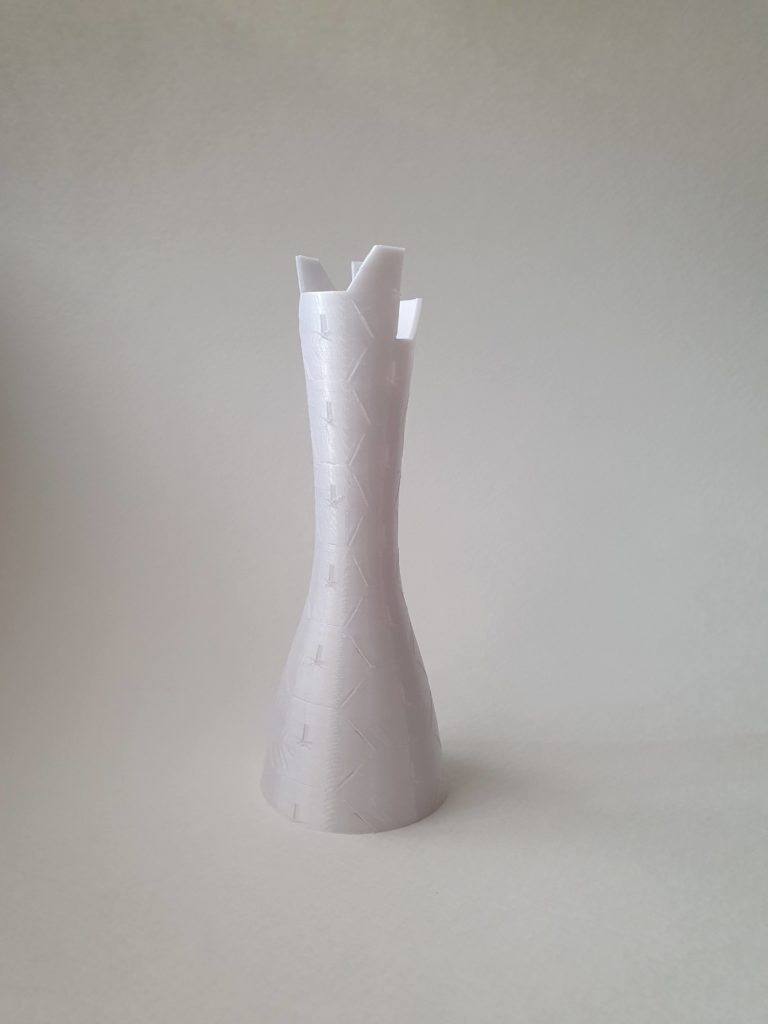
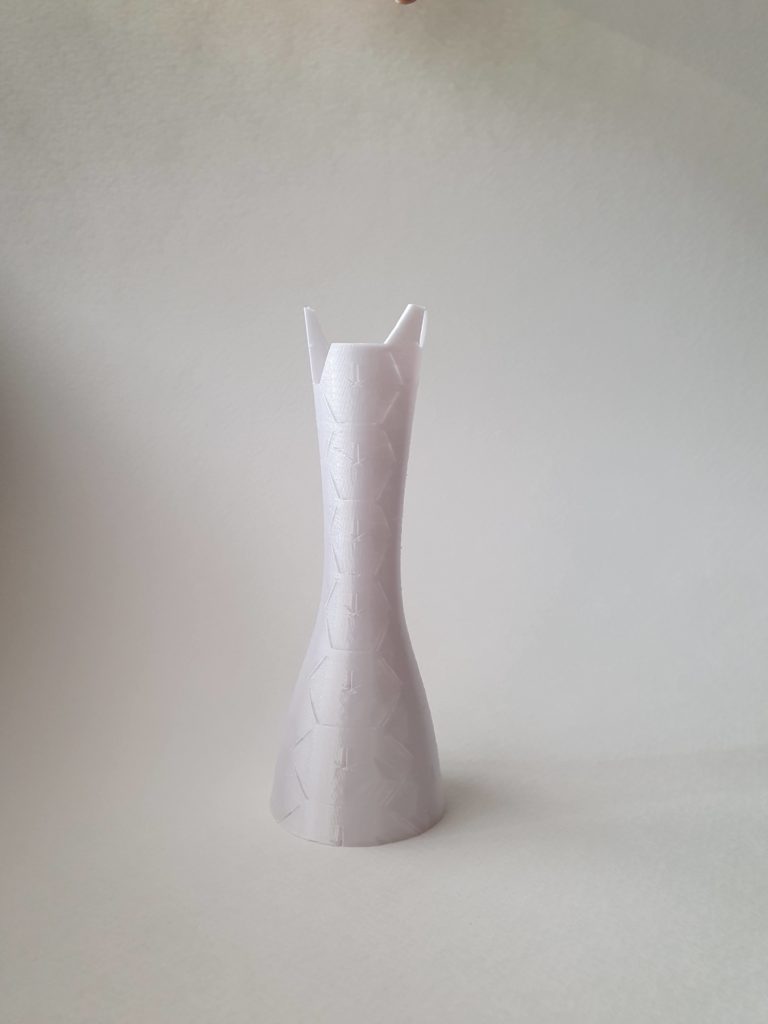
And here is the result that I got from printing the shape. There’re some interesting textures on the surface but it doesn’t look as interesting as the cut-out style surface.
Yea, this was a hard project. I made my tile, made it all the way to then end, then almost scrapped it and started over because I thought what I made did not tile the plane. I almost created myself another 2 – 3 hours of work.
I used the Python turtle instead of the Processing one. It took me a little bit to learn it as I went, but it worked pretty well, I think. I also spent a lot of time working out the math and geometry, doing some guess and checks, etc.
I really like your kite shaped tile and your final print looks great. My prints kept failing. I had to use some glue and slow down the extruder setting in the Cura slicer and then my print succeeded.
Yeah, I agree that this is a hard project. The math was very confusing to me and it took me so long to figure out. The printing process is also hard too but I’m glad that you were able to 3D print your pieces.
Hi Ruby,
Did you use hexagon tile too?
I used hexagon and my morphing onto cylinder also encounter similar problem: the morph extended much beyond my base cylinder.
I asked Prof Leah about such morphing problems. I really appreciate her help that she points out and demostrated that I didnt get the uvz input to the surface morph block right.
I think your printed surface got noticeable hexagon shapes and I hope I can adjust mine to look that way too.
Best regards,
Yie-Sheng Chen
Maybe that was my issue figuring out the uvz input too. I actually tried so many different inputs for the uvz inputs but they didn’t solve my problem. So, keep the shape how it is because I really love the noticeable hexagon shapes on my cylinder.
Working on the math of drawing the shapes in Processing was an unexpected challenge. Even for relatively simple shapes, it took me a lot longer to work on the math and angles than I was expecting. Those red parts when you import your solid into Cura were way too intimidating for me as well. I kept wanting to add support and had to reel myself in and just hope that they would print even without them. It still shocks me how some designs are able to print.