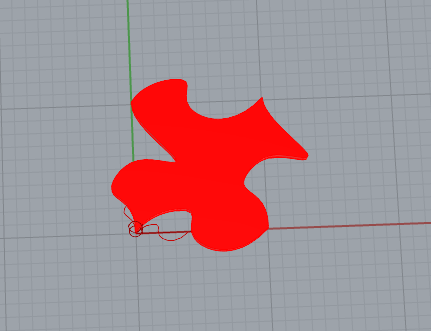
Escher / Parallelogram Tiling
A simple puzzle-piece-esq shape for a simple tiling. More or less just what we did in class.
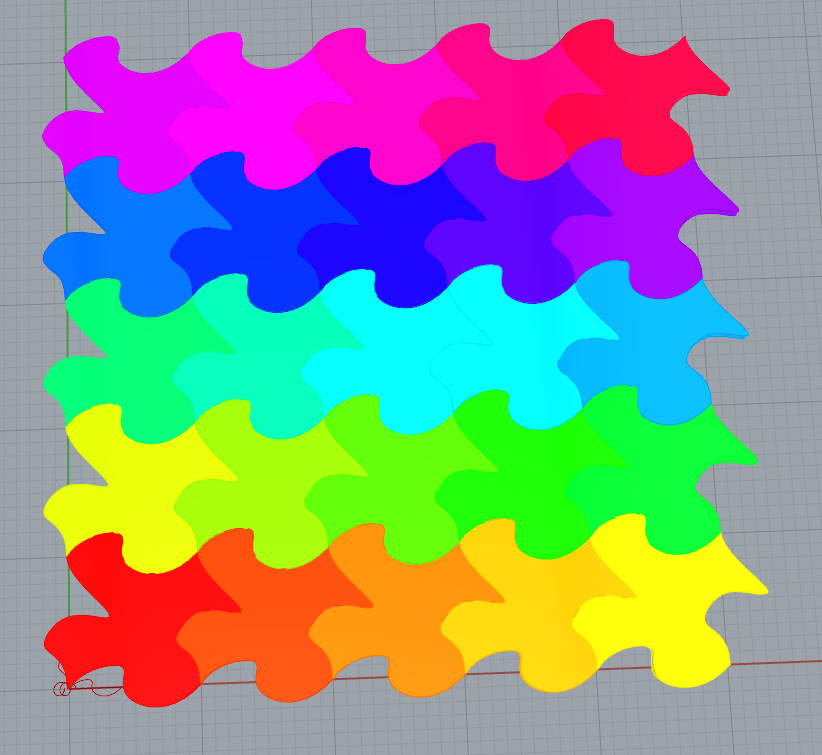
Hexagonal Tiling
I went through multiple (theoretical) implementation approaches when planning this one out, from simple to complex to (mostly) simple again. The tiled.art website was extremely helpful for visualizing the pattern and testing different ideas in my head.
Instead of repeating the A and B curves (or the triangle they form together) and making an overcomplicated pattern to do the tiling, I copied them out into a single hexagon shape and used the same ‘duplication along two axes’ trick used in the parallelogram tiling, but on a group of sub-tiles instead of one tile or its constituent curves. As such, you can see a rhombus shape emerging out of the finite tiling, the same as if you were to do the parallelogram tiling with an angle other than 90 degrees.
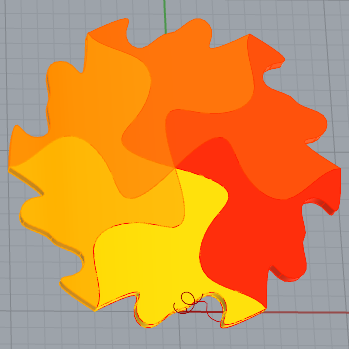
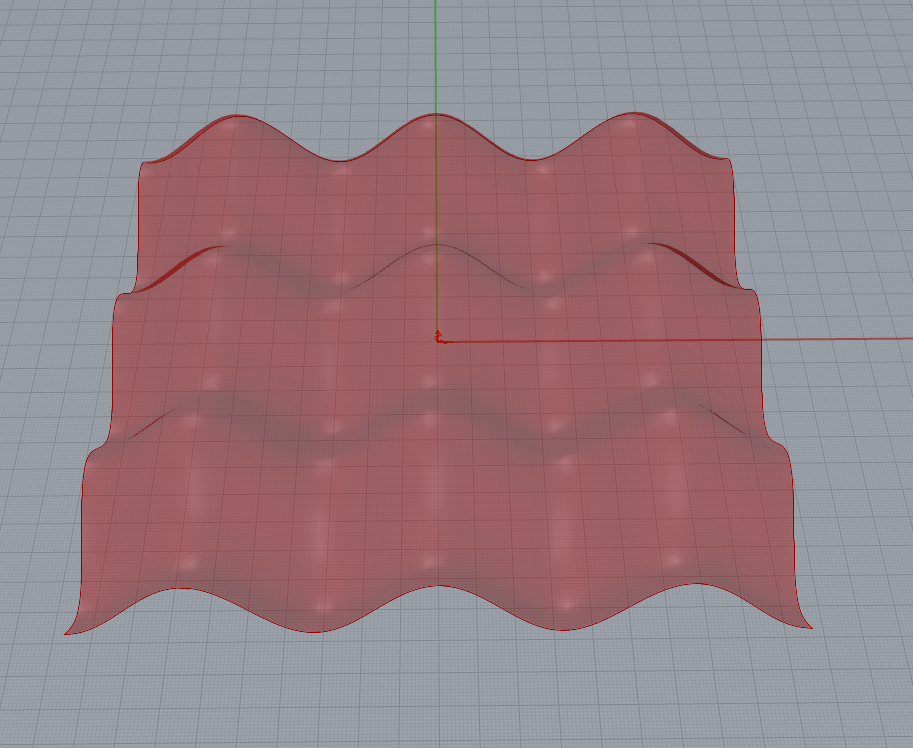
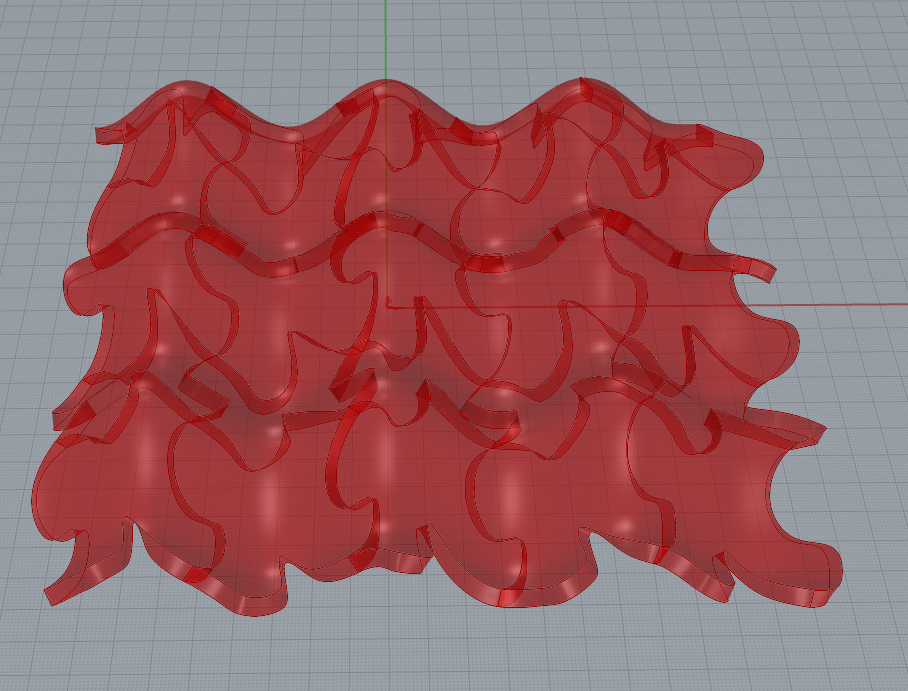
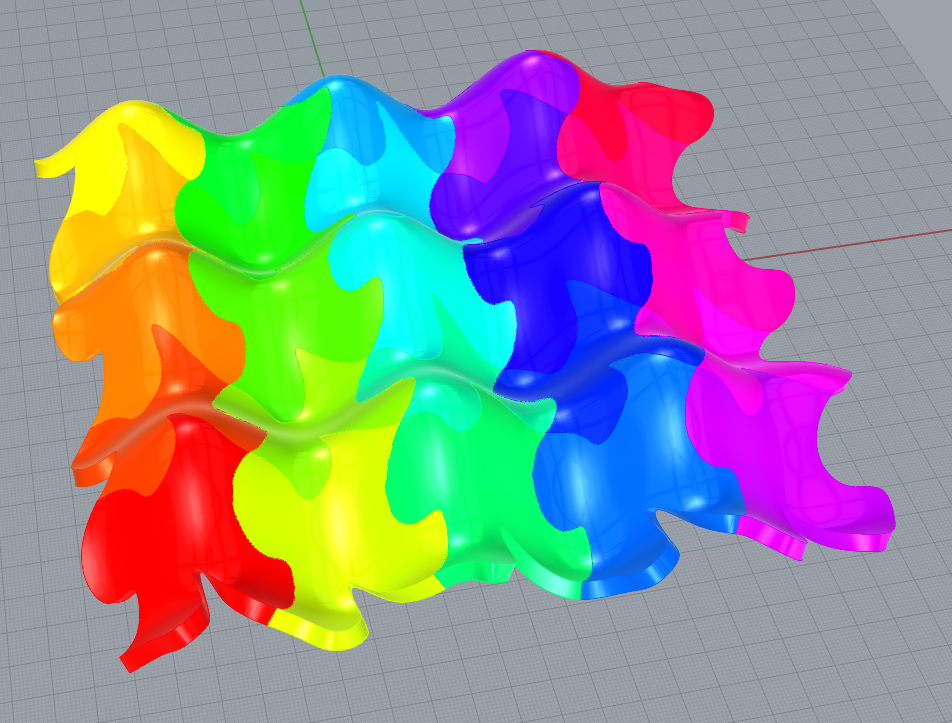
Surface Morph
Here’s the parallelogram tiling again, but morphed onto a sheet of two-axis waves.
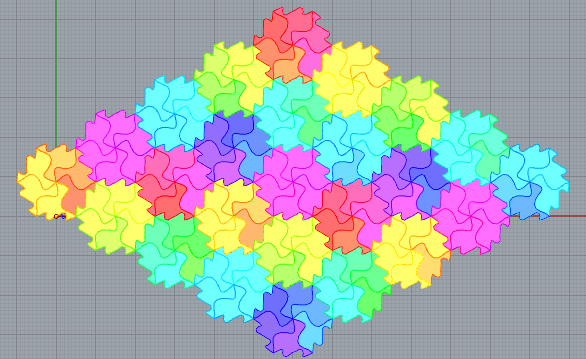
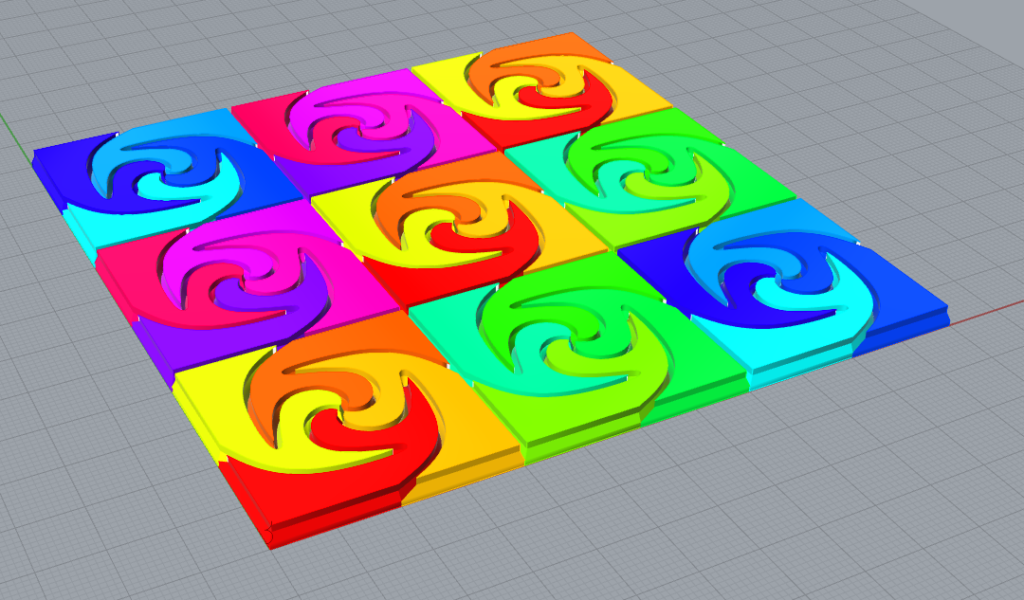
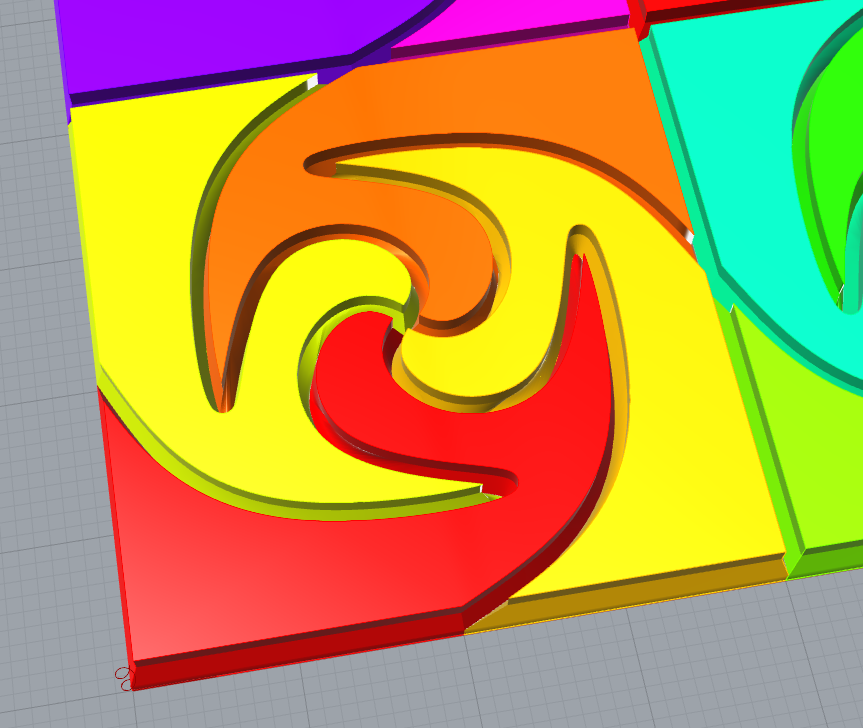
3D Tiling
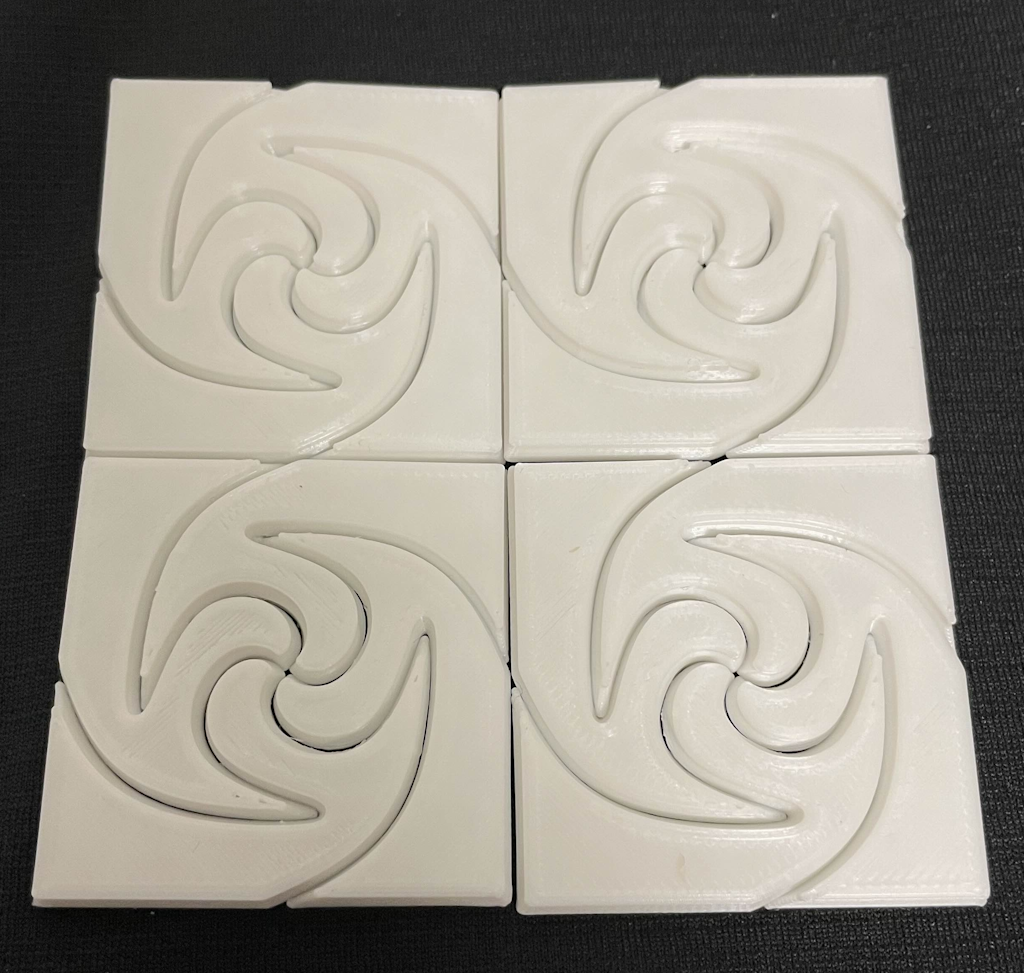
For the 3D tiling, I used tiled.art to experiment with interesting patterns, specifically using the Quad 4 symmetry. I got a pattern that I liked, though its complexities made it rather difficult to come up with a good way to manipulate it in 3D without breaking the tiling, and without making it impossible to assemble the tiles once printed as separate pieces.
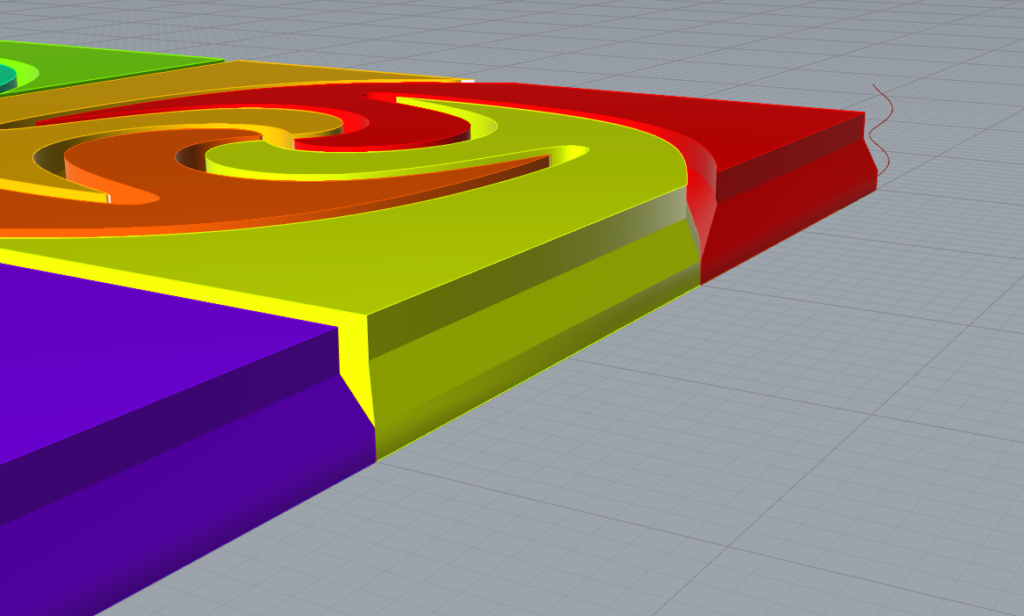
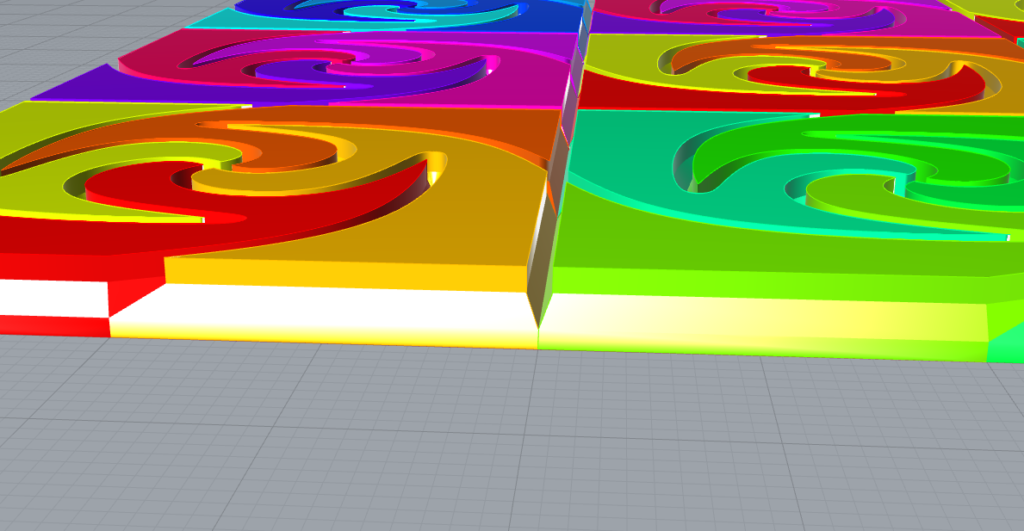
In the end, I used four copies of the base curves along with edge offset to make the tiles start at their original form, raise straight up, move inwards and upwards uniformly, and then raise straight up again. This results in a valley-like cut running along the edges between tiles.
The implementation uses a similar approach to the hexagon tiling: create the base tiles and arrange them into a larger, easily repeatable group, and use the two-axis duplication method.

Files
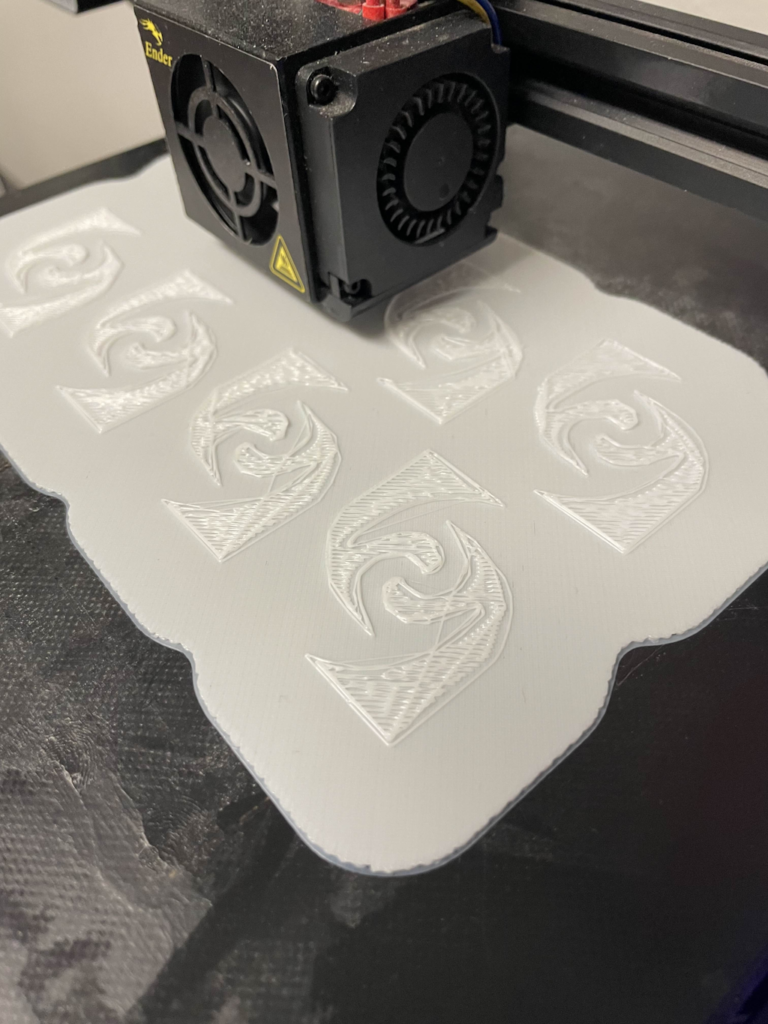
Bonus Prints (Wednesday Edit)
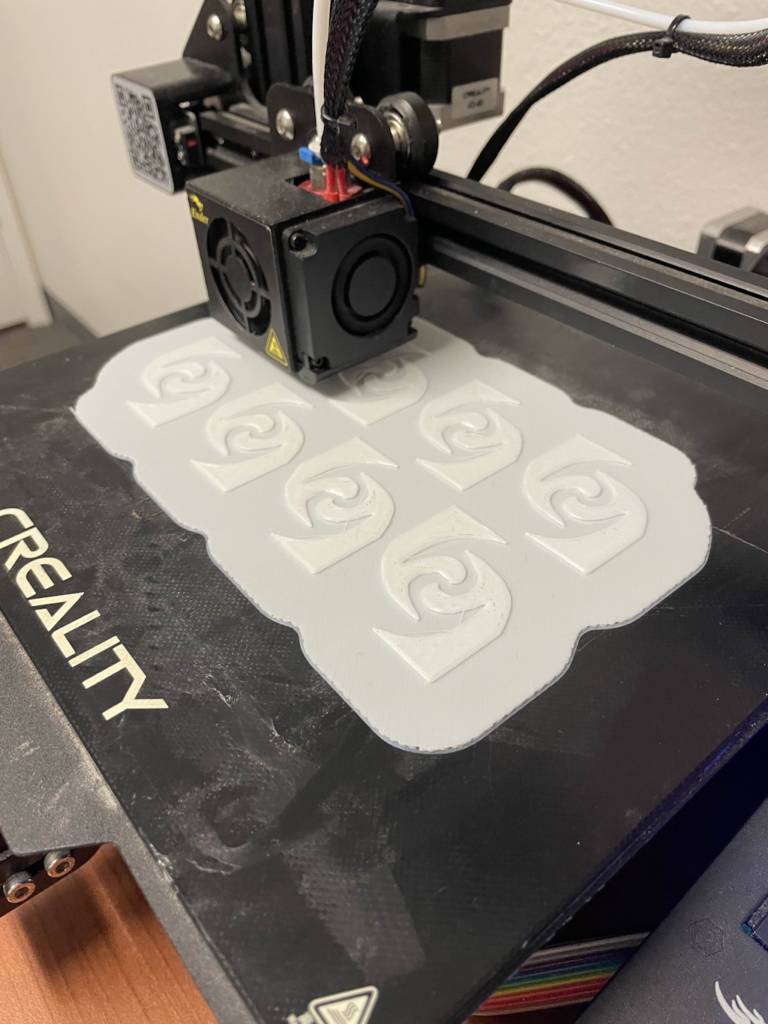
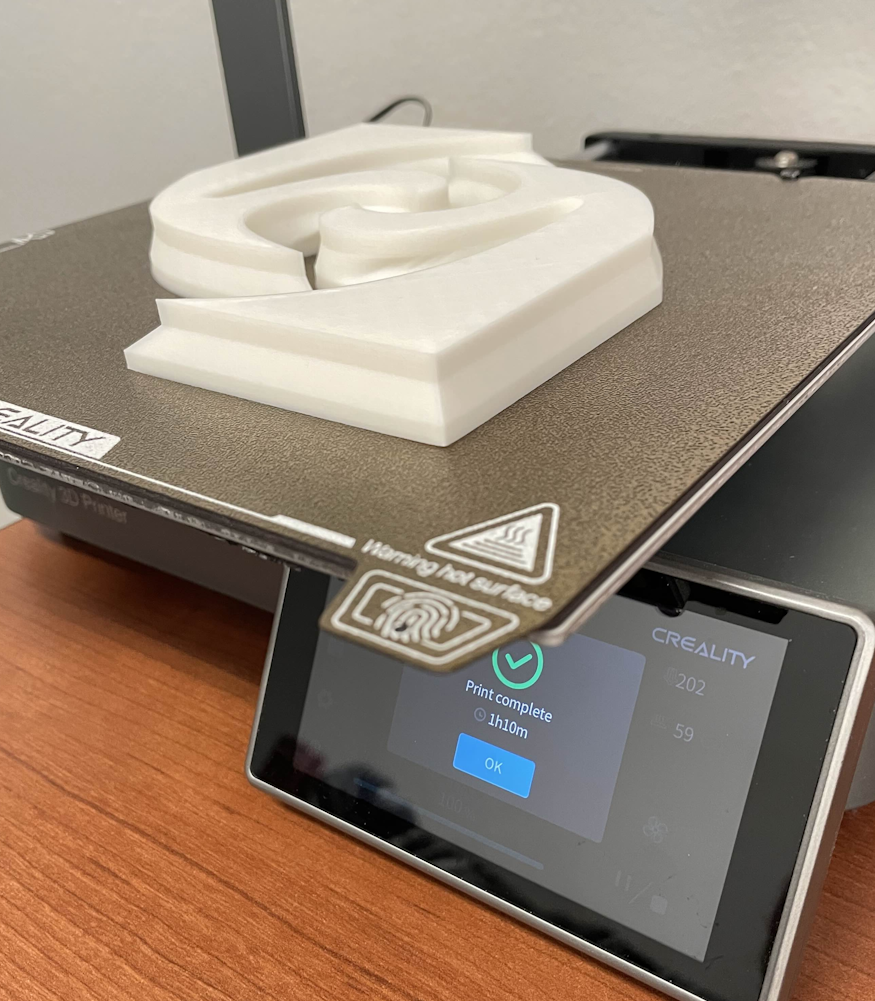
The new motherboard for my Ender 3 V3 arrived today, meaning my printer is finally fixed again after about a month of being broken, hooray! The prints shown above and the ones in the gcode assignment were done with an Ender 3 loaner from Leah, which I am grateful for. Its age definitely shows though, both in the printer model and this specific device, with hours of troubleshooting and failed prints abound. As you can see in the images above, the only way I was able to get the prints to stick was with a huge raft that took 30% of the 4hr44min print time. I also had to use glue, as the printer came with an old glass bed and I don’t have the rubbing alcohol needed to clean it of oils.
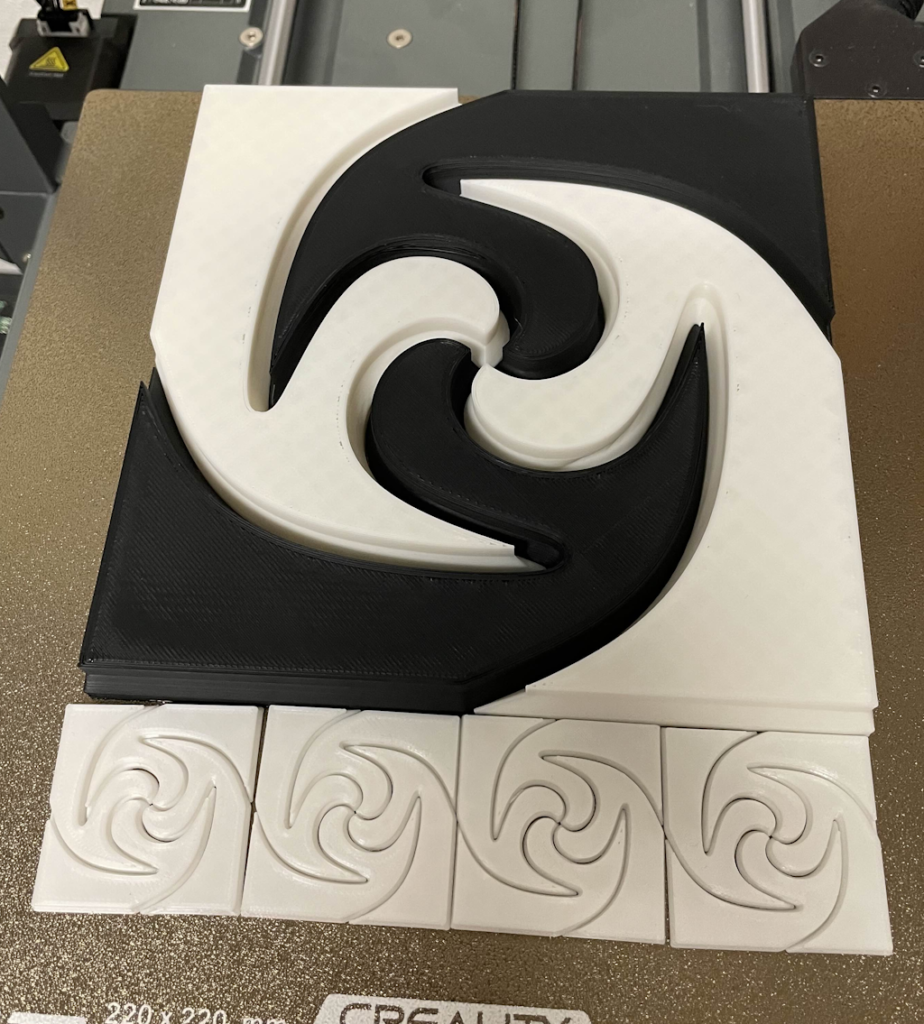
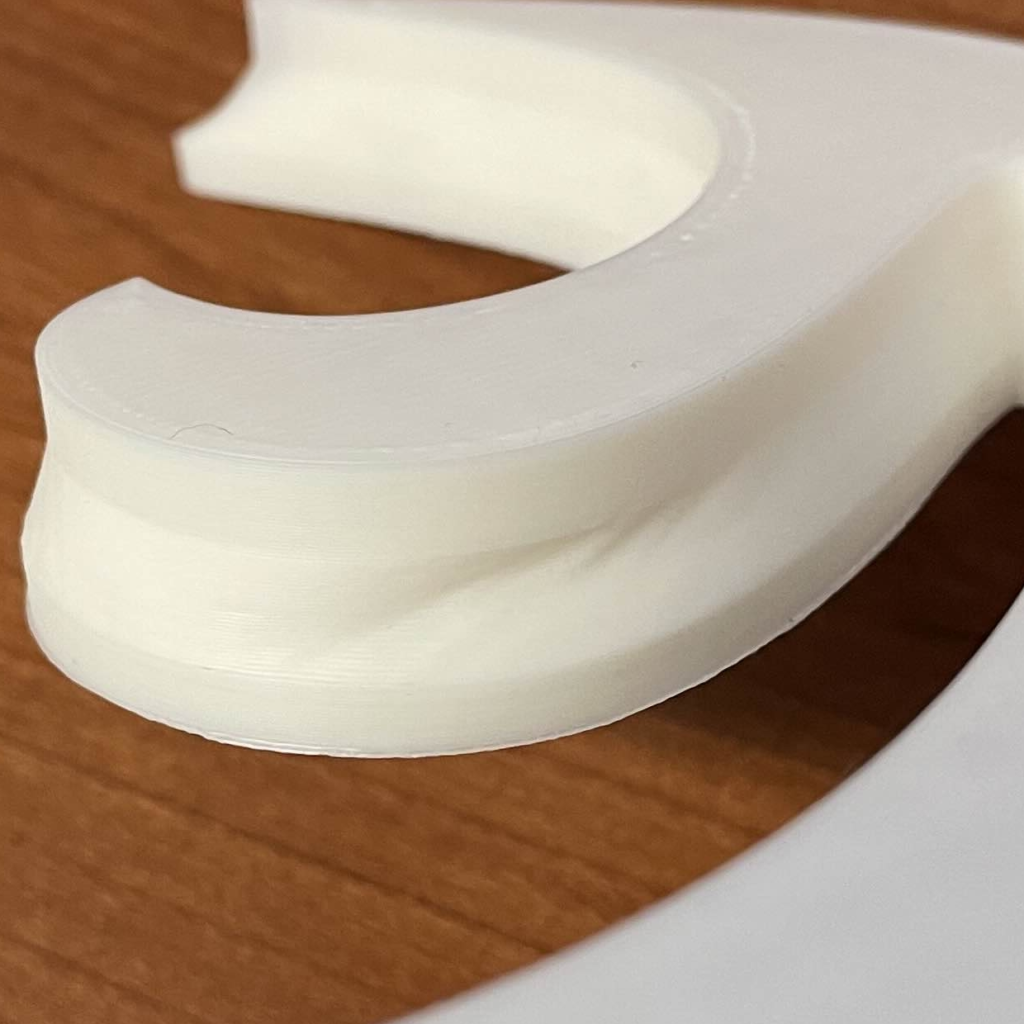
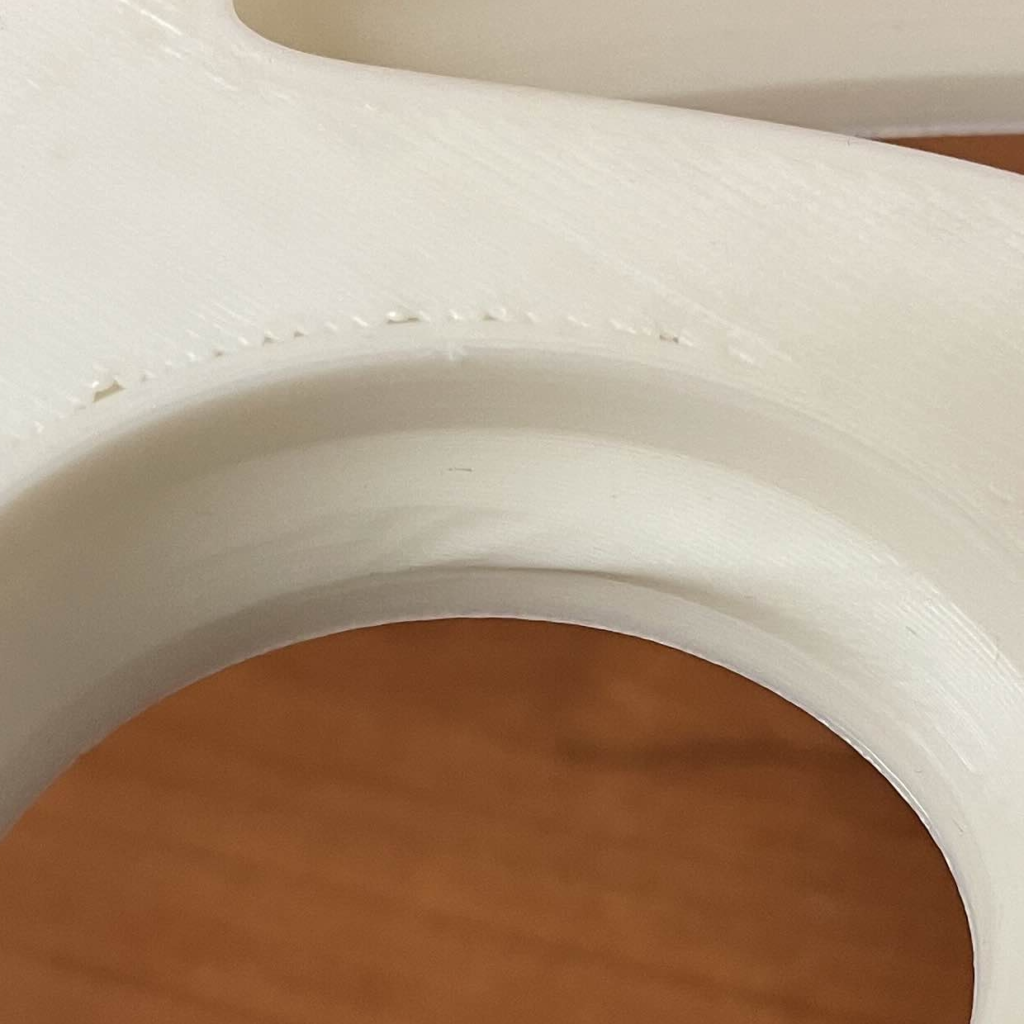
Now that my personal printer is fixed though, I can print some much bigger (4x size) pieces with ease, showing the model detail much better and making them fit together better. In fact, the extra detail has revealed a curious pair of flaws in the model made by Rhino, visible in the last two images. There’s an extra indent on one of the curves curve, where the vertices got twisted in an unusual manner. On the other side is a protrusion which makes it slightly harder to put the pieces together, as the shape requires at least one of them to be inserted straight from above and any protrusions would interfere with that (hence the 3D modification being a uniform inset). Fixing the protrusion was relatively simple in Blender, and has been applied to the pieces printed in black filament.
Logan,
I really like how you emphasized the patterns visually by adding all the colors! Glad that you were able to get your printer fixed as well, your 3D prints look great! I especially find it pleasing that you added your own personal to the hexagonal tiling in the way that it was all still able to fit so well together. Did you run into any issues trying to get the hexagons to tile together after changing it?
First off, congrats on getting your printer working. The way it prints is so much more fluid than the older model I have, I see why you’re so fond of it. I’d also just like to commend you on your very creative takes on a very simple prompt. I especially like your final 3-D print with the interlocking sides, creating tiles within tiles as well as allowing for the multi colored design which is very cool to see.
Hey Logan,
Cool patterns in your prints! And congrats on getting your personal printer fixed. I think it would’ve been a lot more interesting if you got to work with your personal printer for this assignment. But what you managed to create with the loaner was still impressive. Looking forward to your final project with your personal printer back in action.
P.S. I couldn’t edit my initial comment, so I’m replying to it here.