Part 1: 2D Tiles
A. Escher-esque tile
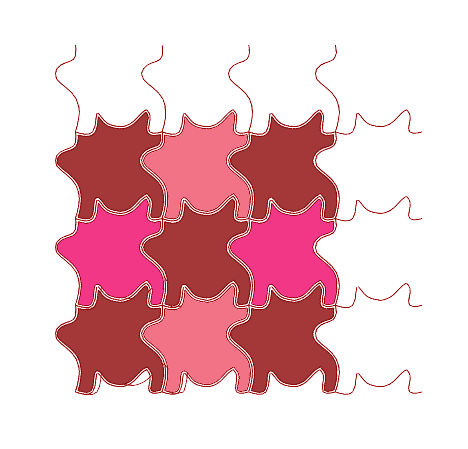
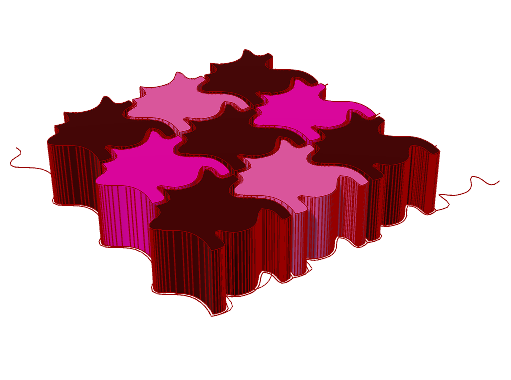
For the Escher-esque tile, I first drew out some curves I liked for the lattice in Rhino. I settled on a shape mimicking a cat’s head where the top/bottom curve represented the ears and the left/right curve was the nose. Then, I used the tiling code we went over in class to generate the tiling. The main challenges I ran into were making sure the curves didn’t overlap so that the tile could close properly and also making sure the lattice-to-tile translation was happening correctly.
For the first challenge, I had to fiddle with the curves quite a bit, and the end result did not end up looking like what I expected. Additionally, I used the Point block in Grasshopper to trace the original curves I made in Rhino and stream the list of points using a Panel and text file (this was a hack I found online). I then reinput those points into an InterpCurve in the Grasshopper code to get the tile below. For the second challenge, the top and right curves were just being initialized with the wrong indexes, so it was a straightforward fix once I realized what the issue was.

B. Triangular Tile
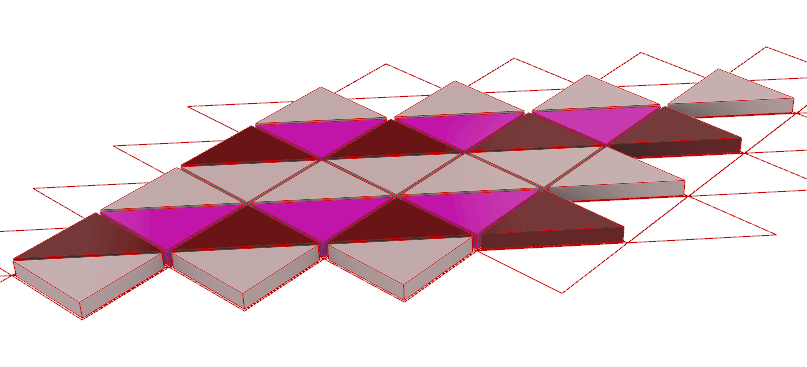
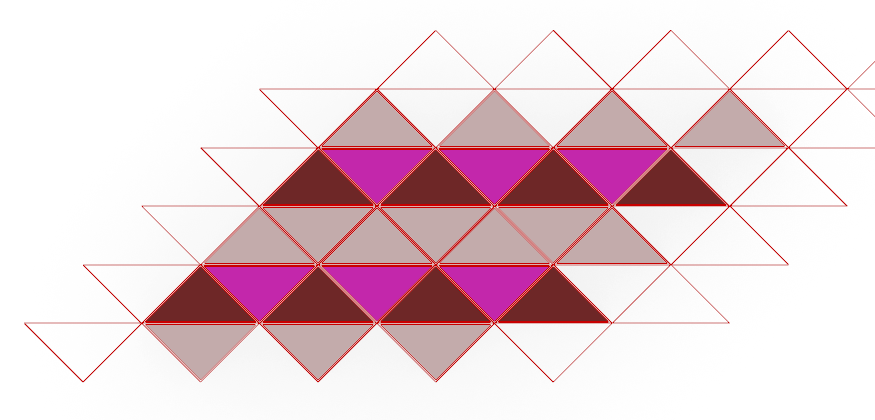
I decided to create a triangular tile for the second set. I generated a simple isosceles triangle in Grasshopper. For the geometry, I first duplicated and rotated the triangle 180 degrees using the origin as the center of rotation. Then, I modified the original code for the tiling, and I realized that I needed to add a second set of triangles that weren’t rotated for each iteration of the lattice. This filled in the rest of the tiling. I also had to adjust the amount that each triangle was moved within the lattice loop so that the tiles lined up correctly.
Part B: 3D Tiles
I searched online for some inspiration and came across the Moroccan scale tiling shown below. My first attempt was to draw out the arcs in Rhino and modify the triangle code from the previous section to utilize the curves instead of the straight lines. This was easy enough, but I struggled more with the scaling aspect. I ultimately decided to remove the scaling factors to make the program simpler. However, this meant that I had to tinker manually with the offset values in the lattice (similar to the triangle tiling). The extrusion worked after that.
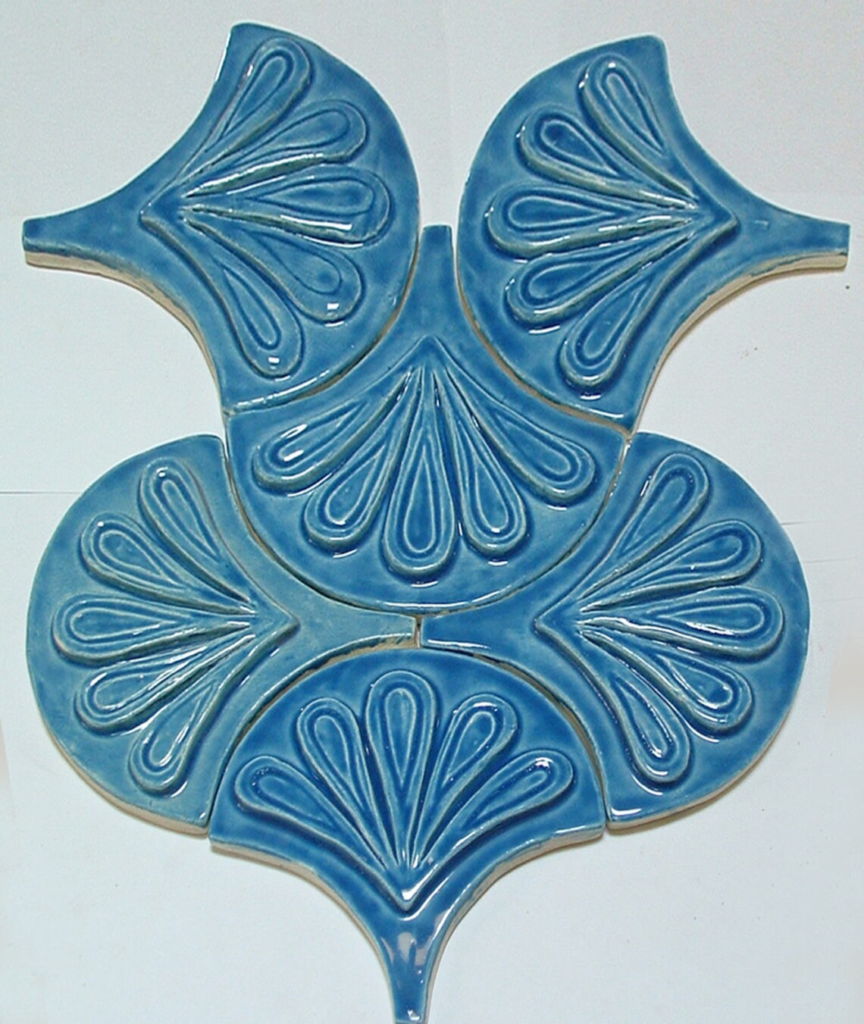

My next task was to come up with an interesting 3D aspect to the tiles. I worked in Rhino on the base curves I had generated. I duplicated and rotated the curve by 45 degrees upward, and I was interested in having a more gradual curve from the long edge of the curve to the point at the top. I used a sphere and BooleanDifference to carve out that curve. Then, I also wanted to add details like in the image above. This ended up being a much more intensive process than I expected due to the nonplanar surface I had created with the sphere. I drew out the shape I wanted with InterpCurve and then rotated and projected it onto the surface. I tried several different methods of extruding the round surface I wanted from this curve (I was envisioning a bean-like shape), and only after many attempts was I able to successfully print the curve. The final solution required projecting another line to split the original curve, creating another curve above the surface, and then lofting the two halves together. I unfortunately printed my forms before realizing I was meant to code it in Grasshopper instead of Rhino, but they turned out quite nice.
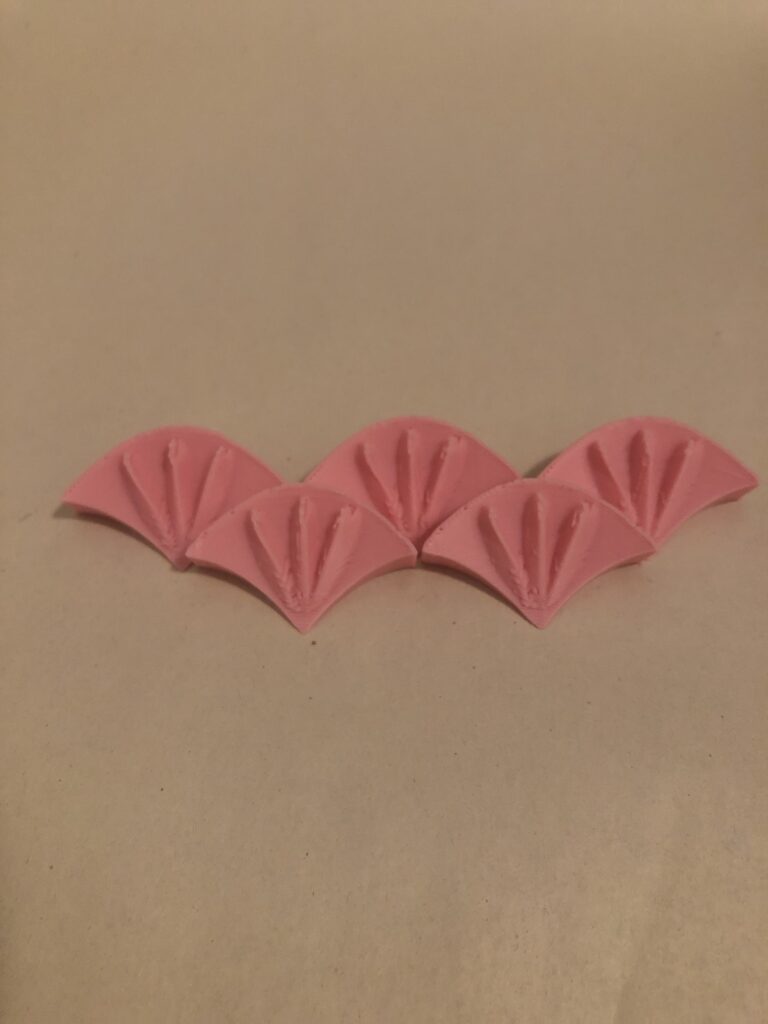
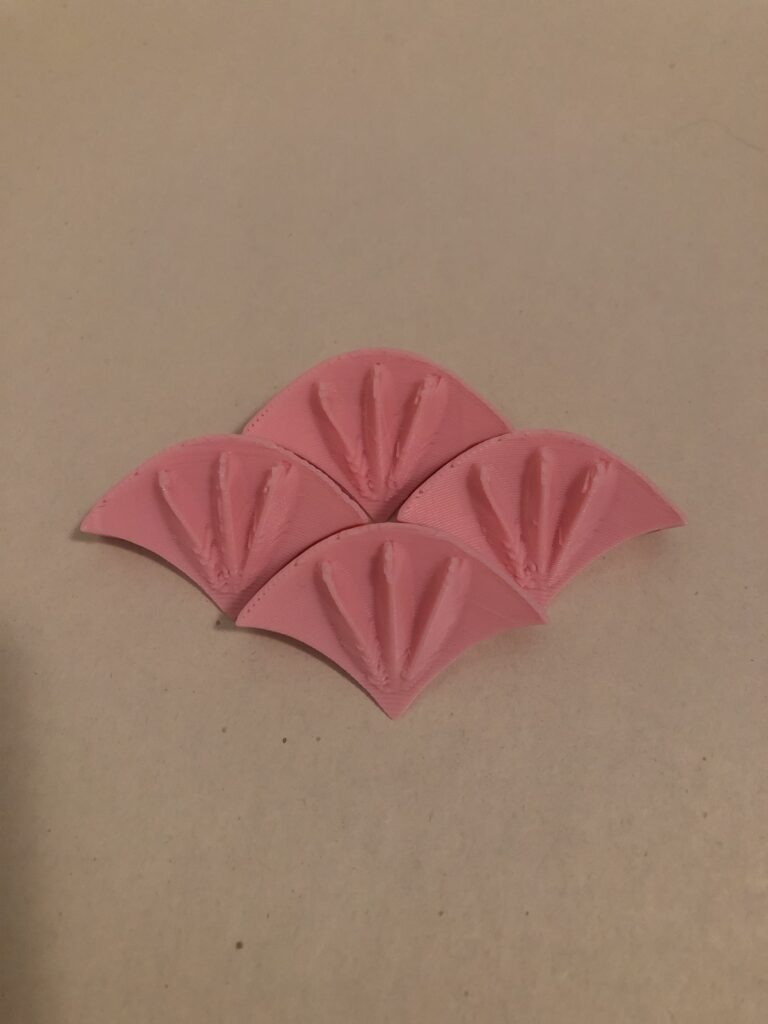

After printing, I also realized that the dimensions I used for the tiles only allowed for tiling configurations where each tile was in the same orientation (unlike the photo above). With more time, I hope I could make tiles that could be turned into even more tiling options.
Part C: Surface Morph
I primarily relied on the code that was provided in the slides for the surface morph. I first tried to use the lattice instead of lines, but the bounding box was much bigger than the actual object when it was fit on the Escher-like curves. With the bounding box error, the morph was of course incorrect. This was solved by creating lines using the vectors of the original Python code.


Code
Grasshopper
Rhino (for 3D form)
Hi Sachi,
I like your cat shape, it’s super cute! I also really like the colors you chose for your coloring. Your scale tiles came out very nice. Their vertical slant adds a lot of interest. Projecting the curves onto the surface is something I wouldn’t have thought of doing. This is a beautiful project!
Hi Liz, thank you so much! I wish I had been able to find a set of curves that were a bit more cat-like, but I’m glad to hear you liked it anyway. The projection was a bit tricky but ultimately helped me create the form I wanted, so it was cool to explore.
Hey Sachi! I really enjoyed your presentation today. I wanted to say that I think you had one of the most unique and interesting designs of all of the tiling projects I have seen so far. I really enjoyed reading your explanation on how you were able to make your curves align perfectly in order to tile with such a unique shape. I think that I was a genius design process and the results speak for themselves. All parts of your project turned out very well and I liked the detail you included in how you designed every part. Looking forward to seeing your final project!
Hi Wayne, thank you so much! I really appreciate your comments, and I hope you like my final project too.