Code
Design Process
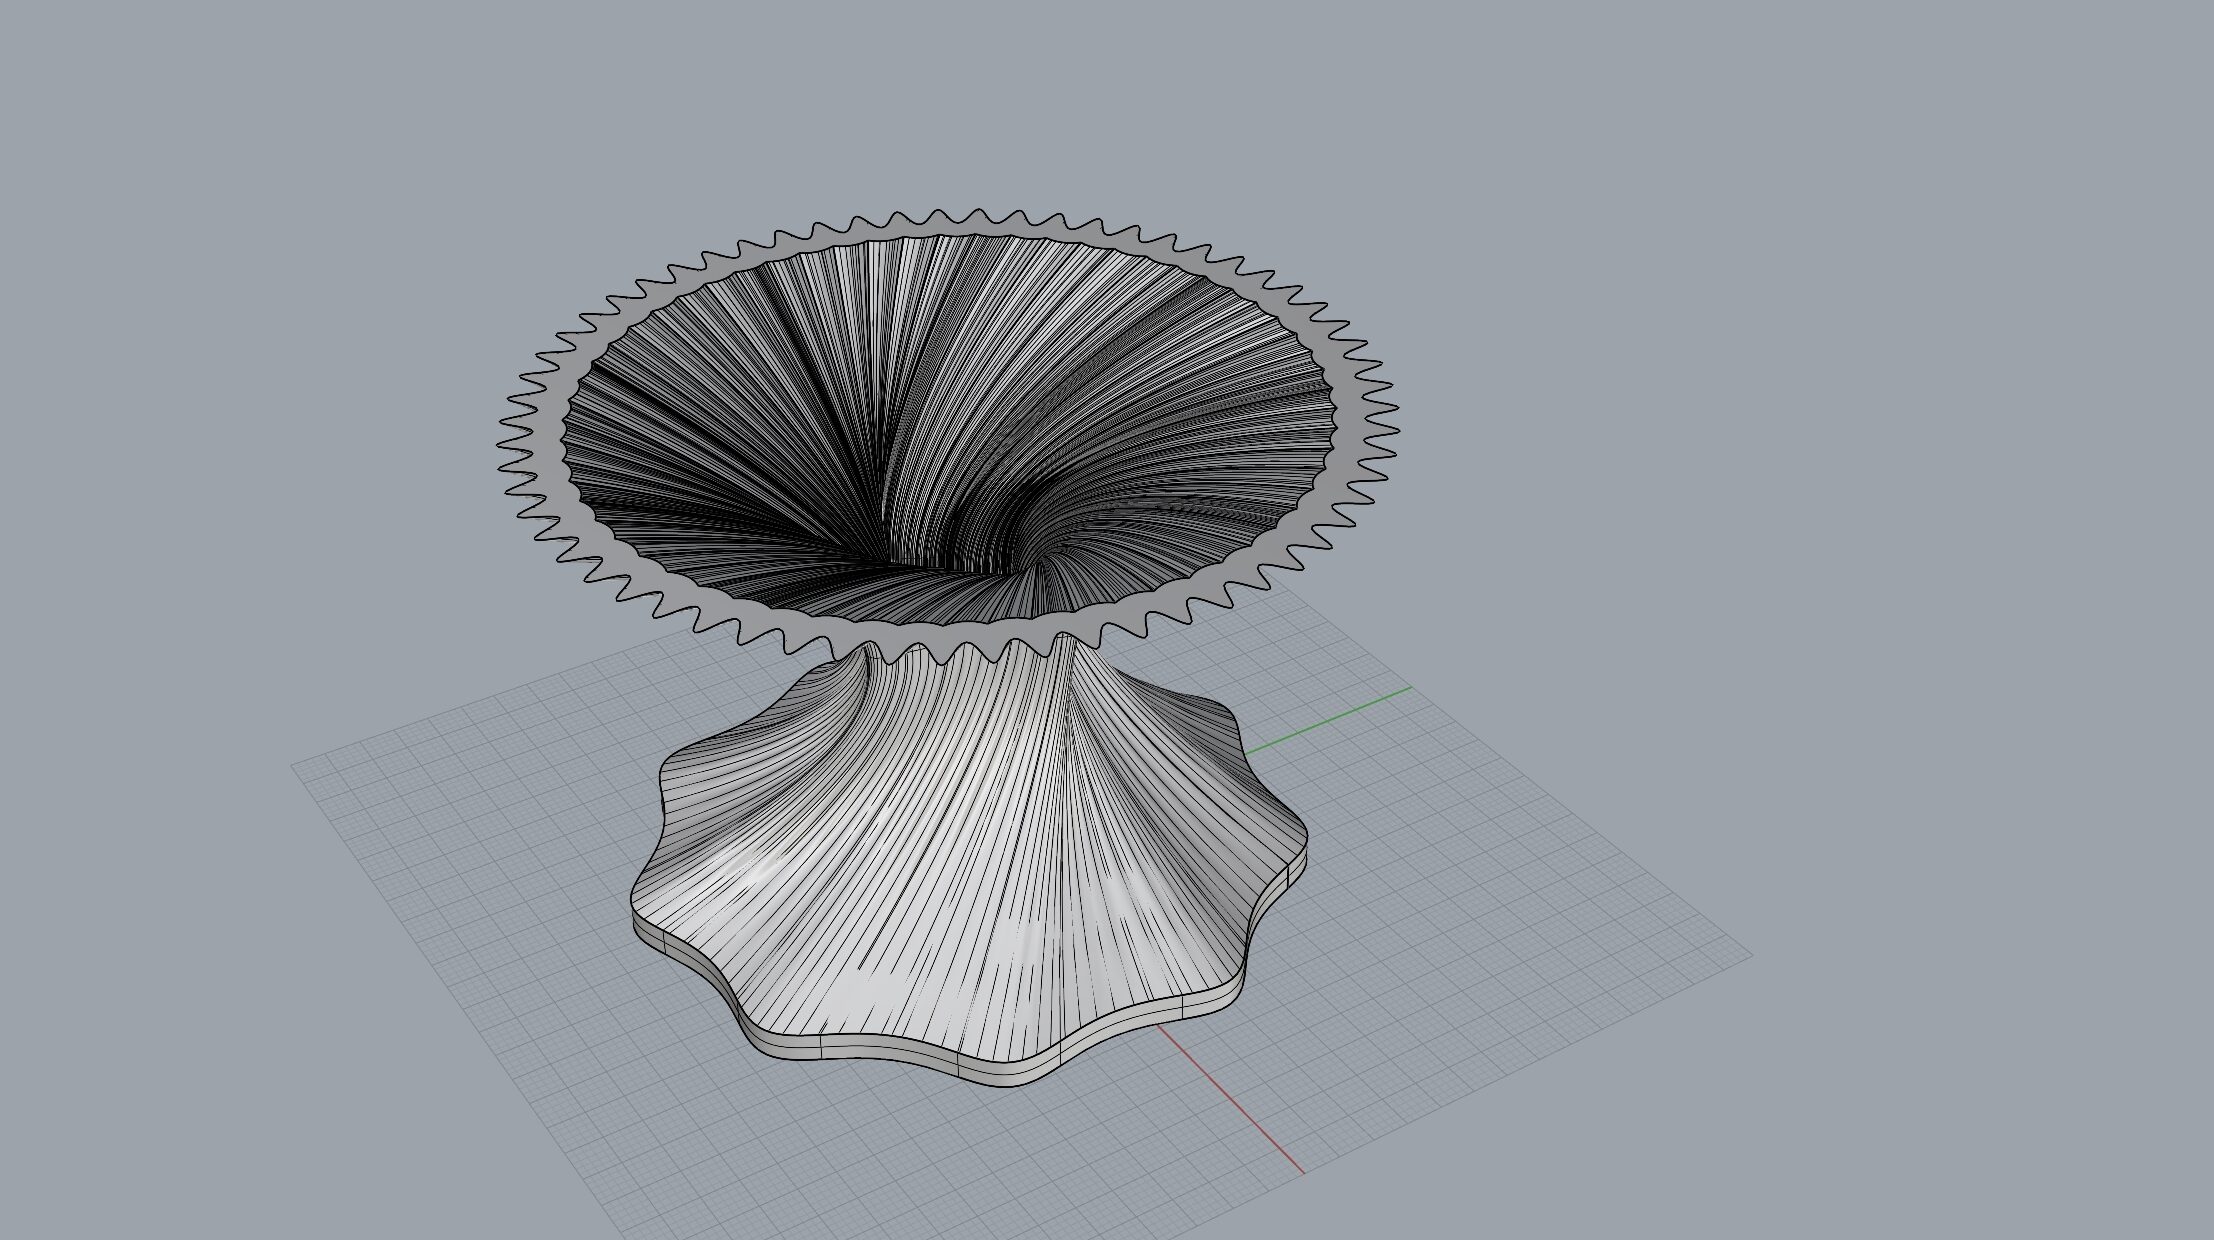
In my design process, I started with a simple print, working with just 3 curves, and gradually added more. For the last 3 models, I used 6 curves and experimented with different line types, such as InterpCurves, Curves, and Polyline. Before each print, I leveled the bed to ensure nothing was out of place, although I initially struggled to get the PLA filament to stick. Eventually, I was able to get it leveled correctly. For my first parametric print, I used tree support, and things were going well at the beginning, however as the body thinned, the model fell apart and this model was estimated to take around 10 hours. For the next models, I avoided giving them a thin neck and tried different points and curves.
Vase 1
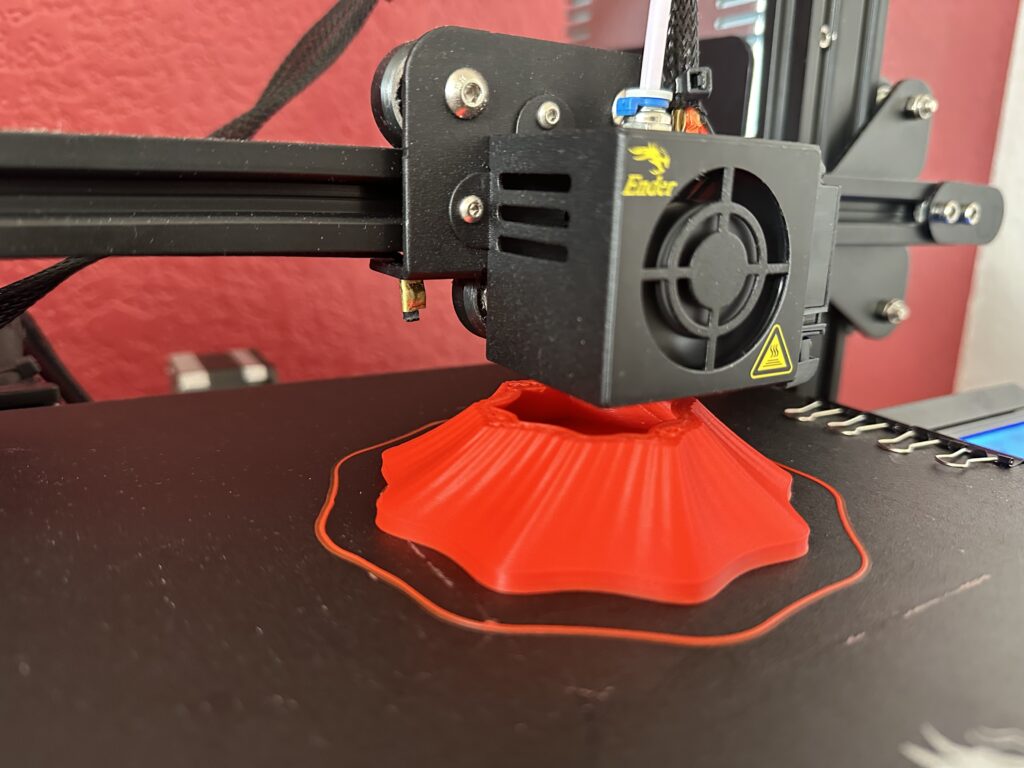
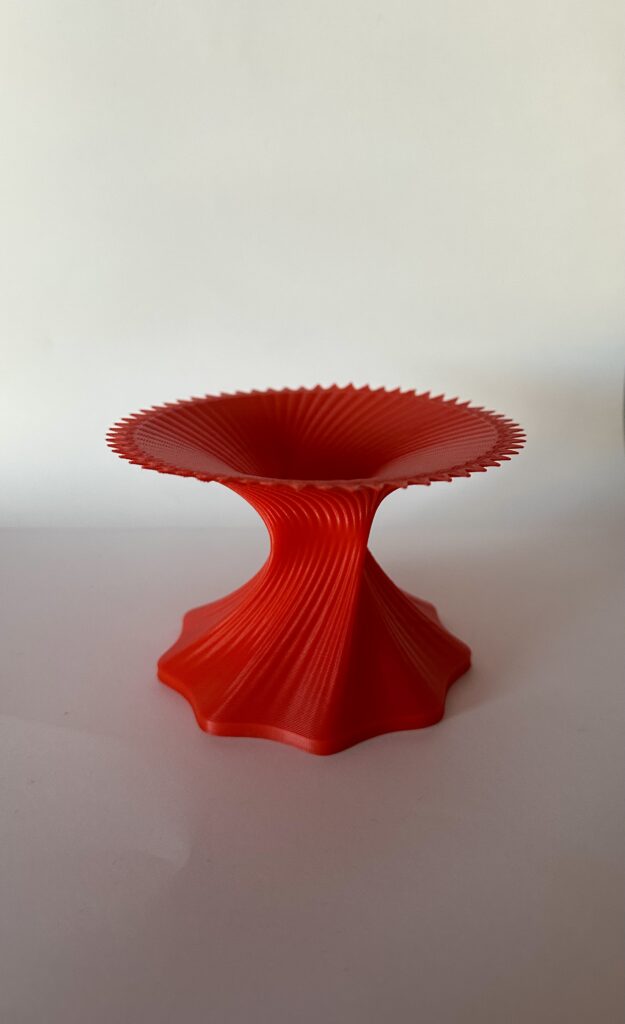
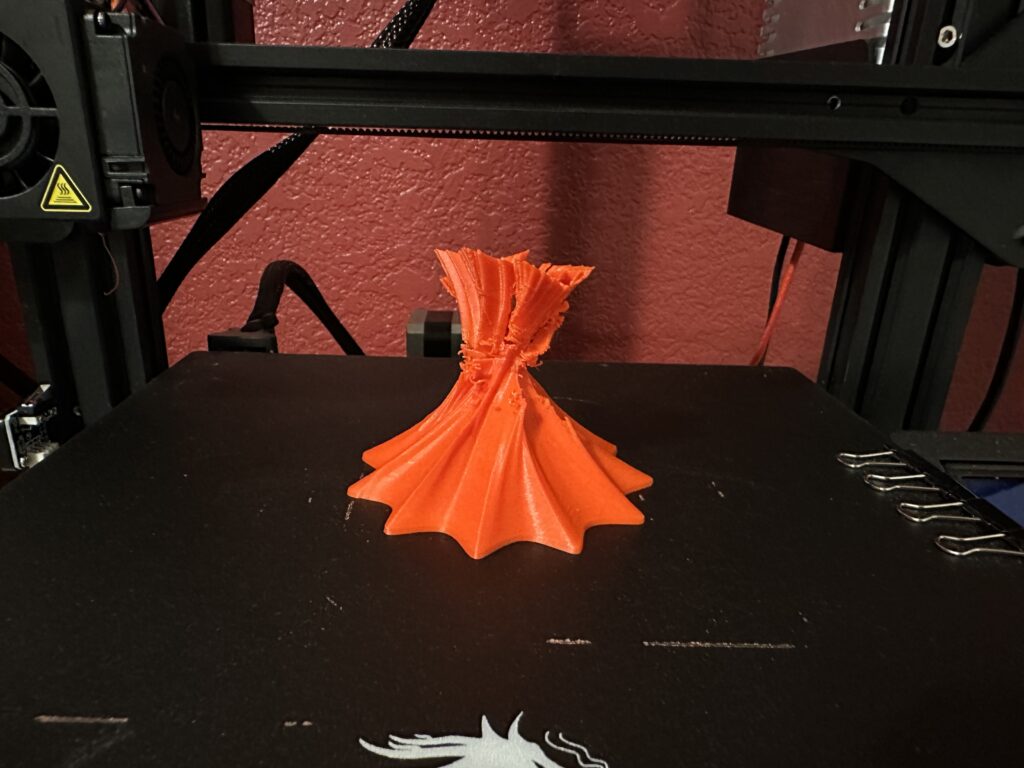
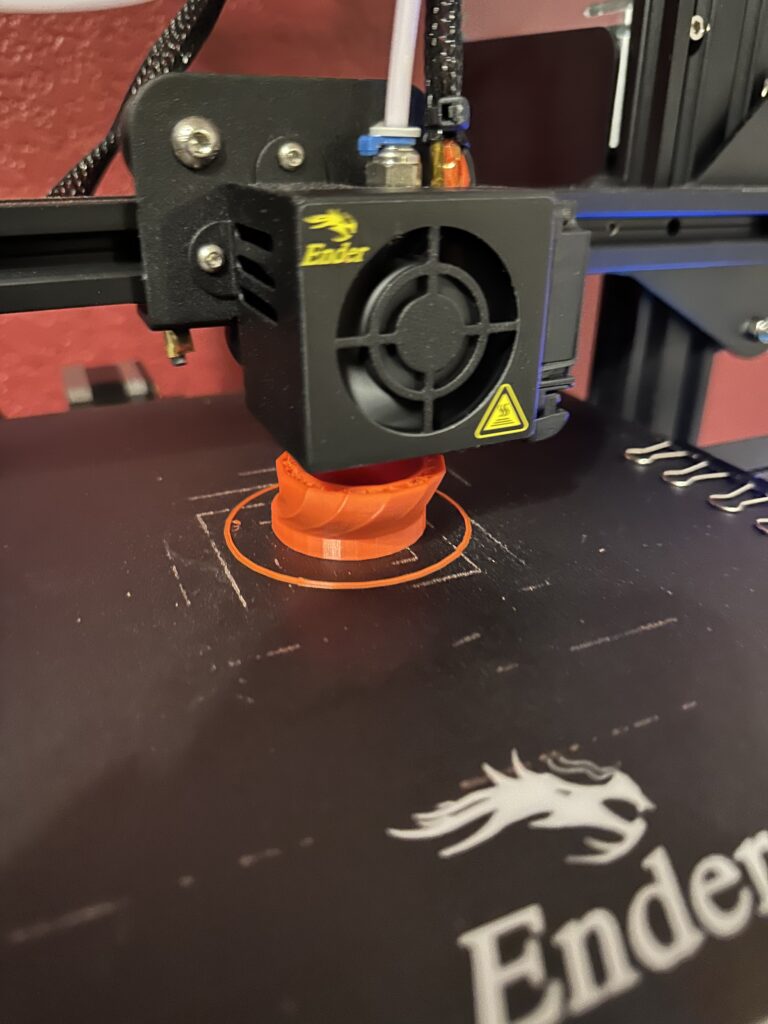
For my first successful vase, I used the code provided during class and experimented with the z-axis, points, and the radius of each curve. This vase really caught my attention. I liked how the transition at the top had spikes, while the rest of the design twisted and looked smooth. The vase took about 10 hours to print, and I was able to monitor most of the process from home to ensure it printed correctly. I was amazed at how sturdy the vase turned out and the detail of each edge.
Vase 2
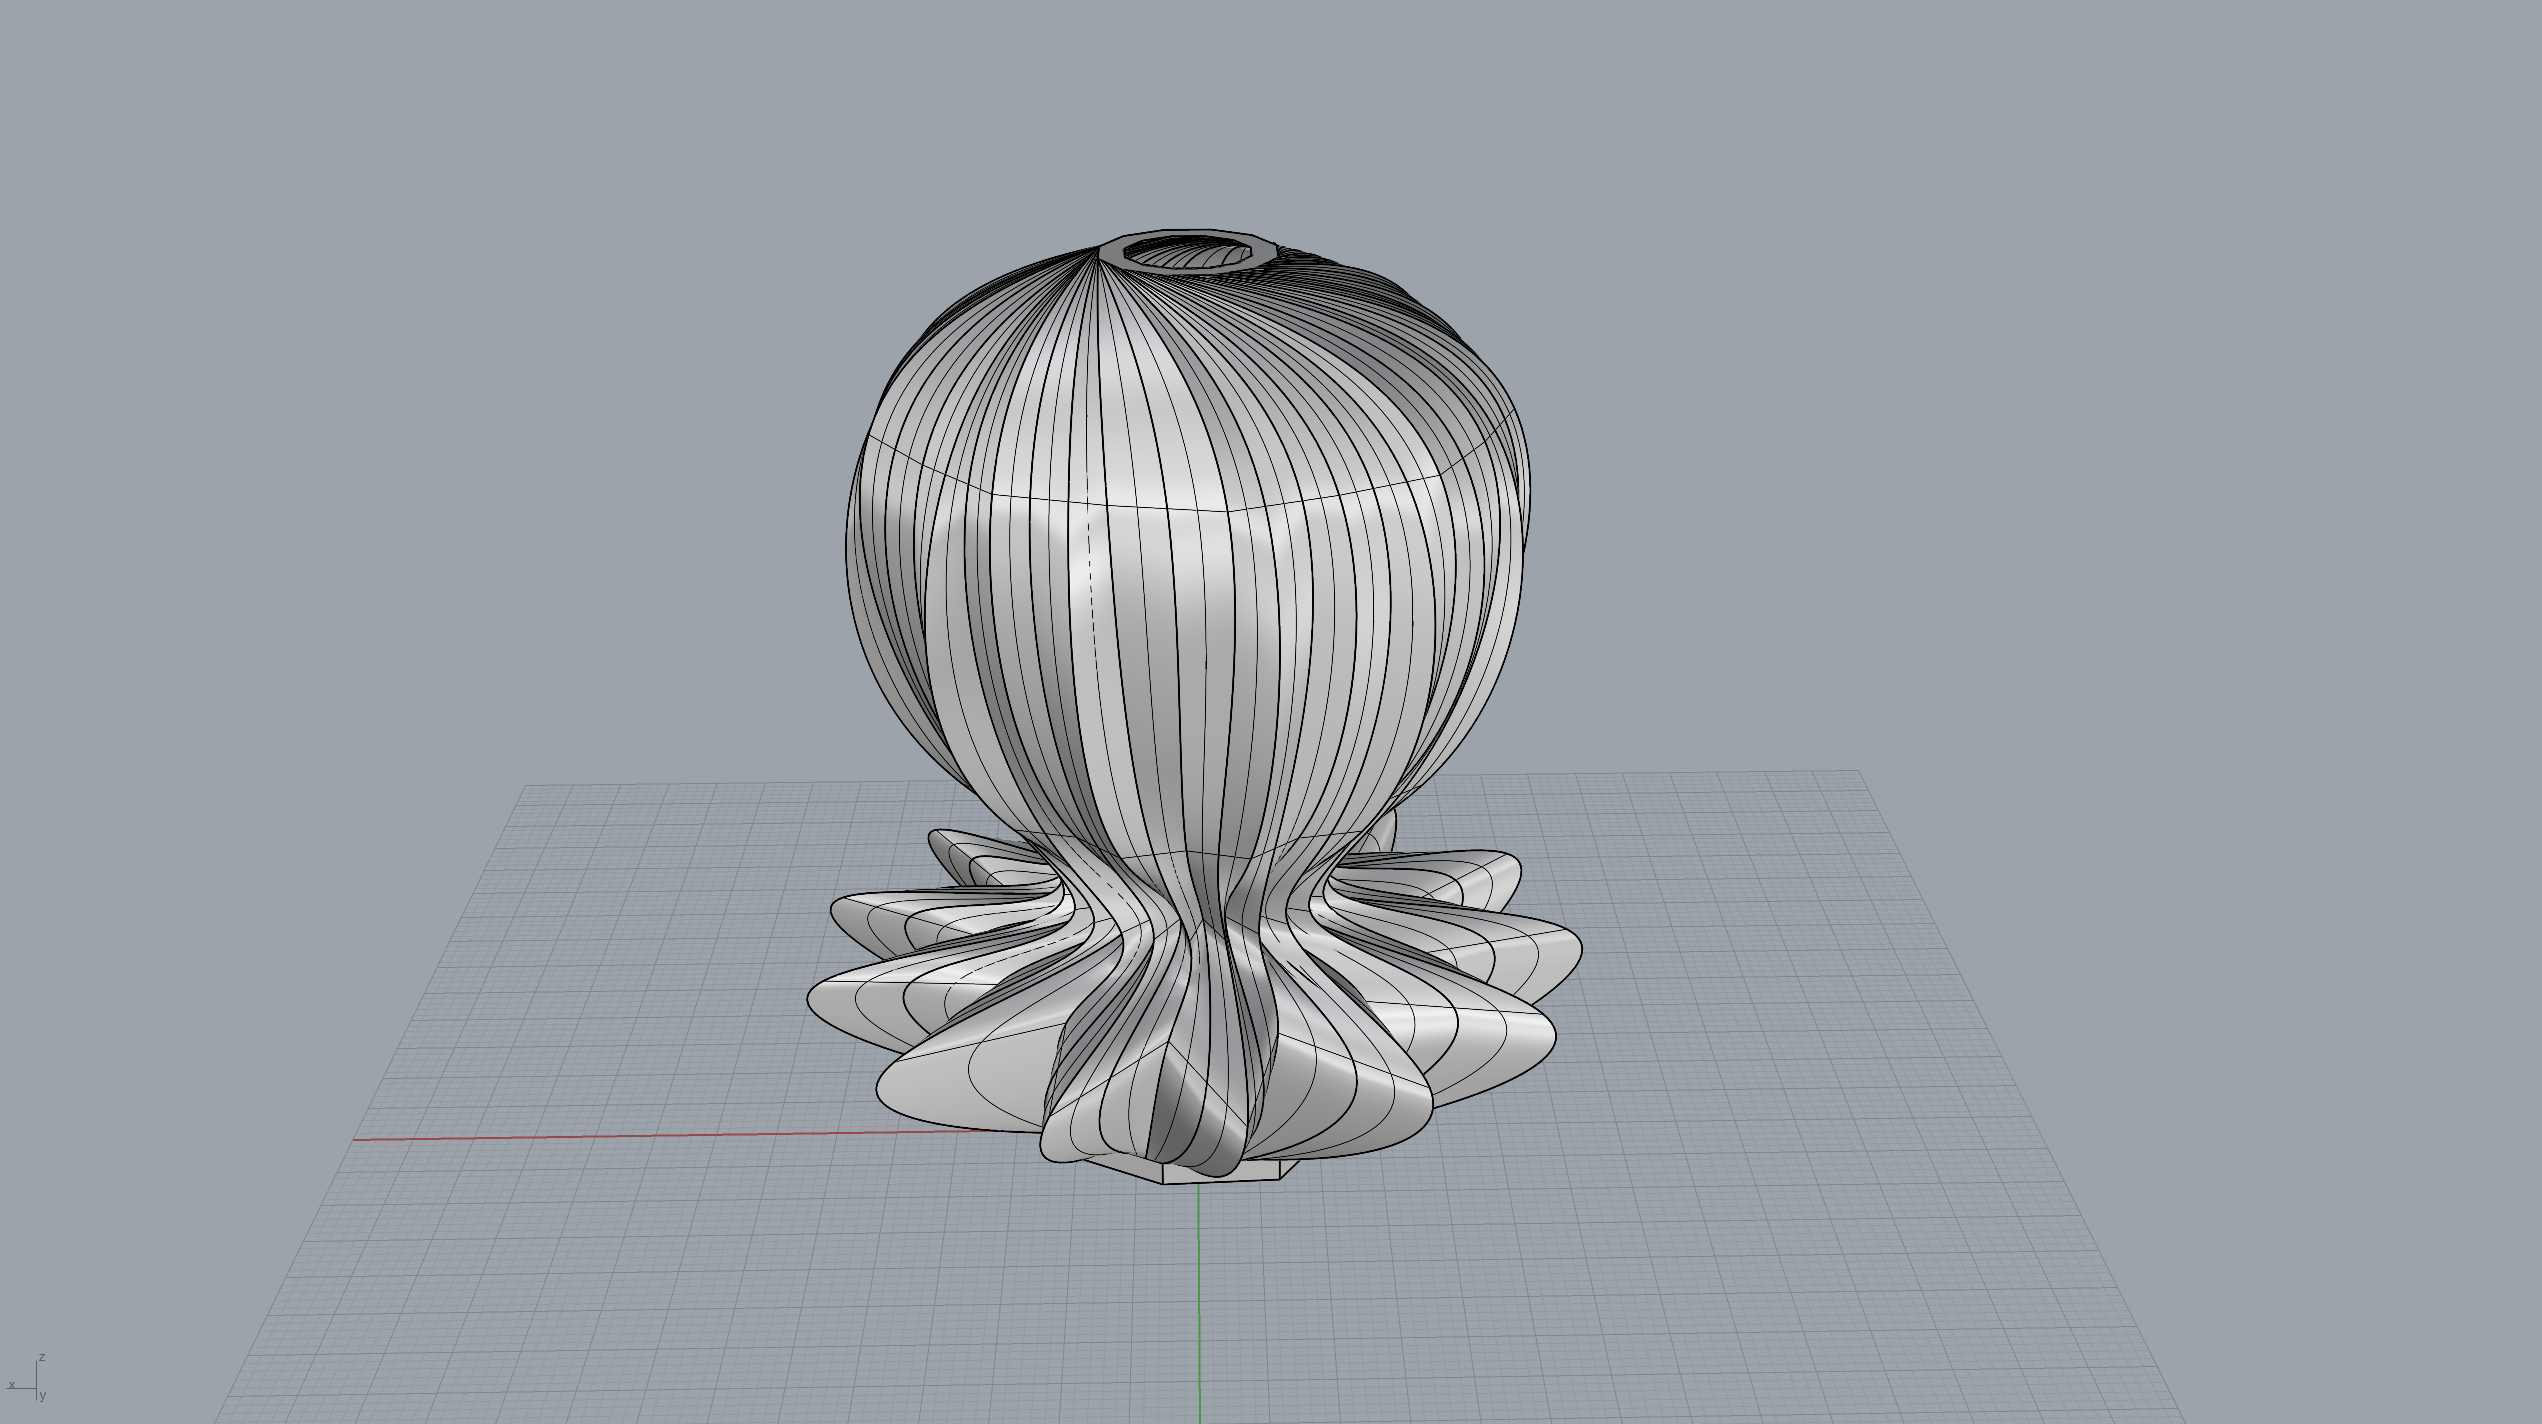
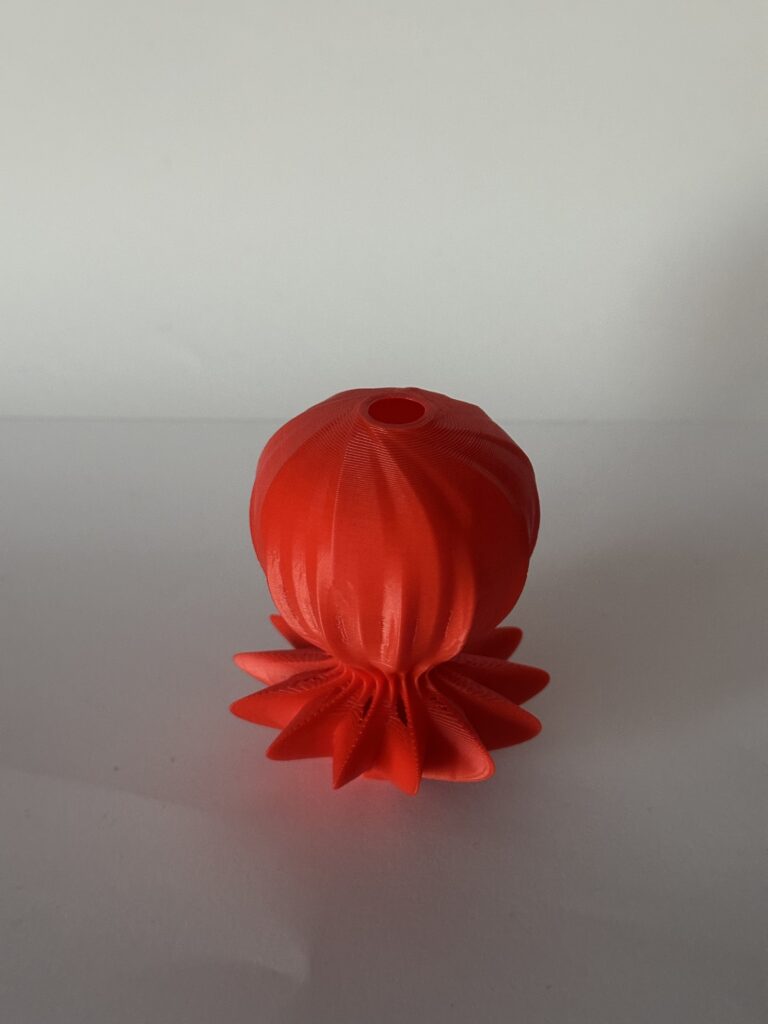
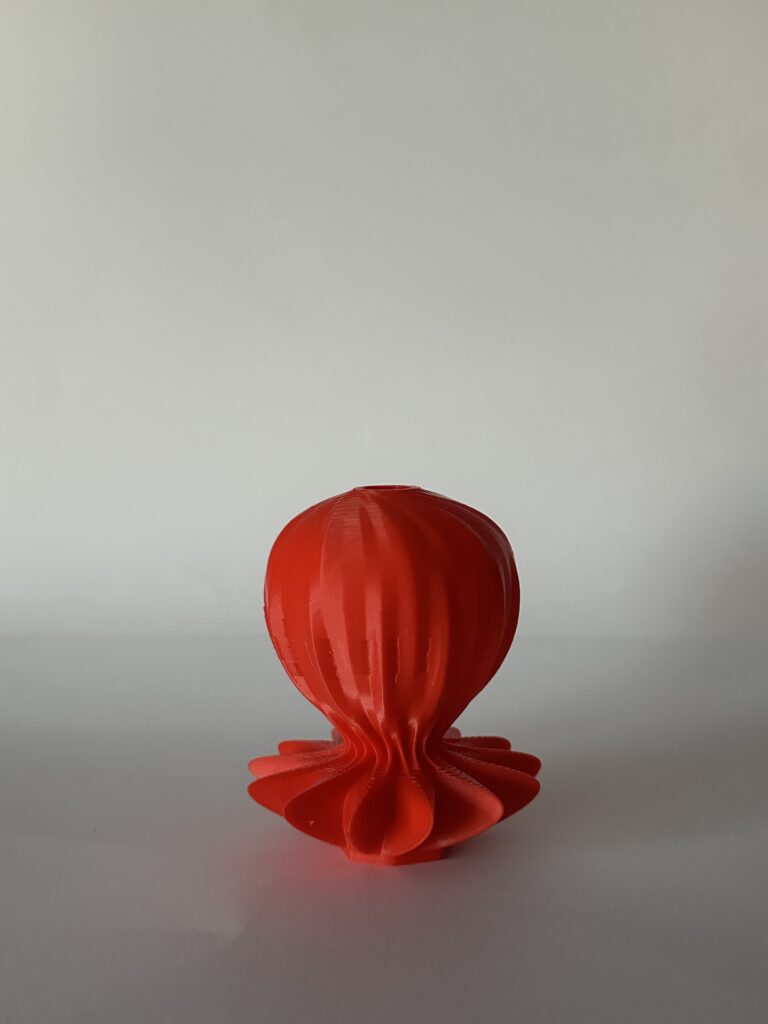
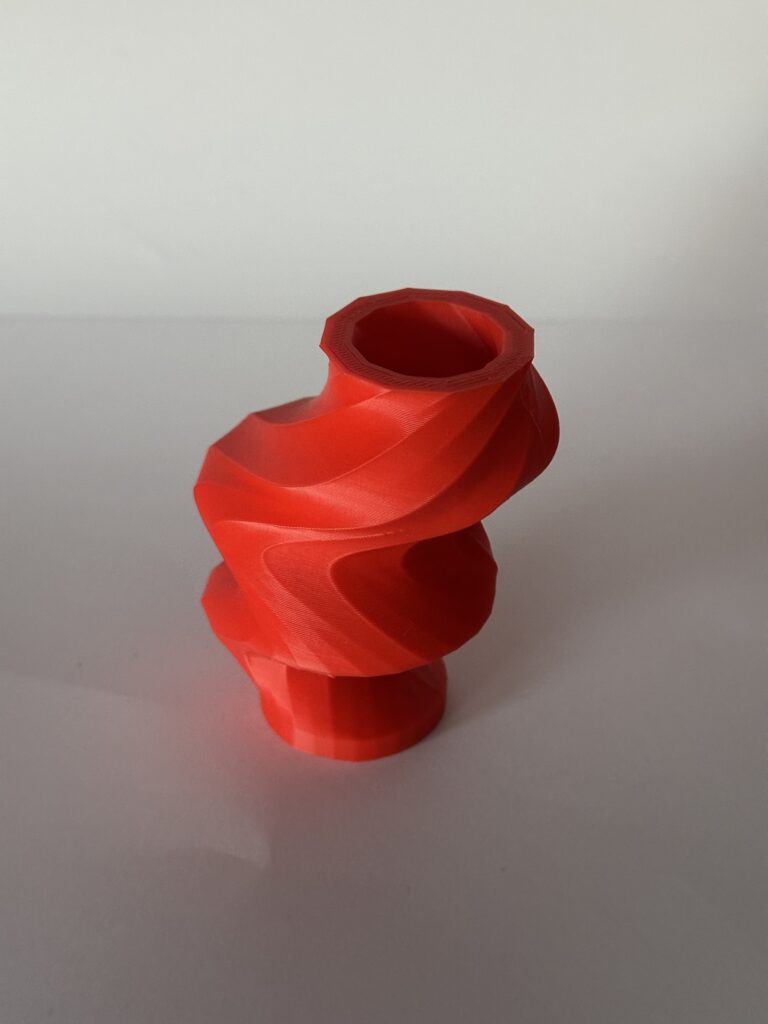
In my second vase, I initially planned to create a lotus-like model, with wide spikes and a small semi-circle. However, I realized it didn’t meet the minimum size requirements for a vase, so I increased the height of the two top curves and tried to form a sphere. I then made the spikes thinner and rotated them. As these transformations took place, the design started to remind me of a hot air balloon with a propeller. I was pretty satisfied with this model and printed it out, and to my surprise, it only took about four and a half hours. There are a few small areas where the PLA didn’t stick, leaving tiny holes, but overall, the quality was really nice.
Vase 3
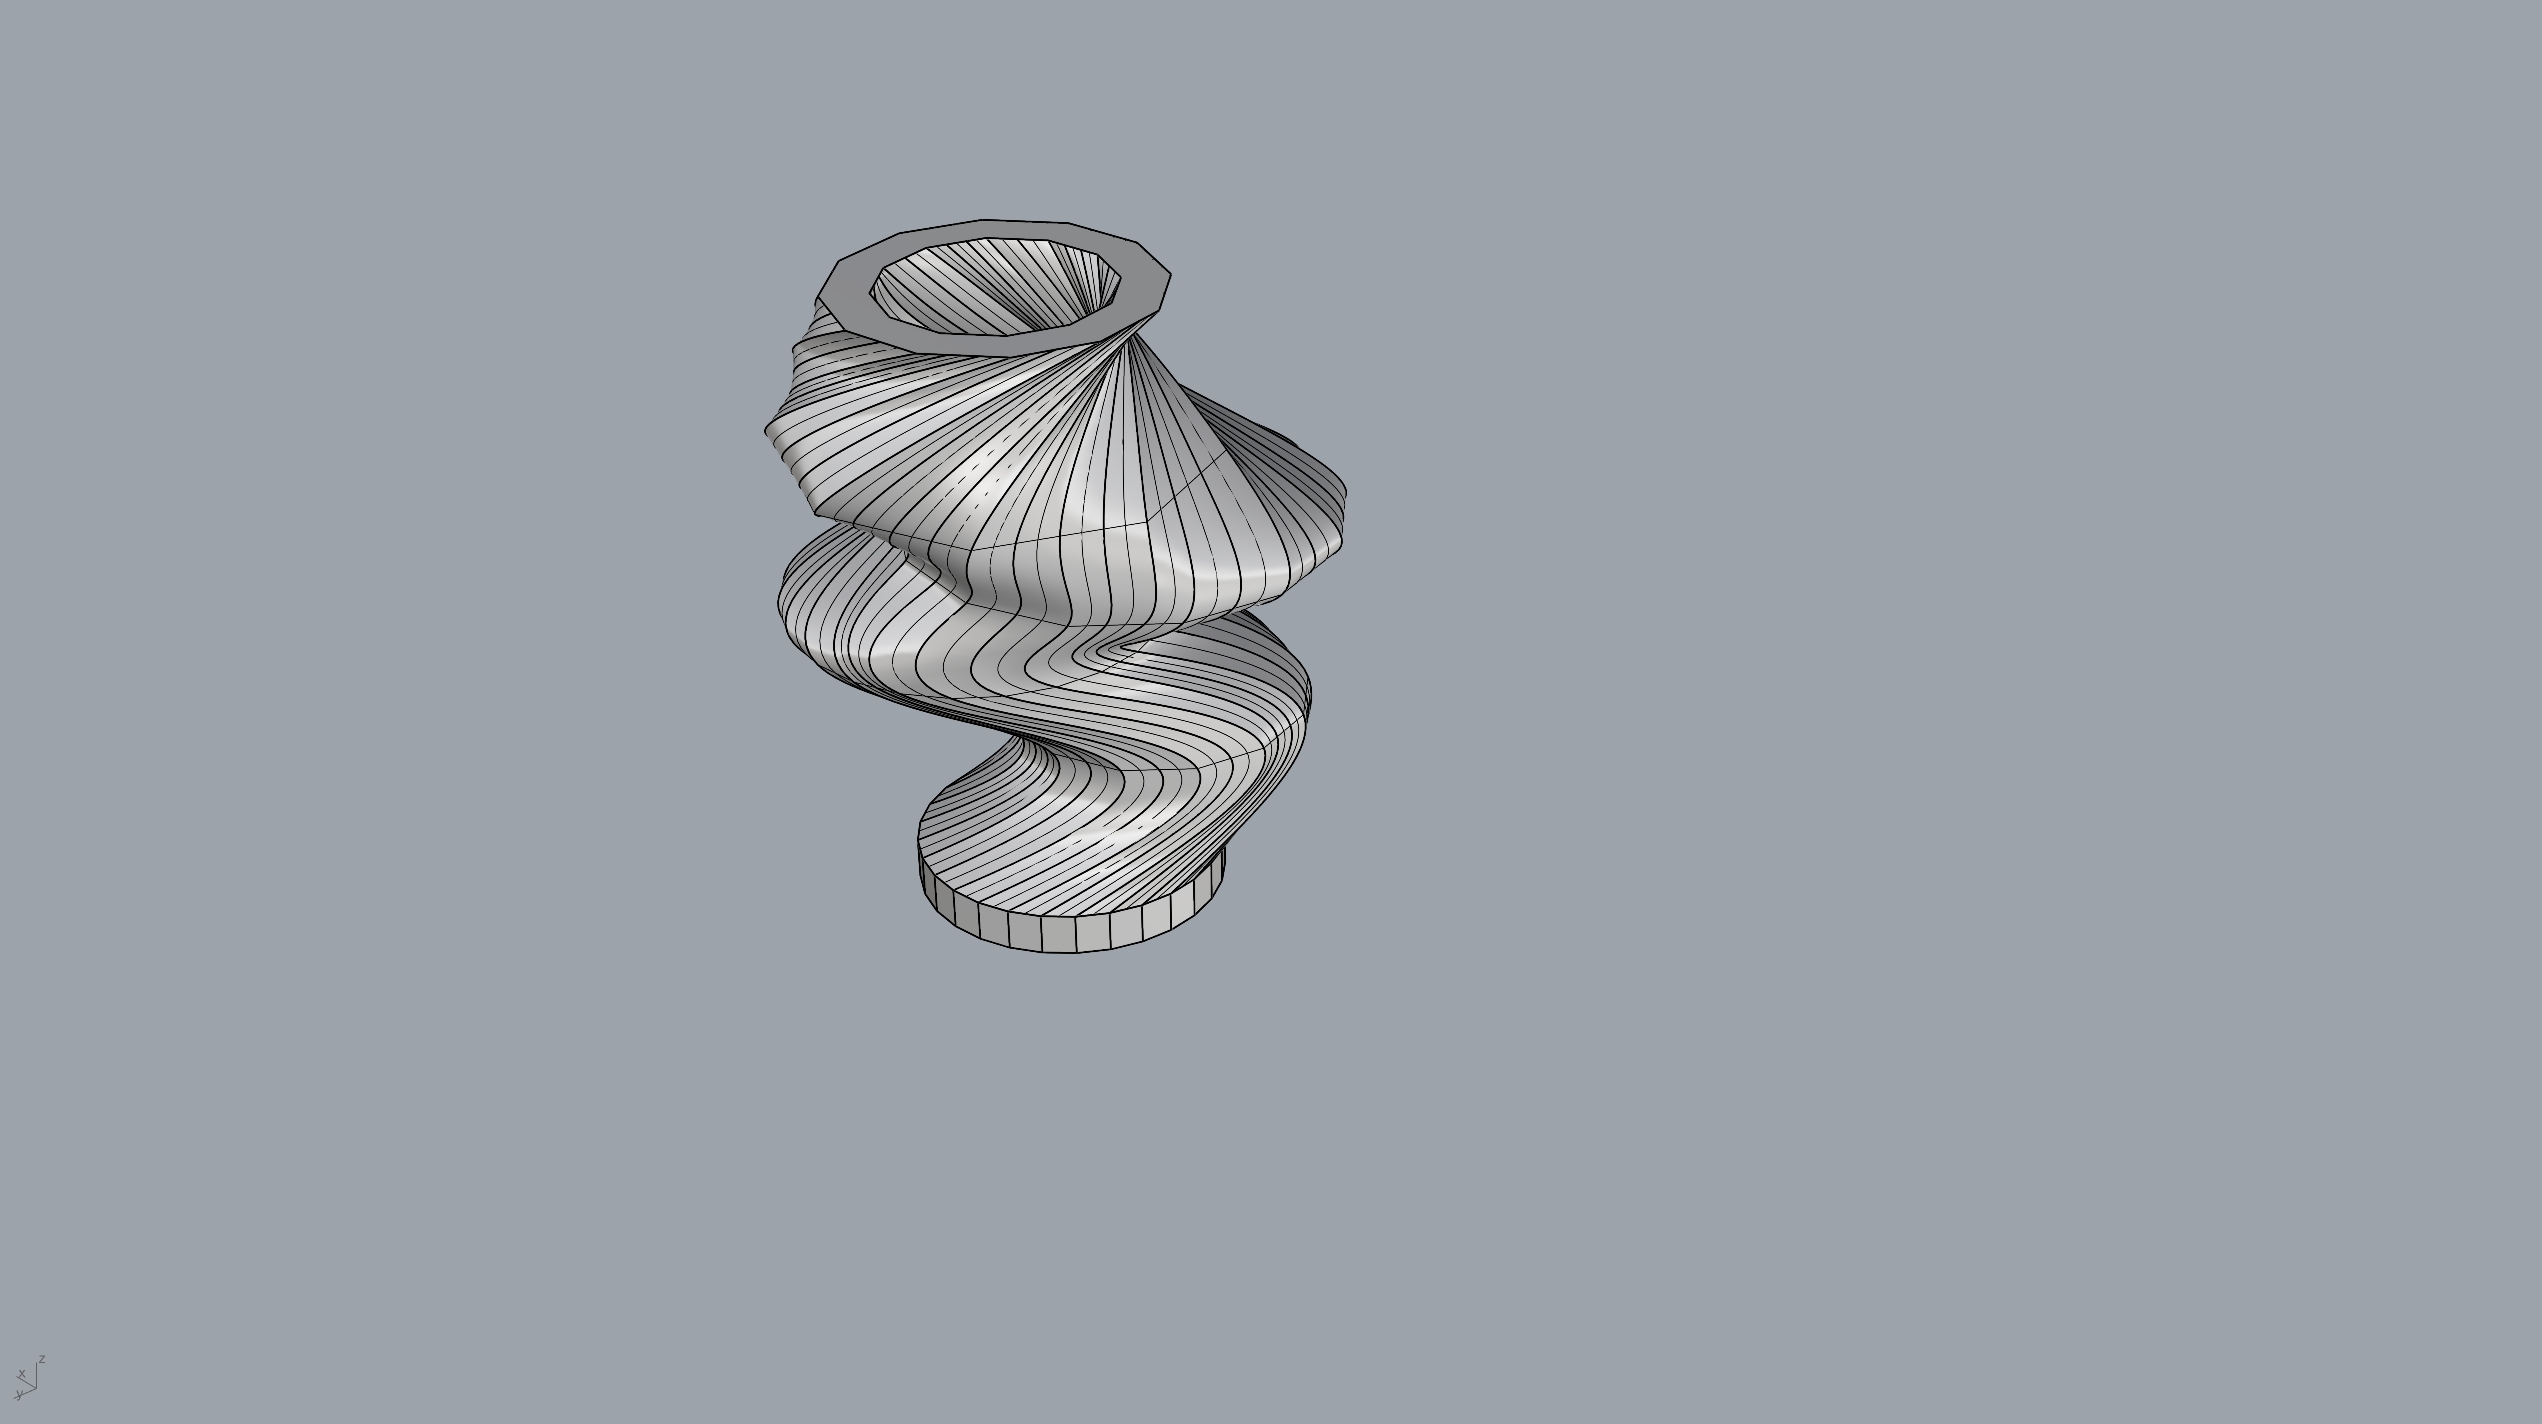
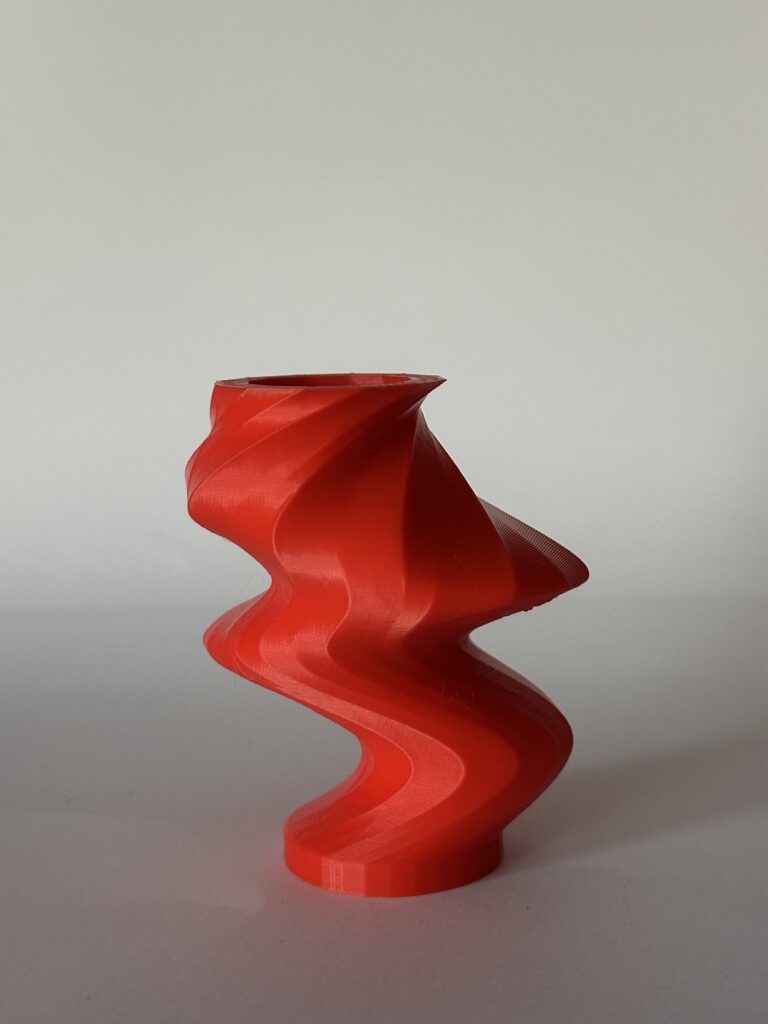
For my third vase, I wanted to change things up and explore different transformations. Initially, I considered tilting the curve along the x or y axis, but I couldn’t figure it out, and time was running out. Instead, I decided to translate the curve along the x and y axes. I was really happy with how this model turned out. I thought it would need supports, but I didn’t see any errors in Cura and hoped it would print well and it did. The print took about 8 hours. I hope to revisit this design and modify it by tilting the curves.
Vase 4
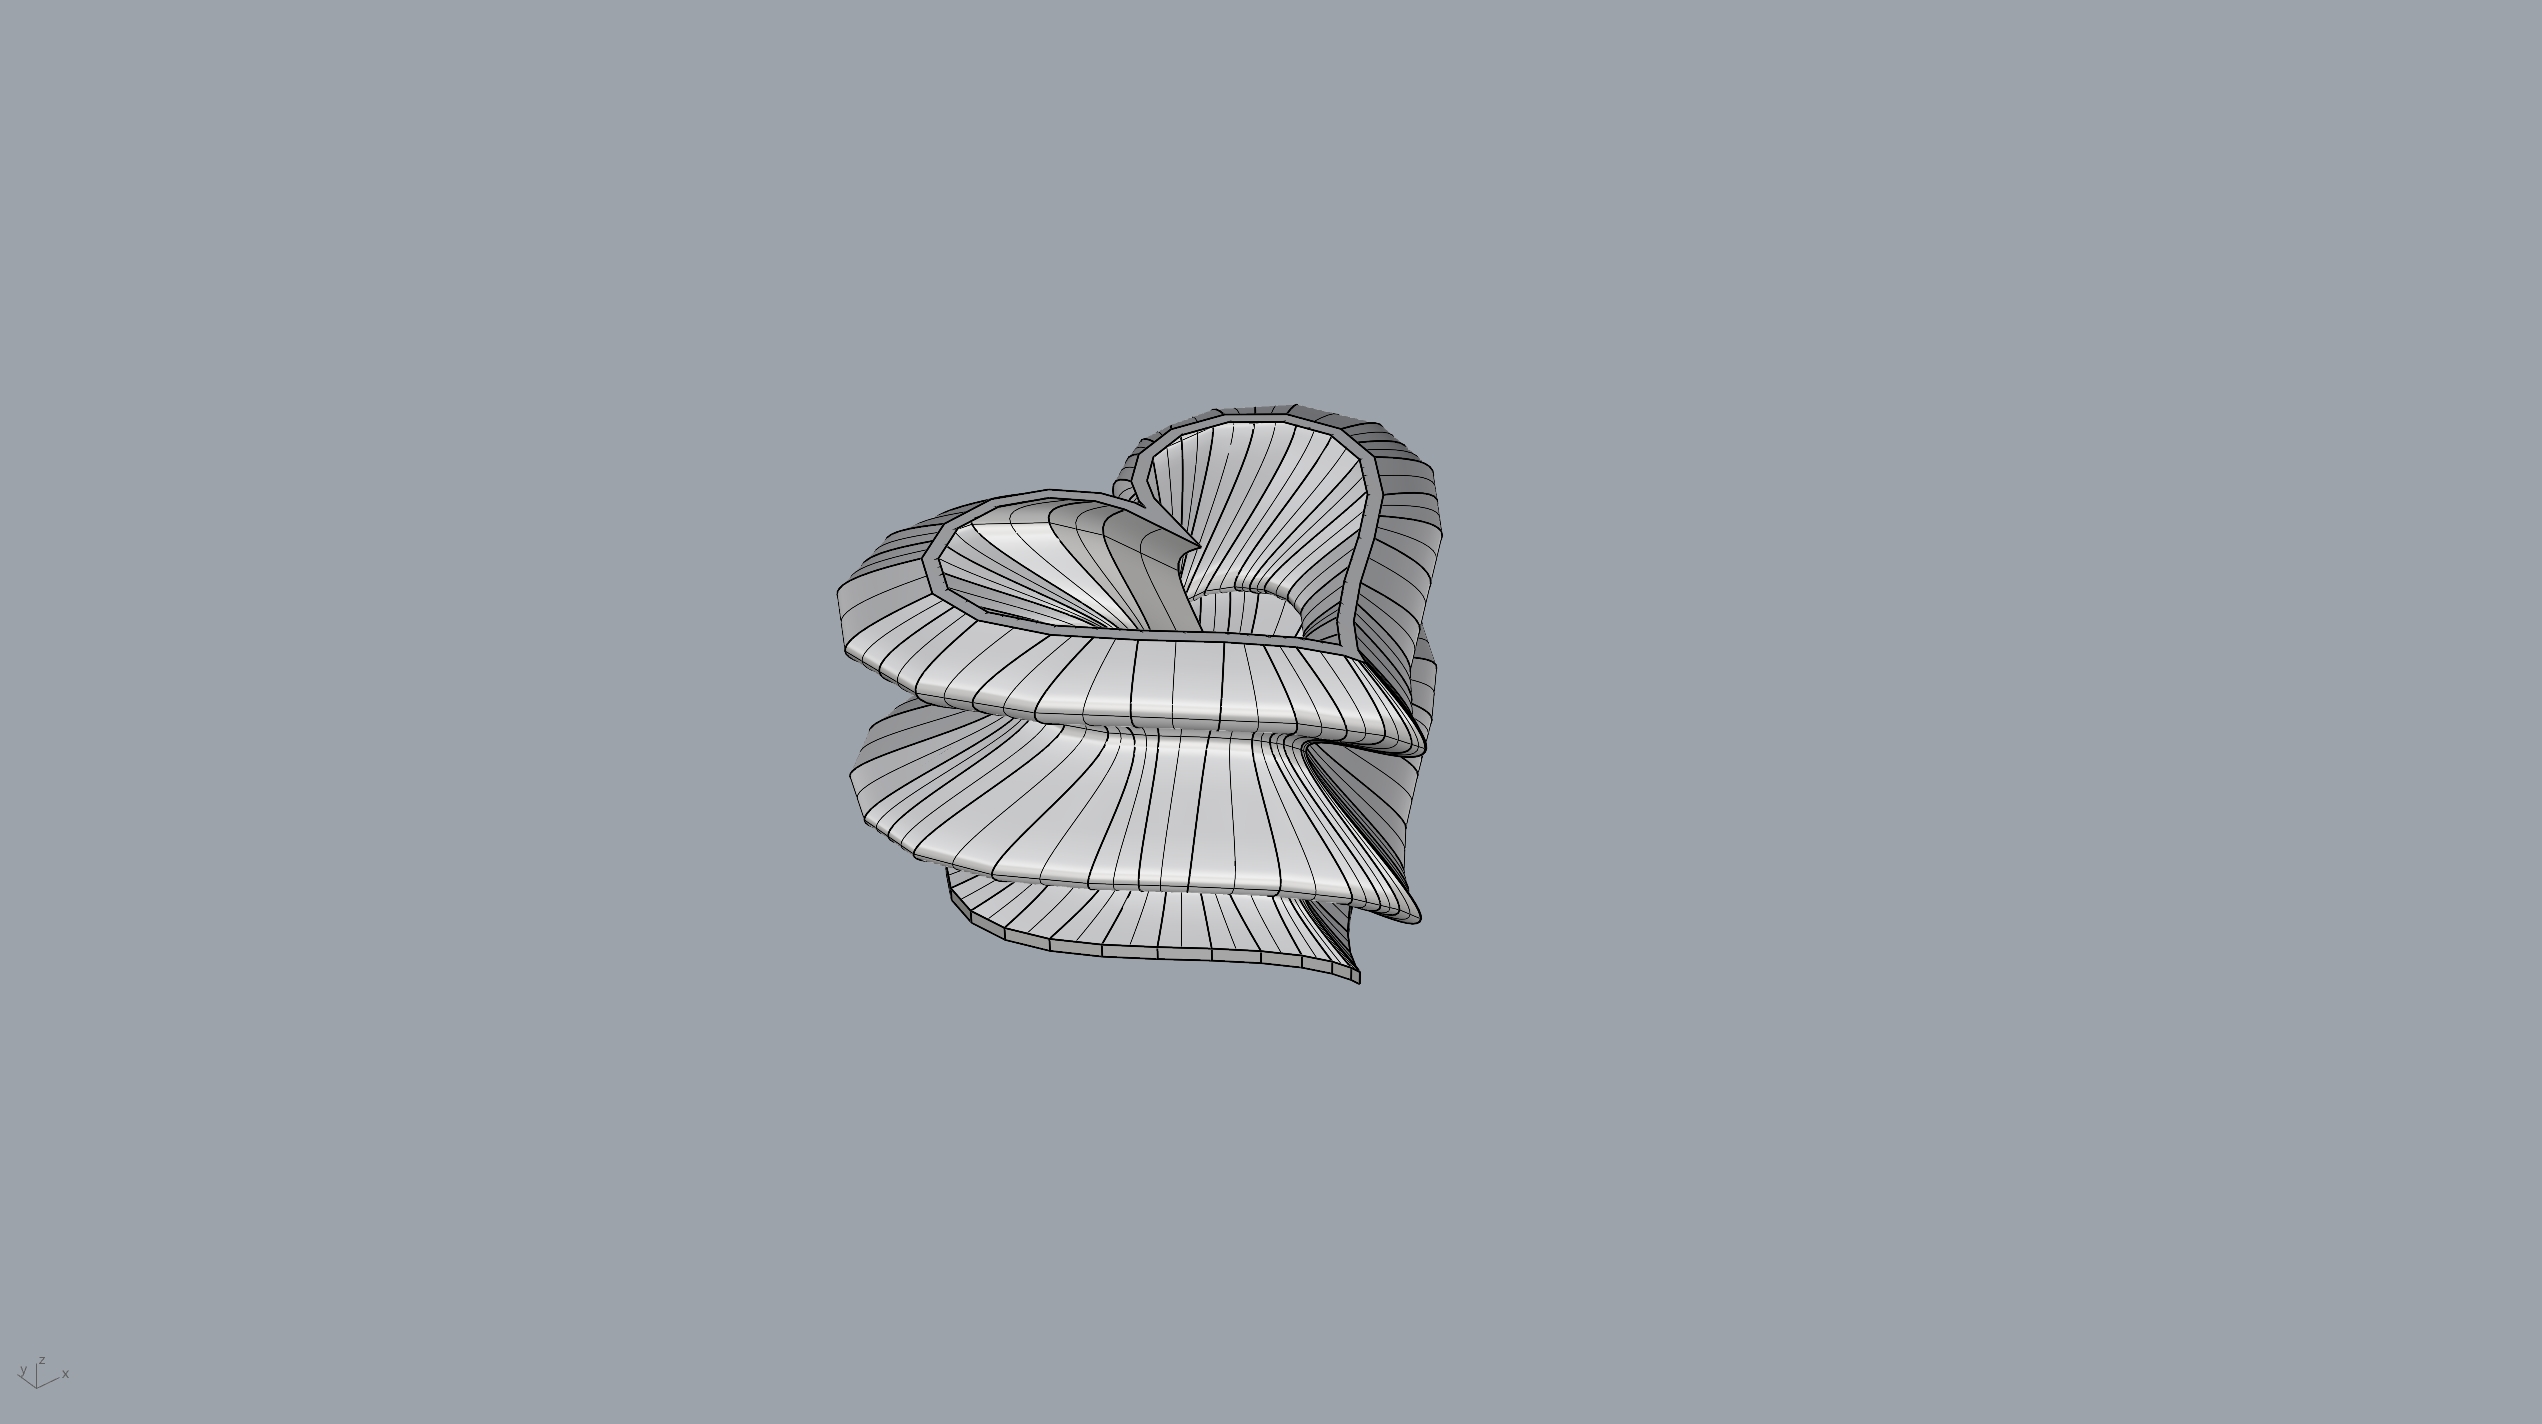
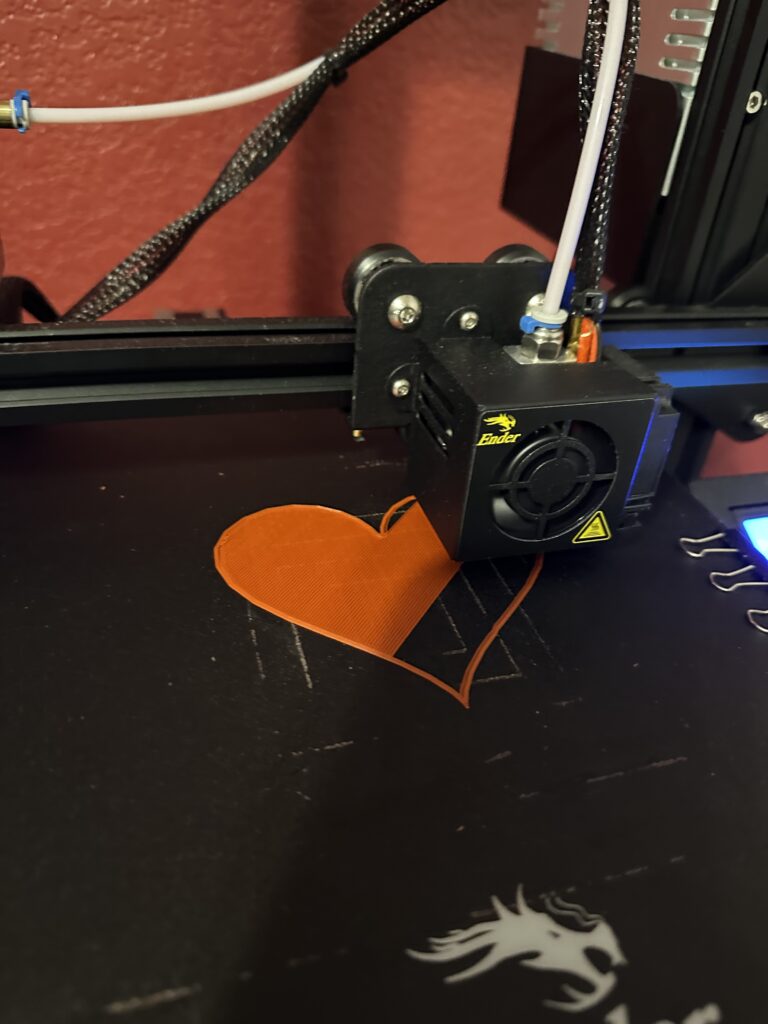
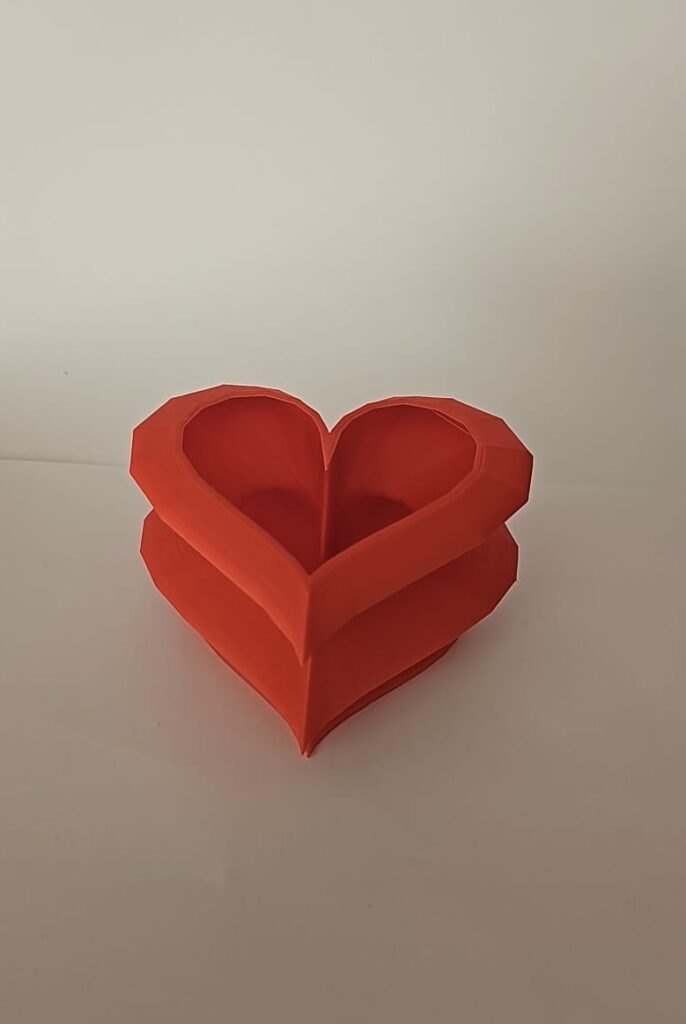

For my final vase, I kept changing my design because I wanted it to be unique and meet the radial function requirement. I considered creating an Archimedean spiral, but I couldn’t get the curves to loft together. I also tried making clover-like curves, but I wasn’t satisfied with the result. In the end, I chose to design a heart shape. Initially, I struggled to loft the curves again, for some reason the lofting function wouldn’t work. On a spontaneous idea, I switched my curves from InterpCurve to Polyline, and to my surprise, the lofting worked automatically. I was so satisfied that I went straight to printing. The print took about 11 hours, and I think the wait was worth it. I’m really happy with how it turned out.
Reflection
The process of creating 3D objects through programming allowed great organization and gave me a clear understanding of how each function works and how I can expand them. It also made visualization faster and efficient, without the need to draft designs on separate media. The difference between making process and traditional design might be in the story behind the design, while the digital process is driven by machines, numbers, and code, which is fascinating, traditional design may carry more sentiment and value. One advantage of making process is being able to create a general equation and use it to generate various shapes and sizes. A disadvantage of programming based design is the limitation on how abstract or freeform one can be without needing to write a significant amount of code.
Hi Alan, your final vessels are very fun, especially the third one with the waviness that it has, it’s good that it seems to stand on its own well too since if it had too much going on maybe it would’ve been too top-heavy. I did also try and mess with clover shapes but the equations I was using meant that the lines crossed over themselves so I mostly gave up on that, and the sine functions I ended up with made similar shapes anyway. I also agree with you about how it’s a lot more difficult to create abstract forms with this kind of process unless there is an existing basis creating that in this way would be very complex.
Alan, I really like the different designs you chose for your prints. They are both elegant and fun. My favorite is the one that reminds you of a hot air ballon- my immediate reaction was actually its resemblance to an octopus!
Hello Alan,
I like all of your desings. While scrolling I was like “wow, I realy realy realy like the octopus looking one” and then I saw the heart one and was like “dammit, thats also realy cool.” and the red realy makes it pop. For your issue with loft, I had the same issue in python but my solution was to take it out code and give it to grasshoper to do and it just worked. I know not greatest solution but it might of worked for your case too.
Hi Alan!
I really like the shape of your final vessel,I tried many heart-shaped objects but could not generate the surface successfully. How did you do it? In addiion, your sencond vessel also seems interesting!
Hi Qinghong,
I was having trouble with the heart shape as well, I actually gave up on creating a lofting surface. But after coming back and trying to work on it one last time, the InterpCurves was giving me a hard time so I switched to Polylines and made sure my n points were high enough to create a smooth heart and it worked, I just had to make sure the radius of heart was big enough to not intersect in weird ways. If you need help let me know.
Hello Alan,
Great post, your concepts were really awesome. I definitely enjoyed the lotus looking one. It reminds me of an octopus. Did you try messing with the radiuses or depth of the shape to eliminate the holes? Maybe try thickening the surface? I had this same issue with all of my functions. I only solved it by lessening the severity of radius change. Kind of wish there was another way to keep the shape but get rid of the holes. Do you have any advice for future prints? Again, great post, I look forward to seeing what you create next.
Justin
Hi Justin,
I’m not sure why there were holes in my octopus-shaped one. In Rhino I checked if there was anything wrong with the lofting but it seemed ok. In Cura it looked good as well I think it was a printing error. I also saw that a shape with rounded curves would give me more trouble than a polyline, maybe if you didn’t try with a polyline that could probably help a bit more.
Hello Alan, these prints look so awesome. I especially love the organic yet truly symmetrical look of the first one. How would you recommend implementing symmetry like this if you were to do it again? I was also wondering, how did you go about printing this one since it does not appear to have a significant base? Did you use supports in the print? Anyway, great work man!