Open a new Rhino File and practice the curves commands by completing the following steps. Organize your Rhino file so each step is clear. Use the Text command to label each step and the commands you used.
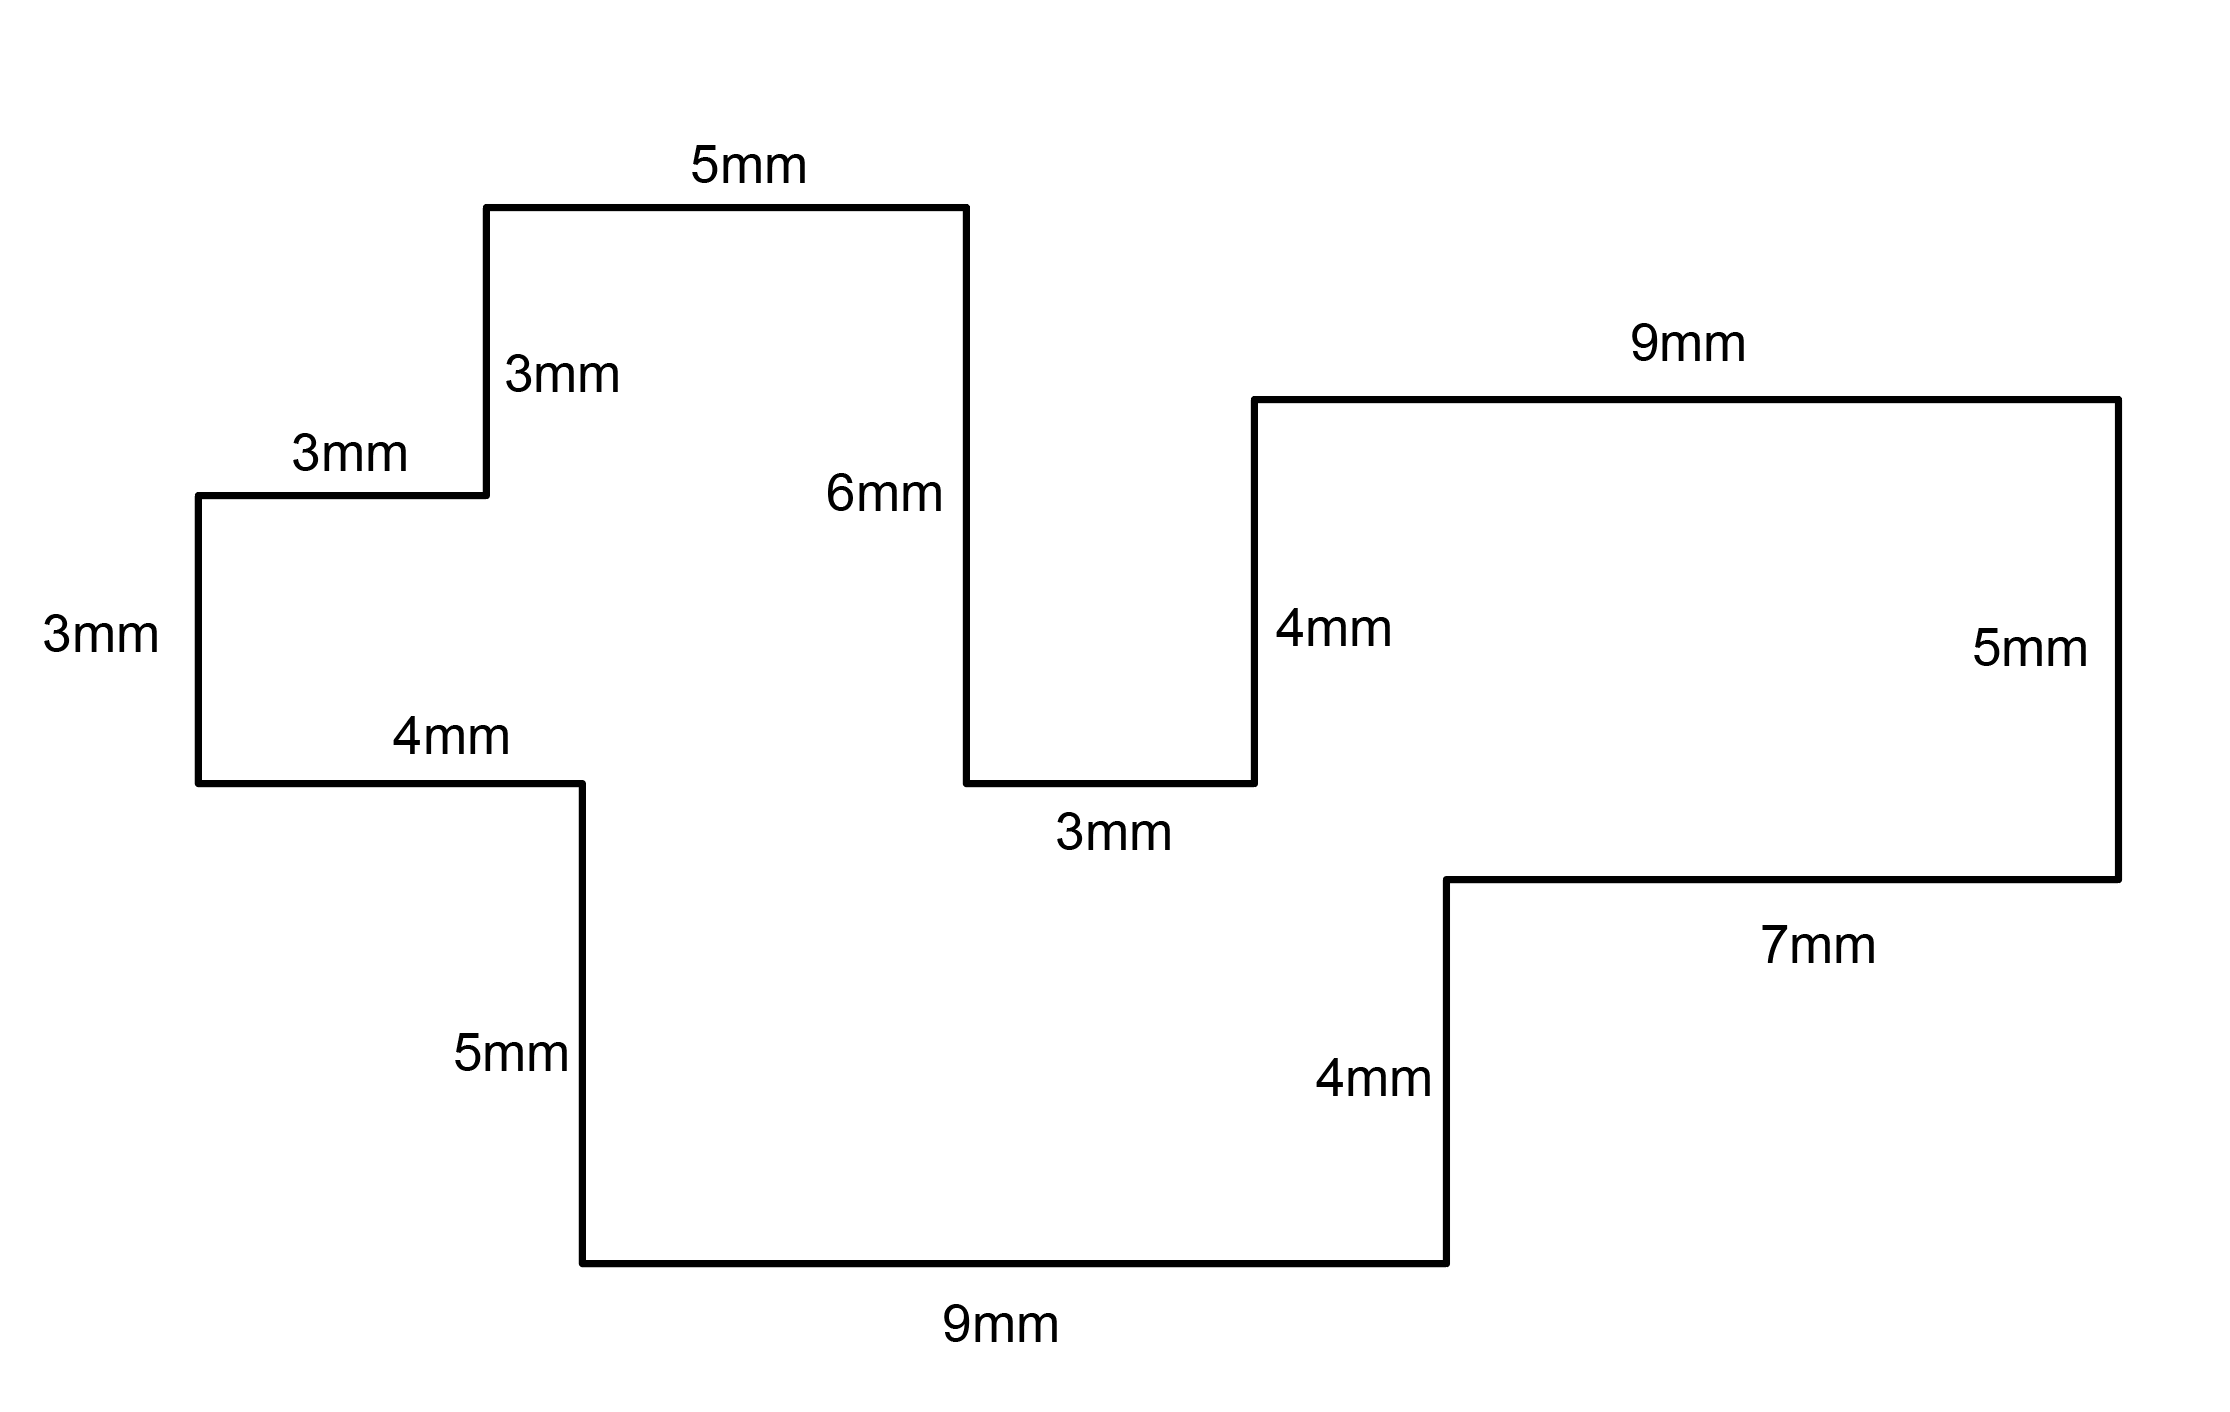
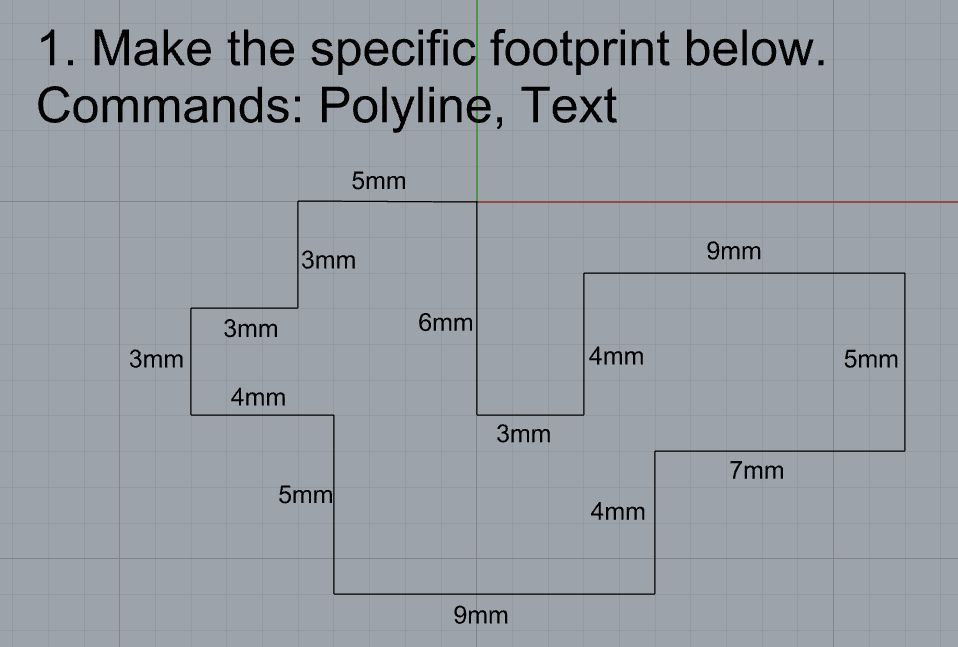
- Make the specific footprint below.
- Commands: Polyline
- Commands: Polyline
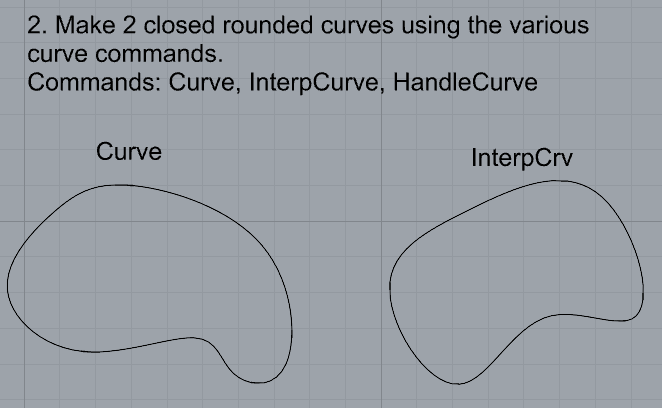
- Make 2 closed rounded curves using the various curve commands.
- Commands: Curve, InterpCurve, HandleCurve
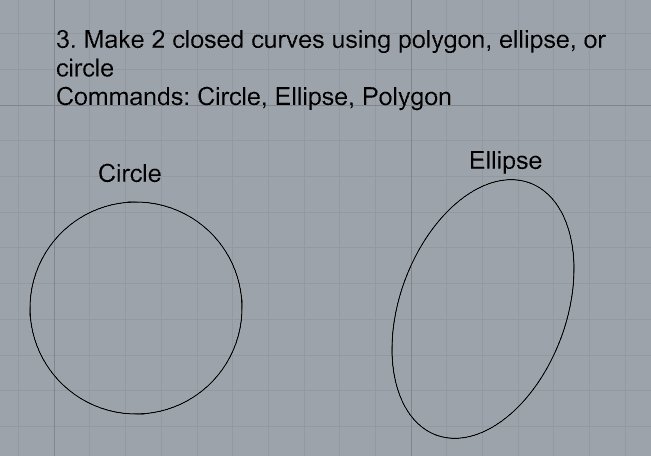
- Make 2 closed curves using polygon, ellipse, or circle
- Commands: Circle, Ellipse, Polygon
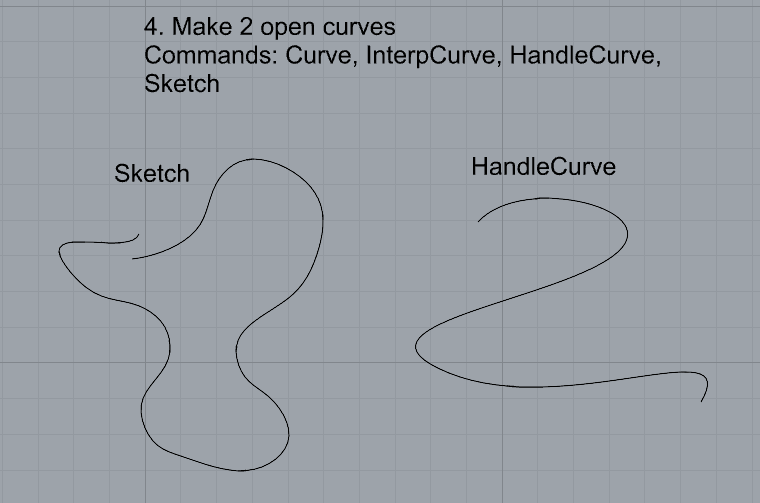
- Make 2 open curves
- Commands: Curve, InterpCurve, HandleCurve, Sketch
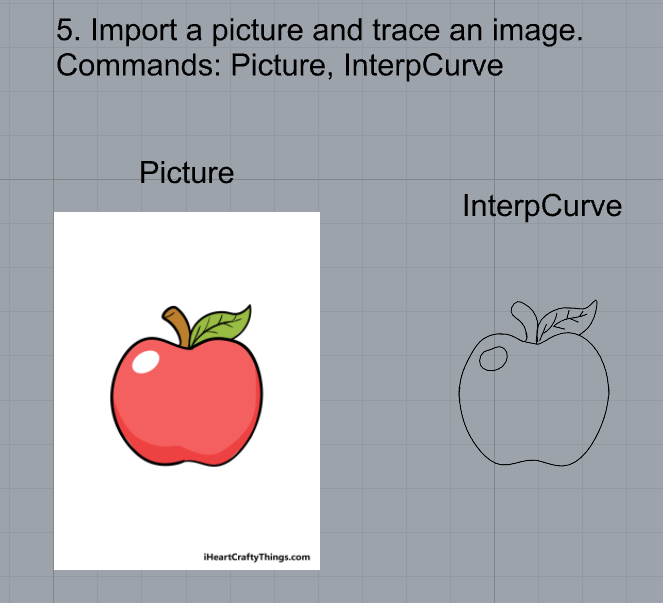
- Import a picture and trace an image
- Commands: Picture, InterpCurve
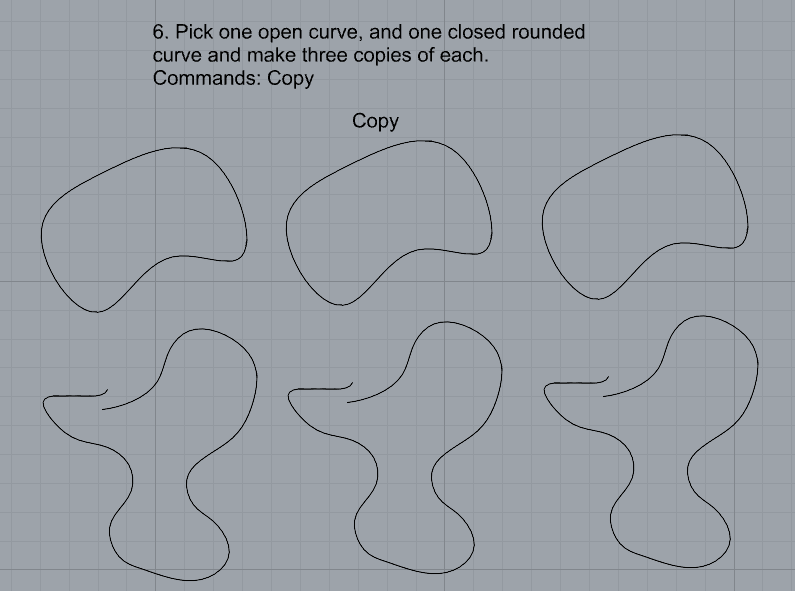
- Pick one open curve, and one closed rounded curve and make three copies of each.
- Commands: Copy
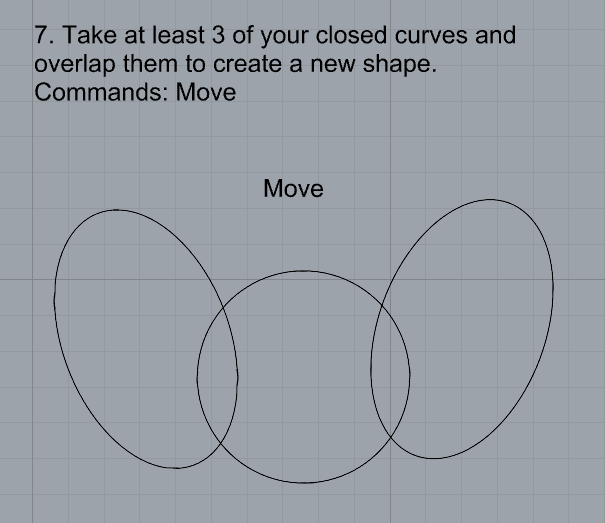
- Take at least 3 of your closed curves and overlap them to create a new shape
- Commands: Move
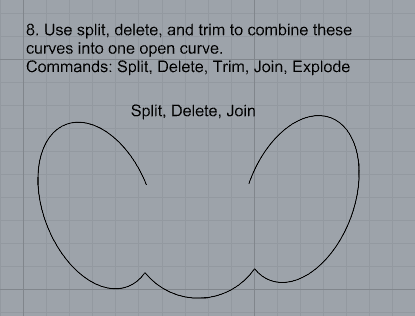
- Use split, delete, and trim to combine these curves into one open curve
- Commands: Split, Delete, Trim, Join, Explode
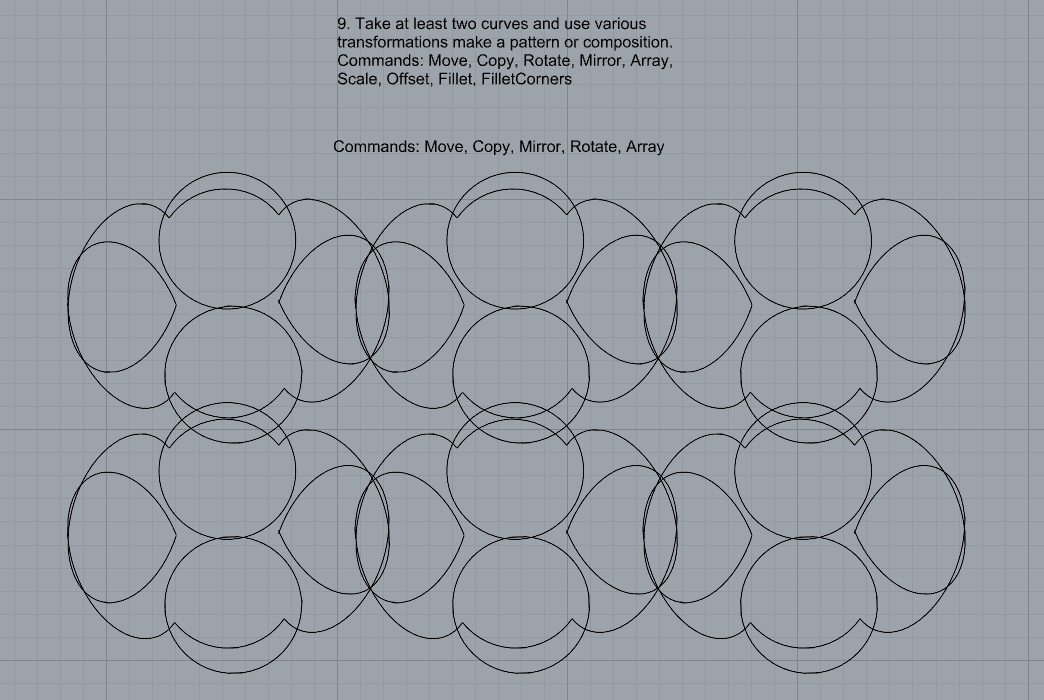
- Take at least two curves and use various transformations make a pattern or composition.
- Commands: Move, Copy, Rotate, Mirror, Array, Scale, Offset, Fillet, FilletCorners
- Organize your Rhino file so each step is clear. Use the Text command to label each step and the commands you used. Add a link to your FirstnameLastname_Curves file at this point in your post.
Part 2: Surfaces
Open a new Rhino File and practice the surfaces commands below by making two different surfaces for each command. Organize your Rhino file so each step is clear. You may want to use some of the curves you modeled in Part 1. Use the Text command to label each step and the commands you used.
- Plane
- PlanarSrf
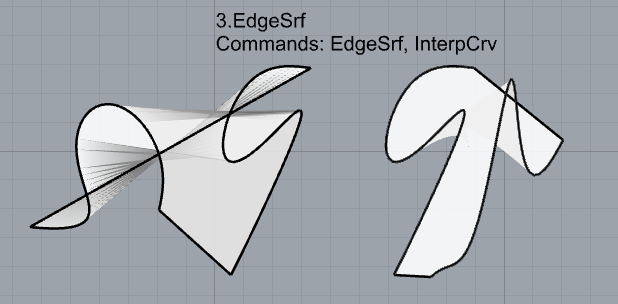
- EdgeSrf
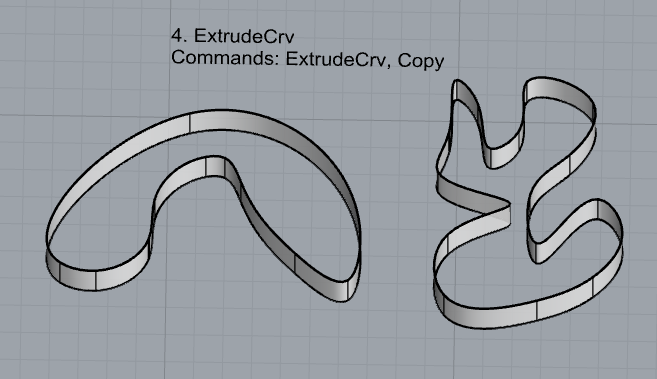
- ExtrudeCrv
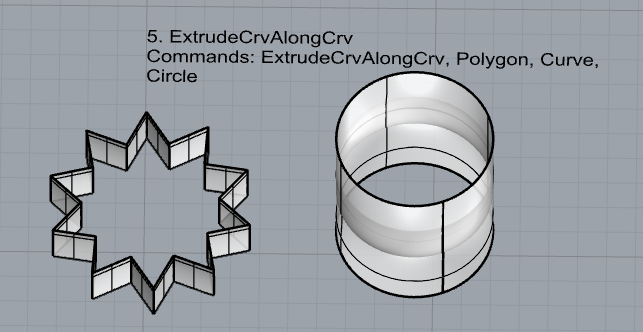
- ExtrudeCrvAlongCrv
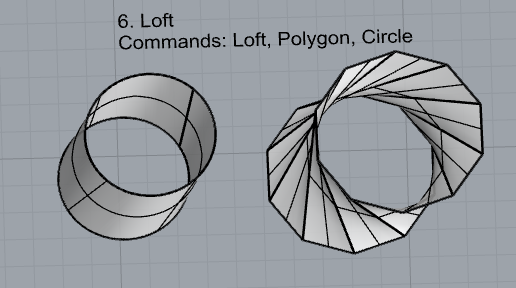
- Loft
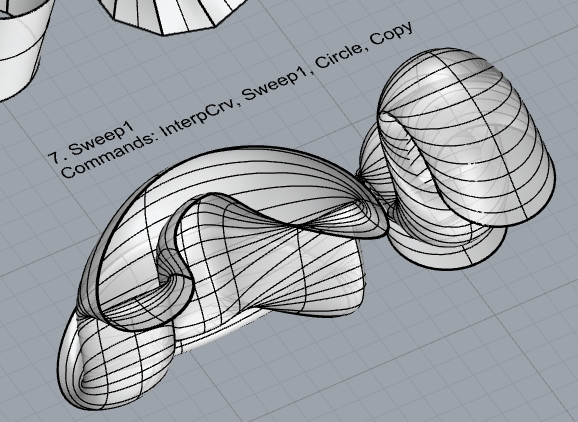
- Sweep1
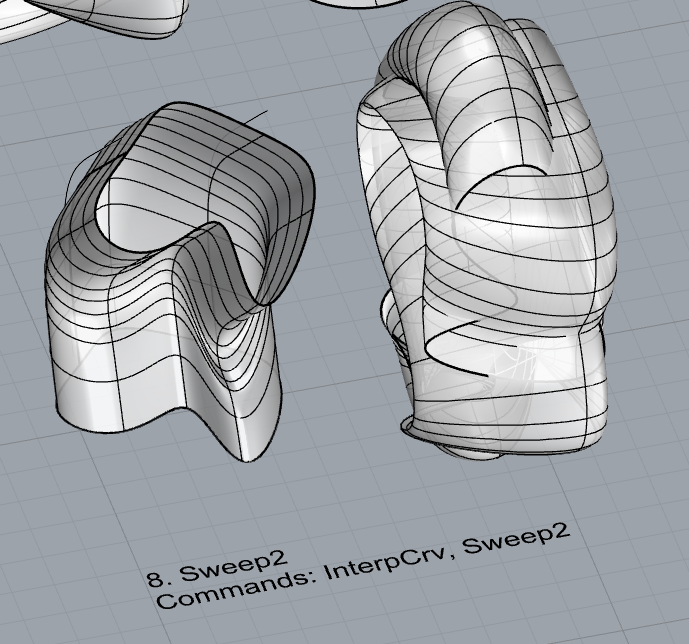
- Sweep2
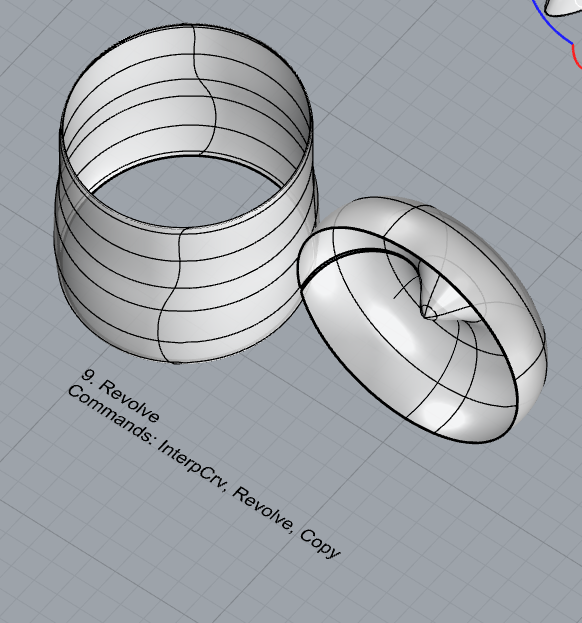
- Revolve
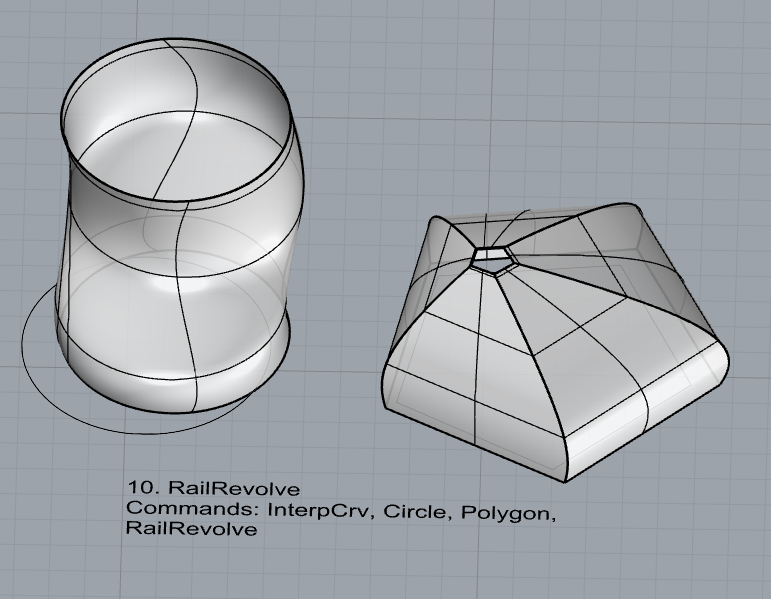
- RailRevolve
- Add a link to your FirstnameLastname_Surfaces file at this point in your post.


Part 3: Solids
Open a new Rhino File and practice the solids commands below by making two different solids for each command. You may want to use some of the curves and surfaces you modeled in Parts 1 and 2. Organize your Rhino file so each step is clear. Use the Text command to label each step and the commands you used.
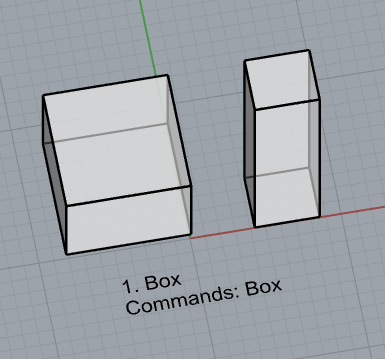
- Box
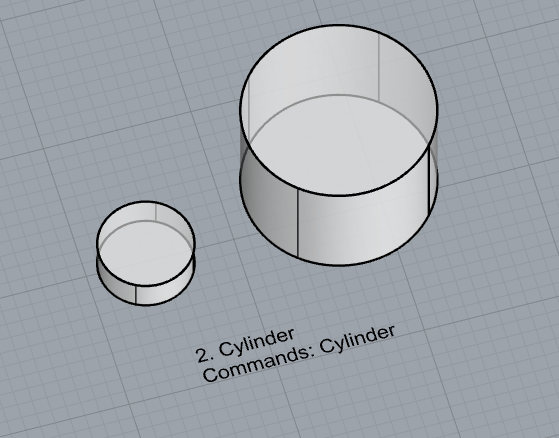
- Cylinder
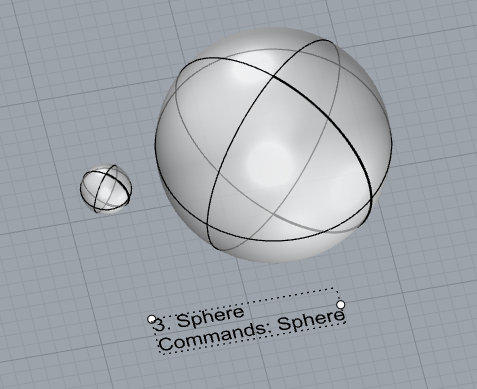
- Sphere
- ExtrudeCrv and Cap
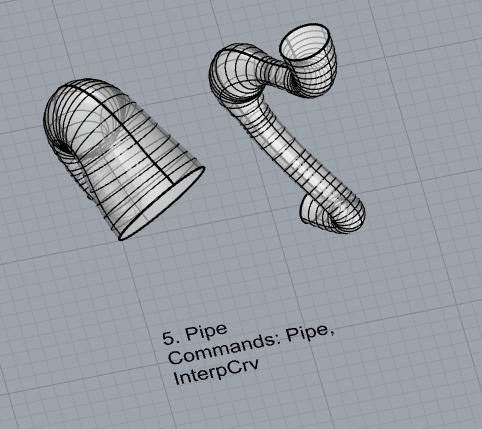
- Pipe
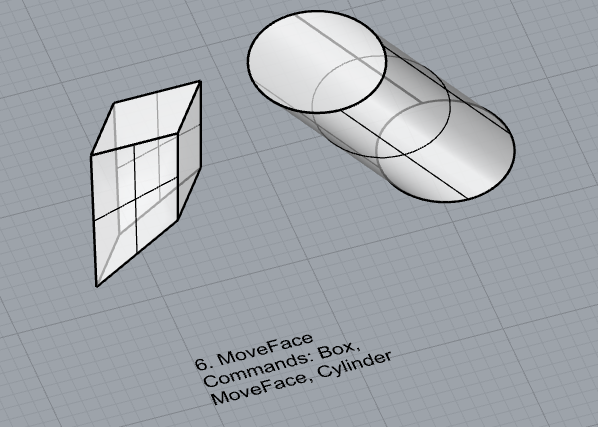
- MoveFace
- MoveEdge
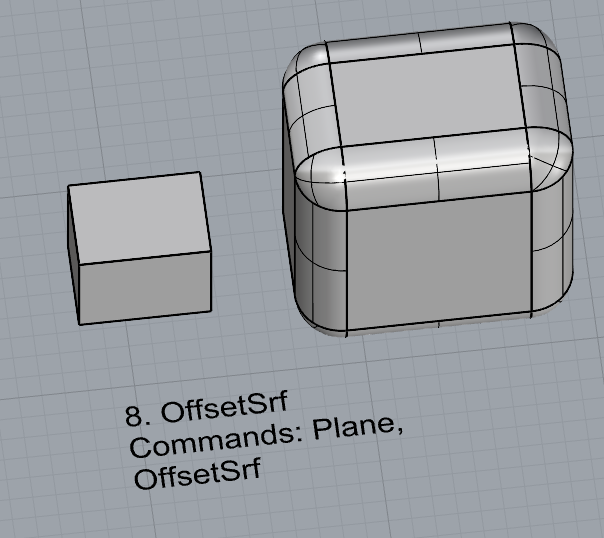
- OffsetSrf
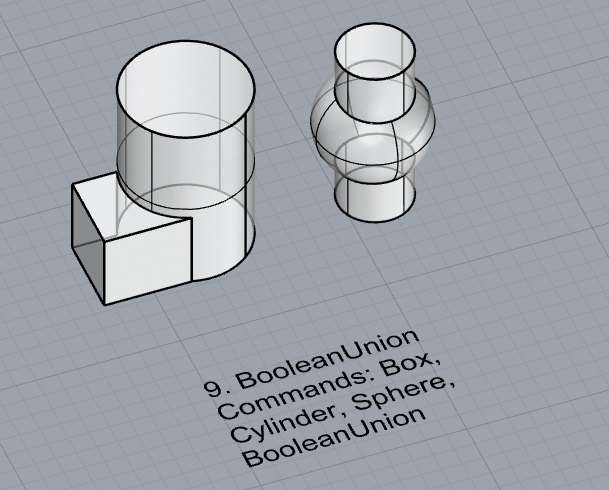
- BooleanUnion
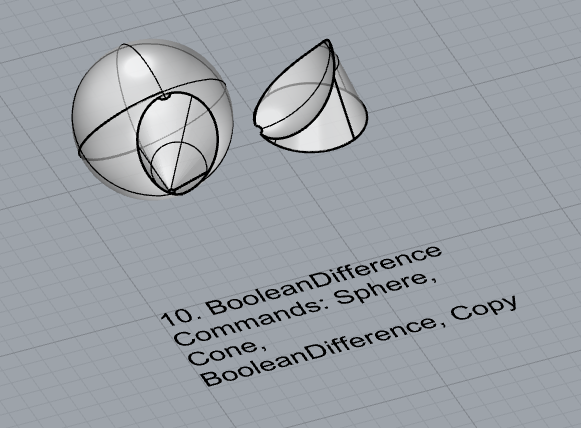
- BooleanDifference
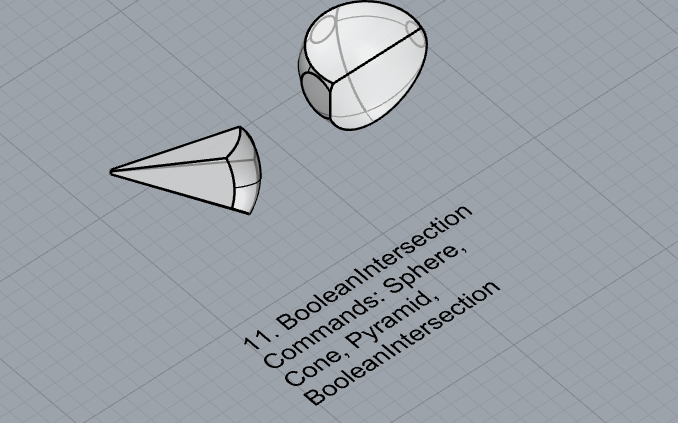
- Boolean Intersection
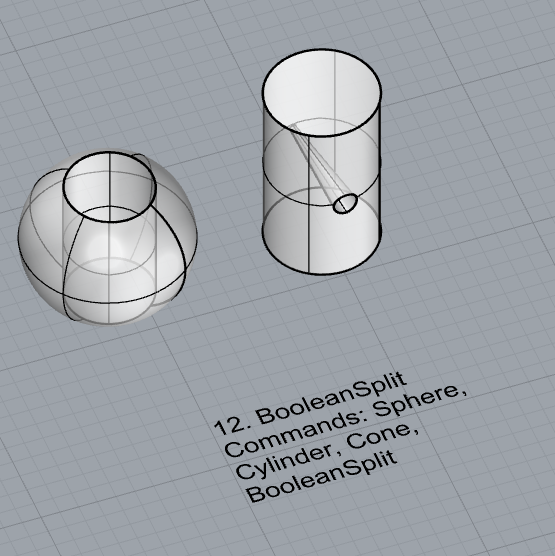
- BooleanSplit
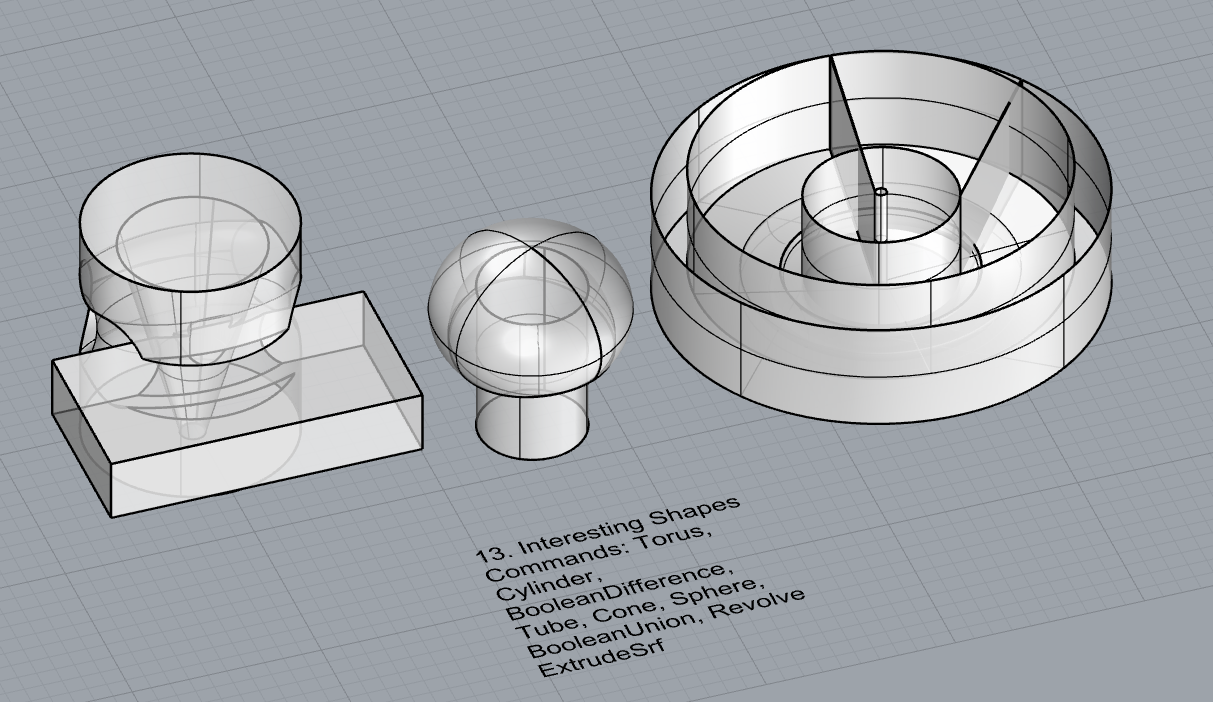
- Using the surfaces and solids you modeled and the Boolean tools, make three solid shapes you find interesting.
- Add a link to your FirstnameLastname_Solids file at this point in your post.


Part 4: 3D Printing
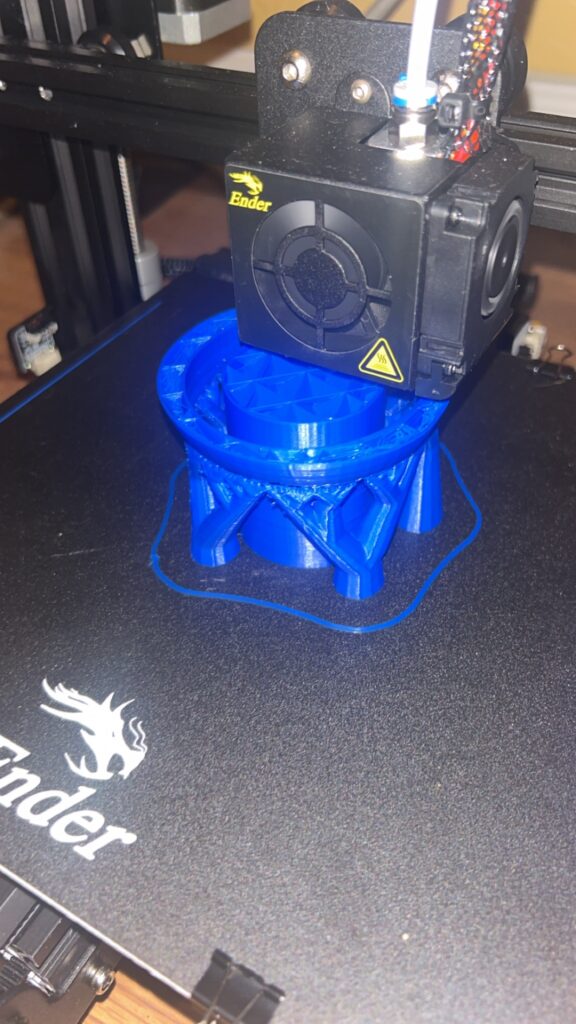
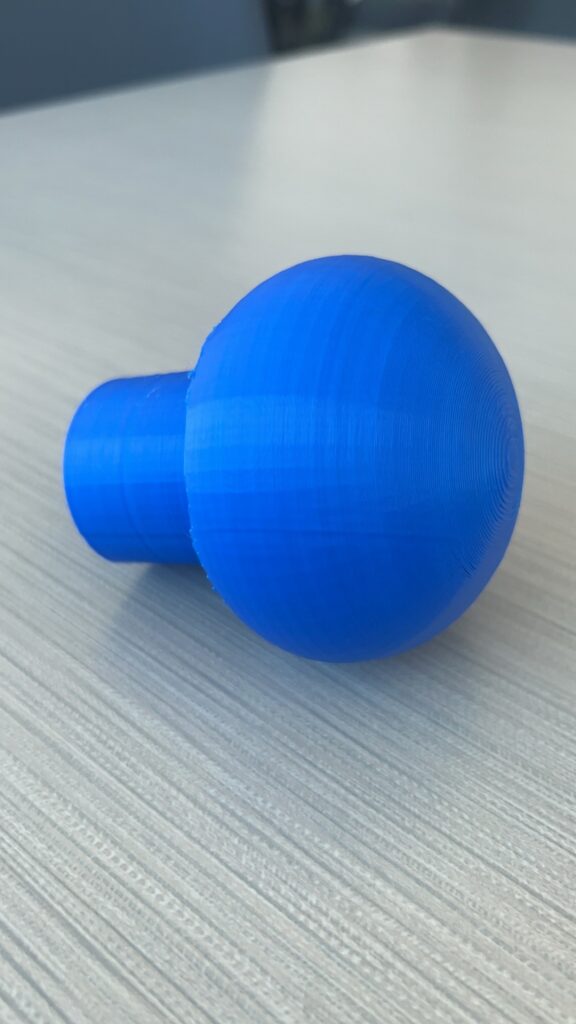
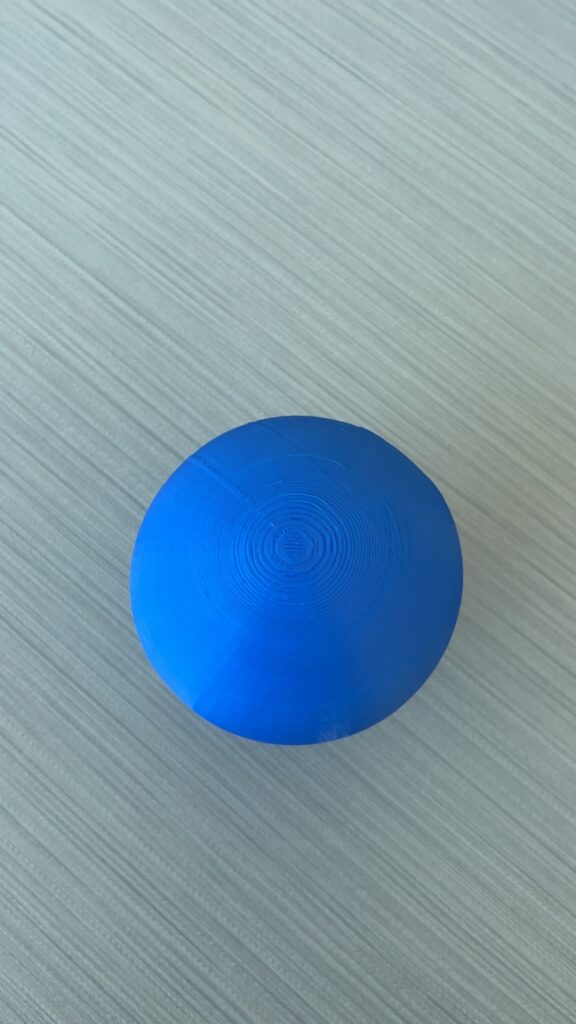
This print took about two tries and the final print took about 7 hours to complete. The first print failed due to their being no supports for the overhang (I forgot). In the second print, I added tree supports and also increased the infill density to 10% just to ensure that the object had enough internal support as well. I think this final print went well. However, I need to be more careful removing the supports as you can see some very obvious scarring due to quick removal. I will be sanding this down. (Edit: Changed background)

Ryan,
Great post, the shapes, surfaces, and solids you created were really neat. Curious how you did some of them. Your print was simple but really cool. I will have to try the supports as well. I do not have any experience with them, how do you think the supports should be taken off? Just to avoid the breaking the actual print. Great post!
Justin
Hi Ryan,
I like your 3D print, it reminds of a mushroom. The fact your printer was able to create a clean curved surface is amazing. Even the tip doesn’t have build up of filament. I can see why it took so long to print. I recommend getting some needle nose pilers when trying to remove supports, but be careful as it can still cause damage.
Hi Ryan, nice model! Though, looking at your in-progress shot, the model only needed supports due to the sudden transition between the vertical stalk and the near-horizontal underside of the bulb. If you tried flipping the model upside down first, it’s possible that the more shallow curvature would’ve allowed you to build with no supports at all. When in doubt, experiment and look at the preview Cura gives you. It might take a bit of back and forth between programs, but it’s well worth the extra effort.