Part 1: Curves
Open a new Rhino File and practice the curves commands by completing the following steps. Organize your Rhino file so each step is clear. Use the Text command to label each step and the commands you used.
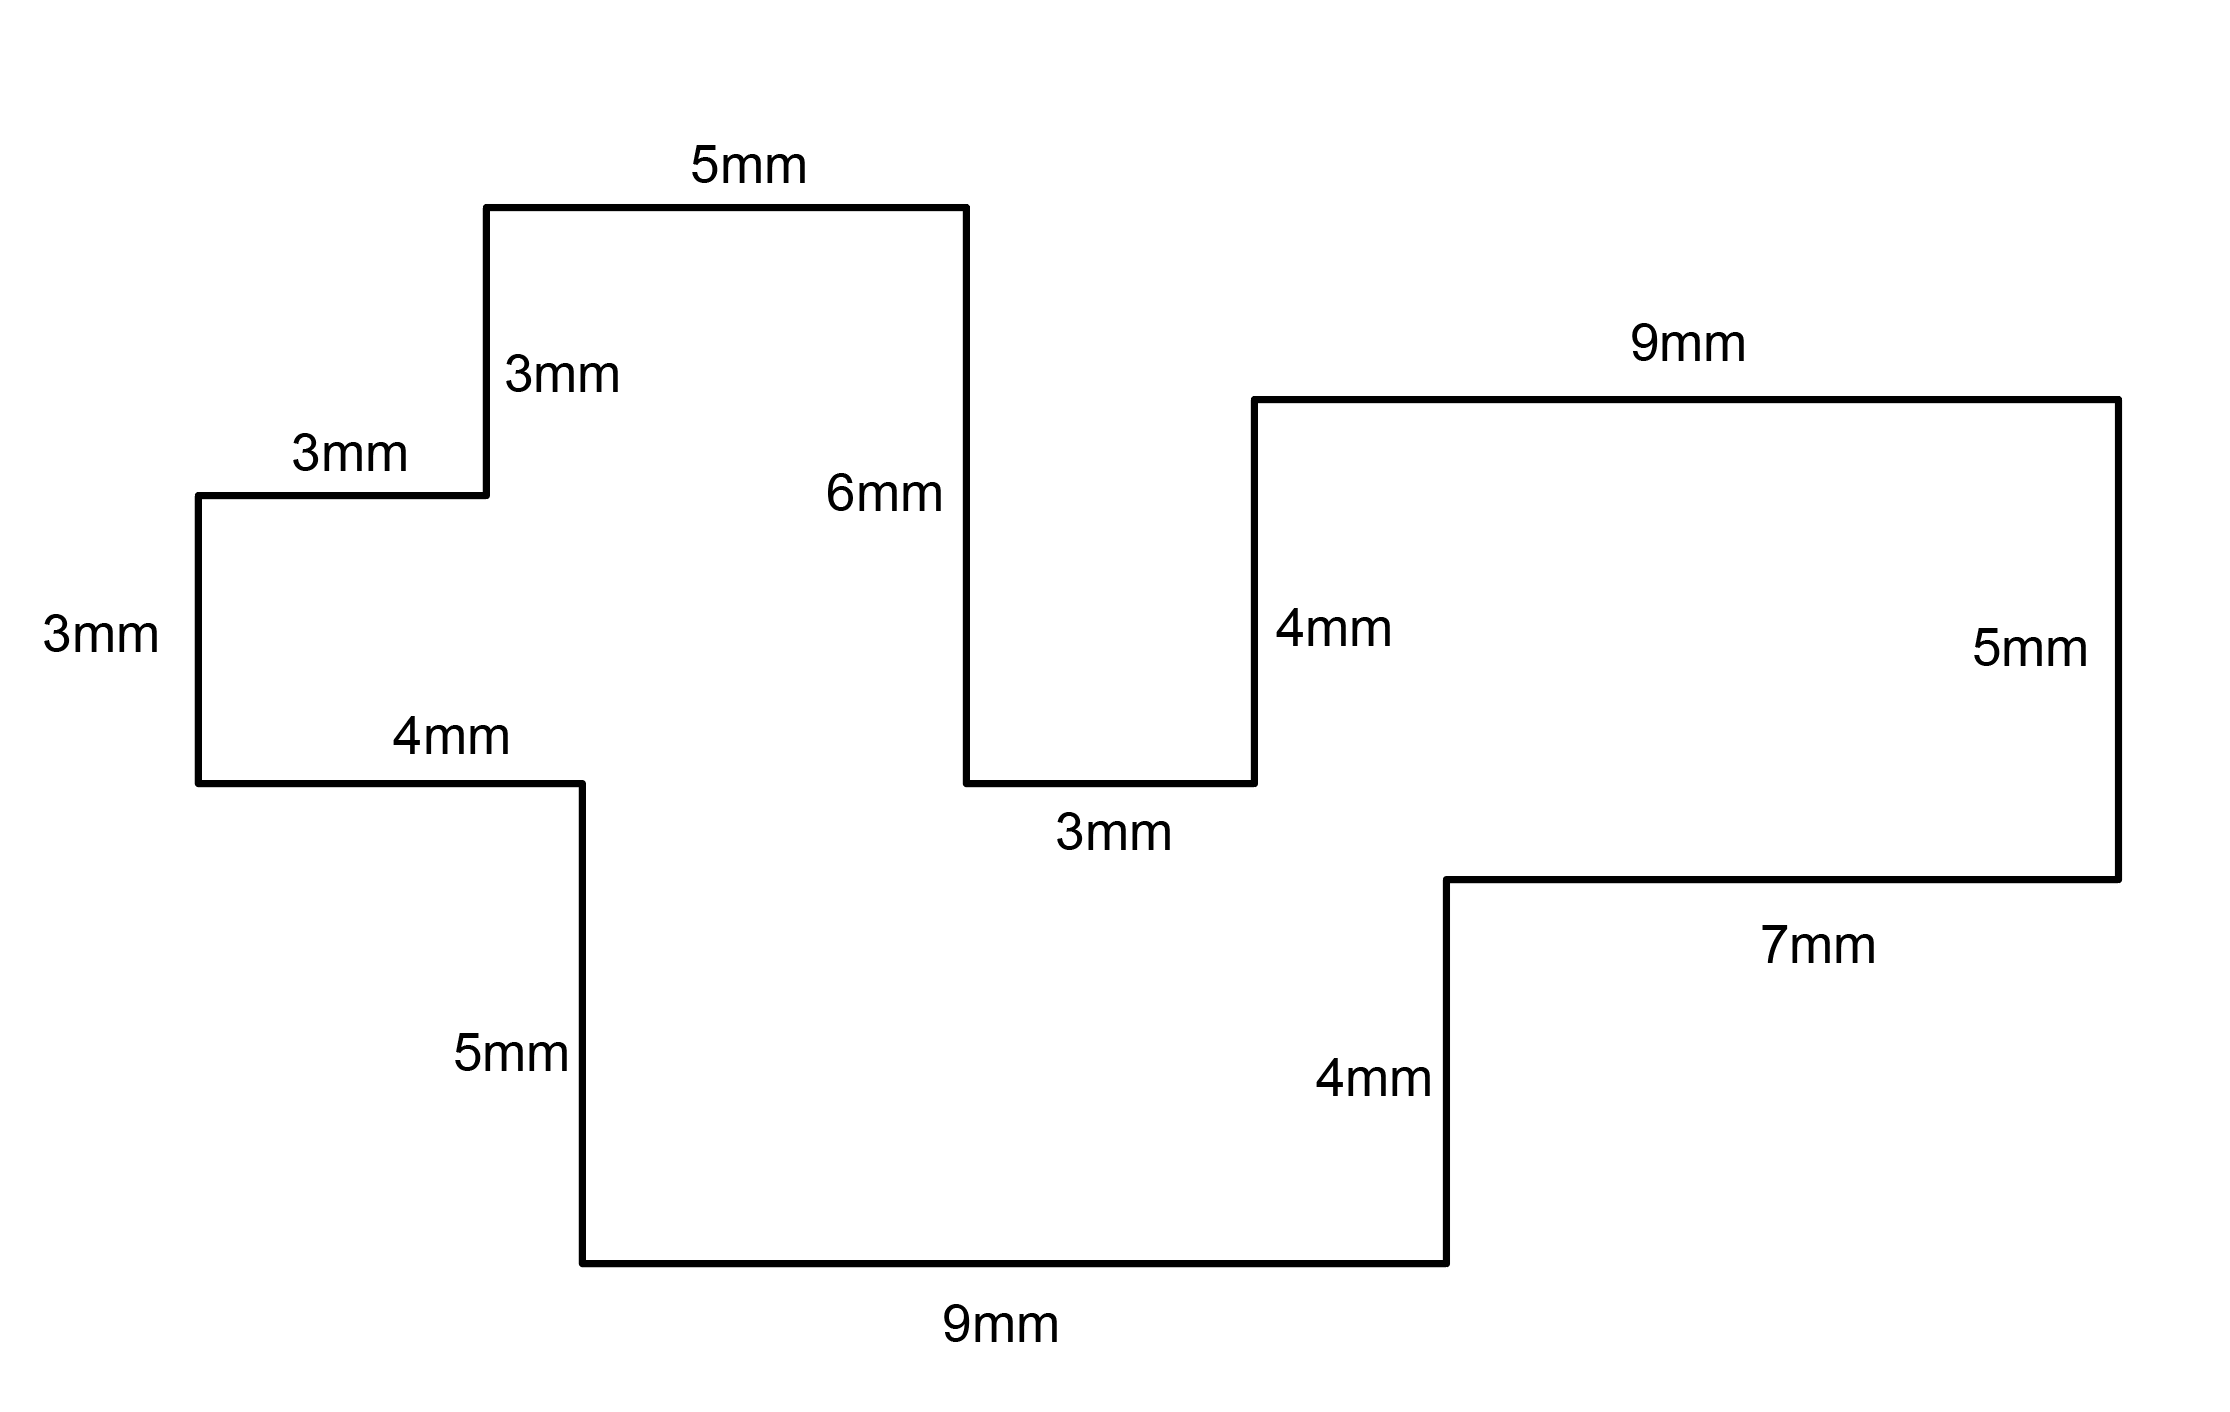
- Make the specific footprint below.
- Commands: Polyline

- Commands: Polyline
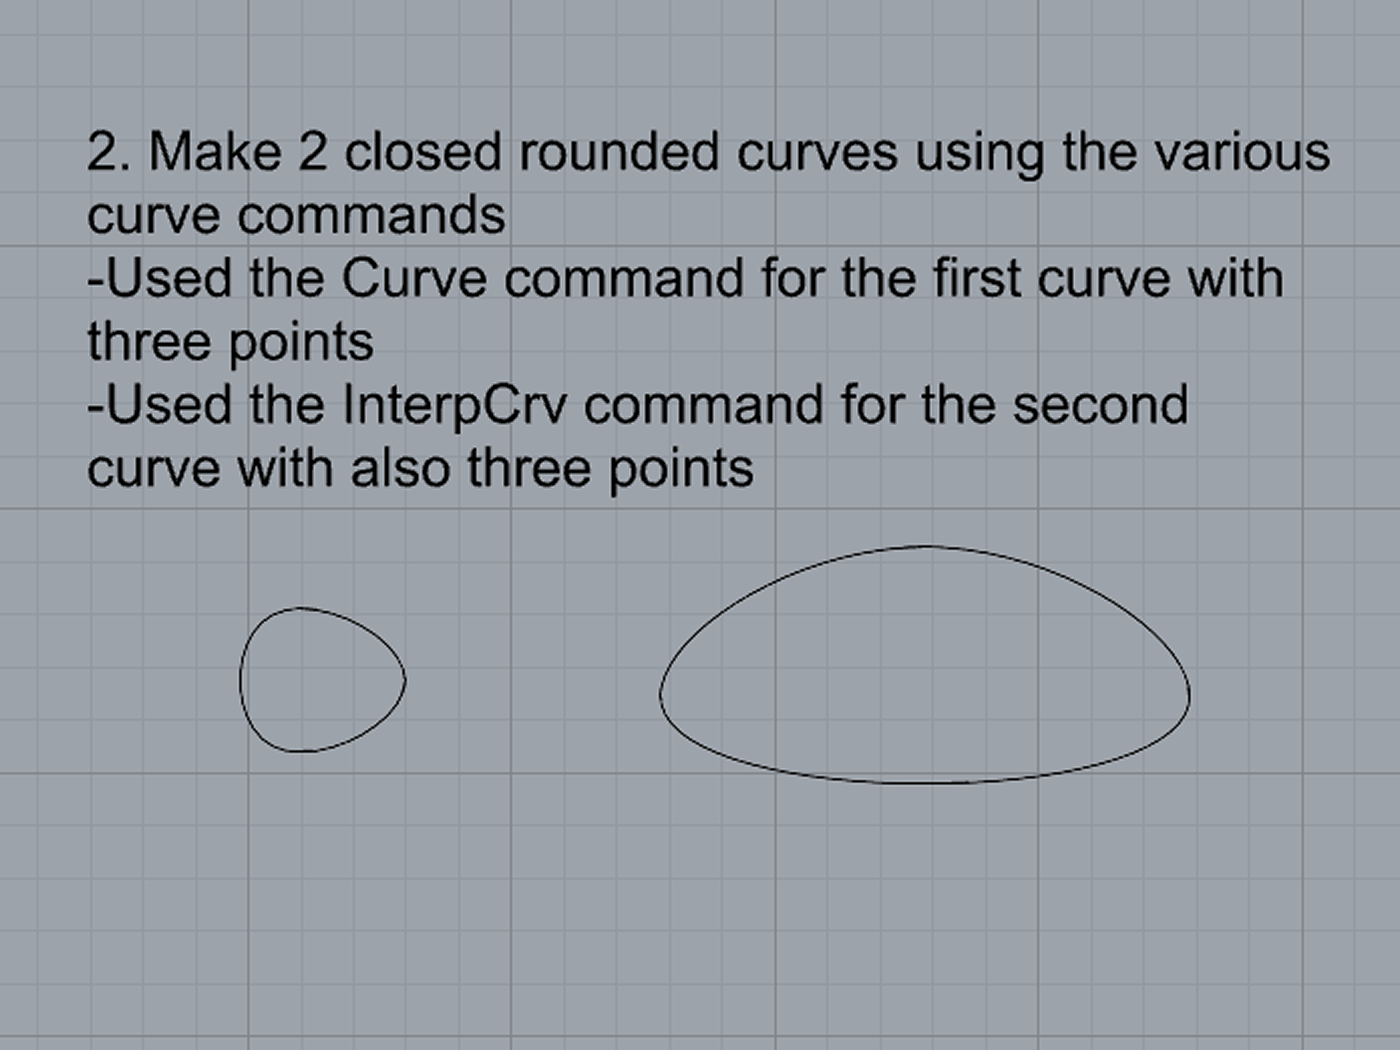
- Make 2 closed rounded curves using the various curve commands.
- Commands: Curve, InterpCurve, HandleCurve
- Commands: Curve, InterpCurve, HandleCurve
- Make 2 closed curves using polygon, ellipse, or circle
- Commands: Circle, Ellipse, Polygon

- Commands: Circle, Ellipse, Polygon
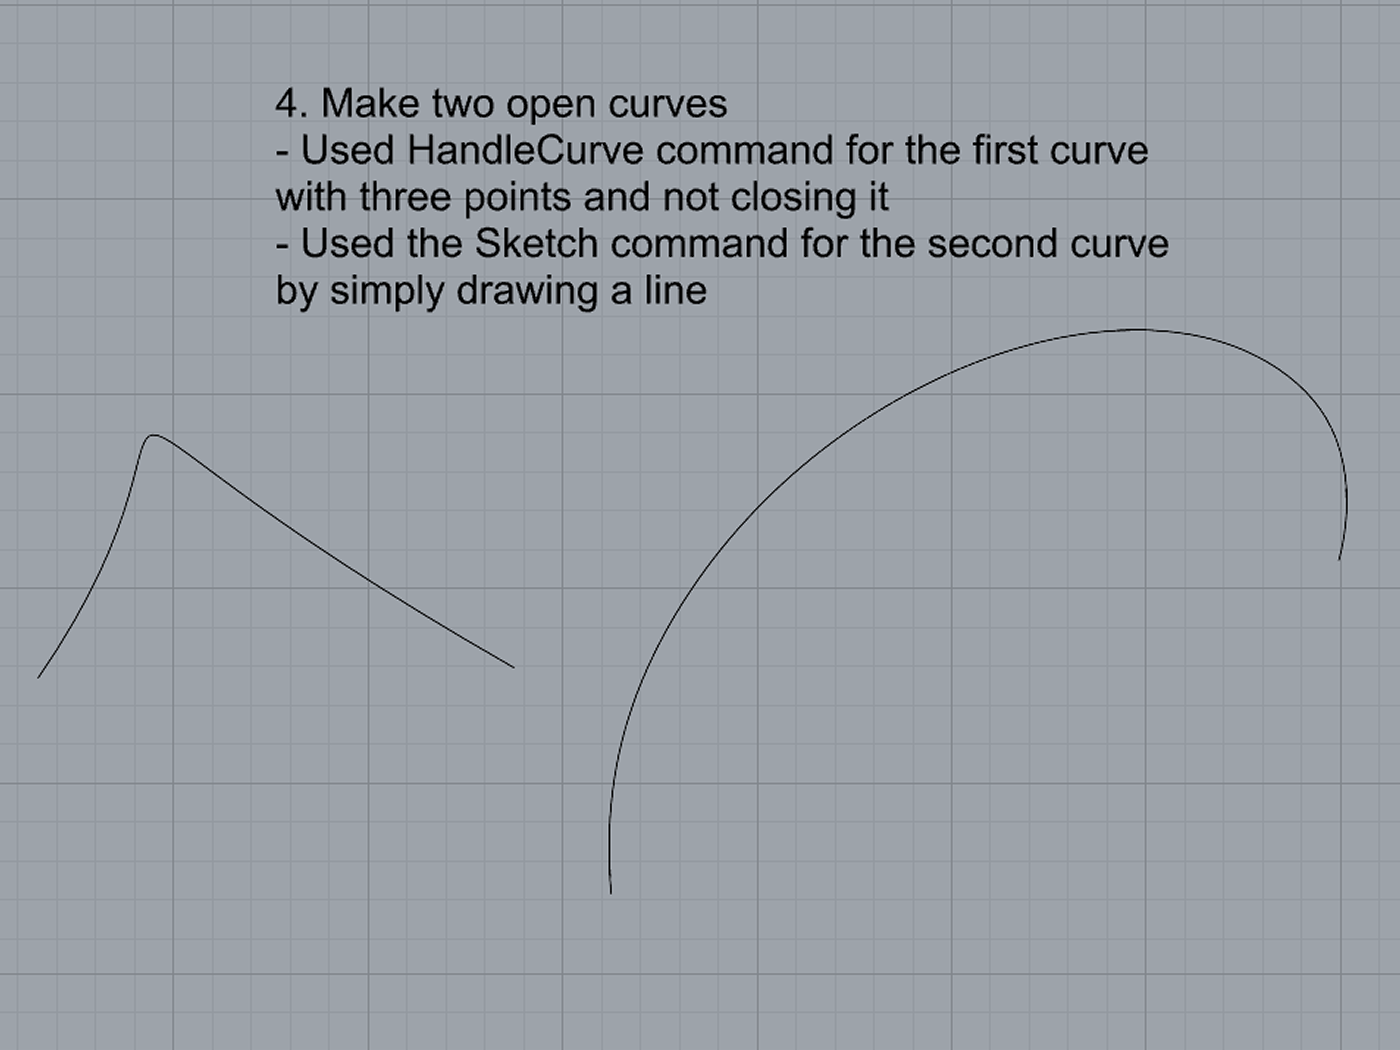
- Make 2 open curves
- Commands: Curve, InterpCurve, HandleCurve, Sketch
- Commands: Curve, InterpCurve, HandleCurve, Sketch
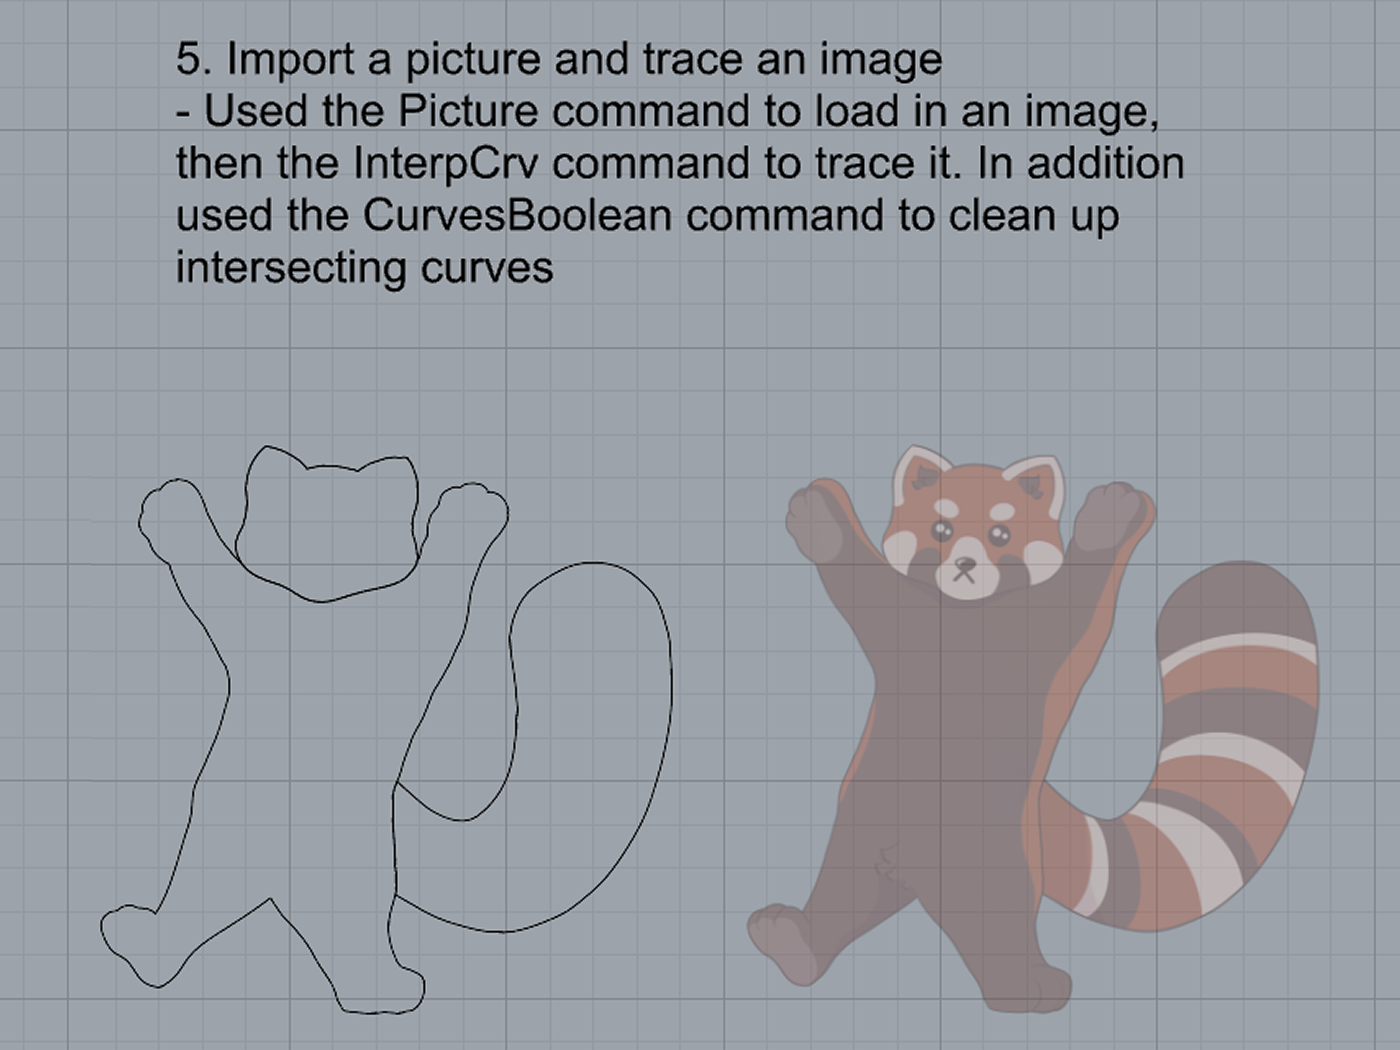
- Import a picture and trace an image
- Commands: Picture, InterpCurve
- Commands: Picture, InterpCurve
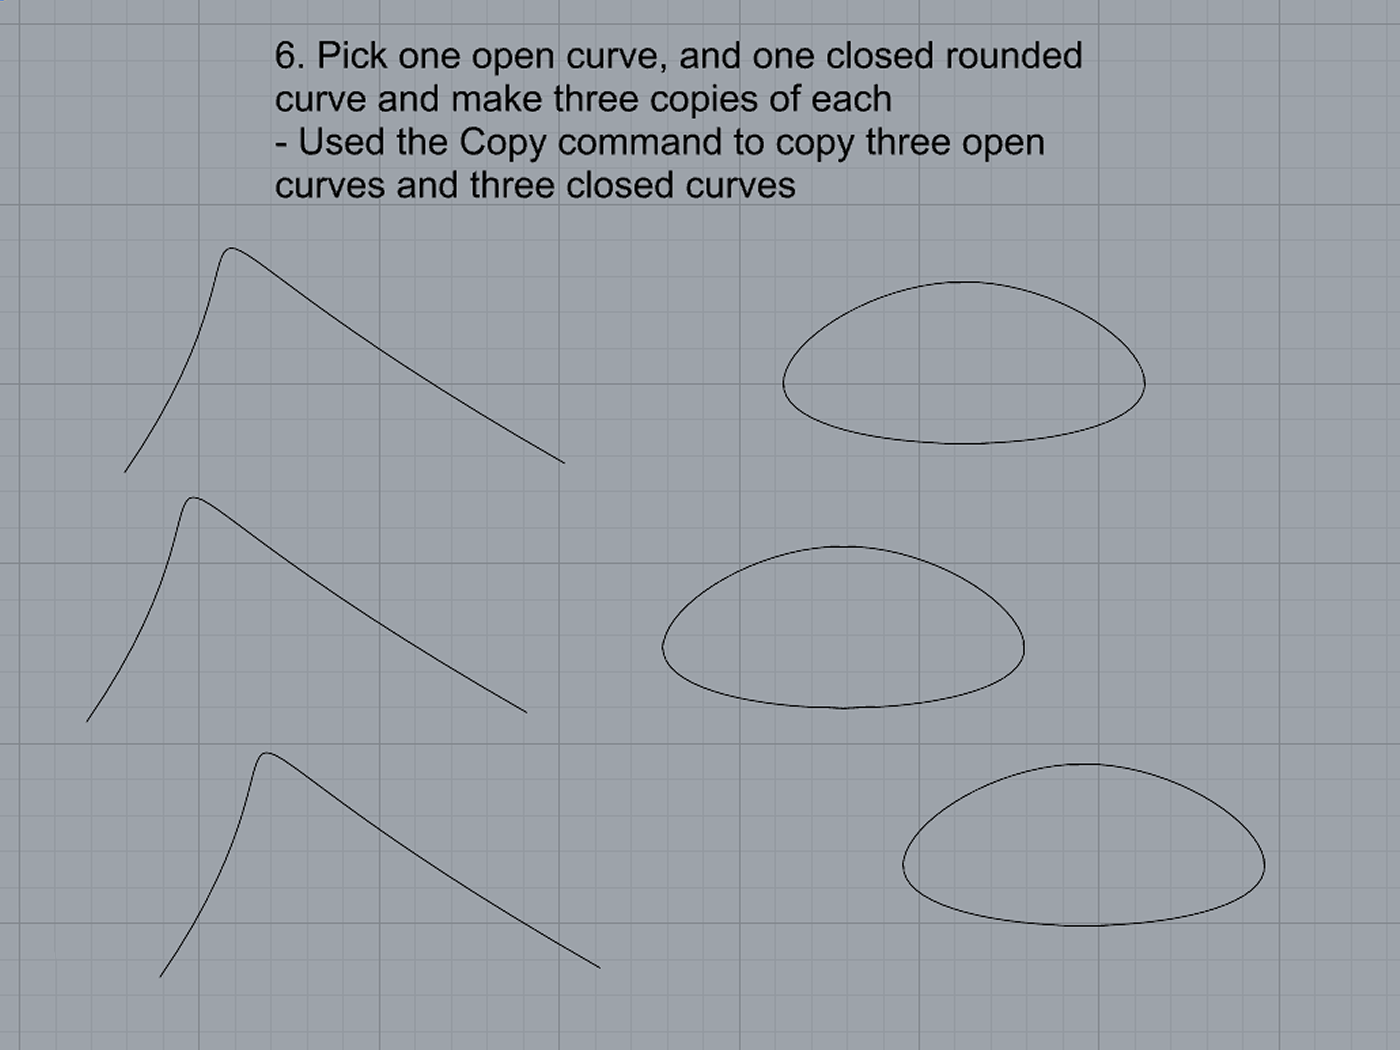
- Pick one open curve, and one closed rounded curve and make three copies of each.
- Commands: Copy
- Commands: Copy
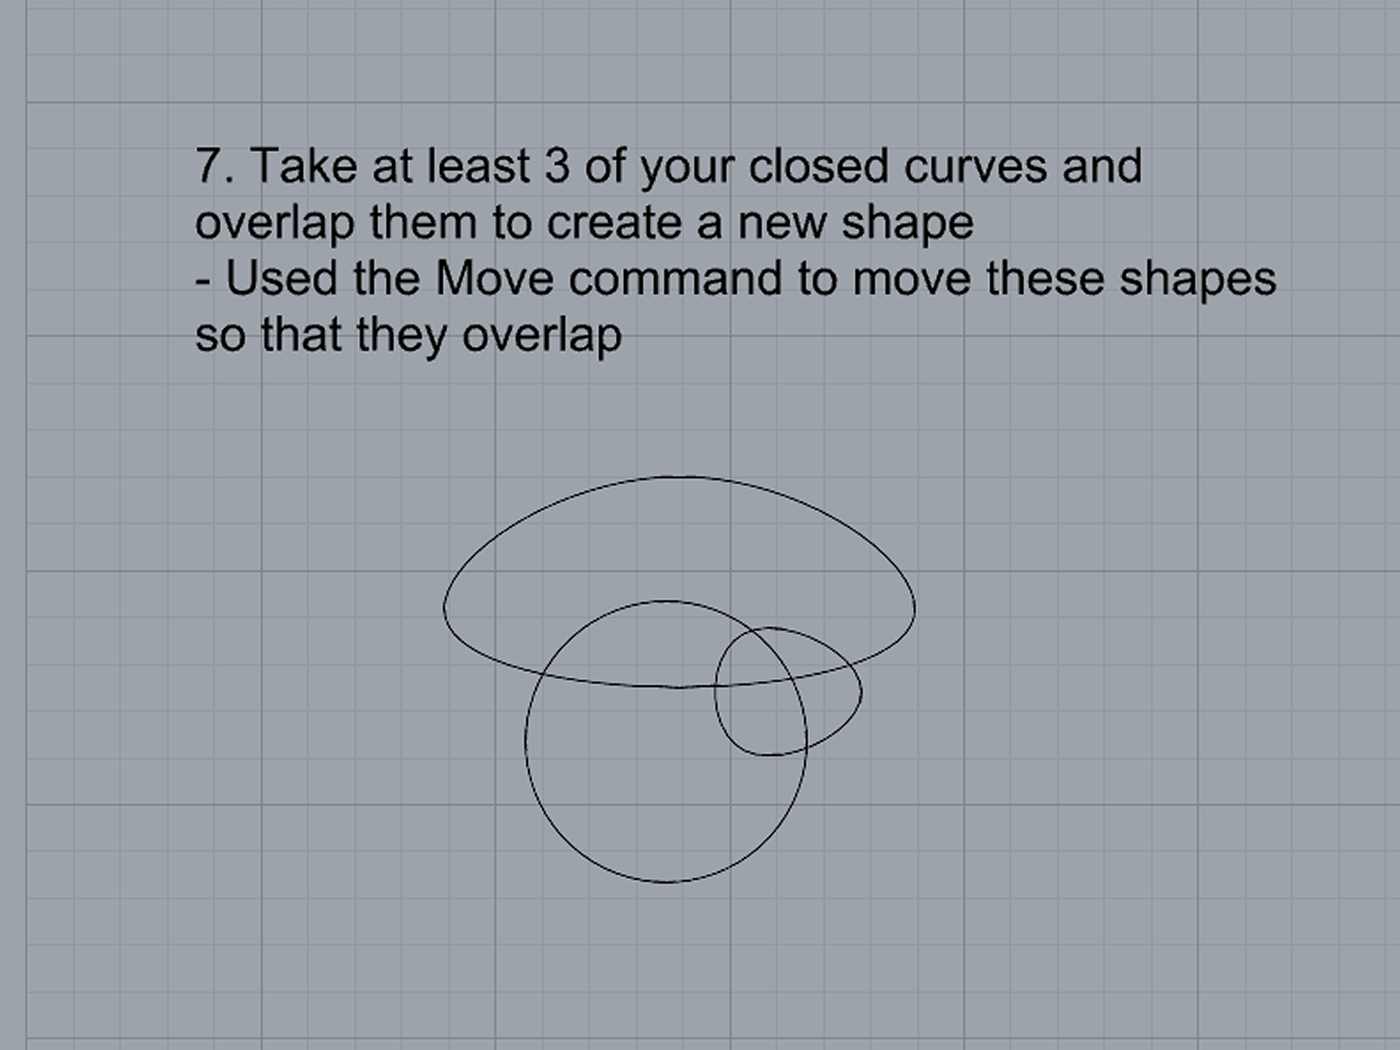
- Take at least 3 of your closed curves and overlap them to create a new shape
- Commands: Move
- Commands: Move
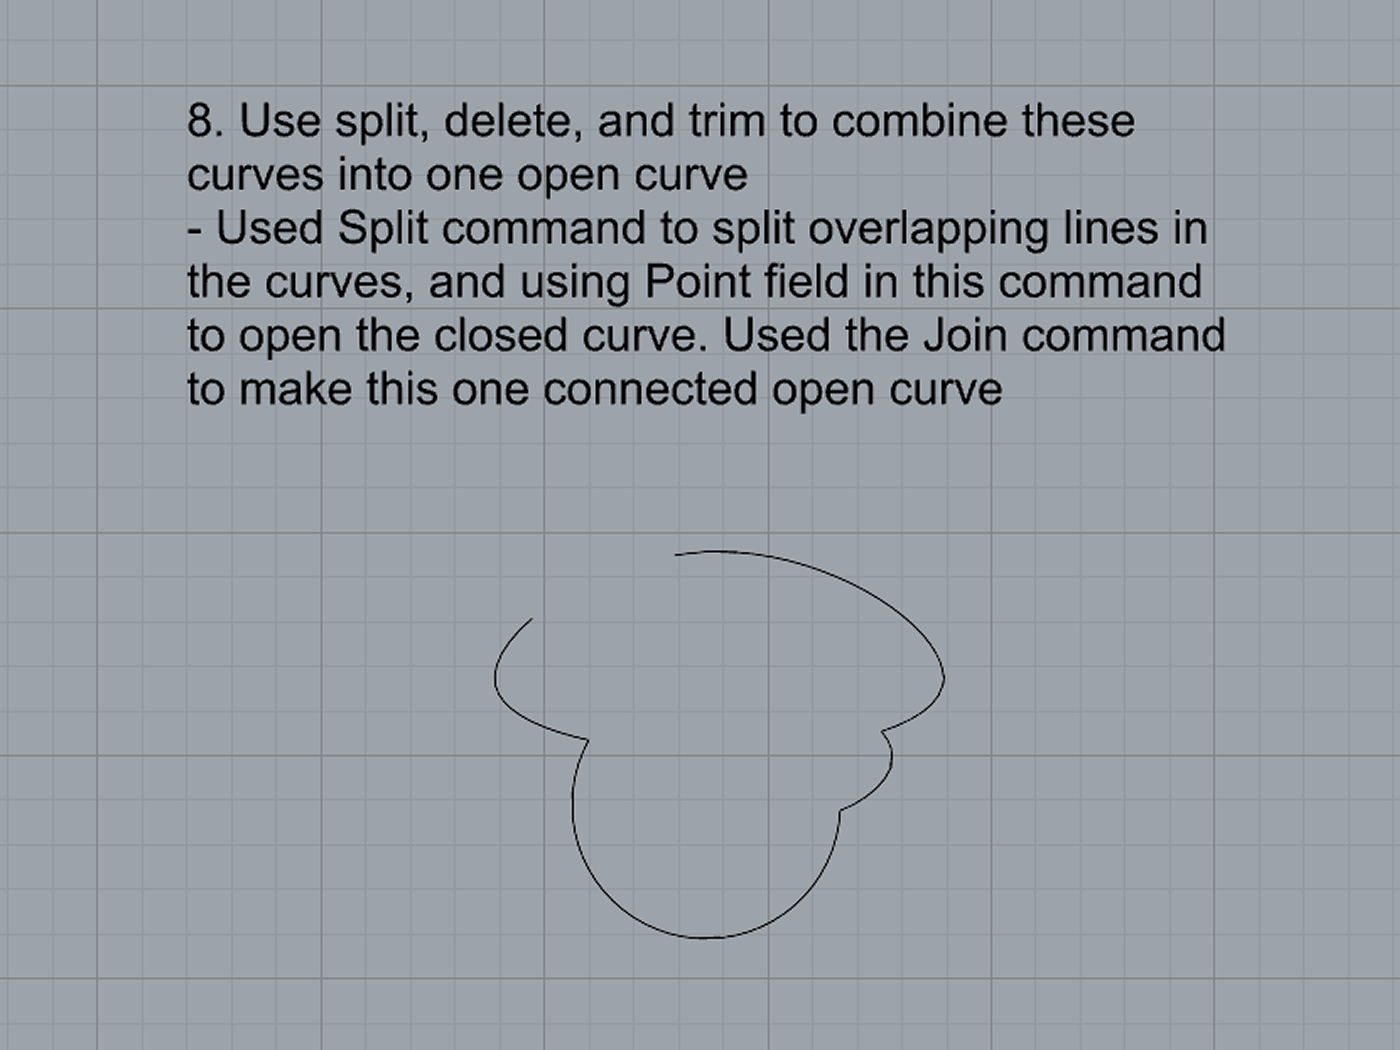
- Use split, delete, and trim to combine these curves into one open curve
- Commands: Split, Delete, Trim, Join, Explode
- Commands: Split, Delete, Trim, Join, Explode
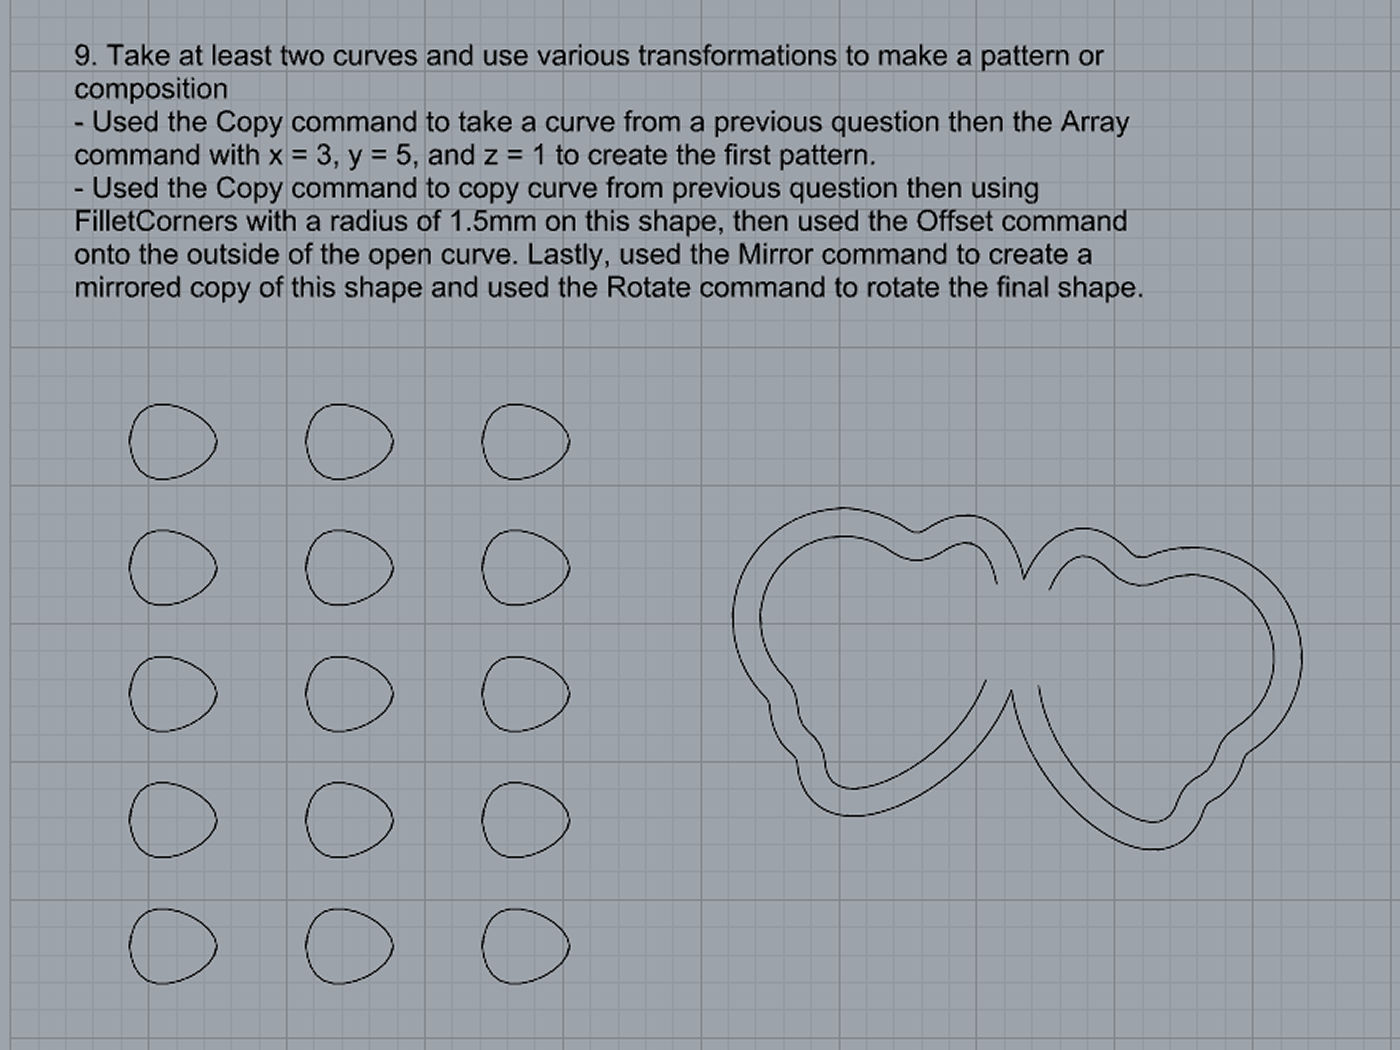
- Take at least two curves and use various transformations make a pattern or composition.
- Commands: Move, Copy, Rotate, Mirror, Array, Scale, Offset, Fillet, FilletCorners
- Commands: Move, Copy, Rotate, Mirror, Array, Scale, Offset, Fillet, FilletCorners
- Organize your Rhino file so each step is clear. Use the Text command to label each step and the commands you used. Add a link to your FirstnameLastname_Curves file at this point in your post.
Part 2: Surfaces
Open a new Rhino File and practice the surfaces commands below by making two different surfaces for each command. Organize your Rhino file so each step is clear. You may want to use some of the curves you modeled in Part 1. Use the Text command to label each step and the commands you used.
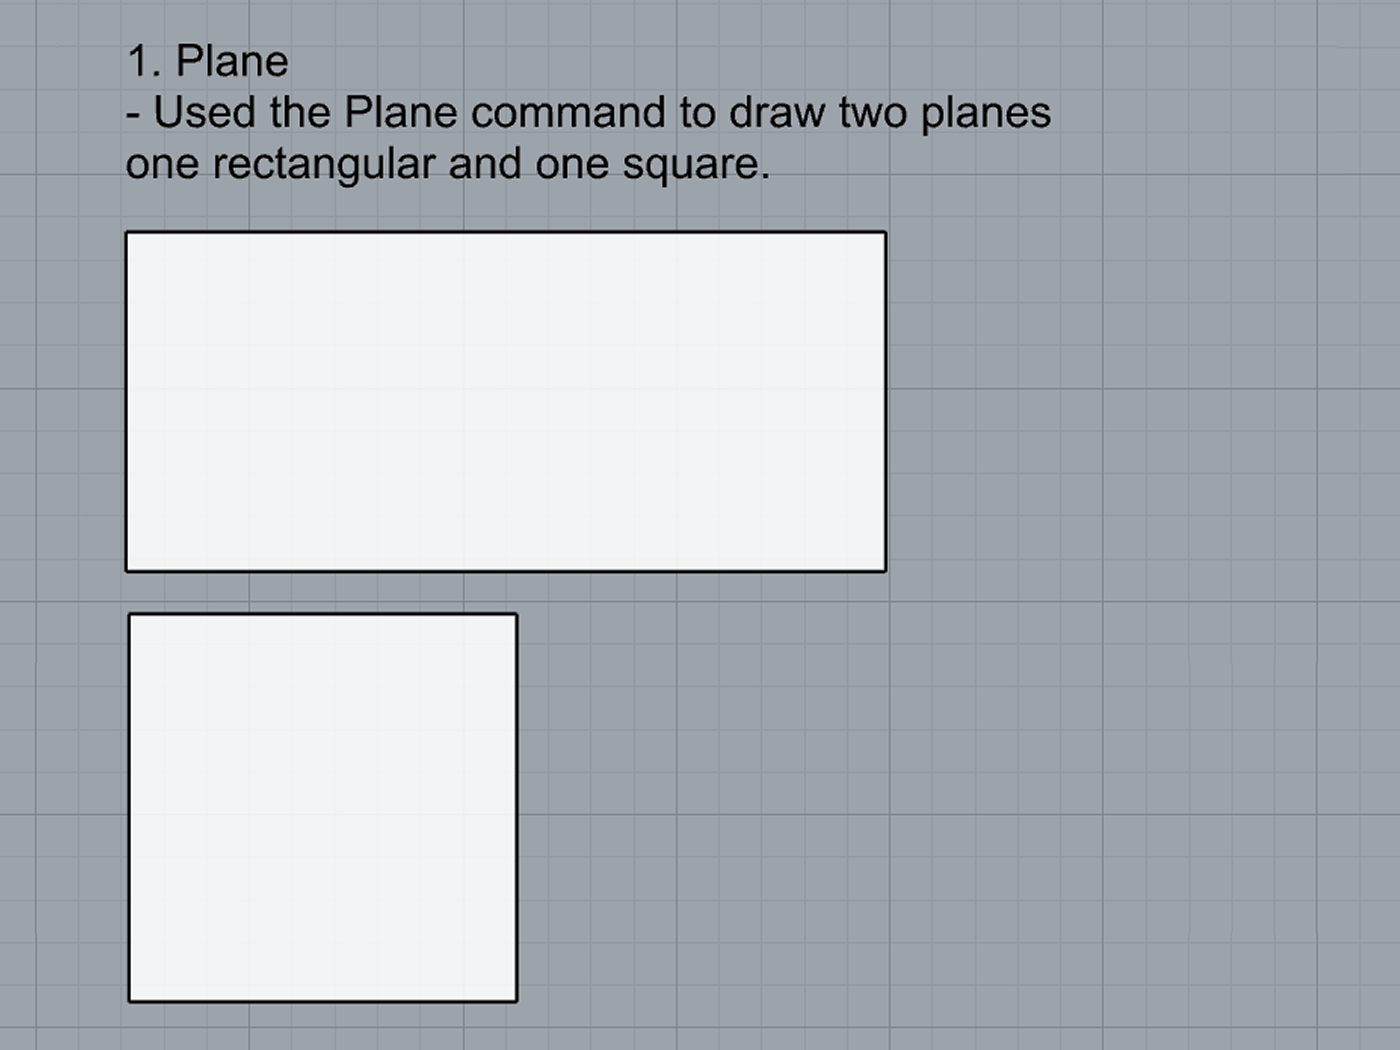
- Plane
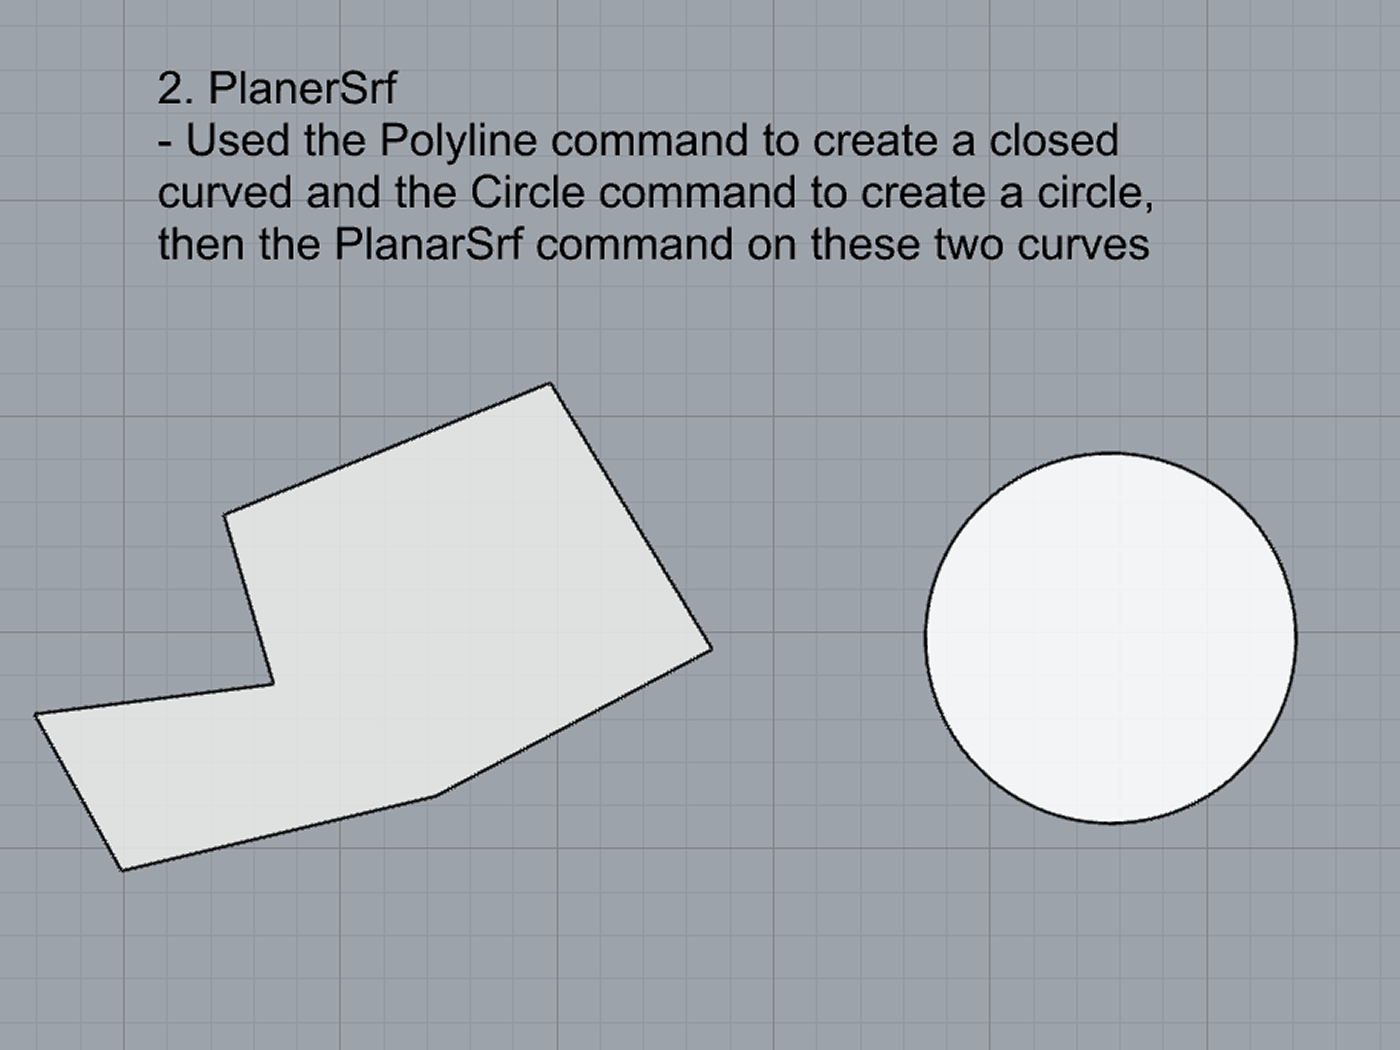
- PlanarSrf
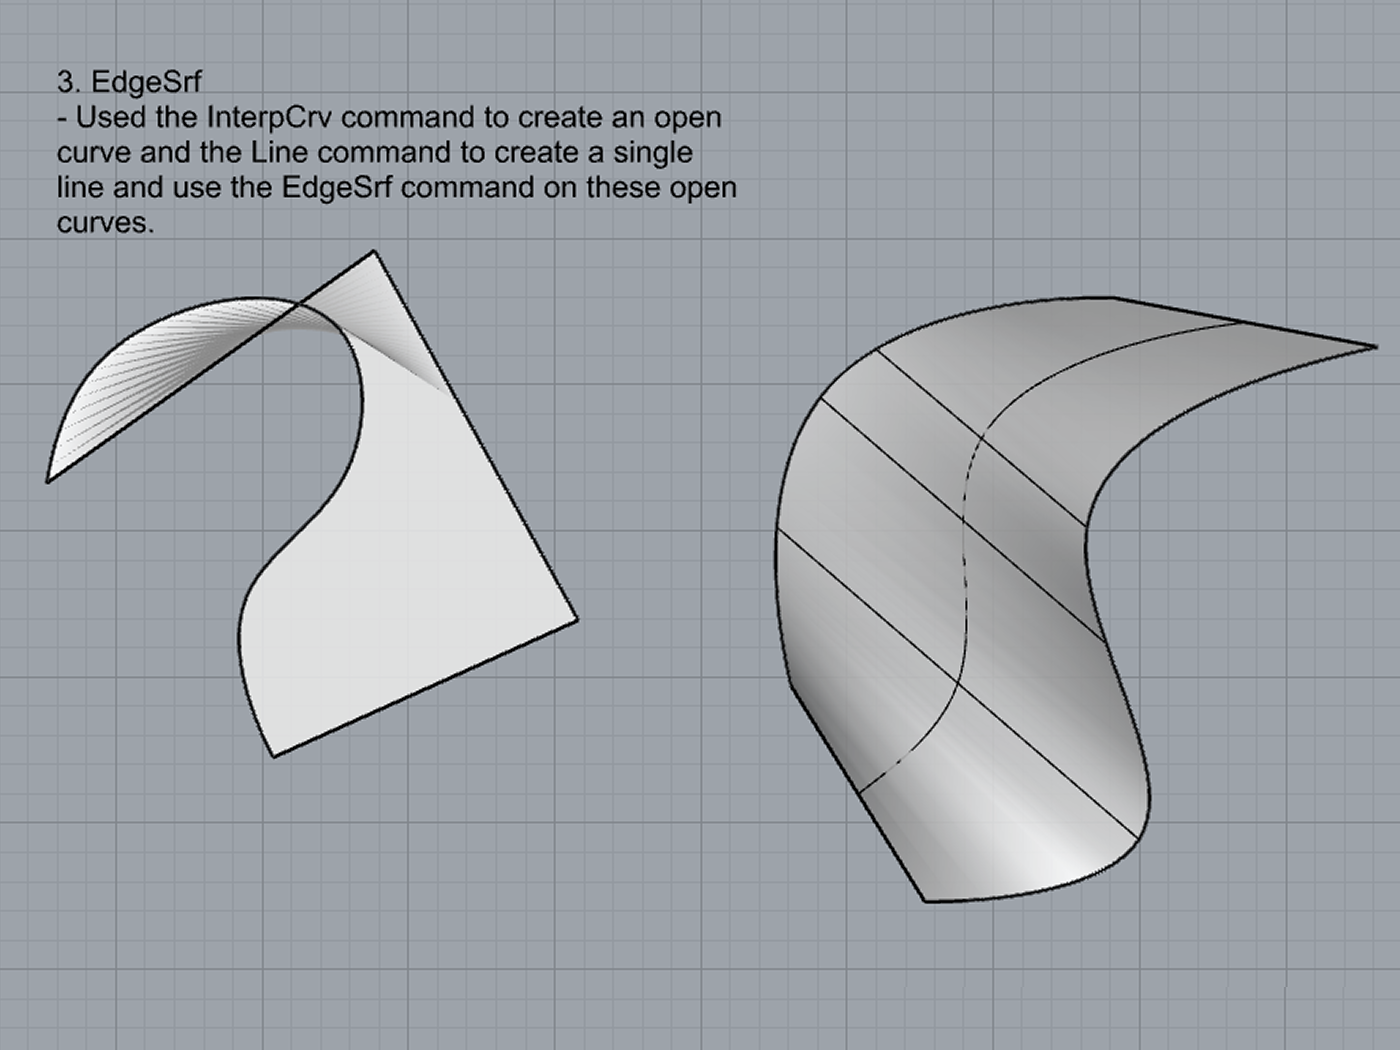
- EdgeSrf
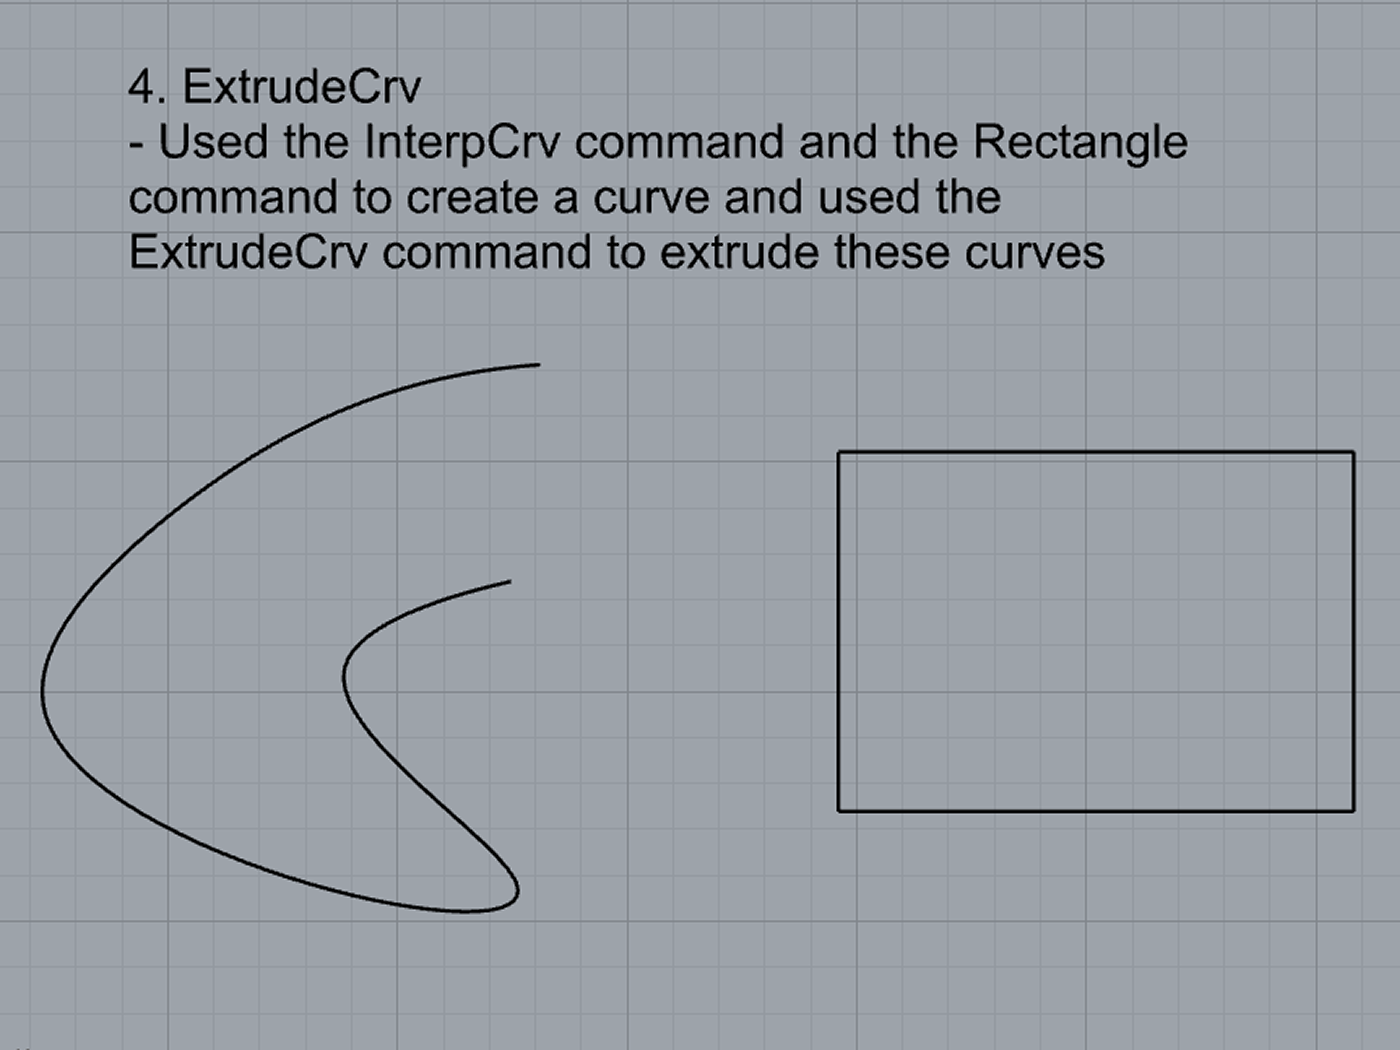
- ExtrudeCrv
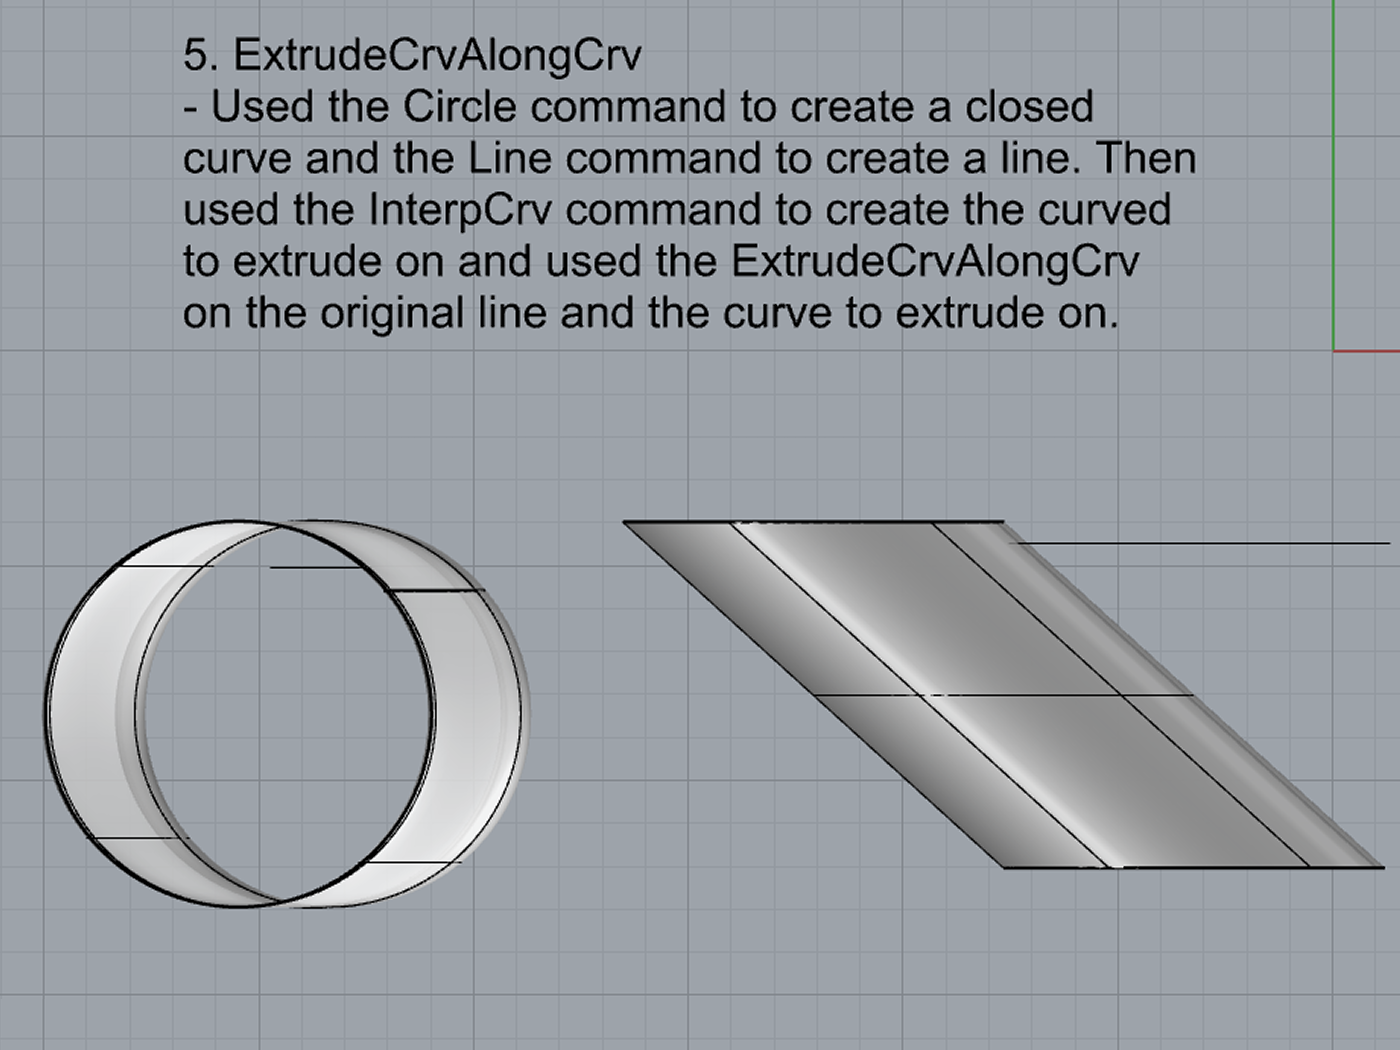
- ExtrudeCrvAlongCrv
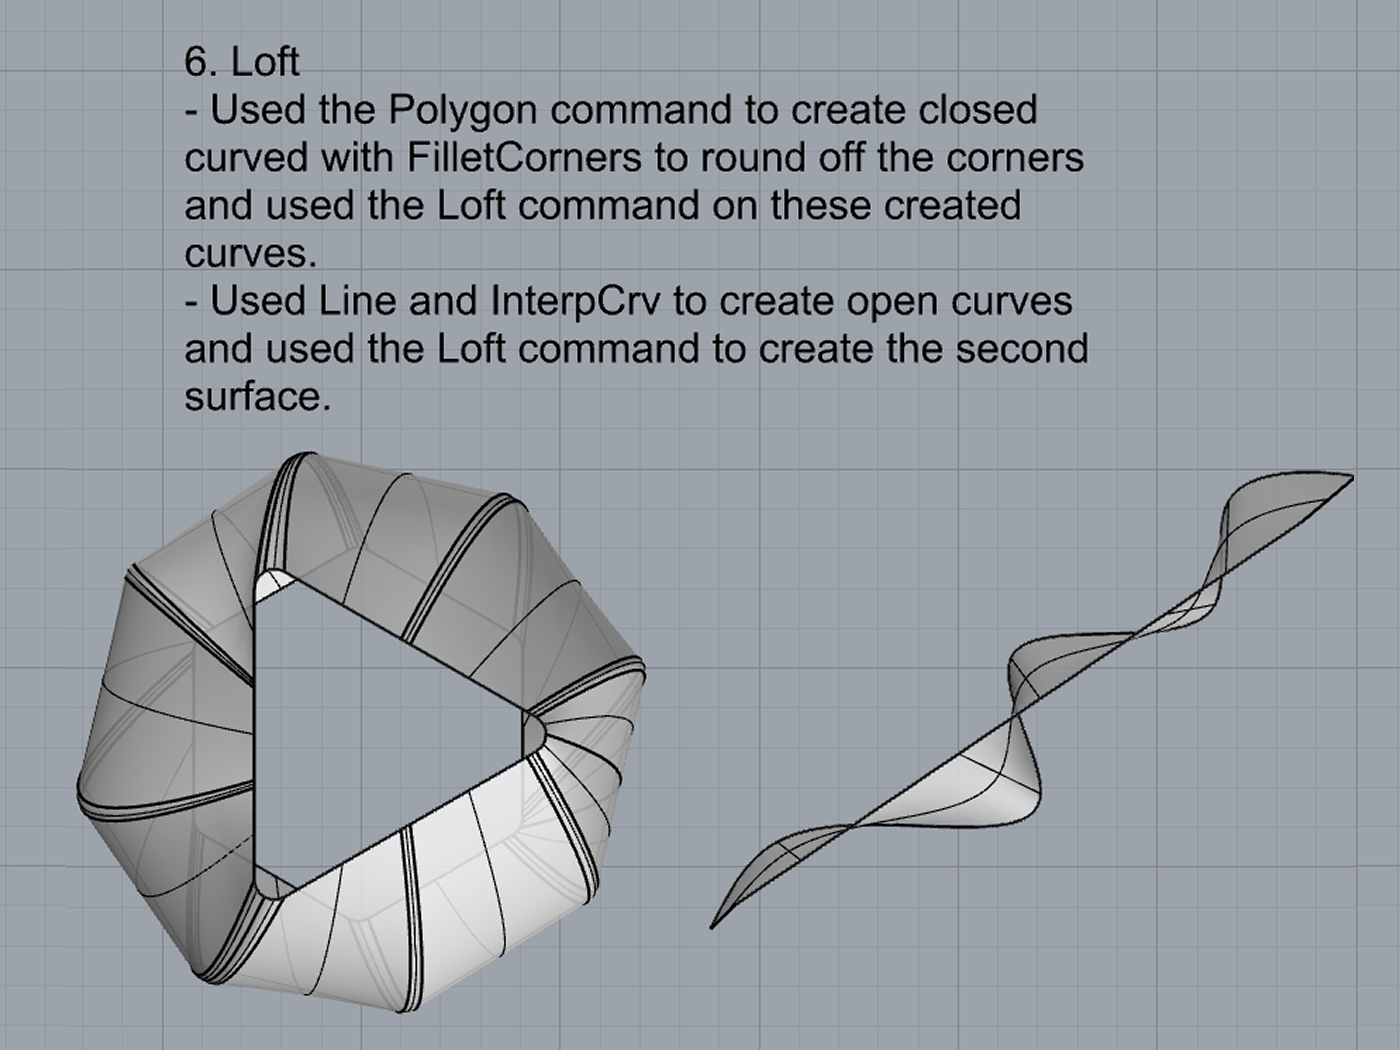
- Loft
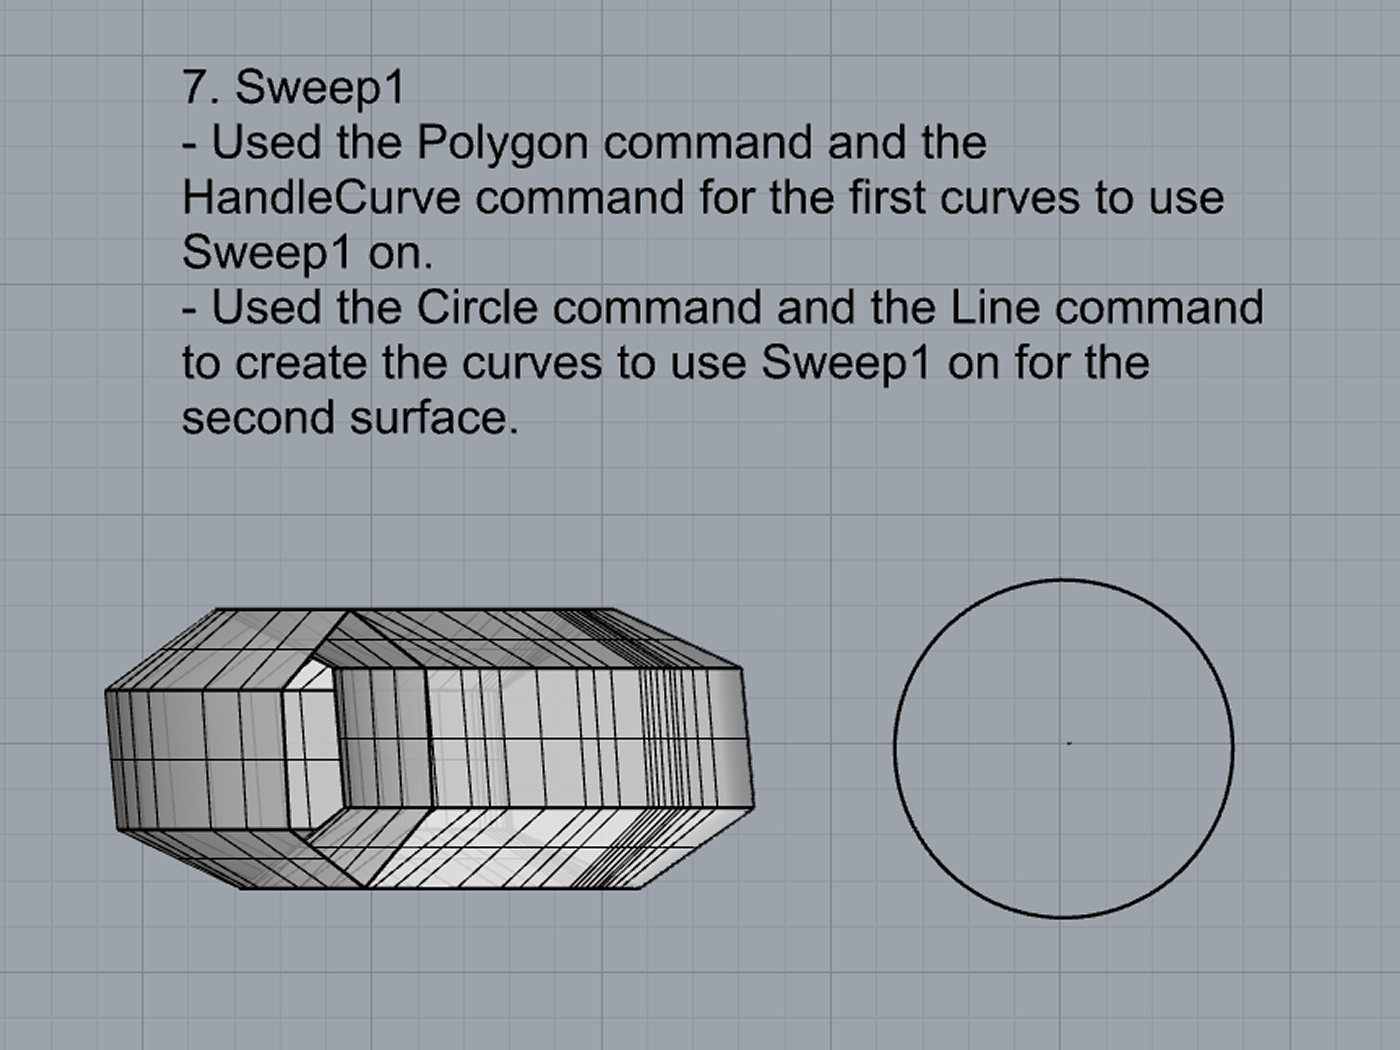
- Sweep1
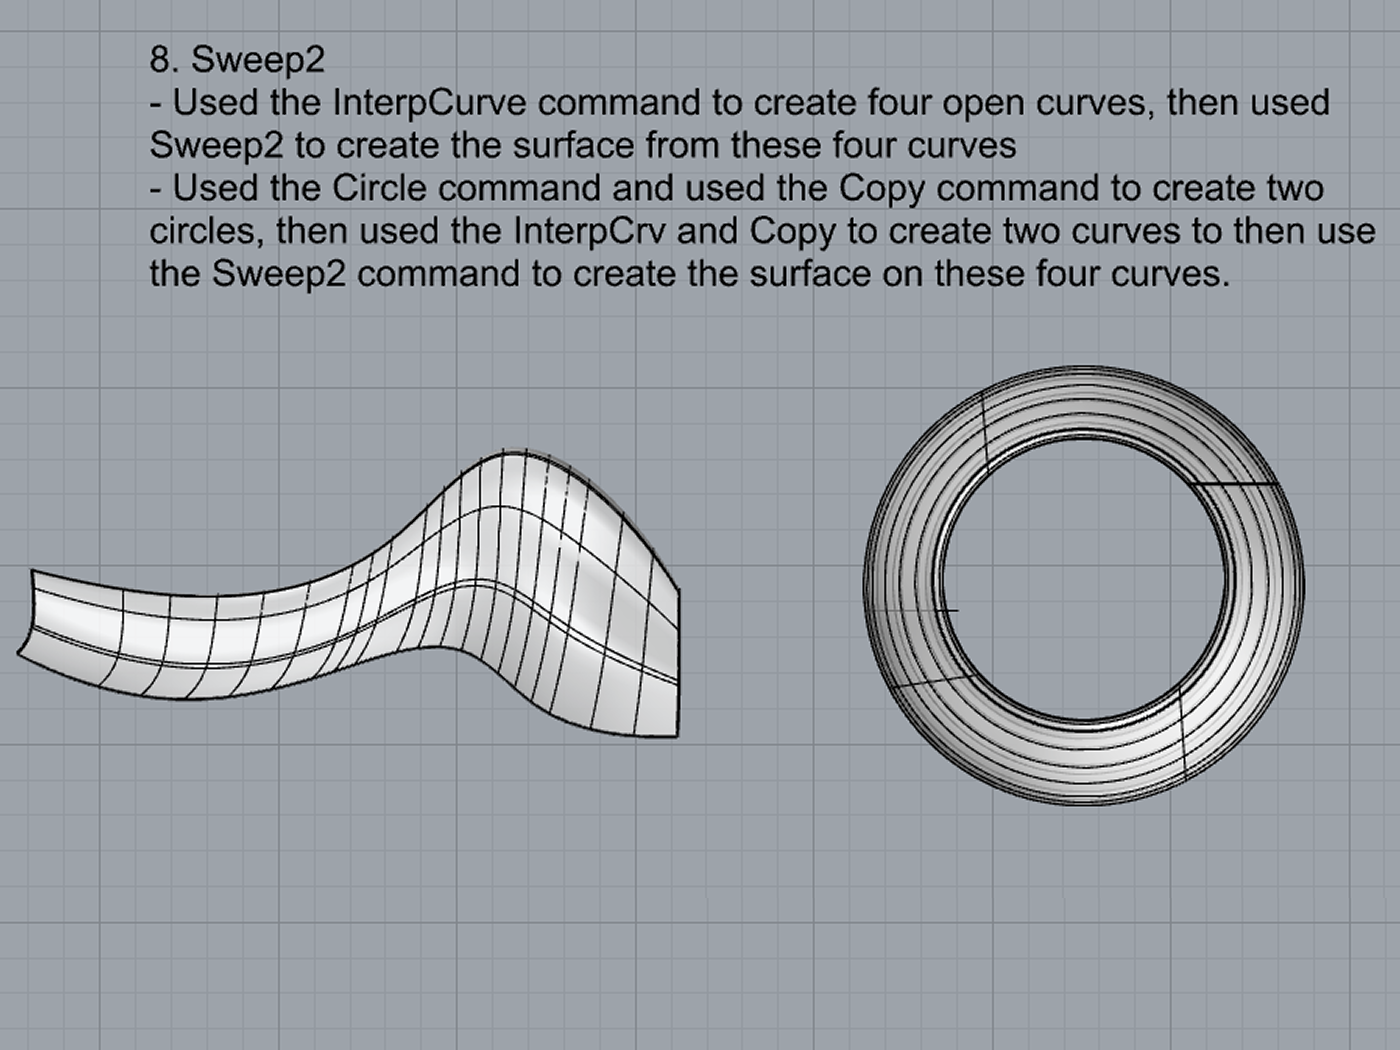
- Sweep2
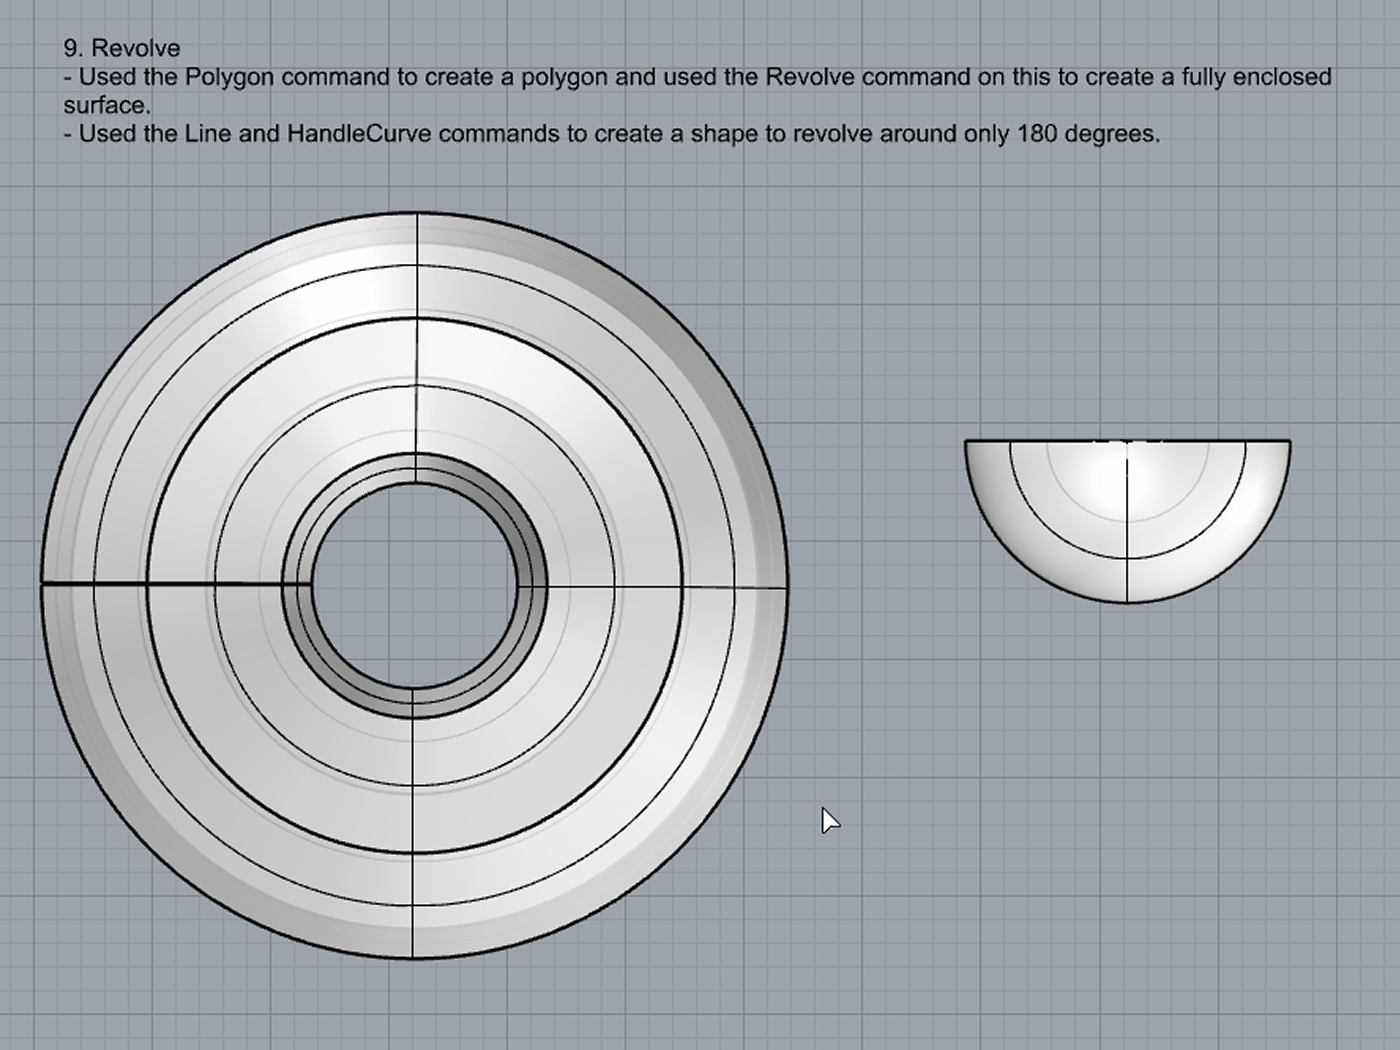
- Revolve
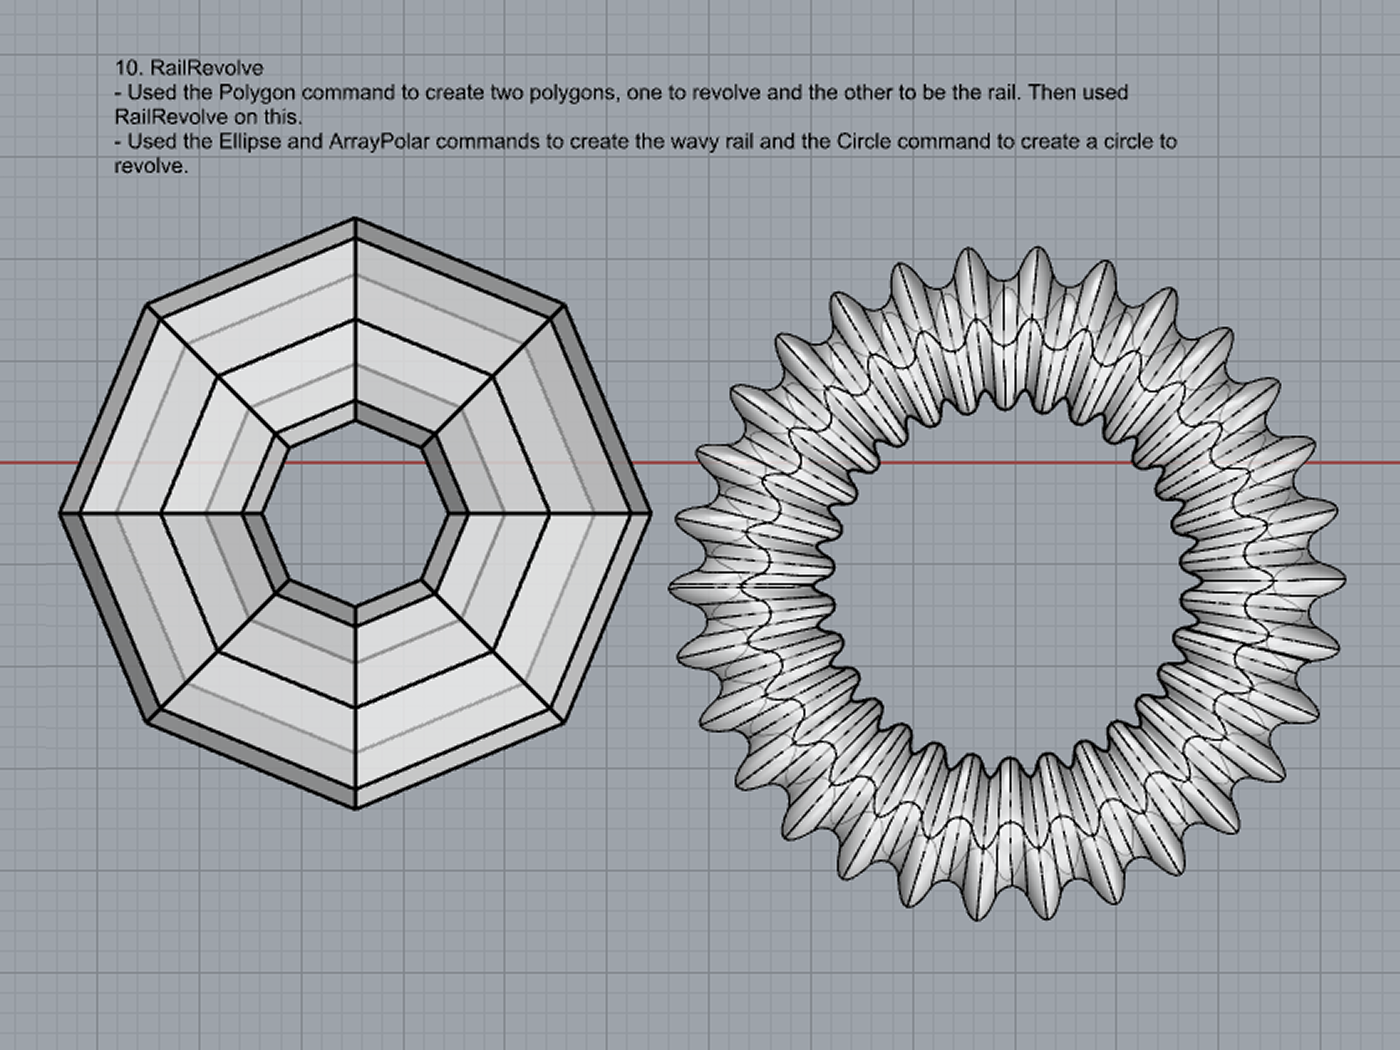
- RailRevolve
- Add a link to your FirstnameLastname_Surfaces file at this point in your post.
Part 3: Solids
Open a new Rhino File and practice the solids commands below by making two different solids for each command. You may want to use some of the curves and surfaces you modeled in Parts 1 and 2. Organize your Rhino file so each step is clear. Use the Text command to label each step and the commands you used.
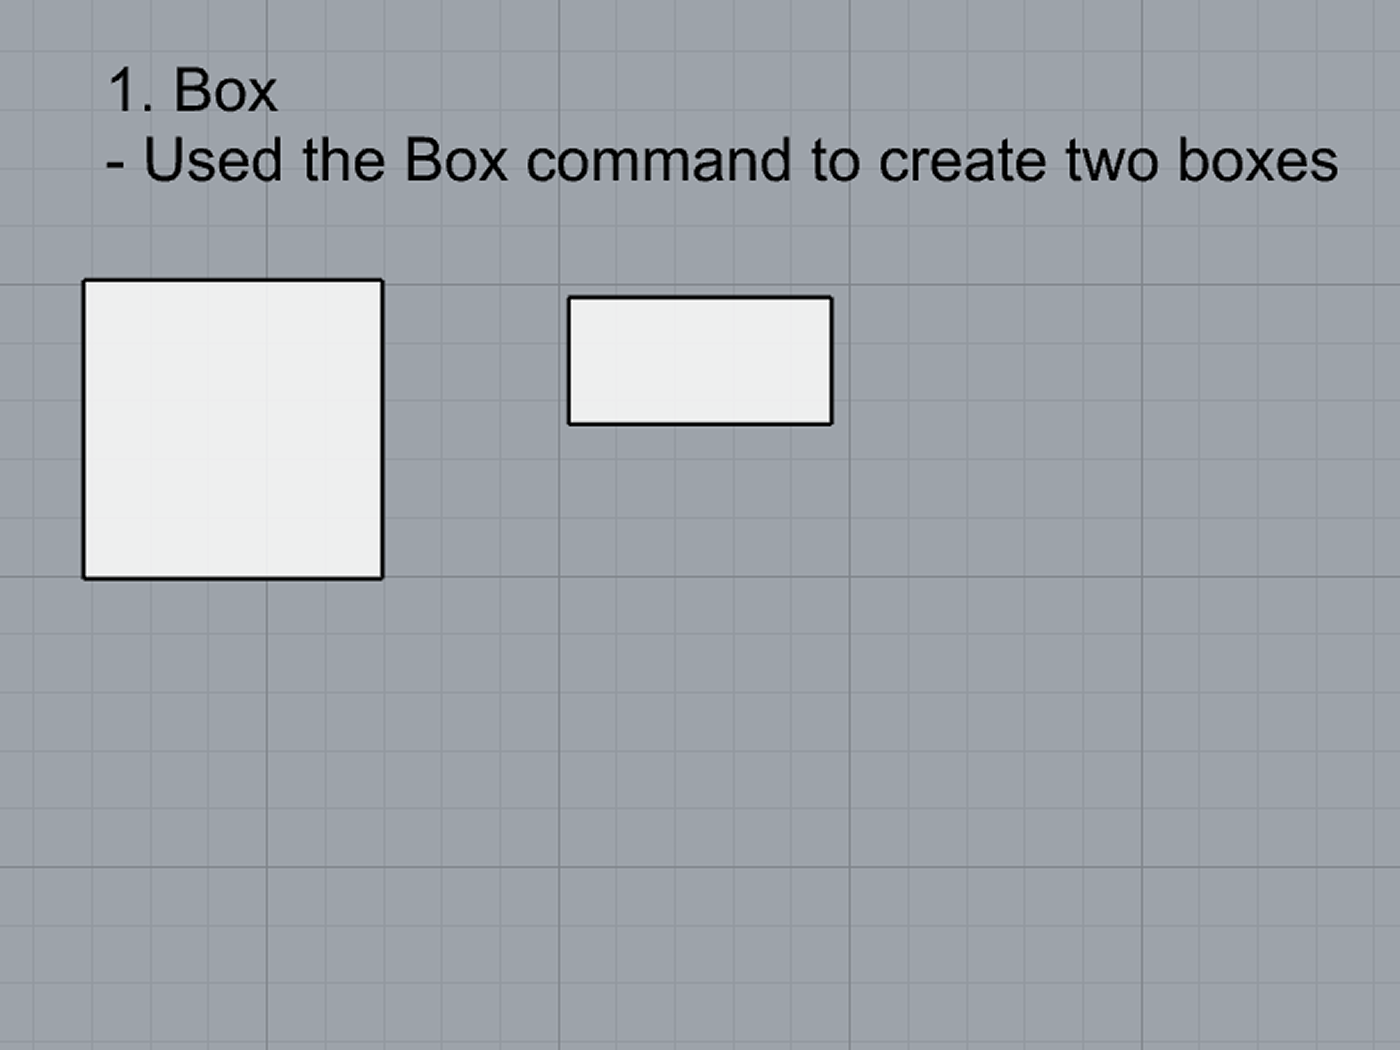
- Box
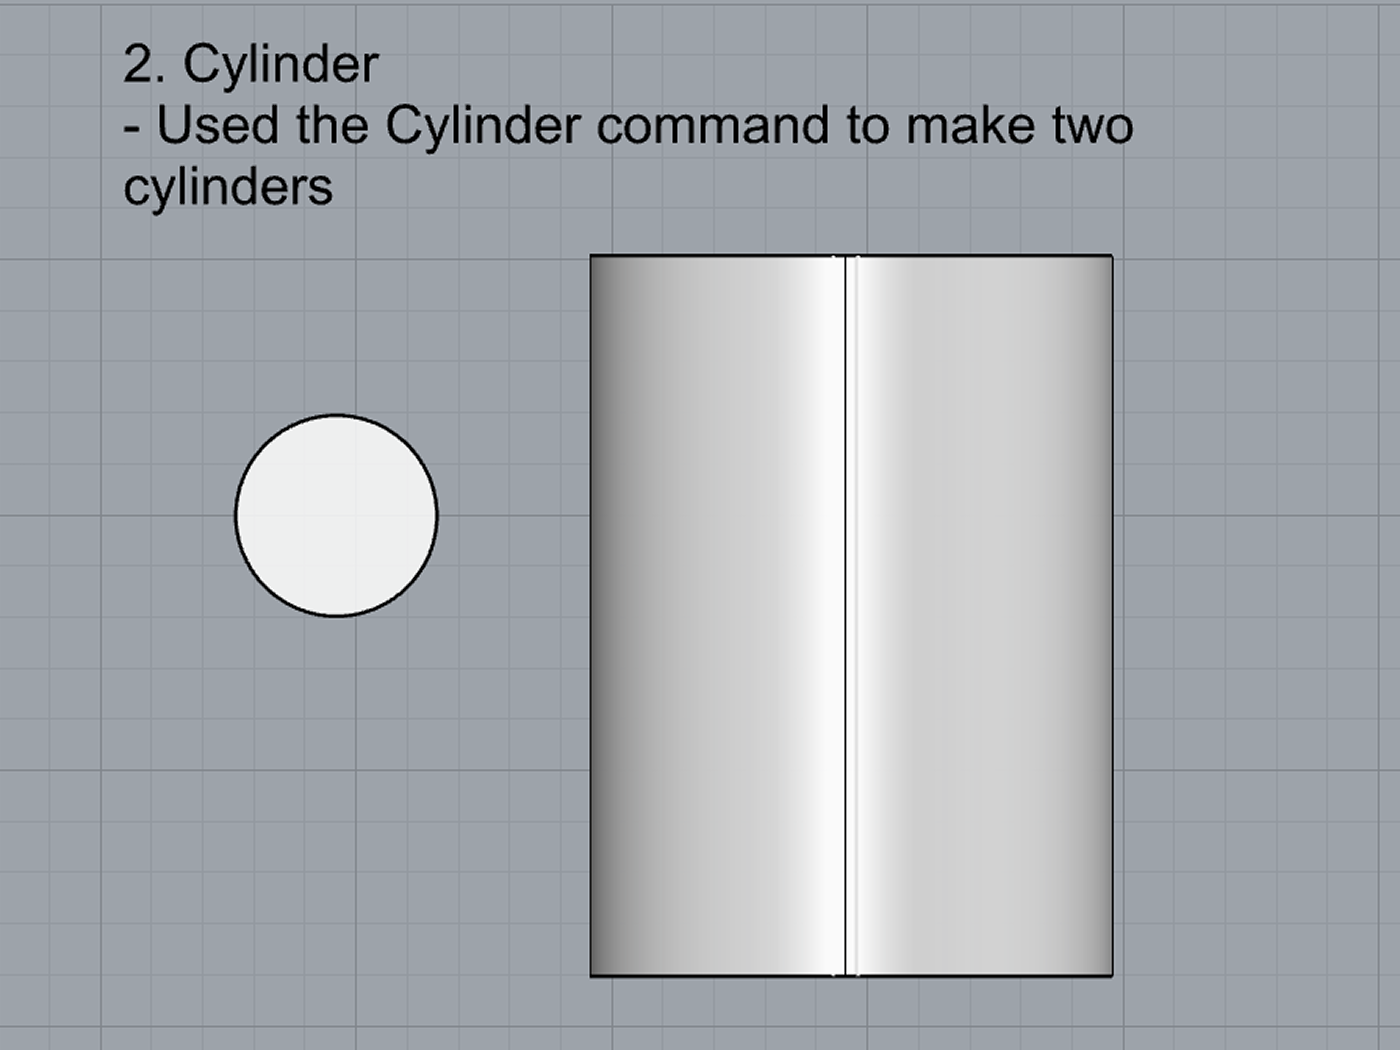
- Cylinder
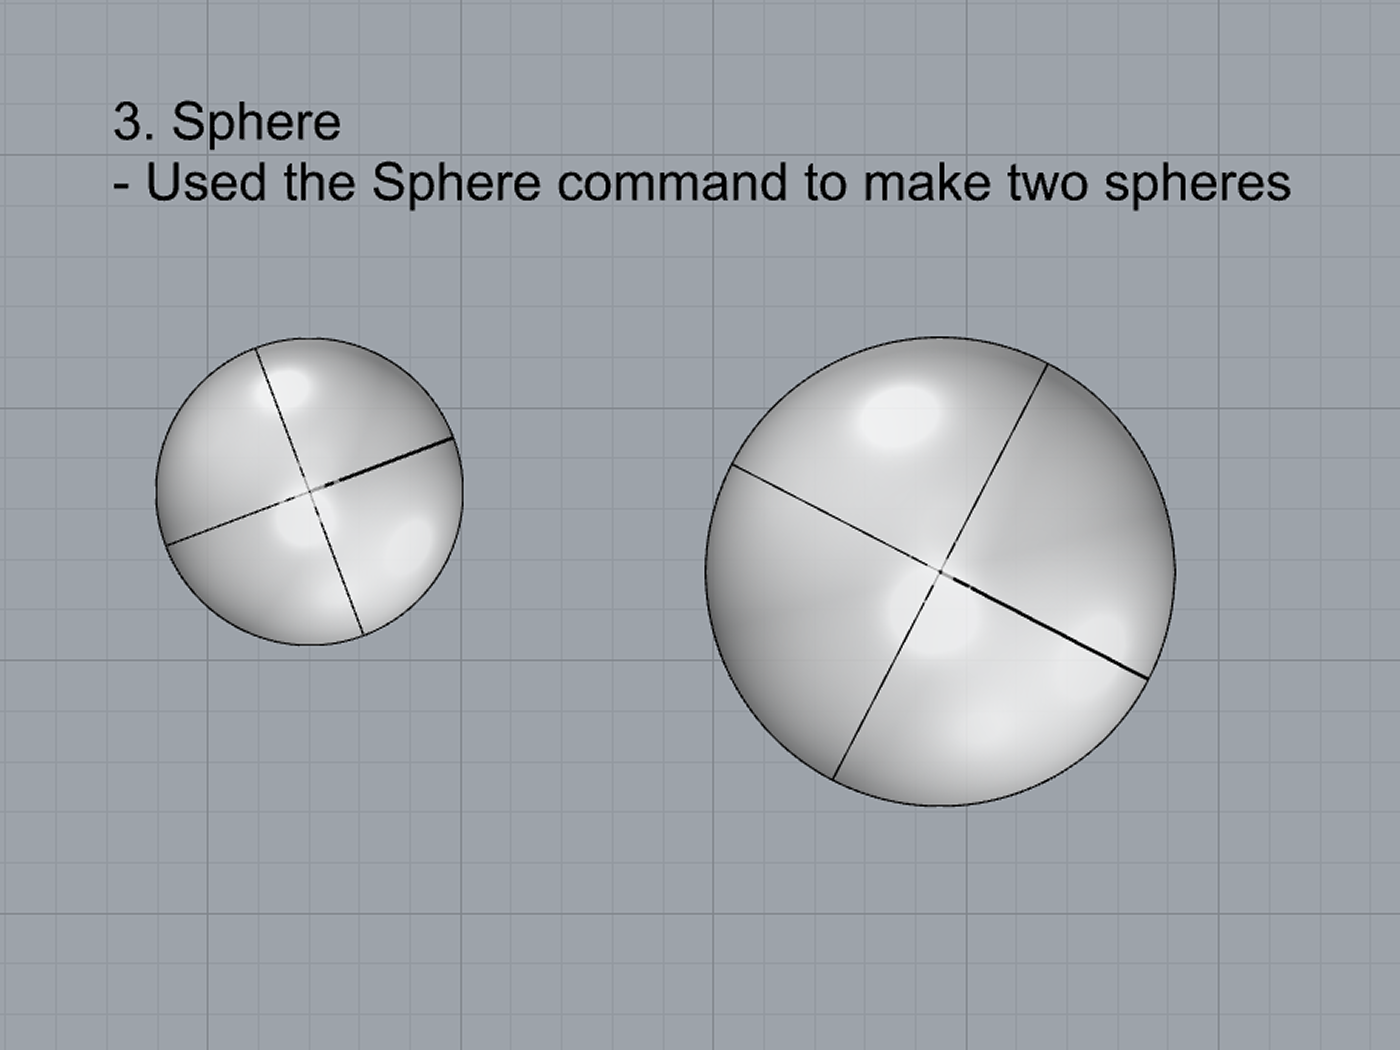
- Sphere
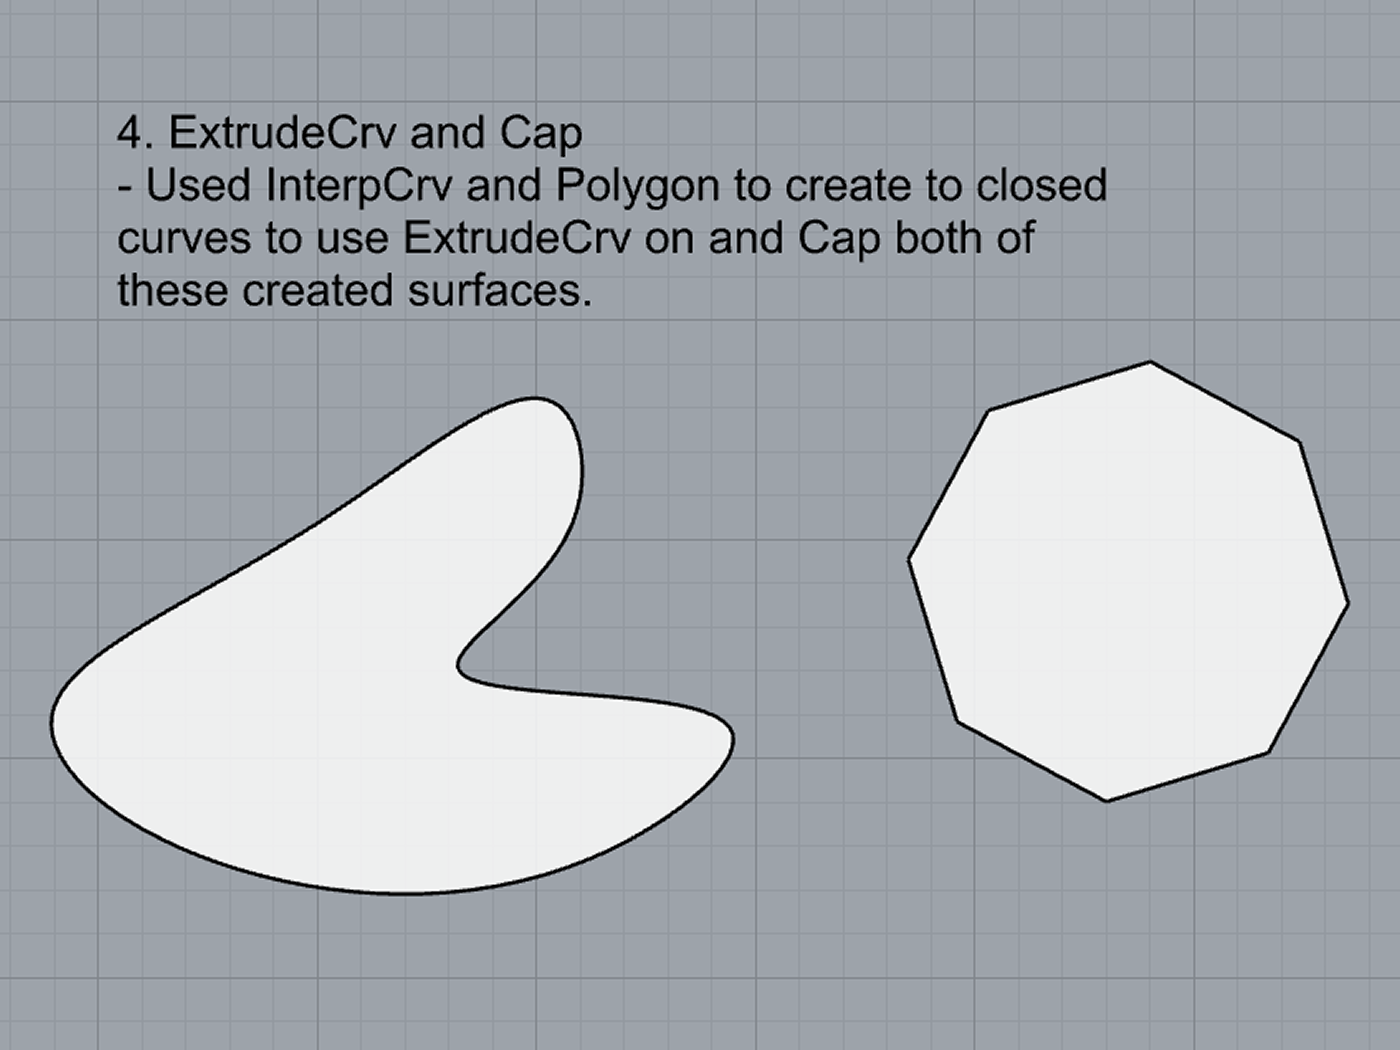
- ExtrudeCrv and Cap
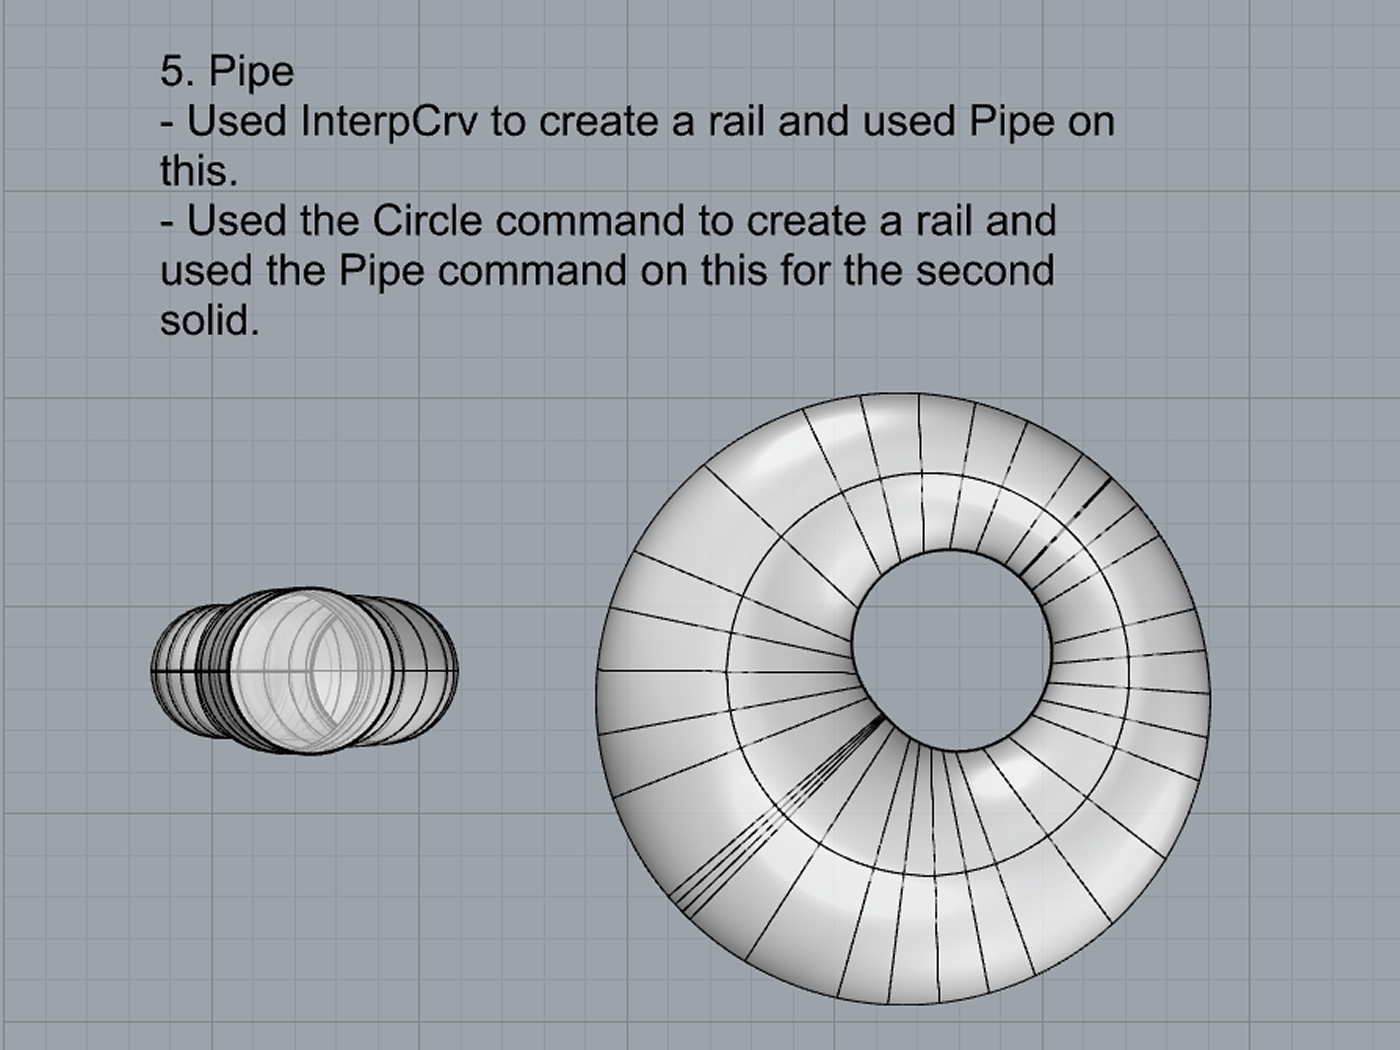
- Pipe
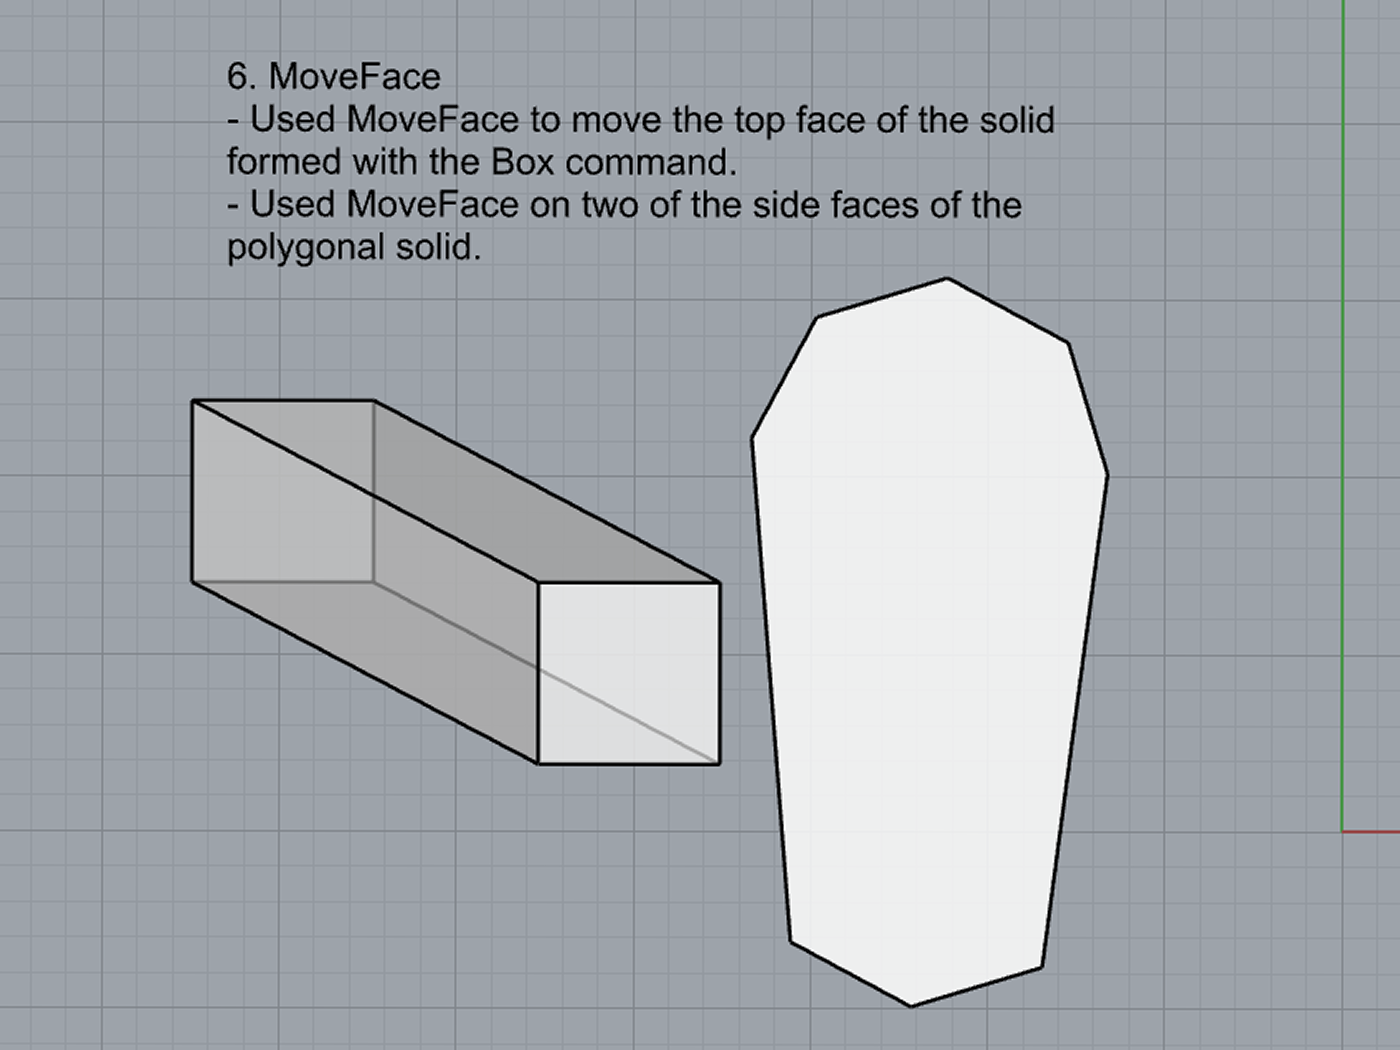
- MoveFace
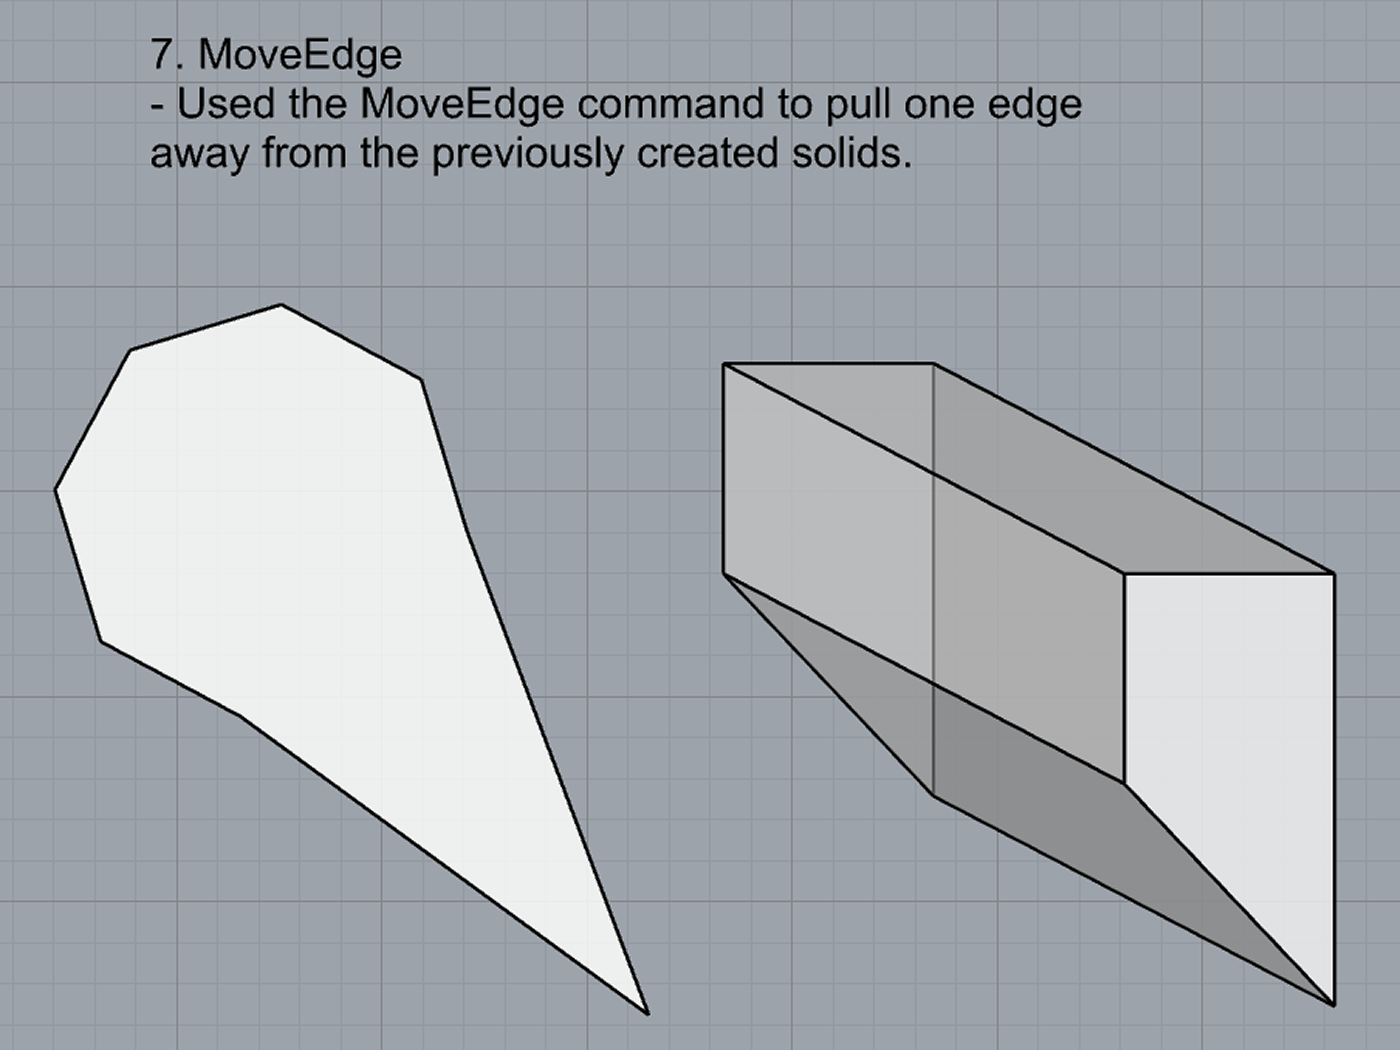
- MoveEdge
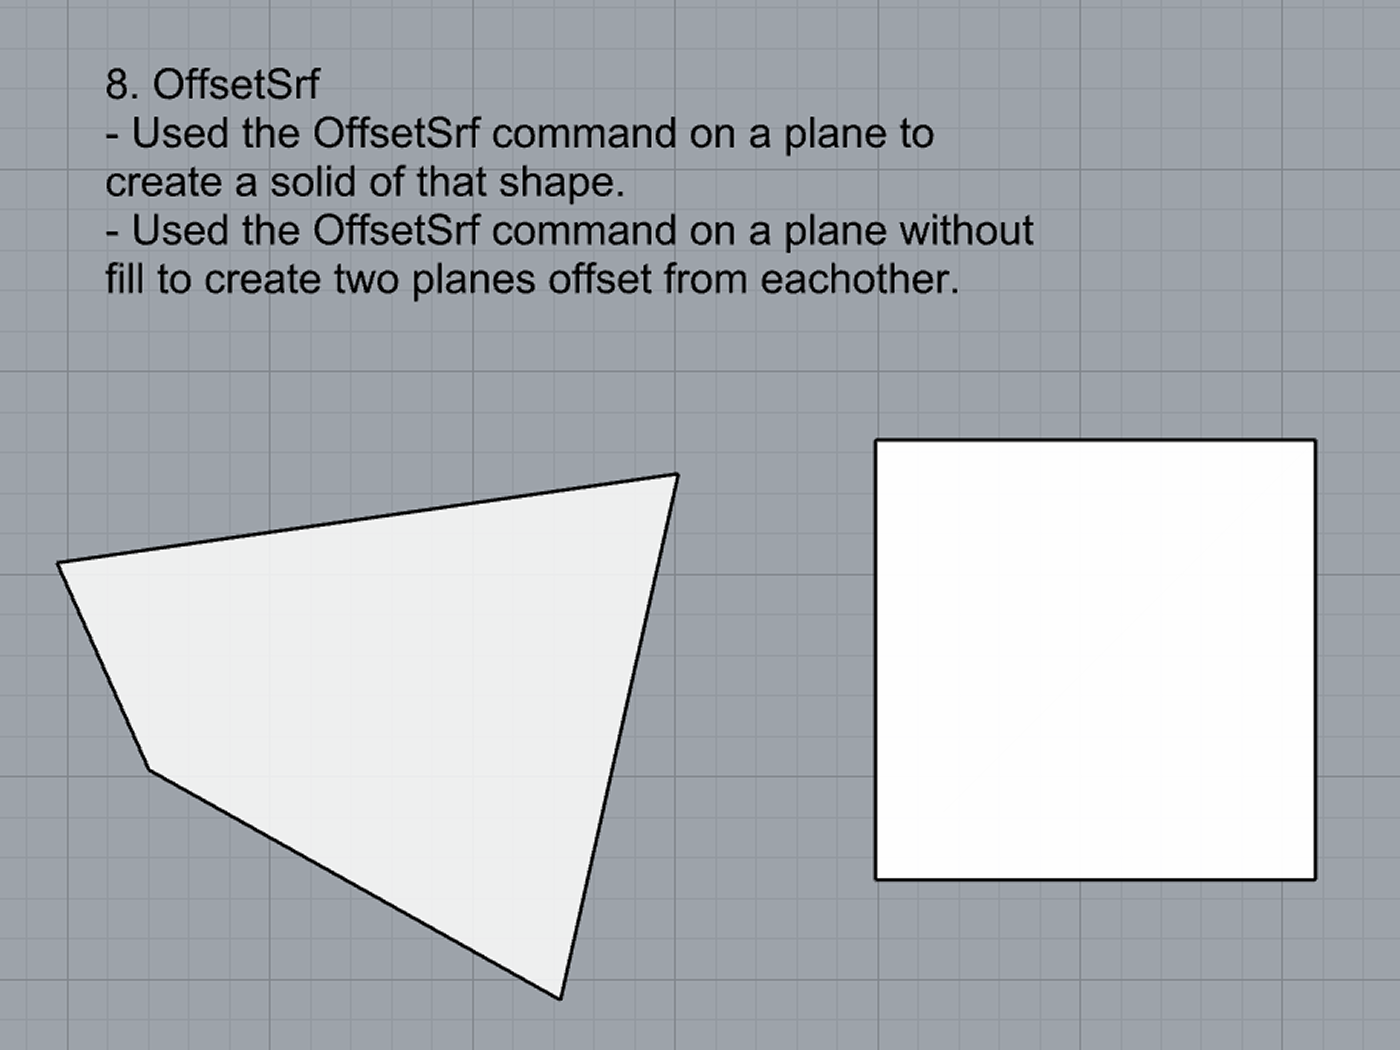
- OffsetSrf
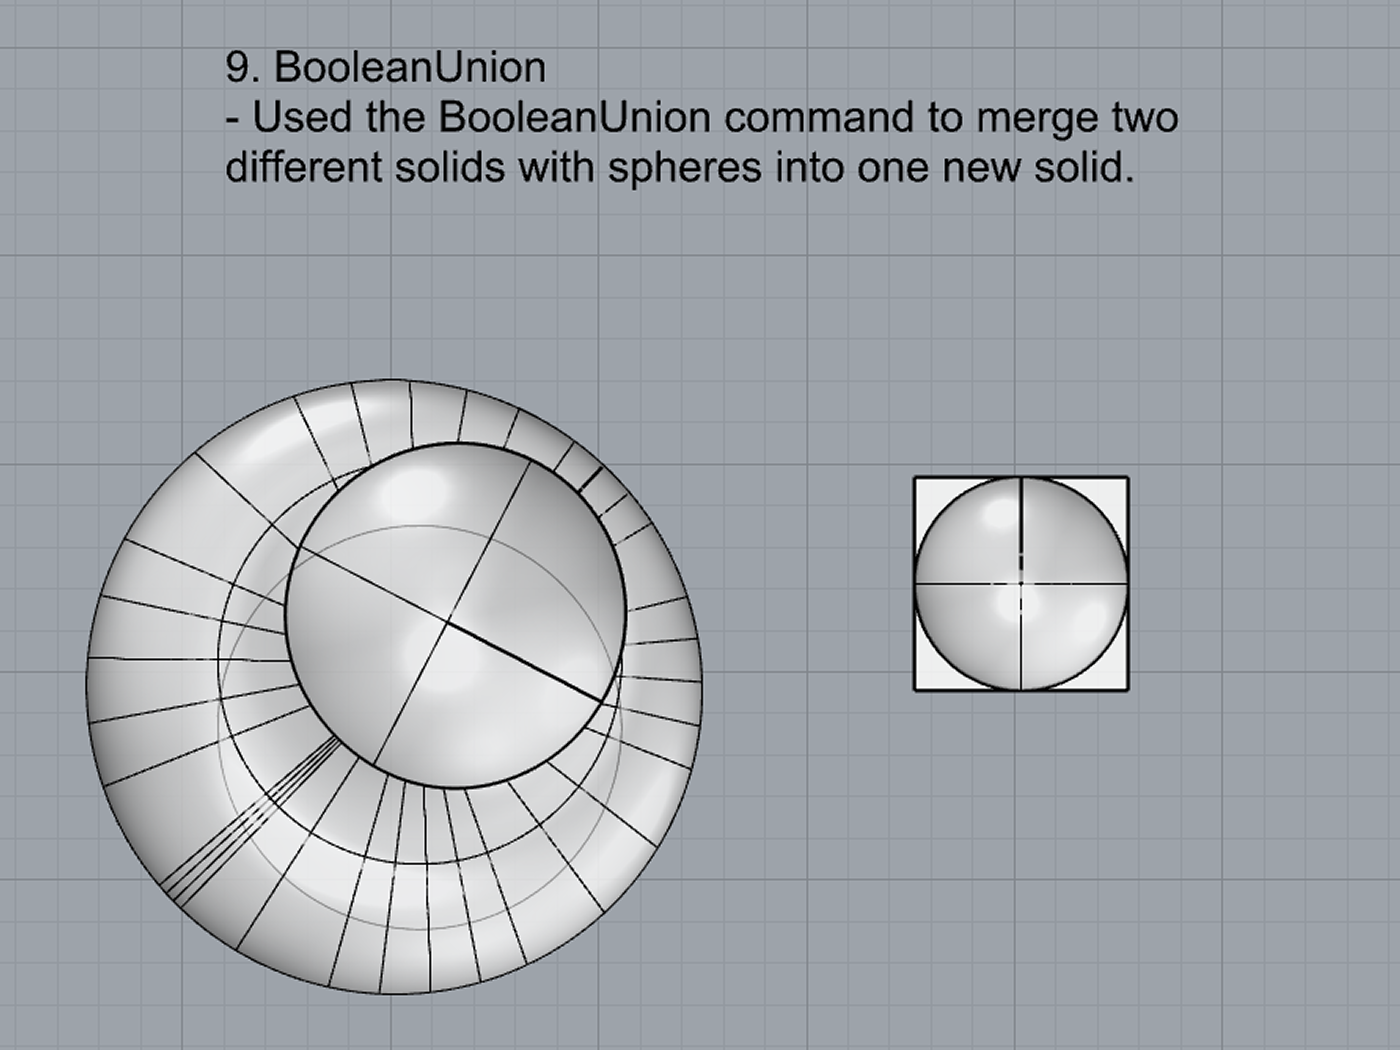
- BooleanUnion
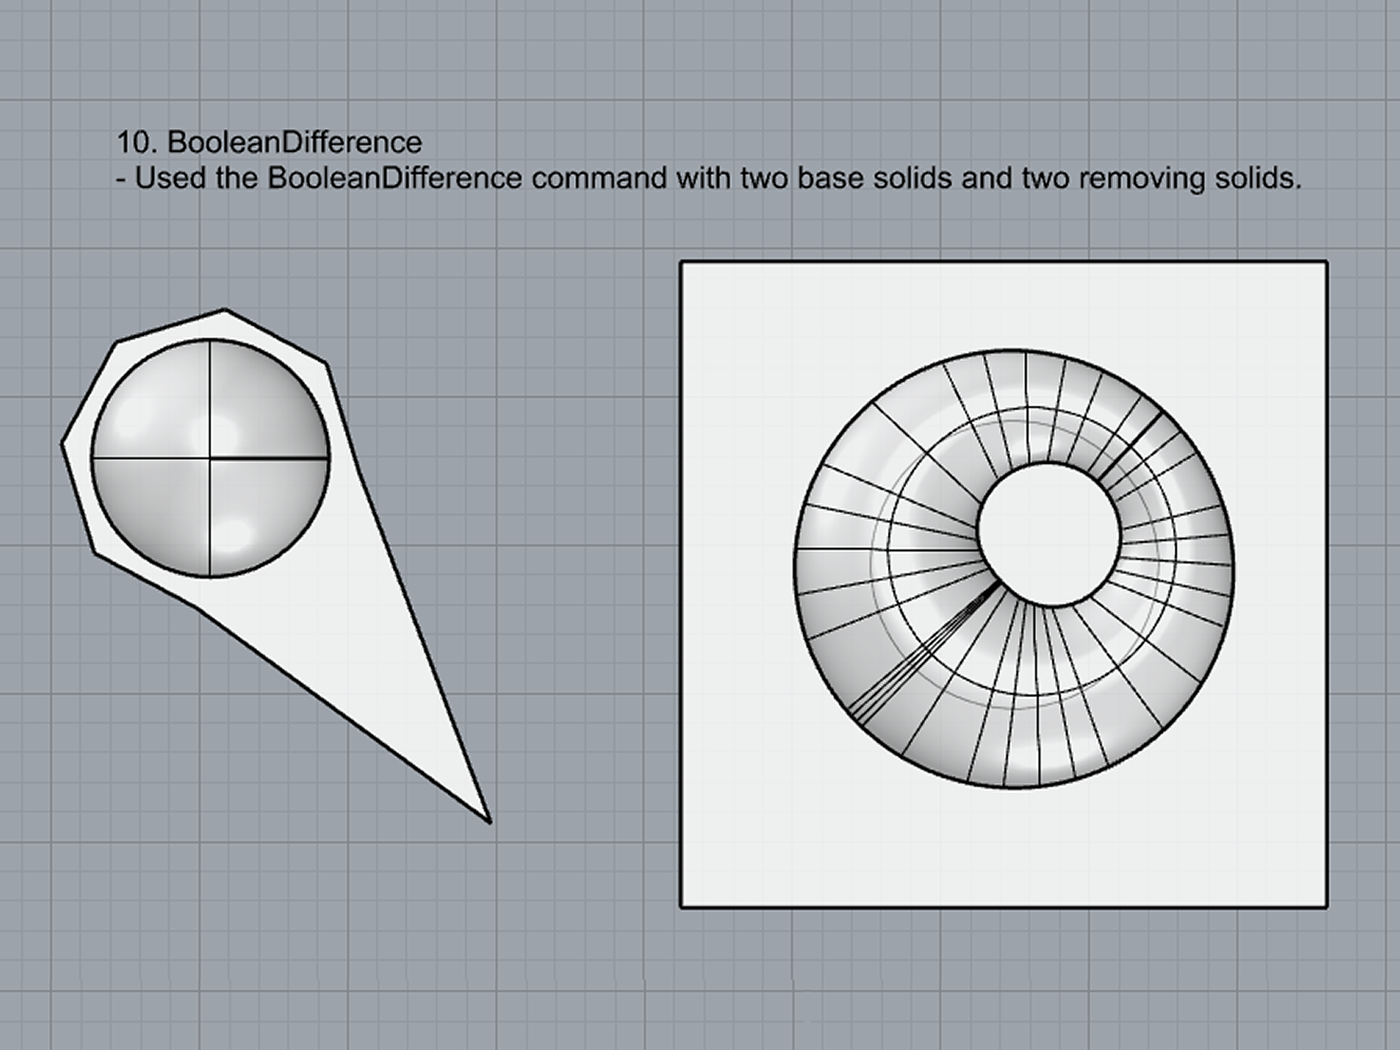
- BooleanDifference
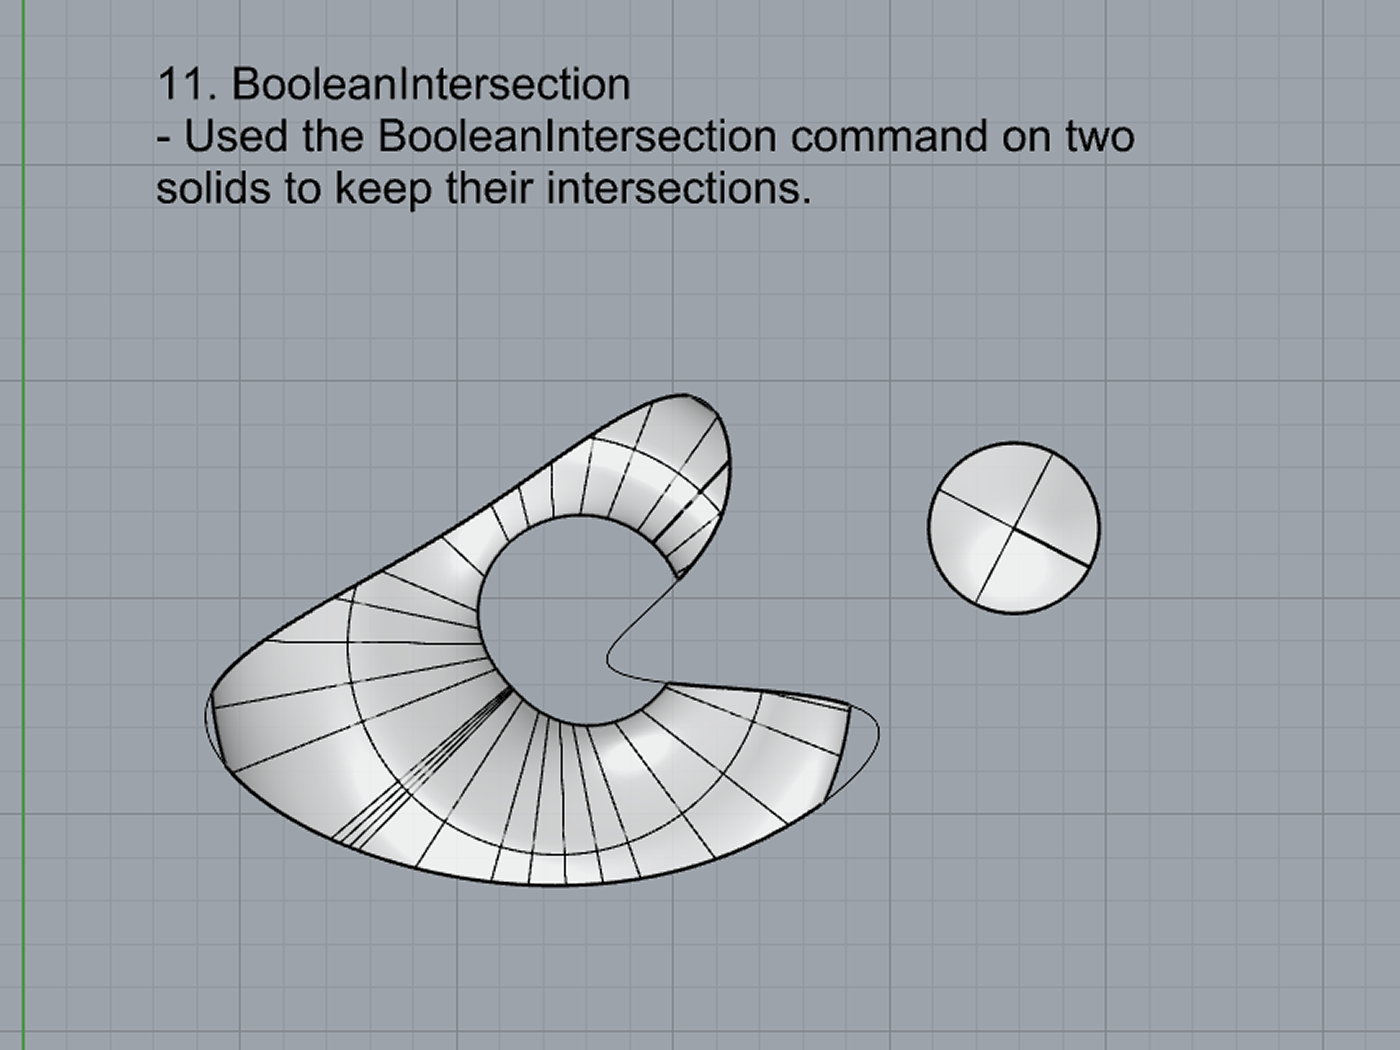
- Boolean Intersection
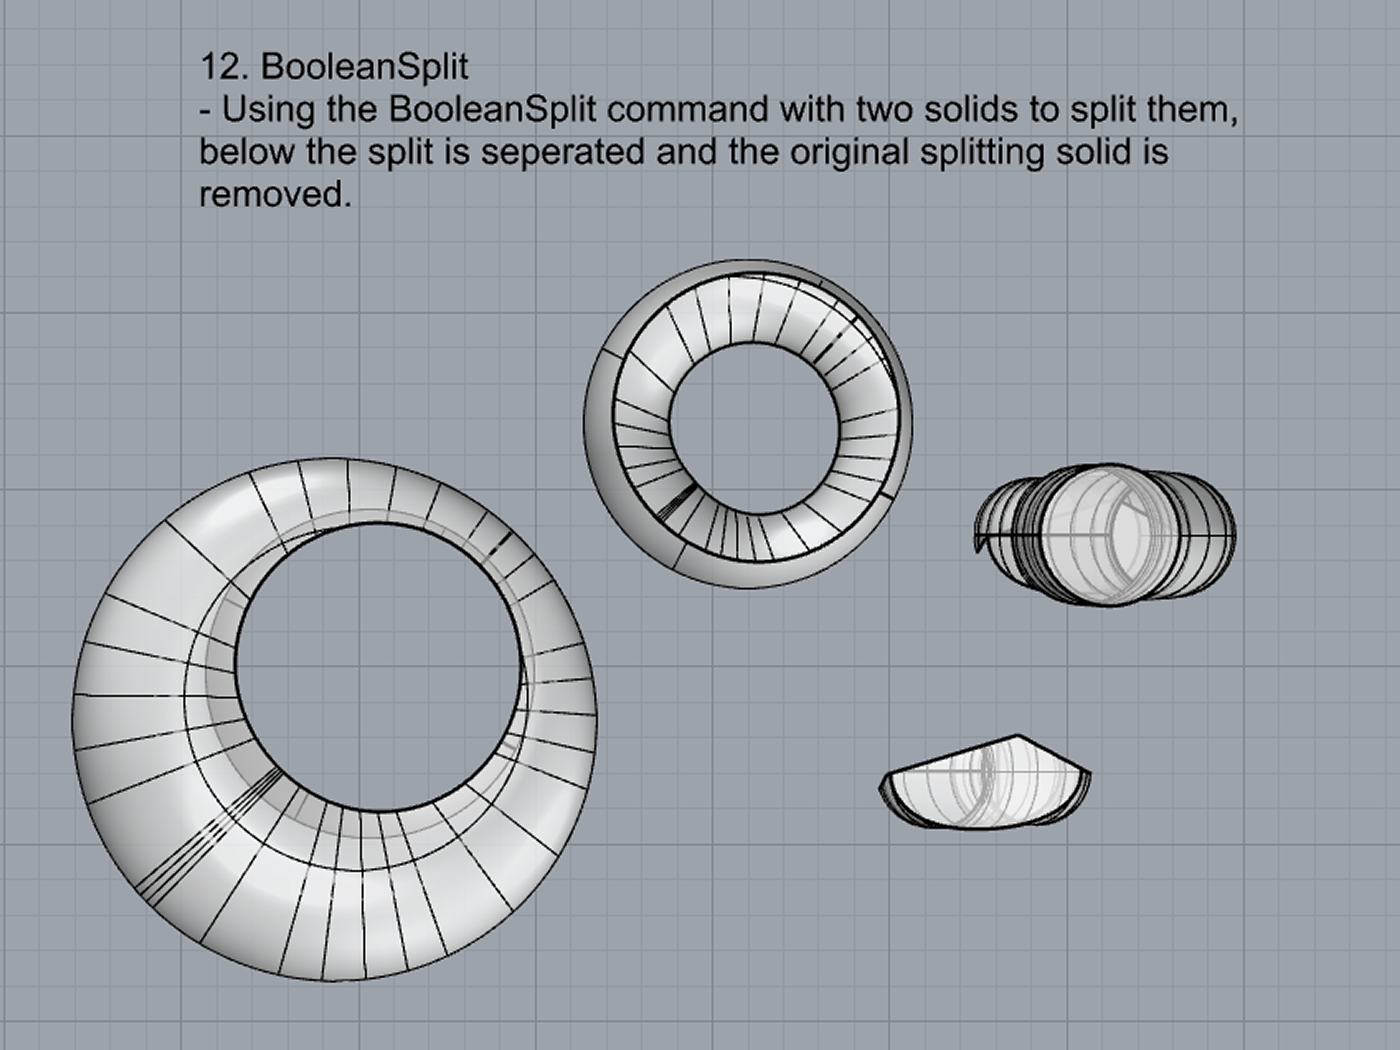
- BooleanSplit
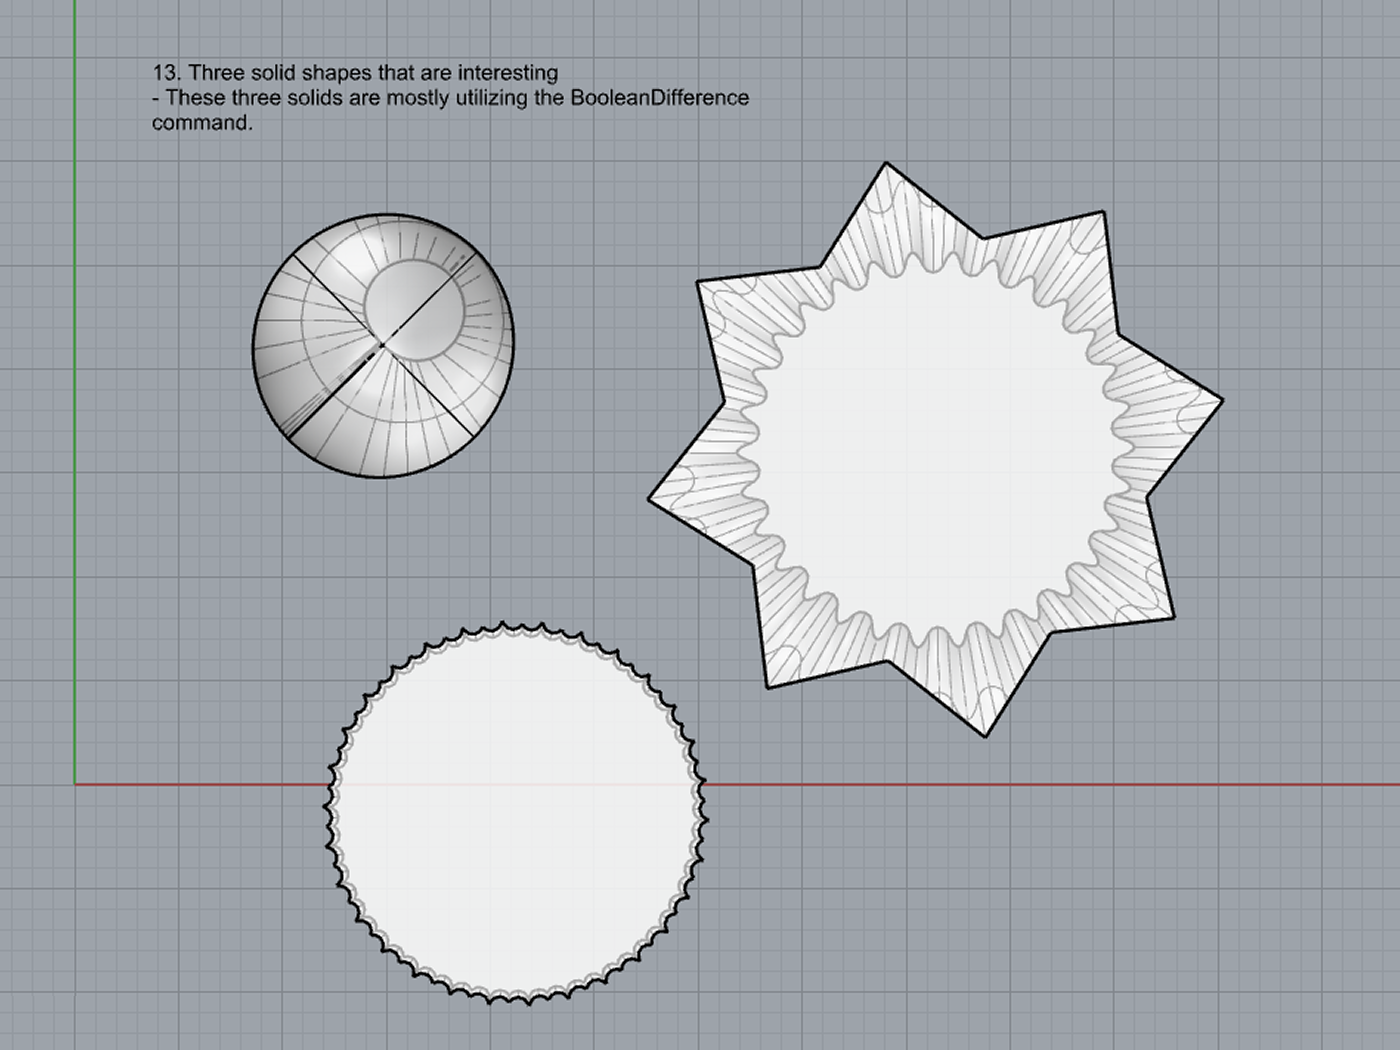
- Using the surfaces and solids you modeled and the Boolean tools, make three solid shapes you find interesting.
- Add a link to your FirstnameLastname_Solids file at this point in your post.
Part 4: 3D Printing
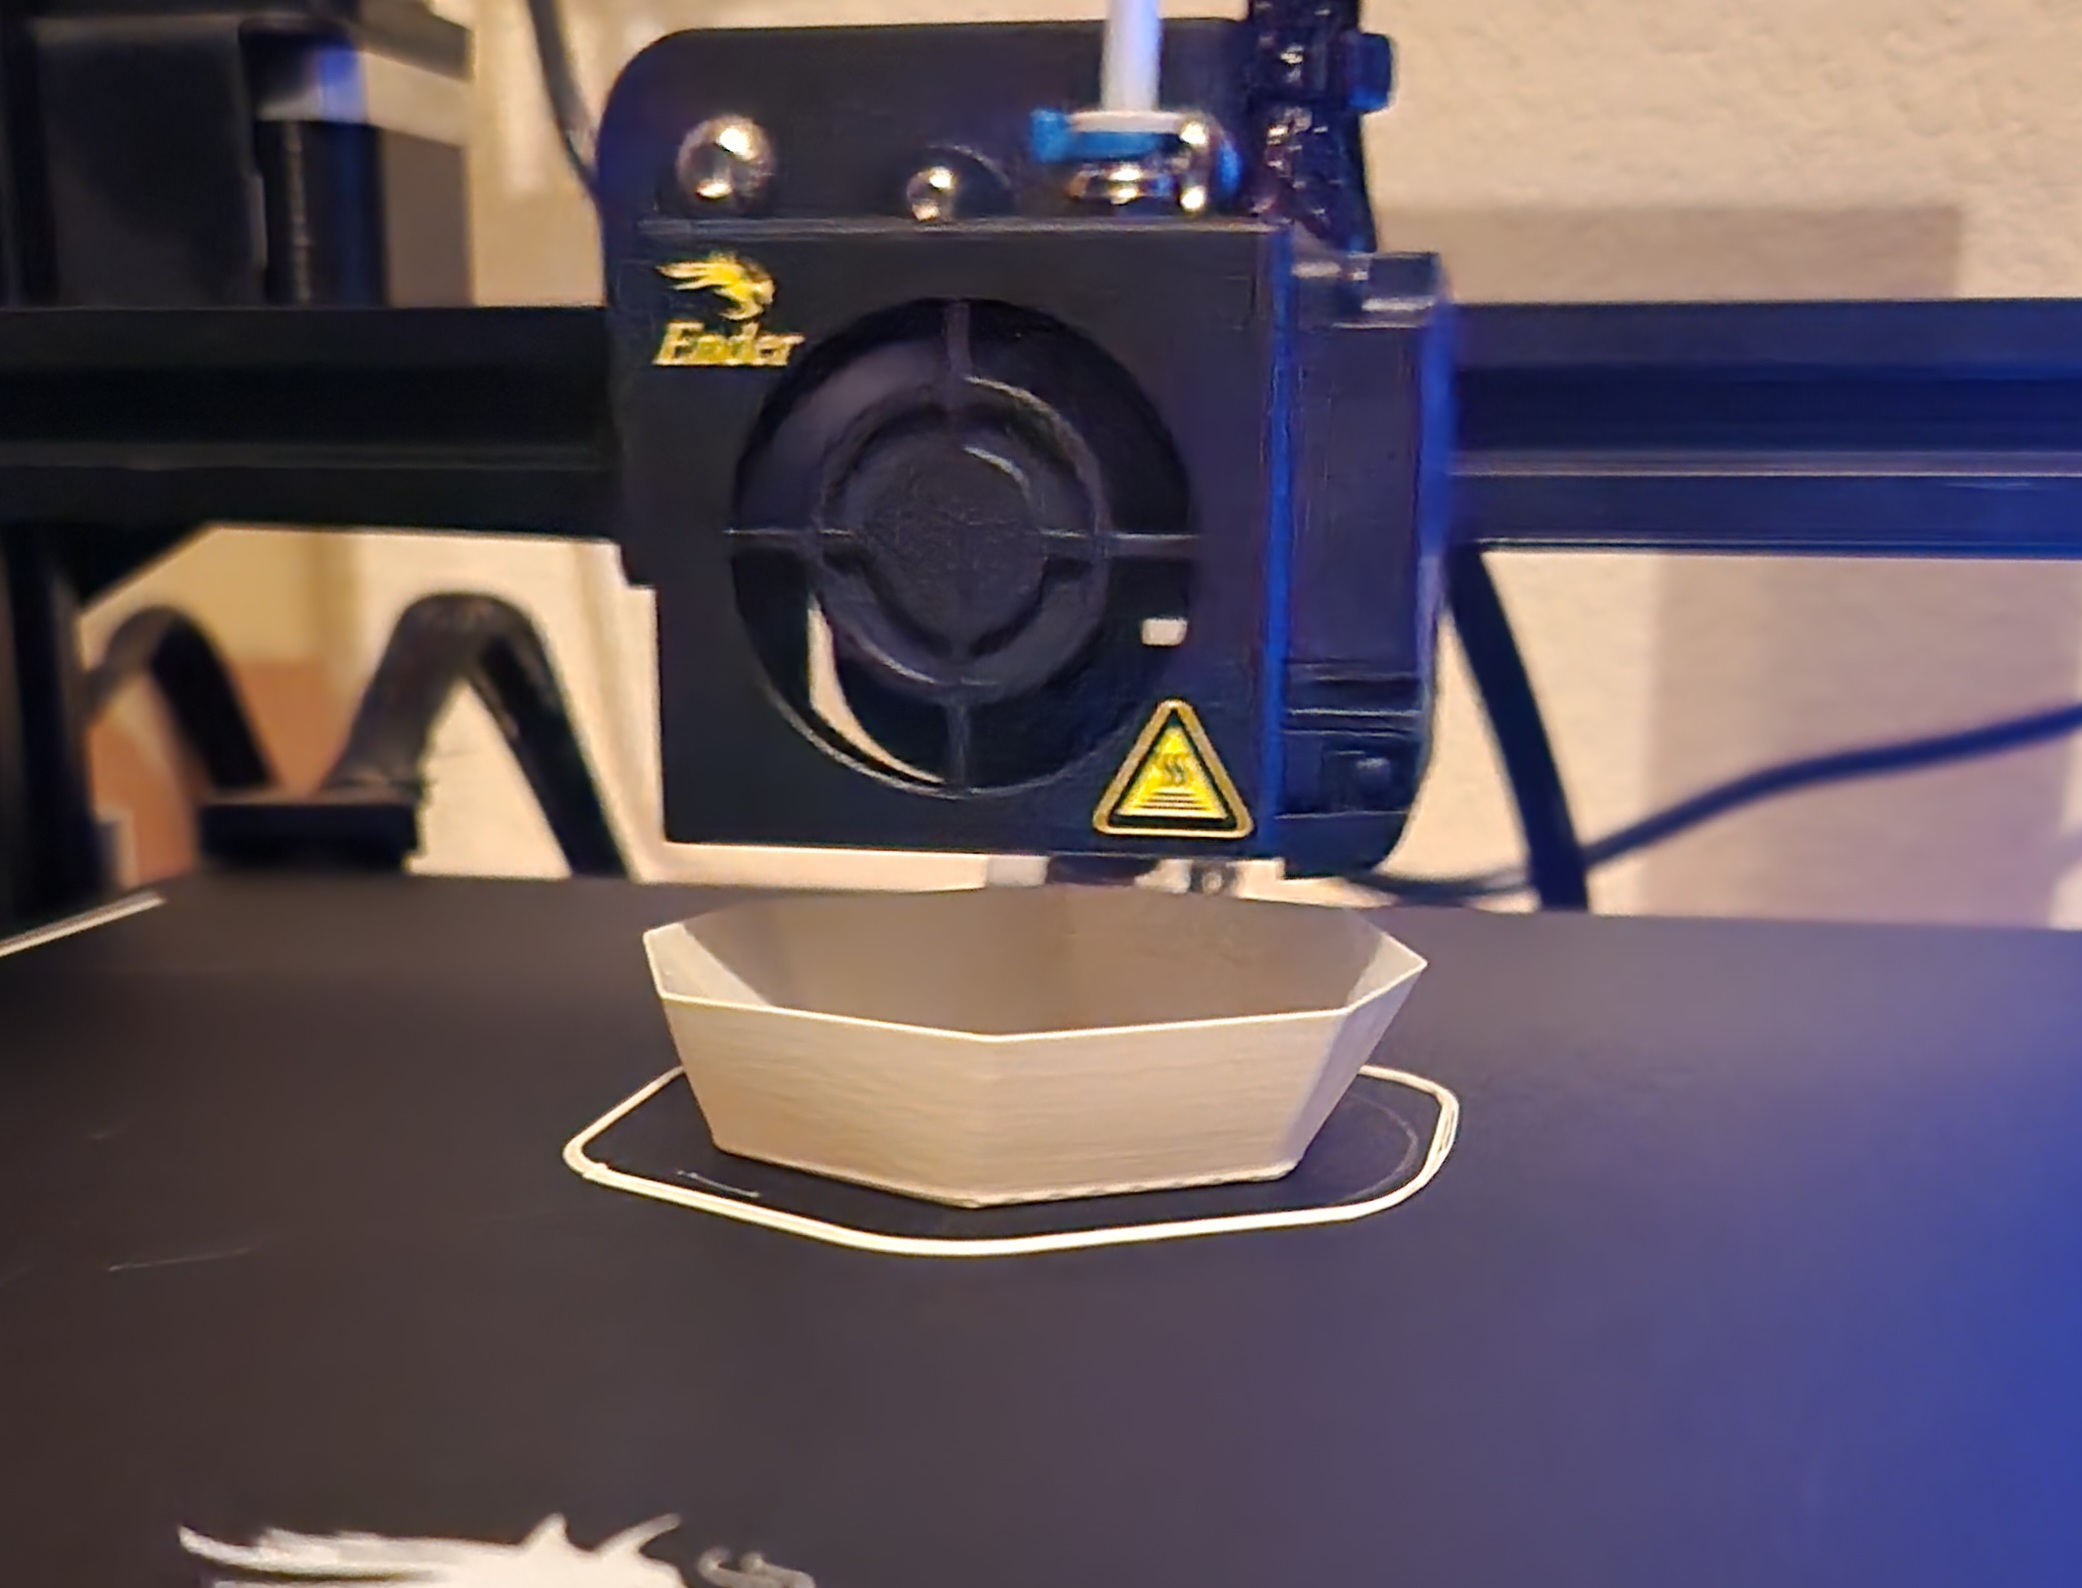
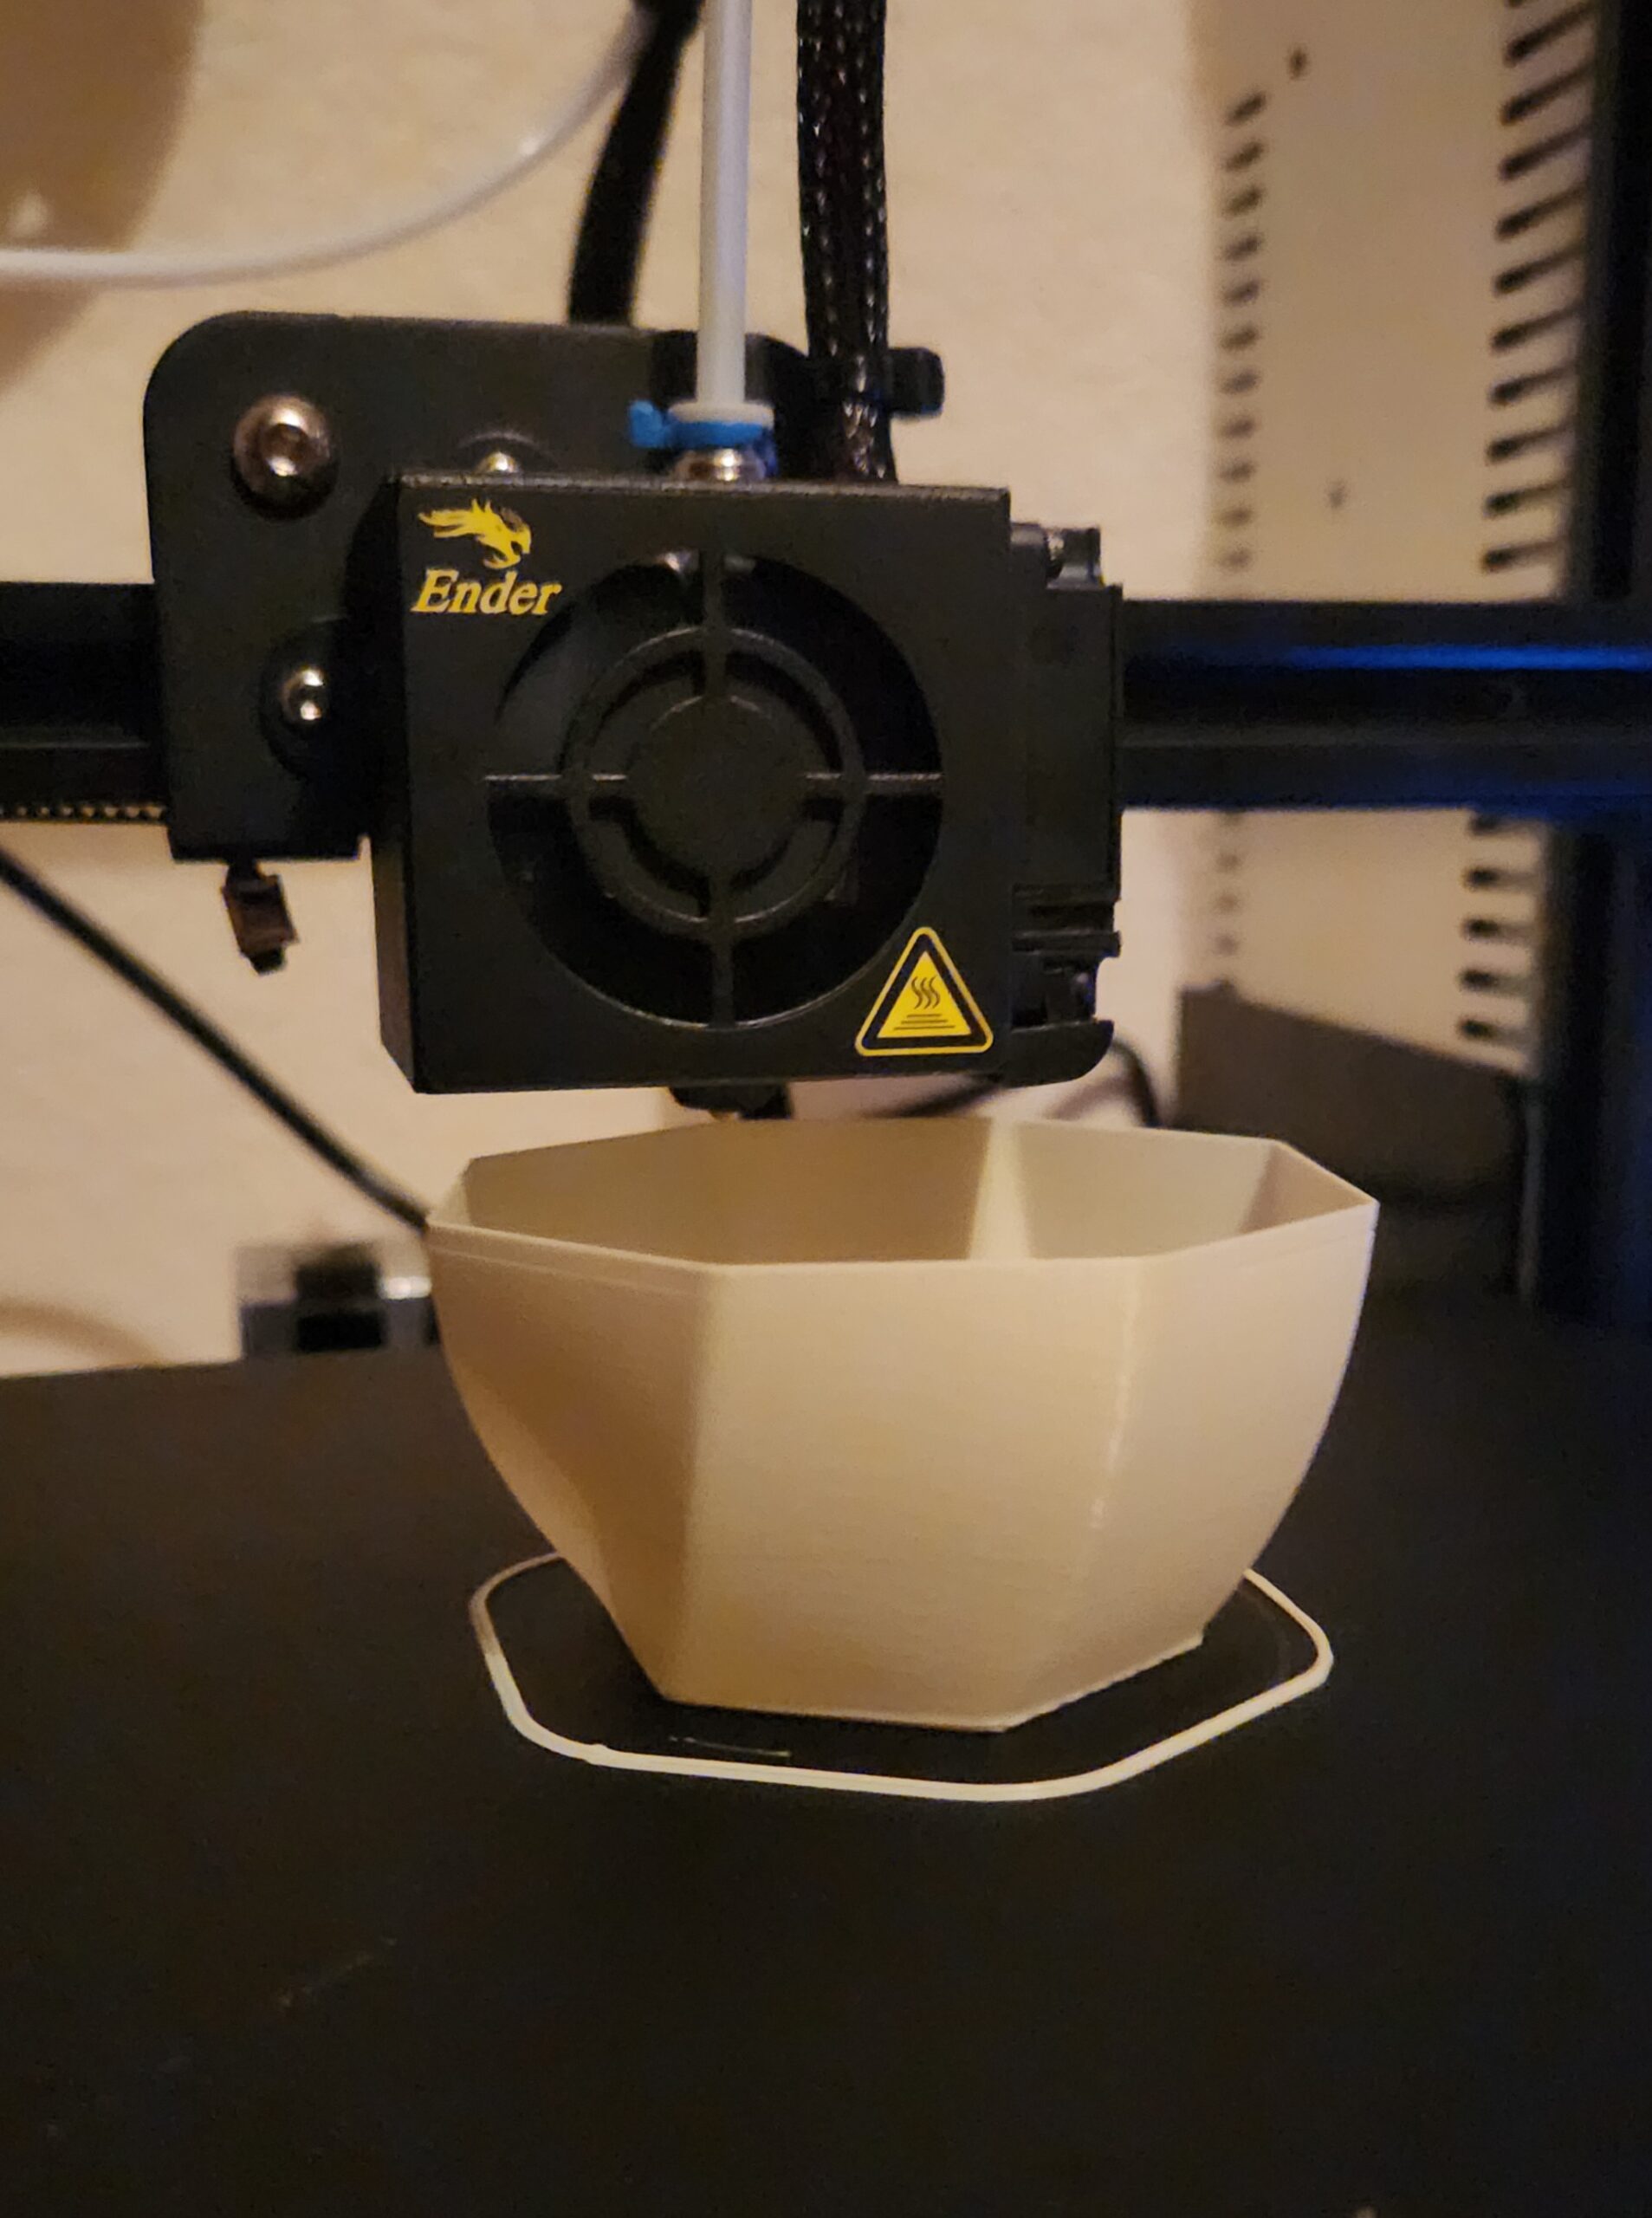
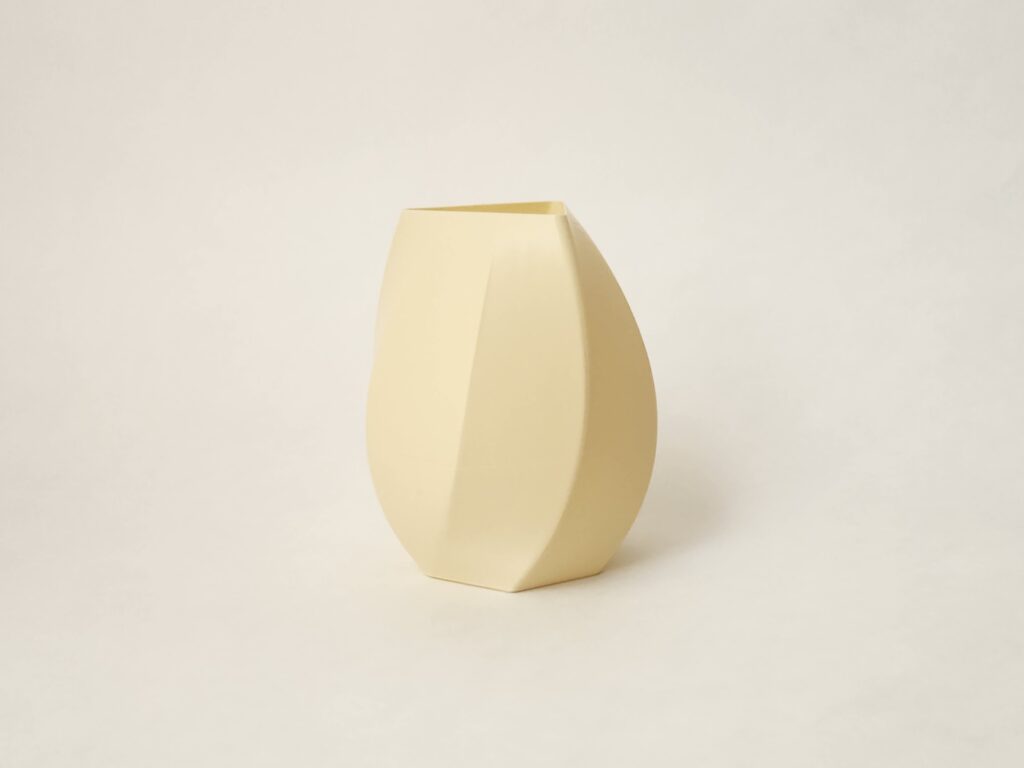
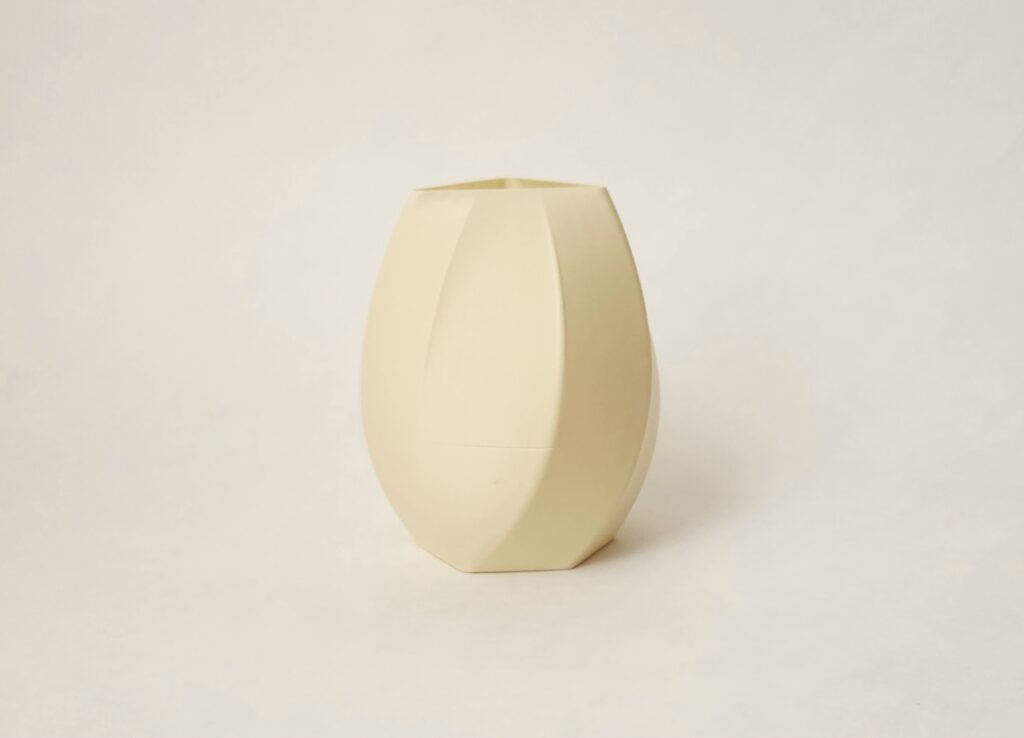
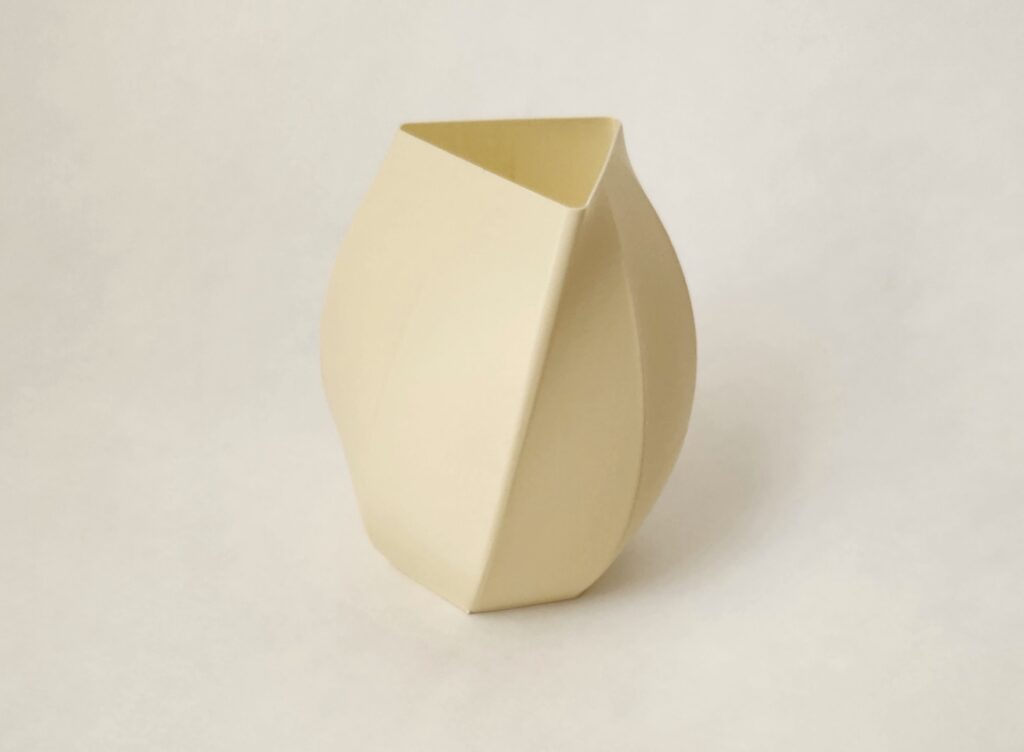
I decided to print the first surface I created using the Loft command (Surfaces #6), when slicing this to print I opted to use the Spiralize Outer Contour setting so the final print would be hollow and more of a vase than a large block of plastic. I had originally printed this with steeper curves near the top but with how this prints and the fact it’s only one layer it ended up with holes and was extremely brittle in places. I edited the shape slightly to have less steep curves and it worked well the second time. Below are images taken during printing and the final print below that.
Hi, Luka!
I’m curious about how you did the spiky circle in Solids section for part 14. Did you do it with one of the RailRevolve command or one of the Boolean commands? Other than that, your work is amazing and your 3D object is sharp! Your 3D print reminds me of a vase that would be in modern museum.
Hi Luka,
It was great going through your post! I especially liked what you did for the “import a picture and trace an image” part—it turned out really well. Your 3D print looks fantastic! From the images, I can tell the quality is really high. I’m curious, though—how do you get such good photos? The lighting and overall look of your images are amazing; they almost don’t seem real!
Hi, your 3D printed work is very concise and the colors are very beautiful. Although the shape is simple, it has a simple beauty. It’s great.
Hello Luka! Your print came out very nice. I haven’t looked into the Spiralize Outer Contour setting but seeing what you did with it makes me want to give it a try myself. Did you take pictures of your first design? I am curious how much of a difference you had to make to the angles to get a good print out of it.
Hello Luka,
Your print looks really good. I thought the tracing of the red panda was really fun and cool. I also struggled with having steep curves on my print. Mine wasn’t as brittle, but I definitely didn’t get the quality I was looking for in some places.