Form Processes
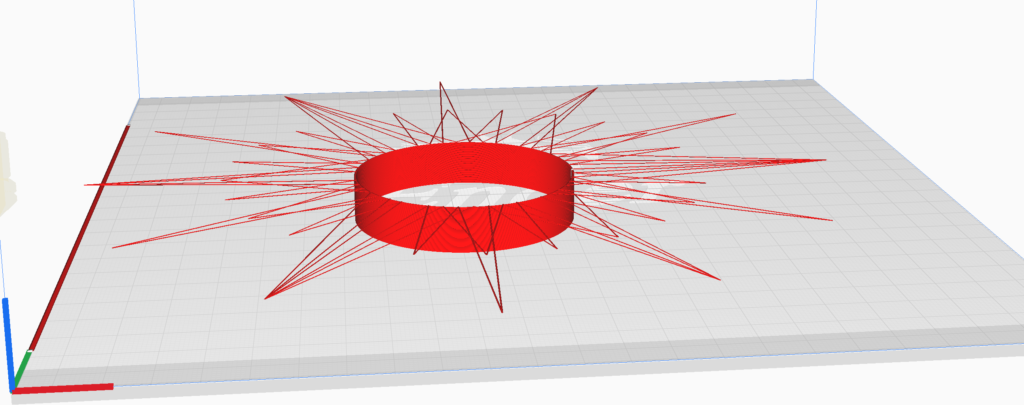

The first form I created was a flower with a cylindrical center and freestanding filament petals. Initially the code creates a normal cylinder, then uses my starburst gear pattern from Large Assignment 2 to generate 3 layers of petals (note that while I call these “layers”, there is no increase in z in between them). The initial layer has a number of petals defined by a parameter in Grasshopper. In my case this is 12. The second layer has half as many petals (for my print, 6) and the final layer has one third as many (4 in my case).
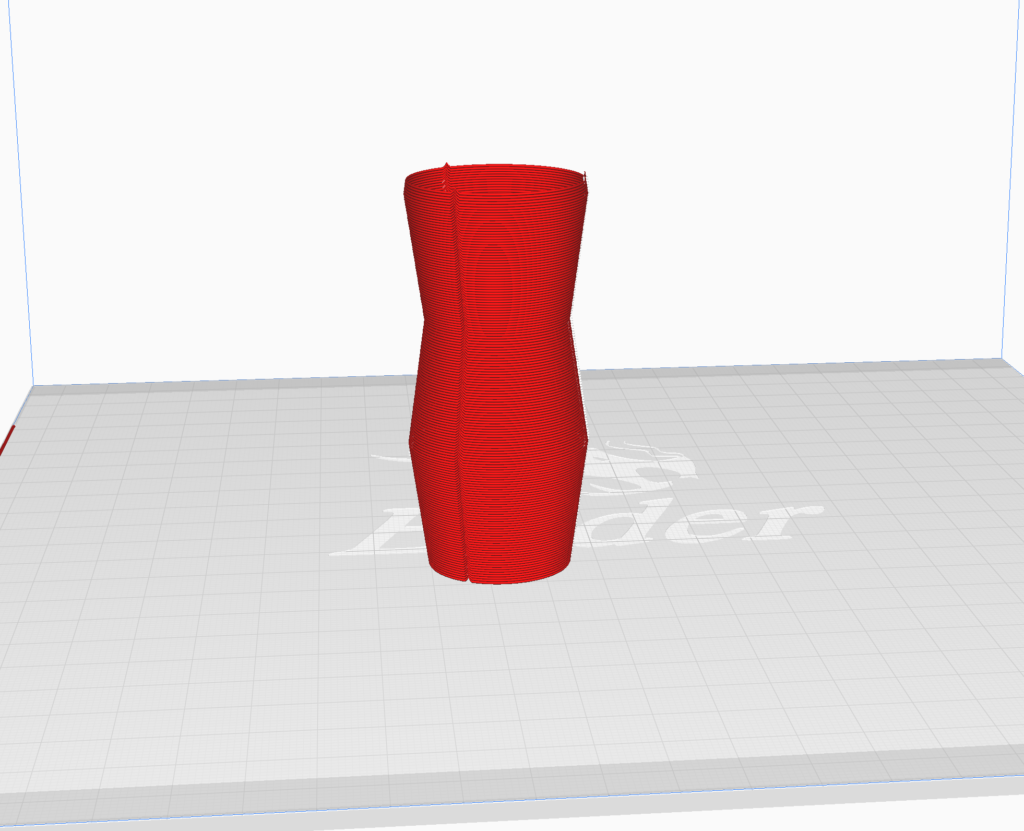
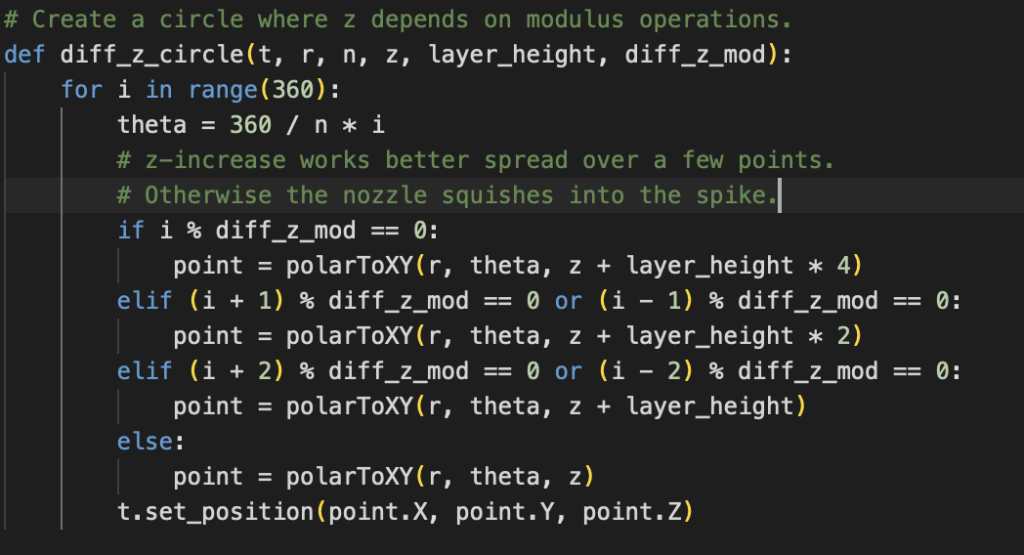
For my next form, I tried to create a cylinder of increasing radius where a number of points had an increase in z compared to the rest of the layer. My test print for this came out fairly well, but I decided that I wanted the z-increase to be more dramatic and to be spread out over a few points to avoid squishing the nozzle down into the higher filament. Unexpectedly, the more dramatic spikes changed the alignment of the layers such that the default layer height was too much of a change in z for each layer. Using a fraction of the layer height, the printer created not a cylinder but a polygonal sculpture where the spikes define the corners and the walls are comprised of freestanding filament strings! ‘Twas a delightful surprise. For my final piece, I oscillated the radius of the circle a few times as z increases.


For my third form, I created a cylinder where z varies based on a sine function. Here I played with extrusion rate, print speed, and printing above the bed. I wanted some twisting and coiling when the sine function was close to its maximum. I found that heavier extrusion rates and slower print speeds worked better this look.
Why Not Traditionally Sliceable
All of my forms have at least a little freestanding filament which a traditional slicer would want to support, thereby ruining the effect and possibly losing the intentional parts in the support material. Additionally my second and third forms both involve z-axis changes within each layer. Traditional slicers cannot handle this as they make every layer constant in z.
Iterative Design Process

I started the flower out with some small petals to get a feel for the scale. I quickly increased their size and tried a different gear pattern with a higher extrusion rate, but I didn’t like how it looked. I blamed the extrusion rate for the thicker bits near the end of the petals. However, upon further observation I discovered that it was an artifact of printing. By the time the print head doubled back, some of the filament had cooled so it resisted the motion and sort of curled back into the print head, resulting in thicker areas. I went back to the starburst gear with a normal extrusion rate and added multiple layers of petals. However, the petals ended up kind of swooshing around the center in the direction of the printer head’s motion. To mitigate this effect I increased their length once again. I decided it needed a bit more chunk to it so I increased the extrusion rate again. The petals were much more sturdy, and the later petals were able to use older ones as things to anchor to. As a result the newer petals are much straighter.
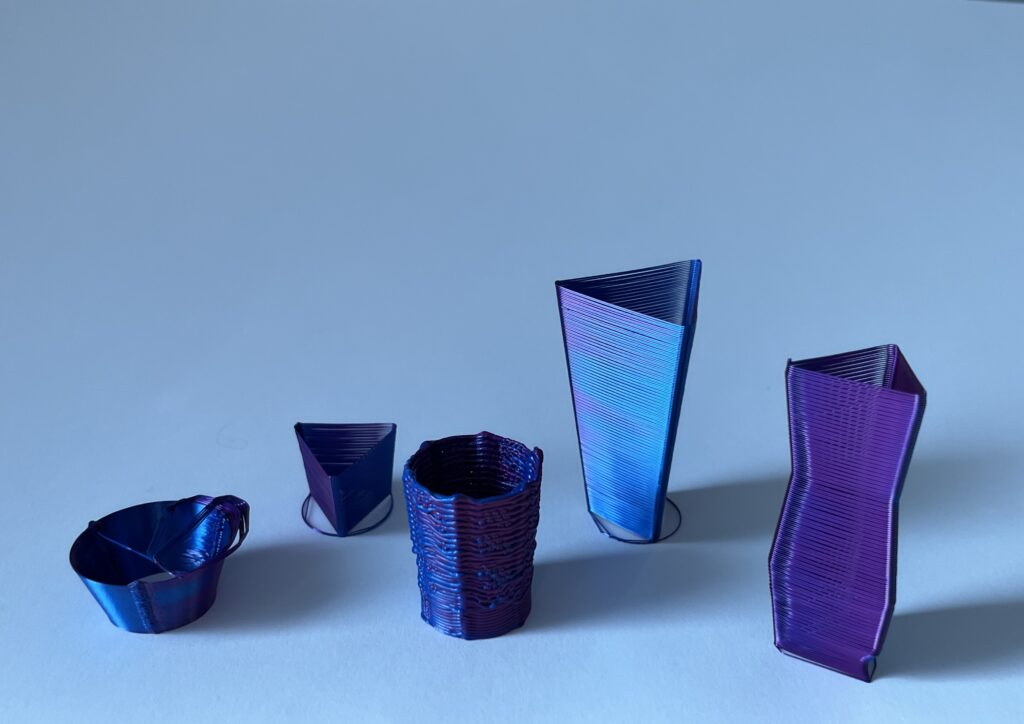
I began trying to print a solid cylinder as seen on the left. However, I made the z-motion more dramatic. This had the unexpected effect of creating a string sculpture, as the z-increases somehow spaced out the layer heights without me actually changing them. As a matter of fact, I had to use a fraction of the layer height in order to get more than just string. I then attempted the same thing but with more points to hang the string on and a higher extrusion rate. I still used a fraction of the layer height, This resulted in a chunky cylinder, with parts of it almost looking woven from the nozzle putting out filament while inside the filament and splooshing out. I then abandoned using a higher extrusion rate for this piece and scaled it up. While I really like the second piece from the left, I felt it needed something more so rather than merely increasing the circle radius with height, I oscillated the radius.

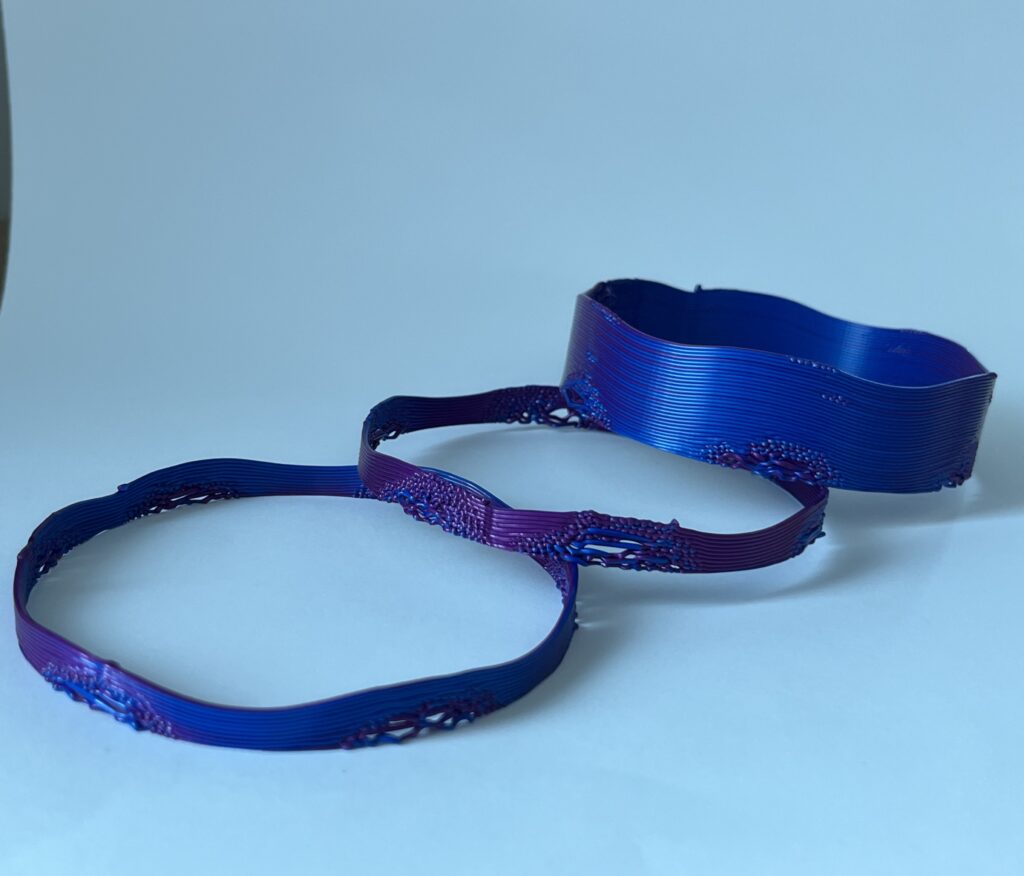
I started out trying to print a sort of wreath shape by moving the print head in a circle and oscillating the z-values with a sine function. However, even with a slower print speed and a higher extrusion rate, I wasn’t getting an effect I was happy with. I decided to pivot to making a solid cylinder but still using the sine function for z. I retained the slow movement speed and upped the extrusion rate a little. With these settings, I got some fun filament effects like curls and zig-zags. The second from right and rightmost pieces involve the same code and print settings, but the final print shows the filament effects more extensively.
Final Artifacts

Hello Liz! I appreciate you adding pictures of the ‘design in progress’ prints. It gives such a better idea of how you came to the final forms. I think my favorite of yours is the string sculpture from movement in the z axis. It is interesting how many things change when there is non planar movement. I also think that it is cool that you brought some of what you did from large assignment 2 into your flower iterations design. Your filament still catches the light in such a pretty way even when it is only free standing filament. Beautiful work!
Hi Elektra,
Thanks for your comments! The string sculpture is my favorite as well.
Hi Liz,
Out of your three prints, I would have to say the first is my favorite, but the third comes close. I had a similar print with a wavy wall, but mine started off flat and increased in wave amplitude. I initially tried to do something similar to yours but I had trouble with the filament being too thin. I noticed you said you used a higher extrusion rate and slower printing. I’ll have to try that next time! Also, your first print was interesting and reminded me of those metal sun frames that people hang on their porches. Great prints!
Hi Jyrus,
Thank you for your comments! The filament thickness definitely has a large impact on what effects you can get. Varying the amplitude is a cool approach that didn’t occur to me before the presentations. I’d like to try increasing the amplitude in the positive direction to see if I can get the filament effects all the way up. Lol the first print does resemble the metal sun frames!
Hi Liz,
I think you had really good ideas for your project. Contrary to your approach to try new things, I was reluctant to try what seemed “difficult” to me before today, like attempting to print filament without supports. Your starburst flower object takes that to the next level with its long unsupported petals. It ended up looking really cool, with the strings extending outwards from the cylinder. I also made one of those wavy cylinder objects and had similar problems. It wouldn’t stick to the bed or it would de-laminate. I like the way you tried to solve the issue by increasing the extrude rate for the low spots.
Hi German,
Thanks for your comments! This project was definitely daunting at the outset. I was paranoid about hitting the print bed the whole time. I’m glad you like the flower! Delamination and bed adhesion are pesky problems for sure. Thanks! I’m not sure if I’ll have time, but I might try printing the cylinder again with an increase in the amplitude in the positive Z direction to see if I can get those filament effects to occur all the way up.