Design Process
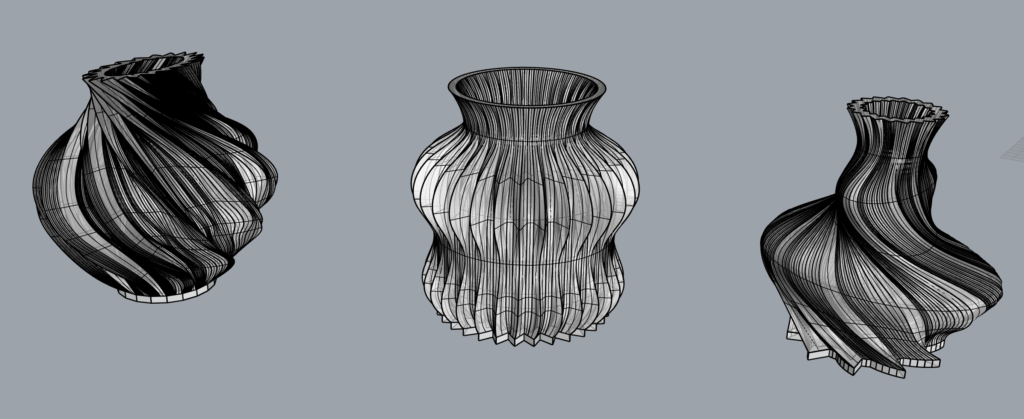
In the design process I was intentional in my choice of the curve shape pattern that I wanted to use. I spent a fair amount of time getting it to look how I wanted it to. The first vase I printed (leftmost in image below) was also purposful as I wanted a sort of wrapping ribbon pattern around the vase. The next two vases were more results of playing with the parameters until it created something I thought was interesting.
Rhino Renderings
Printing Process
Final Prints
I experienced no issues while printing any of these designs. Although I was surprised at how long they took to print.
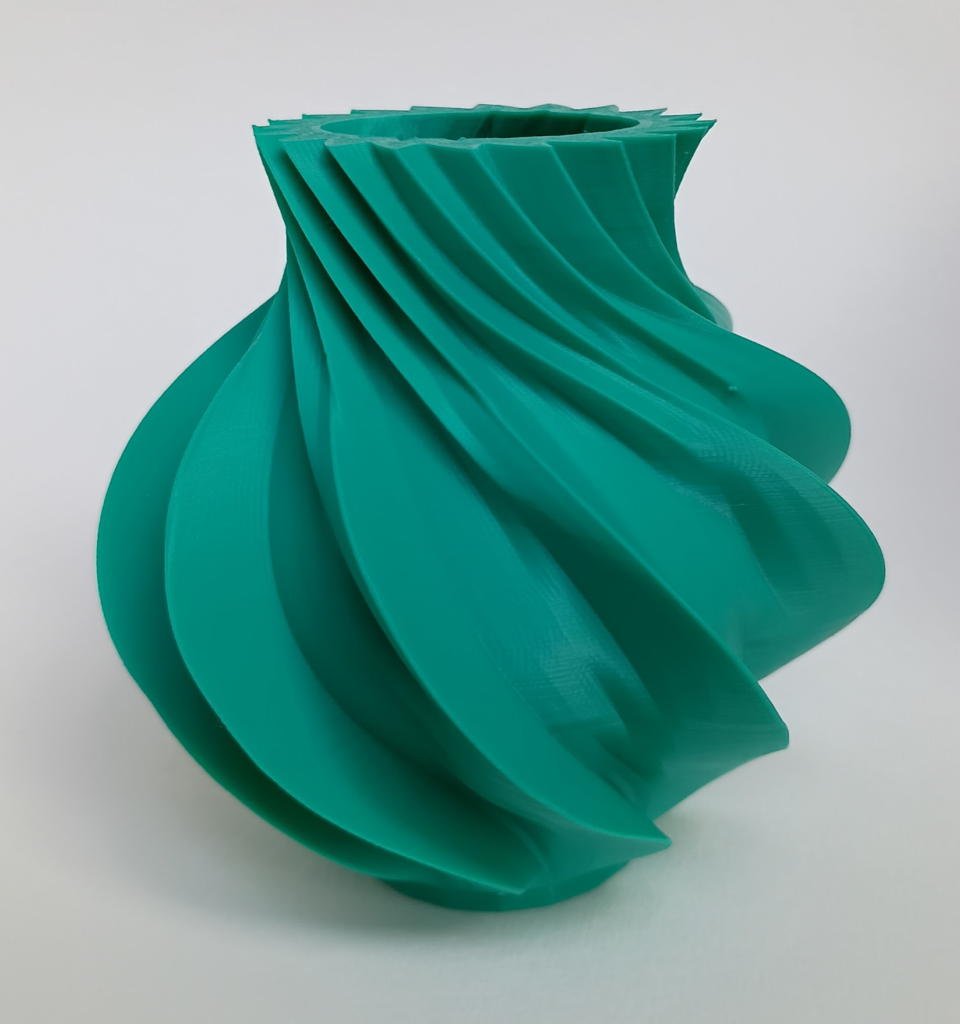
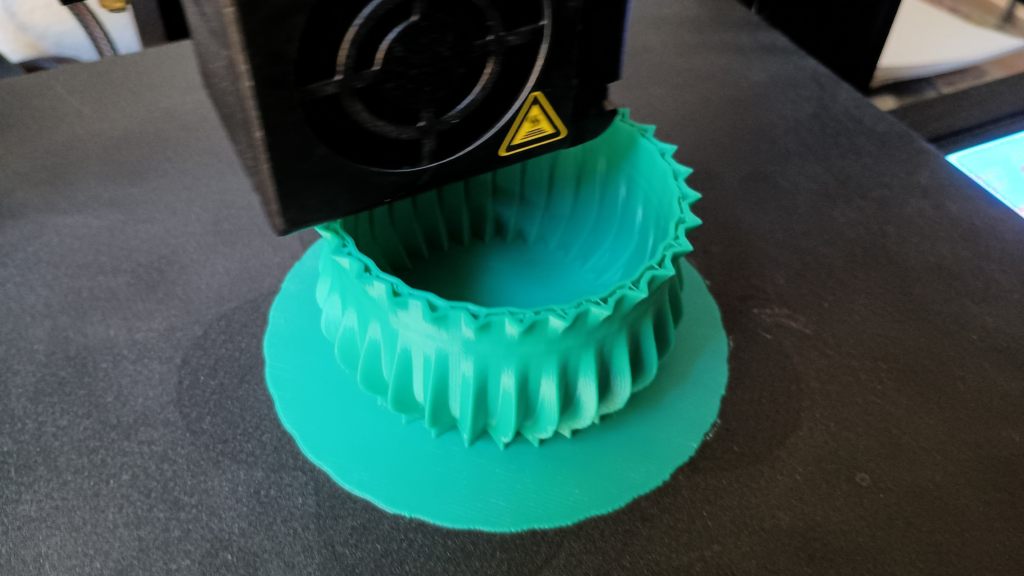
The design above was my first. I was much more intentional in the choice of this form. It took about 10.5 hours to print.
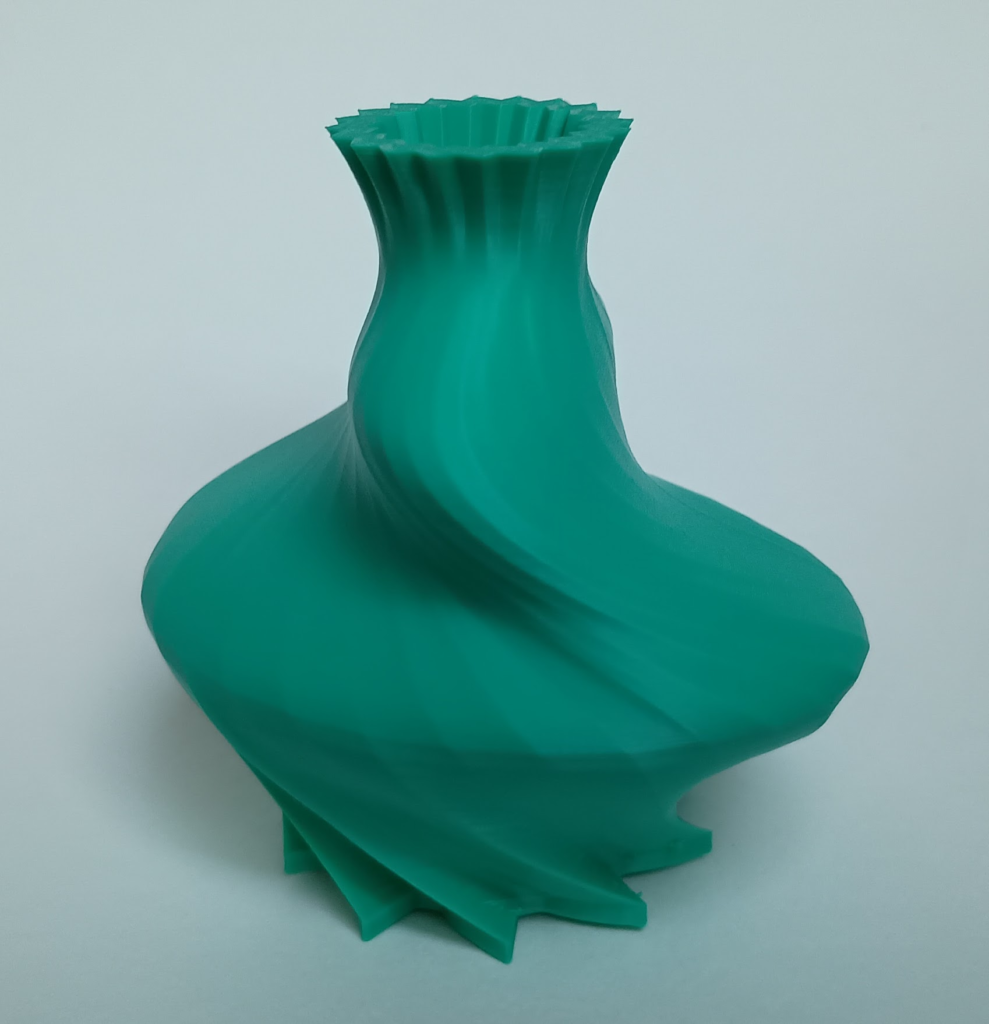
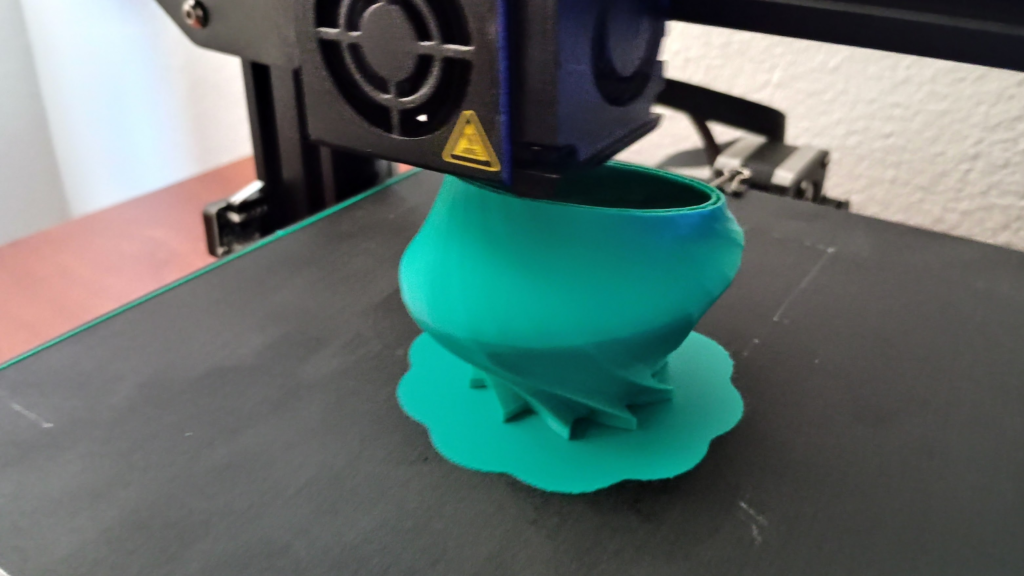
This print above took about 7 hrs to print. I created this design through manipulation of the parameters. In particular I wanted to focus on the twisting of the curves and the scaleing of the shapes to ‘squish’ them. Besides that, I did not have a specific idea in mind for the final form so chose to print it once it was something I thought was interesting.
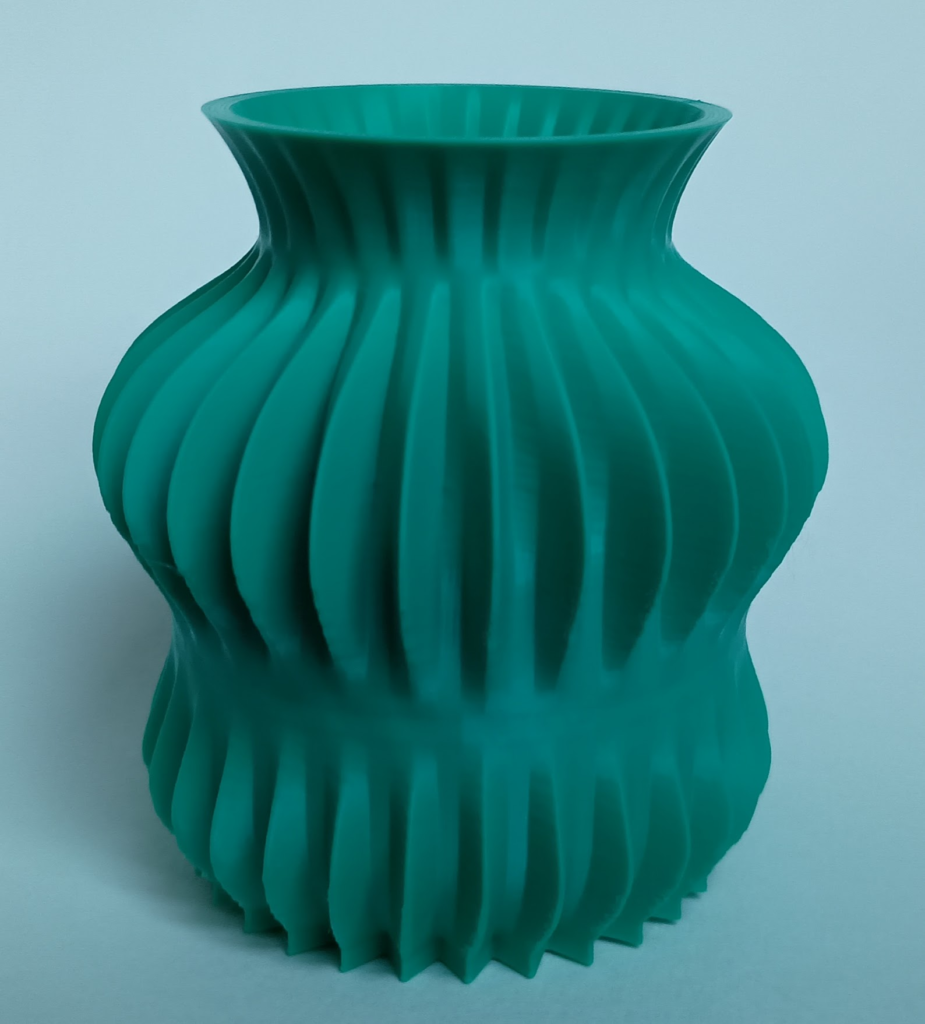
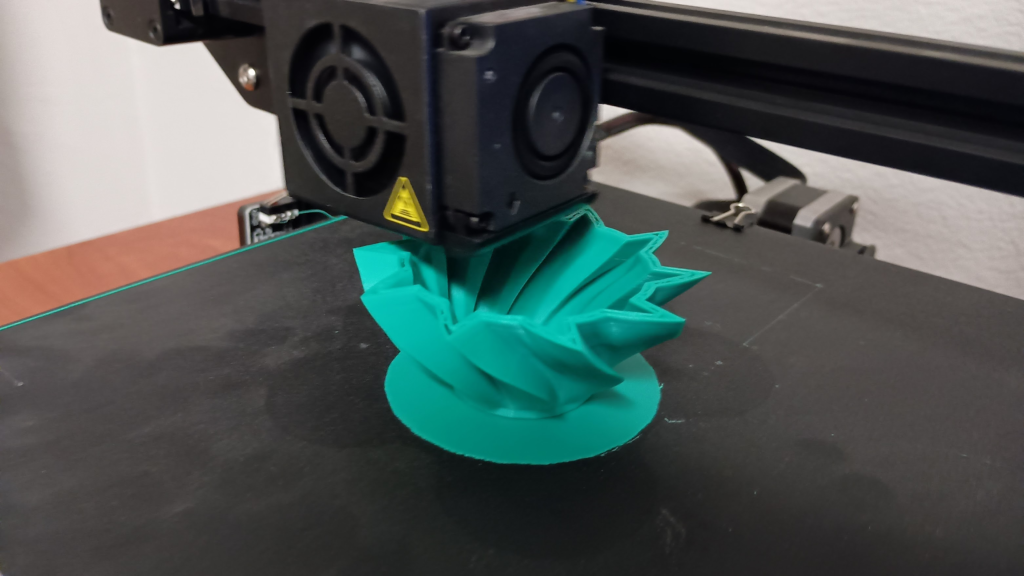
The print above took 11hrs and 45 min. For this design I also did not have something specific in mind. I decided not to do any twisting or ‘squishing’. I focused on the length of the spikes and minimizing the number of points used in each spike (less meant more of a triangle shape, more would mean an arc side). There was a little bit of ‘spider webs’ inbetween the spikes but not enough to be an issue.
Parametric Design Process
Creating objects via programming gives opportunity for higher precision and easier manipulation. For example repeating patterns are easier to create and manipulate programatically. I found it much easier to twist the shapes and scale them in a controlled way than when I was working directly in Rhino. If I had a simple and precise idea of what I wanted in my head it felt easier to complete it programmatically than doing it in Rhino.
Creative Agency and Intent
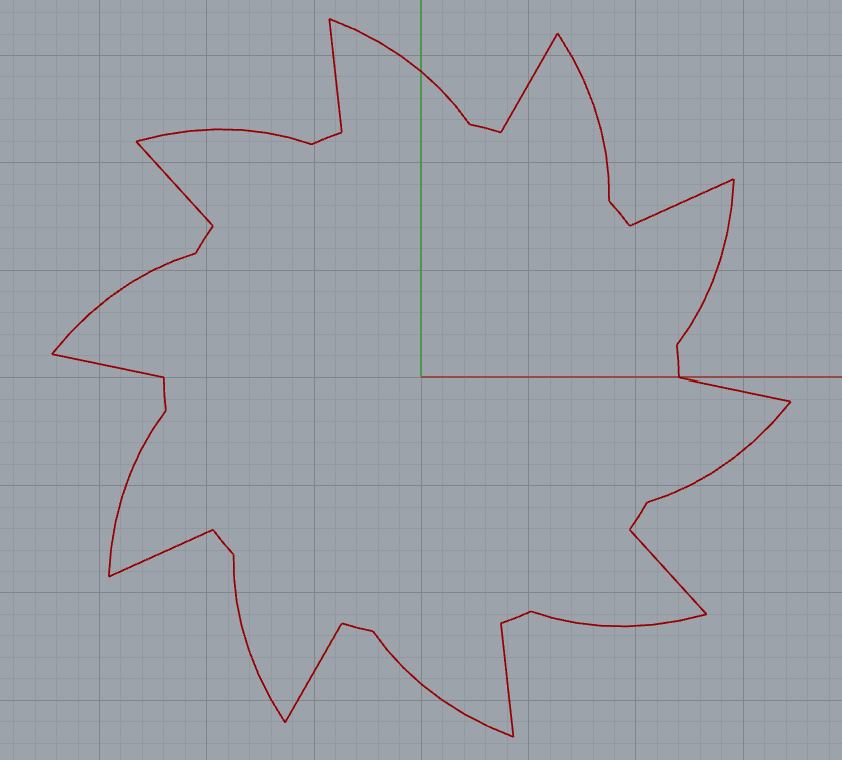
For the first form, I started with an idea and then tried to code it. It took some time to get it to look how I intended. The main parameters for manipulating the curves were the length of the spikes, the spacing of them, how many points were used in each spike (more points meant more curvature), how many spikes there were, twisting the shapes, and scaling the shapes. I was trying to get the spikes to act as sort of ribbons wrapping around the spherical vase. While I was creating this form is when I was determining the parameters that I needed. The base shape I was working with is below.
The next two forms were both made from experimenting with the parameters and choosing the forms that I liked. I do have a strong sense of authorship towards my designs which doesn’t feel different from a more traditional process. I was purposeful with my choice of parameters and their manipulation.
Elektra,
I love the way your vessels came out! I’m surprised they took that long to print assuming that you stayed around the assigned diameter and height range. Did you make any other modifications in Cura before slicing it to get your prints to print out in such great quality despite having some of the curves and “spikes” you spoke about? On a similar note, was there something specific you did in your radial function to get the spikes you created for your base shape? I think the shape is very cool. do agree on your comment about shape, curve, and line manipulation being way easier to control in Grasshopper compared to Rhino, and a lot less time consuming!
Thank you! I made them a bit bigger than they had to be but I wouldn’t have thought that would have made such a difference. I think it was partly that the more pattern there was the longer it took, more surface area I suppose. I didn’t do anything special in cura. In my base shape, each spike was created with n points. For all of the points in the shape I would take i %(number of points in one spike) and if that value was less than the number of points I wanted to remain around the radius then it would have r = radius. Otherwise I would gradually increase the radius of each point. That resulted in a curve with a straight line back to the radius for each spike.
Hi Elektra,
I love how smooth your curves and twists are. When I did mine I had more of a random chaotic pattern. I was curious about the small platform that was printing under your artifacts on the printing bed. Is that something you put there for support or was it unintentional? Overall, I really enjoyed looking through your post and I think your artifacts came out very well!
If I understand you correctly, that ‘platform’ under the prints on the bed is a raft. That is an option you can select in cura. It basically helps your print adhere to the printing bed. I have been using it for every print so far and haven’t had any issues. I suggest giving it a try.