Design Process
I started my design process by setting up my Grasshopper program based on the example from the lecture slides on Tuesday, September 17th. My initial approach was to replicate the basic setup provided in class, allowing me to explore and modify various parameters to experiment with different forms. To gain inspiration, I reviewed posts from previous years and was particularly drawn to projects where students created parametric vessels with practical applications, such as planters, vases, or pencil holders. This inspired me to design vessels that were not only visually appealing but also functional and sturdy enough to be used in everyday settings. My focus throughout this project was on creating a family of parametric vessels that balanced aesthetics with practical utility.
Generated Vessels and Renders
Vessel 1
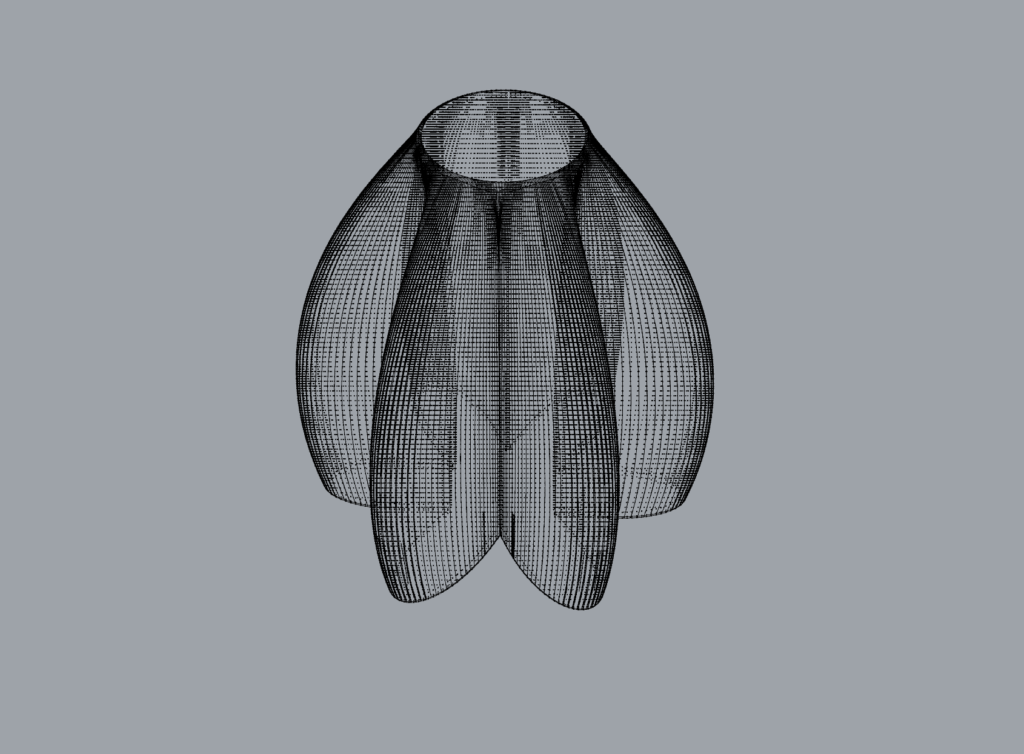
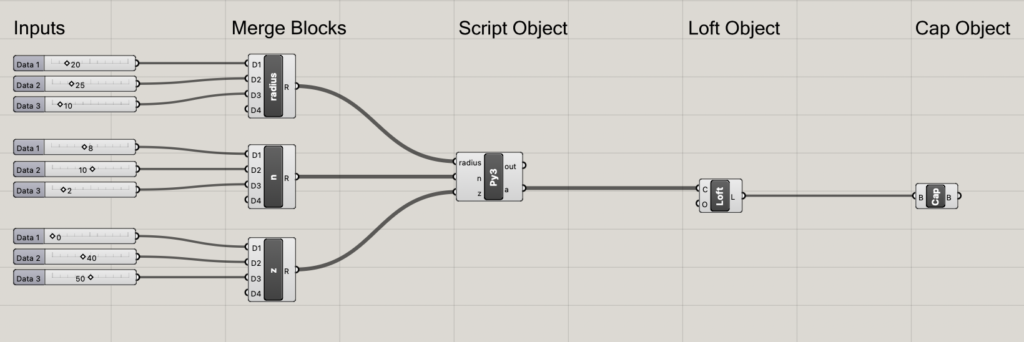
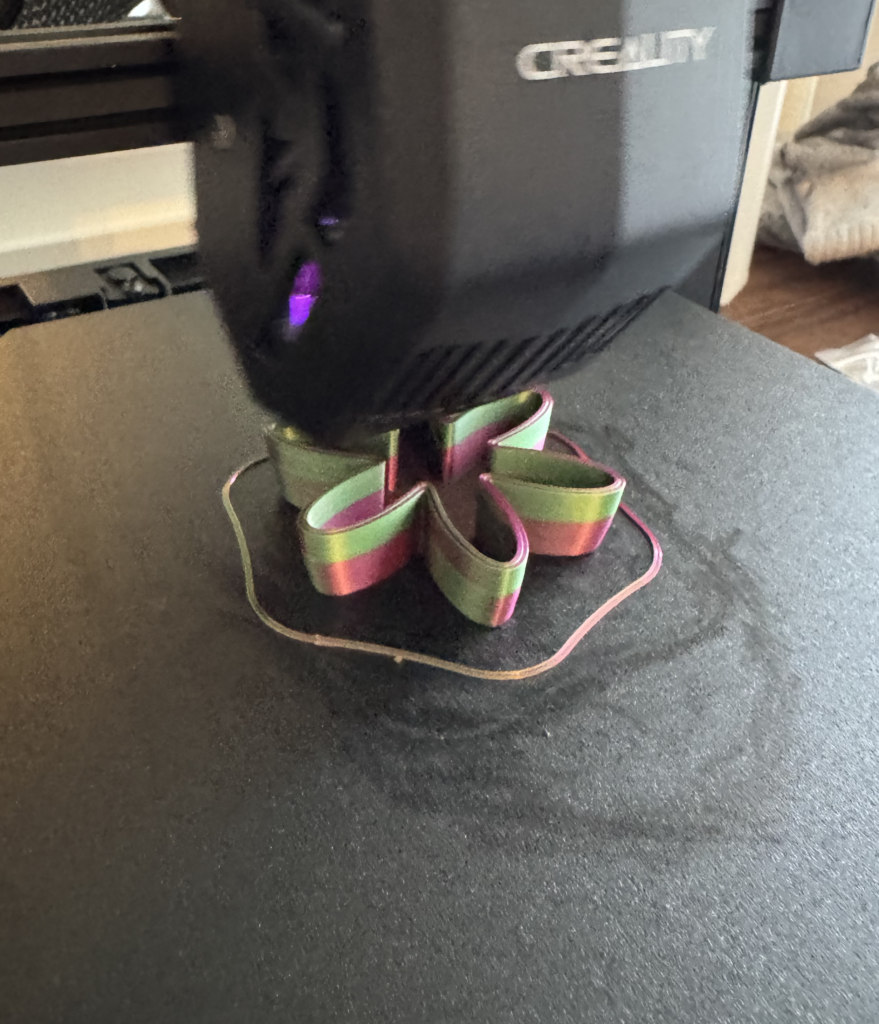
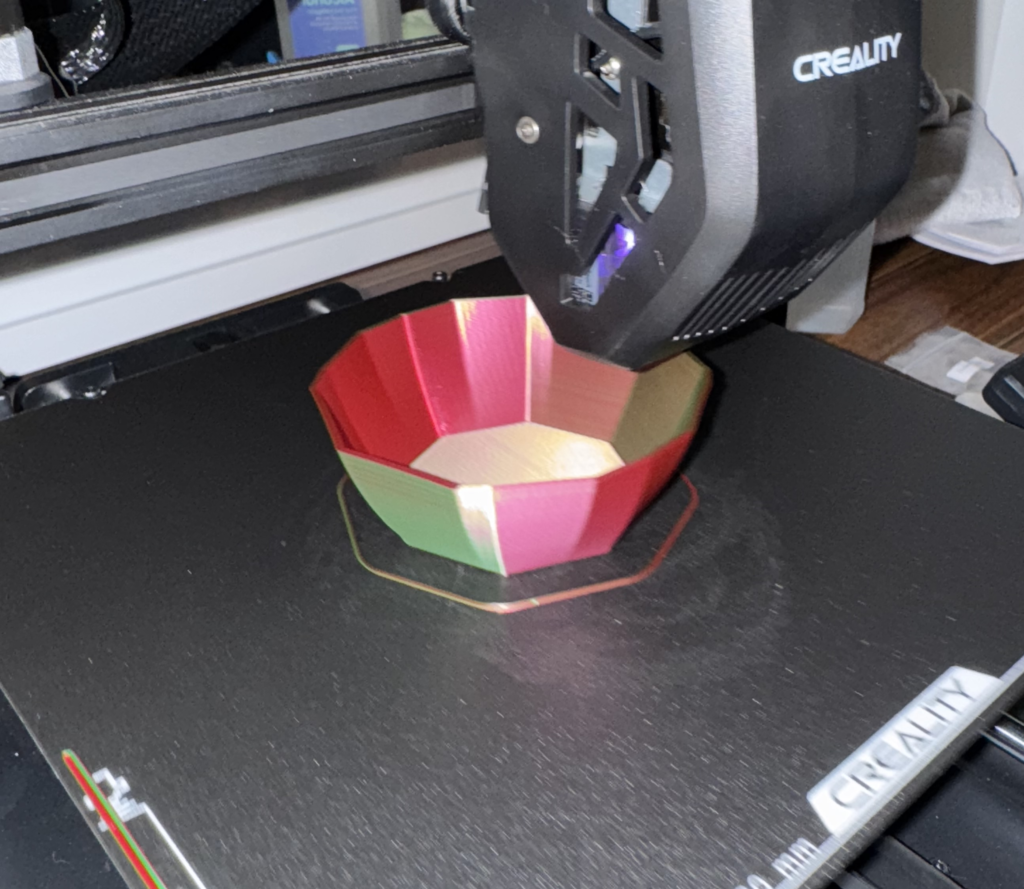
For vessel 1, I used a radial function to explore the dynamic possibilities of parametric design, allowing the form to evolve through mathematical variations rather than predefined shapes. Instead of beginning with a fixed idea, I experimented with parameters, specifically adjusting the amplitude and frequency of a sine wave, which resulted in the petal-like characteristic of the bottom-most layers of the vessel. This approach felt distinct from traditional design methods because it allowed the form to emerge organically through code, giving me a sense of co-creation with the algorithm rather than simply crafting the design in Rhino. This process of discovering the final shape through parameter manipulation made the design experience feel much more satisfying, which blended my creative vision with the inherent possibilities of the parametric functions.
Vessel 2
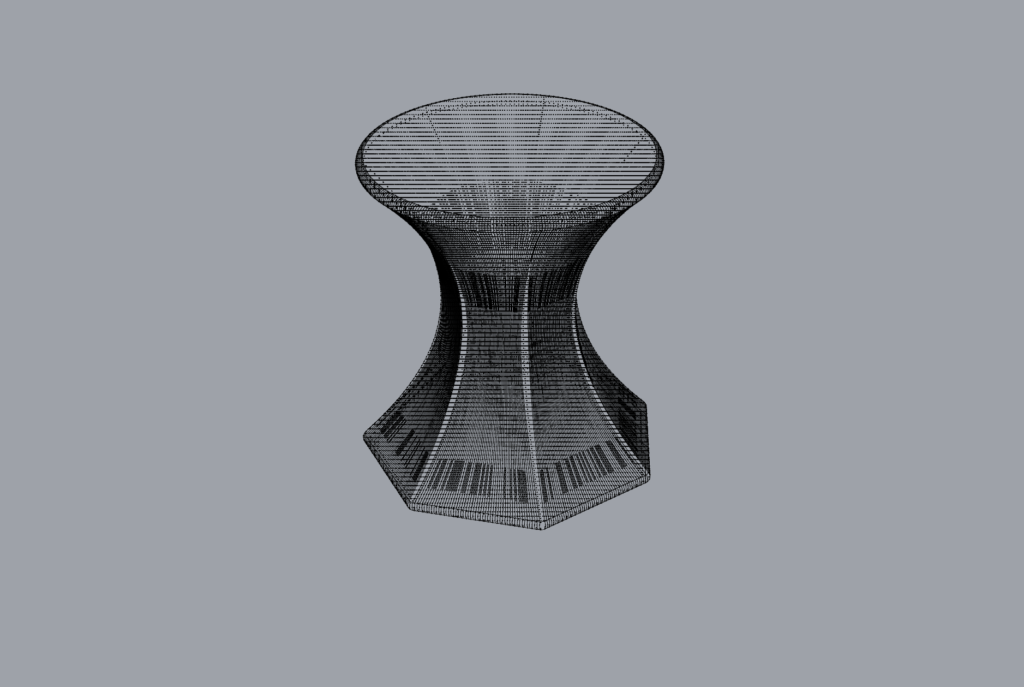
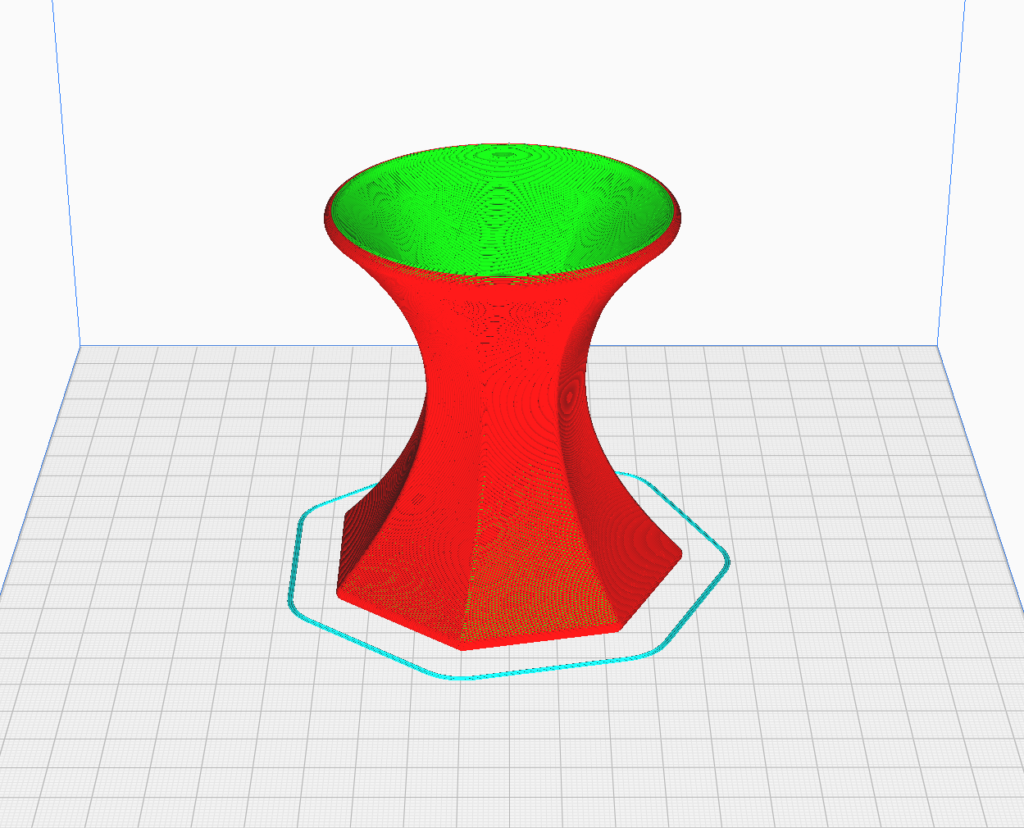
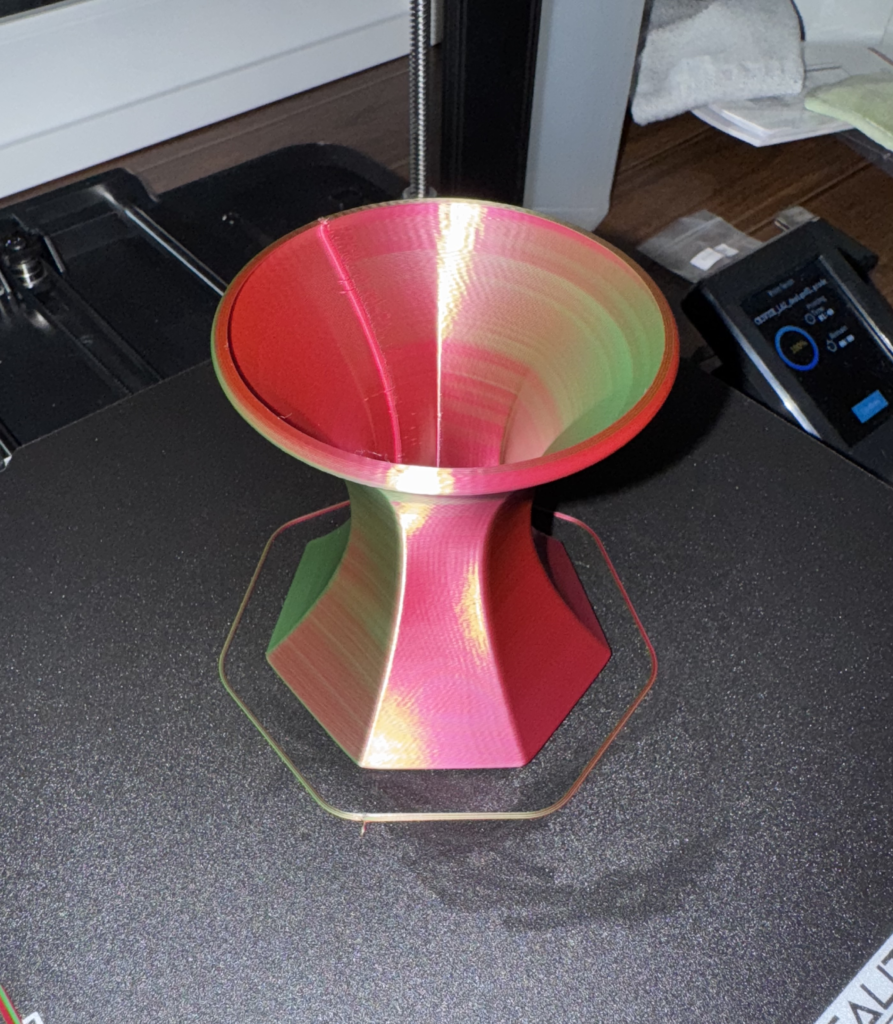
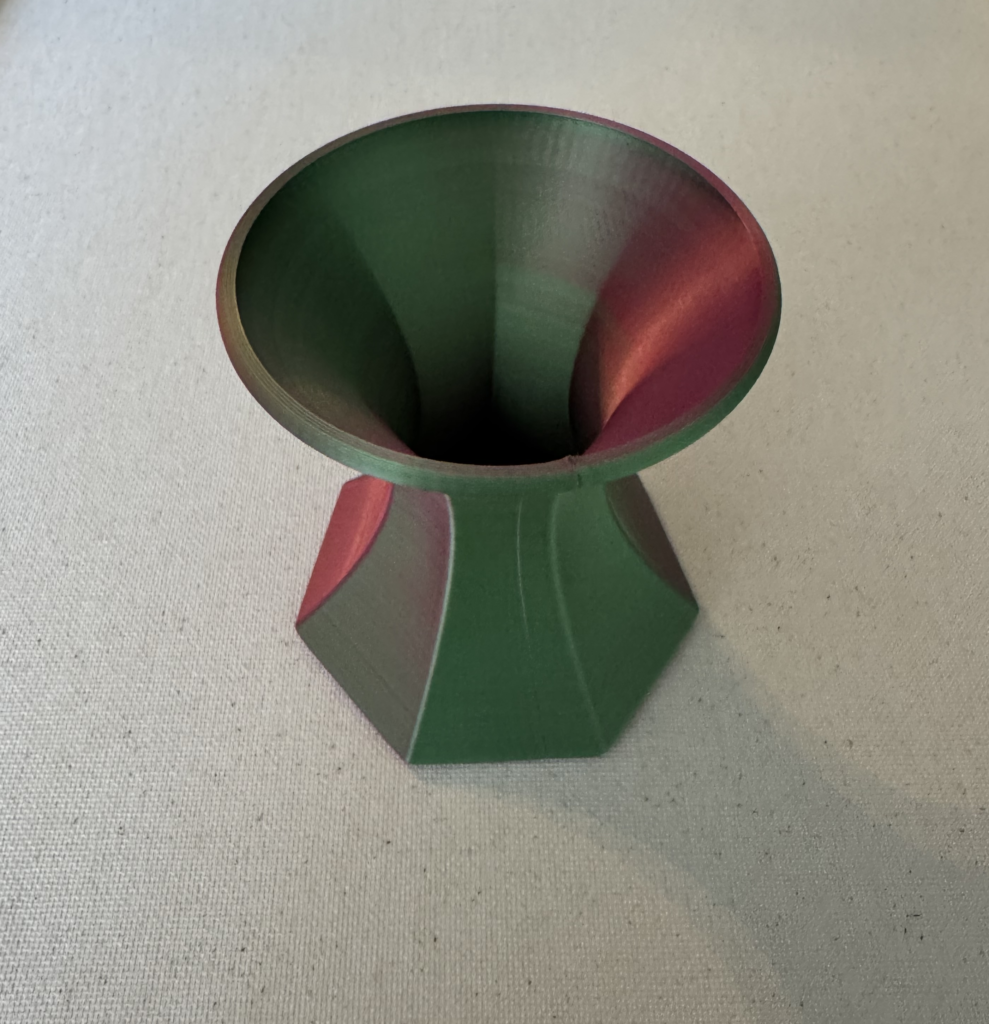
For vessel 2, my creative intent was to explore the use of geometric transformations rather than relying on complex radial functions. I focused on creating a form that emphasizes smooth curvature and symmetry, reminiscent of a flared vase or pedestal. By manipulating basic geometric inputs such as the number of sides, radii, and height, I was able to produce a shape that visually transitions from a narrow base to a wide, open top, giving it a sense of stability and elegance. This process differed from the first vessel as it involved direct manipulation of polygonal forms and lofting techniques, allowing me to precisely control the shape’s overall contour without the unpredictable variations of a sine wave function. This approach felt more deliberate and structured, giving me a clear sense of control over the design outcome.
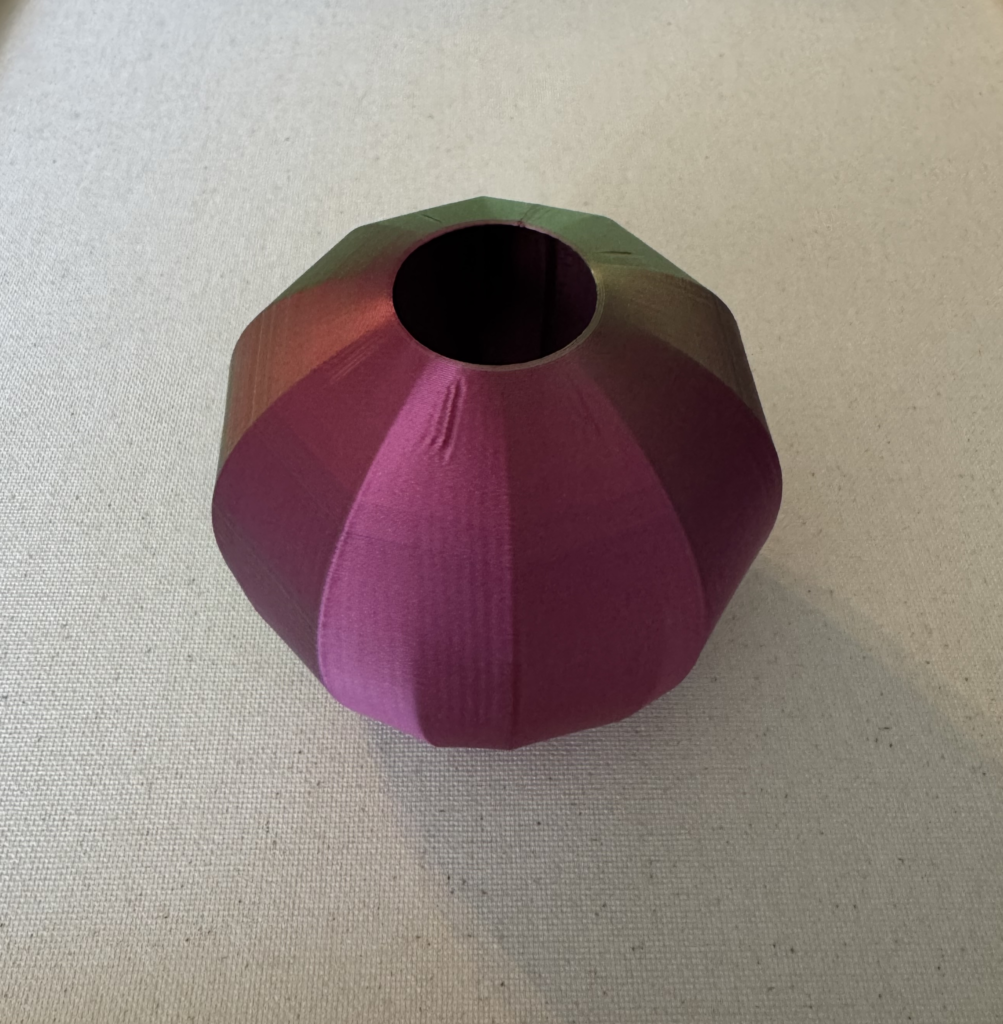
Vessel 3
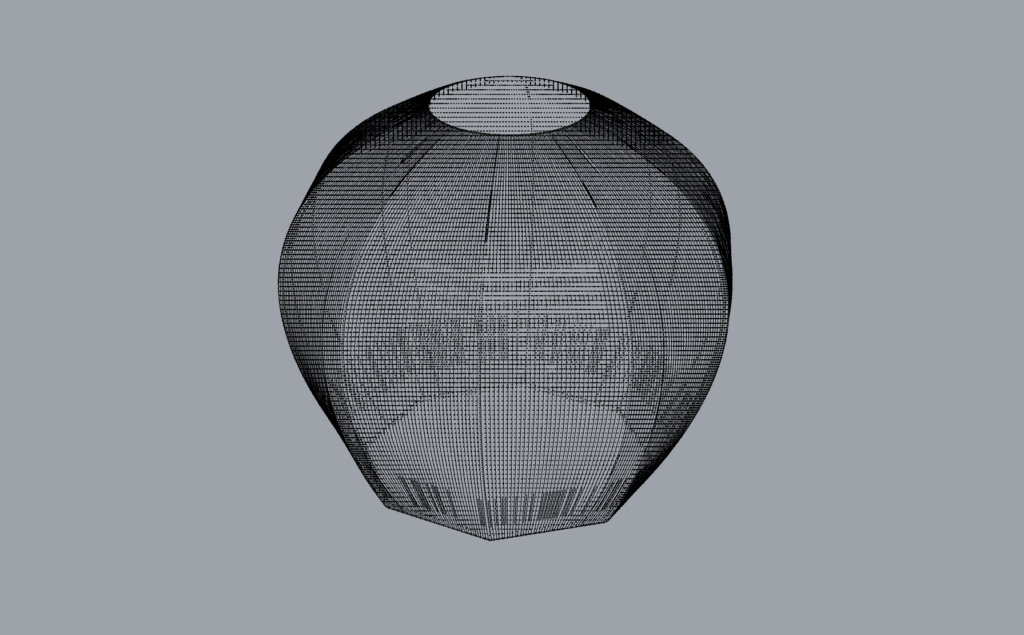
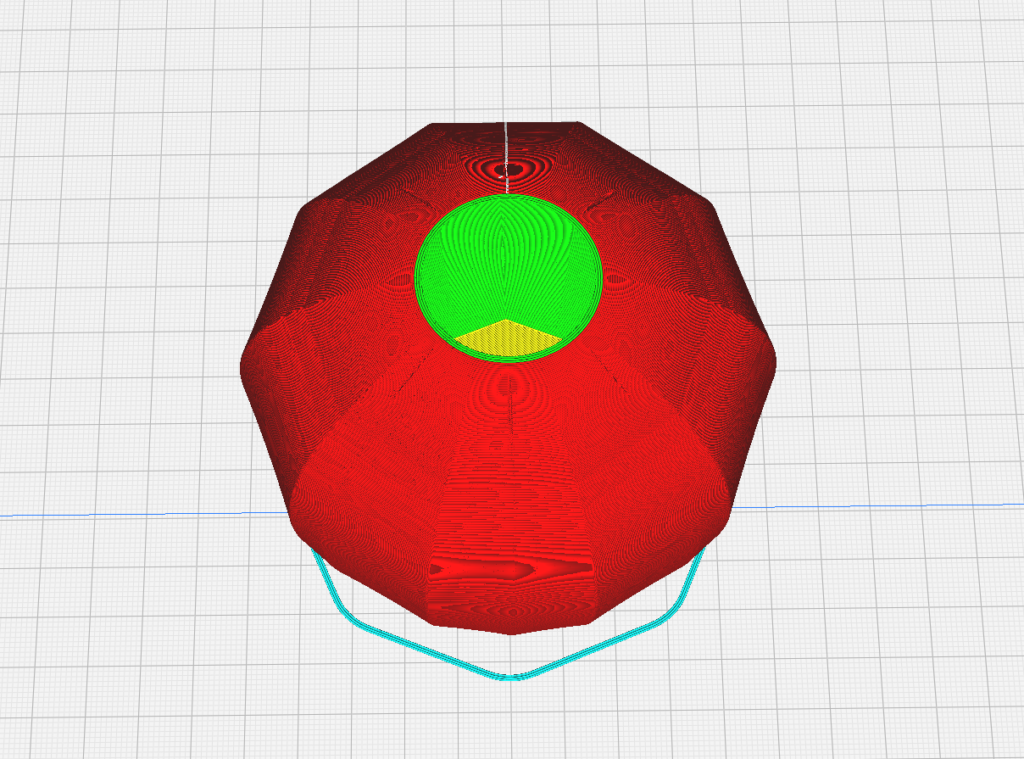
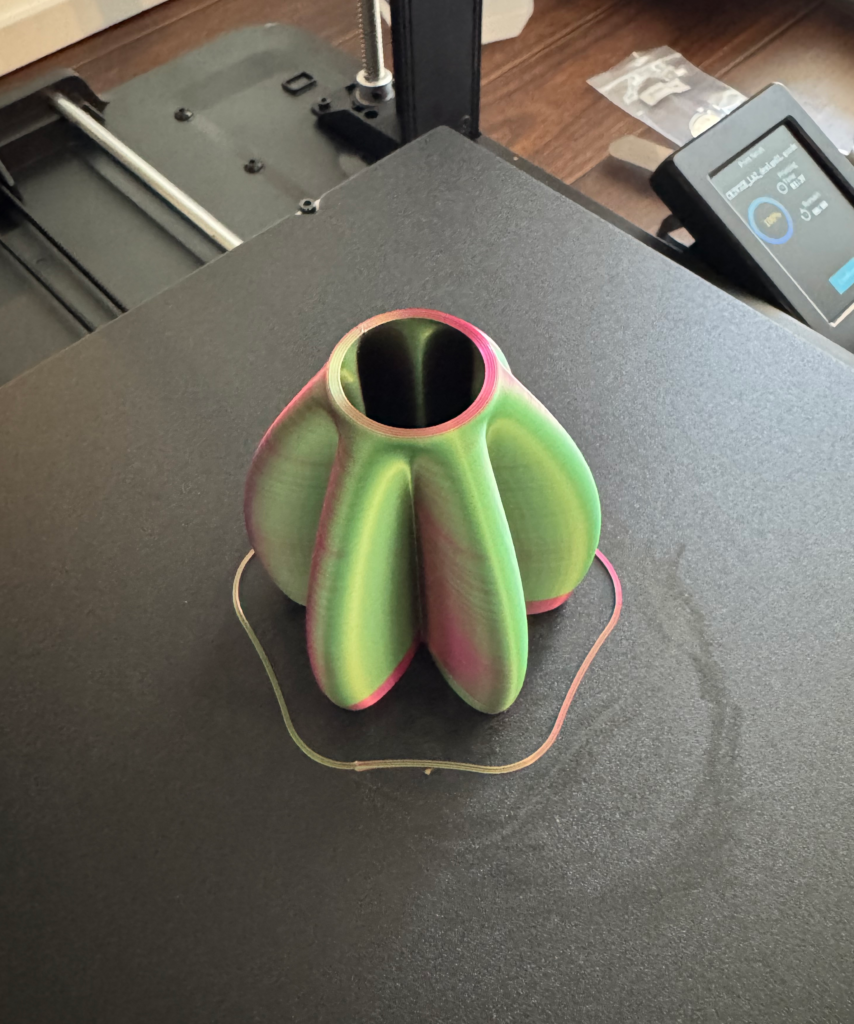
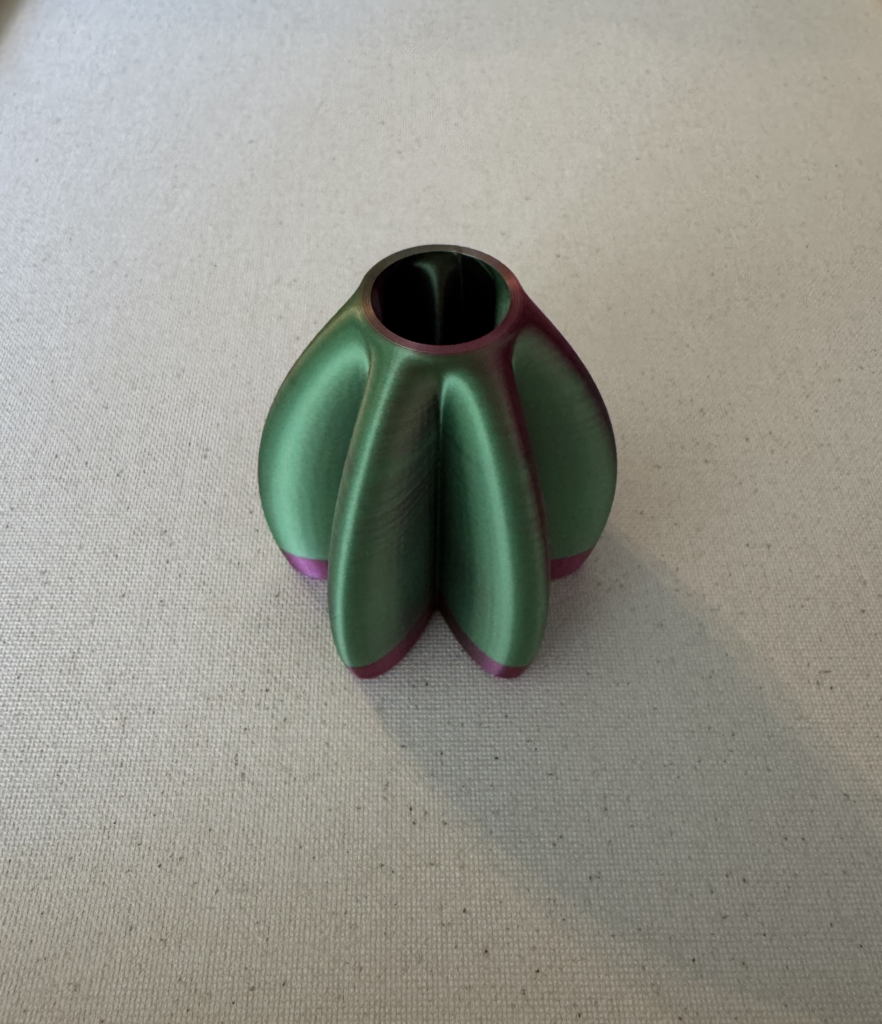
For vessel 3, my goal was to create a form that balances geometric simplicity with a voluminous shape reminiscent of traditional vessels. I used a series of polygonal cross-sections lofted together, resulting in a rounded, faceted surface that emphasizes symmetry and stability. By adjusting parameters like the number of sides, height, and radii, I achieved a smooth, spherical contour that blends angular elements with a softened profile. Similarly to the second vessel, this process allowed me precise control over the form, making each parameter change directly impact the vessel’s aesthetic and functionality.
Printing Process and Challenges
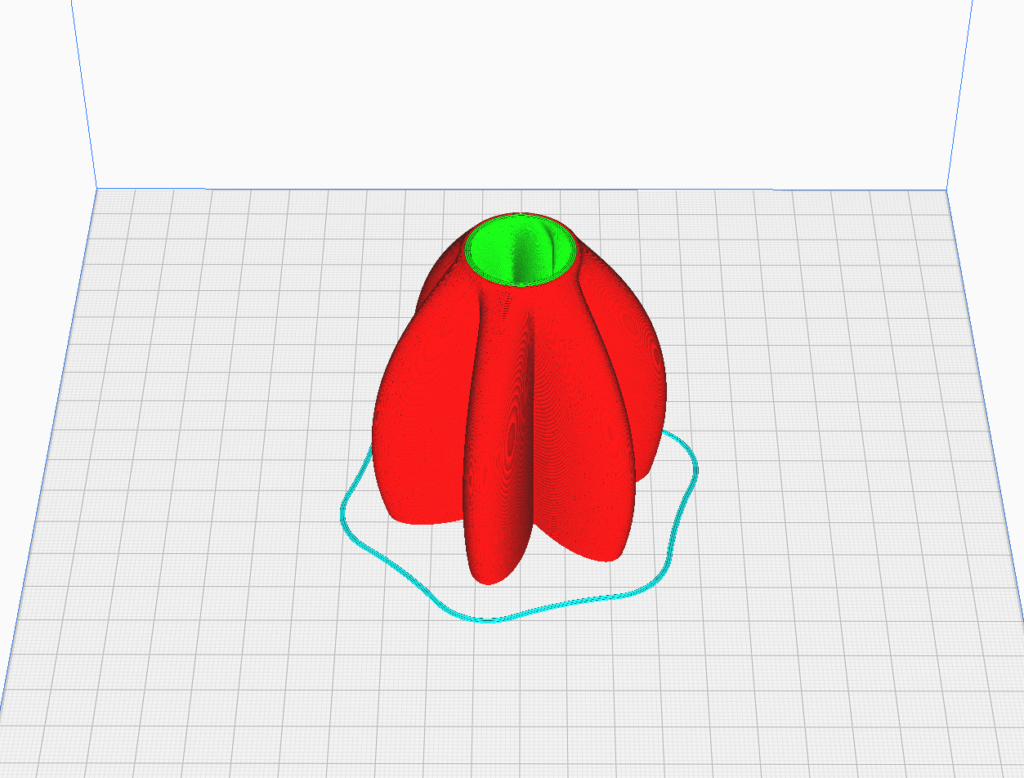
Printing vessel 1 was challenging. It required four attempts before achieving a successful result. On the first try, the filament failed to adhere properly to the print bed, prompting me to heat the bed and clean it thoroughly with isopropyl alcohol and a microfiber cloth. During the second attempt, the nozzle jammed about 25% into the print, causing excess filament extrusion and a skipped layer. Despite stopping and restarting, the issue persisted at the same point on my subsequent print. After researching potential fixes, I adjusted Cura settings: I lowered the print speed from 180 to 160 mm/s, increased the nozzle temperature from 200 to 210 degrees, and switched the quality setting from Super to Dynamic. These modifications resolved the problems, and the object printed successfully, measuring 65.9 x 65.9 x 72.0 mm.
Printing the second vessel was significantly smoother than the first. I began by cleaning and leveling the print bed to ensure proper adhesion and re-used the optimized Cura settings from the previous print. This careful preparation proved effective, as the object printed successfully on the first attempt without any complications. The result was a clean and accurate print, measuring 76.5 x 77.3 x 84.6 mm.
The printing process for the third vessel was similar to the second, with minimal challenges. I repeated the setup by cleaning and leveling the print bed and applied the same Cura settings that worked well previously. This consistency ensured a smooth printing process, and the third object printed successfully on the first try without issues. The final print measured 96.6 x 92.2 x 82.0 mm.
Grasshopper Code
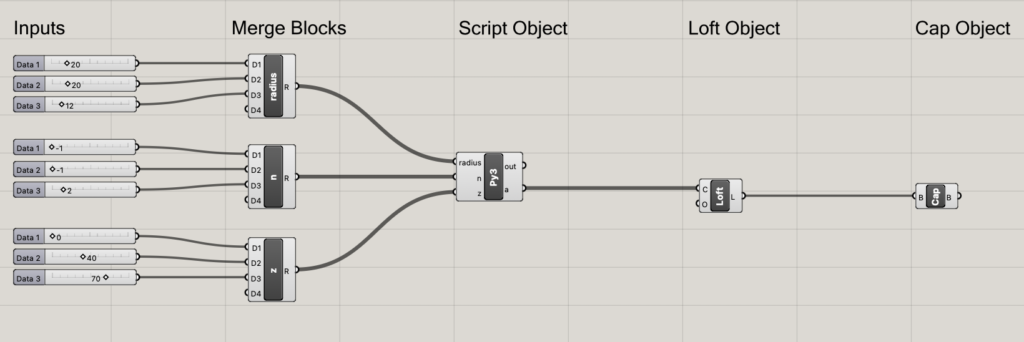
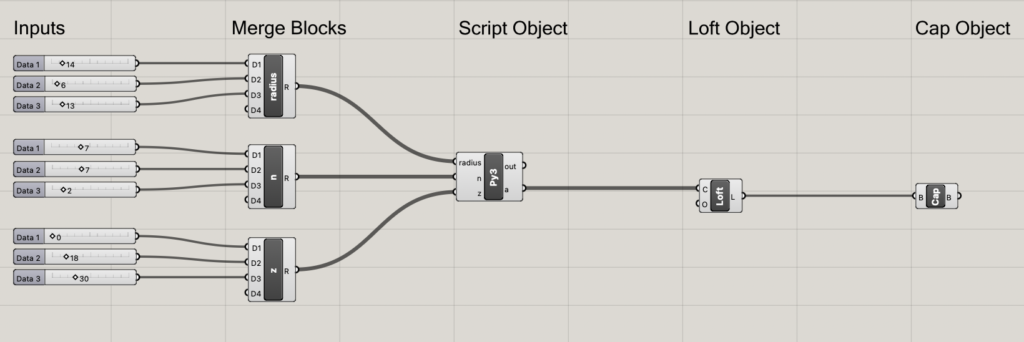
The Grasshopper code was designed to generate various base curves for the vessels using different functions depending on the input parameter n. For n = -1, used specifically for vessel 1, the code activates the radialFunctionBase with a custom sine-based starRadialFunction. This function dynamically adjusts the radius using a sine wave, creating oscillations that result in the petal-like, star-shaped form of the vessel. The amplitude and frequency of the sine wave control the depth and number of peaks, adding a customizable and organic element to the design. For inputs of n ≤ 2, the code generates a simple circle, while for n > 2, used in vessels 2 and 3, it creates a polygon with n sides, allowing for more structured and angular forms that contrast with vessel 1’s fluidity.
The primary challenge was ensuring that the generated points formed a seamless, closed curve suitable for lofting, especially with complex radial functions. Adjustments to input parameters and careful validation of point sequences were necessary to maintain continuity. The code’s flexibility allowed for iterative experimentation, making it possible to explore a range of shapes from organic, wavy forms to precise, geometric structures, enhancing the creative possibilities of the parametric design process.
Final Vessel Prints
The final prints highlight how versatile parametric design can be, showcasing the distinct qualities of each vessel created in Grasshopper and Rhino. The first object stands out with its star-like radial pattern, showing how sine functions can produce intricate and organic shapes that go beyond typical geometric designs. Its petal-like base came together well in the final print, balancing visual complexity with practical stability after tweaking the print settings.
The second vessel offers a more refined look, with its polygonal structure smoothly transitioning from a narrow base to a wider top. The sharp, precise lines reflect the control I had over the design by fine-tuning the number of sides and height, resulting in a clean and elegant shape. The third vessel, with its rounded and faceted design, blends polygonal lofting with subtle curves to create a vessel that feels sturdy yet sophisticated, adding to the diversity of the final collection.
Your design process is really interesting, Andrei! I like how you started by replicating the class example and then branched out to create functional, practical vessels. Your approach of blending aesthetics with utility is something I resonate with, especially when considering the real-world applications of 3D printing. The use of a sine wave to shape your first vessel’s petals is a creative way to leverage parametric design, and I agree that discovering the form through parameter manipulation adds a satisfying layer of co-creation with the software. It’s interesting to note that I also experimented with petal-like characteristics in my design.
Your problem-solving during the printing phase also stood out to me. It’s great that you identified issues early on, like bed adhesion and nozzle jams, and adjusted your Cura settings to get better results. I faced similar challenges with my own prints, and I found that those little tweaks, like increasing the nozzle temperature, can make all the difference. The final vessels look awesome, and I think your careful preparation and attention to detail really paid off in achieving clean prints with minimal issues. My favorite is definitely vessel 2 – it has a sleek design, and the filament choice really enhances its overall aesthetic.
Thanks for the feedback! I appreciate that you noticed my approach to blending aesthetics with practicality—it’s something I really wanted to focus on to make the designs more functional. The sine wave element was fun to experiment with. It’s cool to hear you’ve been working with similar petal-like features in your designs, too! The printing challenges were definitely a learning curve, but those tweaks in Cura and figuring out how to get the first few layers right made a big difference. I’m glad you liked my second design. I really liked how the multi-colored filament made each of them look.
First off, love the filament you use, the green and purple is a very striking color pallet. Beyond that I like forms you chose to iterate on they’re very stable and practical. You did a good job to have designs that were all extremely distinct from one another while also feeling like they belonged to a single overarching theme. Also the simplicity means you should be able to get some actual use out of them as small containers rather than just abstract paper weights.
Thank you so much! I’m really glad you liked the color palette and found the designs practical yet cohesive. My goal was to create something functional while keeping the aesthetic unified, so it’s great to hear that came through. I appreciate your feedback!
Hey Andrei! I really like the filament that you used for your prints! I think it made the objects come out looking really cool and unique.
I’m glad you were able to resolve your issues with printing. it seems like a few people in this class have had issues and lowering the print speed has seemed to help. I really enjoyed reading about your methodology when designing your objects I think you came at it from a very mathematical approach kind of like I did. Overall, I really liked your project and I am looking forward to seeing more of your work in the future.
Thank you so much! I’m happy to hear you liked the filament and found the mathematical approach interesting. It’s great that we both took a similar route in designing our objects! I’m also glad the print speed adjustment worked—it really made a difference. Looking forward to seeing more of your projects as well!