Part 1: Curves
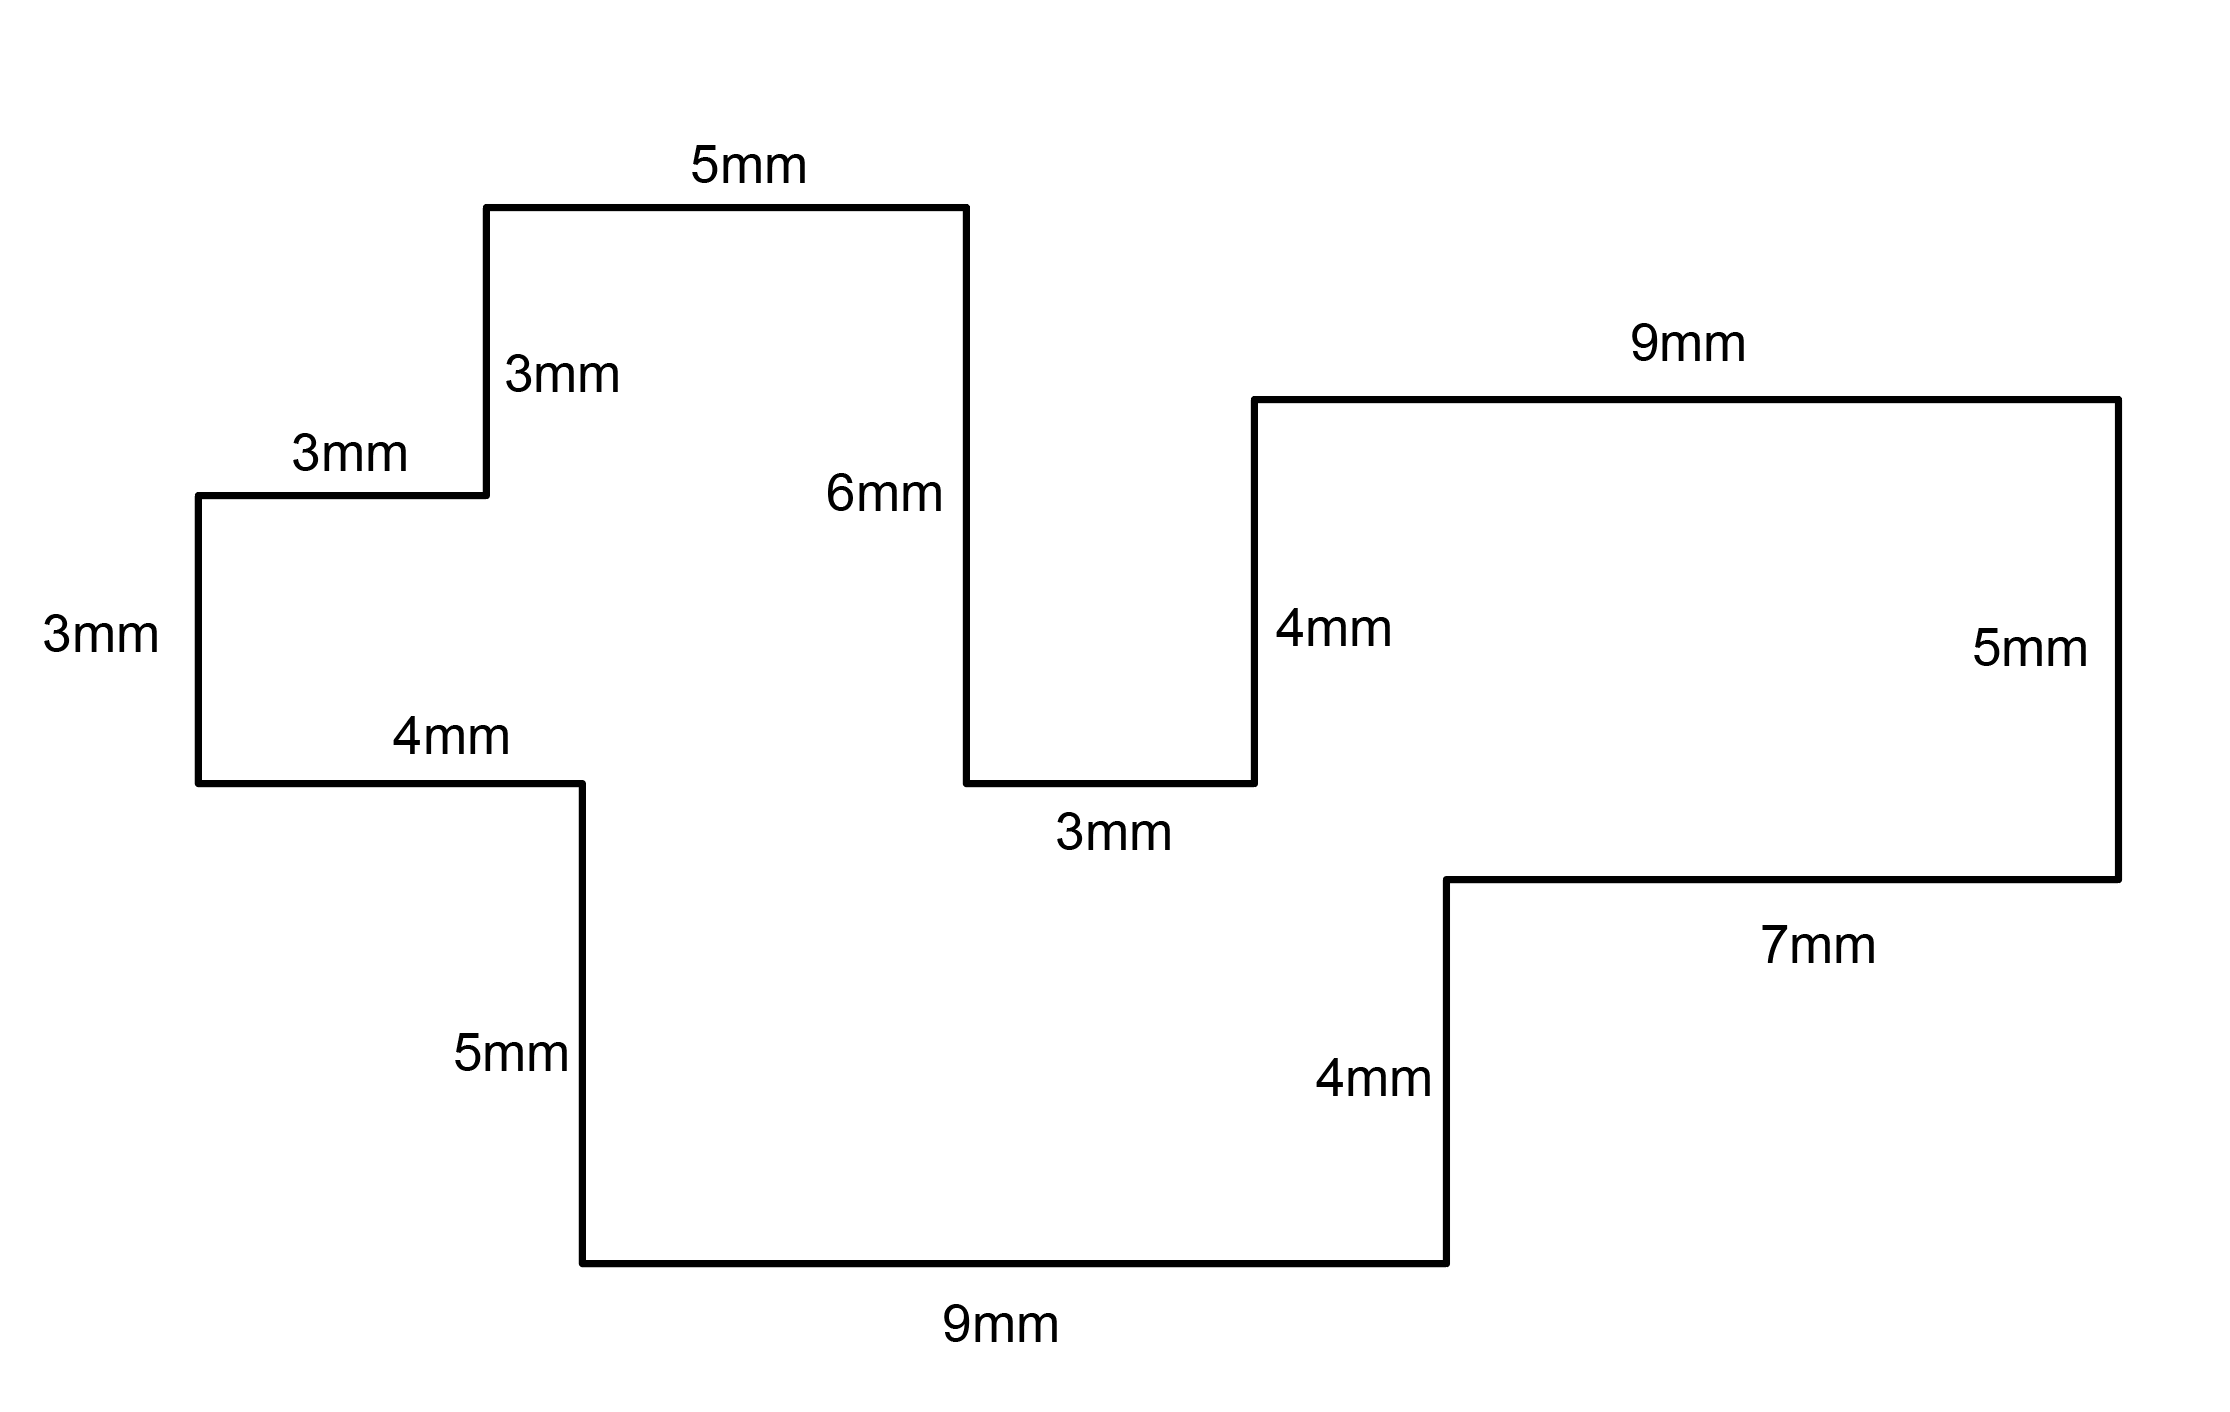
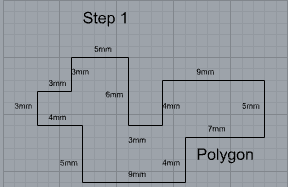
1.Make the specific footprint below.
- Commands: Polyline
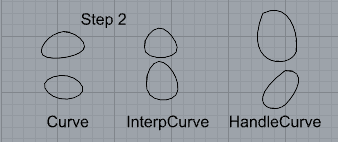
2.Make 2 closed rounded curves using the various curve commands.
- Commands: Curve, InterpCurve, HandleCurve
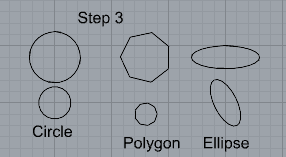
3.Make 2 closed curves using polygon, ellipse, or circle
- Commands: Circle, Ellipse, Polygon
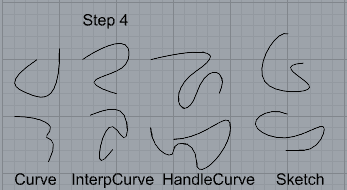
4.Make 2 open curves
- Commands: Curve, InterpCurve, HandleCurve, Sketch
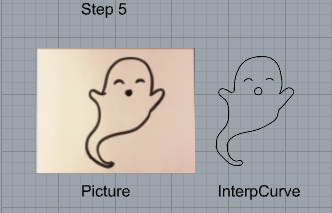
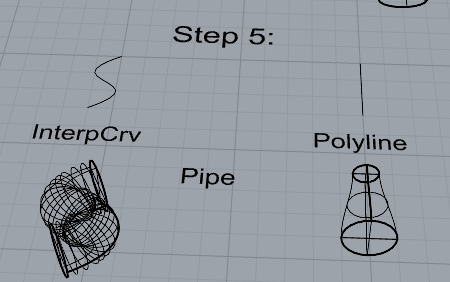
5.Import a picture and trace an image
- Commands: Picture, InterpCurve
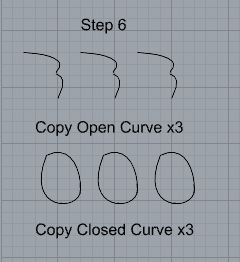
6.Pick one open curve, and one closed rounded curve and make three copies of each.
- Commands: Copy
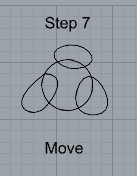
7.Take at least 3 of your closed curves and overlap them to create a new shape
- Commands: Move
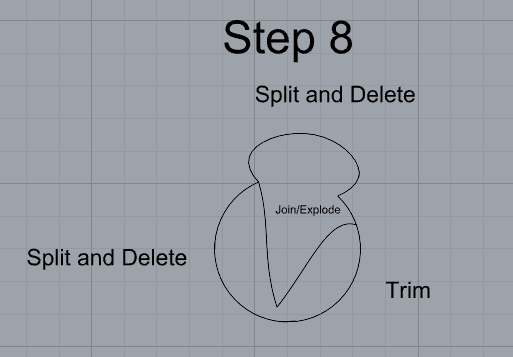
8.Use split, delete, and trim to combine these curves into one open curve
- Commands: Split, Delete, Trim, Join, Explode
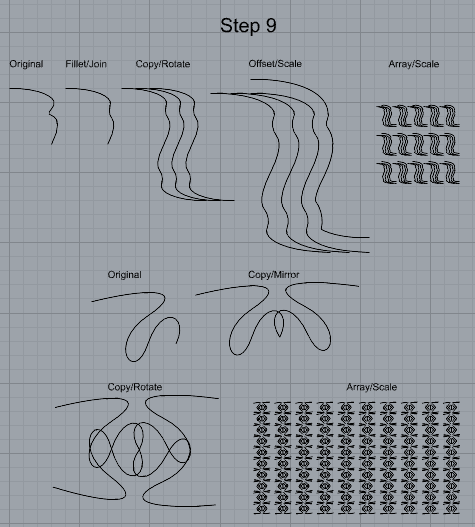
9.Take at least two curves and use various transformations make a pattern or composition.
- Commands: Move, Copy, Rotate, Mirror, Array, Scale, Offset, Fillet, FilletCorners
10.Organize your Rhino file so each step is clear. Use the Text command to label each step and the commands you used. Add a link to your FirstnameLastname_Curves file at this point in your post.
Part 2: Surfaces
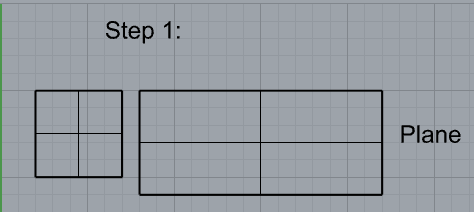
1.Plane
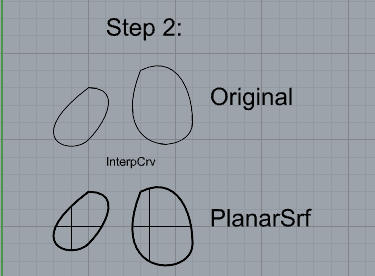
2.PlanarSrf
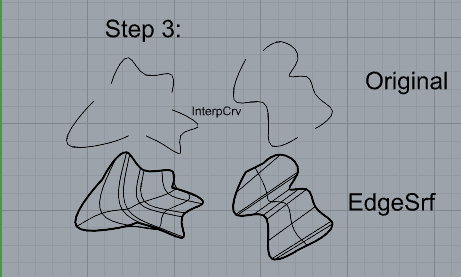
3.EdgeSrf
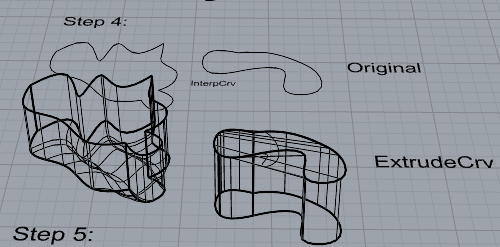
4.ExtrudeCrv
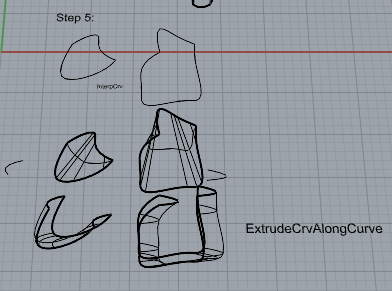
5.ExtrudeCrvAlongCrv
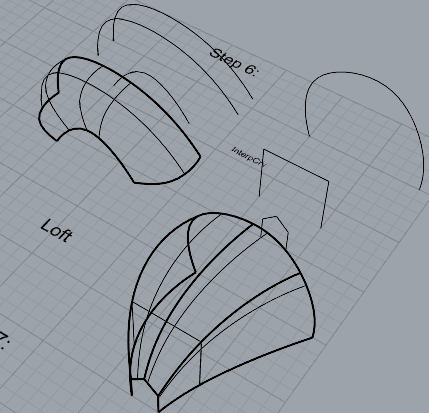
6.Loft
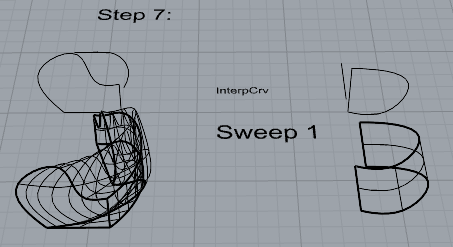
7.Sweep1
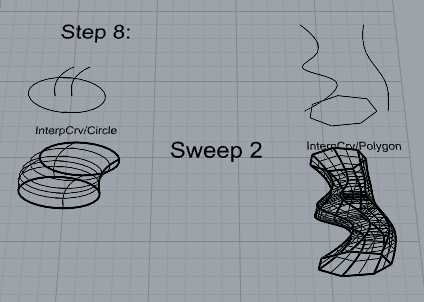
8.Sweep2
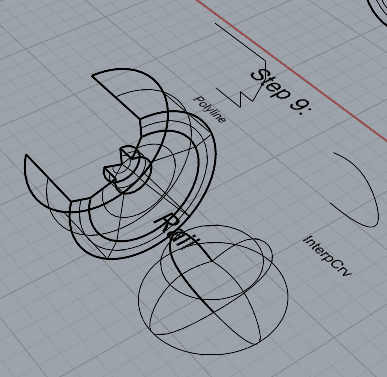
9.Revolve
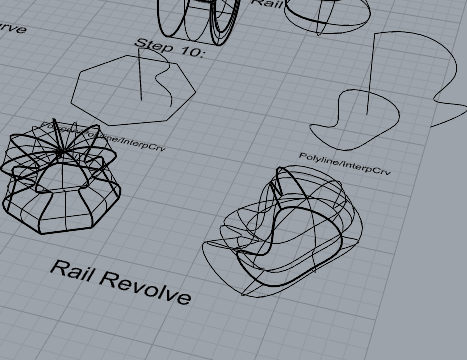
10.RailRevolve
11.Add a link to your FirstnameLastname_Surfaces file at this point in your post.
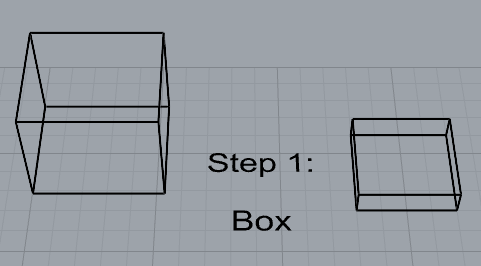
Part 3: Solids
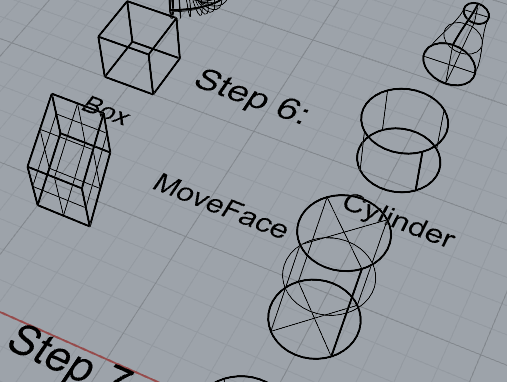
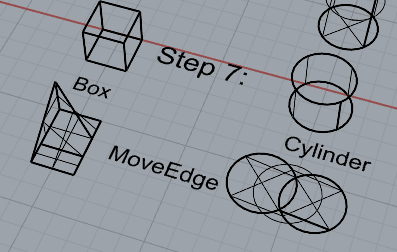
1.Box
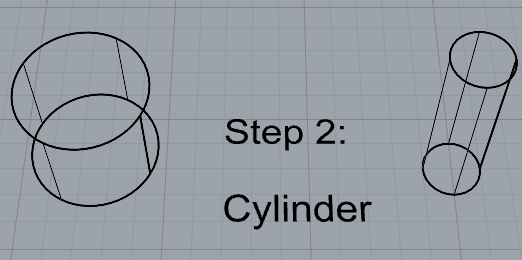
2.Cylinder
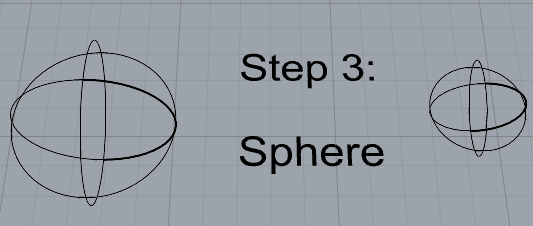
3.Sphere
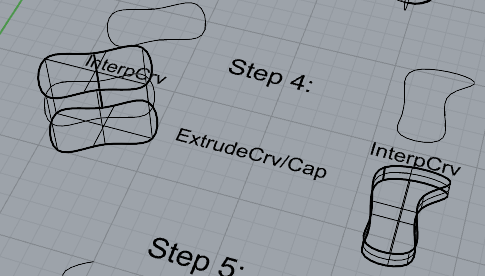
4.ExtrudeCrv and Cap
5.Pipe
6.MoveFace
7.MoveEdge
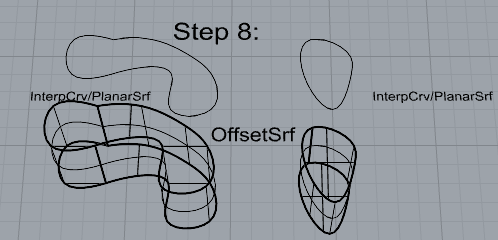
8.OffsetSrf
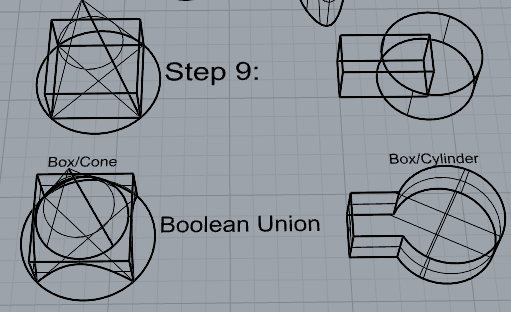
9.Boolean Union
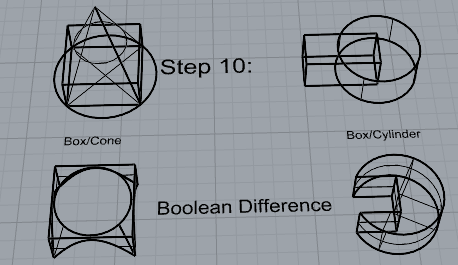
10.Boolean Difference
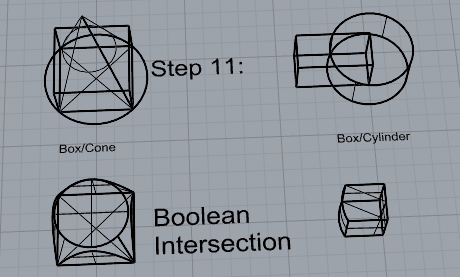
11.Boolean Intersection
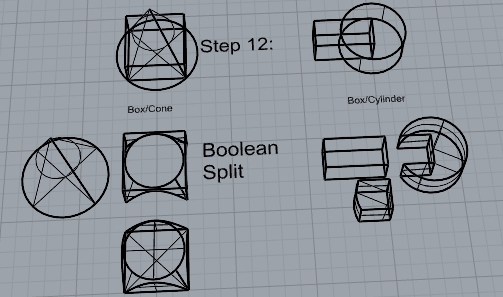
12.Boolean Split
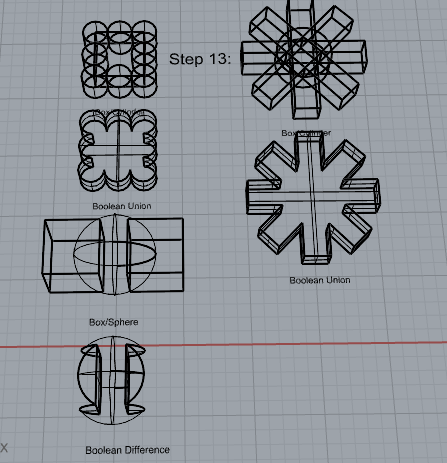
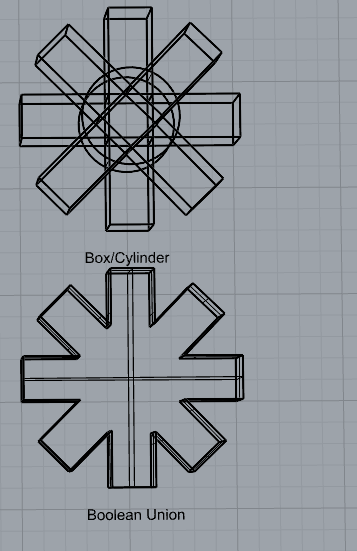
13.Using the surfaces and solids you modeled and the Boolean tools, make three solid shapes you find interesting.
14.Add a link to your FirstnameLastname_Solids file at this point in your post.
Part 4: 3D Printing
Pick one of the shapes you created and 3D print it using your 3D printer. Note: to be able to print an object with the 3d printer, it must be watertight. That means that your shape must be a closed form with no naked edges and no holes.
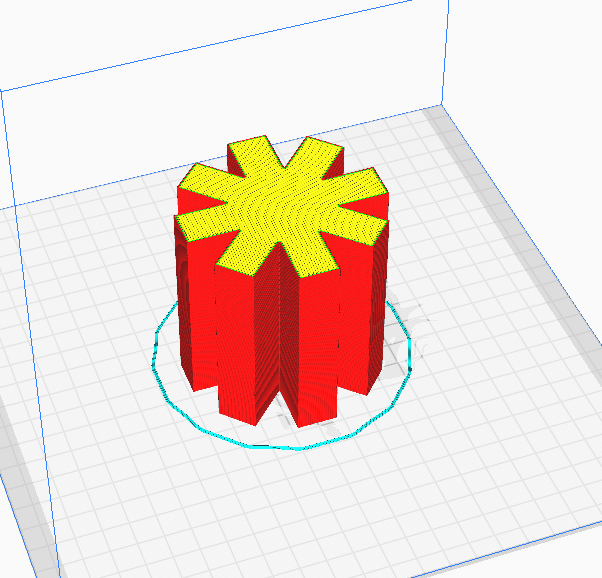
Printing Process:

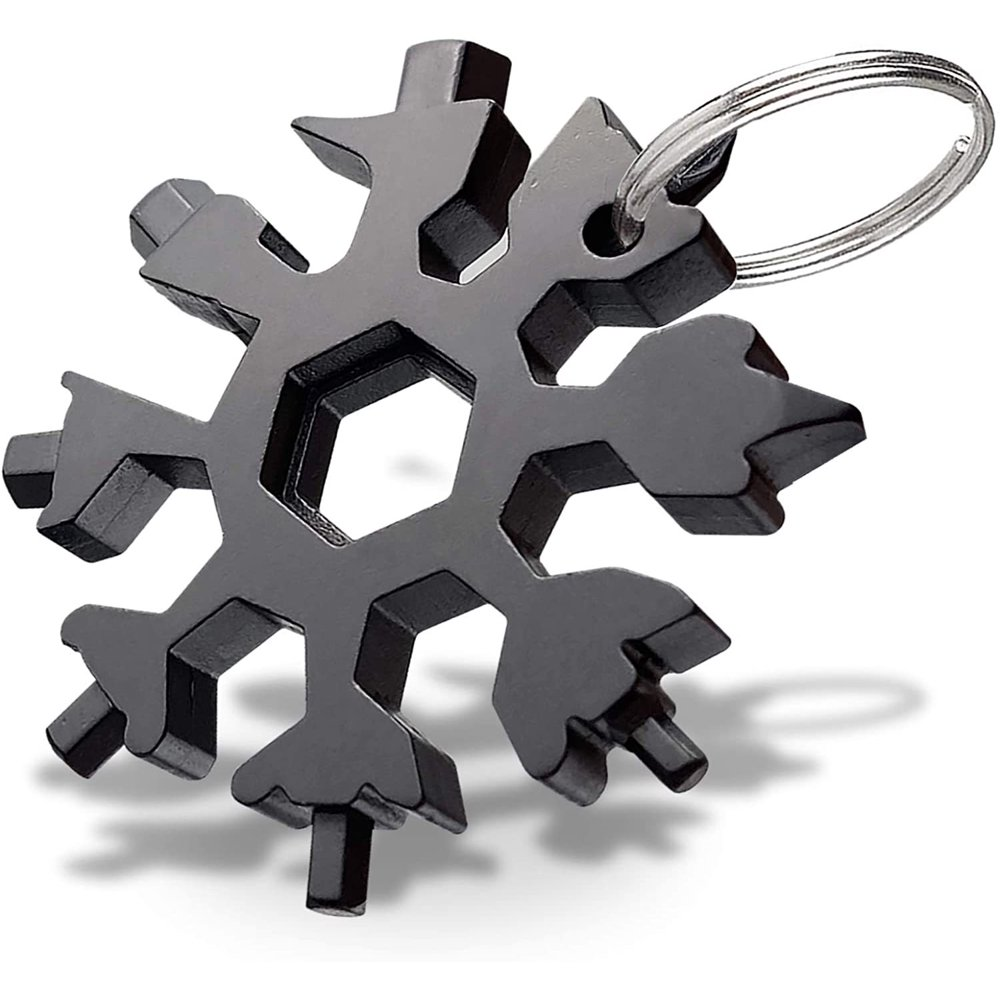
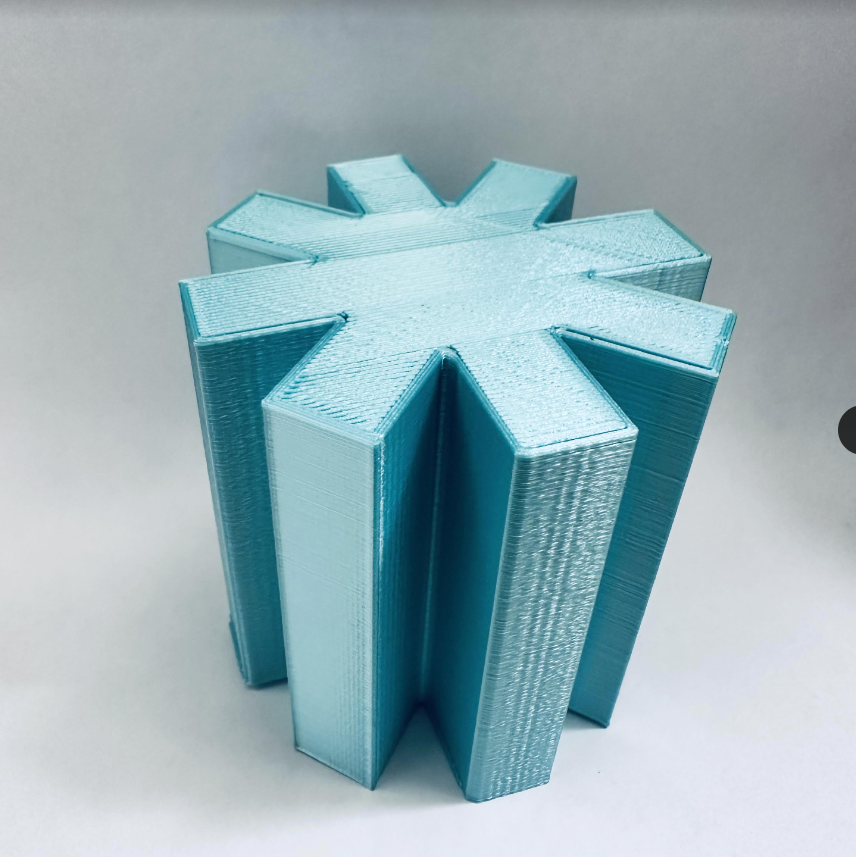
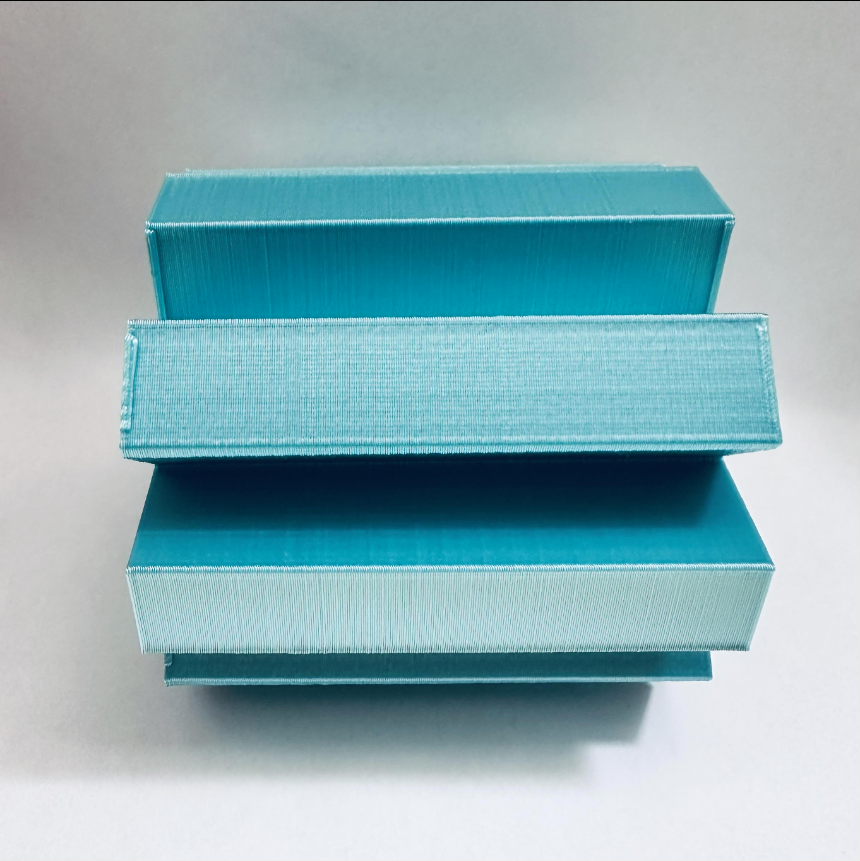
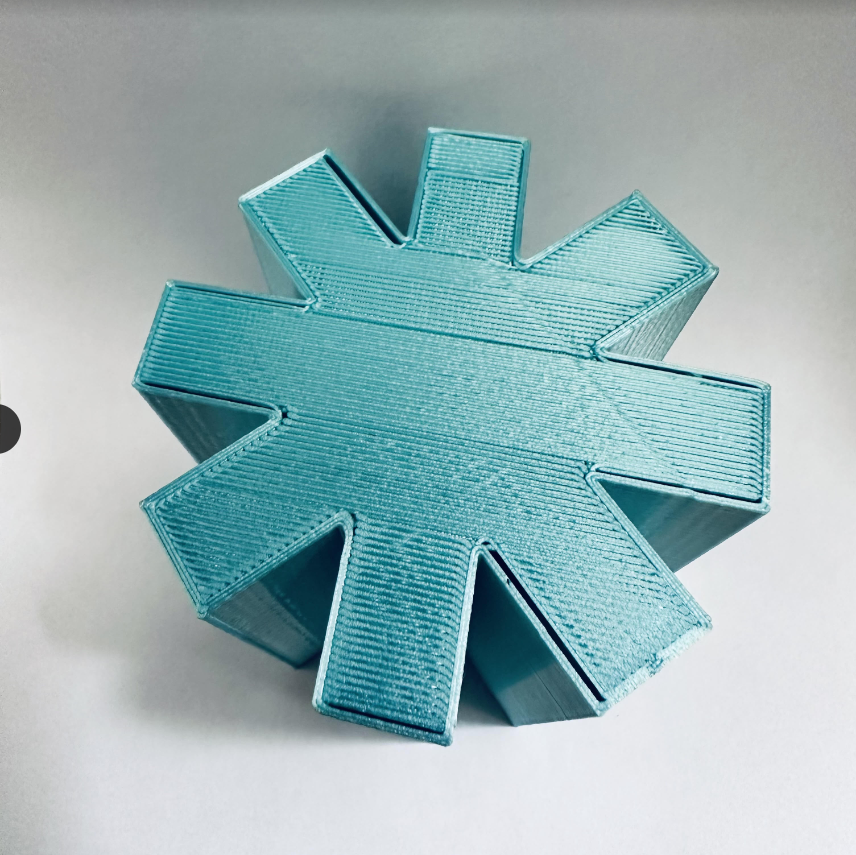
When it came to printing out my shape made from a Boolean union of eight boxes and a cylinder, it went perfectly. I didn’t have to babysit the print, and it completed the very first time I set it to print. I did have to make adjustments to the infill density in Cura and essentially made it hollow by putting it at 0% so that the print wouldn’t take up so much time and filament to print. Before the setting changes it said that it was going to take 24 hours. I also made the fill pattern concentric, so it was one continuous line that was printed to cap the top and bottom of the design and made it look very full despite being just a shell of the actual one. Upon looking at the design it looks like one giant gear, but based on the 3D modeling it looked like a very solid and dense snowflake. I was unintentionally inspired by a snowflake shaped tool I have, but my design was definitely a much simpler one.
Unintentional Inspiration:
Glam Shots:
Hi! The final print you made looks great! Before I read your post I thought you were going for a snowflake mostly due to the color but I can see the gear too. Did you just do standard quality for your print? I wonder what settings you had that would’ve made it take so long unless it was just a size thing.
Thanks for sharing!
Hello,
Love the Glam Shots and the collor! I had a question about the top it looks like it seperating is this issue with the layer size or the model?
Hey Andrew,
The quality of your print looks really good, I personally struggled with the quality of mine and I am in the process of re-leveling the bed to get a better print. I also like how your other shapes within rhino looked really clean.