Part 1: Curves
Open a new Rhino File and practice the curves commands by completing the following steps. Organize your Rhino file so each step is clear. Use the Text command to label each step and the commands you used.
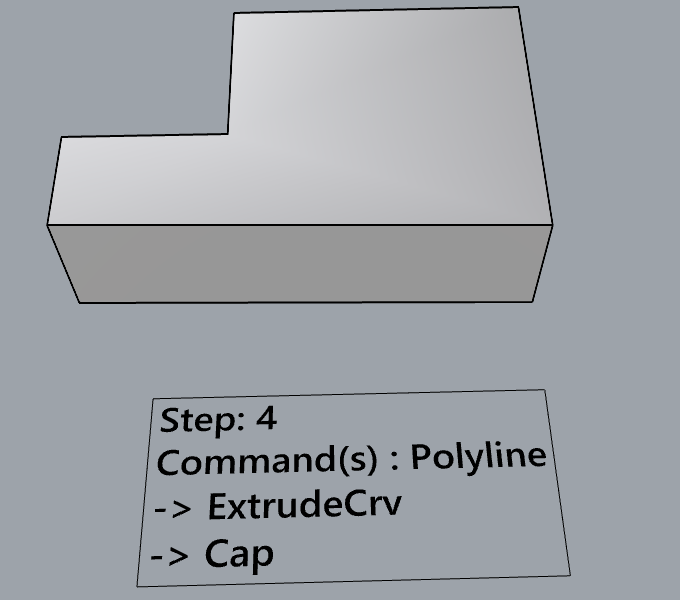
- Make the specific footprint below.
- Commands: Polyline
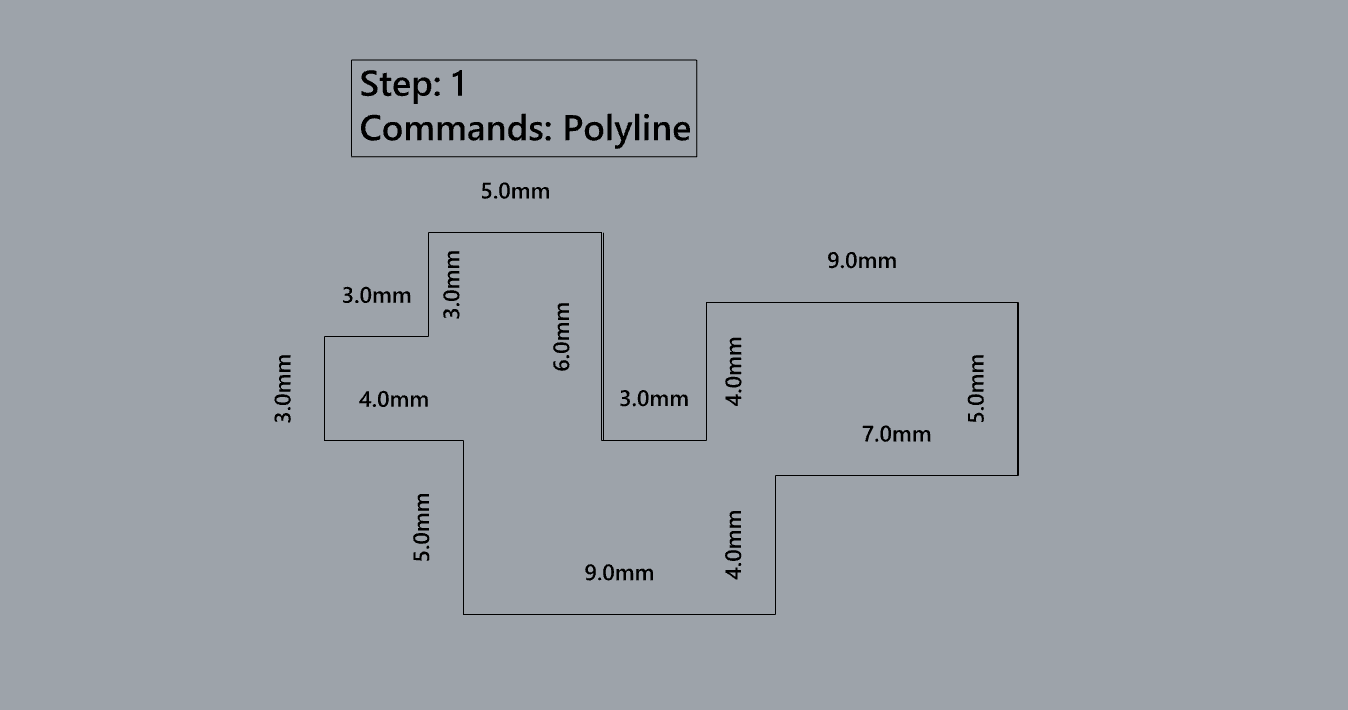
- Commands: Polyline
- Make 2 closed rounded curves using the various curve commands.
- Commands: Curve, InterpCurve, HandleCurve

- Commands: Curve, InterpCurve, HandleCurve
- Make 2 closed curves using polygon, ellipse, or circle
- Commands: Circle, Ellipse, Polygon
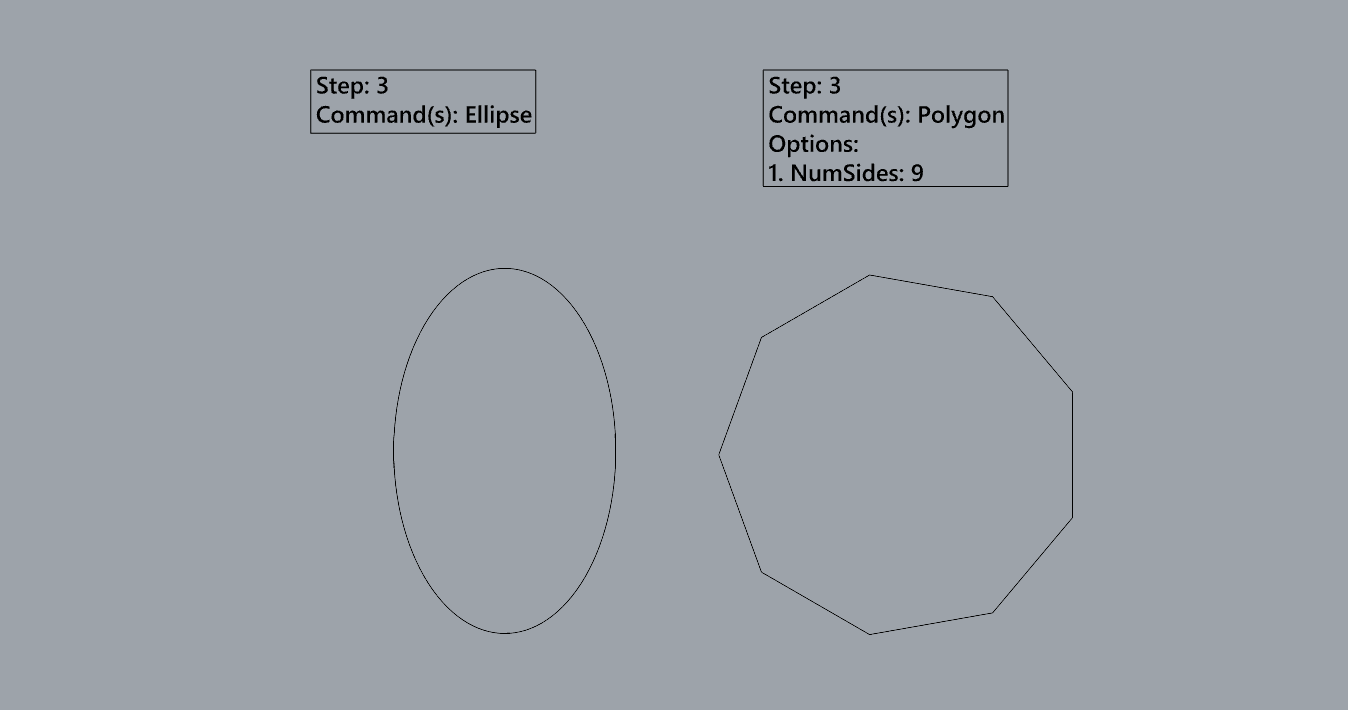
- Commands: Circle, Ellipse, Polygon
- Make 2 open curves
- Commands: Curve, InterpCurve, HandleCurve, Sketch
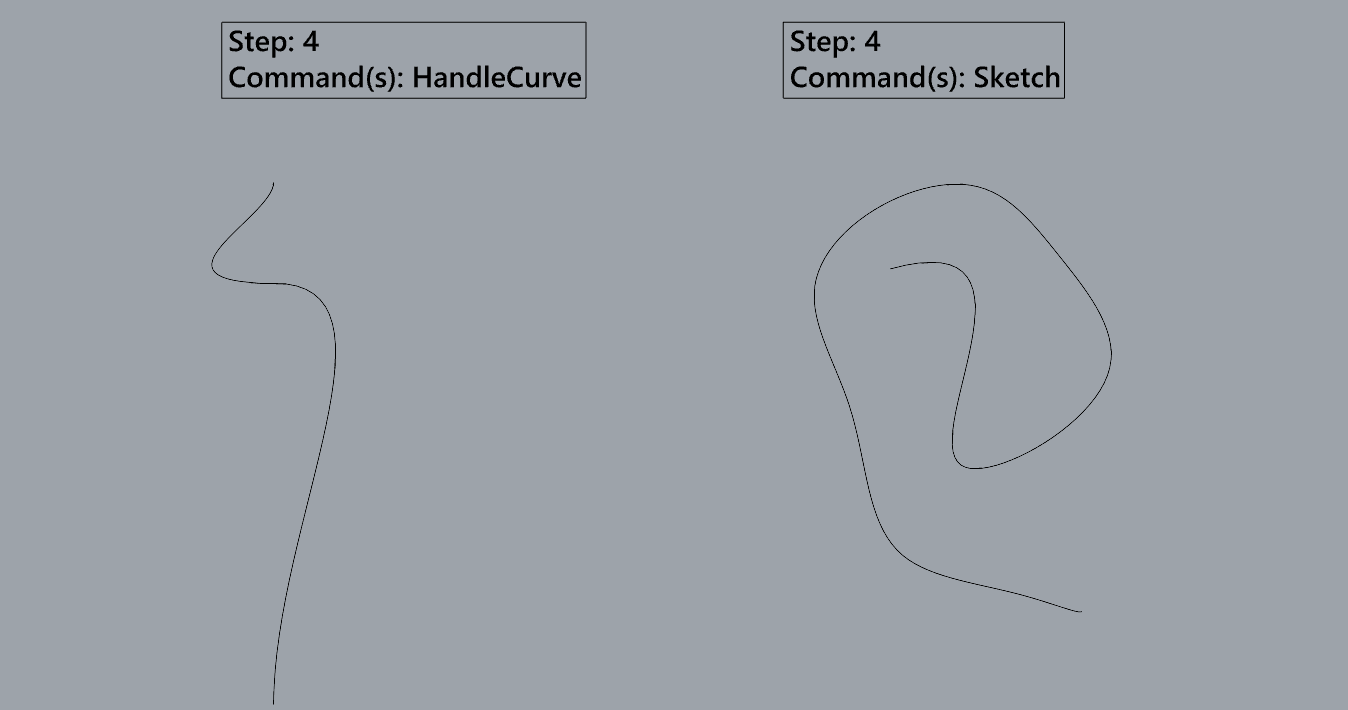
- Commands: Curve, InterpCurve, HandleCurve, Sketch
- Import a picture and trace an image
- Commands: Picture, InterpCurve

- Commands: Picture, InterpCurve
- Pick one open curve, and one closed rounded curve and make three copies of each.
- Commands: Copy
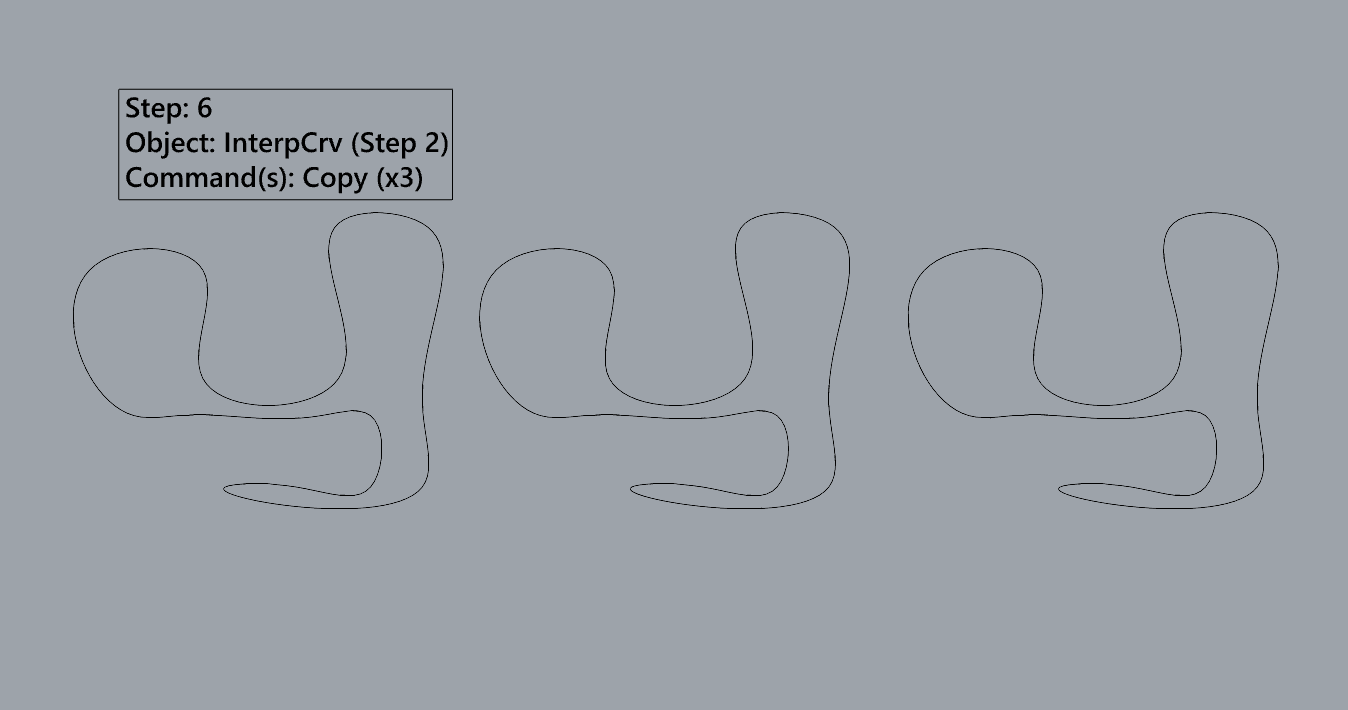
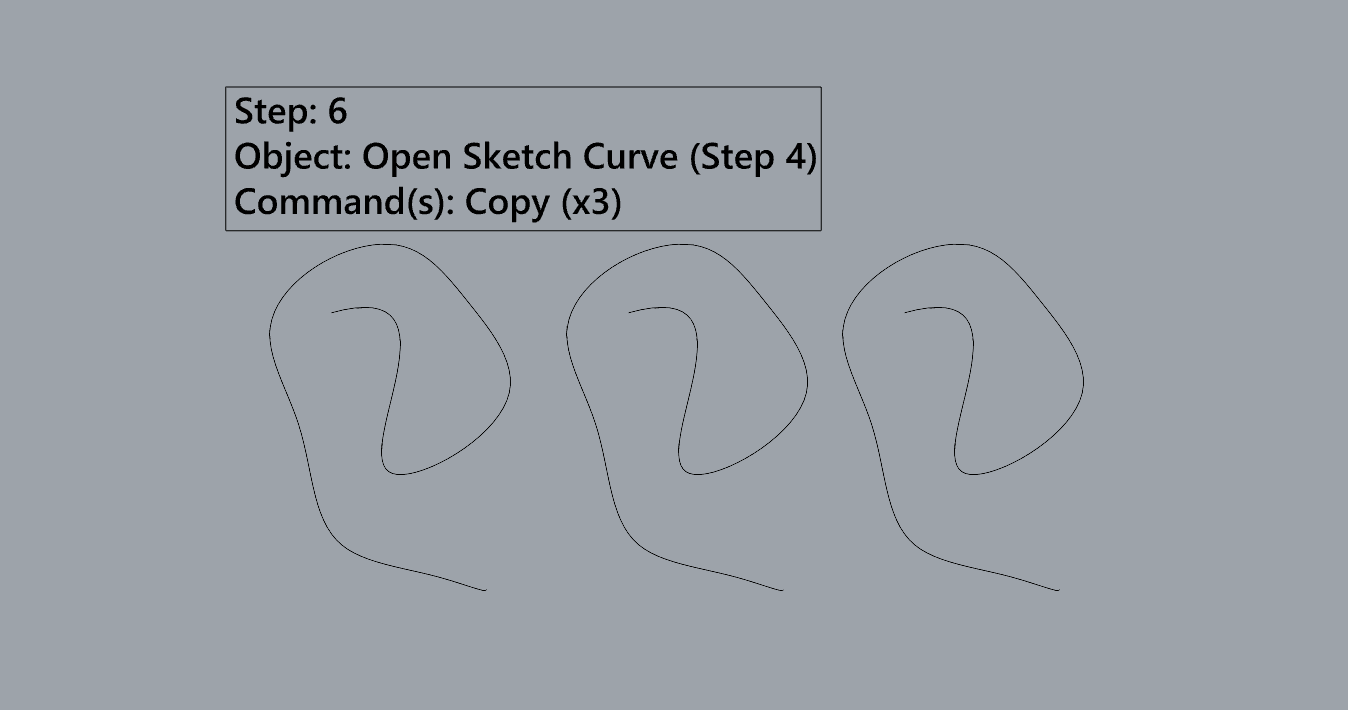
- Commands: Copy
- Take at least 3 of your closed curves and overlap them to create a new shape
- Commands: Move
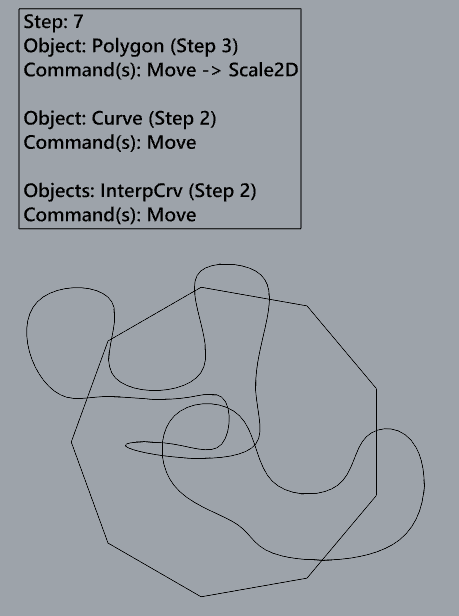
- Commands: Move
- Use split, delete, and trim to combine these curves into one open curve
- Commands: Split, Delete, Trim, Join, Explode
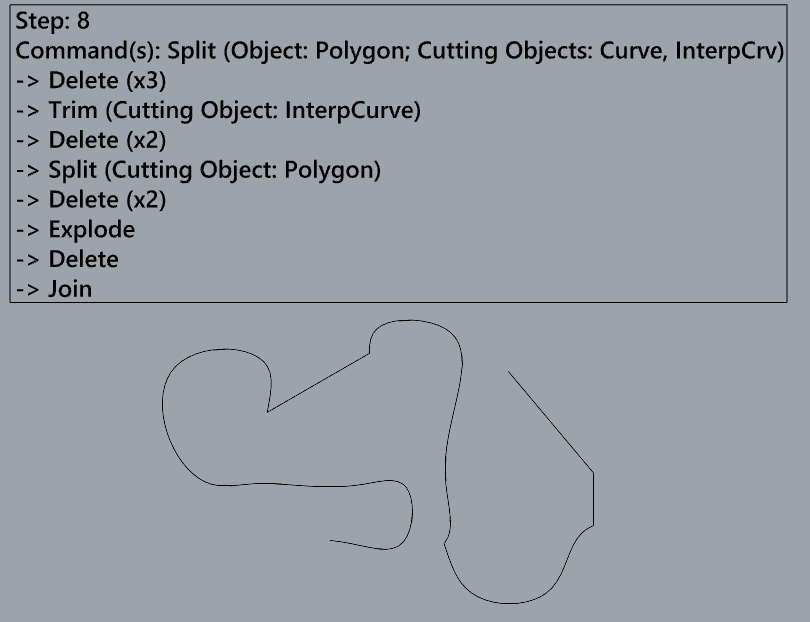
- Commands: Split, Delete, Trim, Join, Explode
- Take at least two curves and use various transformations make a pattern or composition.
- Commands: Move, Copy, Rotate, Mirror, Array, Scale, Offset, Fillet, FilletCorners
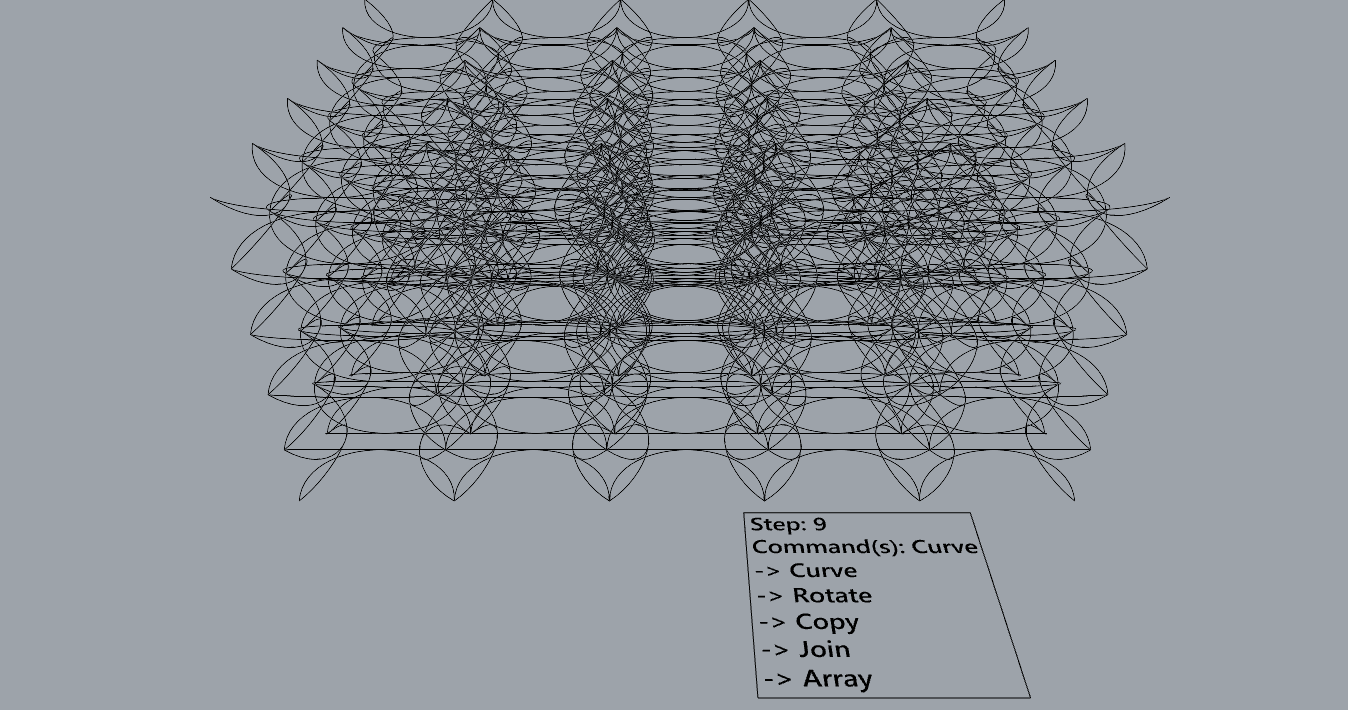
- Commands: Move, Copy, Rotate, Mirror, Array, Scale, Offset, Fillet, FilletCorners
- Organize your Rhino file so each step is clear. Use the Text command to label each step and the commands you used. Add a link to your FirstnameLastname_Curves file at this point in your post.
File: https://handandmachine.org/classes/computational_fabrication/wp-content/uploads/2024/09/NathanRowe_Curves.3dm
Part 2: Surfaces
Open a new Rhino File and practice the surfaces commands below by making two different surfaces for each command. Organize your Rhino file so each step is clear. You may want to use some of the curves you modeled in Part 1. Use the Text command to label each step and the commands you used.
- Plane
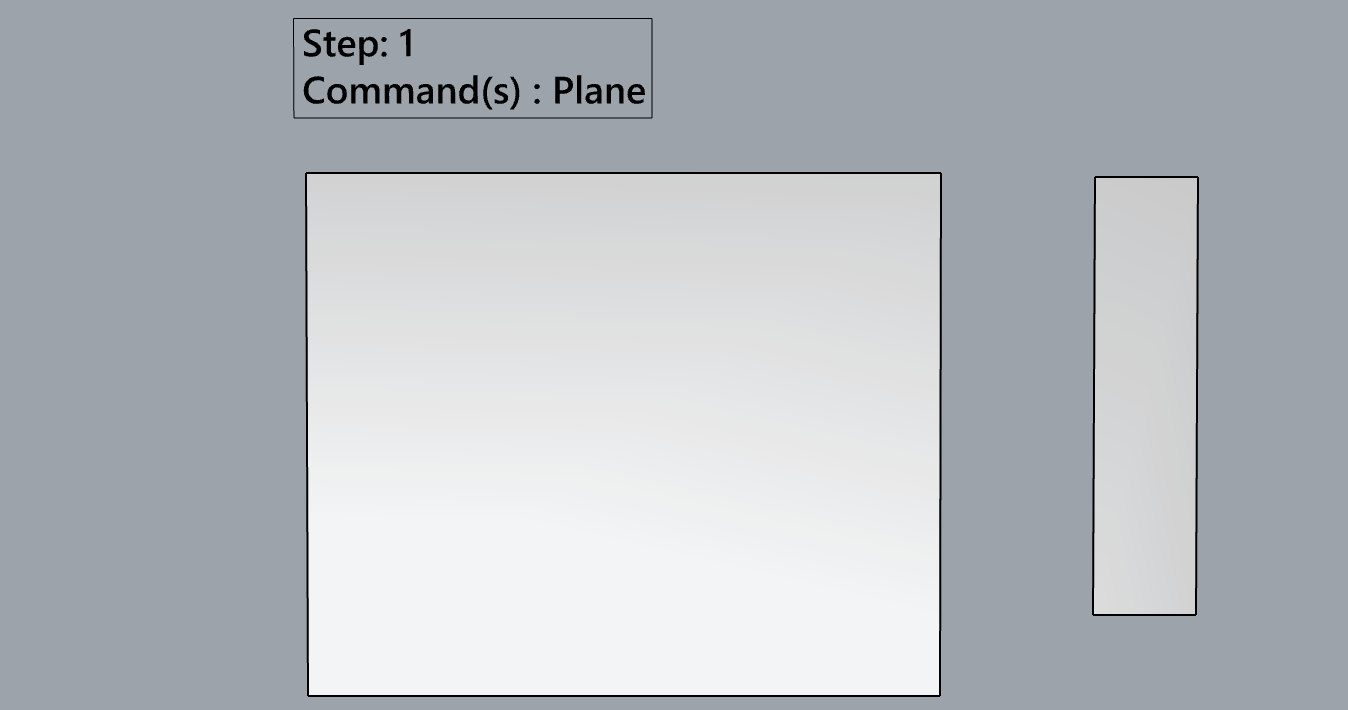
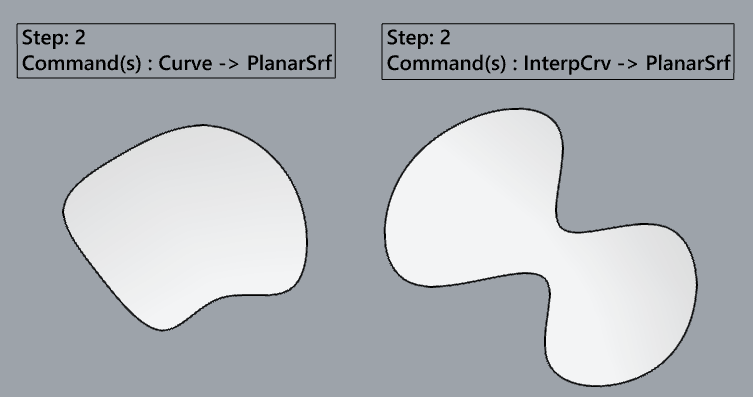
- PlanarSrf
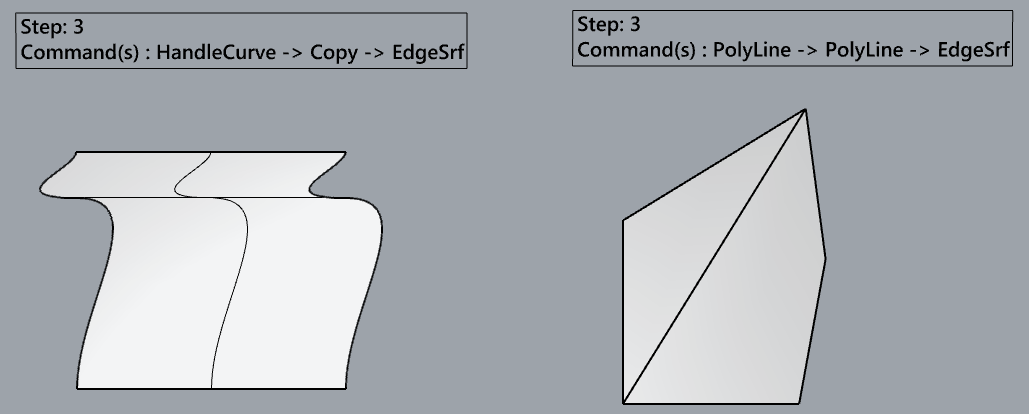
- EdgeSrf
- ExtrudeCrv
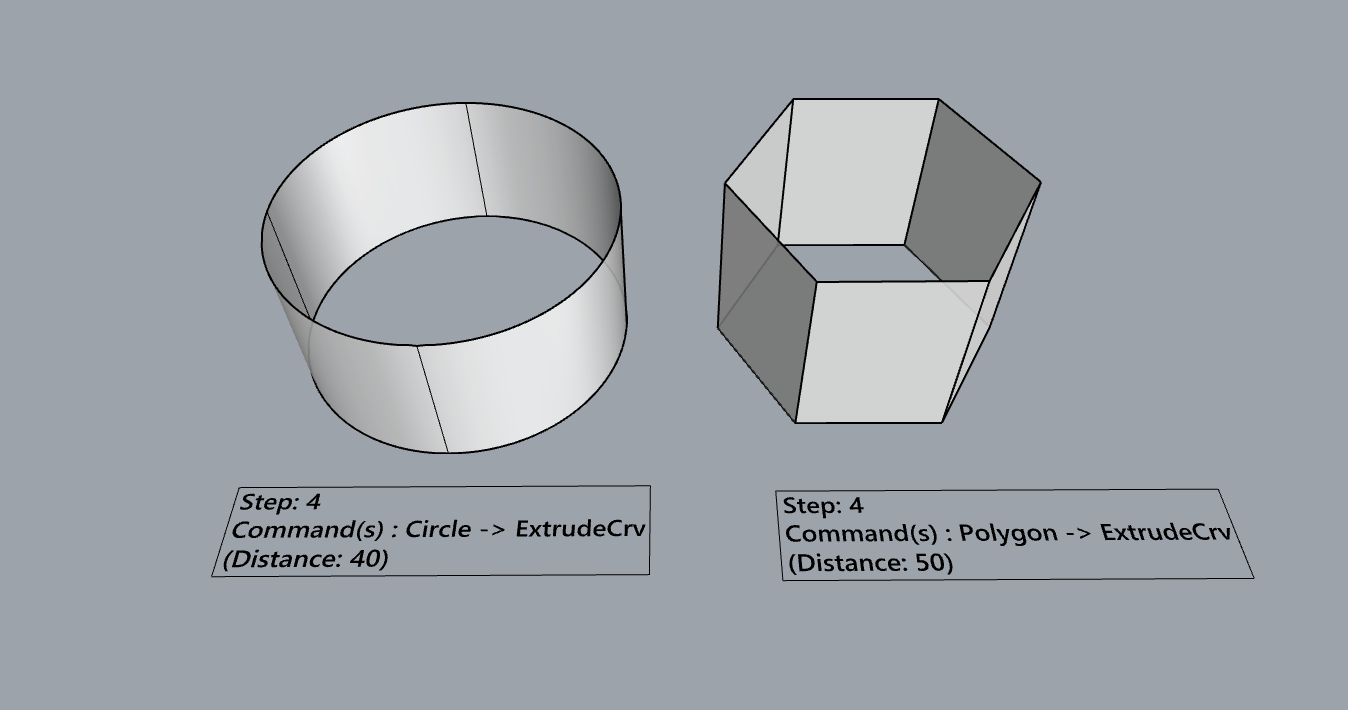
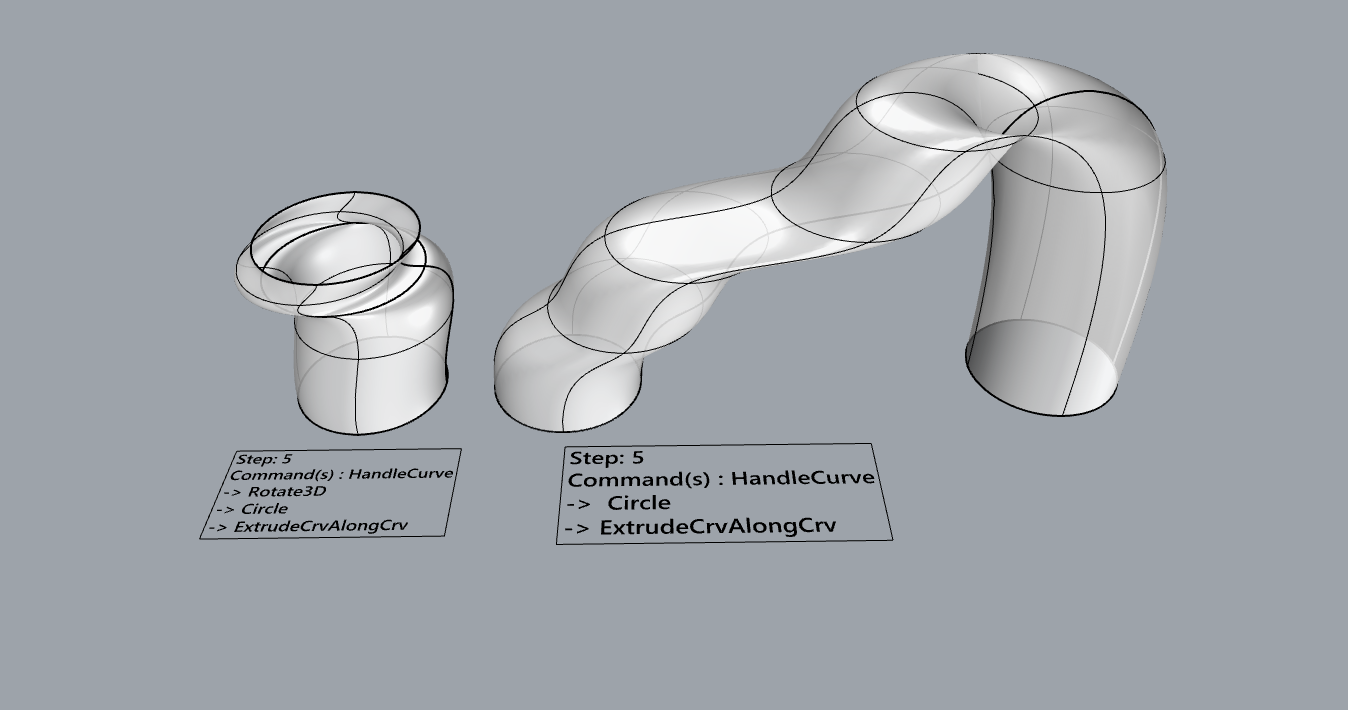
- ExtrudeCrvAlongCrv
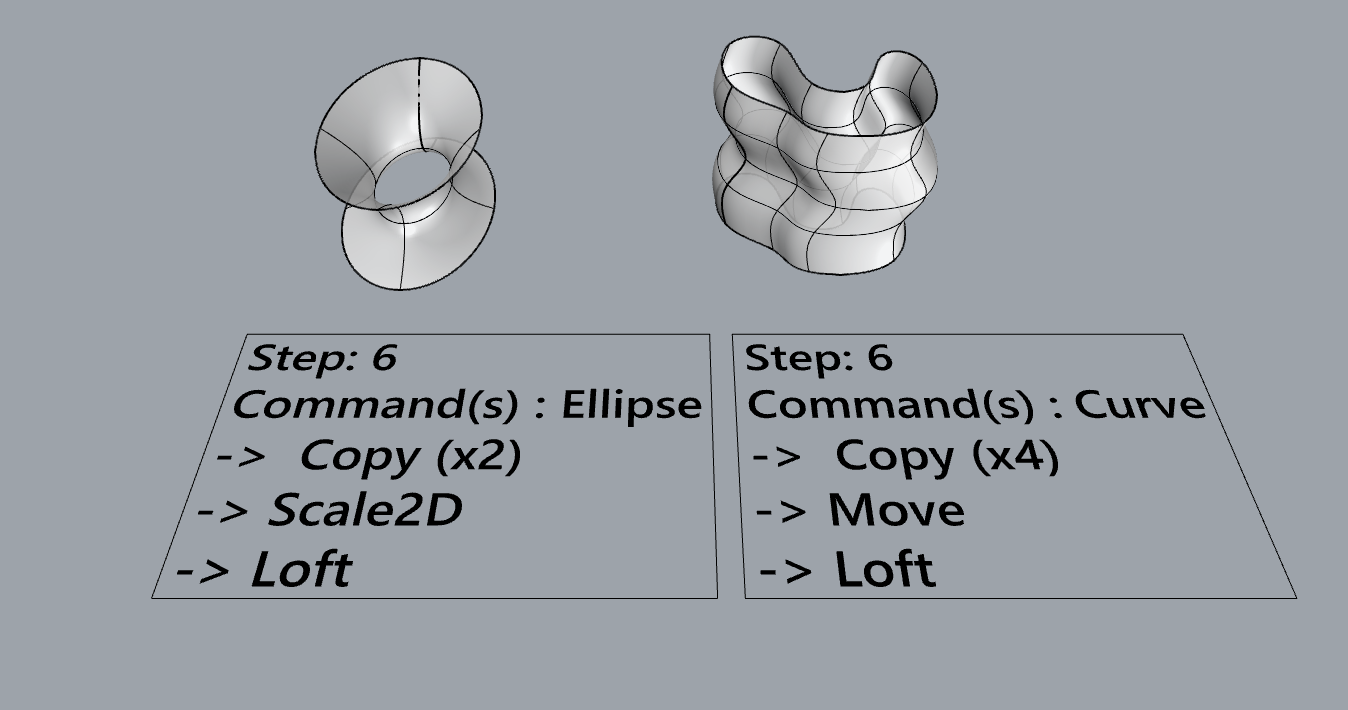
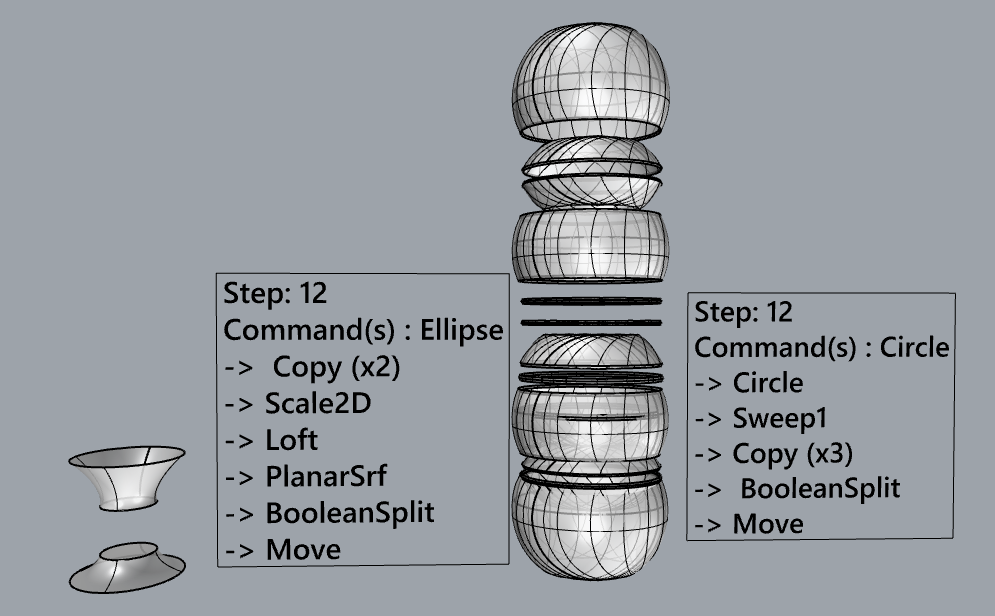
- Loft
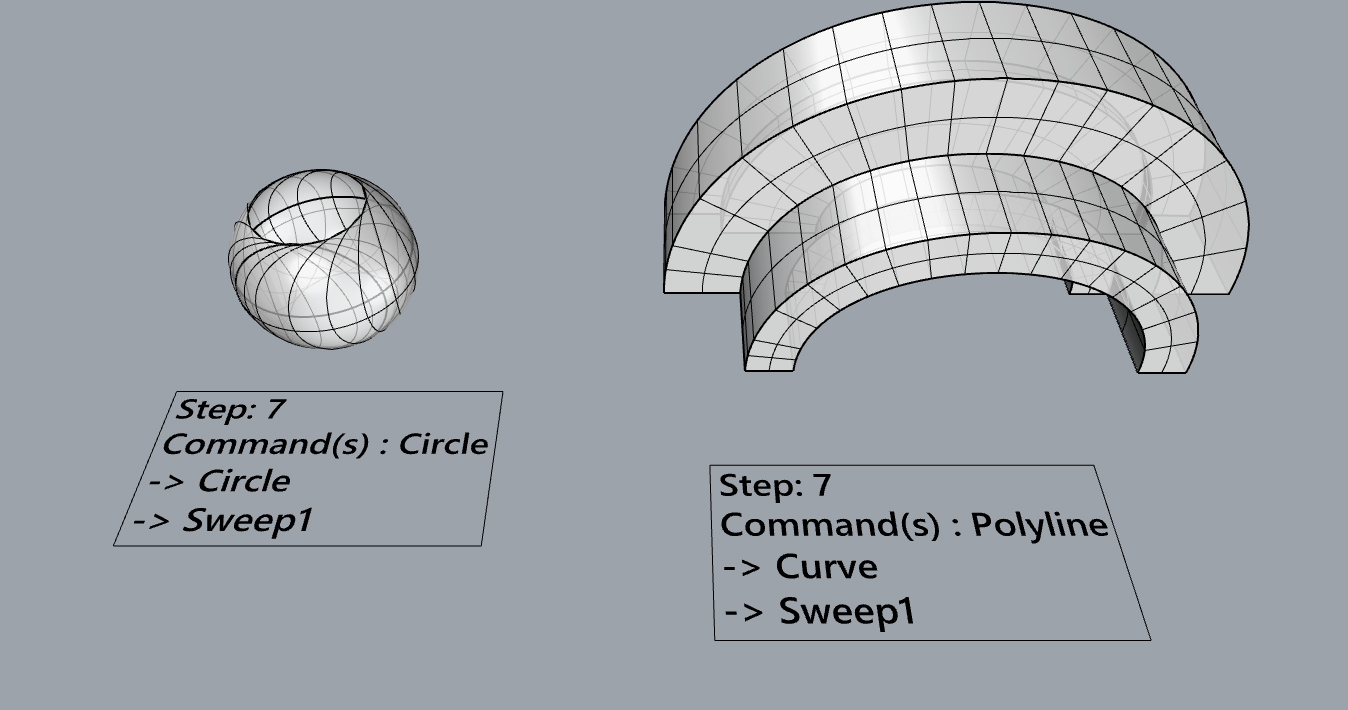
- Sweep1
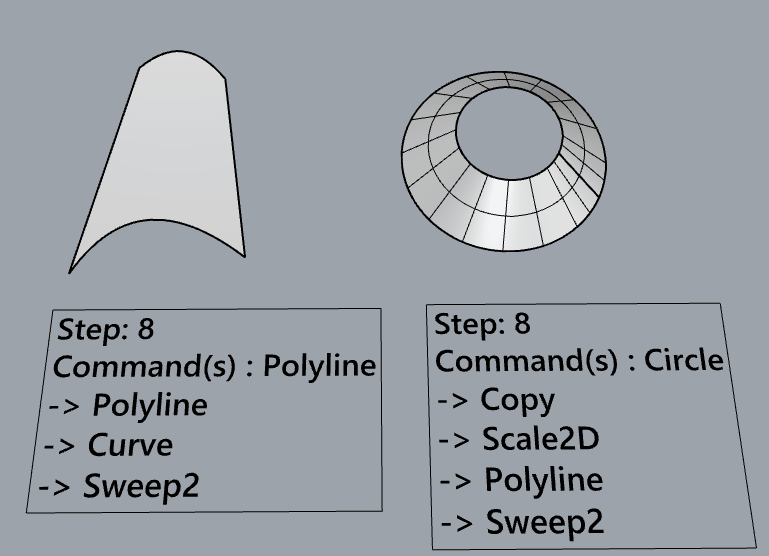
- Sweep2
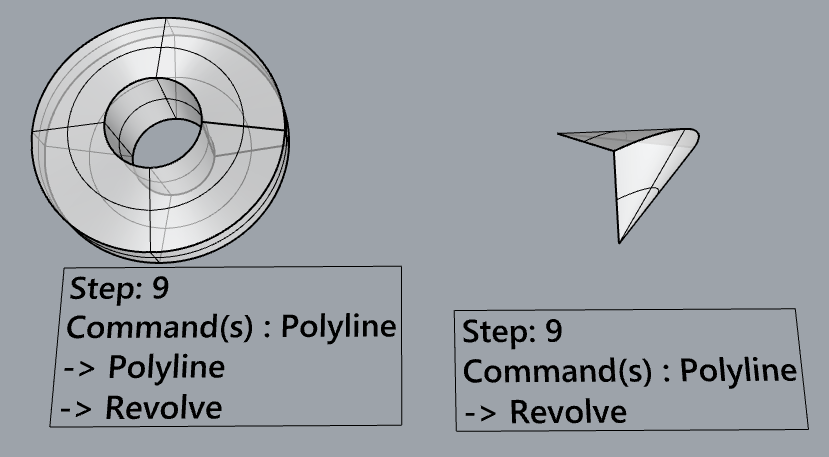
- Revolve
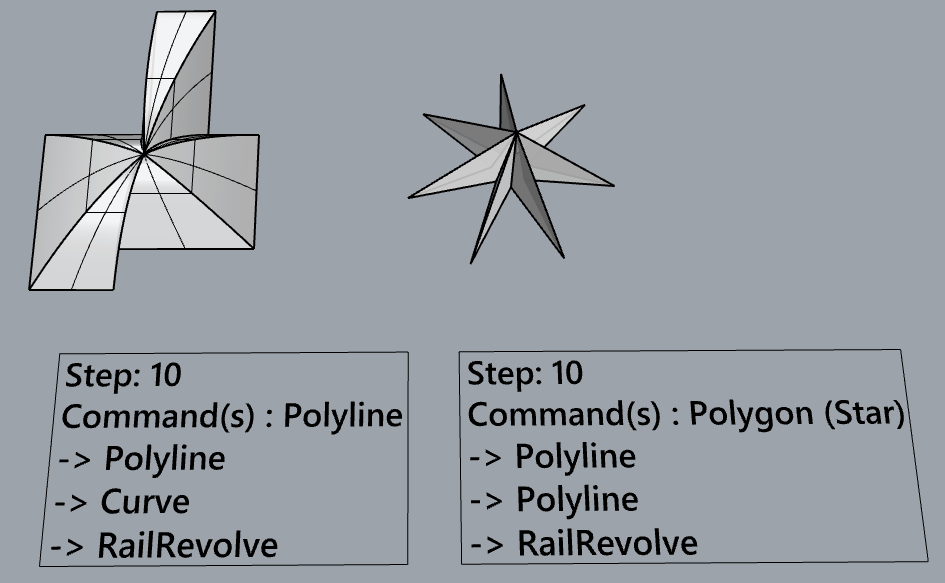
- RailRevolve
- Add a link to your FirstnameLastname_Surfaces file at this point in your post.
Link: https://handandmachine.org/classes/computational_fabrication/wp-content/uploads/2024/09/NathanRowe_Surfaces.3dm
Part 3: Solids
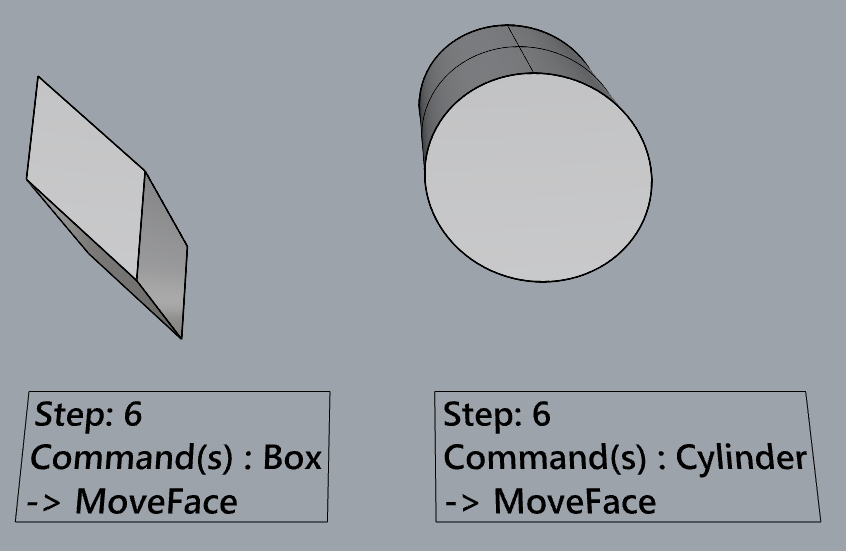
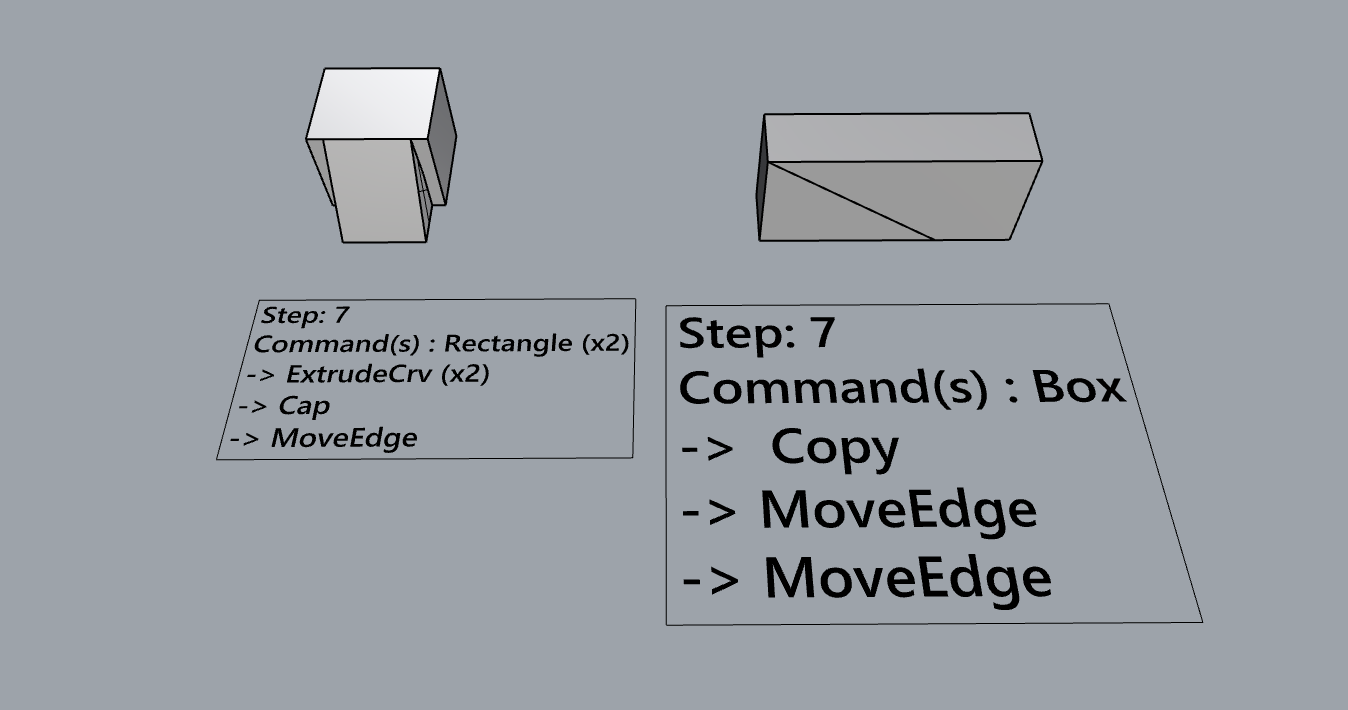
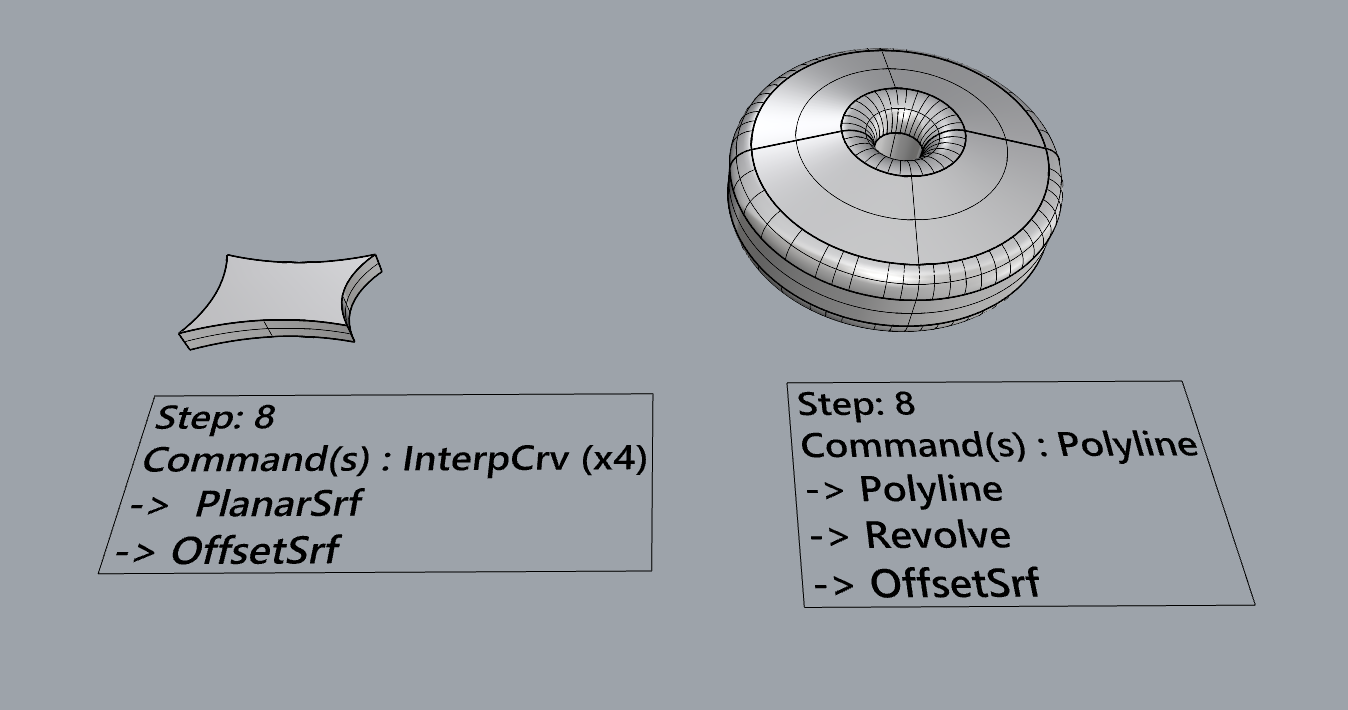
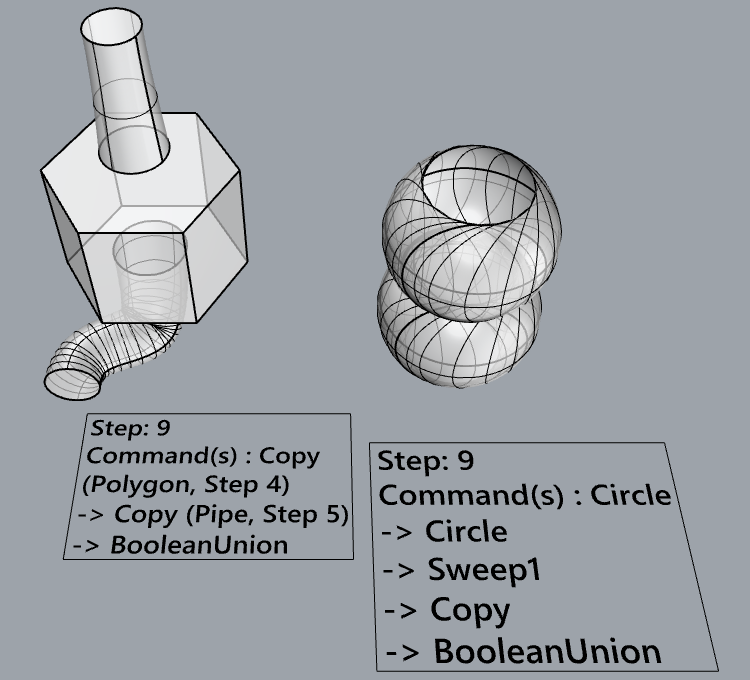
Open a new Rhino File and practice the solids commands below by making two different solids for each command. You may want to use some of the curves and surfaces you modeled in Parts 1 and 2. Organize your Rhino file so each step is clear. Use the Text command to label each step and the commands you used.
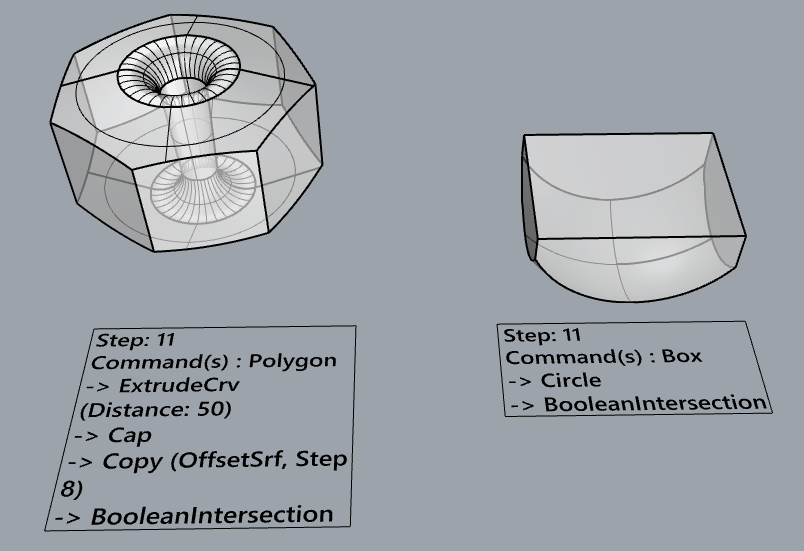
- Box

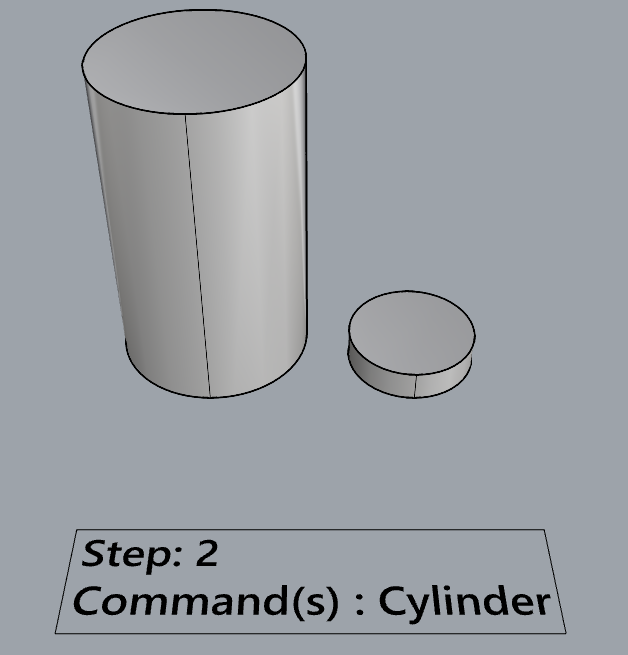
- Cylinder
- Sphere

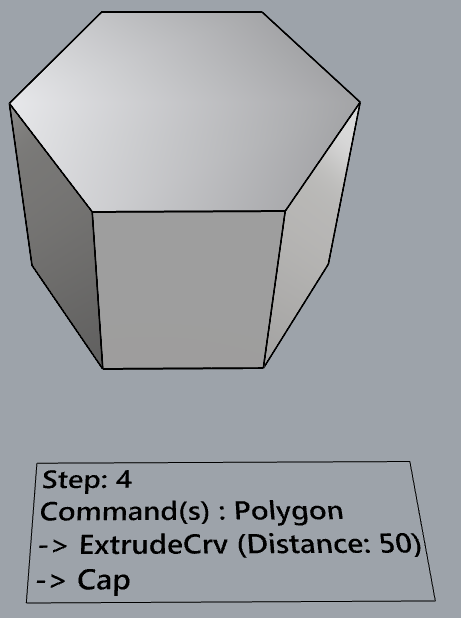
- ExtrudeCrv and Cap
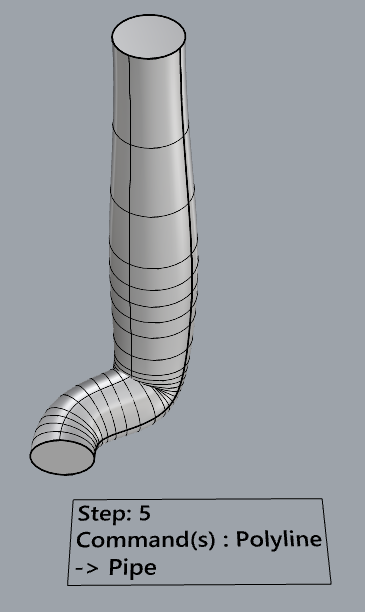
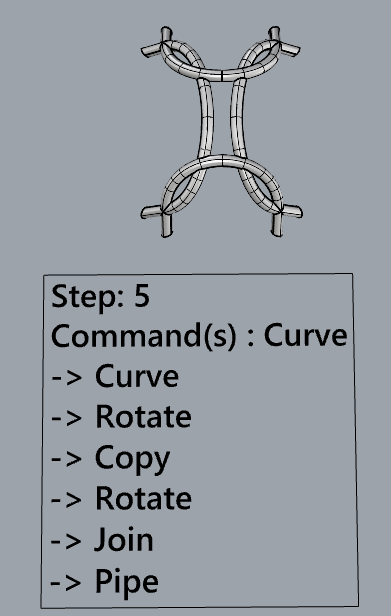
- Pipe
- MoveFace
- MoveEdge
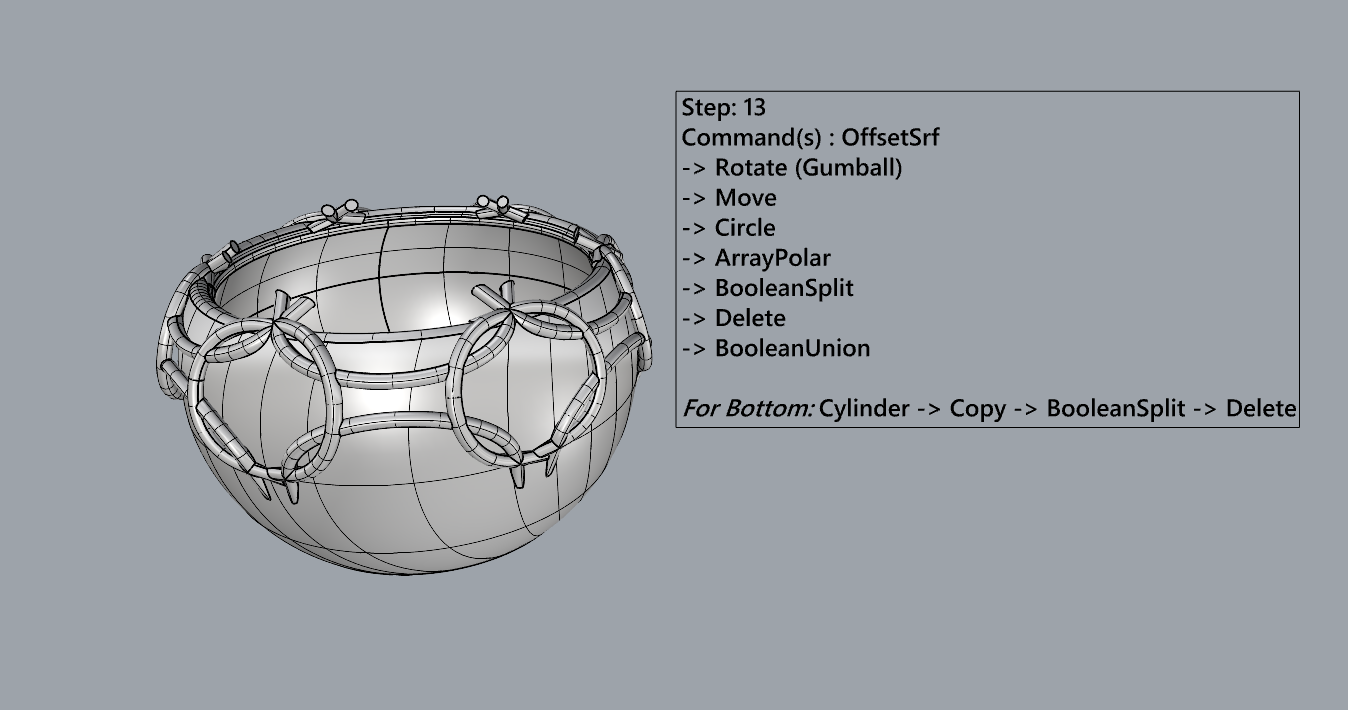
- OffsetSrf
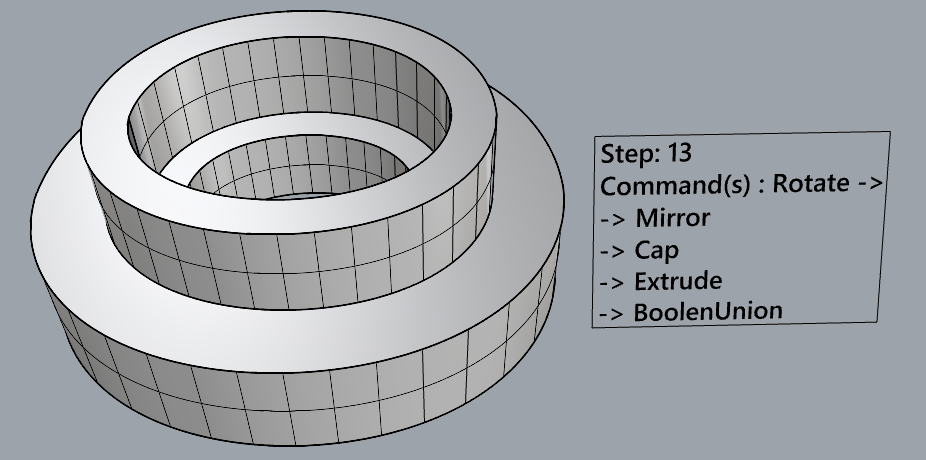
- BooleanUnion
- BooleanDifference
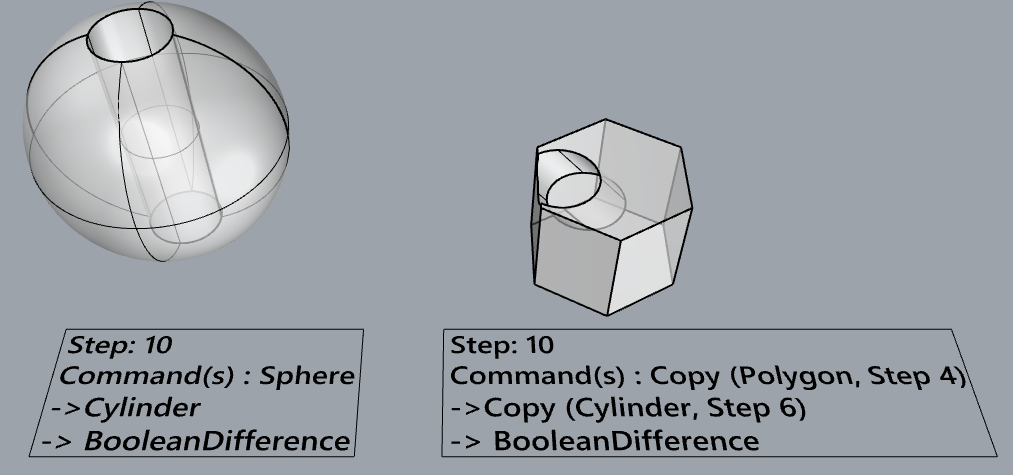
- Boolean Intersection
- BooleanSplit
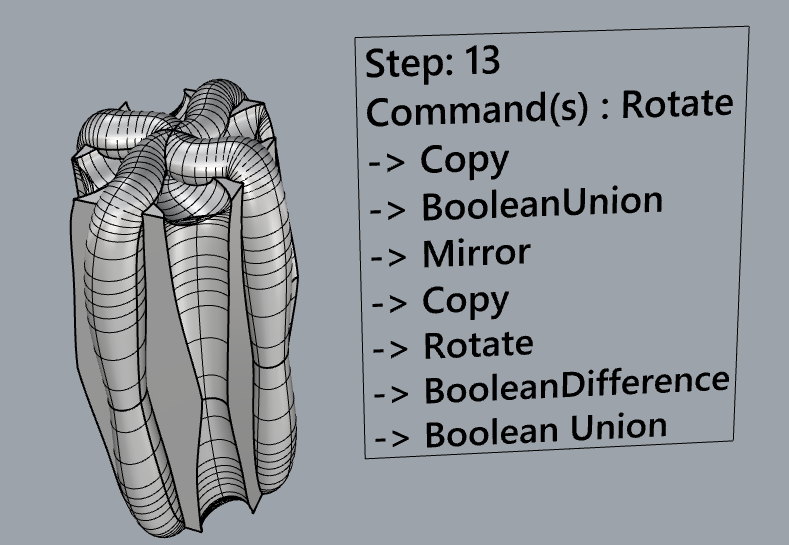
- Using the surfaces and solids you modeled and the Boolean tools, make three solid shapes you find interesting.
- Add a link to your FirstnameLastname_Solids file at this point in your post.
Link: https://handandmachine.org/classes/computational_fabrication/wp-content/uploads/2024/09/NathanRowe_Solids.3dm
Part 4: 3D Printing
COMING SOON! FINALLY HERE!!!
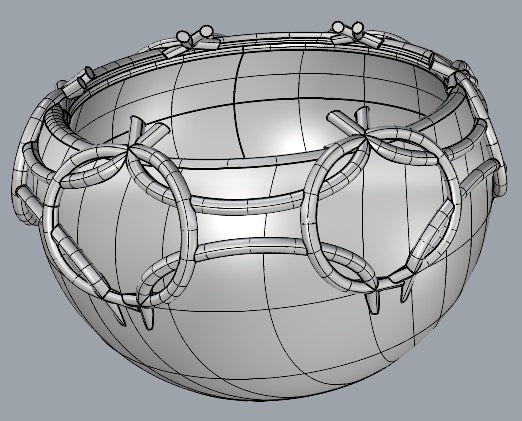
I decided to print the second interesting object I created in part 13 of Solids (we’ll just call it The Pot (trademark pending) moving forward). The interesting part about printing this object with our extrusion printers was that an extensive amount of support structure was needed both inside and outside of The Pot to print the decorative pattern. This is for two reasons:
1. The decoration is not completely attached to The Pot. Therefore, the circular patterns in particular are floating.
2. The decoration hangs into The Pot, so support was needed inside as well.
These requirements provided a unique challenge: optimize the support structure in settings to give a reliable print while ensuring that the structure won’t be a pain to remove from the finished model. Given the design of the decorative portion, I decided that using Tree supports would work best. 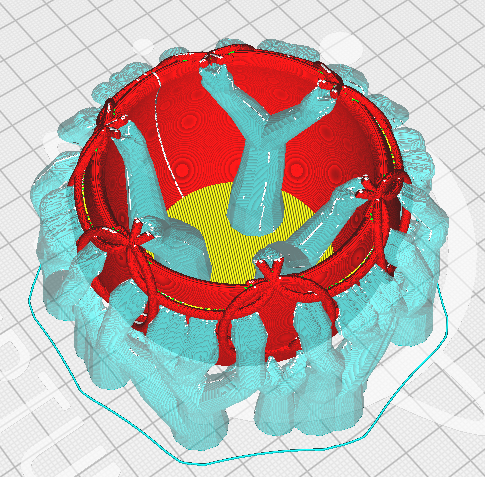
To start, non-default settings that remained persistent with all print attempts:
1. Infill: 100%
2. Layer Height: 0.1mm
3. Infill Pattern: Concentric
Many initial print attempts failed, and the main reason is as follows: At least one support structure would fail to stick at some layer, catch on the nozzle, and take other supports with it. But what could the cause be?
When generating support in Cura, there is a plethora of settings (with default values) that are initially hidden from the user. Importantly, Support Wall Line Count and Support Density are hidden.
Support Wall Line defines the wall thickness of supports by defining the number of walls at each layer. More of these should help make sure consecutive layers have more space to be extruded on. The default value is 1.
Support Density defines the infill for supports. Having at least some density will help make sure these tree supports will print consistently. The default value for this is 0%.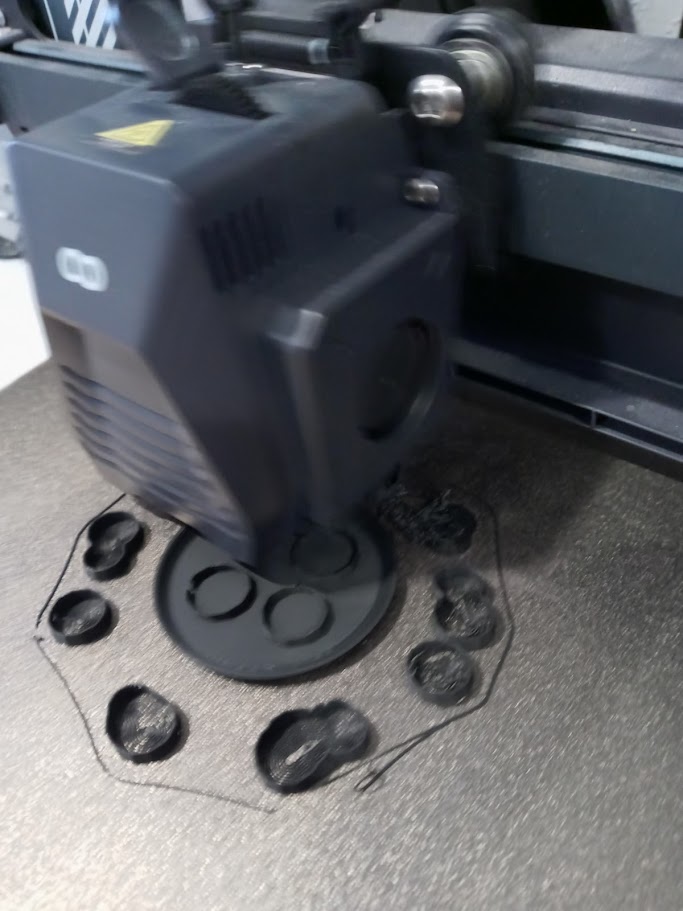
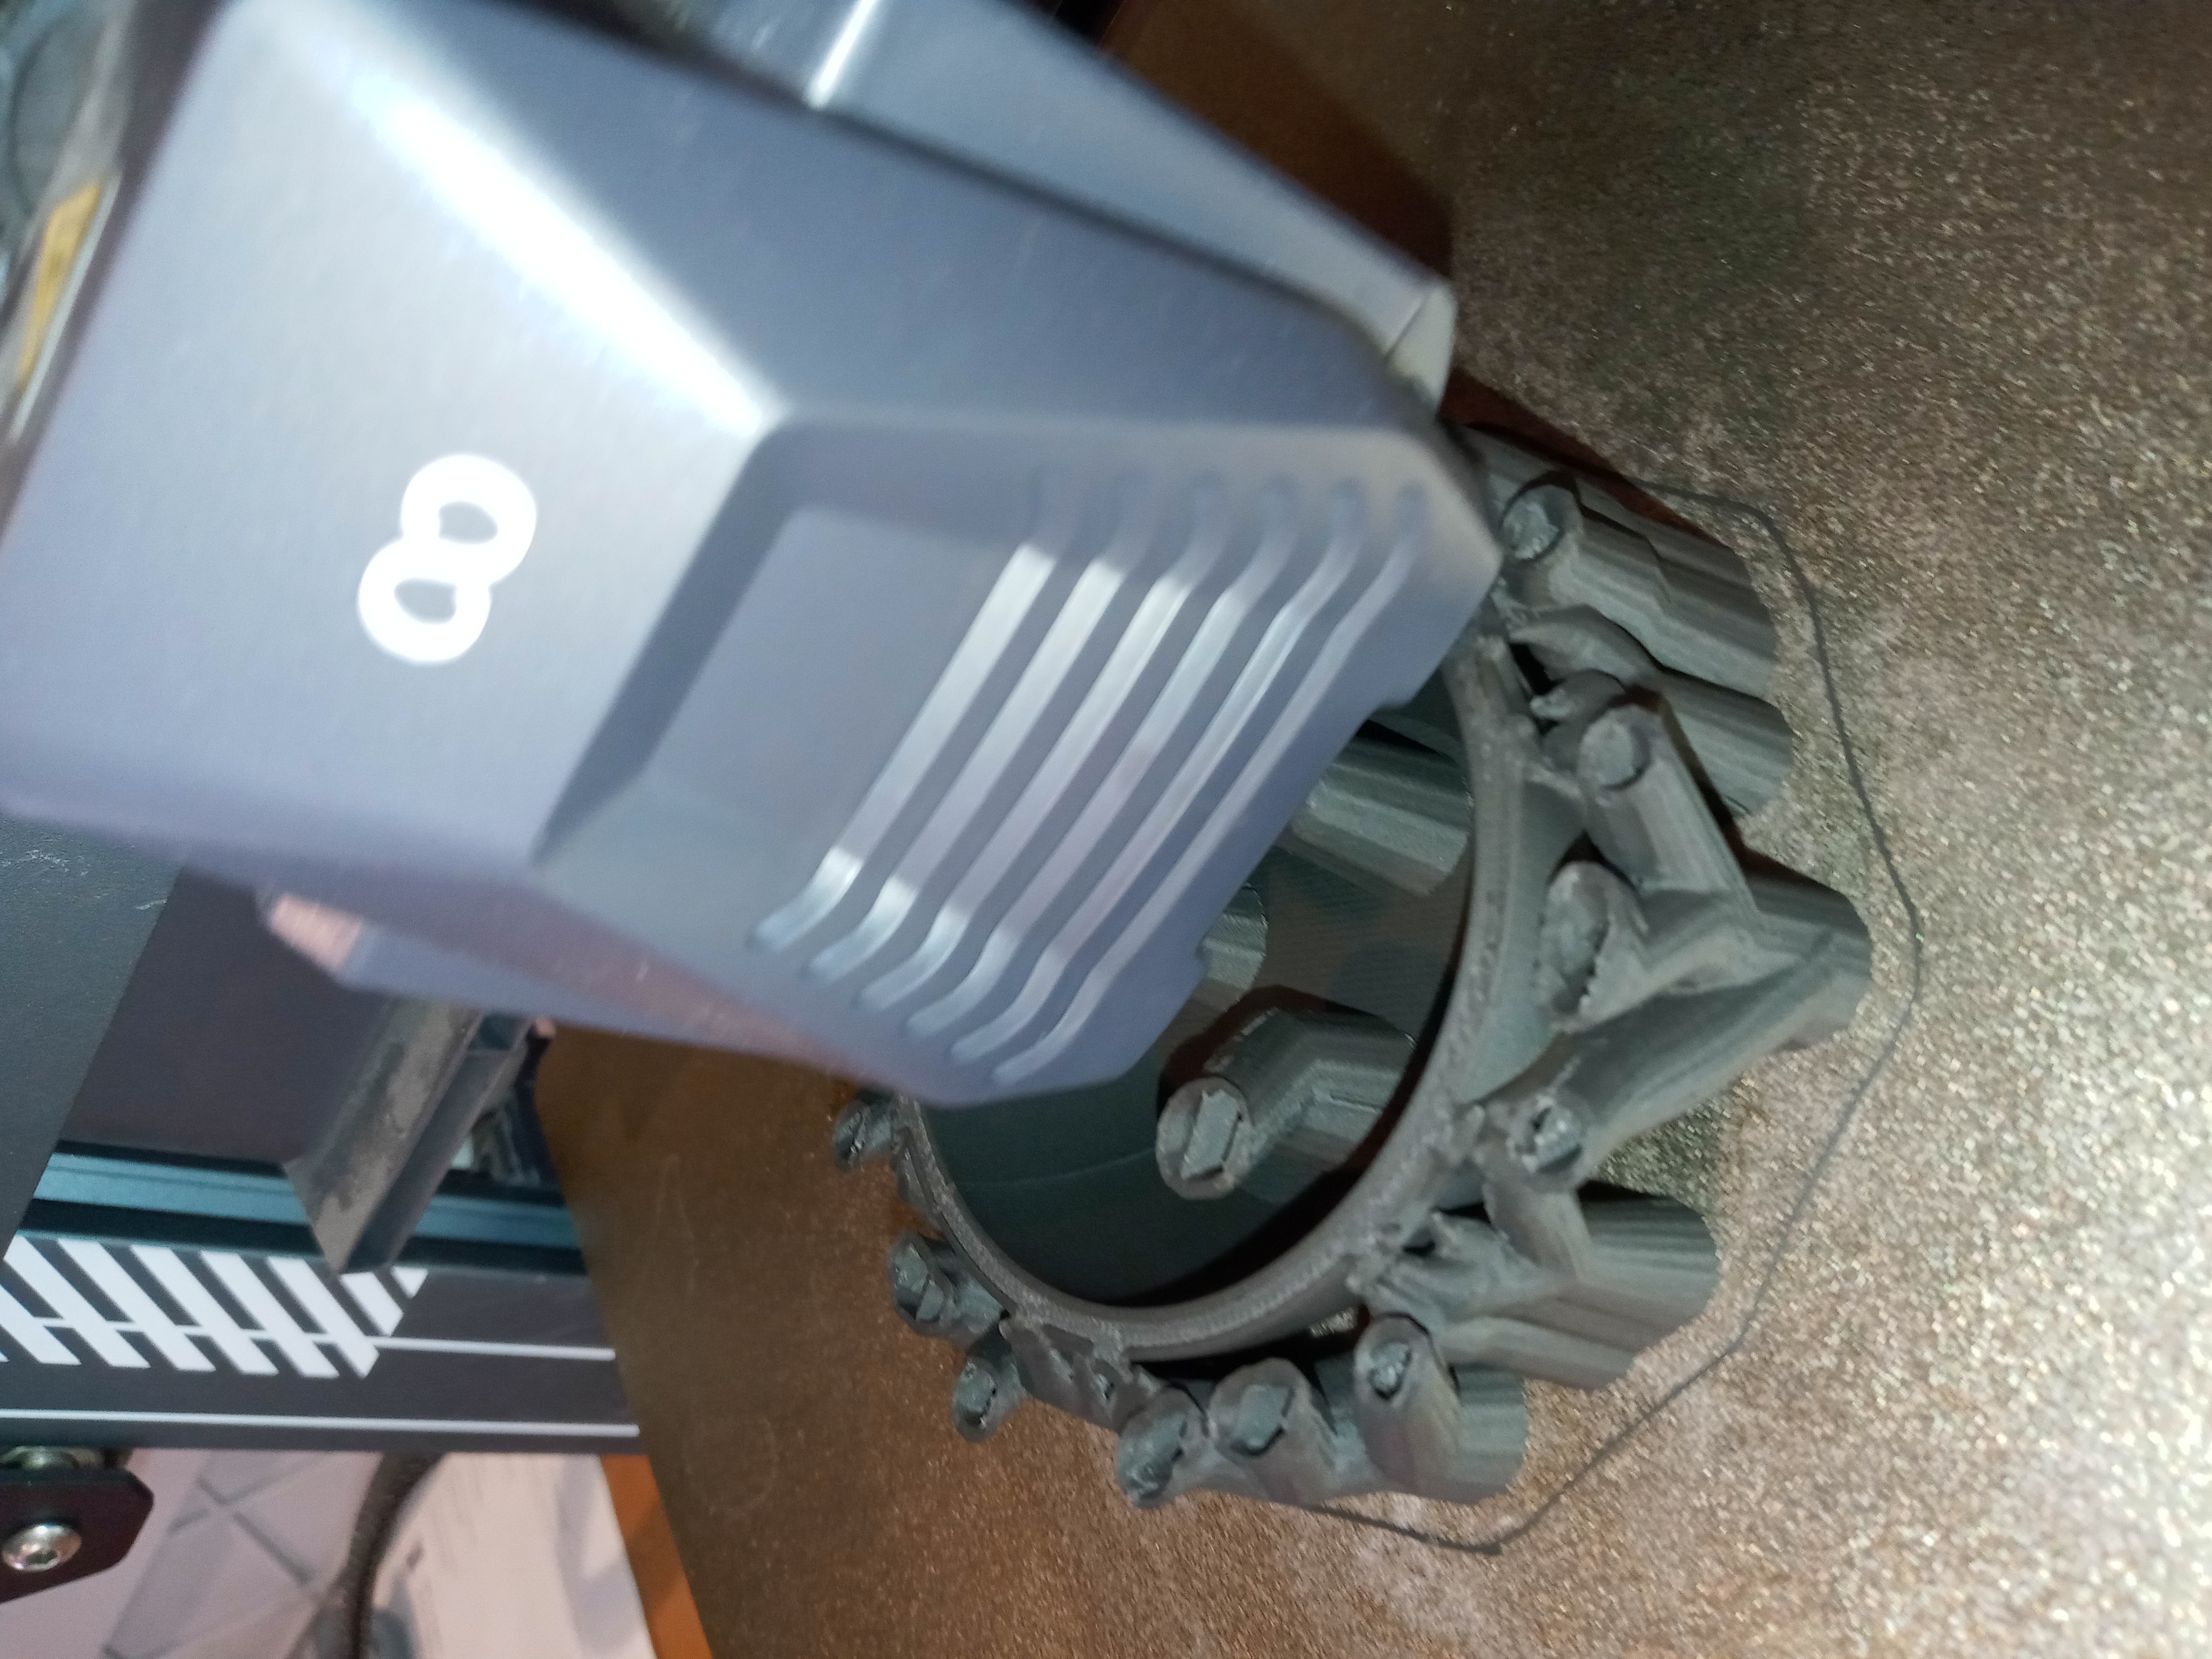
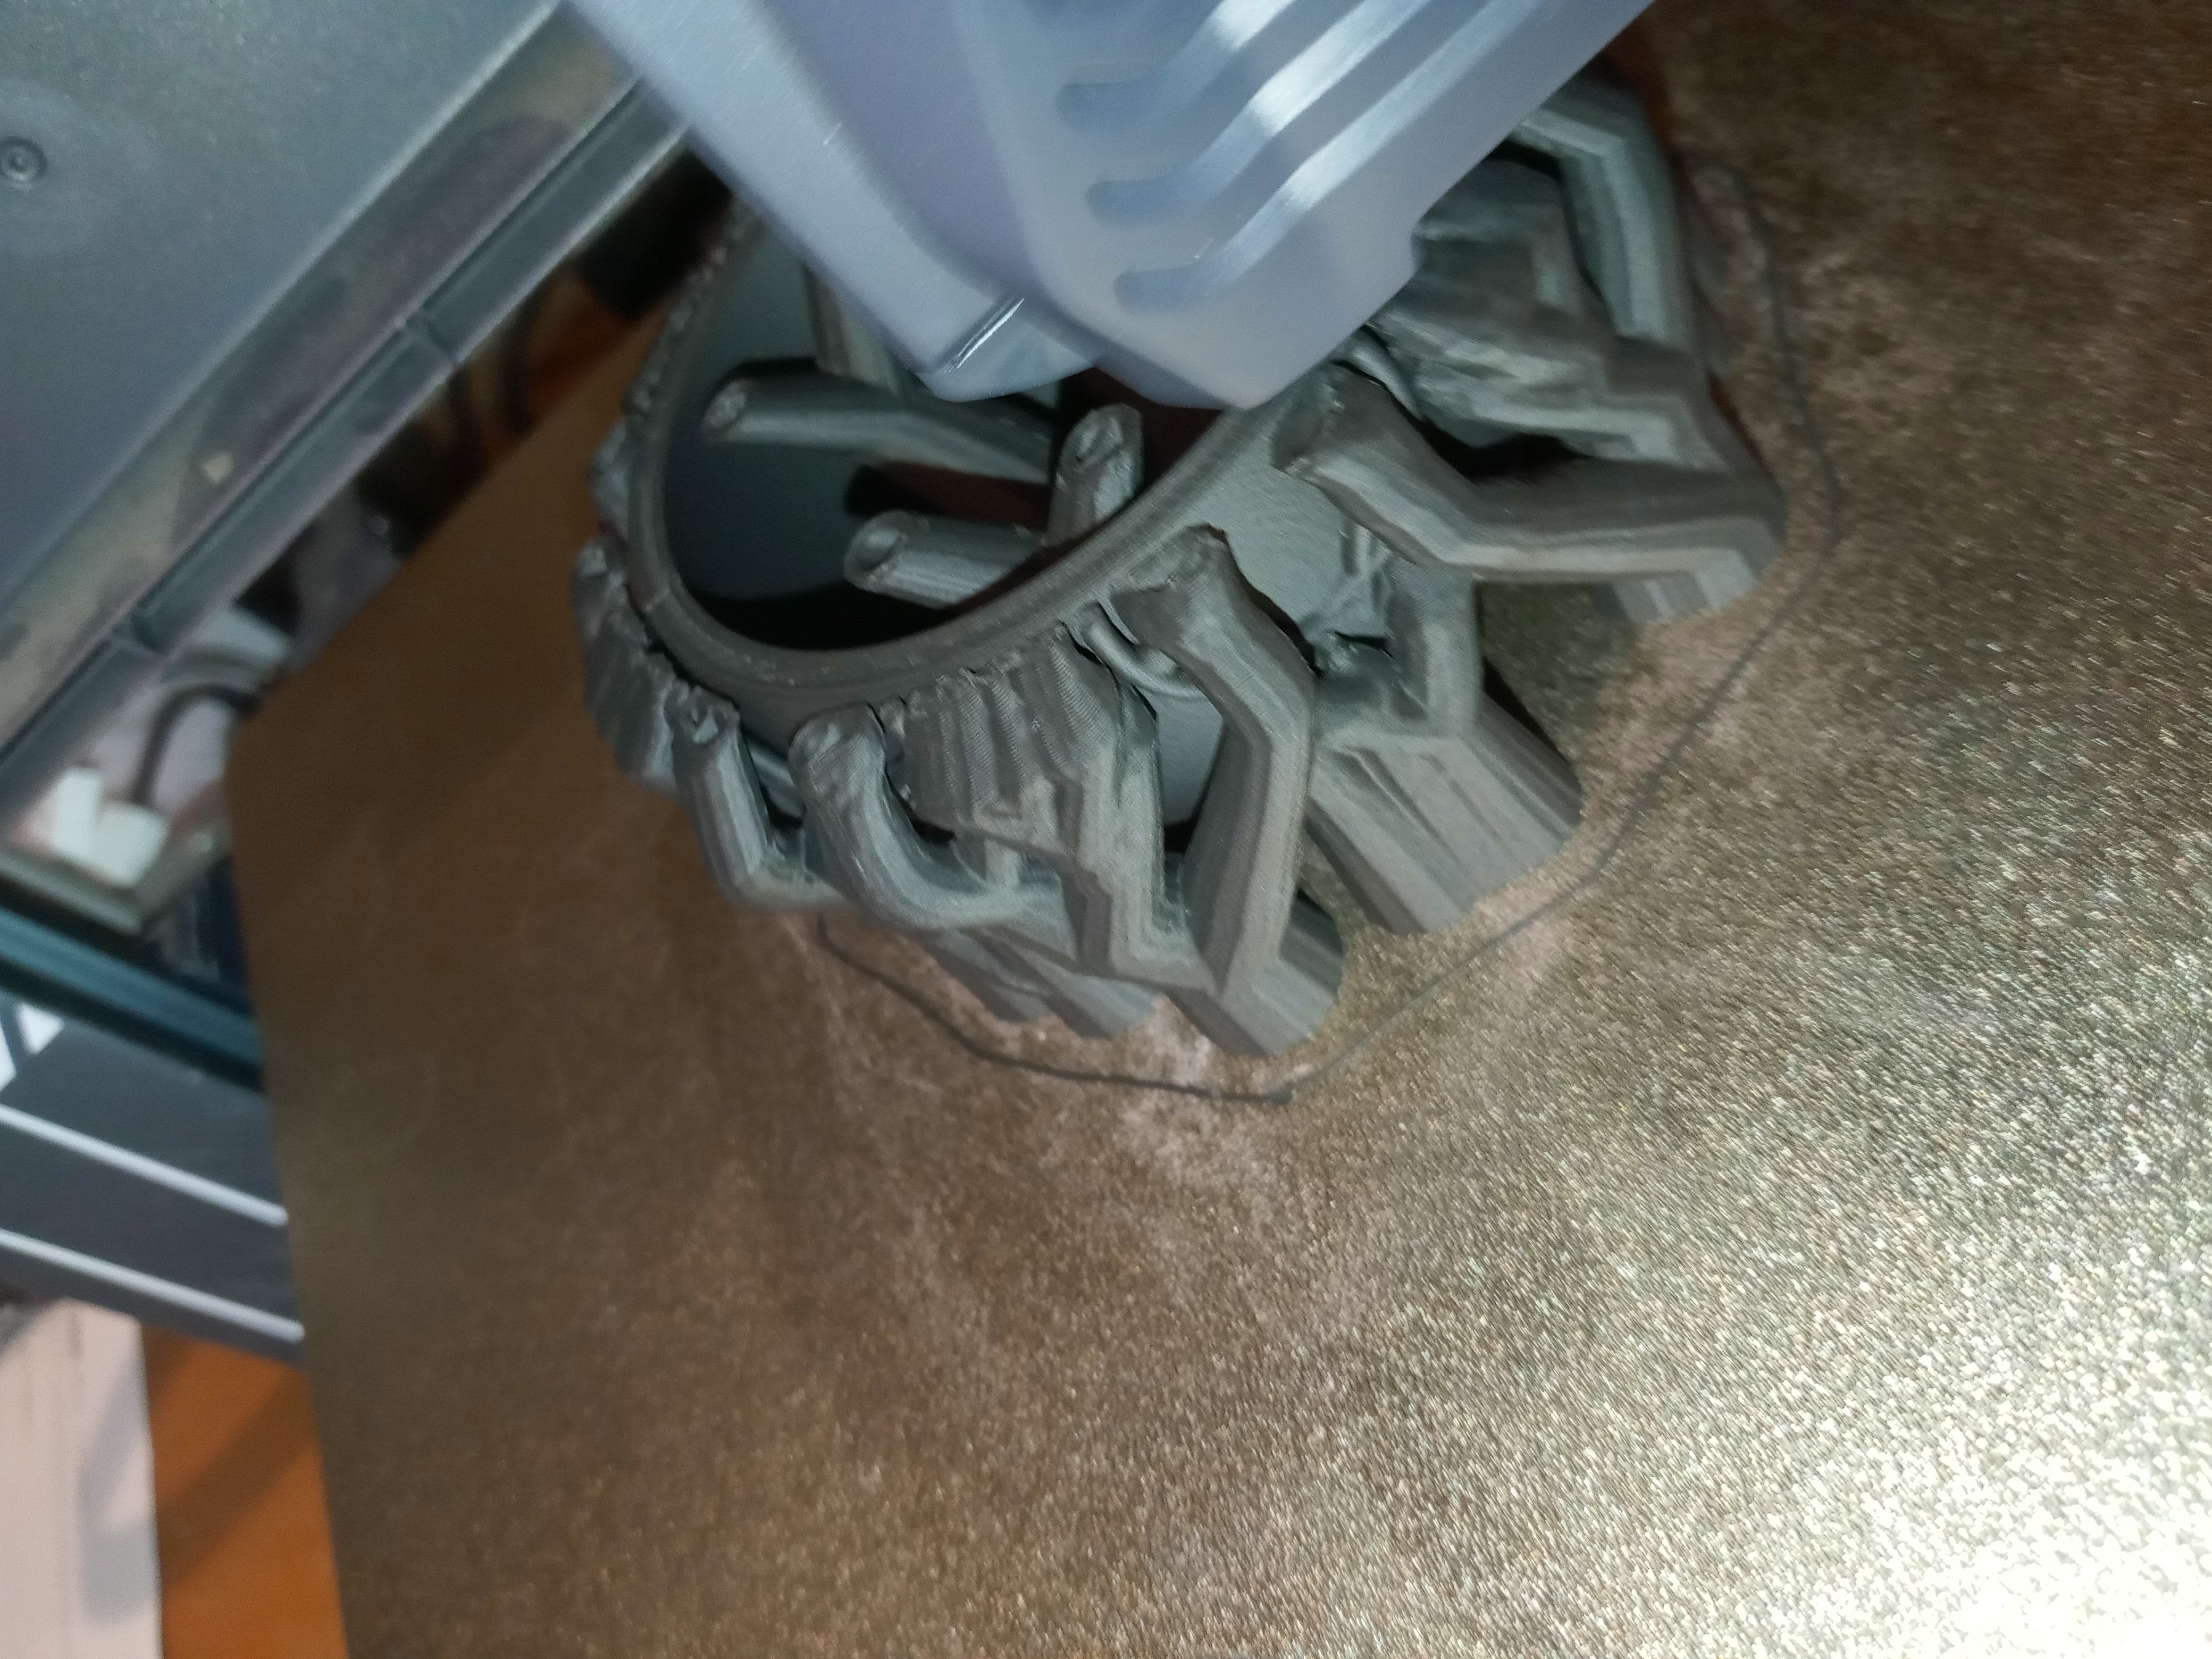
This combination of atrocious settings was the source of every failed print. Changing Support Wall Line Count to 2 and Support Density to 10% resulted in the support structures printing without error, check out the progress of it: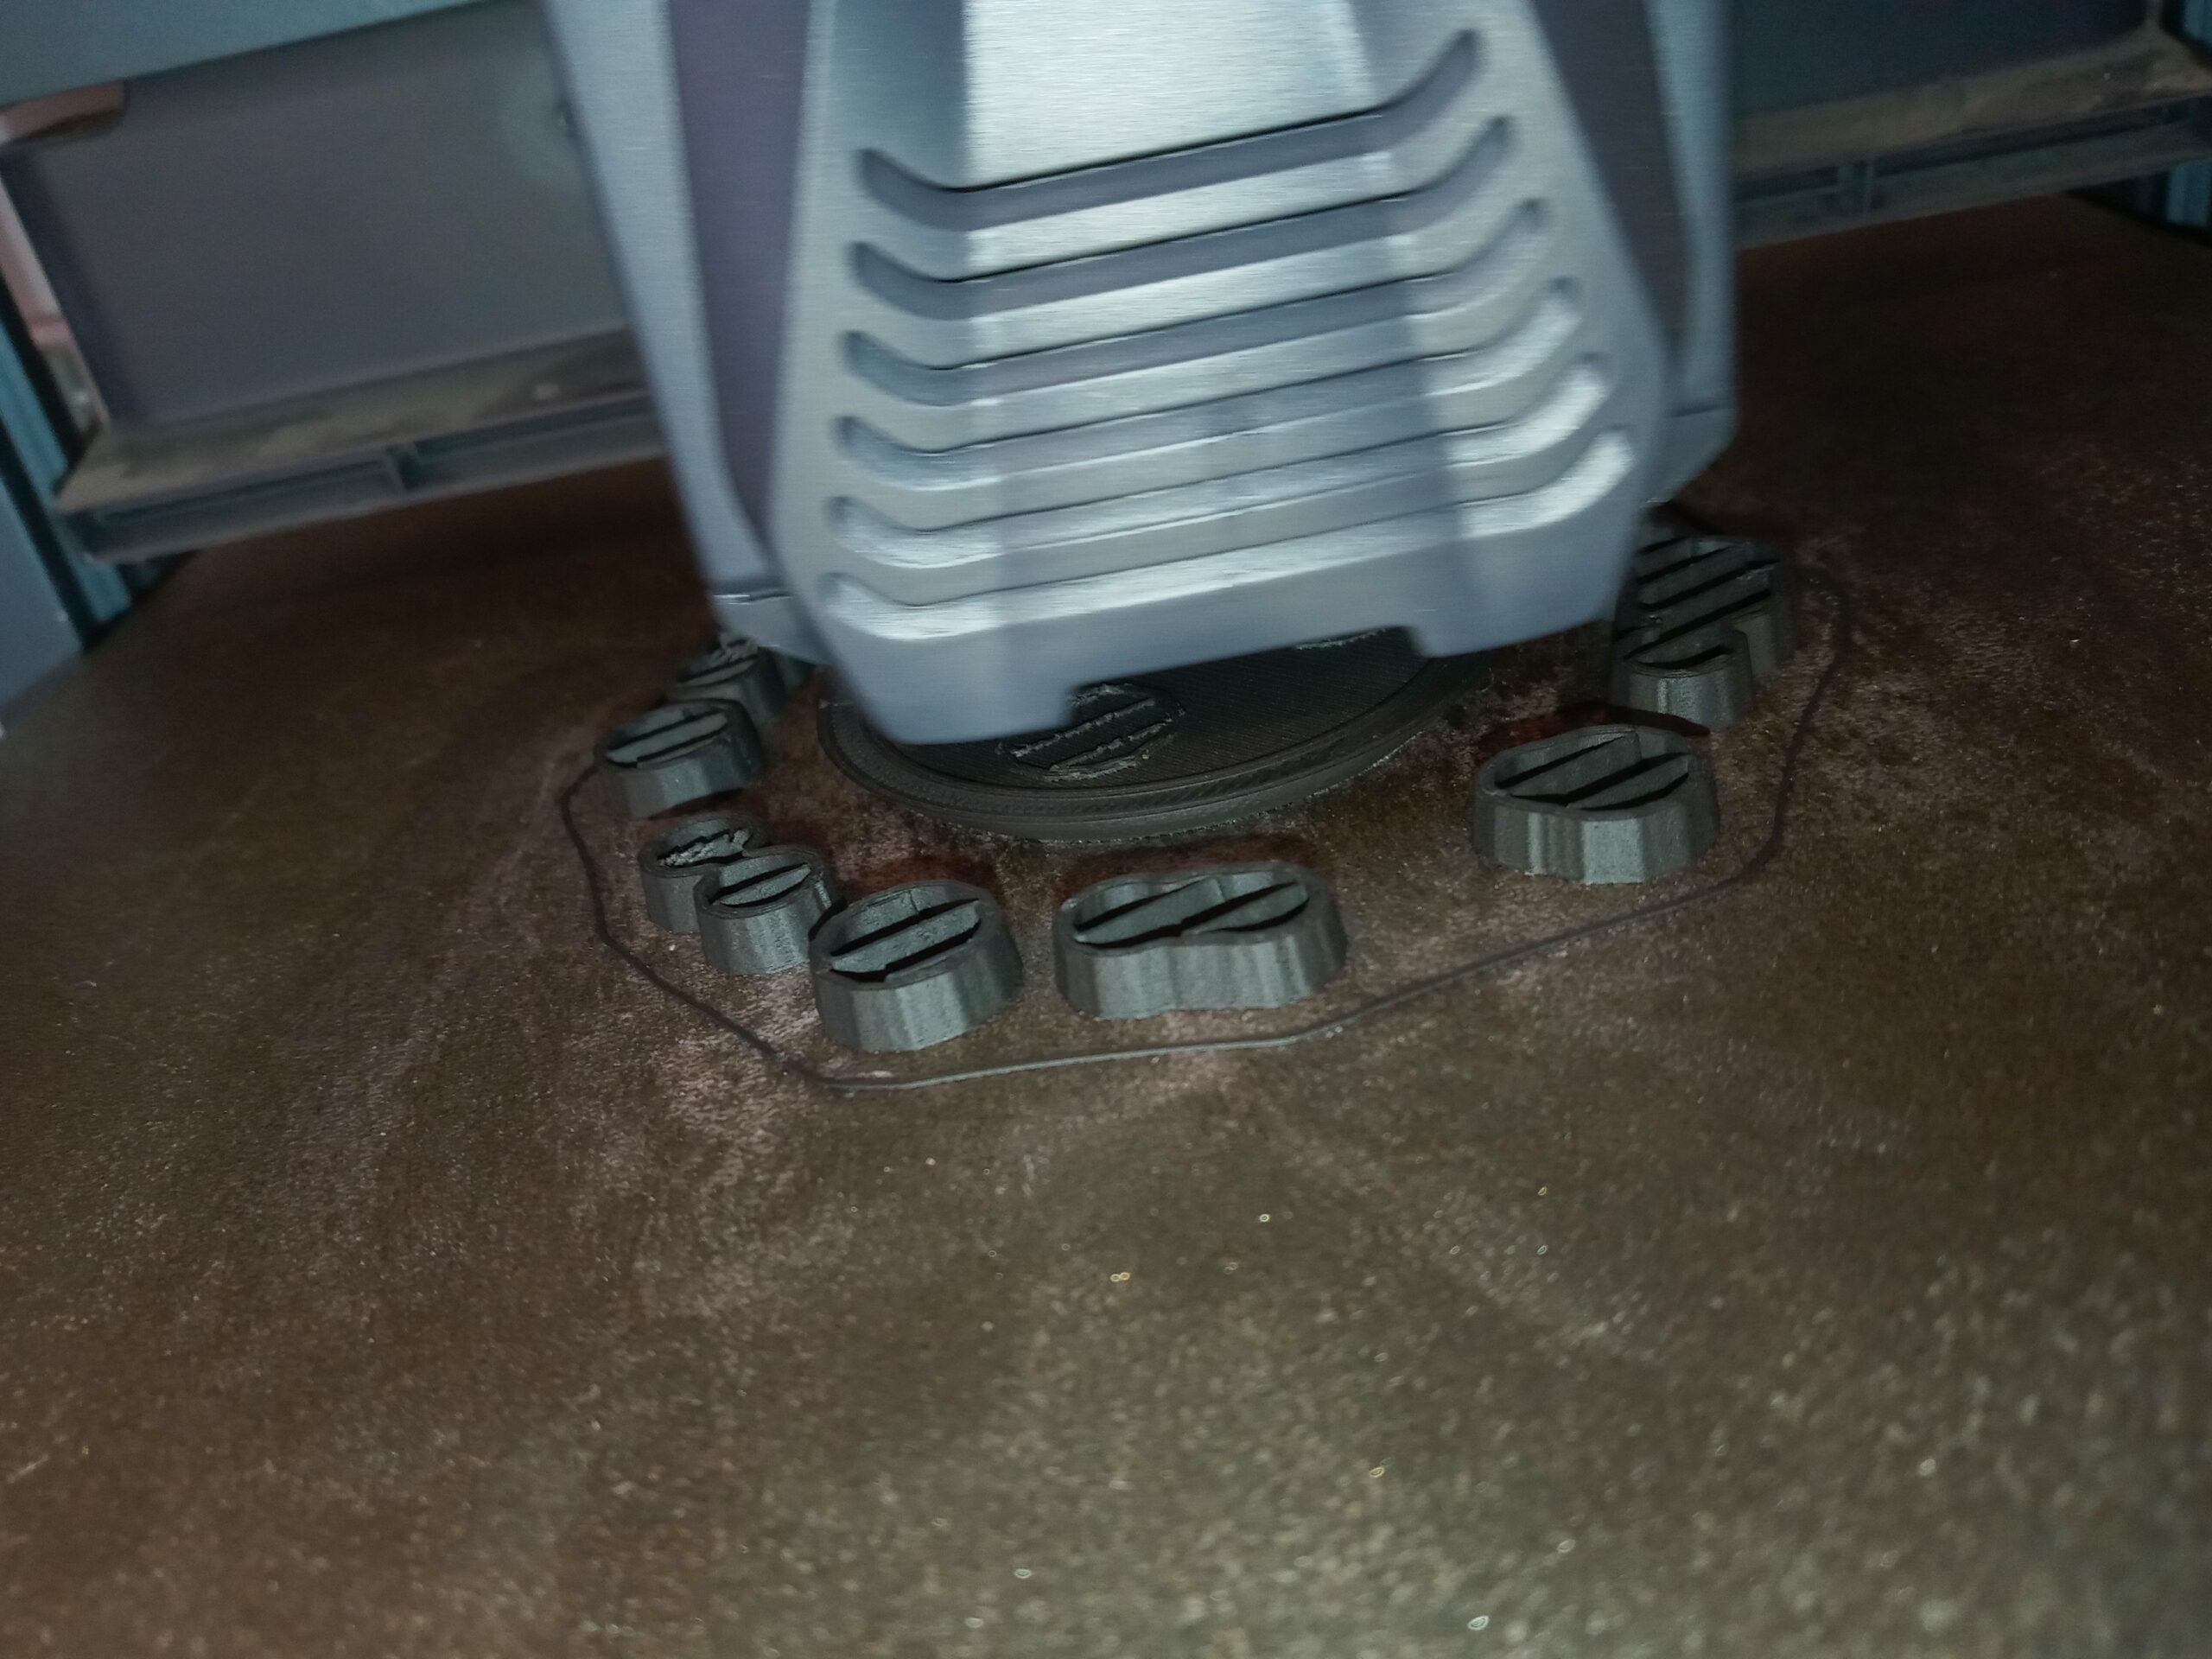
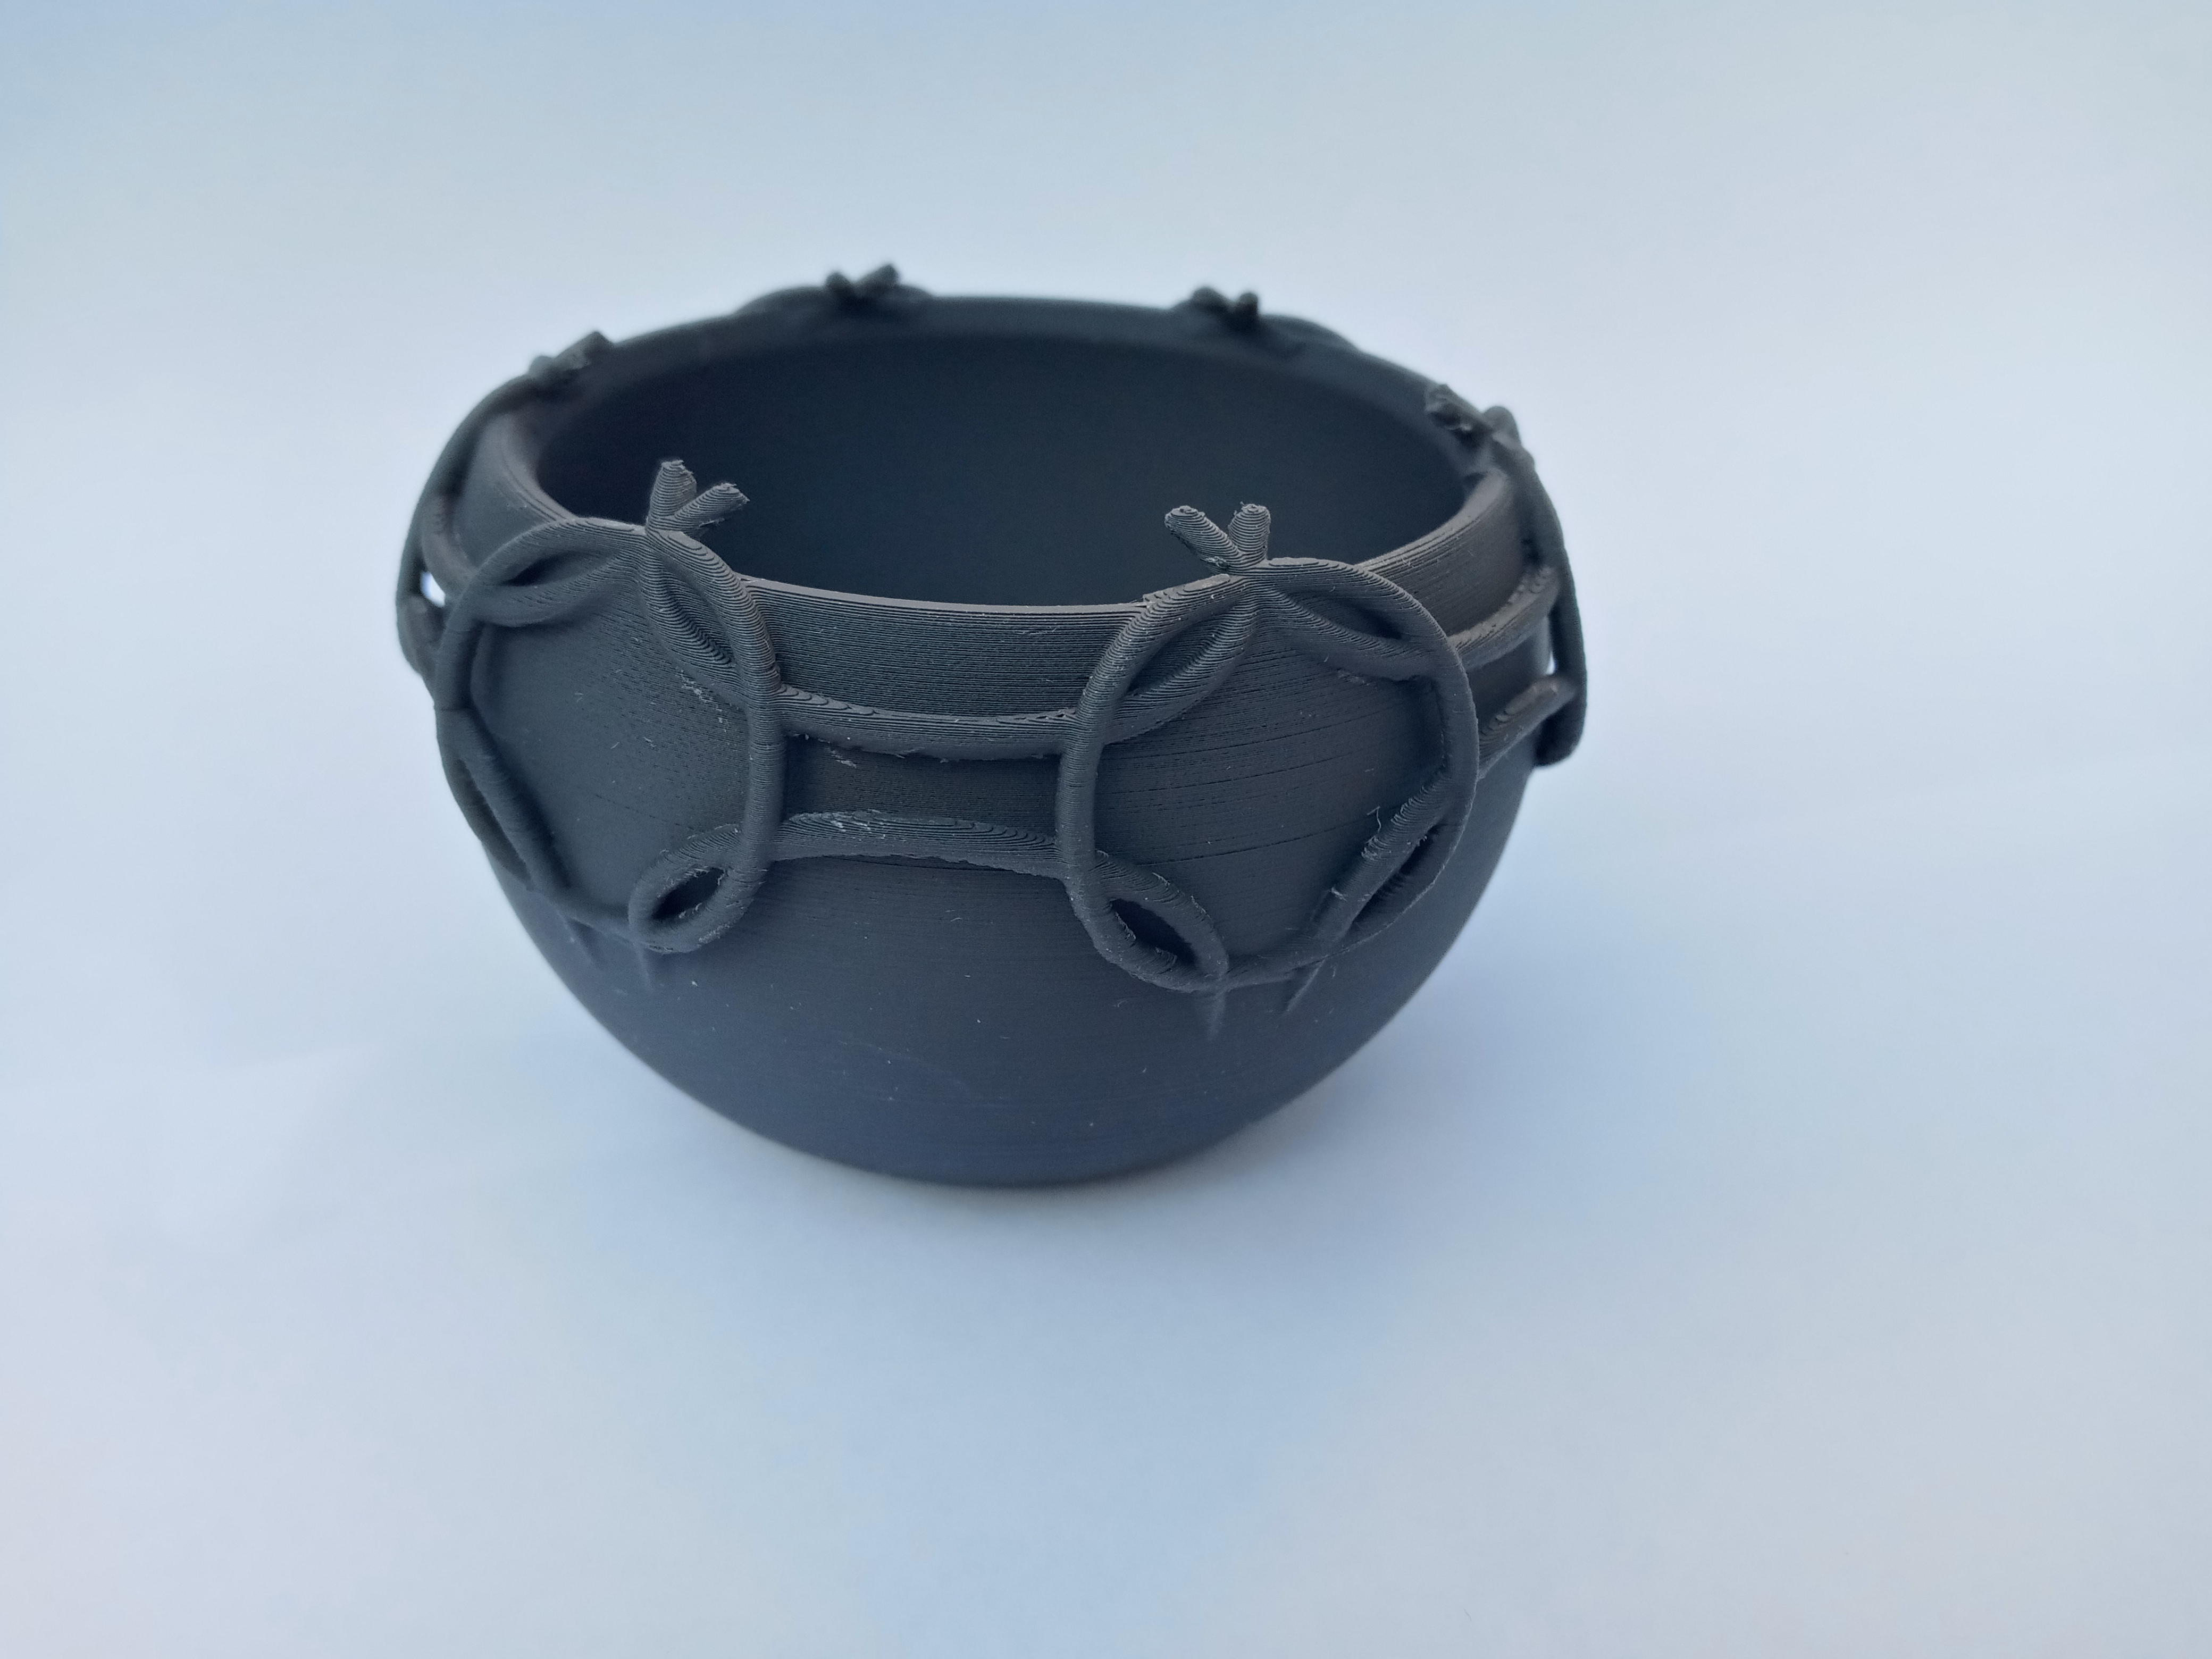
The Finished Print (without supports):
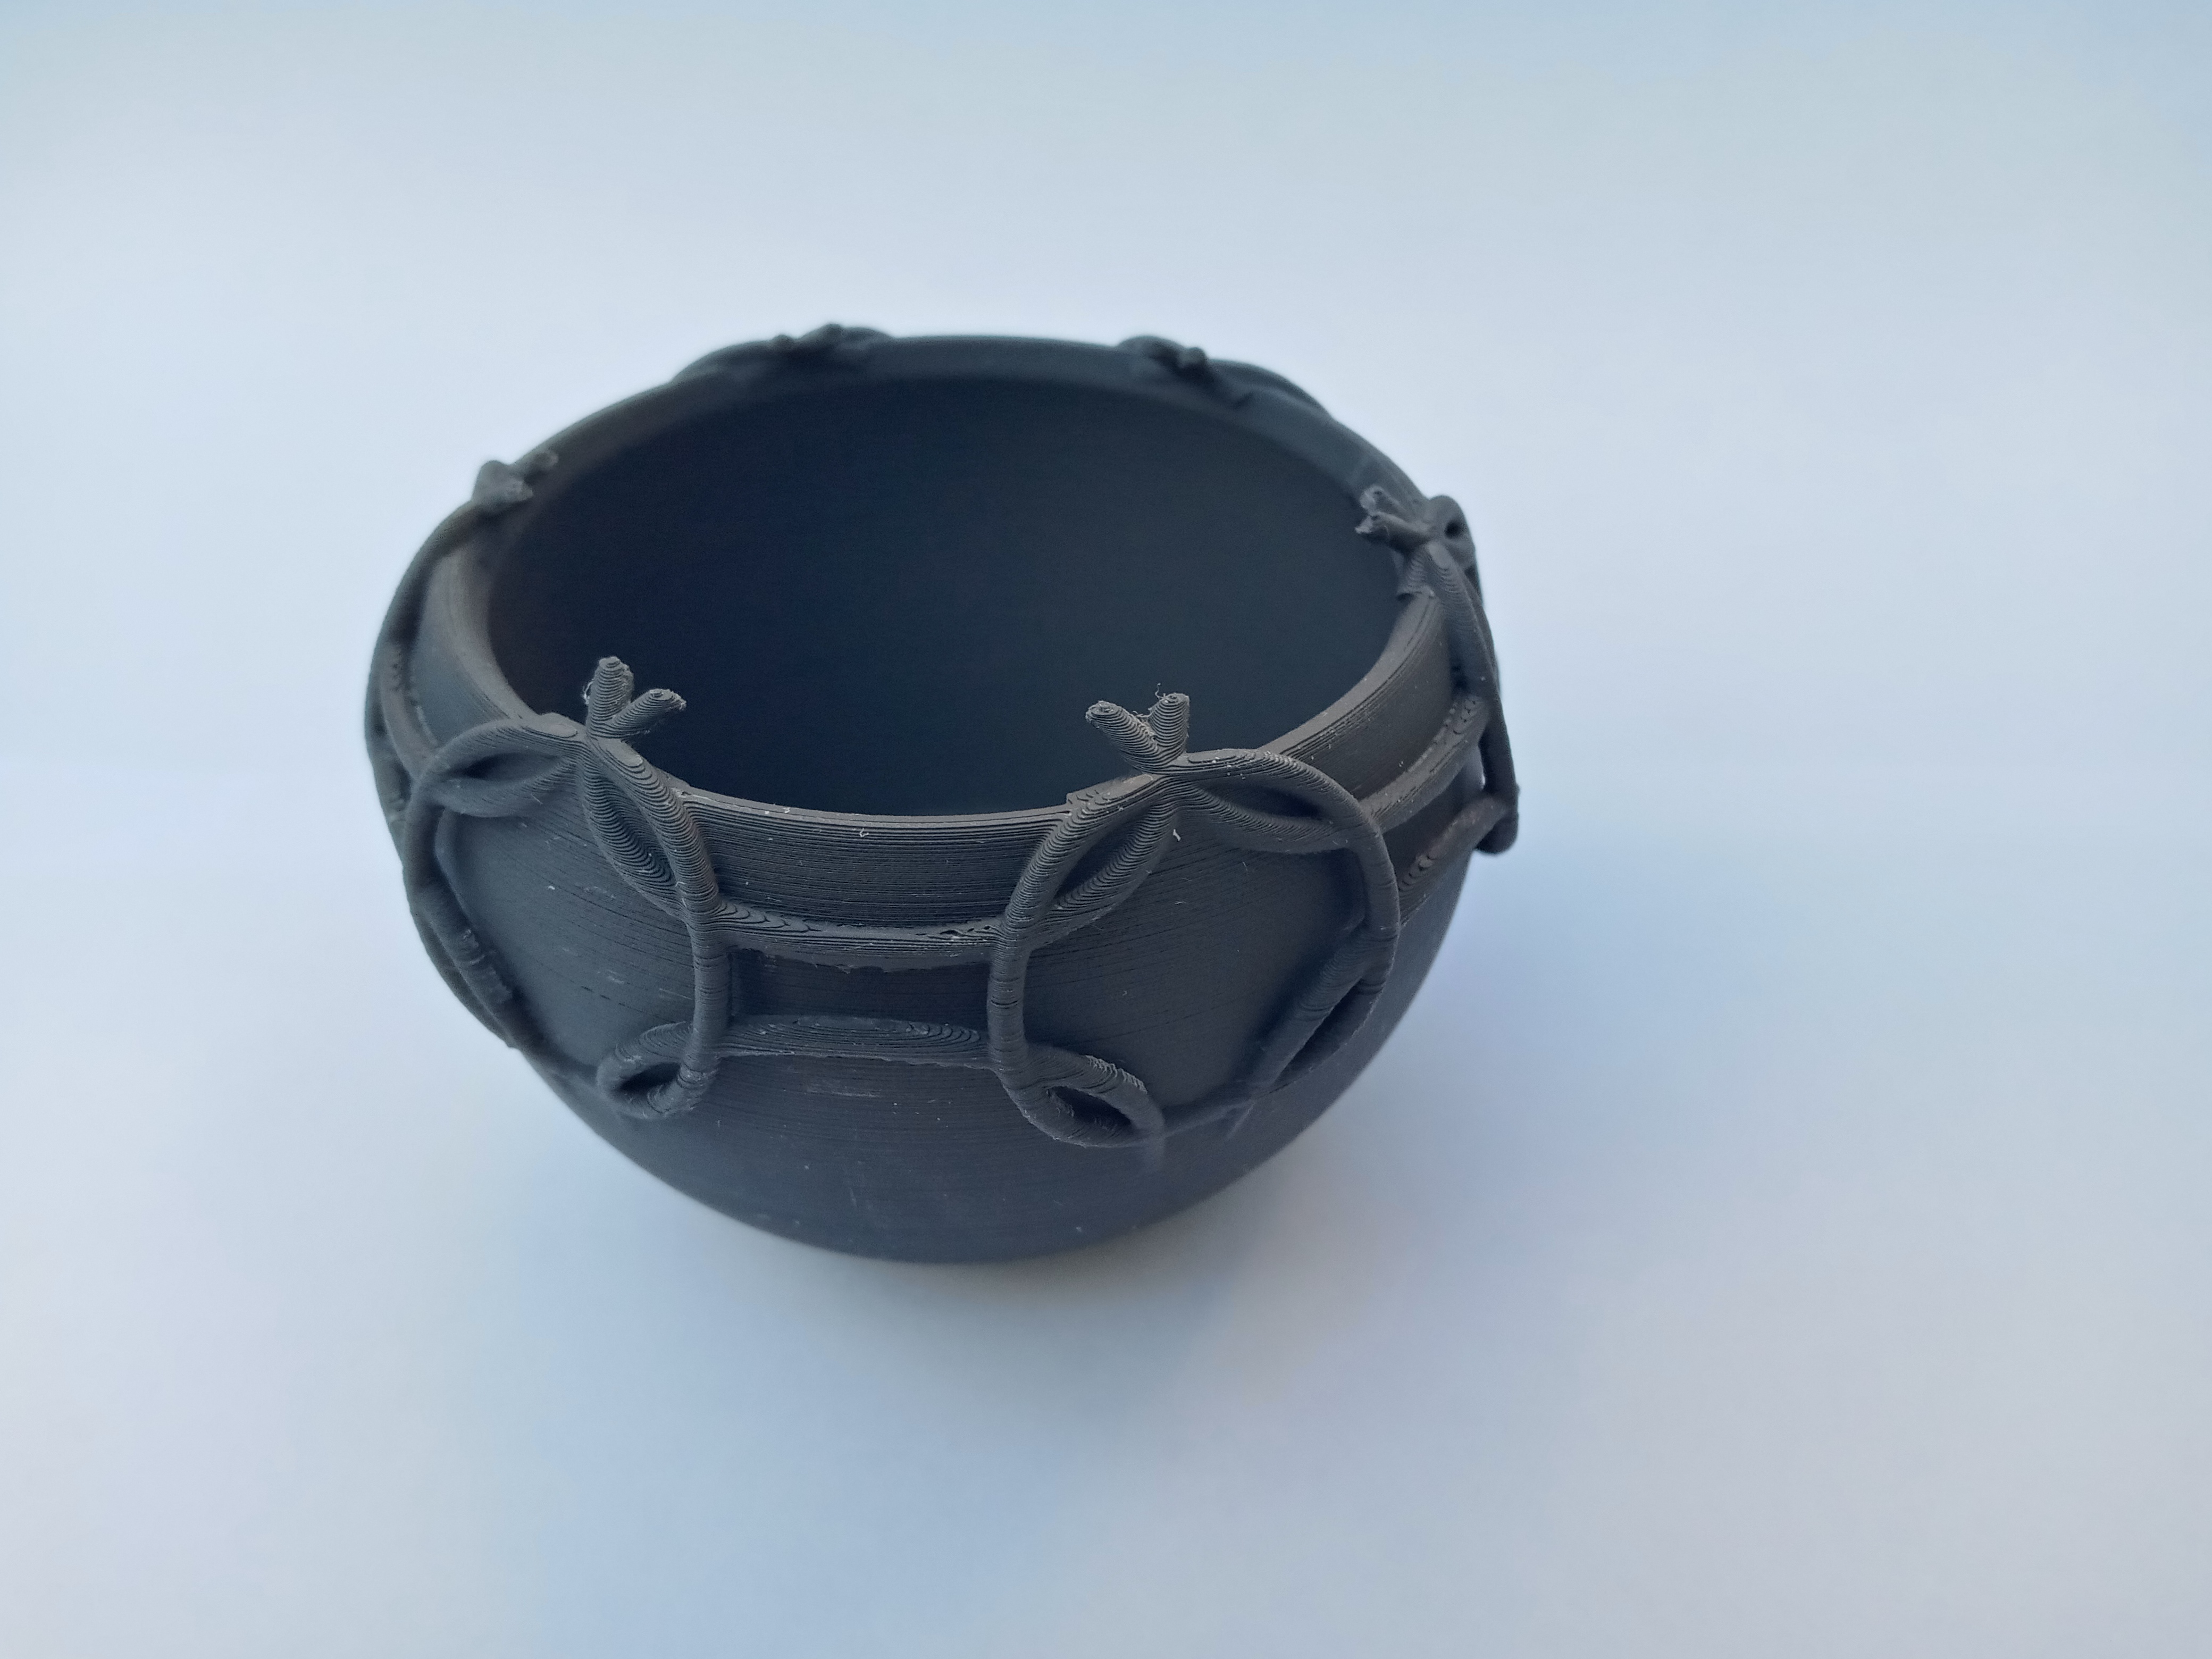
Hi Nathan,
I really enjoyed going through your post! Your surfaces and solids are way more intricate than what I created. My favorite of your designs has to be your “second interesting shape”—the one you highlighted. The design of that solid is really cool. I love how the pattern wraps around the bowl-like surface; it gives me the impression that, depending on the orientation, it could either make for a sleek bowl or, when flipped, some sort of futuristic helmet. I noticed you mentioned your 3D print is coming soon—I’m curious if you’ll be printing this bowl-like shape. If not, I’m excited to see what you end up creating!
Hi Nathan,
Your print is awesome and cam out very well. I had come to your post originally when you print was “coming soon”, and I came back to look. Your third large object you created is also very interesting, very cool design. Thanks for sharing all the detail you did, it definitely give a good sense on how to use the commands.
I’m glad you were able to get he print to work, its a very pleasant delicate design. I applaud trying to get such a small fragile design to print properly I didn’t know that Cura had settings for structural support, my previous experience with 3D printers just sort of infilled ground below the structure, very unlike the branching tree structure Cura comes up with.
Hey Nathan,
I love the final product you printed! It looks sort of eldritch, kind of like a witch’s cauldron, and the pictures with the supports make it look even more uncanny. I also like the high definition of the print. I would love to have a larger version of it as a Halloween decoration.