Introduction
Rewind a few months, and our class is in the middle of finishing our Data Physicalization assignment, but one student is unable to get the bump map code working no matter how much he struggles with it. The battle was lost but the war was not, but that student would set his sights on building and exceeding that bump map visualization for his final project. Of course, that student was me, and through persistence I wanted to get what I thought to be a super cool data visualization working. I decided to combine that desire with one of my biggest interests, astronomy, and from that the idea was born to physicalize the planets and moons in our solar system from data alone.
My goal was to accurately size the bodies in the solar system so that they could be compared to one another, but still have them retain their interesting features to make them recognizable. Figuring out how to print these spherical objects using a FDM printer was a large part in maintaining these features. In short, the project was about transforming displacement map data from the 2D plane into a 3D sphere. This sphere had to retain the features and size necessary to be recognizable, but also printable. Many different materials and methods were used in the pursuit of this, but this required many different tests.
Background Research
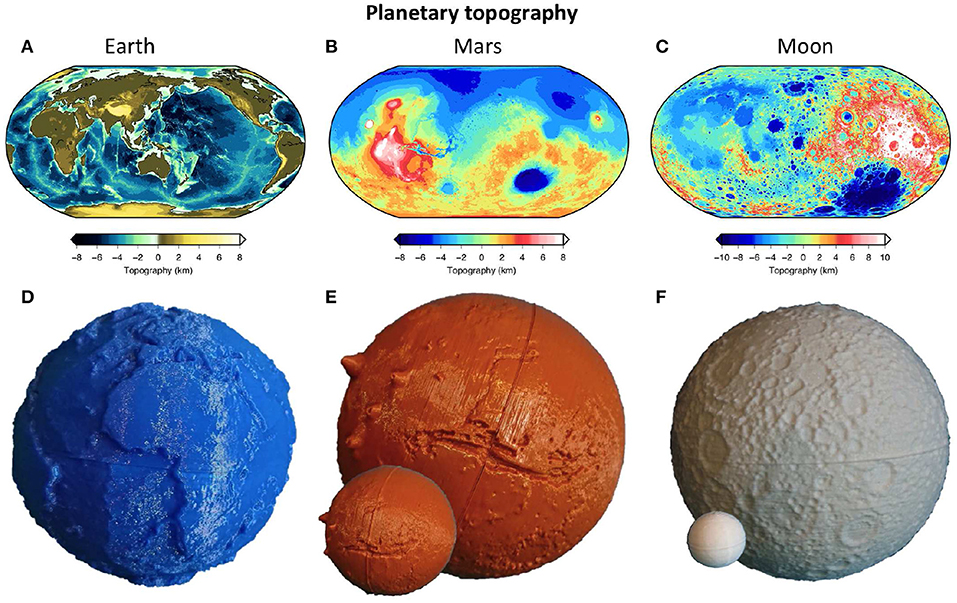
There are many different research projects I pulled from for different facets of this work. For the data portion of my project, much of my work relates to a study I found from Frontiers here. This study discusses developing topological data maps into 3D representations of the planets. It also discusses some of the methods used and how that unique visualization benefited certain use cases such as education. In our class we’ve specifically used Rhino as our modeler of choice, and to that end some of my wrapping techniques in the project stem from some of the advice and research found from Rhino itself here.
Another facet of my research was in the fabrication side of things. Throughout the course of my final project I took a lot of time and tests to see how printing a sphere might be done in a satisfactory way. Specifically, printing a sphere whole instead of cutting it in half as can be seen from the study above. Both of these considerations can be found here in this study, where they tackle computing a globe figure as well as printing it. After some effort and lots of time spent, my printing method turned out to be different than the one shown, but it was fundamental in helping my understanding of the figured I was attempting to create.
Process
Before I could attempt to design my forms, I had to go through the process of computing my forms. This process was the first thing I worked on and was continuously modified all the way through the end of the project to create more effective objects. The computation side of things relies on the properties of a Mercator projection, which takes a sphere and translates it to a cylinder/rectangle like the maps we see in our daily life. We can take advantage of this algorithm to instead reverse that, taking our topological maps and essentially “tracing” them back across an angle to their original spot on a sphere. This process is discussed in more mathematical terms on Jaime’s large assignment 3 submission, which inspired a great portion of my work.
There is some difficulties that stem from this portion of the project. The primary one was that, while I have made a globe figure, due to how the curves are constructed laterally and form the sides that get lofted together, it’s impossible to cap the form to make it a solid like we have in the past. I took quite a bit of time resolving this issue, but due to how manual the solution is I decided to find a way to make the non-solid form work. Thankfully, Cura’s slicing did a lot of the work for me, resolving the internal structure! From this process we can now take our 2D map and turn it into a 3D globe!
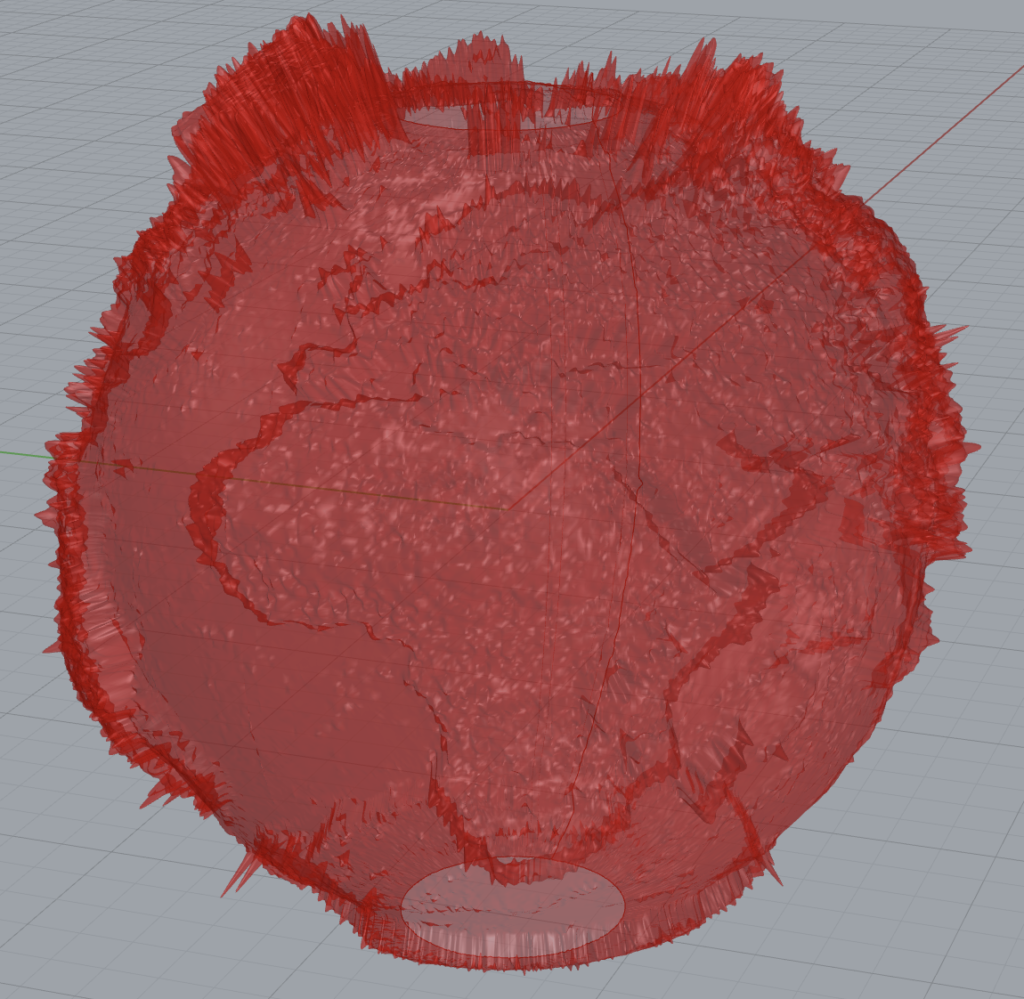
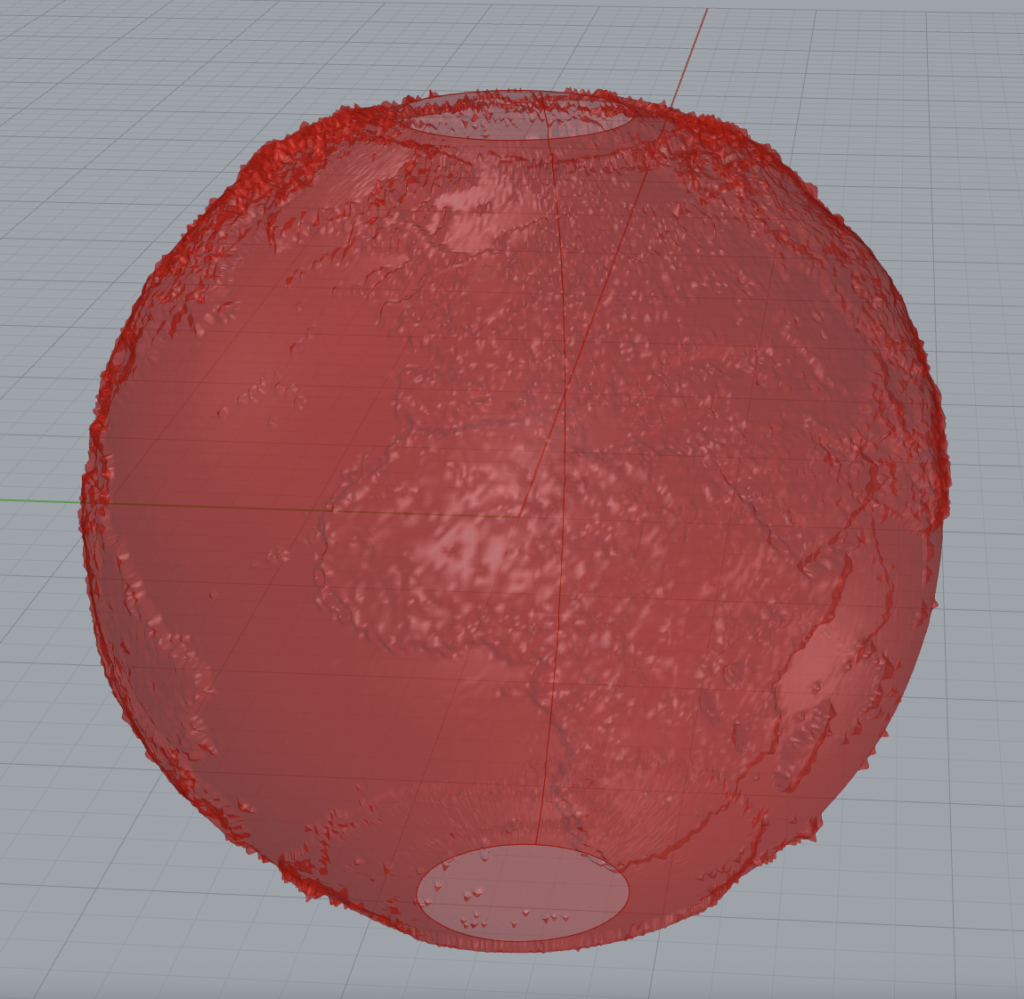
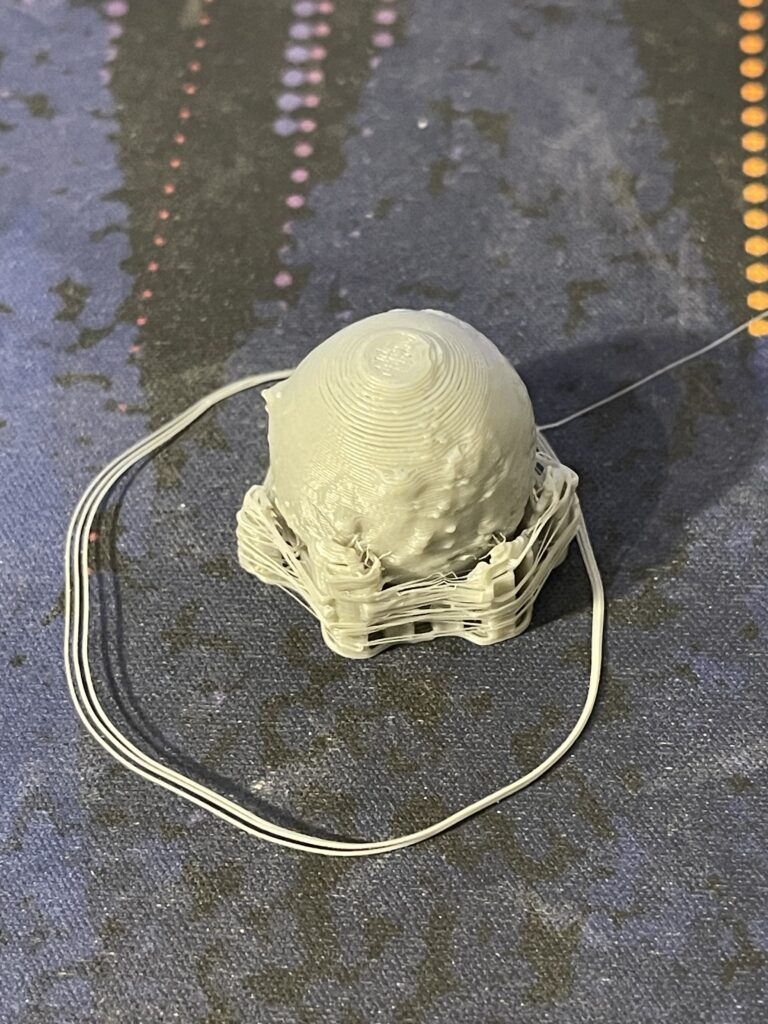
The design process took a bit more of an artistic hand though. Simply translating the numbers across doesn’t necessarily make a good, readable (or printable) representation of an object, as seen above. Since displacement maps aren’t necessarily easy to find (especially for planets that we don’t live on) I had to quickly figure out a process to alter the data output to visualize what I wanted to visualize. To do this designing part of the project, I used some points in the data to change the rest by. While parsing through the data in Python is a great time to do this, and a little of the math can be seen below. The direct result of this change is shown in the change from picture 1 to picture 2 above.
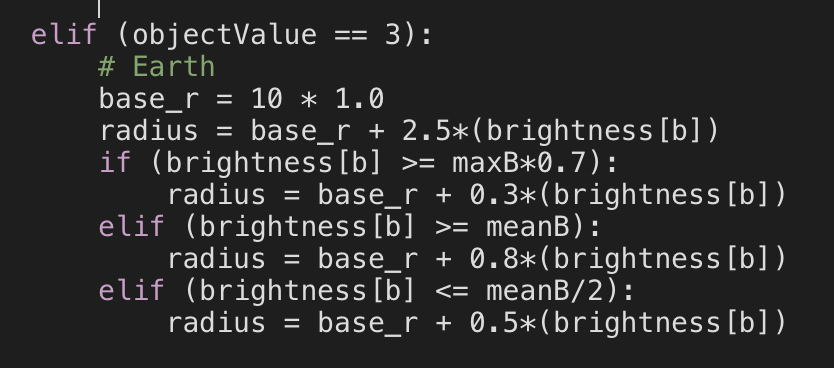
Lastly in my process was the actual printing of the artifacts. As stated at the beginning of this post, printing a sphere in its entirety takes a bit of finesse, and that’s exactly the trial and error process I experienced. From simpler methods like supports to parameterized pedestal generation, I tried many different ways to print the sphere cleanly. At the end of the day, I decided to finesse a simpler solution by flattening the spheres base a little bit more. This extra flattening was very small, and it allowed me to print the whole model in an unobscured, clean way. Examples of the methods tried are shown below.
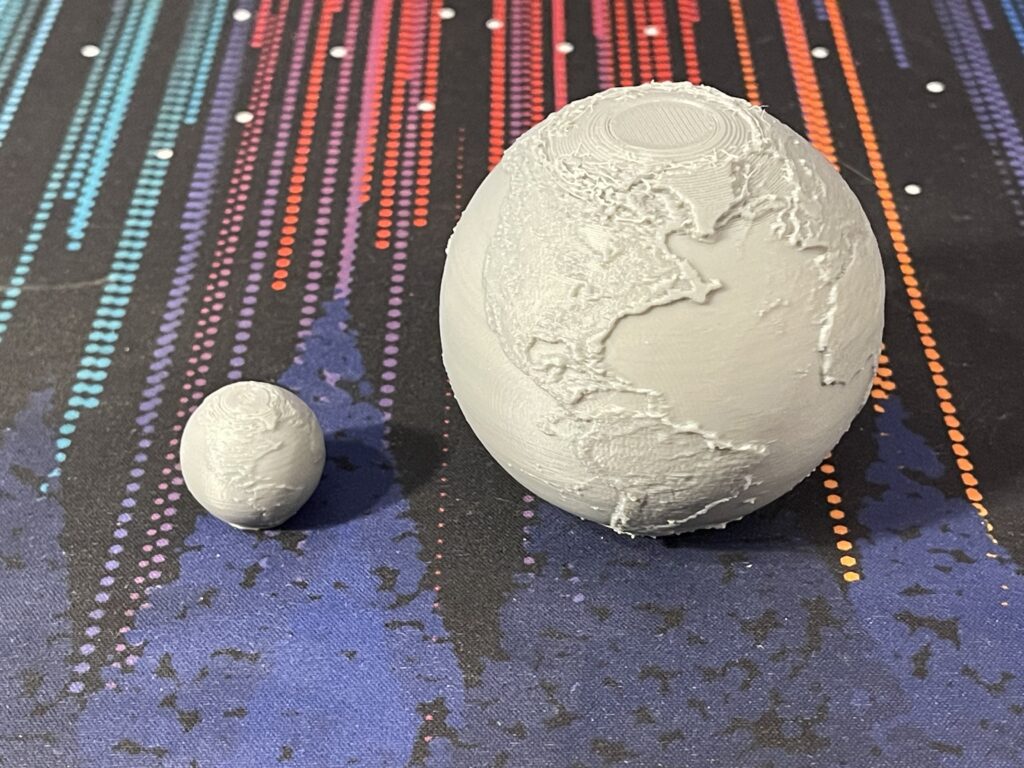
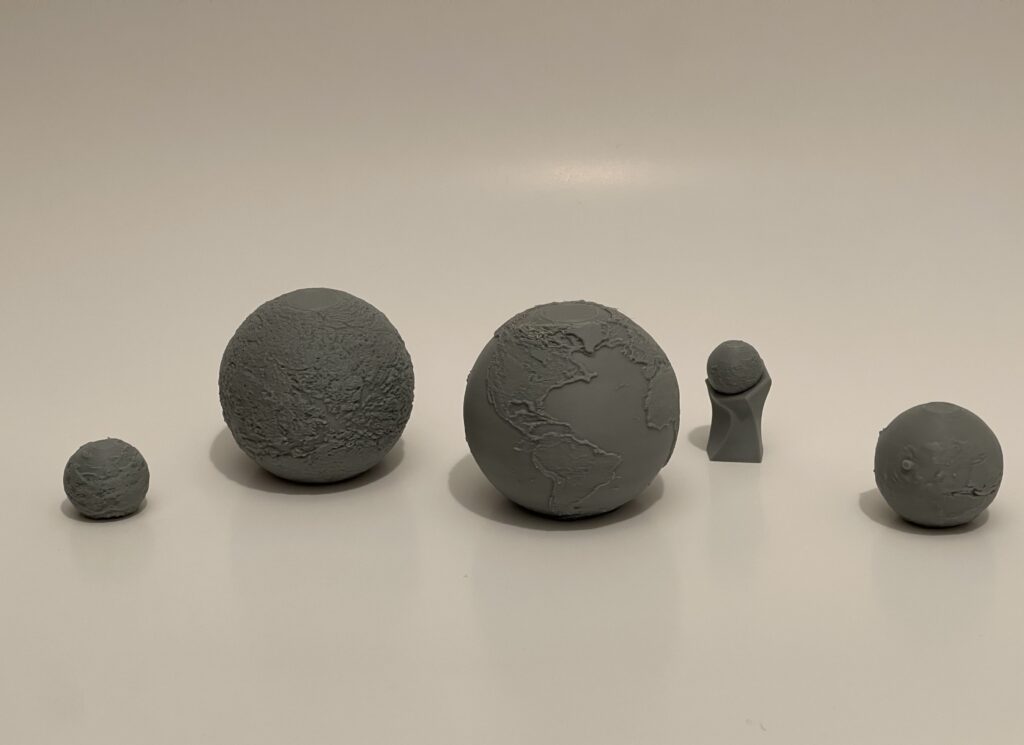
There was also some experimentation in the material and size fabrication process. These experiments were simple and meant to observe behavior, and my conclusion from them was that our base grey PLA printing in large sphere produced the most detailed globes. This extra size was also fundamental in allowing me to print my planets and moons in such a way that they mimic exactly their real world size ratios. That is to say, that all these objects, if shrunk down proportionately to one another to this size, would look just like this. Fun fact, if Earth WAS the size of a cue ball, it would be hundreds of times smoother than one! We wouldn’t see any features at all, so of course for the sake of intrigue and interest, I didn’t keep the features proportional.
Outcome
For my final results, I was able to generate and print much more than I initially aimed to. Due to the restriction of needing a displacement map to translate onto a sphere, I knew I’d be unable to print the gas giants, so I settled on printing the four rocky planets in the Solar System, as well as Earth’s moon. Once again, these representations are true to each other’s sizes, so if you could shrink and put them all together they should look very similar to this!
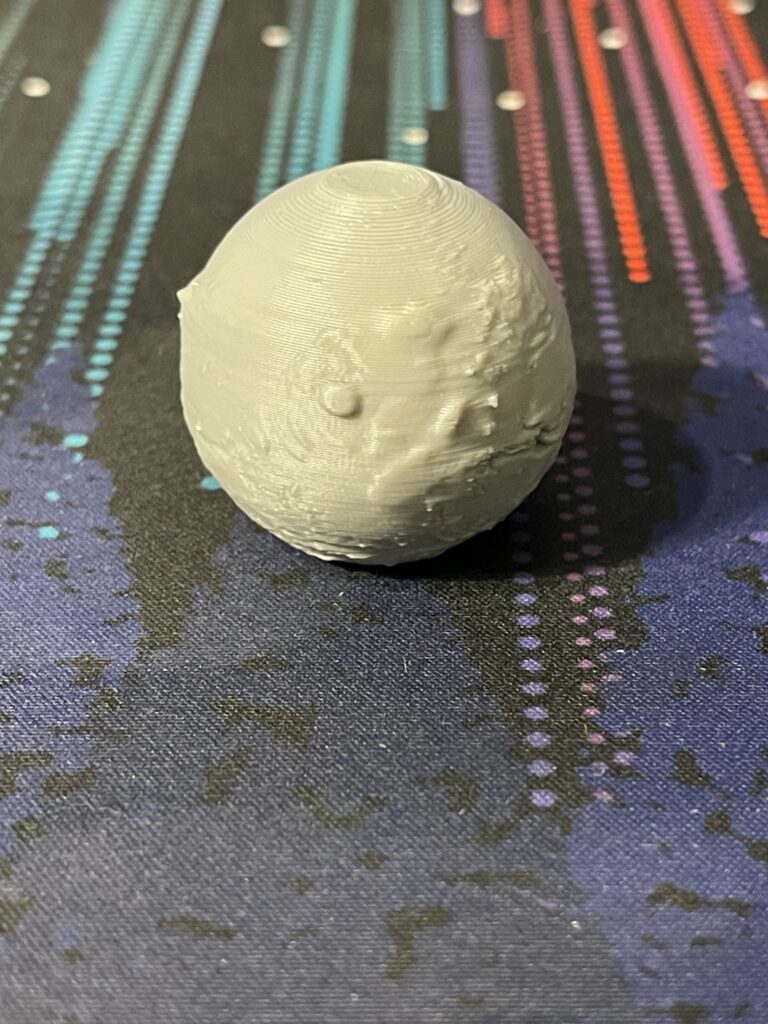
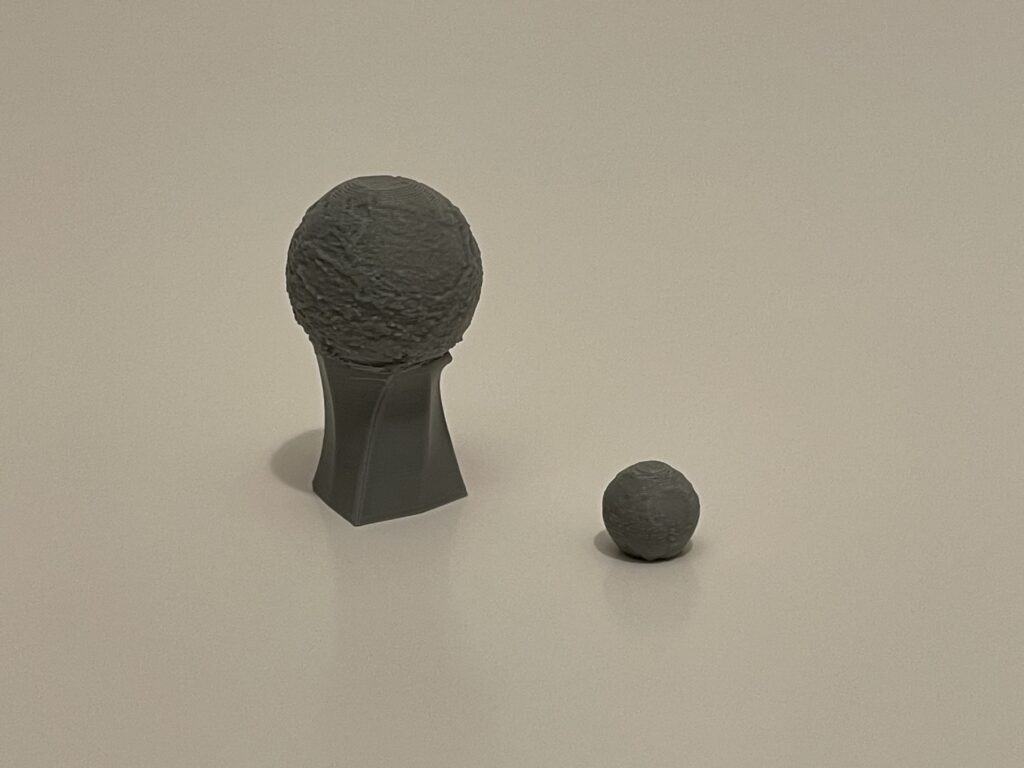
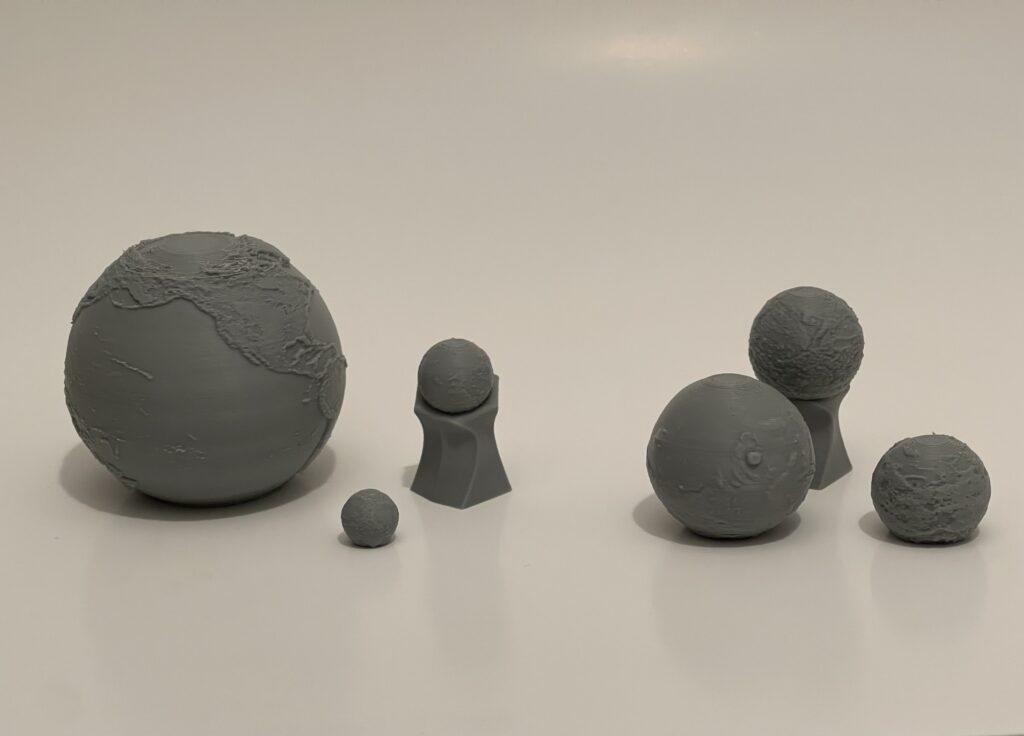
With my process in place though, I tried to think about what other interesting objects might we have a displacement map for? Eventually I stuck on the idea of printing the smallest former planet Pluto, and as juxtaposition the Solar Systems biggest moon, Ganymede of Jupiter. Seen below is them in relation to each other and then them in relation to the other planets. Notice how our Moon and Ganymede both rest on a sort of pedestal. This is another result of the project, using computationally generated forms to differentiate between planets and moons (since obviously size does not!).
Future Work
Given more time on this project, I would’ve loved to use more accurate transformation techniques. Since we used a Mercator projection, some of the results are slightly distorted, but a more advanced algorithm and displacement map could help resolve this and even allow the form to include each of the poles which this one does not. I would also like to generate forms for each of the gas giants by using a visual algorithm like some of the image renders we discussed in class using the bitmap method. I think I would also like to use some different printing methods to allow me to print spheres with less restrictions, something like resin printing or some service. This goes in hand with potentially using a multicolored printer so I can have better differentiation between low and high elevations.
Reflection
This project really let me dive deeper into a method that interested me and a topic that I love, and I think that is what excited me so much through the whole process. I hope that my final product is better for it as well. I learned that placing some restrictions on myself in the pursuit of solving a harder problem can actually result in something more interesting than before as well! Building on these things with a community of like minded individuals that also care about these methods is what inspired me the most, and I want to continue experiencing that as much as I can.
In the future I’d like to use my artifacts as part of a large model to have in my home, as I have full control over the things I think are important as well as the things I find artistic. Everyone needs some interesting trinkets to decorate their living space and these are perfect objects to do that!