2D Tiles


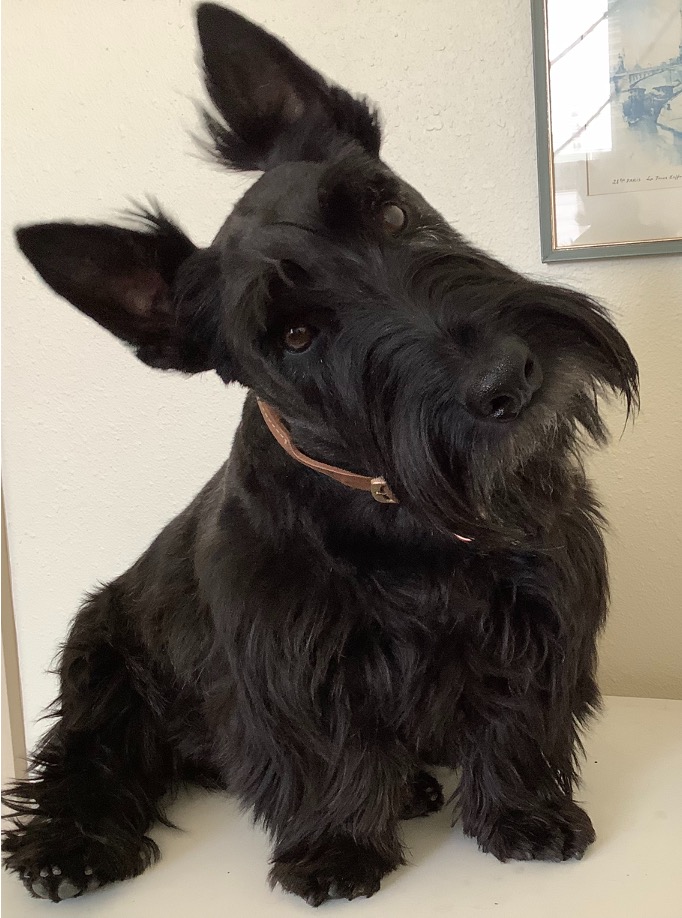
My default doodle is one of my dog Angus. So I knew that I wanted to see if I could make a Scottish terrier Escher tile. I used the tiling tool provided to us to start to figure out the same I needed. My Dog is shaped like two rectangles so I ended up starting with a rectangular shape. This was a very straightforward and fun tile to create.
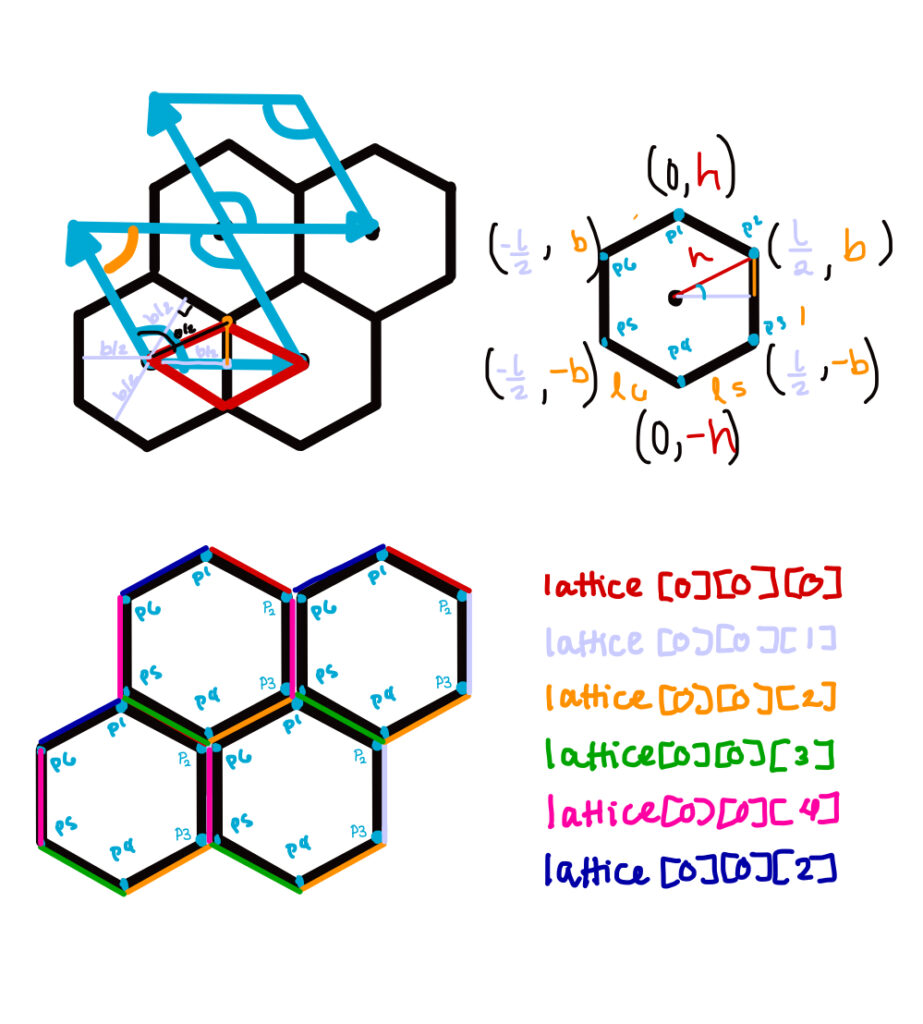
This was one of the more frustrating parts of the assignment. I spent far too long misplacing the ab vector. I assumed it should fall along an edge of the hexagon tile. This did not work and I spent far too long trying to make that solution work. Once I realized the mistake I made the math was fairly straight forward and I edited only a little bit of the in class code. I first calculated the vertices in relation to the ab vector; Next I mapped out where the six edges should be in both the figurative lattice and lattice data structure.

3d Tiling
I had wanted to make a cooked cutter of the my 2d tile above. I added some detail to my 2D tile and then tried to extrude in z at different heights so that my cookie would cut around the edges and stamp in the cookie details.


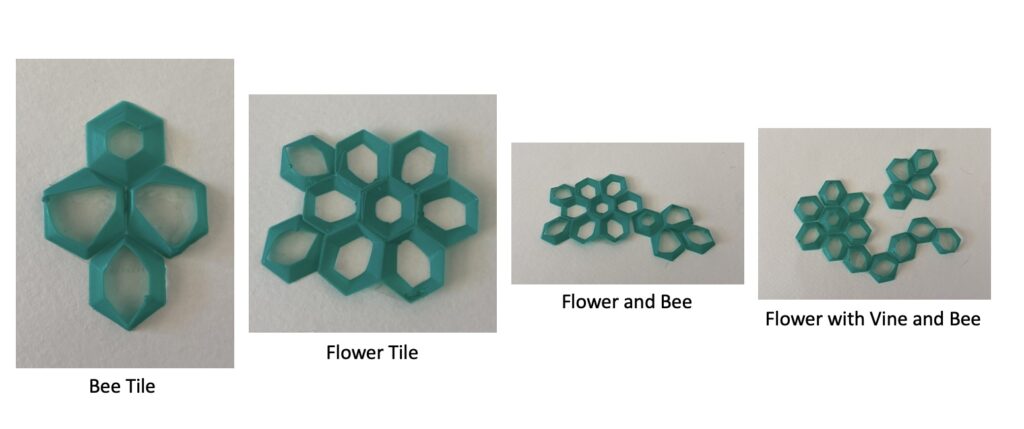
I could not get my cookie cutter to print. Figuring out the needed geometry so that whiskers connected to head outline. I then tried a few failed ideas until finally switching to a bee themed tile. I was talking about my chicken wire 2d tile and was playfully corrected that it is a honey comb tile. As I was looking at hexagonal tiles I found the connection between the bees and the resulting flower pattern poetic. So I wanted my decorative negative space in the honey comb to be reminiscent of bees and flowers. I made a tiles for the center of the flower and corresponding petals. I also made tiles for the bee’s head, wings, and abdomen. Until I switched to shapes that had the six control points like the base hexagon the loft grasshopper plug in produced geometry that is only possible in rhino. I struggle to slice these tiles too. Many of my tiles ended up being solid when I sliced my ultra Cura.


The bee tiles printed quickly and easily after I sliced with the simple turtle slicer from class. I also needed to delete the bee head tile as the geometry was too extreme. I also realized that my printer had a giant glob of pla that was under the rubber cover for the printer tip. I did not realize that the rubber was dragging through some of my prints. I am eggar to see if some of the tile code I wrote for my cookie cutter was fine but was failing because of the rubber cover. The final tiles bellow show the different possible configurations.
Surface Morph
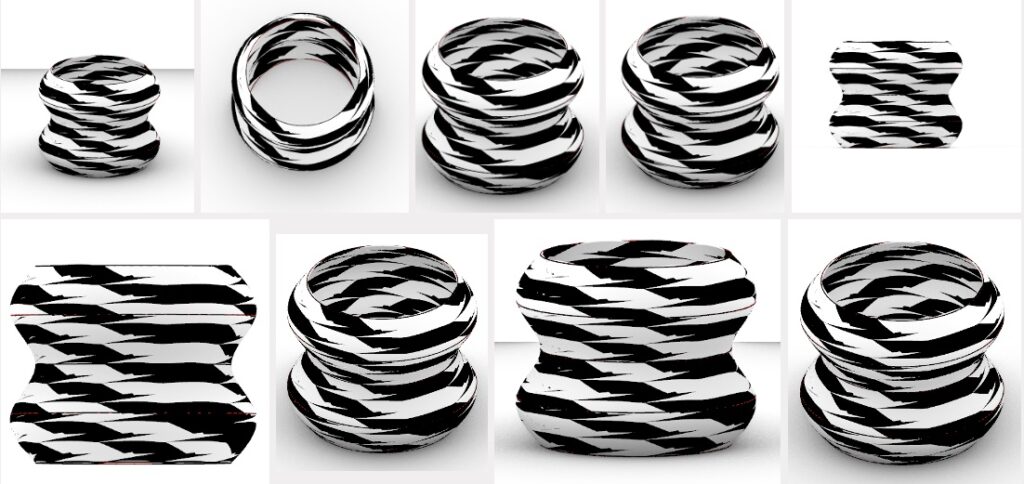
I chose to use my Scottie Tile in black and white for my surface morph. I recreated a vessel from our first vessel assignment so that was no twisted surface or slight lip like my first vessel had.


Hi Erin, your 3d tiling of the Scottish terrier came out amazing. It looks just like him! I also liked the approach you had towards the second part of part 1. It’s really cool to see how you thought through the process and made a hexagon. I also found your bees and flower mosaic to be quite unique. I loved how you presented them in Rhino so that we could see what you wanted to print. I’m sorry that the printing process didn’t go as planned. Nevertheless, you did an amazing job and your project was great!
Thanks! it was such a silly printer issue, I also think slicing my hexagonal tiles myself helped a lot too. I am ready to print my cookie cutter now.
Hey Erin,
I think your tileset is super unique and its cool how you were able to so closely match the shape of your dog. I also struggled quite a bit to get the hexagon tile setup correctly (math is hard), but I’m glad we were both able to figure it out!
Heh! this project was so fun but very, very, frustrating. I am glad we also got the hexagon to work. I think I understand the lattice a lot better now.