Part 1: 2D Tiles
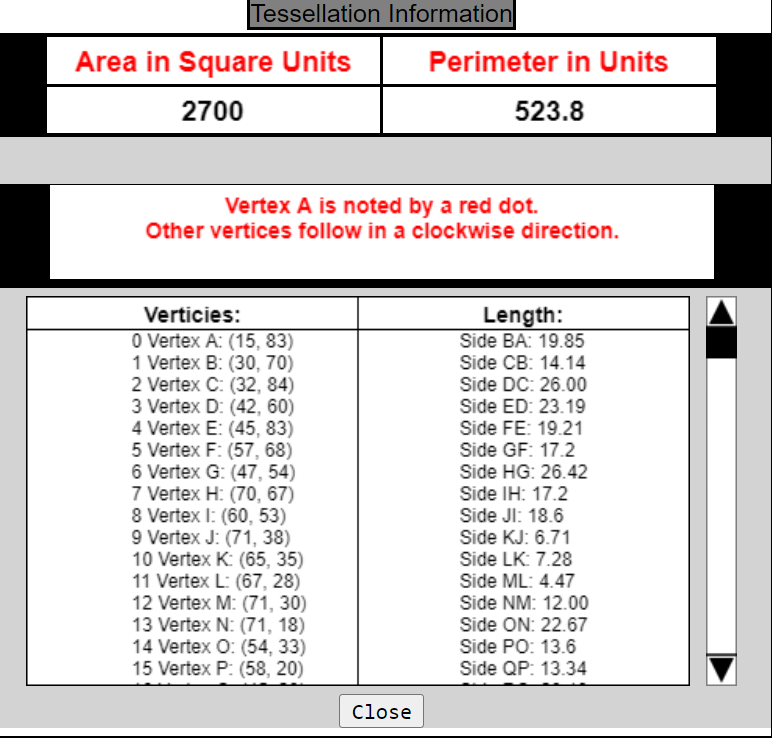
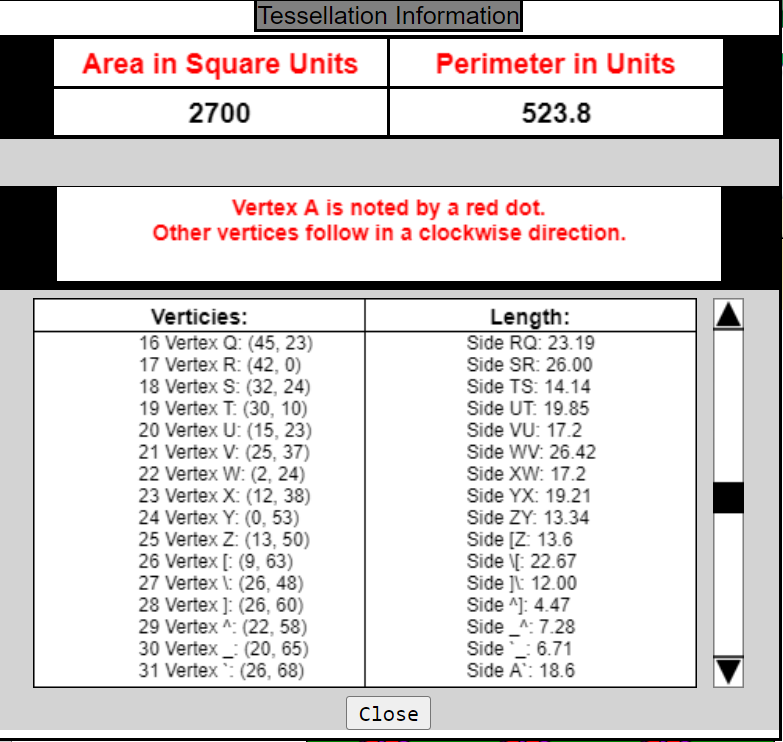
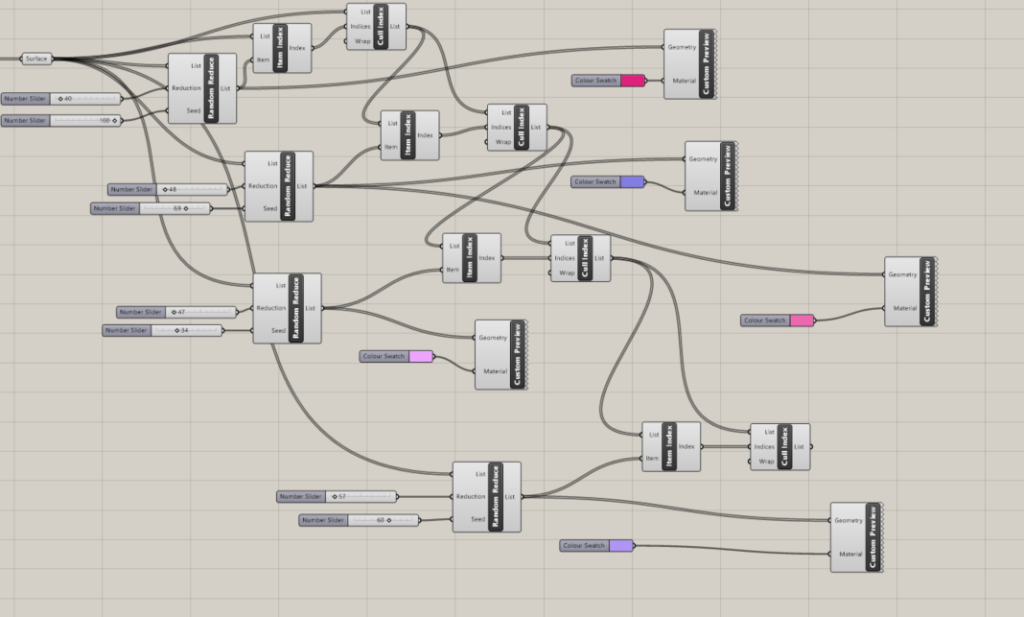
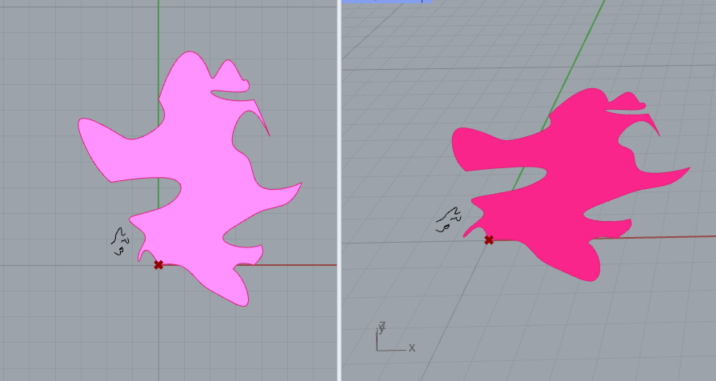
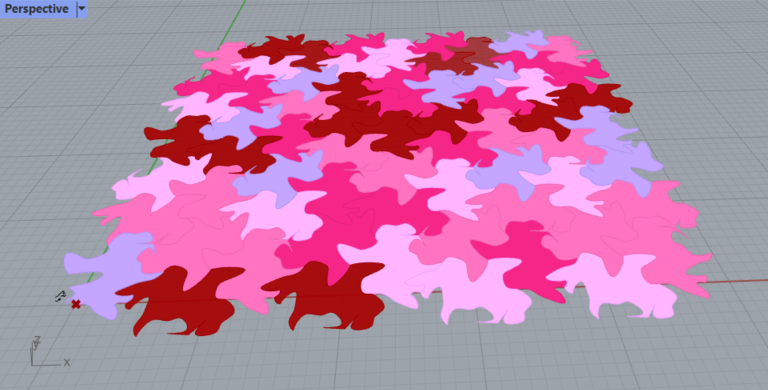
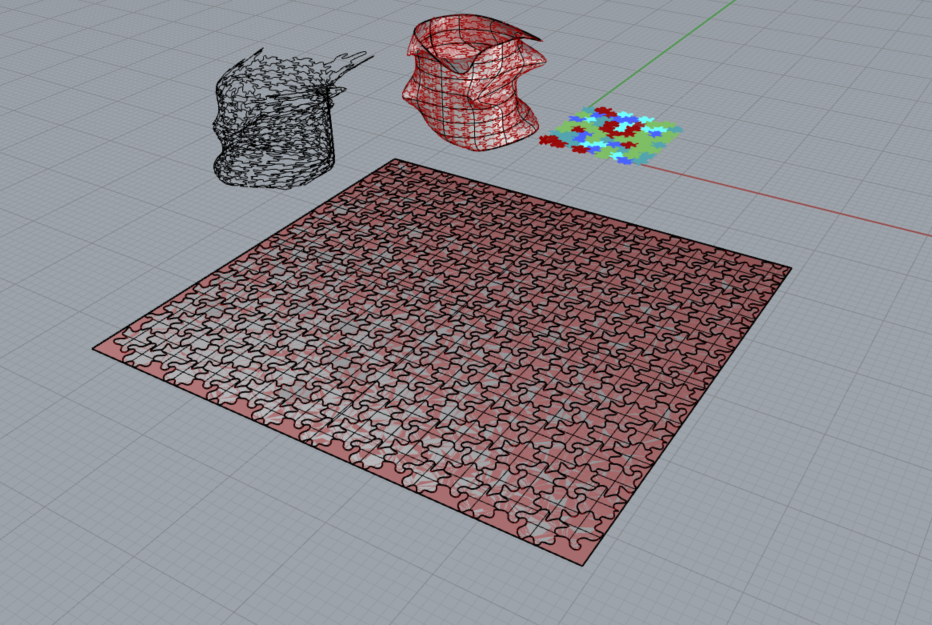
I struggled with deciding what pattern I wanted to make, so I ended up playing with the tessellation we did in class. I saw that I could get some information about the shape, but it was not until a bit later. I tried to go about doing it with “inspect element”, but the information was right there -> on the site under the image. I also wanted my design to be colorful, so I researched how to make it colorful. I thought it was interesting that you can randomize it using the below method with “Random Reduce”, “Item Index”, and “Custom Preview” in Grasshopper. As I was doing so much research about various approaches to tessellation, I came across the Parakeet Rhino add-on. I utilized it to create my pattern, as shown below and as you can see in my code. It was super interesting to see different pattern generations, and heterogeneous tiling creation. I chose to do the Hexagonal pattern and I think it came out pretty nice.
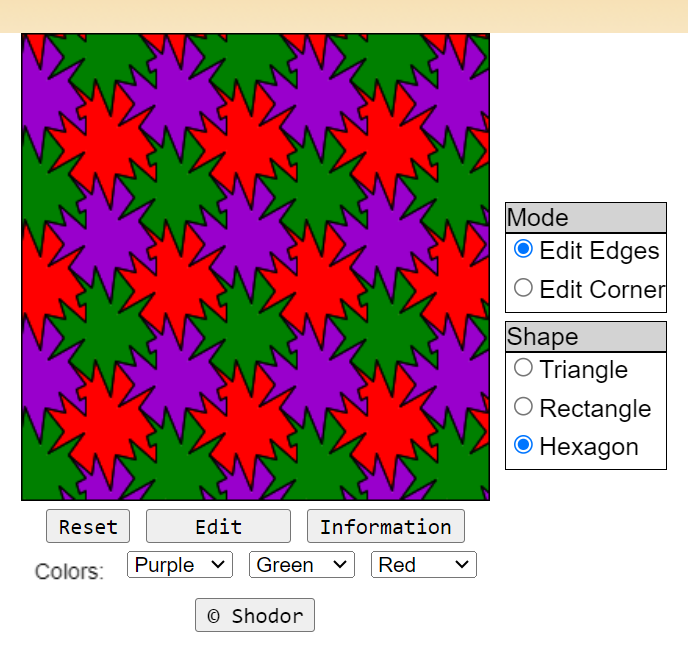
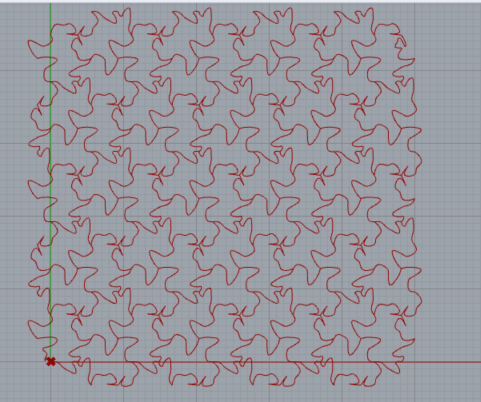
Adding color to my tiles was a fun addition. It took a bit of extra time to figure it out and a lot of research. I ended up utilizing this YouTube video about randomized mosaic (https://www.youtube.com/watch?v=qAvtAnzoqLQ).
Files:
My file for this part of the project can be found here: >> 2DTiles <<
Part 2: 3D Printed 3D Tiles
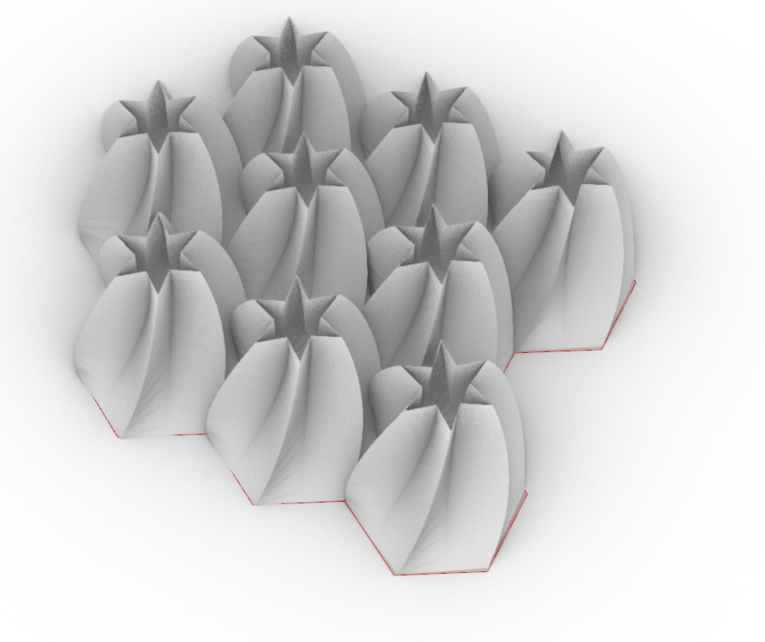
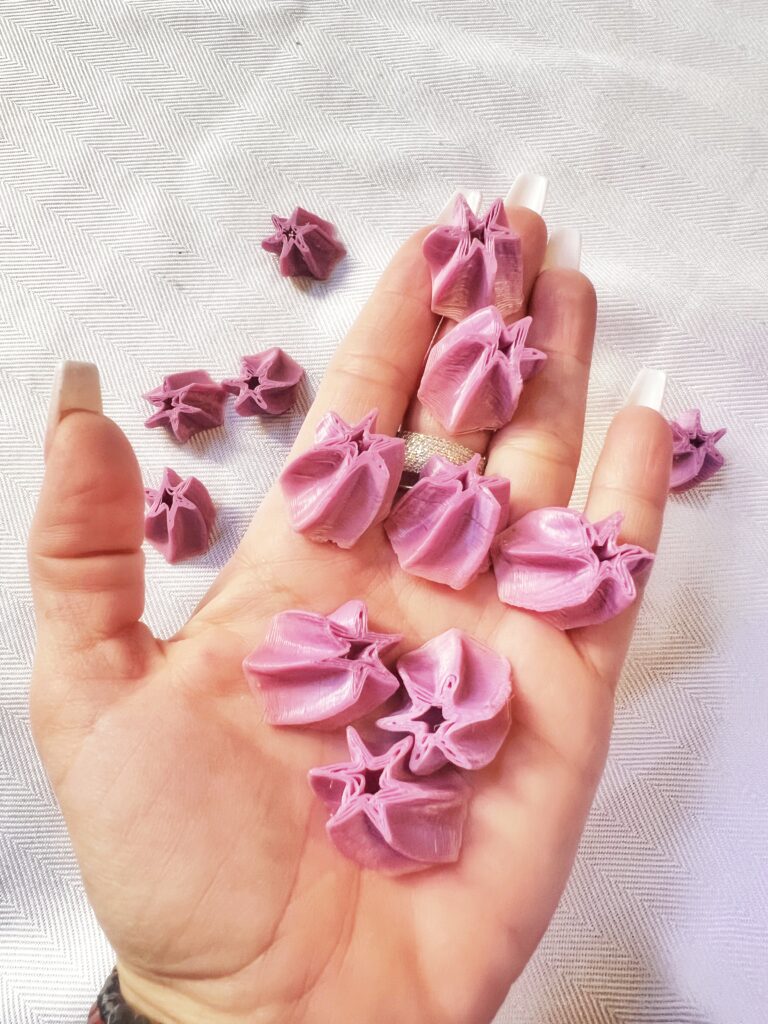
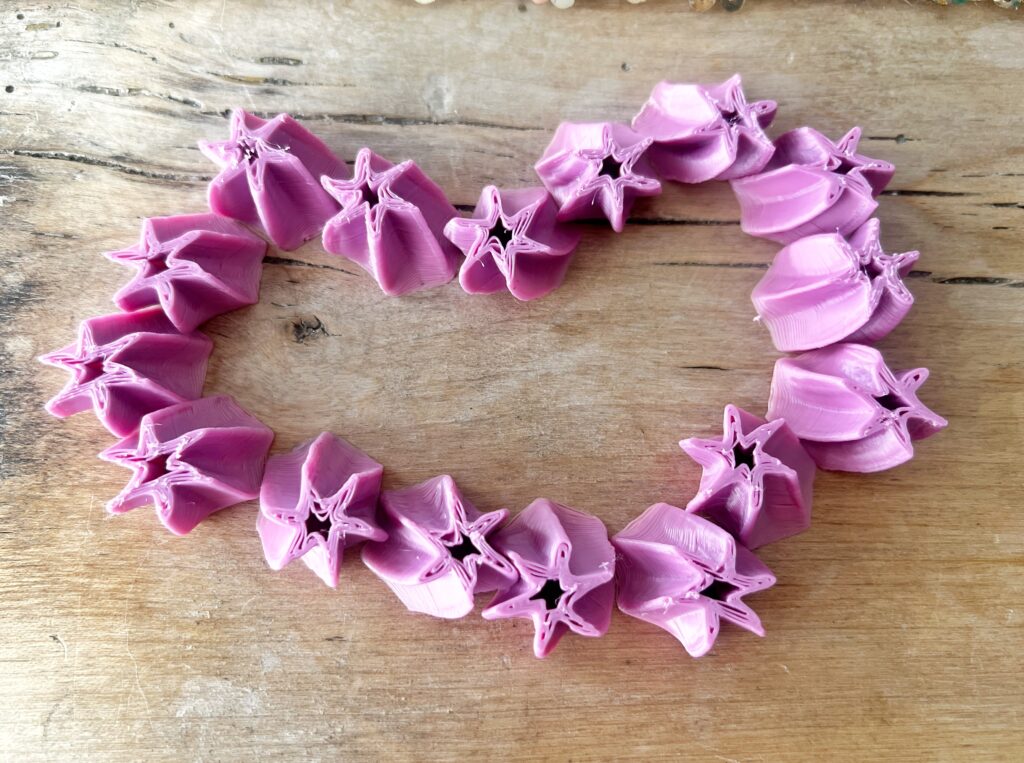
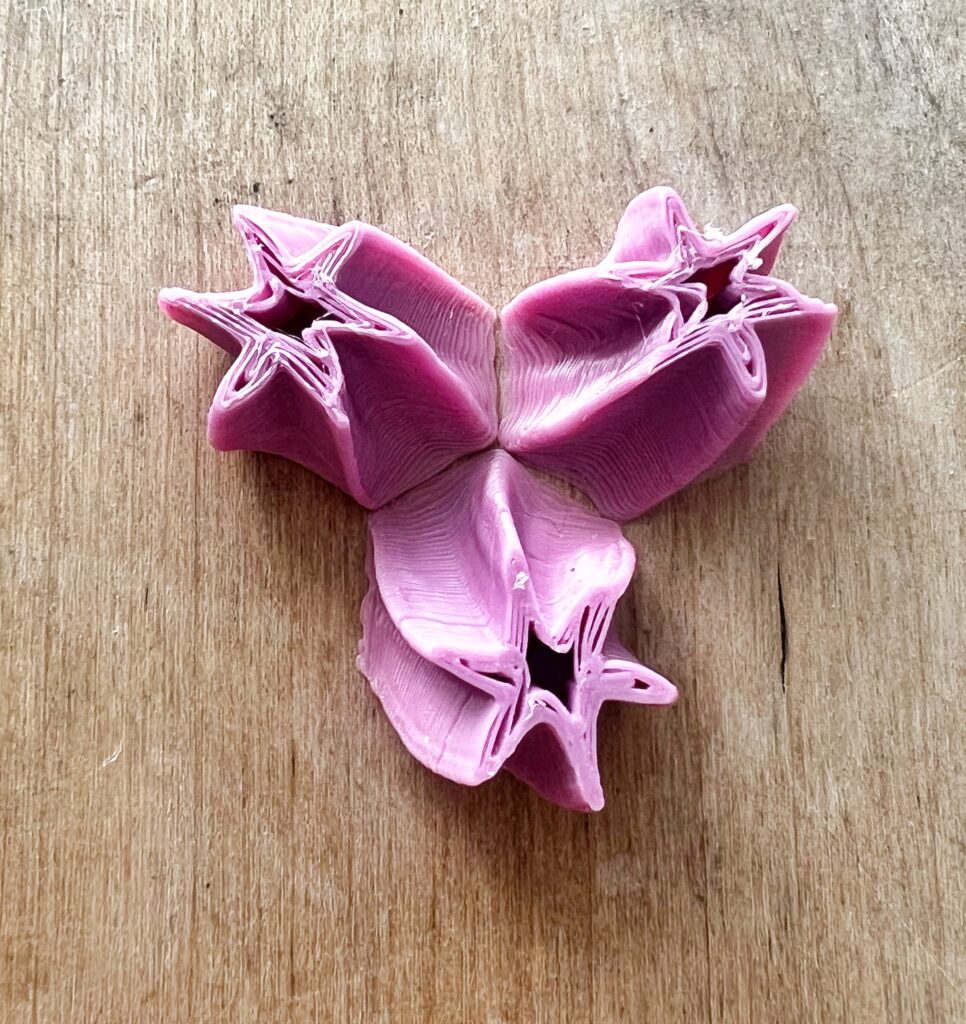
I struggled with this part of the project the most. I ended up using just a base of a polygon and added 2 more star shapes to the middle and top. Then I created a loft. I used a single line to create my polygon shape and distributed it across the plane in Hexagonal pattern.
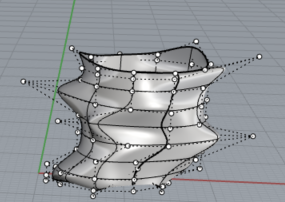
I think my biggest struggle and waste of time was me wanting to create the same Escher pattern with 3D shapes, but I could not execute it. I ended up running out of time, because my surfaces would not transform and for the life of me I could not find solution. I was able to create a base for my tiles:
This was my unsuccessful attempt:

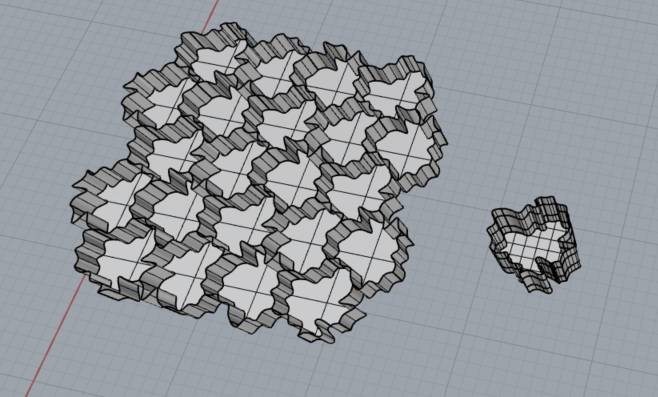
I didn’t think it looked too good, so I scrapped it. And changed my approach, I went with a basic shape and played around with the points on the layers to give it more interesting design.
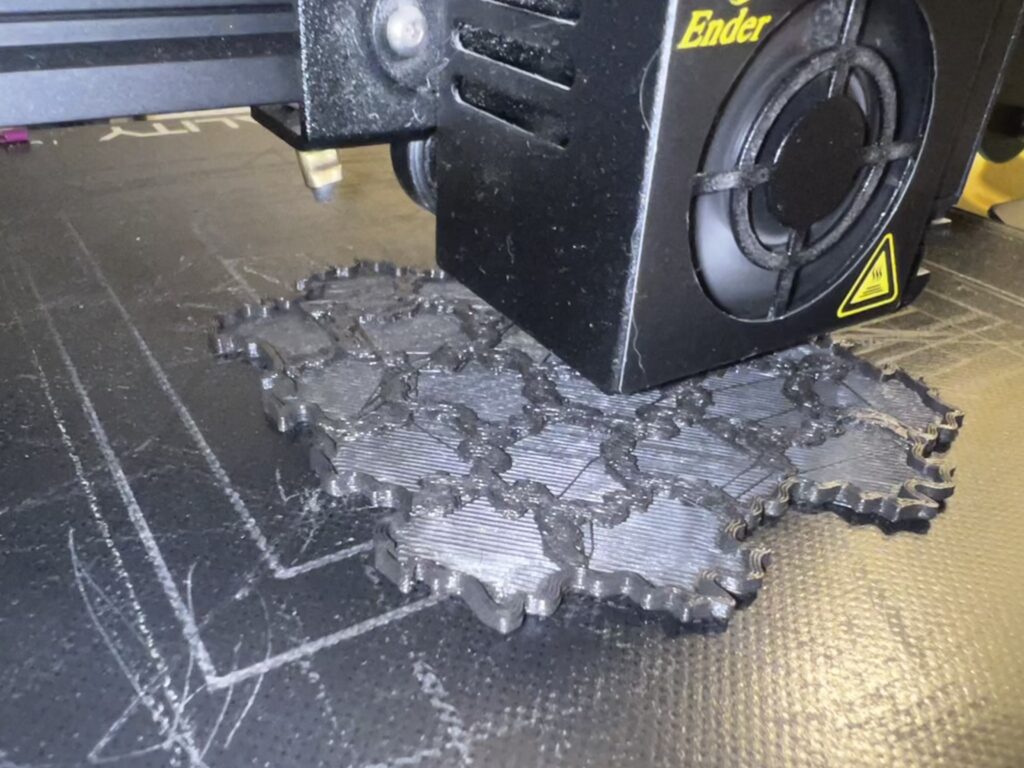
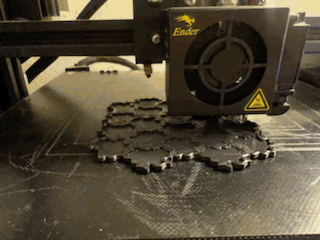
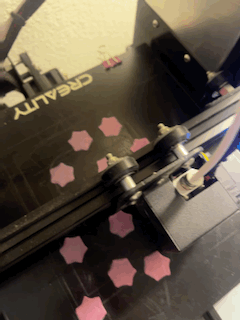
Once I started printing it, it my tiles came out too small, so I had to restart.
I decided to print all the shapes at once
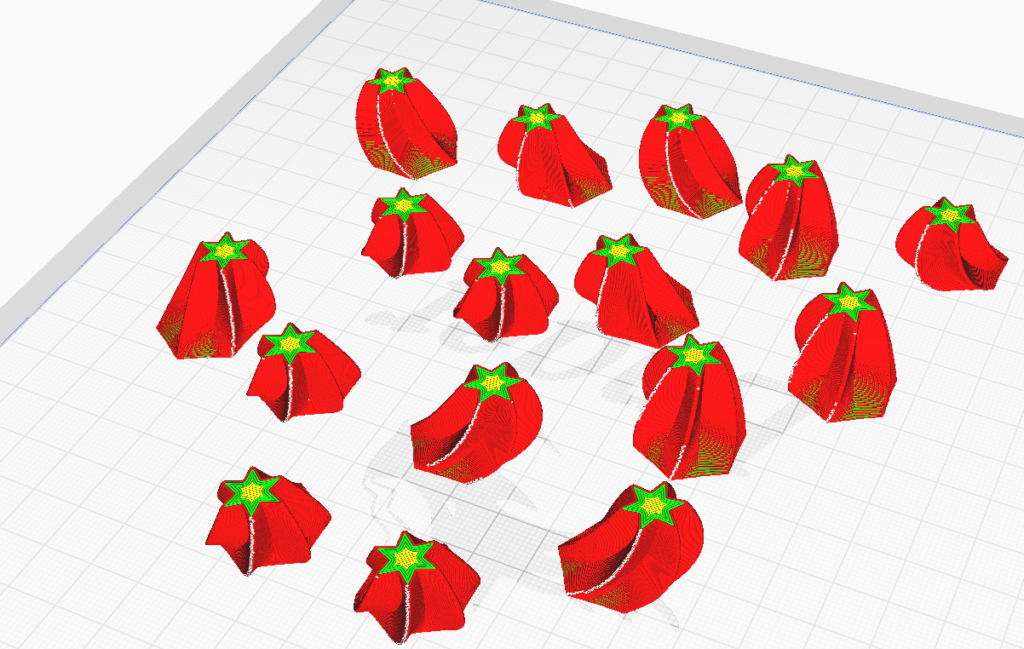
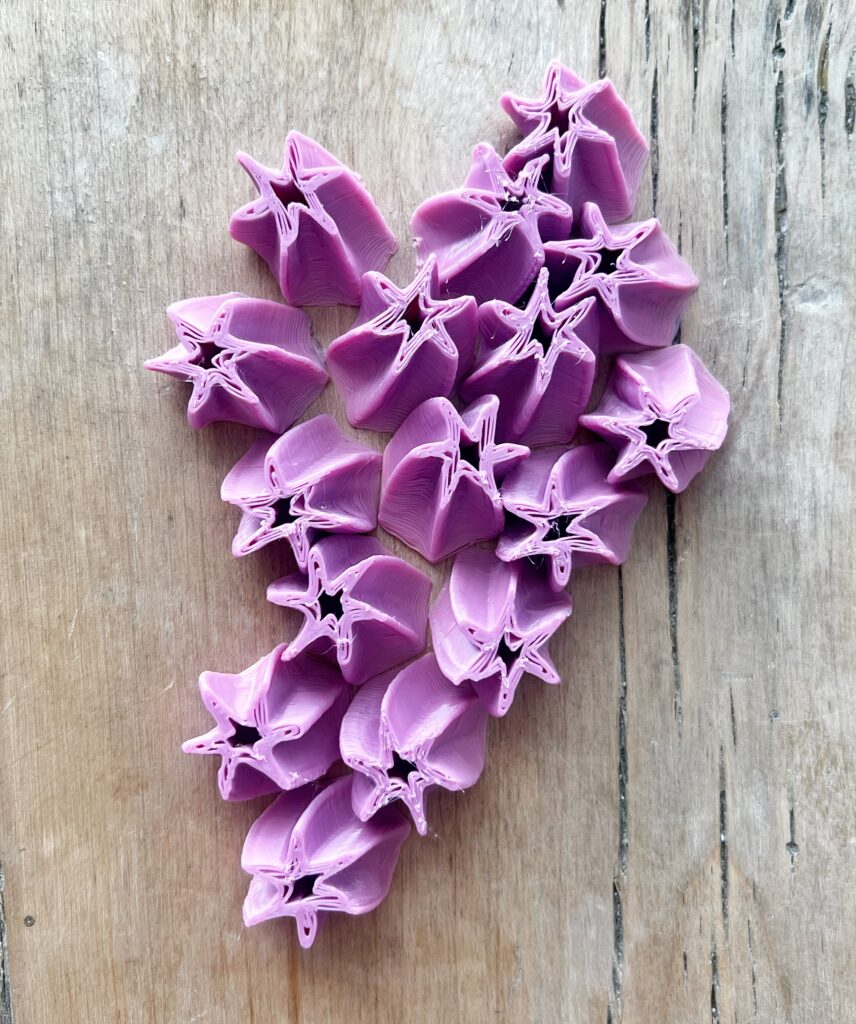
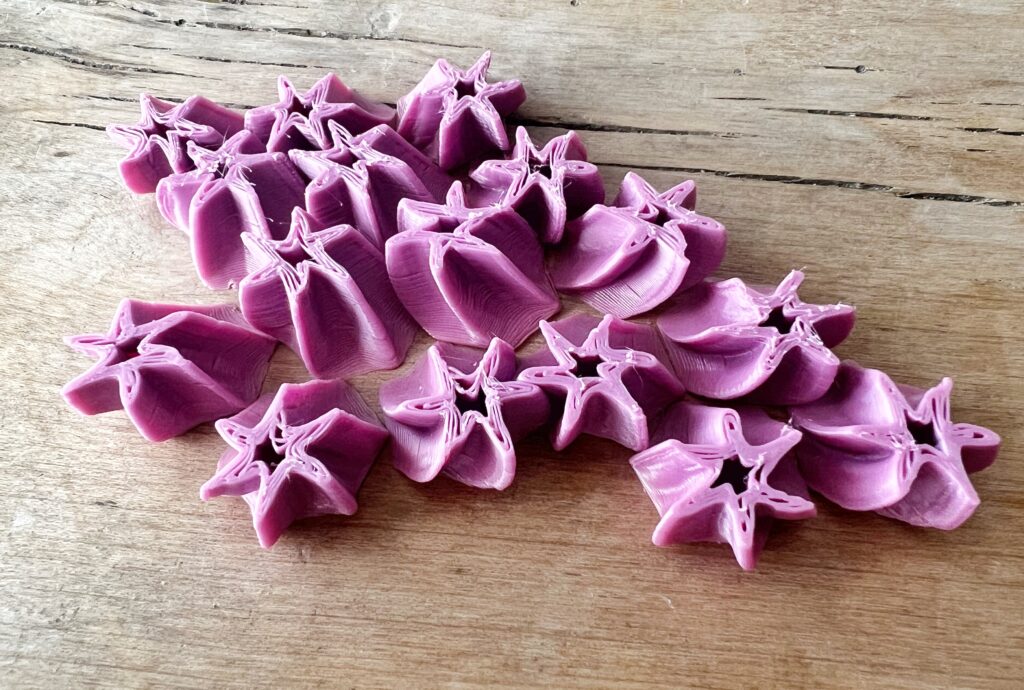
And here is the final product:
Files:
My file for this part of the project can be found here: >> 3D Tile <<
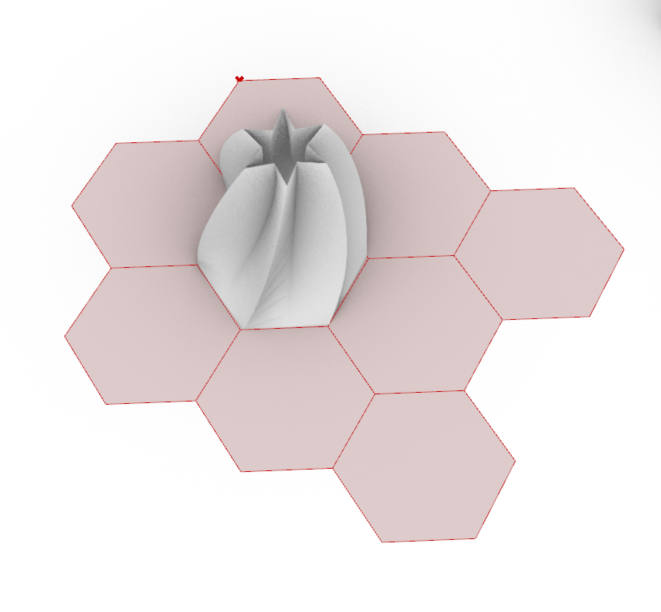
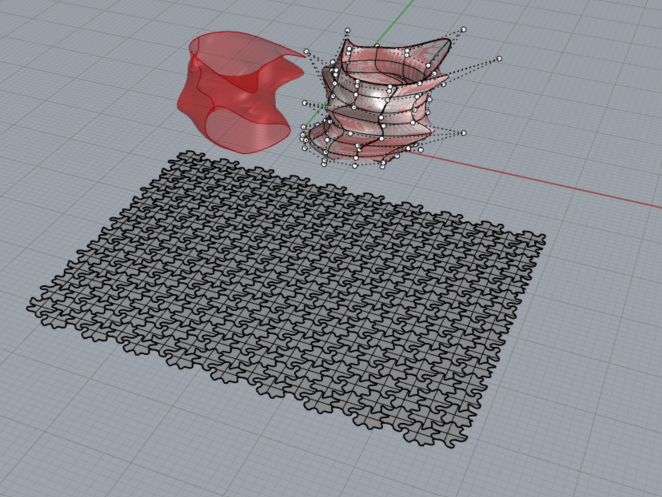
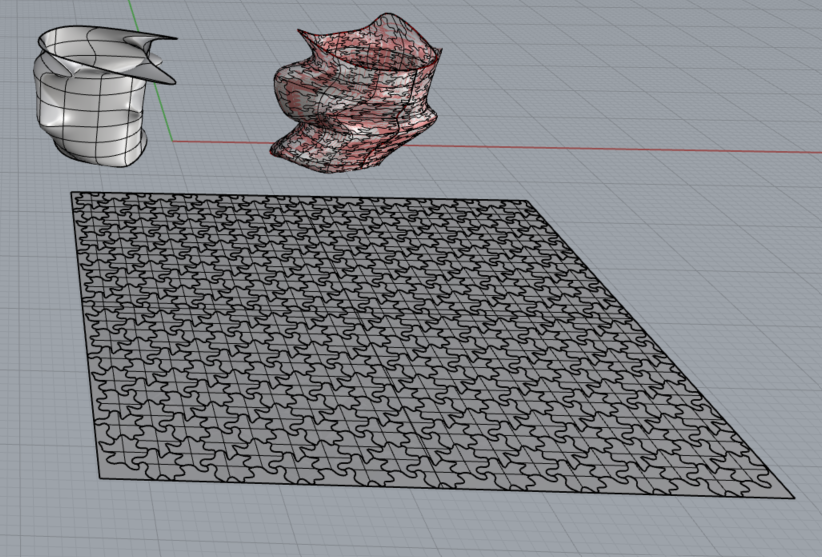
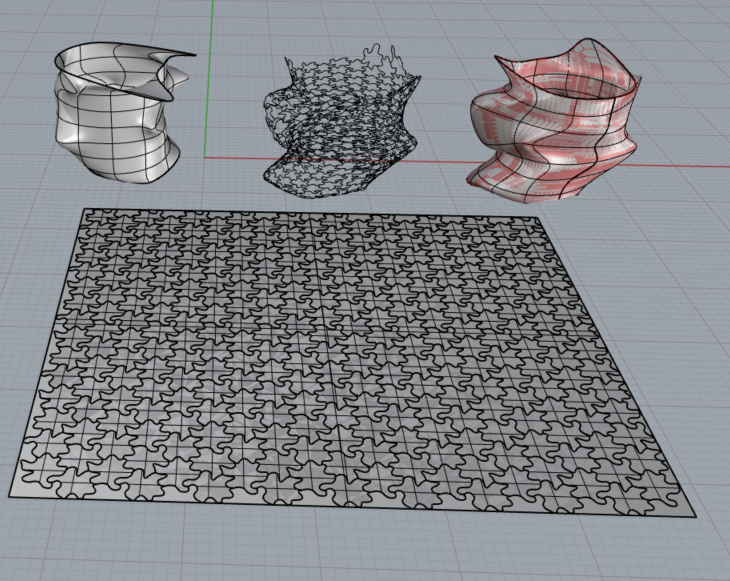
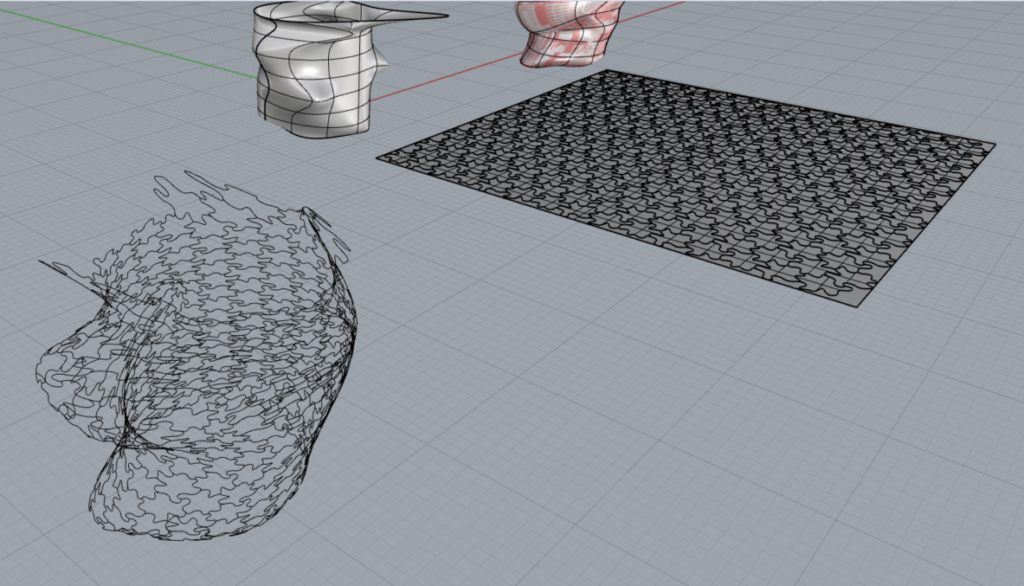
Part 3: Surface Morph
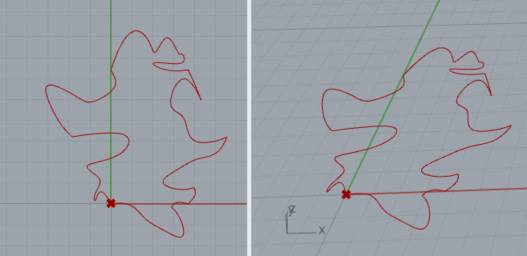
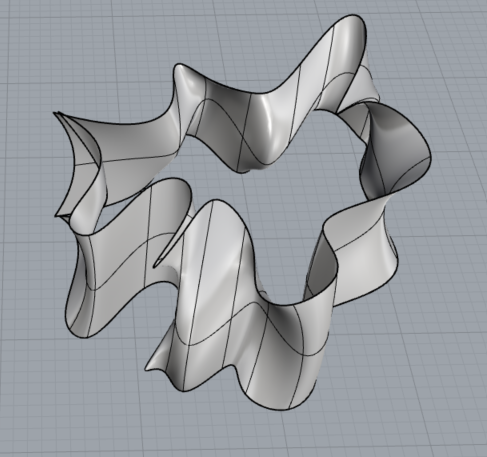
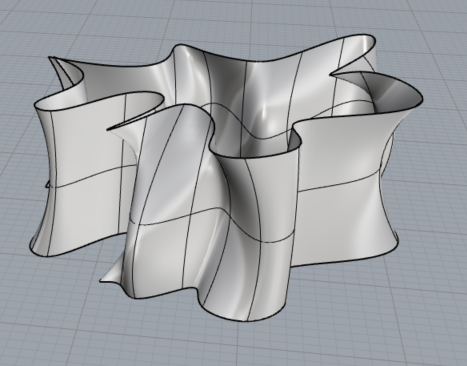
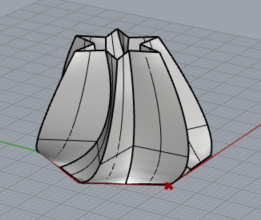
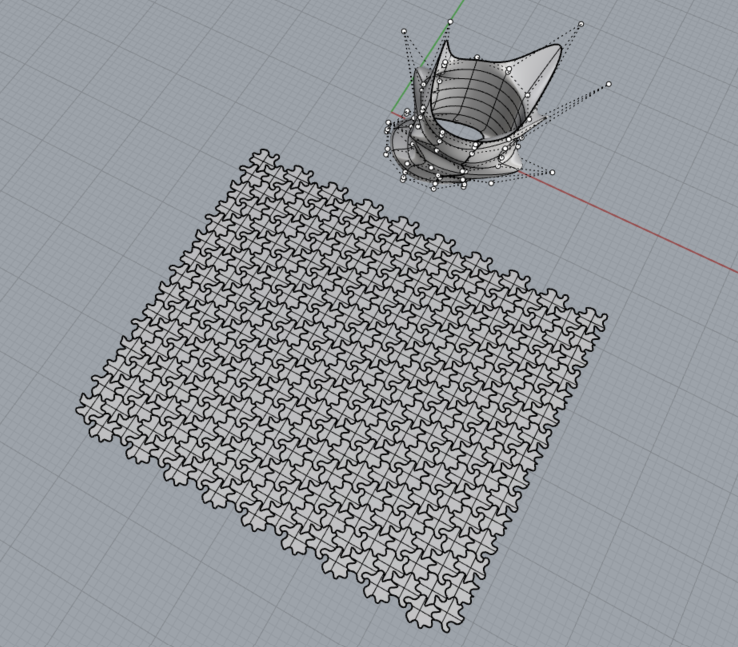
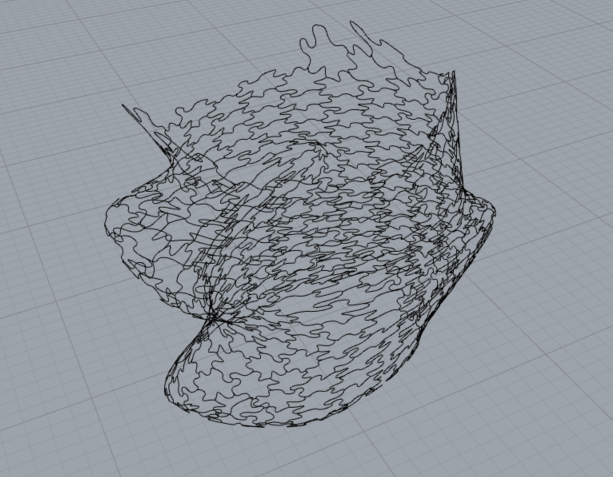
I started first with designing my surface. I wanted it to be funky, so it would accentuate the tiling. I started with a cylinder and then I rebuild the shape by playing with the various points making the surface with different levels.
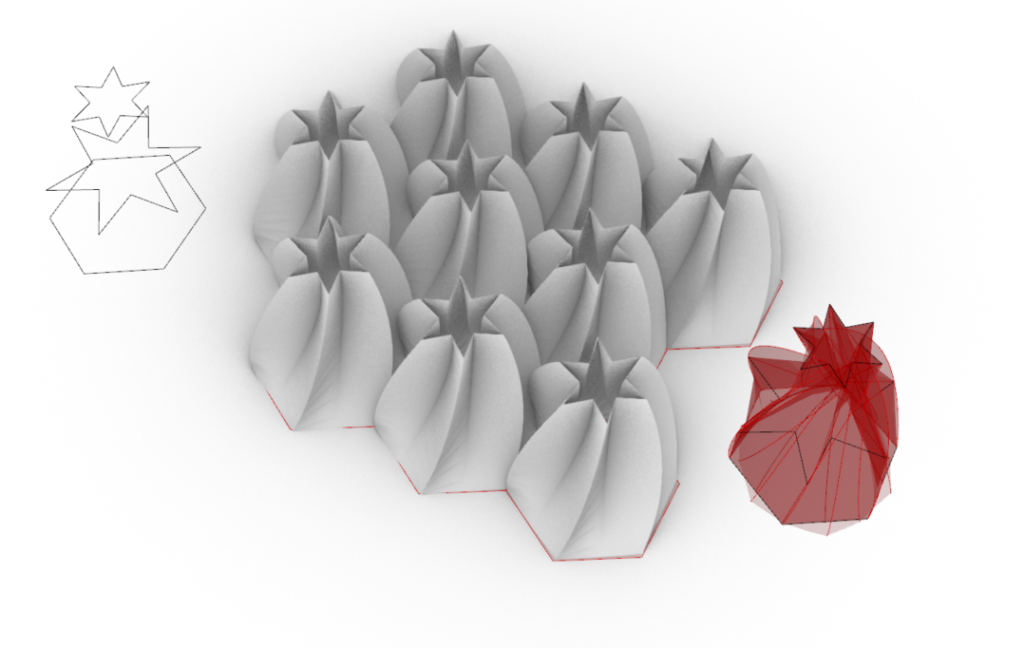
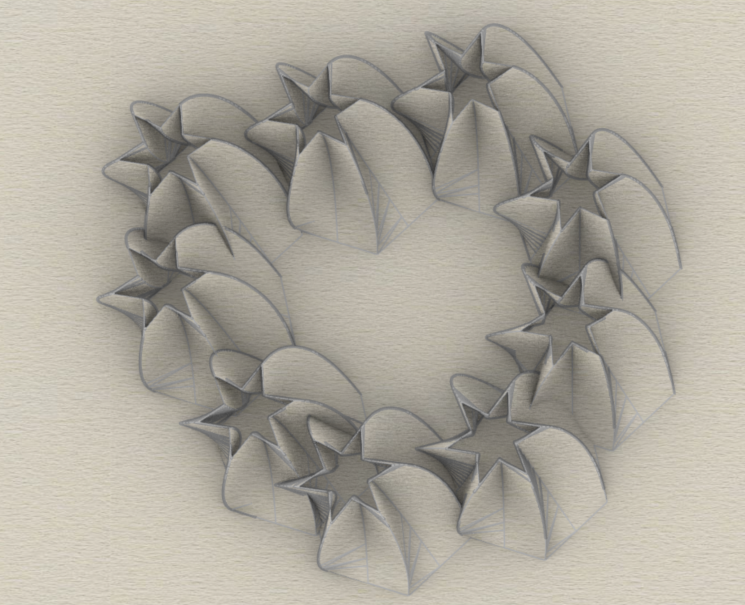
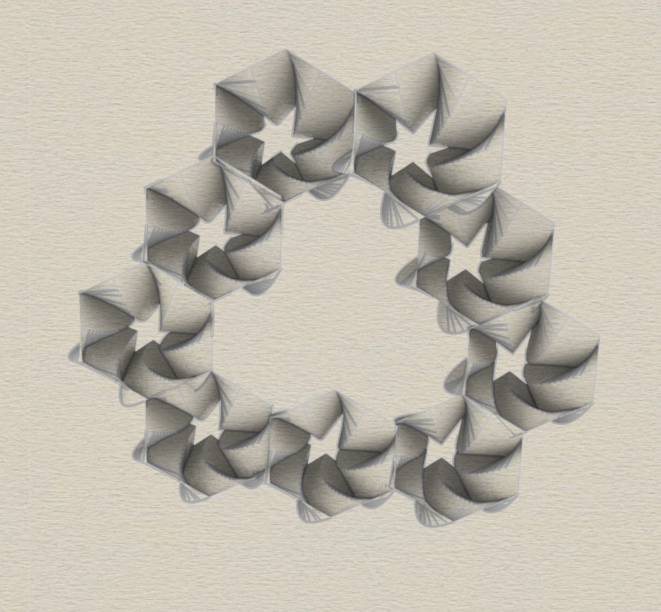
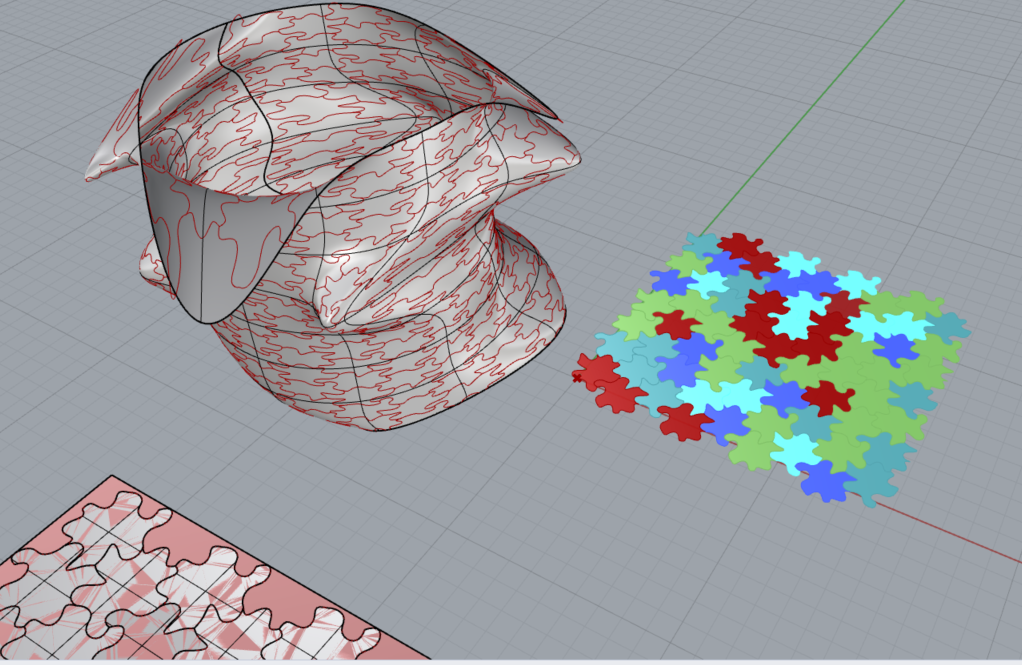
Then I used the same way of creating my tiling that I used in my first part, I just changed the shape slightly, and tried to apply what we learned in class by using the data dam and surface morph. It was super challenging.
I had hard time figuring out how to transfer the shape onto the surface. My computer was not cooperating using the class described process. It just kept freezing and shutting down my program. It was extremely frustrating, so I ended up looking into other options and came across “Flow along surface”. It was a bit tricky to figure out, especially because there were no tutorials, but in the end at 4:30 AM after many many MANY hours I figured it out. I ended up baking both the shape to transfer onto and the tiles itself. I created a bounding box around the tiles to give it a boundary (as the bounding box in grasshopper was not much of help). In the end I removed the shape itself, so only the “cage” was visible, to see the pattern.
Files:
My file for this part of the project can be found here: >> SurfaceMorph <<
ZipFile
Each part of the project has its own zip file with the code, but the combined file can be found here:
>>> PROJECT 5 – TILING <<<
Additional Files: Part1B –> Part1B (https://handandmachine.org/classes/computational_fabrication/wp-content/uploads/2023/11/MichaelaUrichPart1B.zip)
I hope you learned from this project as much as I did and I am looking forward to see what you created!
Michaela
Hi Michaela,
I thought your “witch”-looking tile was really cool. I also found the way your tile tessellates to be very interesting. It doesn’t tile like normal but in different orientations, like one that could be upside down or sideways but still connects, which is really cool. I wish I had enough time to learn how to do that.
Hi Michaela, your tiling project turned out amazing! I love the 2D tiling with all the shades of pink. I also really liked your first 3D print, it was like a really cool coaster! And the pink 3D hexagon tiles remind me of frosting dollops! Great work:)