Part One: 2D Tiles
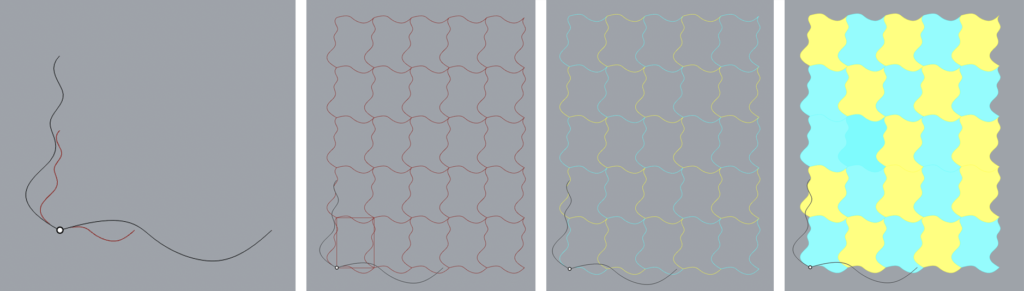
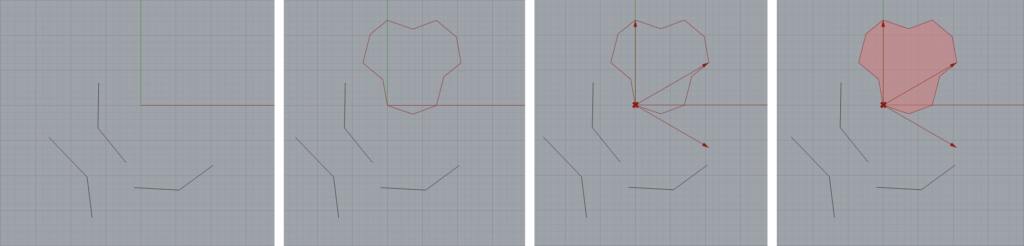
For the initial escher tiling, I essentially followed the code we did together in class. However, I did run into an interesting issue related to preview and Boundary. When passing the flattened tiles that just consisted of the edges to the Preview block, the checker pattern was accurate. However, if I passed the tiles to Surface Boundary and then the Custom Preview block, the colors would then be out of order. I’m not entirely sure why this was the case, but you can see the checker pattern in the third image as compared to the final.
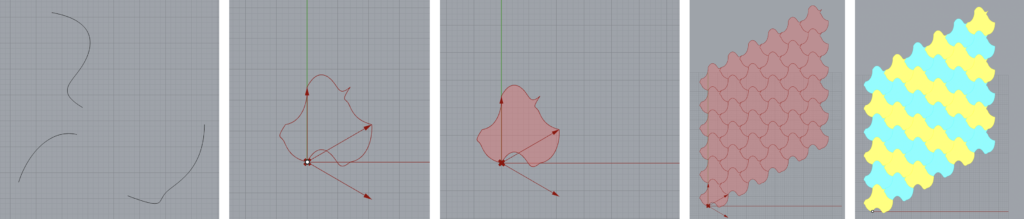
For my second tiling, I chose to do a hexagonal pattern. I wanted to be able to pass and manipulate essentially any curve for my sides, so I wrote my code such that it takes three curves, translates the CurveStartPoint to the origin, computes the angle of the CurveEndPoint: arctangent(y / x), and rotates the curve around the z axis by the angle in order to align it with the positive x axis. It then scales them to a chosen size. I then rotate the second curve by 120 degrees, then the third curve by 60 degrees and place it at the end point of the second. This gives me half of my hexagon.
I found it much easier to create the bounded tile (surface) first before computing the lattice. So I computed my translation vectors for each of my curves (see second picture below), copied and translated them, then joined them altogether. I keep the scale of my hexagon’s sides uniform rather than trying to have multiple different scales. After I have a surface, I pass that to my lattice code along with my vectors I computed for the translation of the sides. If you were to place the hexagon inside of a circle and draw a line to each of its vertices, the angle between those triangles would be 60 degrees. If we divide it further so that a line is drawn to the mid point of the sides, the angle would be 30 degrees. Therefore, the magnitude of the translation vectors is 2 * (scale/2) / tan(30 degrees) = scale/tan(30). The vector for the first side (aligned with the x axis) is [0, magnitude, 0]. The next two vectors are rotated from that original position by 60 degrees and 120 degrees.
Because the direction of the translation vectors for the sides of my hexagons is the same, my lattice generation is very simple:
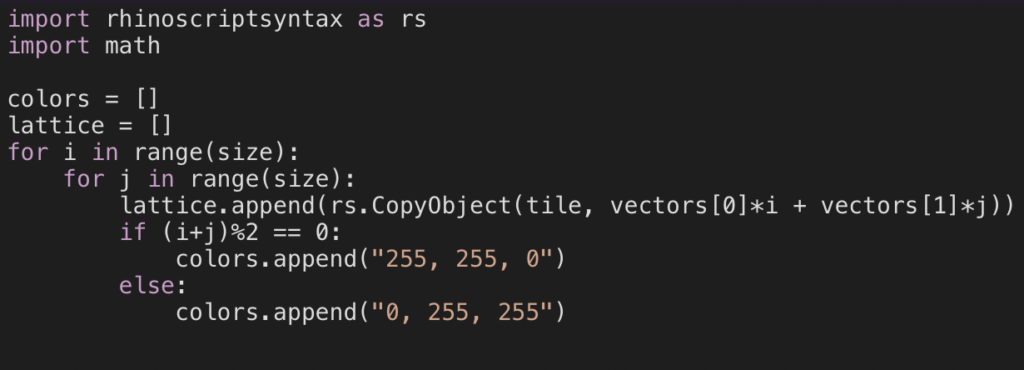
I append everything into a single list instead of a matrix so that I don’t have to do additional flattening, and the checker pattern instead produces stripes in the hexagonal design due to the direction of the translation vectors. I like the visualization of the way the rows are generated.
Part Two: 3D Printed 3D Tiles
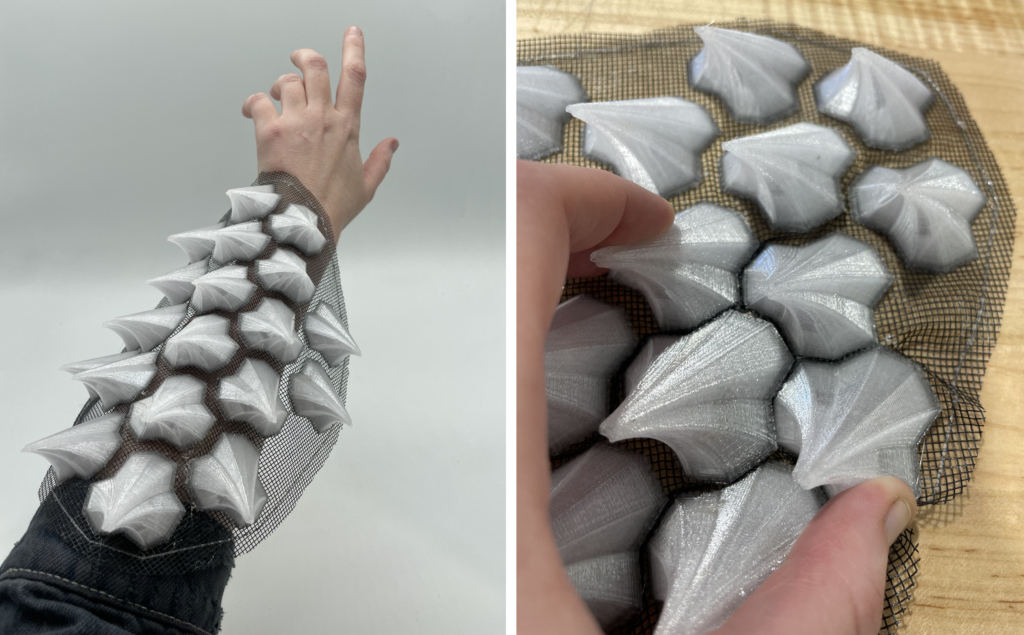
I was inspired by other 3D printed projects I have seen in the past to produce armor or scales, which requires tiling a plane. Additionally, I like the scales on pangolins, which are also space filling and eventually overlap in a three-dimensional way.

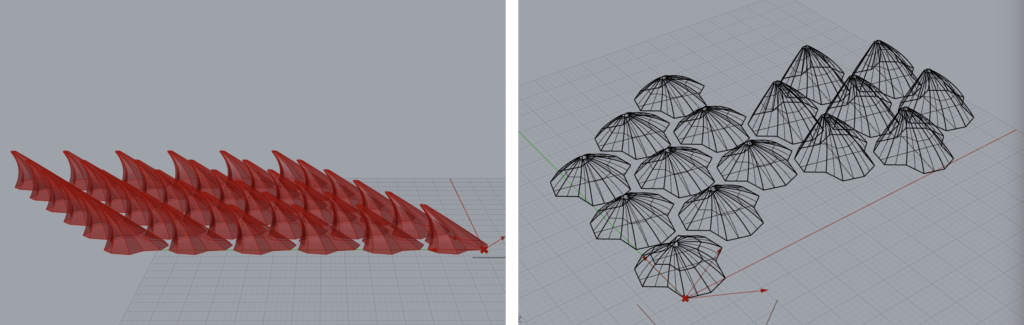
I started with my hexagon tile to produce a simple shape for the base of my “scale”. I then put together some components in grasshopper that allowed me to scale and translate the shape, producing two smaller curves that I could then loft and join together to produce a spike-like shape. I pass this surface to my lattice code, which works the same way in order to translate them, but I added an offset value (<1) to allow for an even separation between the tiles to make the printing easier. I multiply my vectors when translating the object by 1+offset.
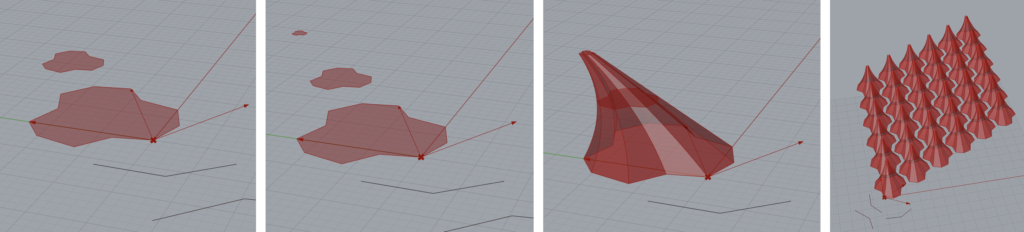
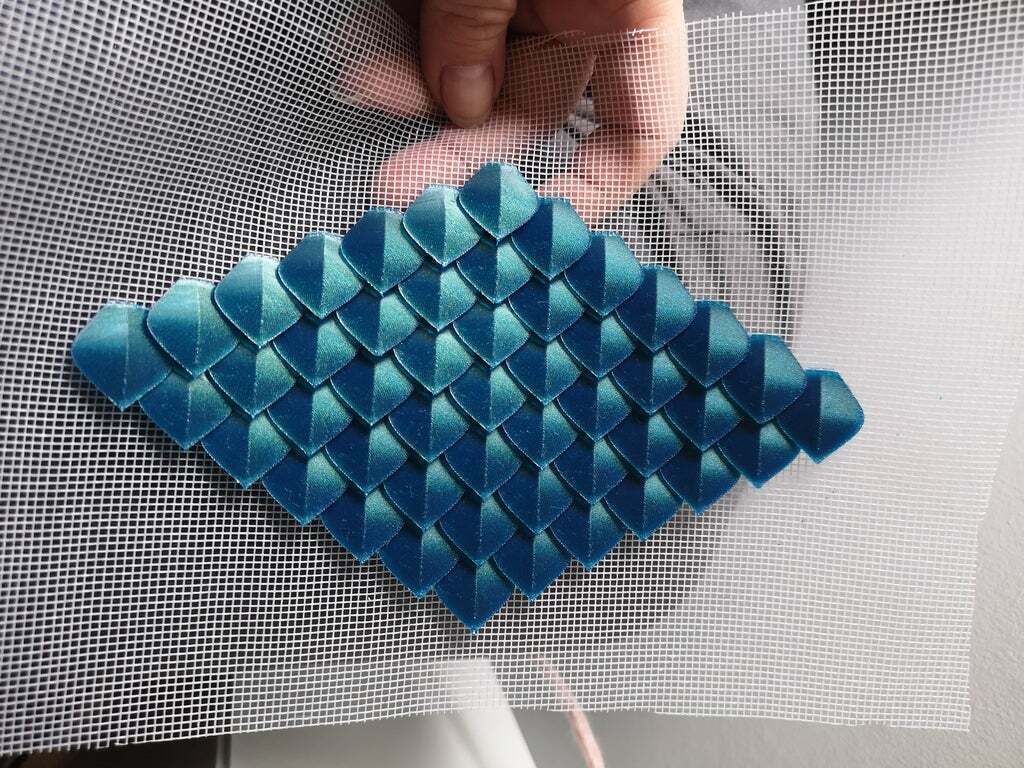
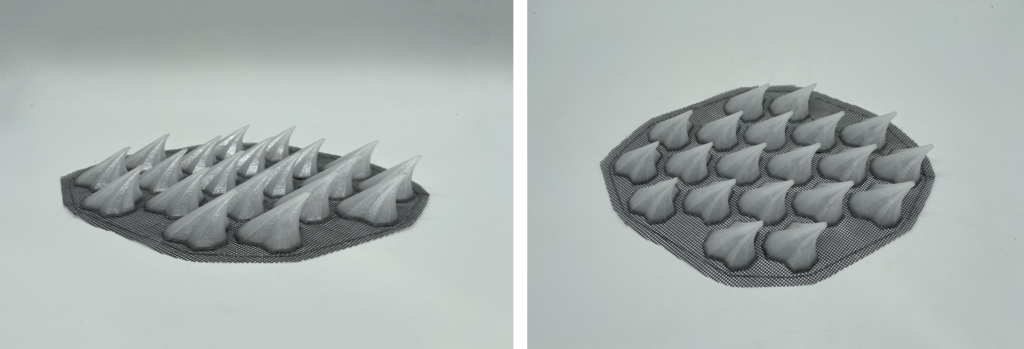
I printed my pieces in clear PETG, because I am still somewhat obsessed with that material, and on a mesh surface because I really like the scale/spike prints that can then be attached to other objects like clothes or backpacks. I then generated some additional spike/scale pieces with the same base tile, but different curves for different vertical shaping, but unfortunately when I tried to print them my print errored due to some filament getting caught on the printer head, and I ran out of time. All of these pieces tile on the xy-plane because they have the same base shape.
Part Three: Surface Morph
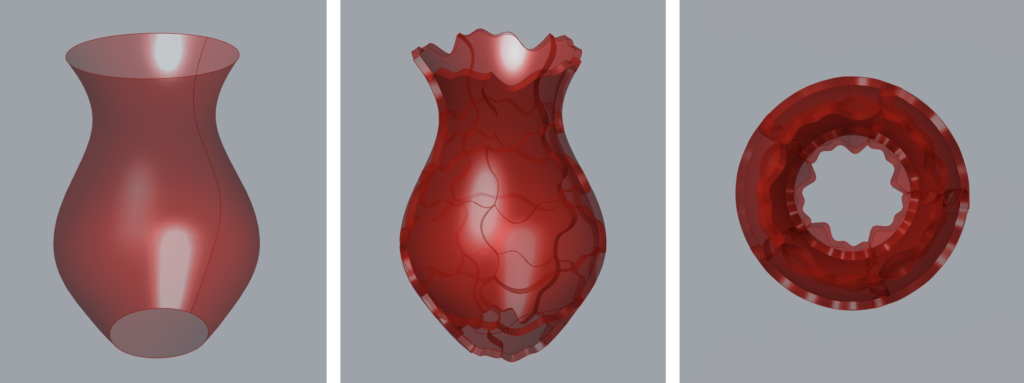
I used my first escher tile in order to create my surface morph (the code is in the first file). Initially I was going to get it working, then change the tile shape. But I really liked the way the tile joined together at the bottom of the vessel. It looks like a cherry blossom flower to me, with the five petals.
I wanted to do an additional surface morph across a shape that could fit over a hand or wrist, then morph my 3D tiles to it in order to produce a glove that could be worn. But I ran out of time and it would have been difficult to print. It would likely have needed to be unrolled after morphing to the surface, which somewhat defeats the purpose.
Hi Jaime, your 3D printed design on mesh was one of the coolest things ever! I so very much enjoyed seeing it. I think it was so creative!
I really struggled with part1B of this project, but your approach seems so seamless and simple.
Amazing work!
Hi Jaime! I love the way this project turned out. The clear PETG is a really fascinating material, I didn’t realize in class that’s what you used but it looks incredible. I think it was smart to space out the tiles on the mesh because the movement it allows is really beautiful.
Hey Jaime!
I loved getting to see your project, particularly the in person demonstration! I know that we’ve talked a lot about 3D printing clothing in class, but I think that your “armor” brings that a step further. The costuming potential is limitless here, for an example, there is a video game character from the Mortal Kombat series named Baraka, and your sleeve looks so much like his forearms that it’s startling. Super well done and I hope that you can go even further with it!
Hello, Jamie:
I like your way of printing on the mesh, that is super creative!
Also, your “armor” is very stylish and interesting.