
2D Tiling
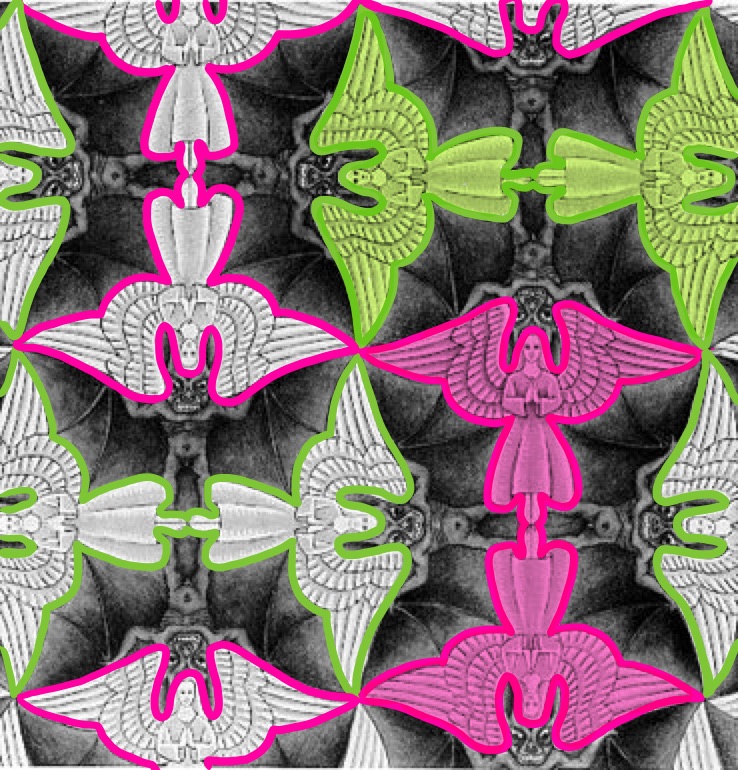
For the Escher Tiles, I was very inspired by Escher’s piece below, Angels and Devils.
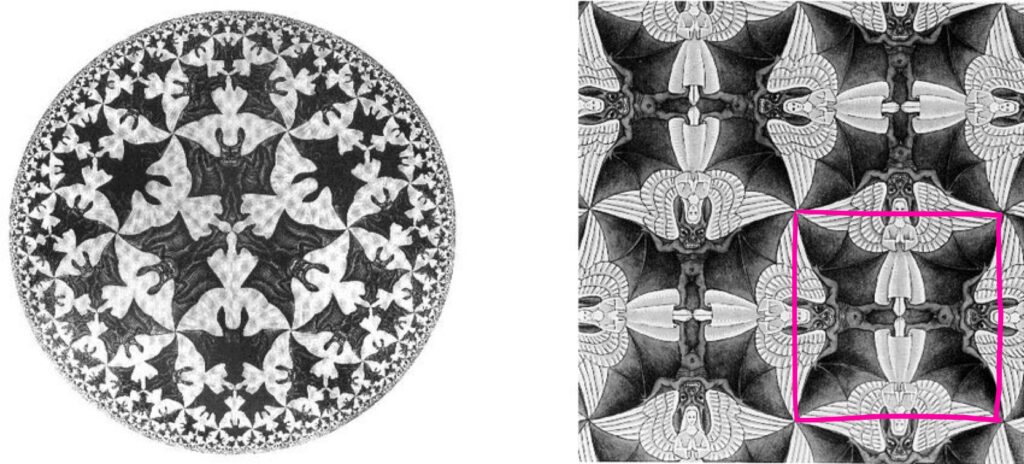
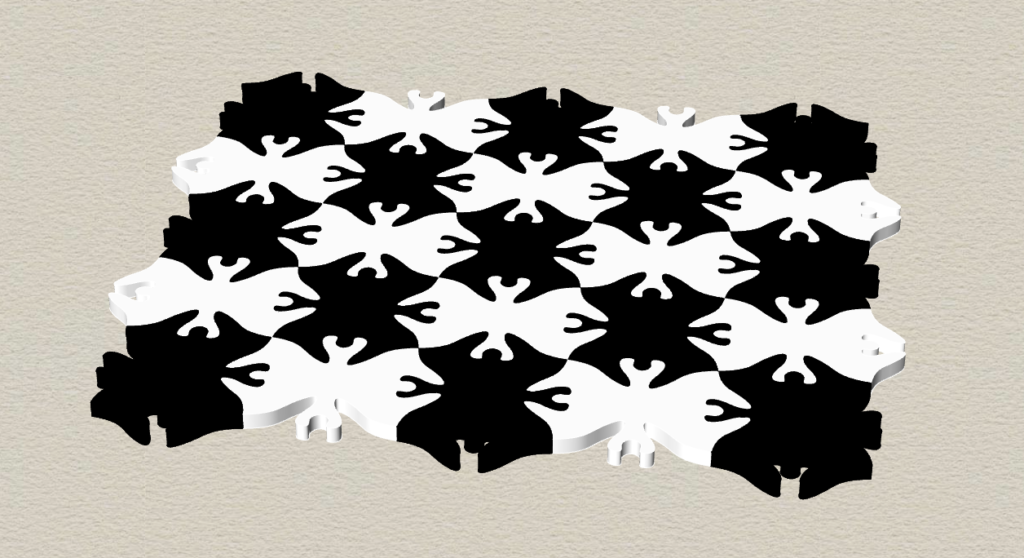
The original tiling is in hyperbolic space, but I based mine off of this square 2D Euclidean version to the right – I drew a square to emphasize the base tile.
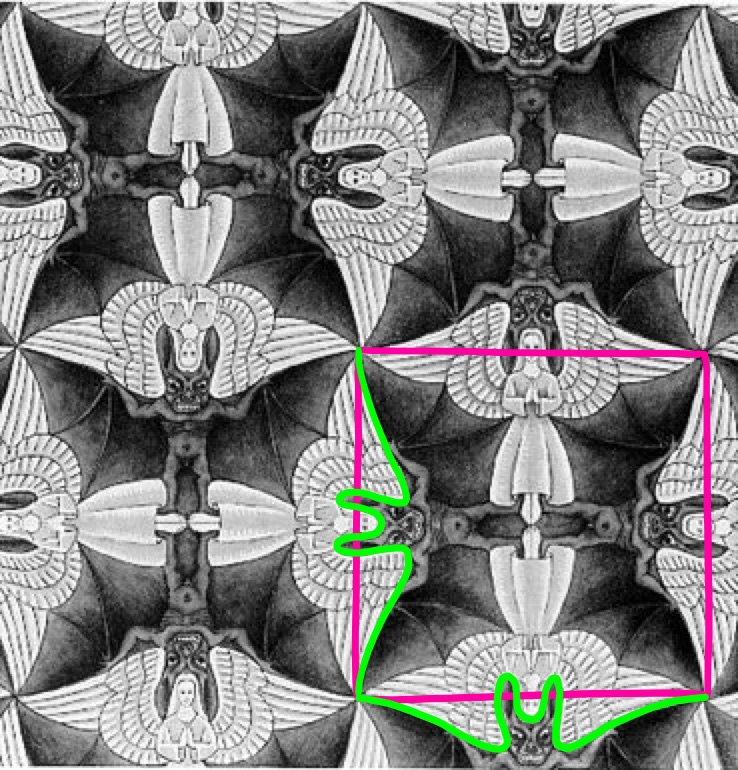
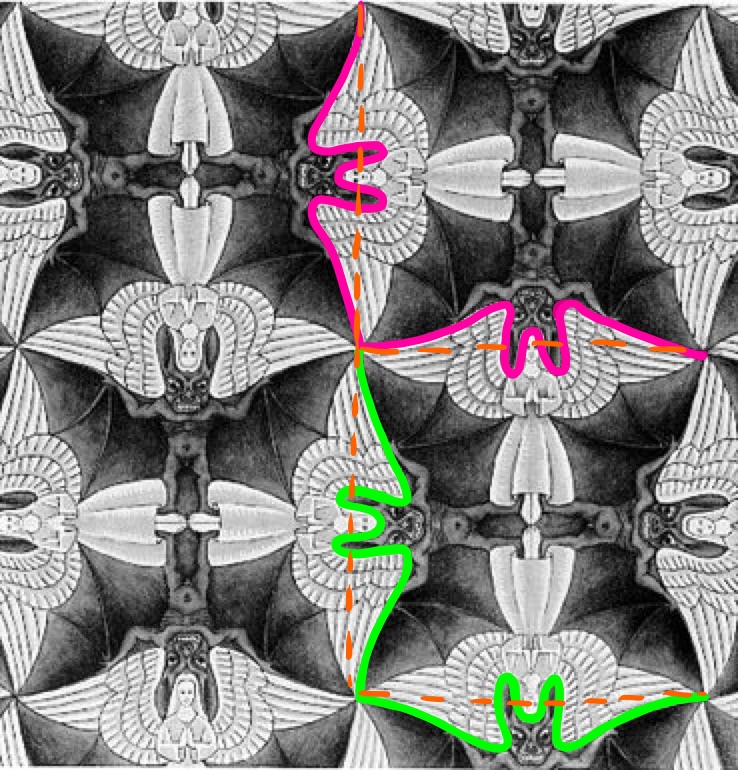
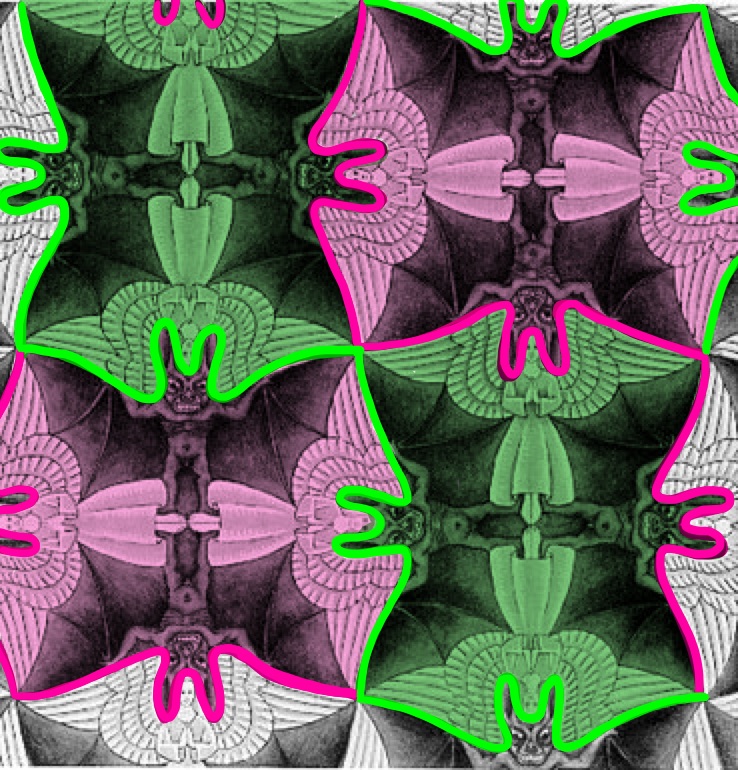
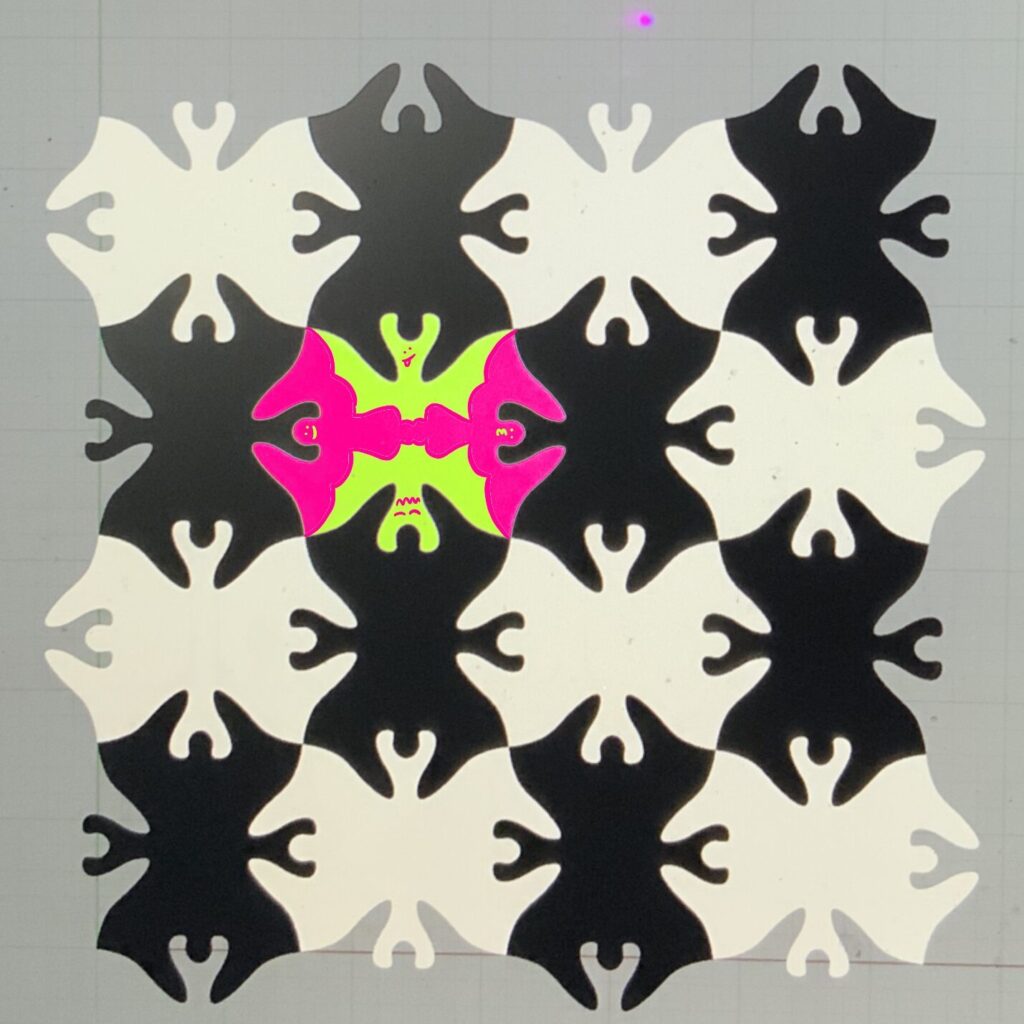
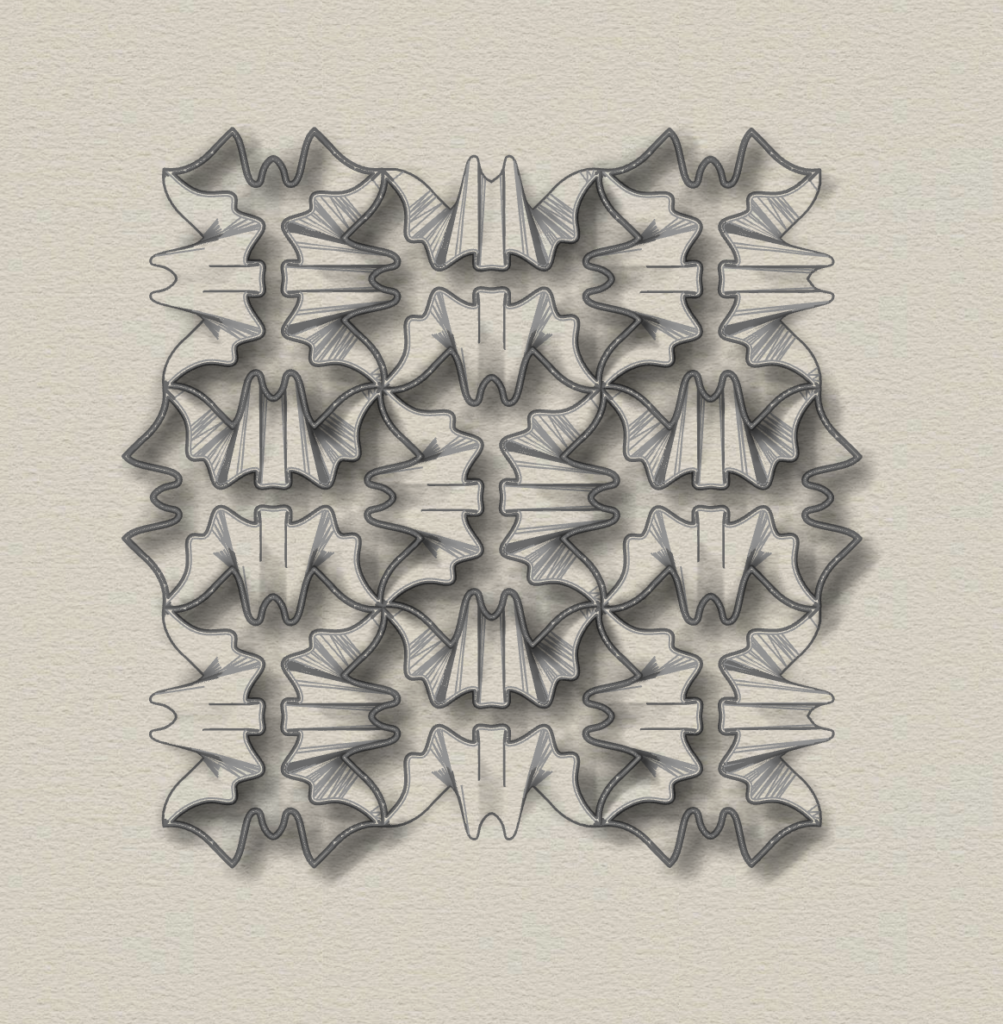
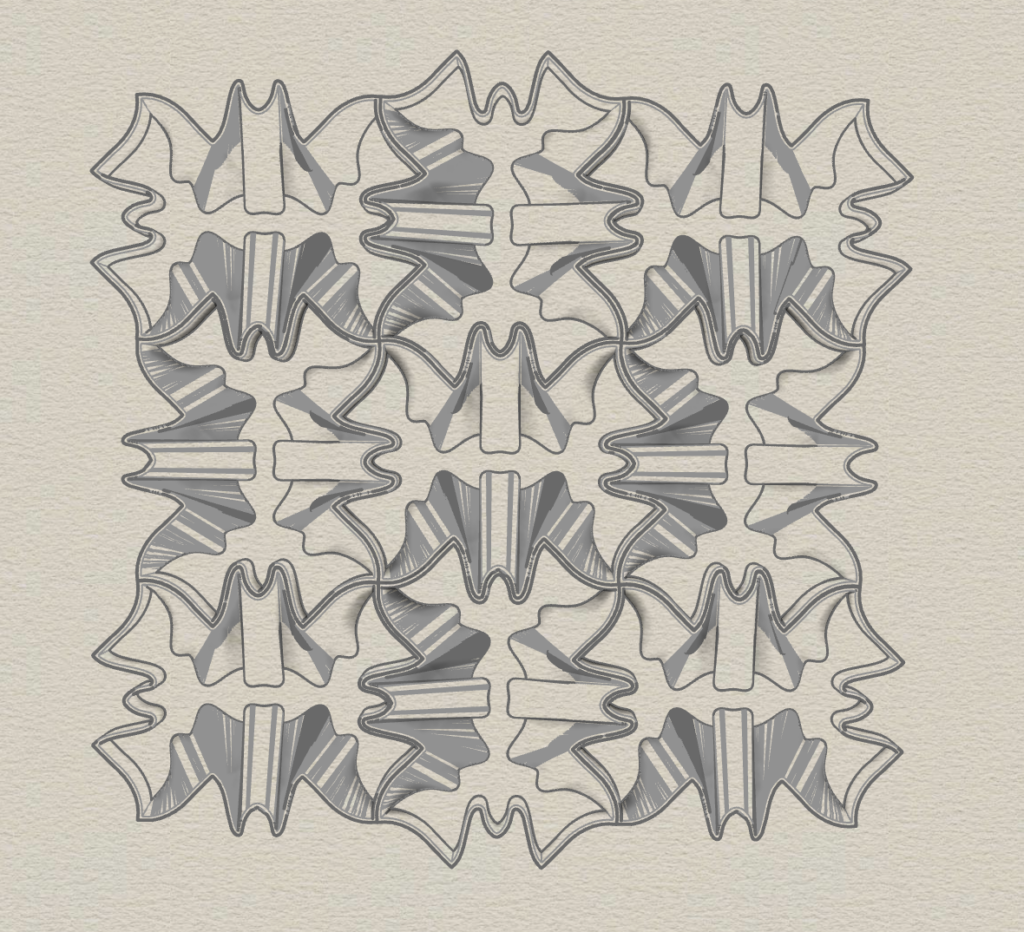
I created my two lines in the shapes of where the heads of the demons and angels intersect, as shown in the first image in green. I noticed instead of the parallel line in the square being the same, like the tiling we did in class, it was the perpendicular line. This yields tiles that rotate 90 degrees every time. I found I could represent this by just mirroring the parallel lines for every lattice unit where (i+j)%2==1, or in a checker-boarded pattern. You can see this in the middle picture above, where the pink lines are versions of the green lines that have been flipped across the orange axes. I used rs.RotateObject(…) for this. When the lattice is constructed, you see the tiles that flip-flop direction in a checker board pattern – as in the third picture. Of course, this yields not quite the same pattern. I only created one tile that encompasses two devils and two angels, whereas Escher had two different tiles – one for the pair of angels and one for the pair of devils.
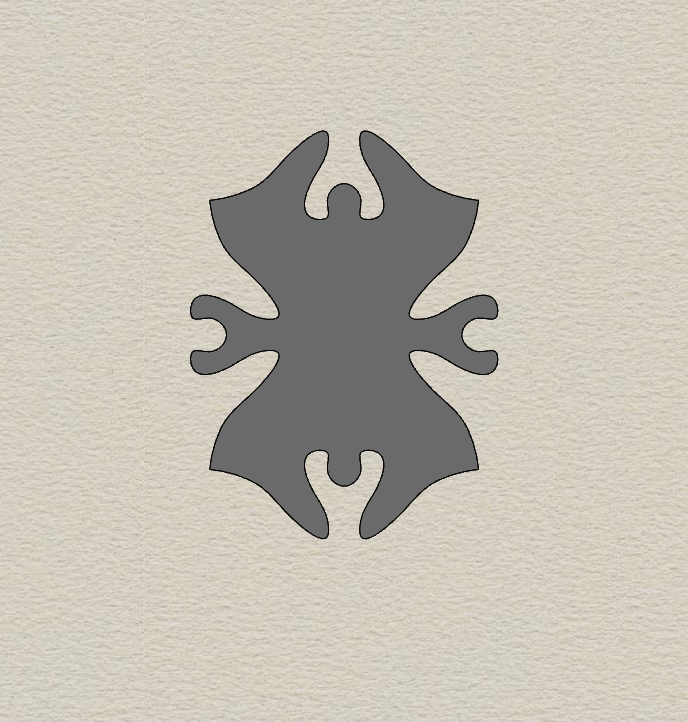
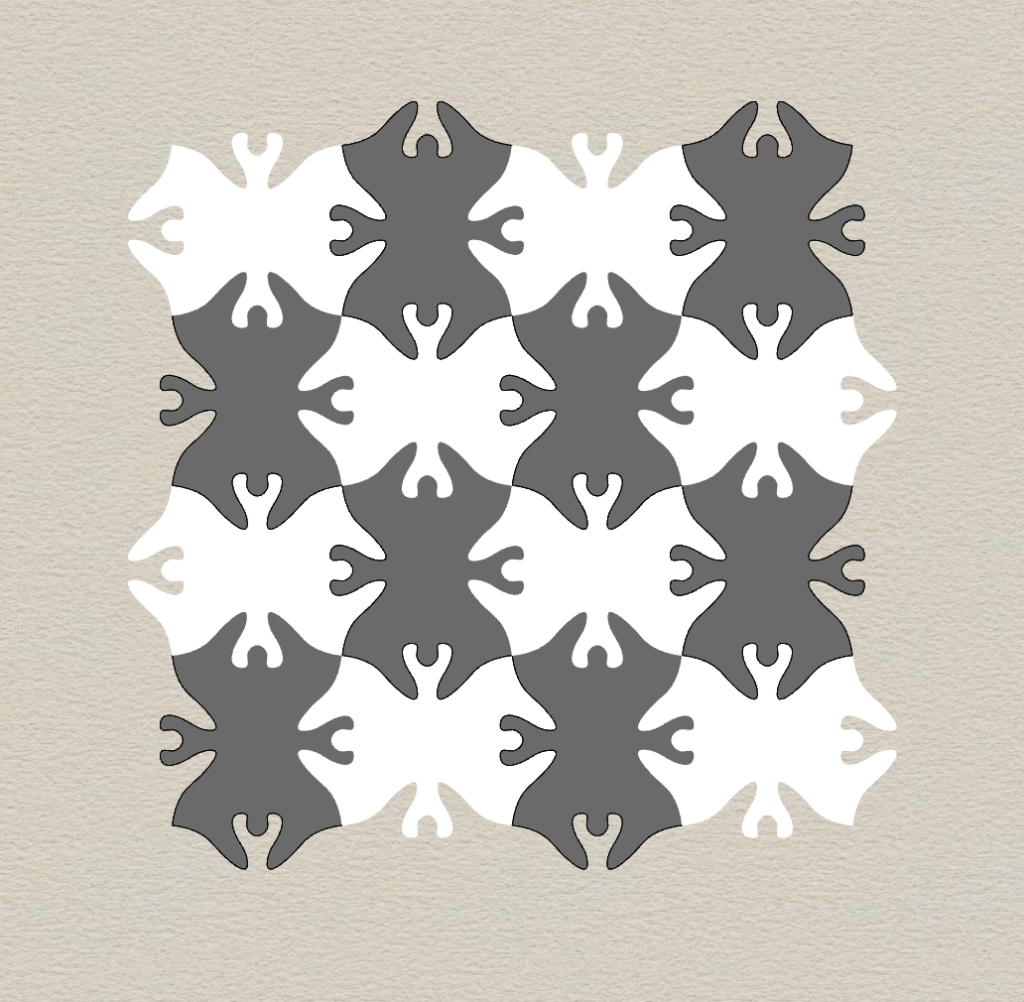
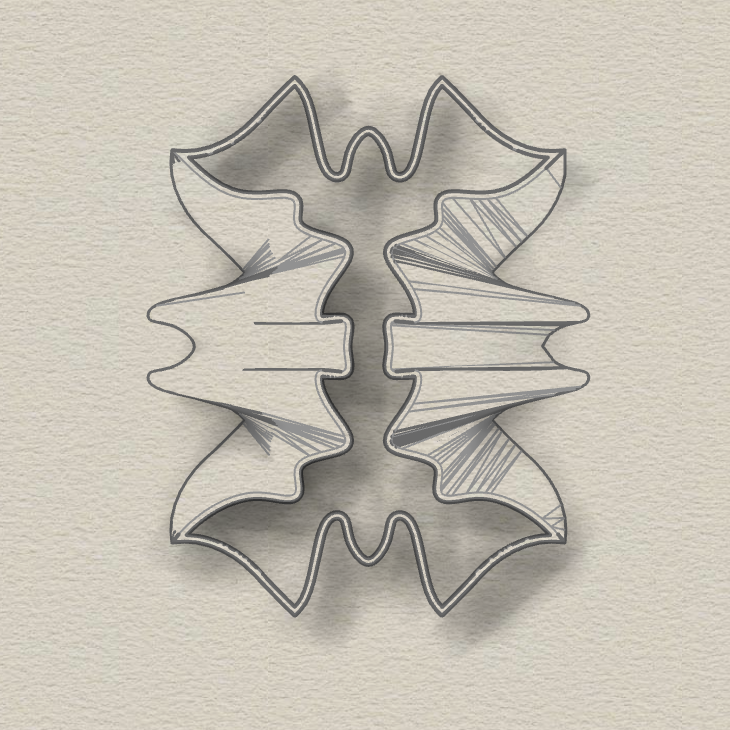
Below is the individual tile, a 4×4 matrix, and a visualization of the shapes of the devils and angels within a tile.
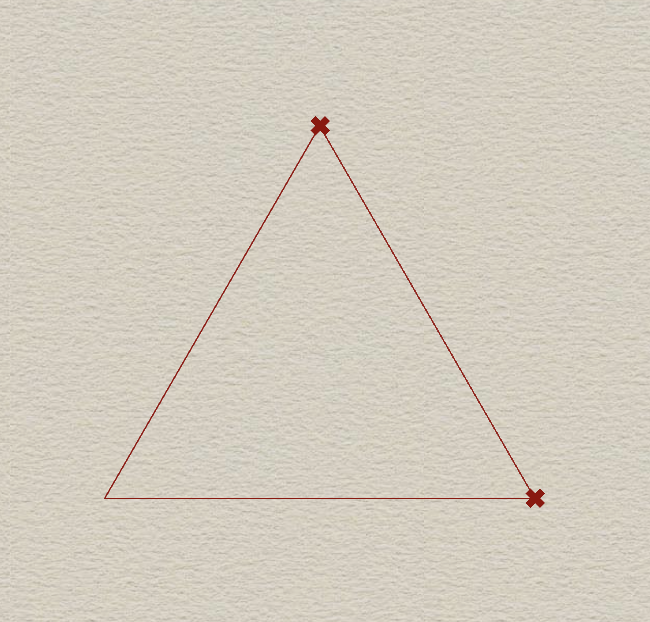
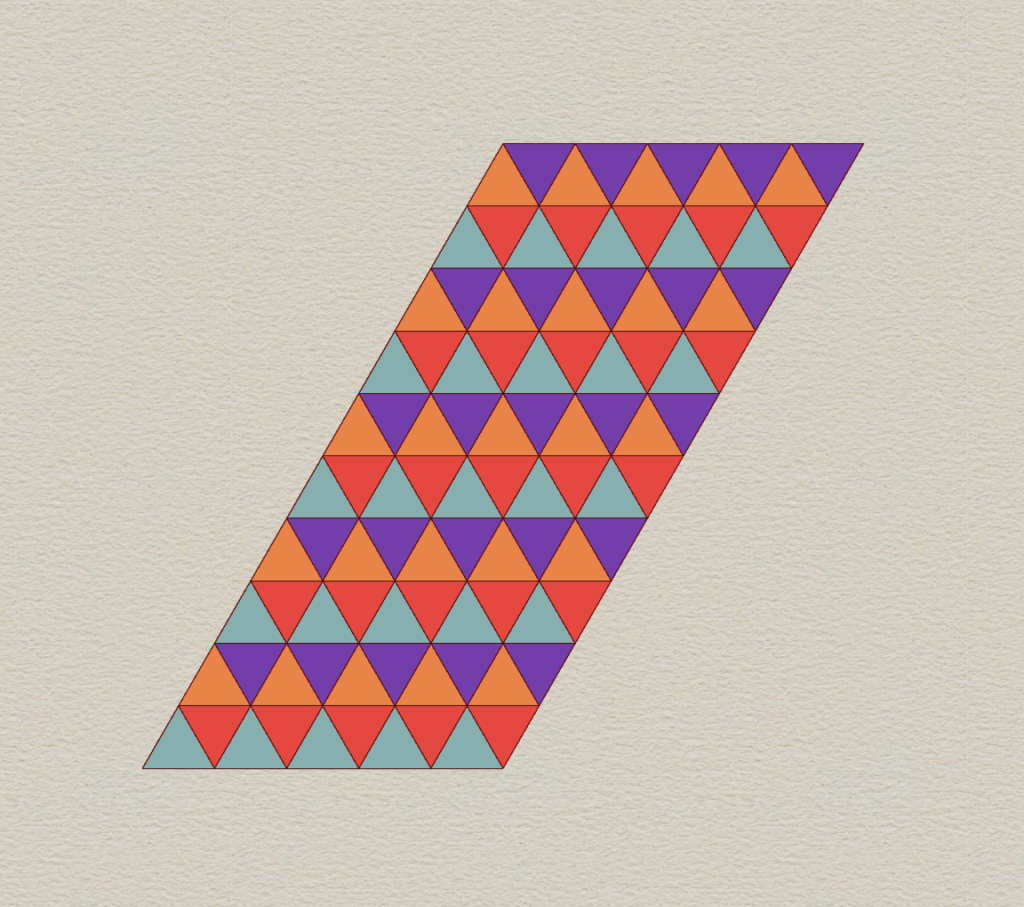
For the second part, I chose to do triangles. Essentially, I created a triangle from 3 lines, with two vectors, as seen below. Then, in the horizontal direction, I moved every triangle half of the vector length, and for every other triangle, (if j%2==0), I flipped it upside down. In the vertical direction, the triangle would move the full length.
Printed 3D Tiles
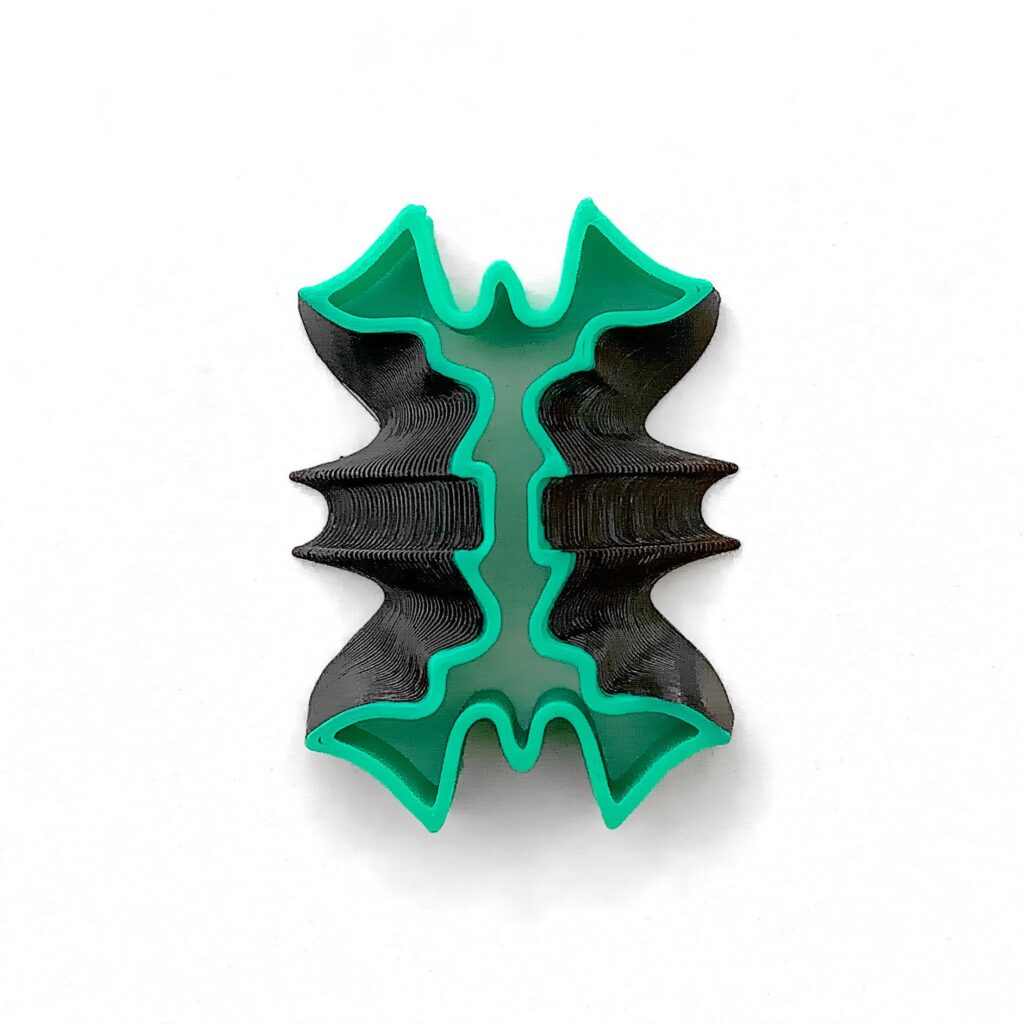
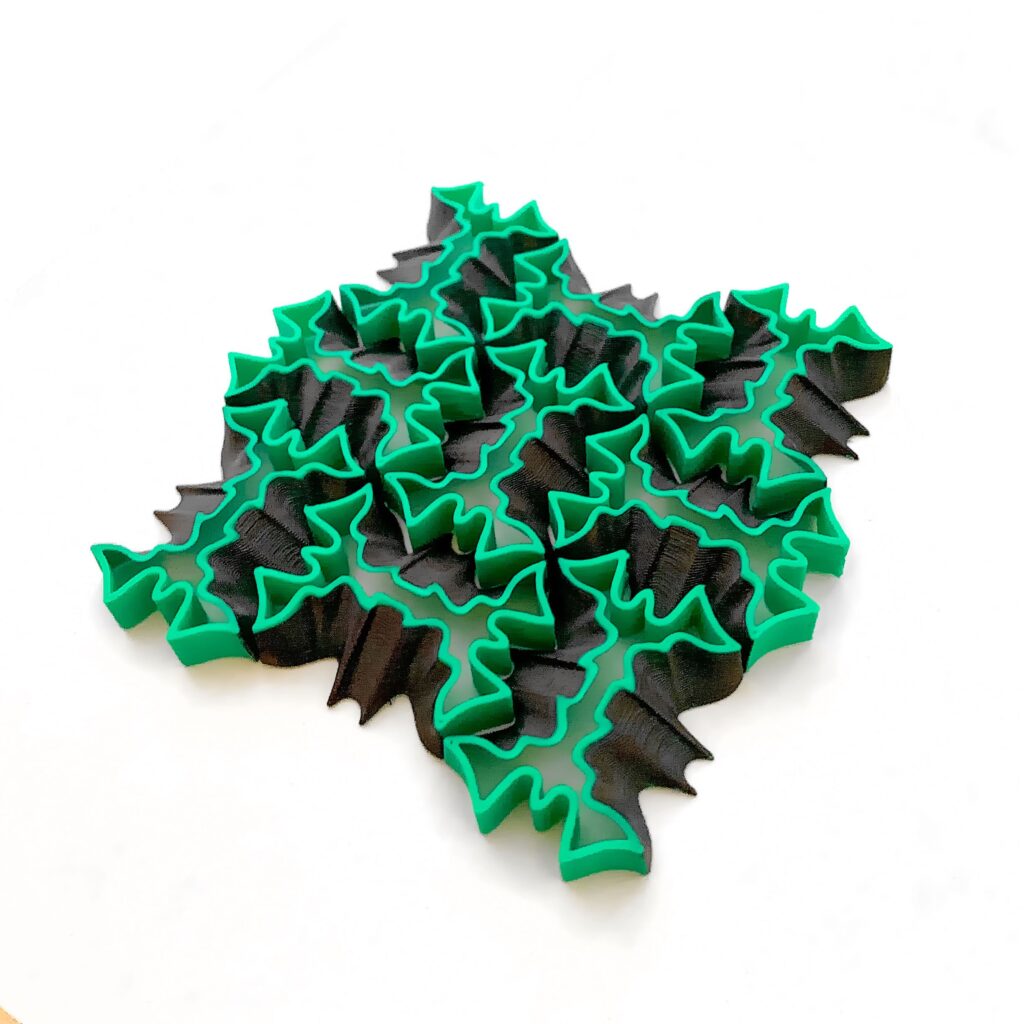
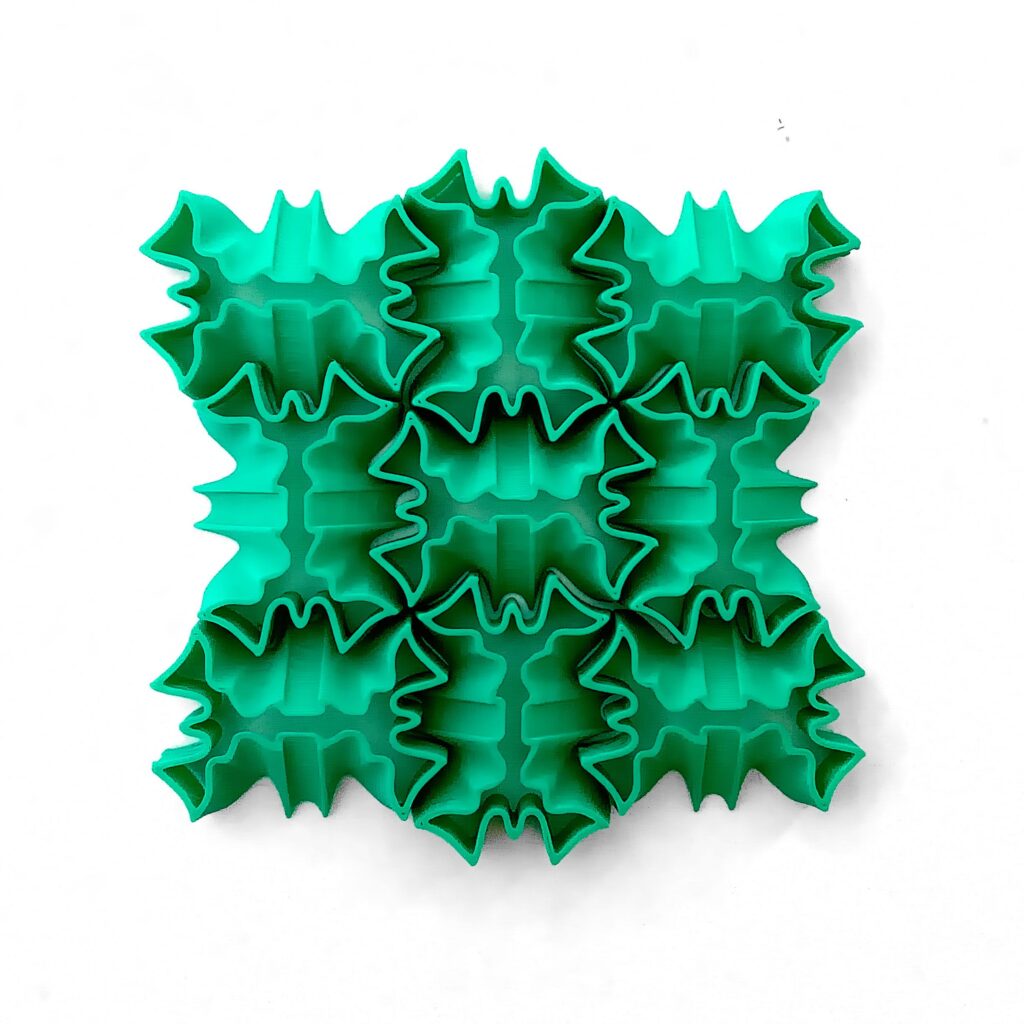
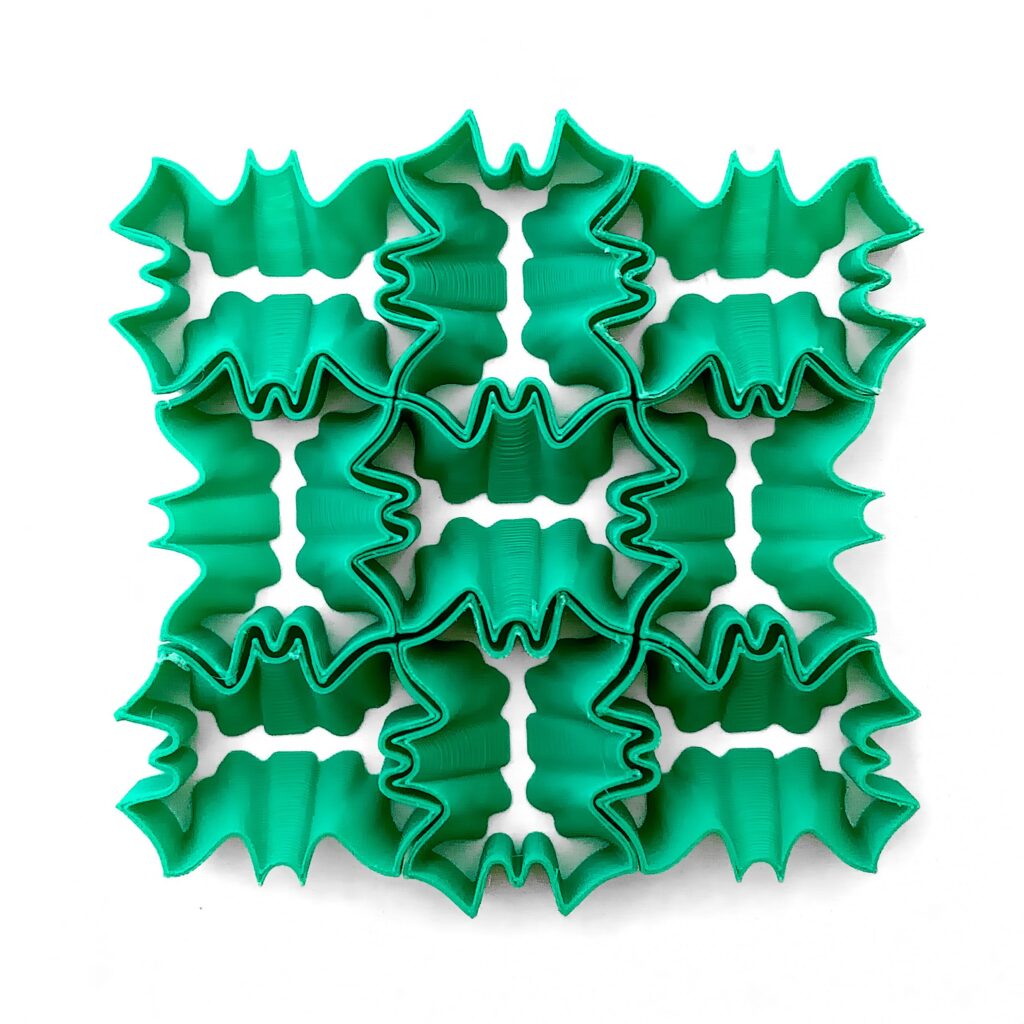
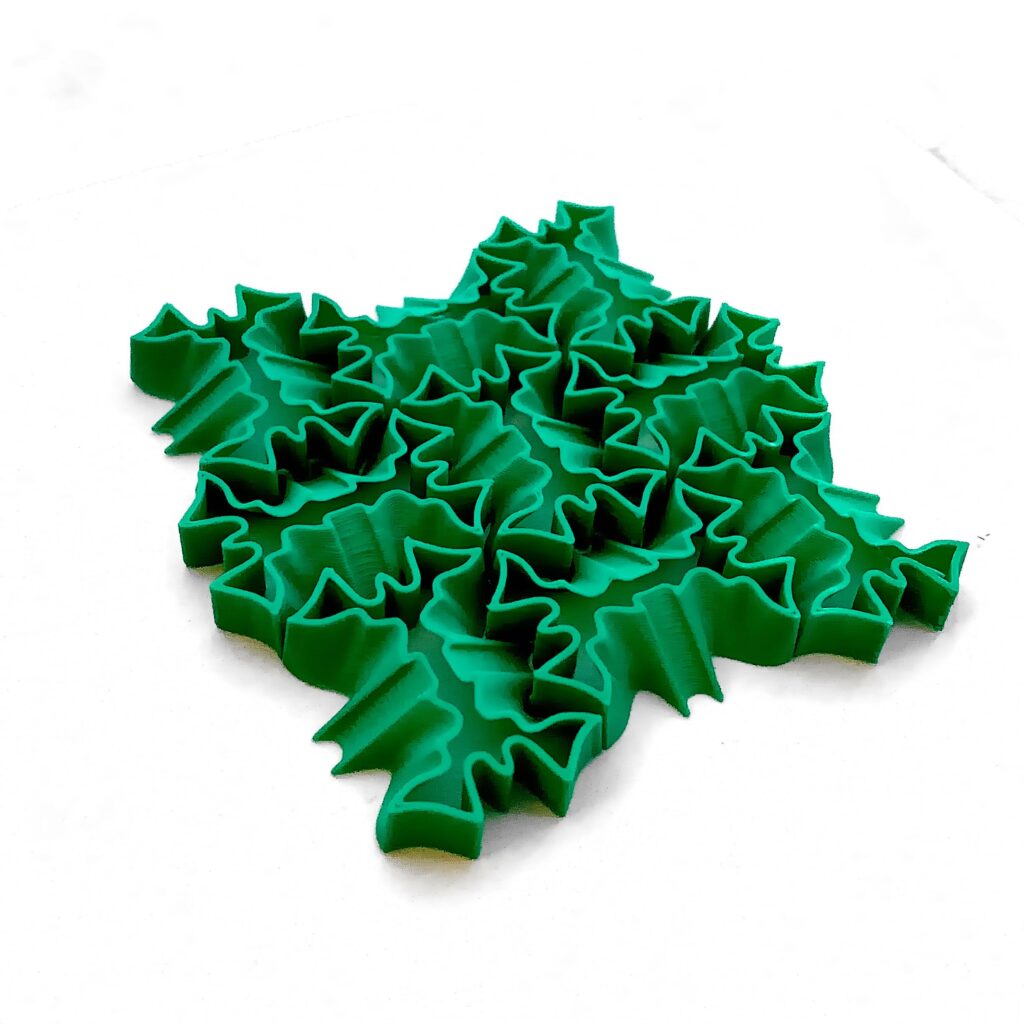
I realized that if I formed the vertical curve as the intersection of the bottom of the devil / the side of the angel, that I would produce an angel tile that formed the devil in the negative space. I chose to loft my original Escher tile to this angel tile. This way, the bottom tiles the plane with my 2D Escher tile, and the top leaves holes where you can now see the figures of the angels and the devils. I’m really happy with the way this turned out!
I had some troubles at first printing because the particular shape of the curve made it so that the lofted surface became wider than the tiling slots, so I had to adjust the curve shapes. This is what it looked like before (I just particularly like this image, it contrasts the tiles really well):

The tiling in this image is a little off because I had grid snapping on and didn’t realize, but you can see above that it tiles the plane perfectly. For the actual tiles I printed, I used the offset block to reduce the outer edge as well, so that they could fit to each other. This resulted in some slight gaps, I think as a byproduct of how much I offset, the tiles being small, the geometry, etc. They still fit together very nicely:)
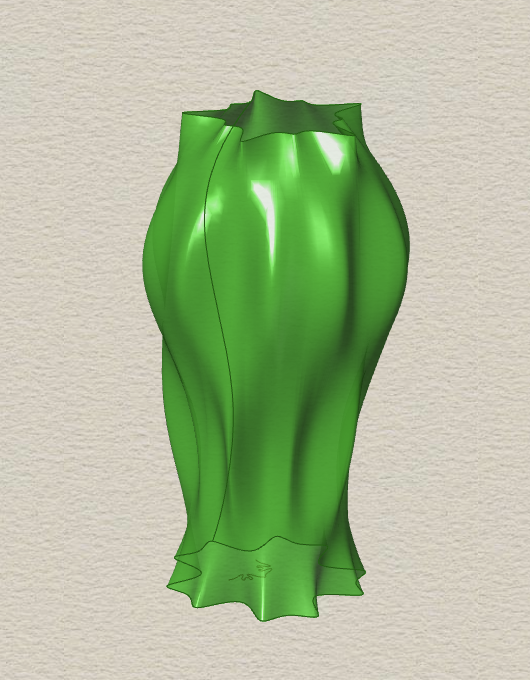
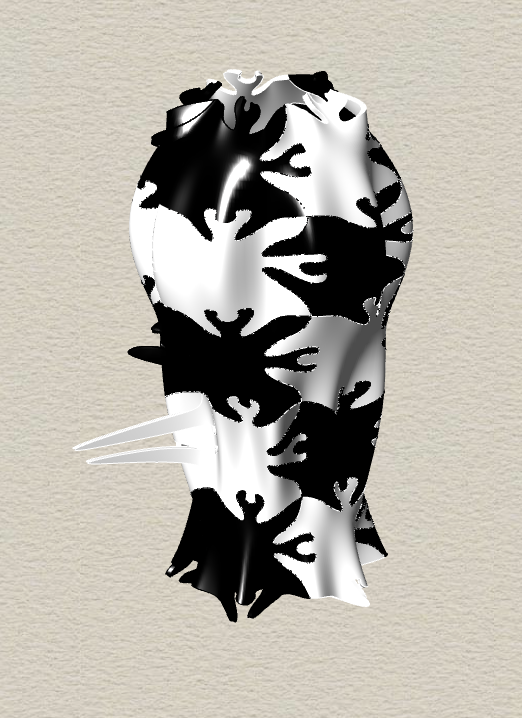
Surface Morph
For this part, I morphed my Escher tiles onto one of my parametric vessels. The code was straightforward from what we accomplished in class. I do have some funkiness going on at the seam but it looks cool.

Hi Lauren, your approach to creating this Devil vs. Angel tiling was so cool! I liked how it turned out on the surface morph as well. Additionally, I liked how you colored the devil’s side after printing to show that contrast.
Thank you Raneem! I was hesitant at first to color them but I’m happy I did and glad you like it as well! I do like the surface morph too, as well as everyone’s surface morphs. It would be interesting to see what we could actually print with it.
Hi Lauren,
Your tiles are really awesome! Really enjoyed seeing the process you used to figure out the shapes of your lines, I tried to do something similar at first looking at some of Escher’s tiles but I couldn’t quite get it right. The coloring in on the sides of your 3d tiles is great too really adds depth to the tiles. Really nice work!
Hey Michel, thank you for your comment. Aren’t Escher’s works so inspiring? You should definitely keep trying with what you were working on:) And thank you, I do like how it turned out with the black on the sides. I also think the shadows on the uncolored tiles looked cool too though!
Hello Lauren,
I think some of the most difficult things to do in art is recreation, because not only are you working against yourself, but against the solidified representation and experience of another artist. I say this, because I would’ve never thought this with your project. You worked inside even more difficult bounds (1 tile instead of 2) and made something that represents an awesome piece of work while still making it feel its own in the final piece! Great use of the negative space, nice job!
Hey Christopher, thank you for your kind words:) I would like to try to make the two tiles individually, I think it would only take a few adjustments to the code. But I’m also really happy I was able to represent it with the one tile:)
Hello Lauren,
I like your work! It is highly elegant and sophisticated.
It is amazing you can come up with a way to print it out!
Hello Lin:) Wow, thank you for this sweet comment. It definitely took a lot of trial, error, and planning, but I’m really proud of this project!