Due Dates
Assignment : 9am, Tuesday November 21
Initial comments: 9am, Tuesday November 28
Comment responses: 9am, Thursday November 30
Description
The purpose of this assignment is to explore the creation of different kinds of tiles and tiling applications. It has three components, described below
Part 1: 2D Tiles
a) Write a program in Python/Grasshopper that creates an Escher-esque tile and use it to tile the plane. Your code must generate both the tile and the tiling. Your tiling should be based on one of the three Regular tilings. Edit the edges and vertices of a regular polygon base tile, maintaining the constraints we discussed in class, to come up with your Escher inspired design. You should capture screenshots of: 1) your base tile(s) on its own, and 2) a tiling of the plane that includes at least a 3×3 matrix of tiles.
b) Write code in Python/Grasshopper to generate a hexagonal or triangular 2D tiling. (Hint: modify the lattice code we worked through in class.) Your tiling must meet the formal requirements for tiling the XY plane. That is, the tiling cannot leave any holes and tiles cannot overlap. Make sure you are fulfilling these requirements by coloring your tiles. Capture screenshots of a (colored) tiling of the plane that includes at least a 3×3 matrix of tiles.
Part 2: 3D Printed 3D Tiles
Write a program in Python/Grasshopper that creates a 3D tile that tiles the XY plane. You can use one of the tiles you generated in Part 1 as a base tile. Again, your tiling must meet the formal requirements for tiling the XY plane. (Note: you are welcome to use holes as decorative elements inside each tile shape, but the fundamental tile shape cannot leave holes in its tiling, see images below.) Your code must generate both the 3D tile and a 2D tiling. (You do not have to generate a 3D tiling in code.)
The 3D tile should include some geometrical change in the z direction. (A simple vertical extrusion of your 2D tile will not fulfill this requirement.) Your tile does not need to tile/fill space in z, but the 3 dimensionality should add complexity and interest to your tiling. Capture a at least one good screen shot of your 3D tile and one screen shot of a 2D tiling of the plane that includes at least a 3×3 matrix of tiles.
3D print enough copies of your tile to demonstrate that it tiles the plane, at least 4 copies. These physical tiles should fit together and demonstrate that your tiles do indeed tile the plane. Each tile should be at least 1″ x 1″ in size.
Below are examples of 3D printed ceramic tiles made by the artist Piotr Waśniowski. See his instagram page for excellent tiling examples.
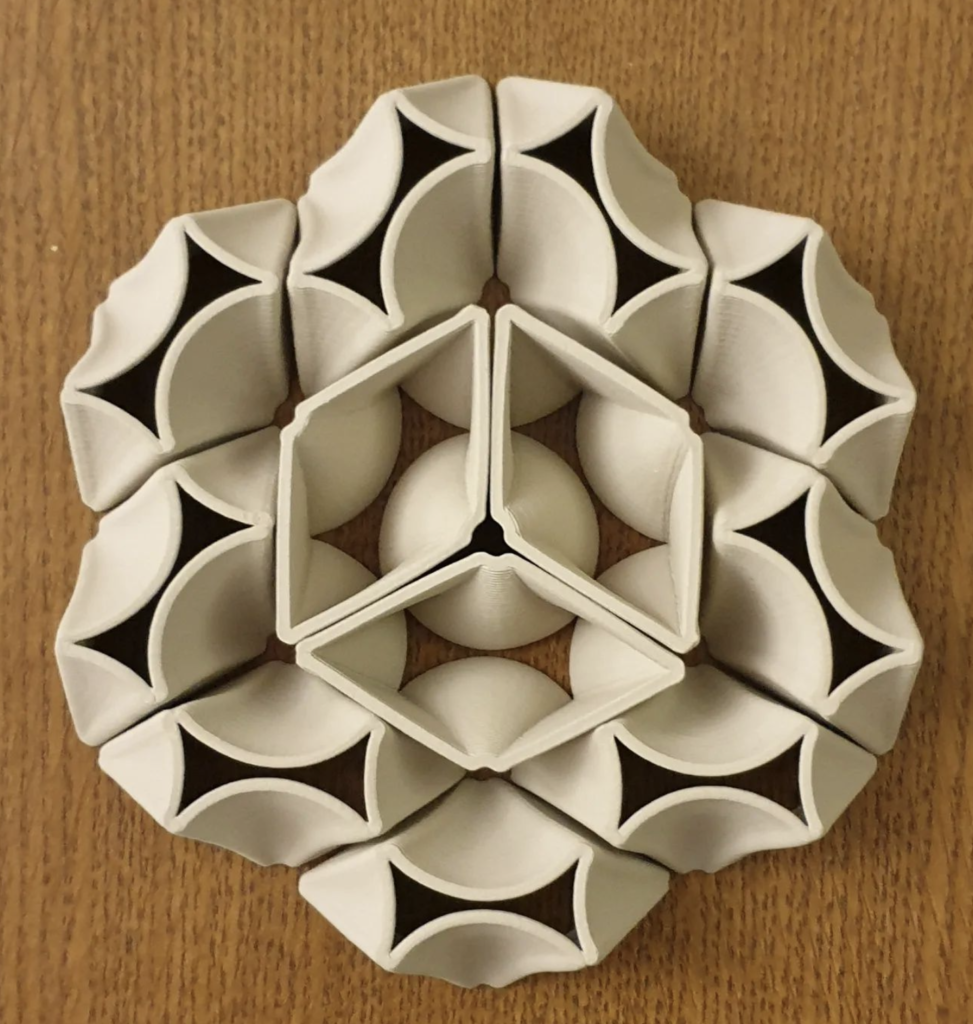
This tiling would fulfill the assignment requirements since the tiles fit together in X and Y with no holes.
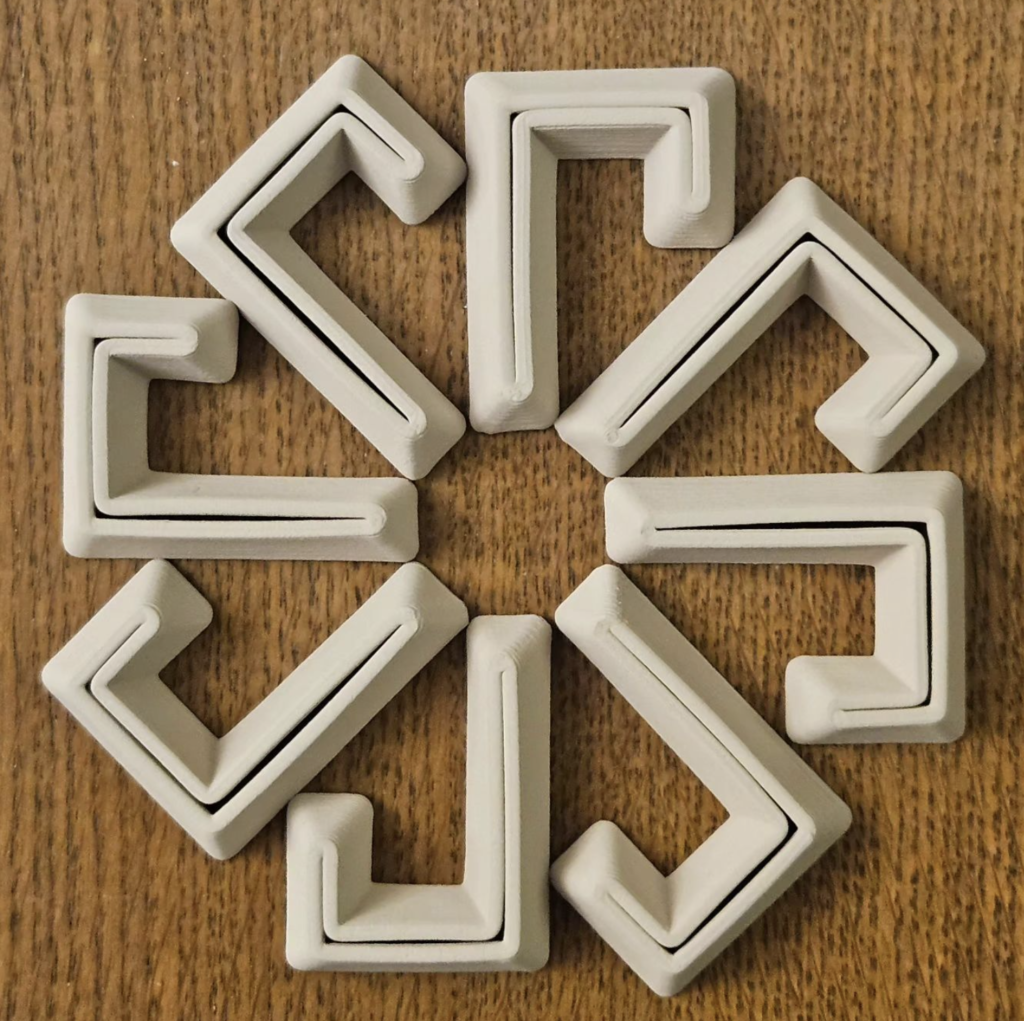
This tiling would not fulfill the assignment requirements since holes are left between “tiles” in X and Y.
The turtle-based slicer we built in class may be useful for this part of the assignment.
Part 3: Surface Morph
Create a 2.5D or 3D tiling pattern and morph it across a surface. You may use one of the tile designs you created in part 1 or 2 of this assignment. Capture screenshots of: 1) a tiling that includes at least a 3×3 matrix of tiles, 2) your surface without tiles, and 3) your surface decorated with your tiling.
What to Hand In
Create a post on this website that documents the work that you did. Your post should include three sections:
- Part 1: 2D Tiles (20%)
- A description of your coding and design process. Include a discussion of any challenges you encountered. Sketches you made to figure out geometry are especially welcome
- At least two images: a screen shot of : 1) your base Escher tile on its own, 2) a tiling of the plane with your Escher tile that includes at least a 3×3 matrix of tiles, 3) a colored tiling of the plane with your triangular or hexagonal tile.
- Your code. Name your files or folder for this part of the assignment: FirstnameLastname2DTiles. Note, if you just have one large grasshopper code file instead of three separate ones, that’s fine. In that case name it: FirstnameLastnameTiling. If you use a single file, clearly label your Grasshopper document to indicate which part of your program does what. The use of groups in GH can also be a helpful organizational tool.
- Part 2: 3D Printed 3D Tiles (70%)
- A description of your coding and design process and a description of your printing process. Include a discussion of any challenges you encountered. Again, geometrical sketches are welcome.
- At least two images: a Rhino screen shot of : 1) your base tile(s), and 2) a tiling of the plane that includes at least a 3×3 matrix of tiles.
- At least three excellent images of your 3D printed tiles arranged in different tiling configurations. One of these images should clearly demonstrate a tiling of the XY plane.
- Your Grasshopper code. If your Grasshopper file depends on a shape imported into or drawn in Rhino, also include your Rhino file. Name your files or folder: FirstnameLastname3DTile.
- Part 3: Surface Morph (10%)
- A description of your process including any challenges you encountered.
- At least three images: a Rhino screen shot of : 1) a tiling that includes at least a 3×3 matrix of tiles, 2) your surface without tiles, and 3) your surface decorated with your tiling.
- Your Grasshopper code. Name your files or folder: FirstnameLastnameSurfaceMorph.
Put all of your code files into a single folder titled FirstnameLastnameTiling. Zip the file, upload it and add a link to your post. Add your post to the “Large Assignment 5 – Tiling” category.
Discussion
Read all of your classmates’ posts and comment at least three of them. Try to comment on projects that haven’t been commented on or that have fewer comments. Comment on both the artifact and reflections.
Respond to at least two comments. If you don’t have enough comments to respond to, email Leah.