Orb-Weaver Web
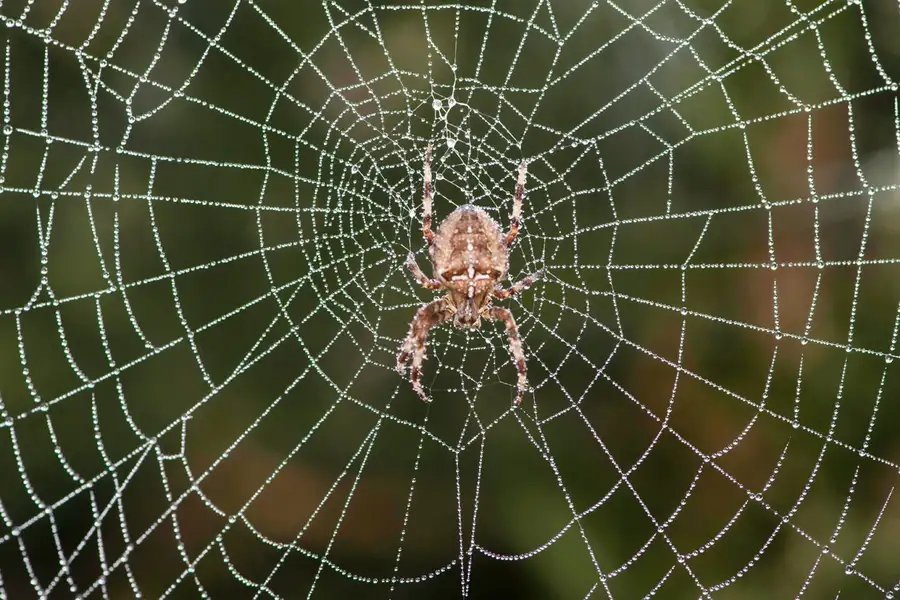
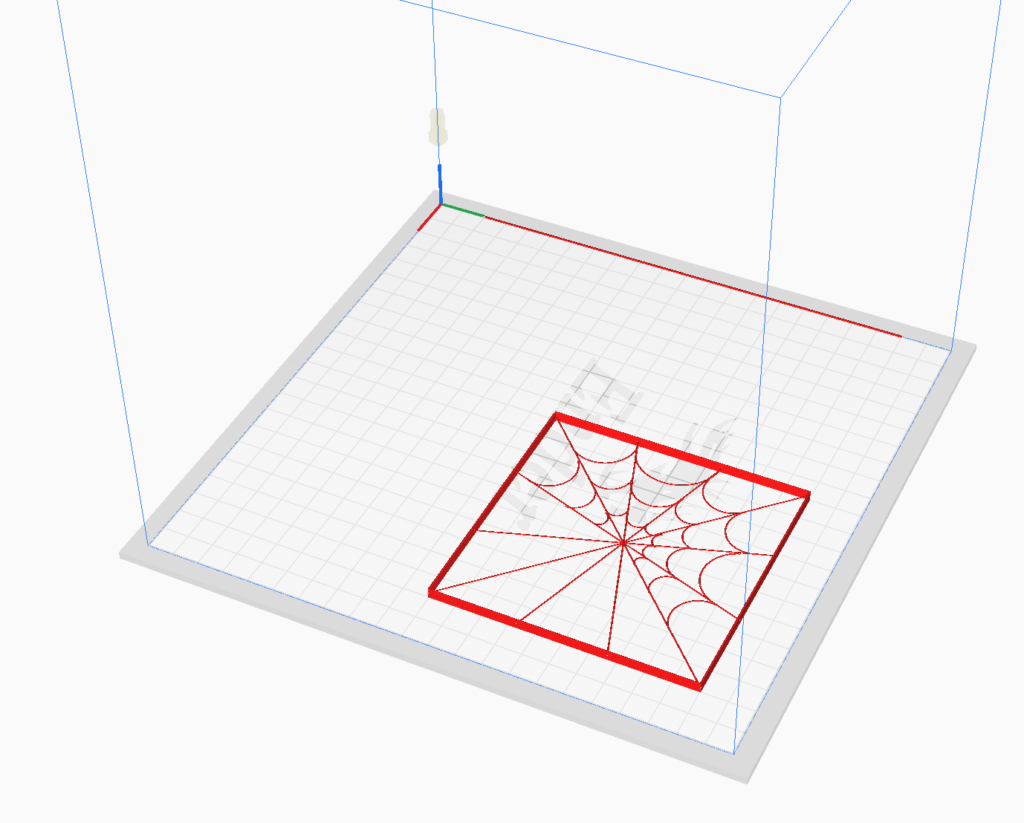
My first design was inspired by the orb-weaver’s webs. Growing up they would always build their webs right by my front door so I would see them every day during the summer and they quickly became a fixture in my life. As soon as I saw the requirement for free standing lines I knew I wanted to attempt to recreate their web. And what nature creates seemingly so effortlessly became my 3D printing nightmare. To begin I knew I needed a shape that could contain the web so I decided to build up just a simple square wall that halfway through would have the strands making up the desired pattern. Unfortunately, that would quickly prove to be the easiest part of the design.
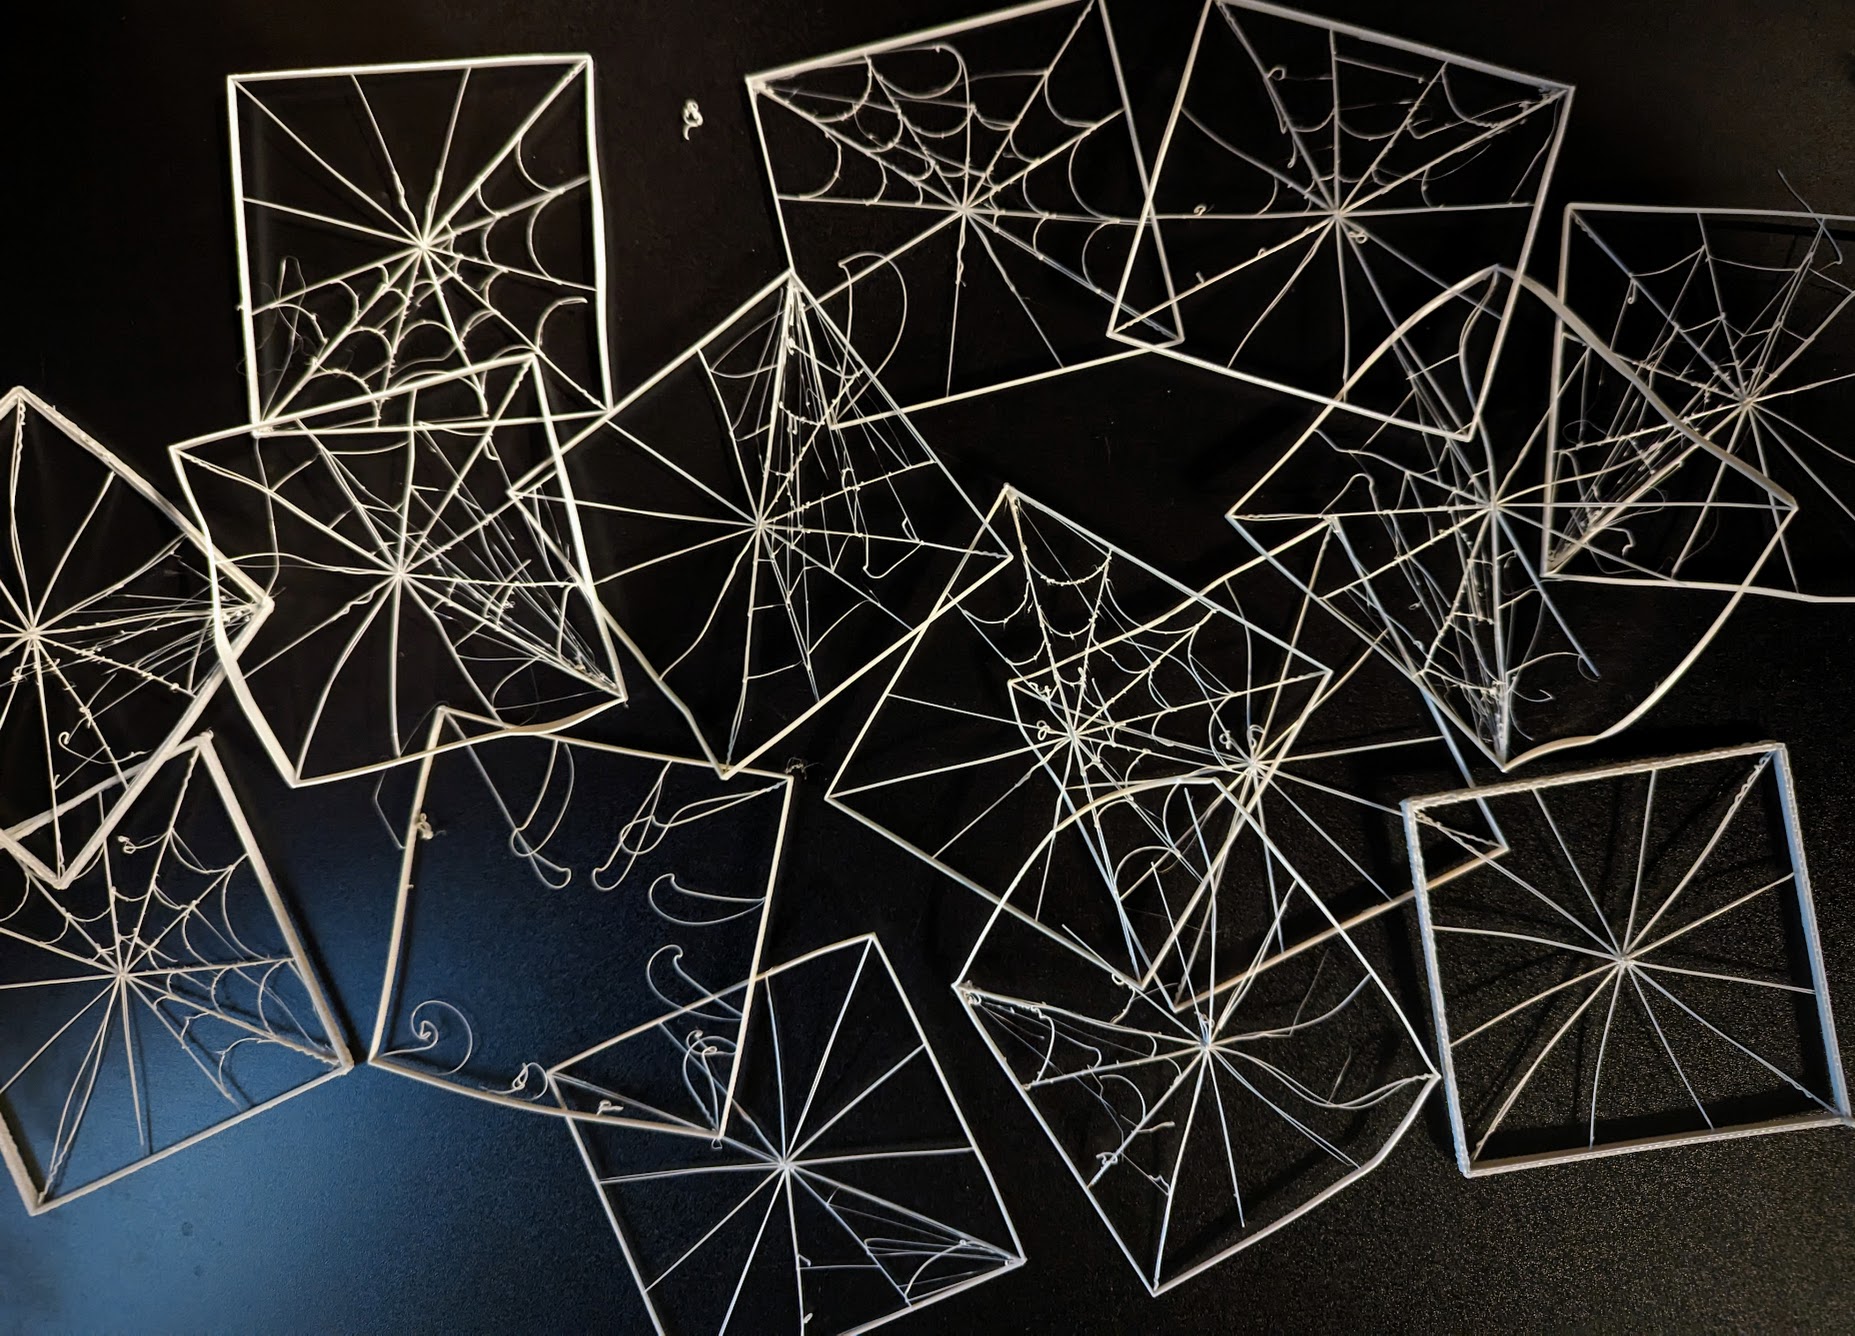
My first task that needed to be accomplished was figuring out how to print the support strands to where they all met in the middle. To do this I simply directed the turtle to the center and then back to the edge on a regular interval for each side. This failed. As can be seen above the first print using this method the lines pulled back towards the outside. To solve this I had the printer head pause and then deposit a small amount of filament at the center before going back to the edge. This allowed the support lines to be printed in free space but still retain the desired shape. The next part was the connecting lines, which needed to be printed in free space, keep their shape, and be attached to the support lines that had been printed in free space. Just attempting a straight print for this resulted in a mess of filament trails that while it might have resembled some type of spider web was not what I was going for. To finally get this to work, I had to work out a method where above each support line before starting the connecting line, the printer head would dispense some filament and then very slowly travel to the next support line and once again dispensing filament in place to make sure the connection stuck. To get this process down to where it worked took a lot of trial and error. I also at one point attempted to make the outer wall thicker which worked the first time I added the method but then resulted in a clumpy mess every other time, so that got abandoned.
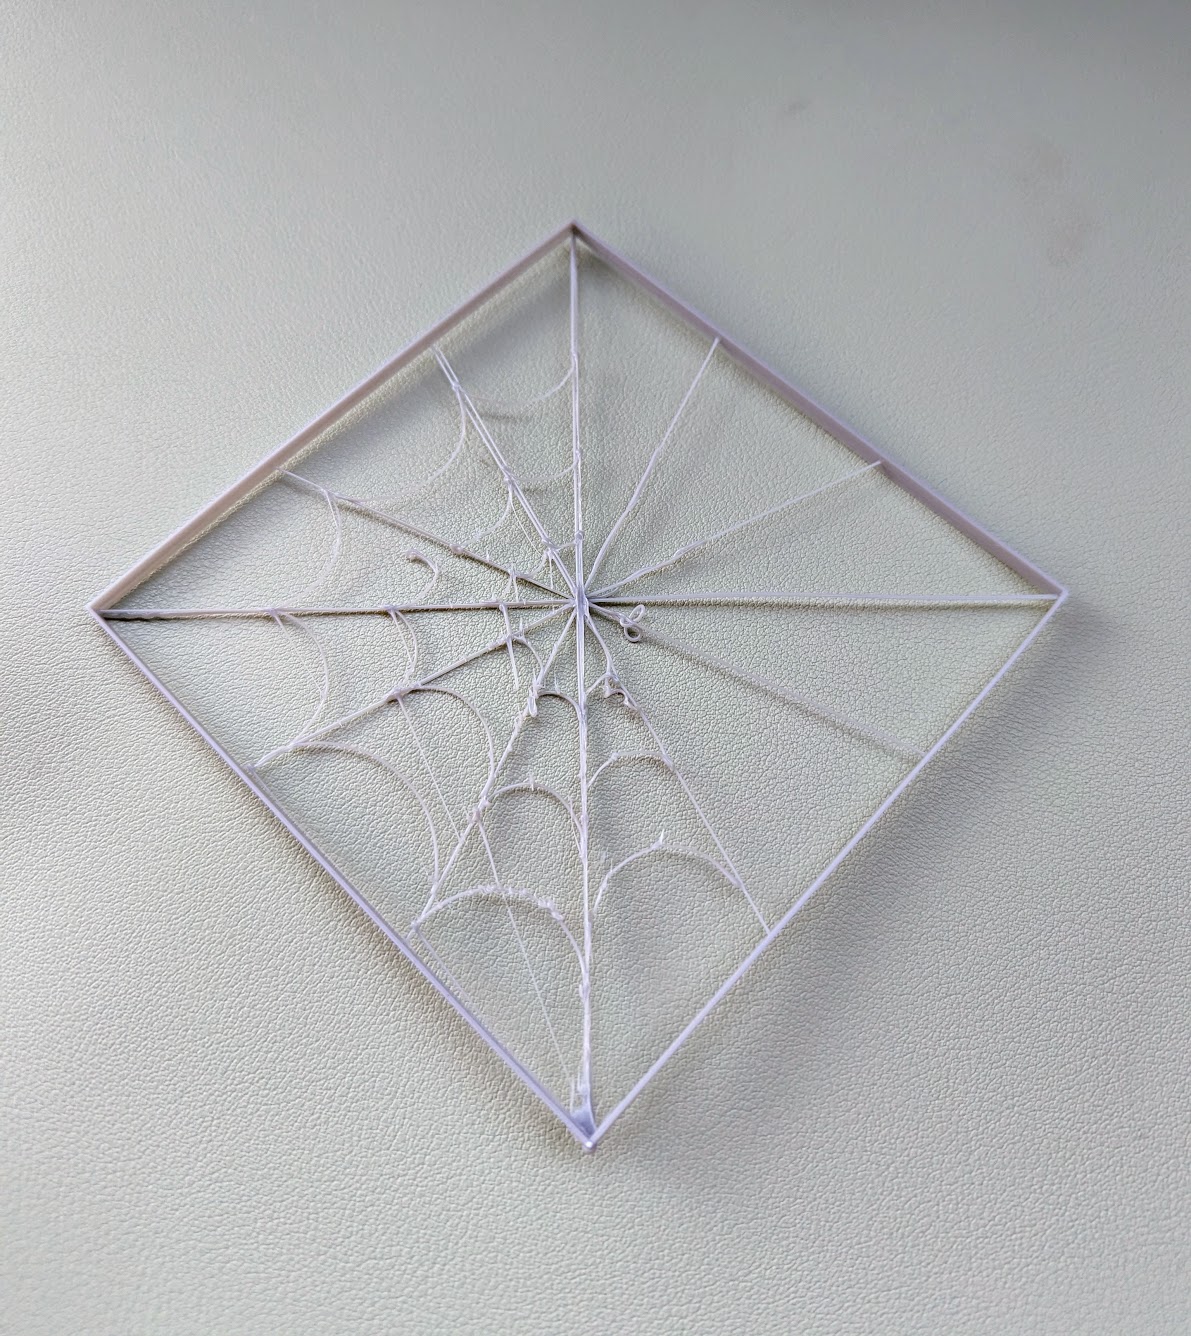
As I was never able to fully get rid of the trailing filament, even after setting pauses to allow it to cool down and break off prior to the printer head moving again, I decided to make it a ‘lived in’ web. This works out though as it is a closer representation of the orb-weaver webs of my childhood which were rarely in pristine condition for long. I never would have been able to use a slicer for this print as I fine-tuned every part of it by hand. I control the speed slowing it down when needed. There are pauses where filament is extruded to create adhesion between lines. And finally the design is freestanding.
Basket
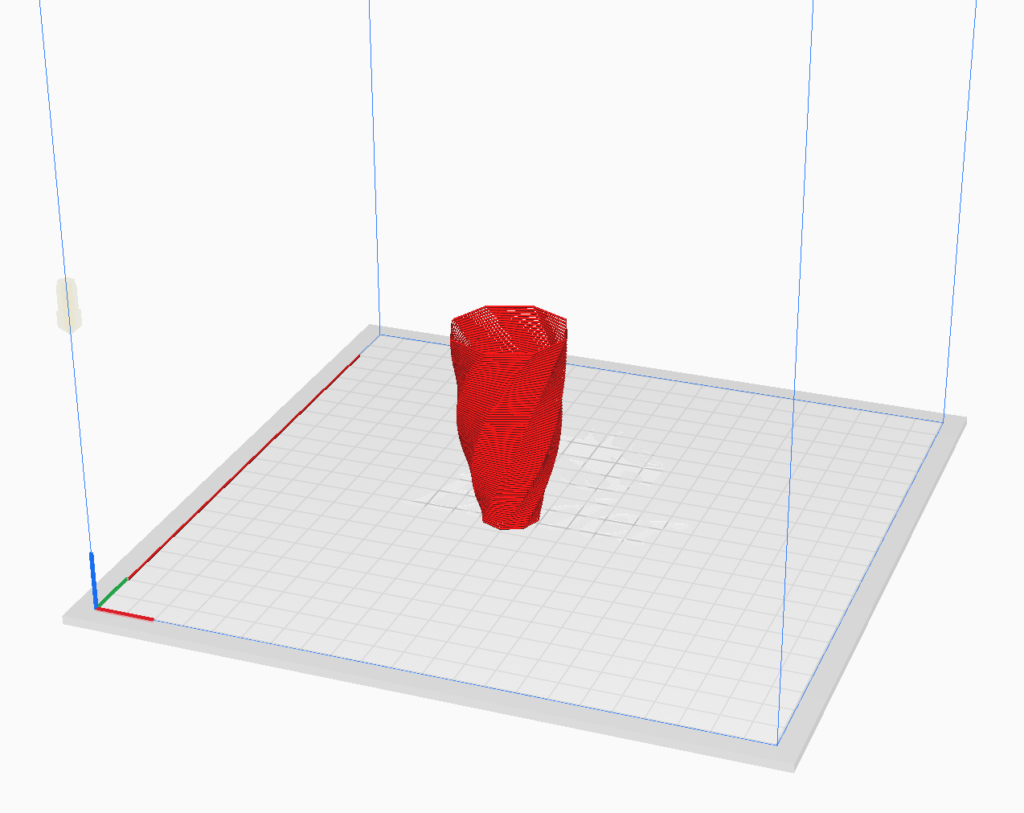
My second object started out from more experimentation than actual plan. I wanted to get a gradually more random object created by lifting the printer head further and further away with each layer, however I had no idea what pattern would be created by lifting it up more. My first attempt at this was created by simply adding to the height moved with each iteration. This created an interesting object however the lines remained straight without any extra movement. To remedy this I changed the extrusion rate so that there was enough weight to drag down the filament and create a pattern. However doing so also forced me to change the speed and the original height that the printer head moved for each layer. This is because if it was moving too fast the filament didn’t have enough time to melt and then it would extrude unevenly. The height needed adjusting because the nozzle began running into the print as it wasn’t lifting enough with each layer. The first object I printed after getting everything adjusted ended up looking like a woven basket as the filament printed in a spiral pattern.
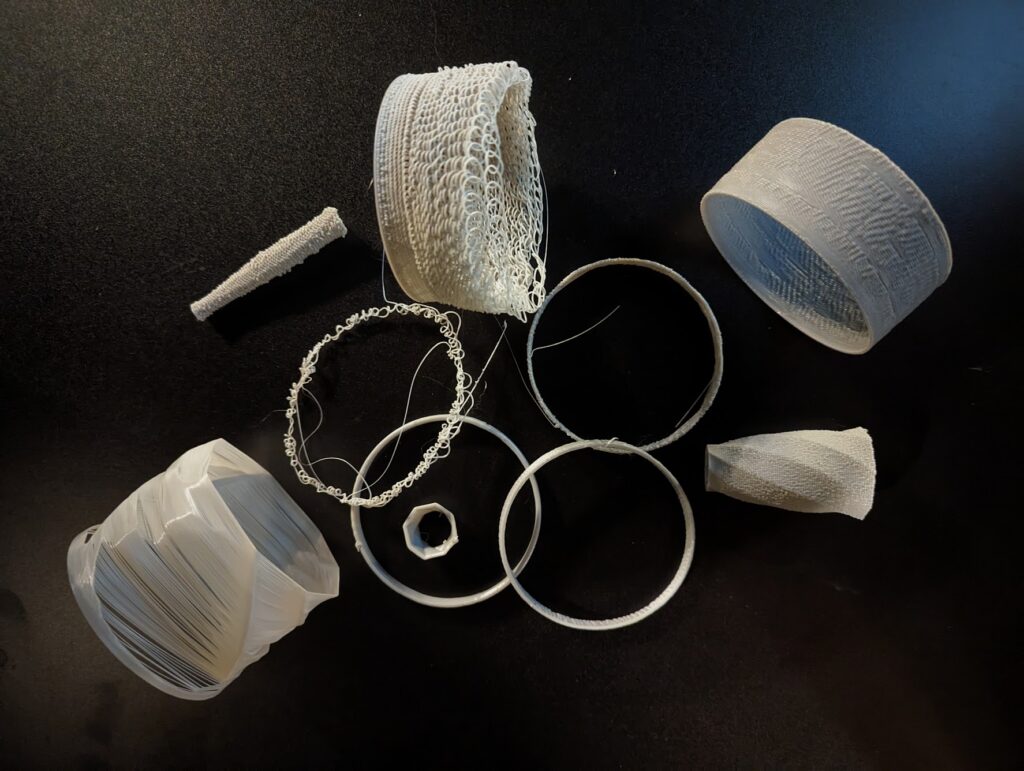
After I got the print with a texture I liked I added in using the vessel creation from large assignment 2 to change the shape and add more interest. The first attempt with one of the vessel objects ended up loosing most of its shape due to how quickly it went from printing normal to a very lifted nozzle. To get the final object to retain more of its design I reduced the extrusion rate and how quickly the nozzle is lifted. This allowed me to create a clearly defined object that slowly became more textured as it got further along the printing process.
These objects could not be printed using a regular slicer due to the change in z. I also do not know if the extrusion rate could have been edited to the degree that I changed it using a normal slicer.
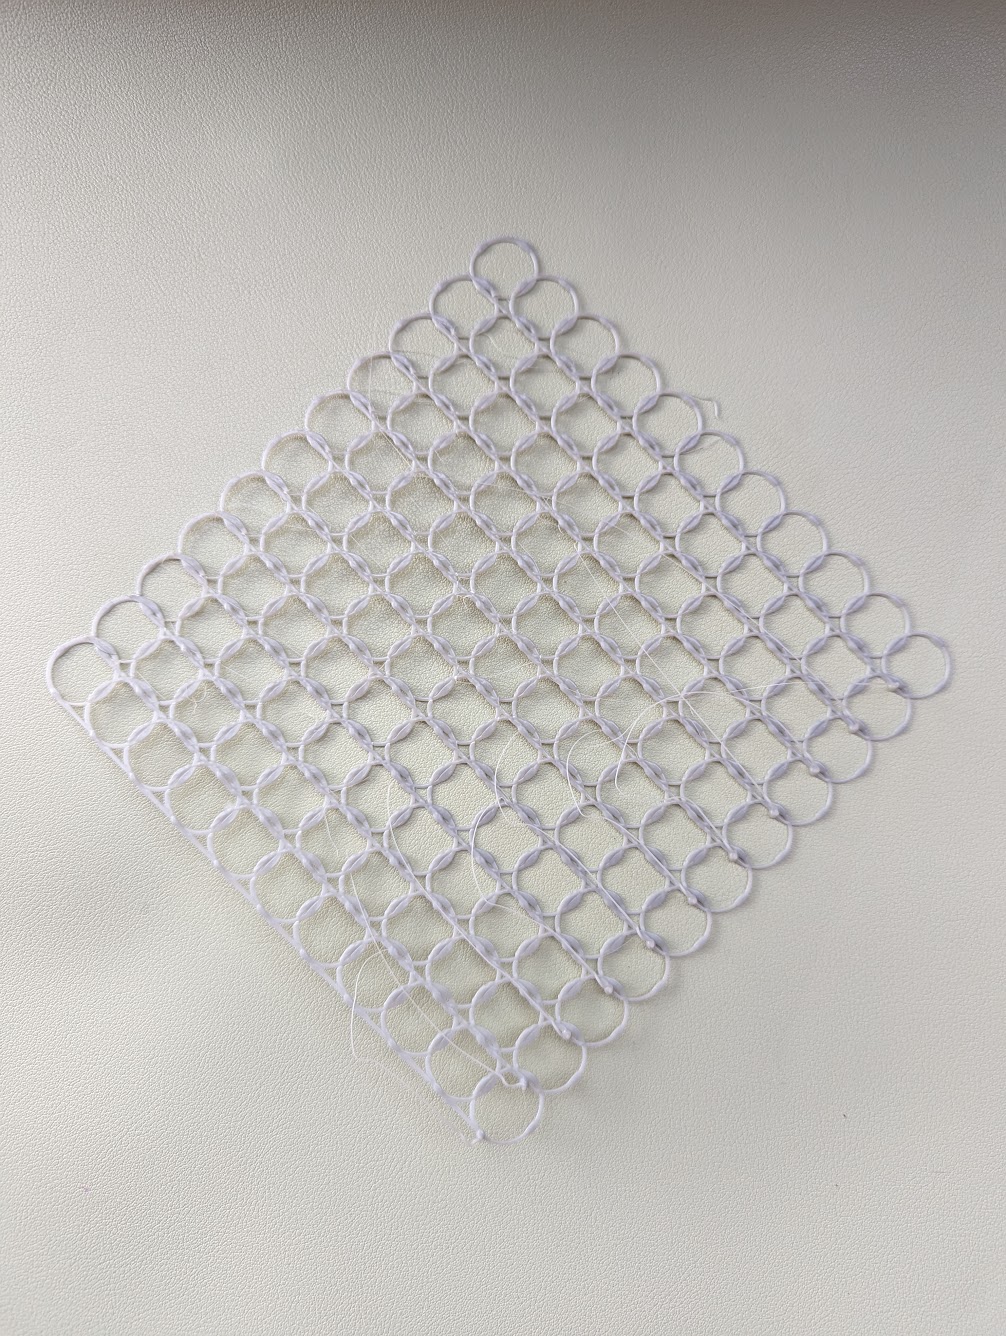
Textile/Fabric
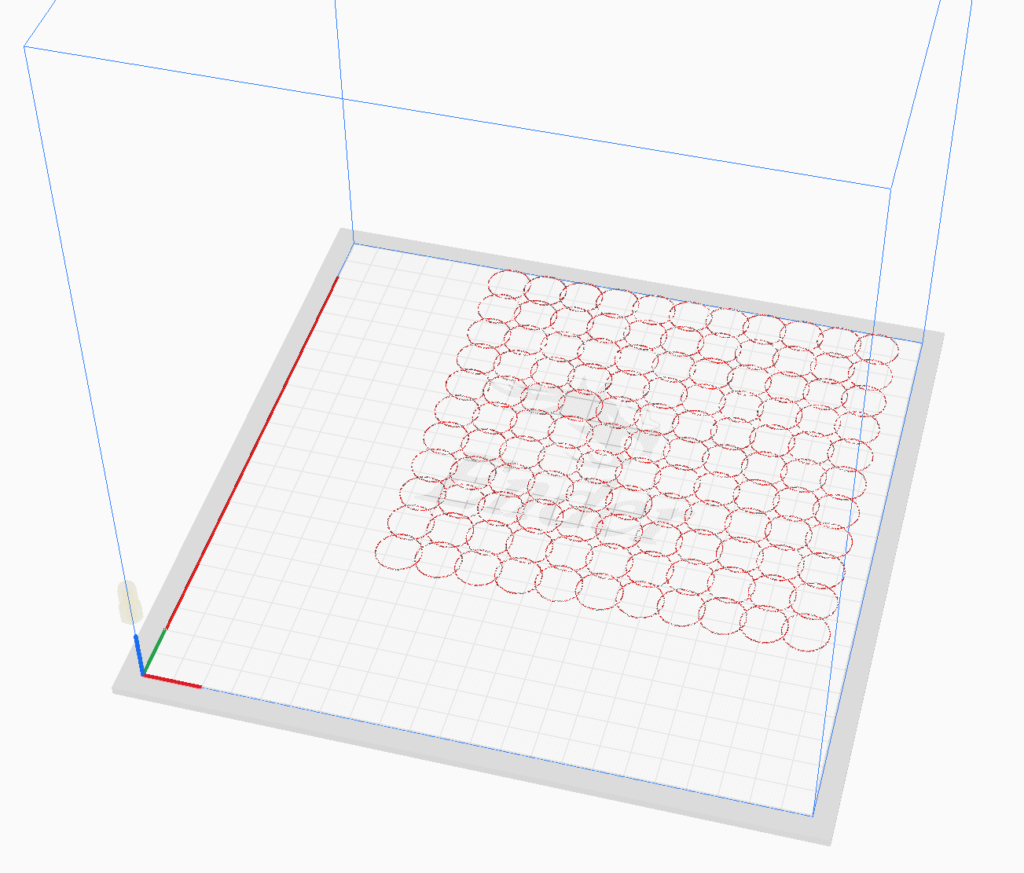
My final shape is one that was inspired by the printed fabric. The one where flexibility was added by changing the size of the extruded filament. To reproduce this I used the same idea of increasing the thickness to connect the lines and have it thinner everywhere else. However, instead of just printing in a line I used overlapping circles. As this was my last shape I had gotten much better at knowing what to expect when I started playing with extrusion values so it took far fewer attempts to get the print how I wanted it. The first time I printed it the circles were much smaller than I wanted and I had increased the extrusion rate too much. From there I got the size and rate correct but the circles were too far apart to connect at the thicker part of the line which was an easy fix. I also found that when I was returning to the start of the print for a new line of circles I had to raise the printer head because otherwise it would drag across what had just been printed. Changing the extrusion rate and the factors that went into that adjustment such as speed and height away from the bed are all factors that could not be done using a normal slicing program.
The final form was created by drawing circles in a grid pattern where the closest points of each circle had a higher extrusion rate so that they would merge together. The size of the circles, number printed in each direction, and distance from each other could all be changed within the code. The strands the can be seen in the photo are artifacts of the nozzle lifting up and moving back to the start of the pattern.
Your webs are so beautiful. How you built your webs was smartly planned and tested. I feel like you could do an entire series of different sider webs. The second failed attempt remained me a a black widow web. It was clear that it was a spider web but was much more chaotic than the orb-weaver web.
Thank you! and yes! it reminds me of a black widows web too. It has me curious if there’s a way to design webs in a similar way to how we created the plant structures in our first large assignment.
Hey Lasair!
These prints are super cool, the web design looks really good. I’m also a big fan of the circle grid, it reminds me a lot of the different meshes and textile fabrications we’ve been shown in class. Well done!
I certainly tried to mimic the textiles from class however given the material used it definitely doesn’t have the same feel as the printed textiles.
Hey Lasair, It’s inspiring to see how you’ve mirrored the organic complexity of nature into a 3D printed form, especially overcoming the challenges with free-standing lines. I really like the baskets texture as well. Great work!