Design Process
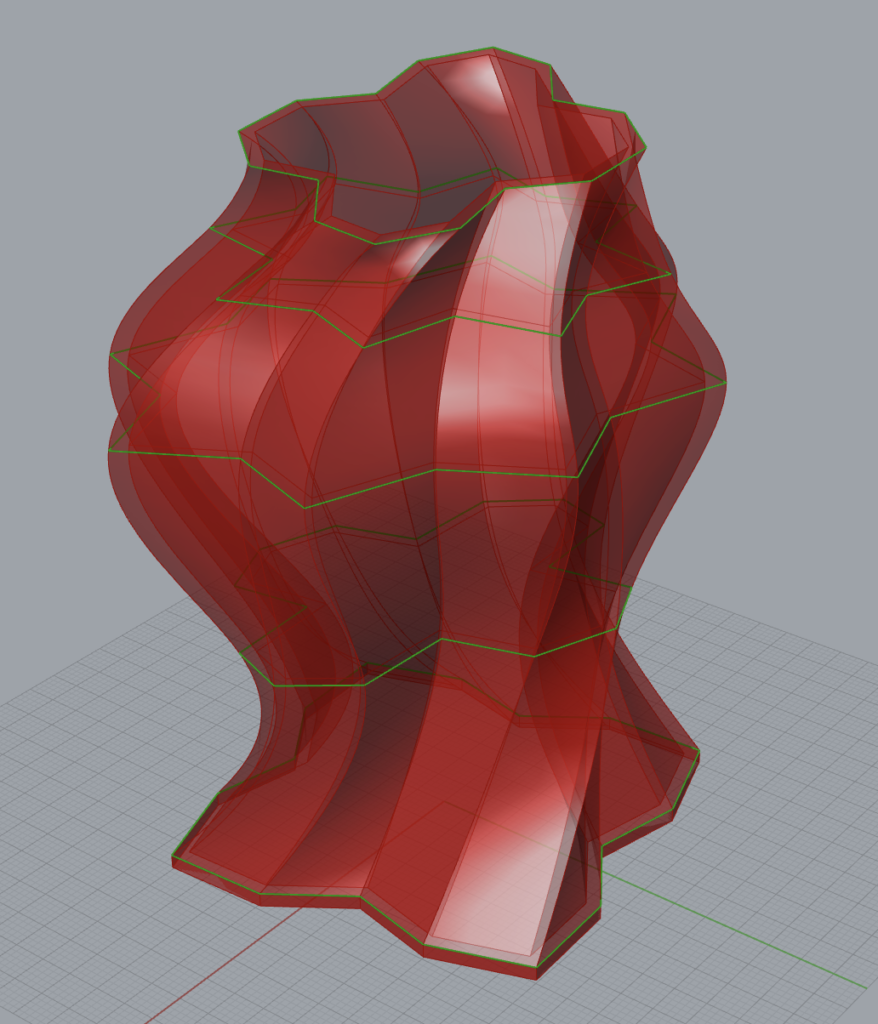
I started by just messing around with the code and trying to see what shapes I could make. I tried for a while to make curvy, rounded shapes but I struggled figuring out how to do that. I really wanted to make blobby edges, but I ended up shifting my focus to more pointed shapes as I spent more time with it. I ended up creating a polygon code with the ability to change several different point lengths. I used mod4 and mod2 in my code in the for loop when creating the points, so that on each iteration, if i%4==0, then parameter A would be added to the radius R, else if i%2==0, then the length would be R, and otherwise parameter B would added to the radius. Below you can see what points are grouped together and the results when the parameters are altered on a polygon with 20 points.
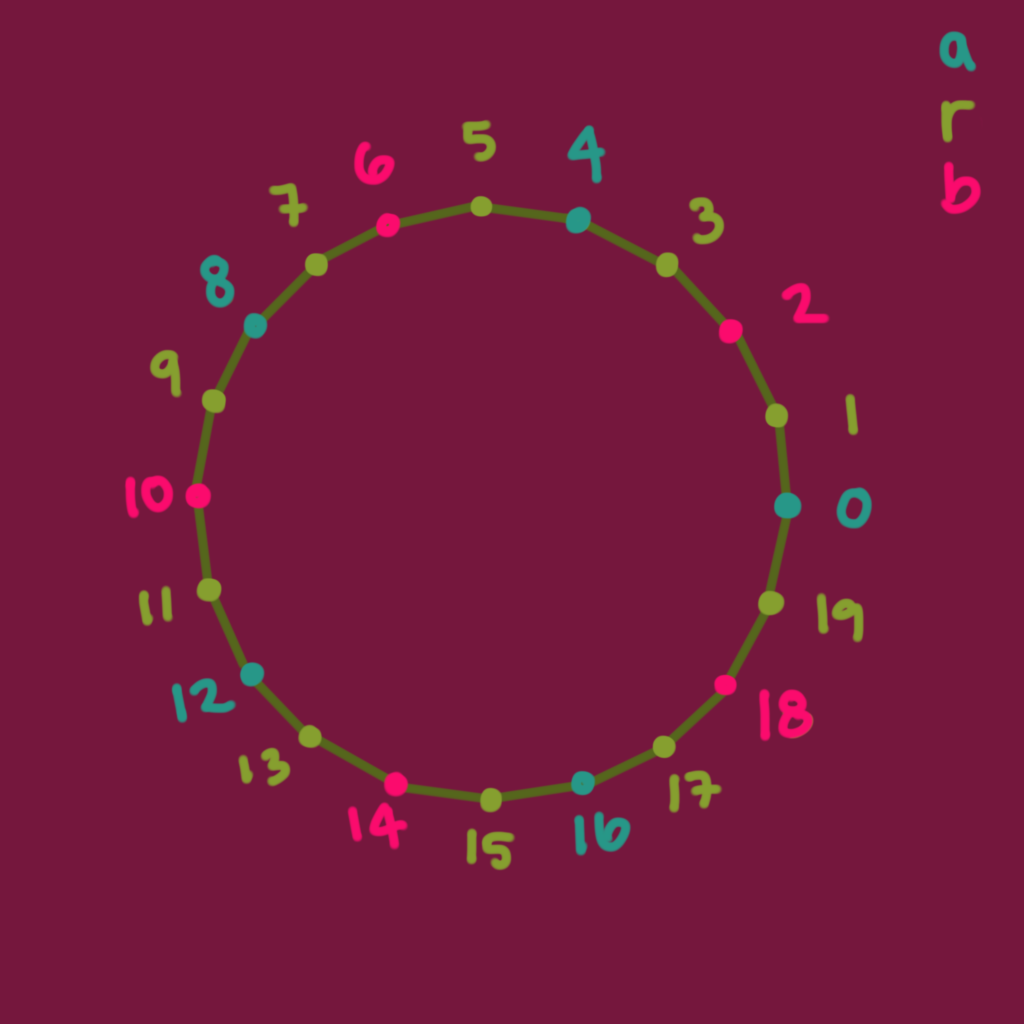
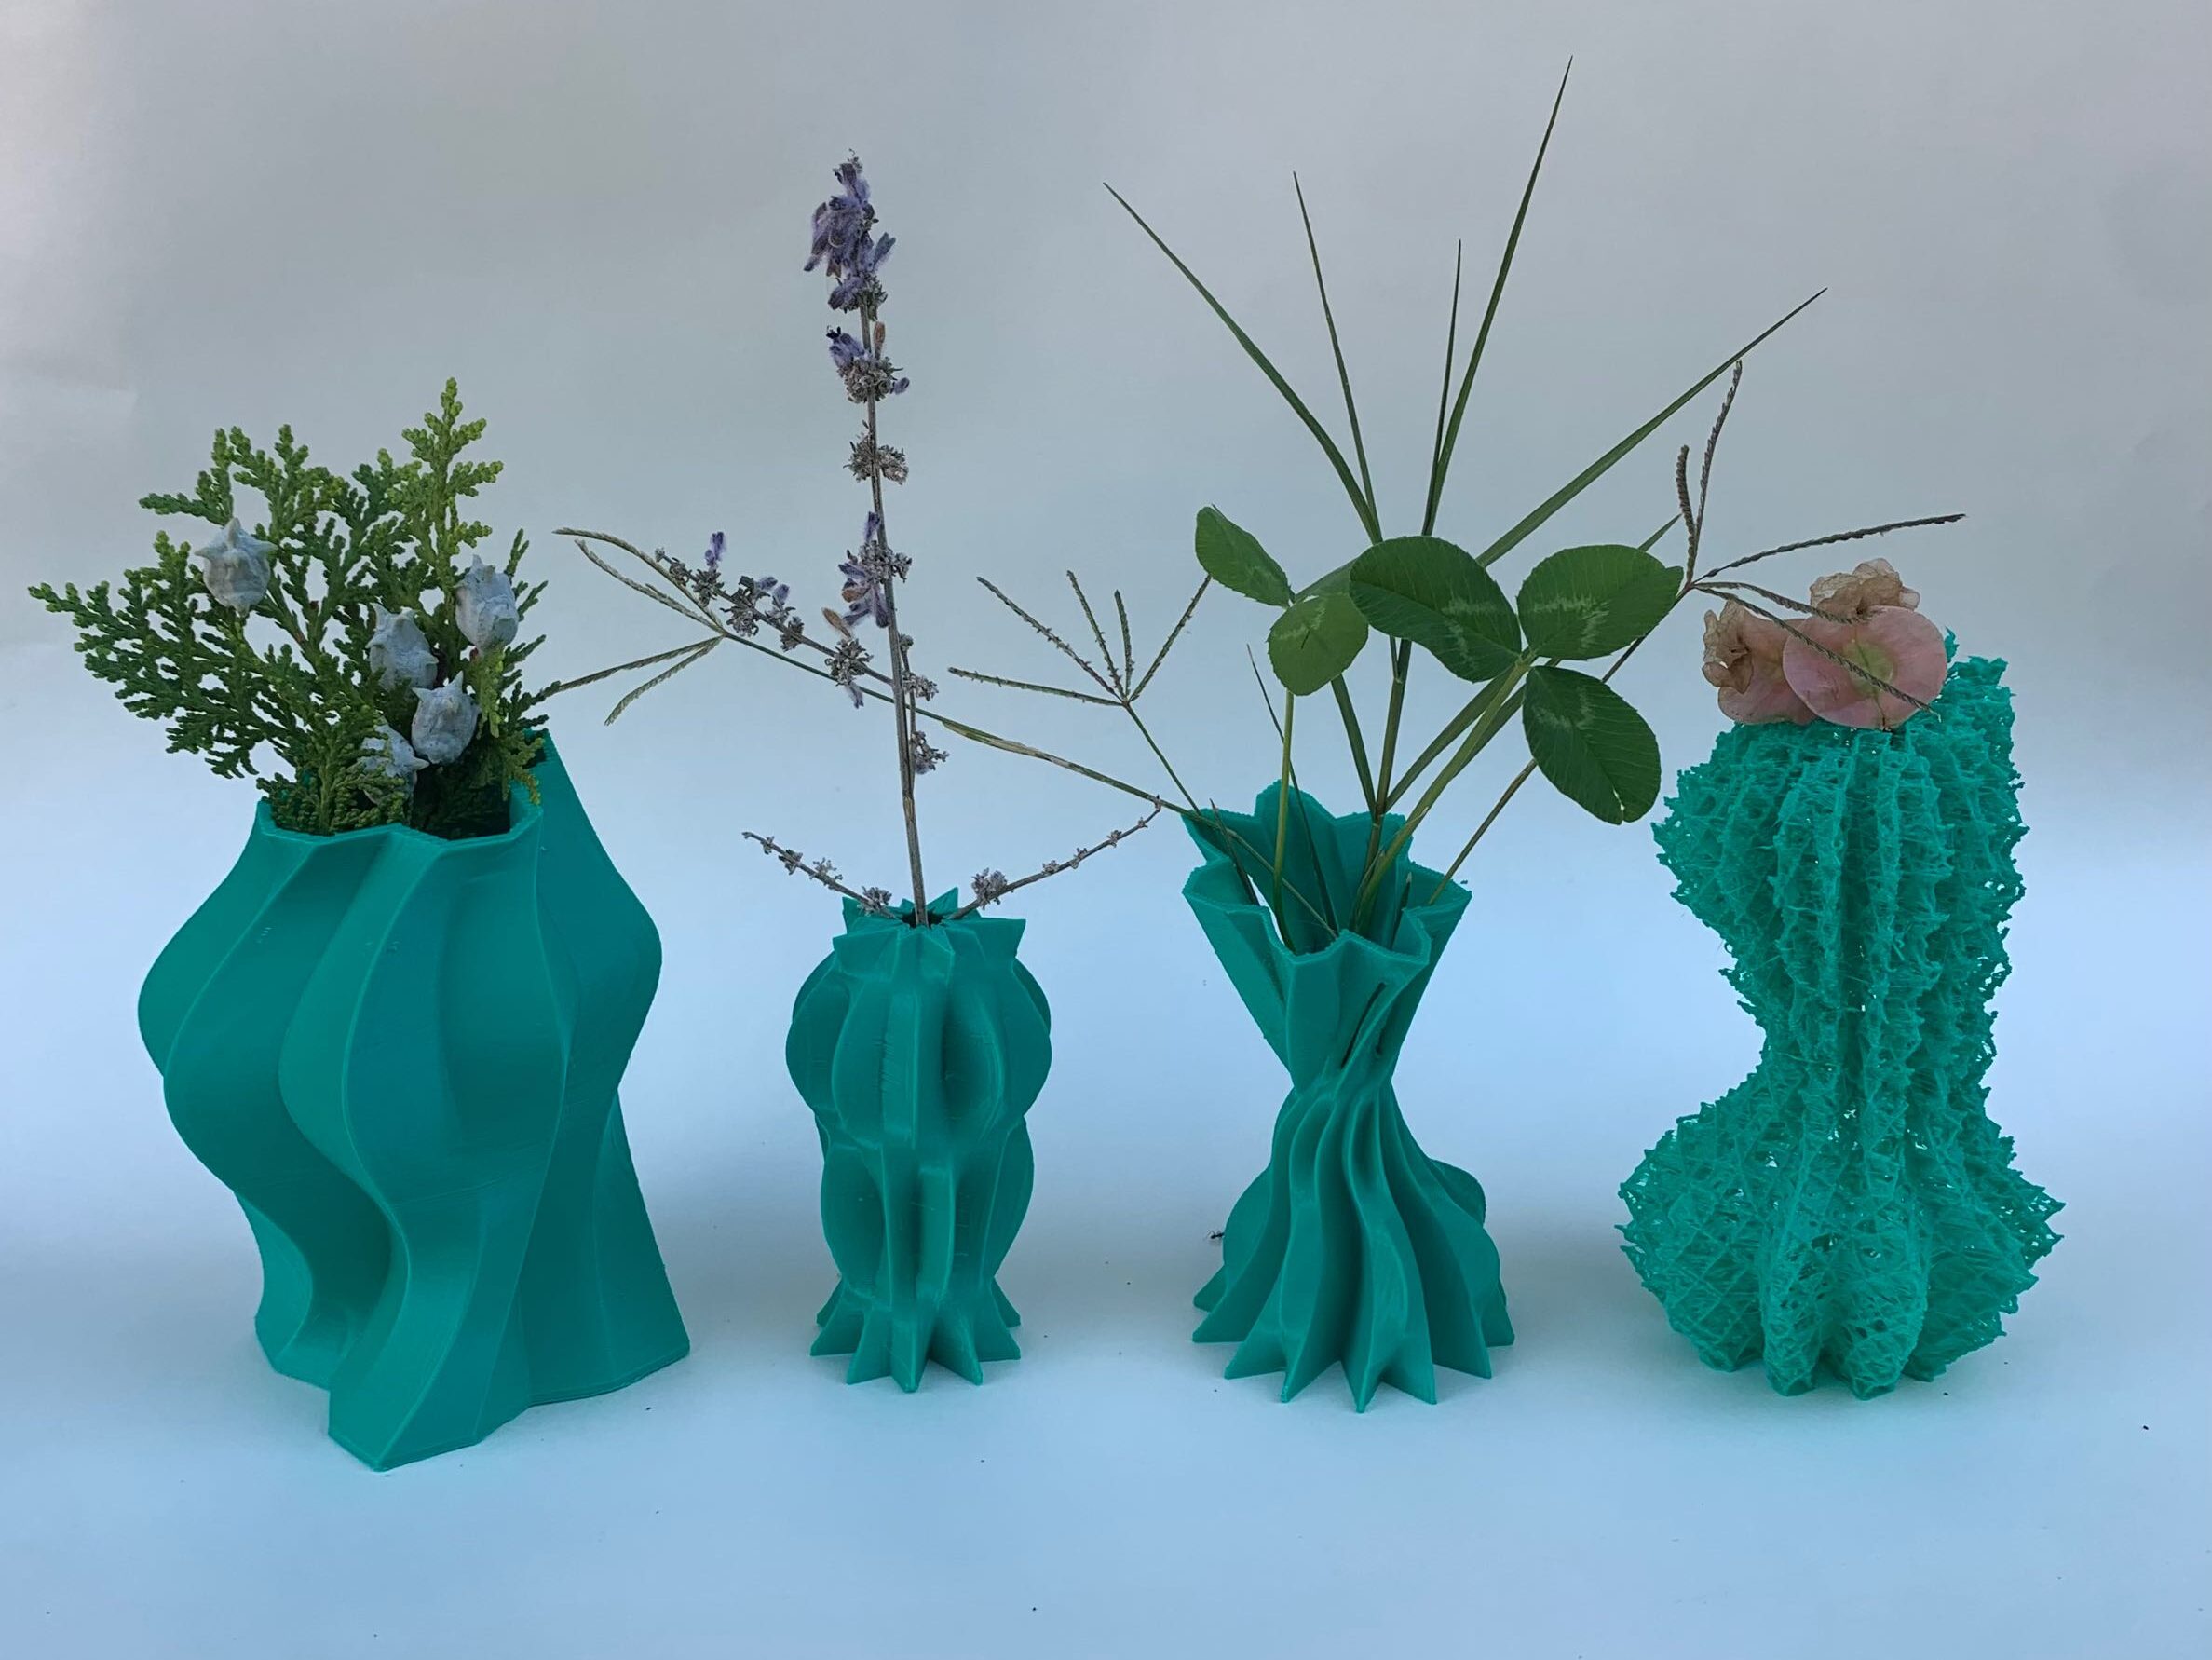
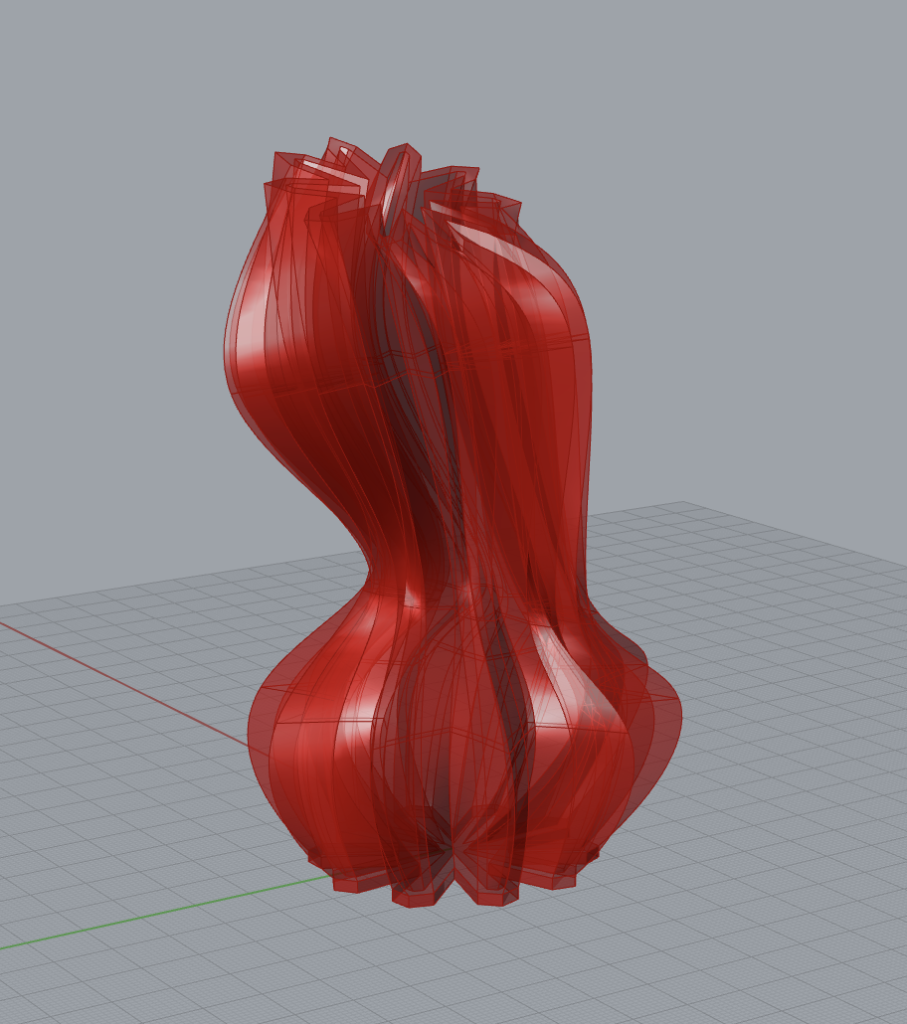
As you can see, this allows you to generate many different flavors of shapes just from the three parameters. I also added the ability to rotate around the X and Y axes (in addition to Z) and translation across X and Y. In addition, I added two extra polygons so that vessel was flowing between five different shapes.
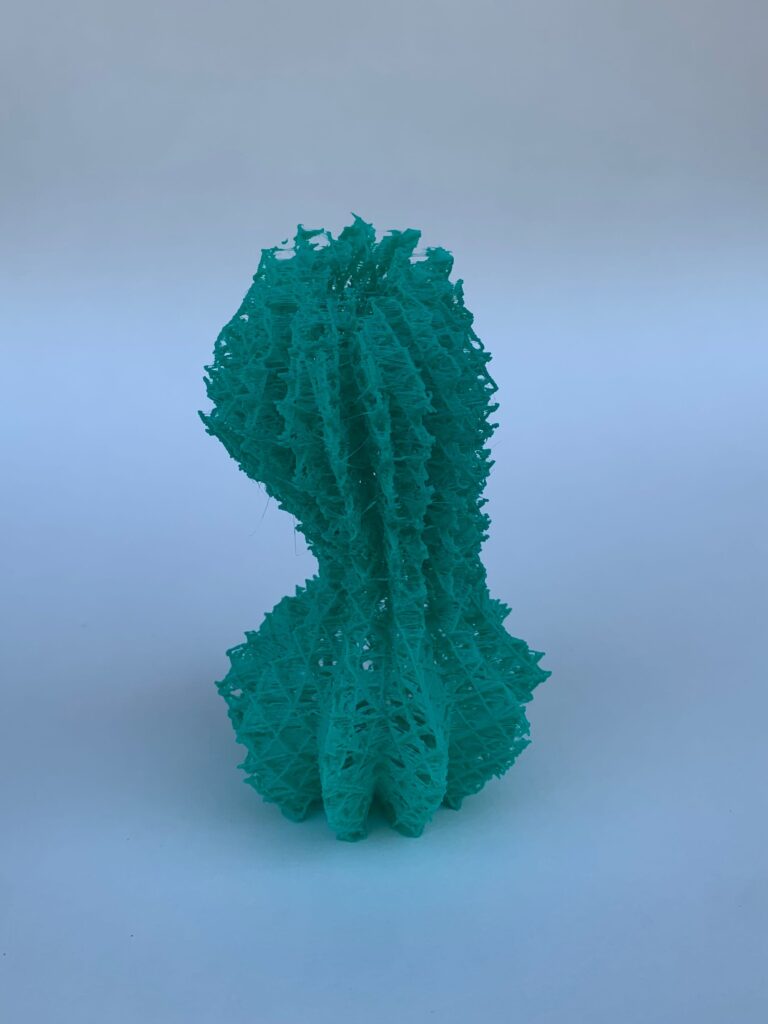
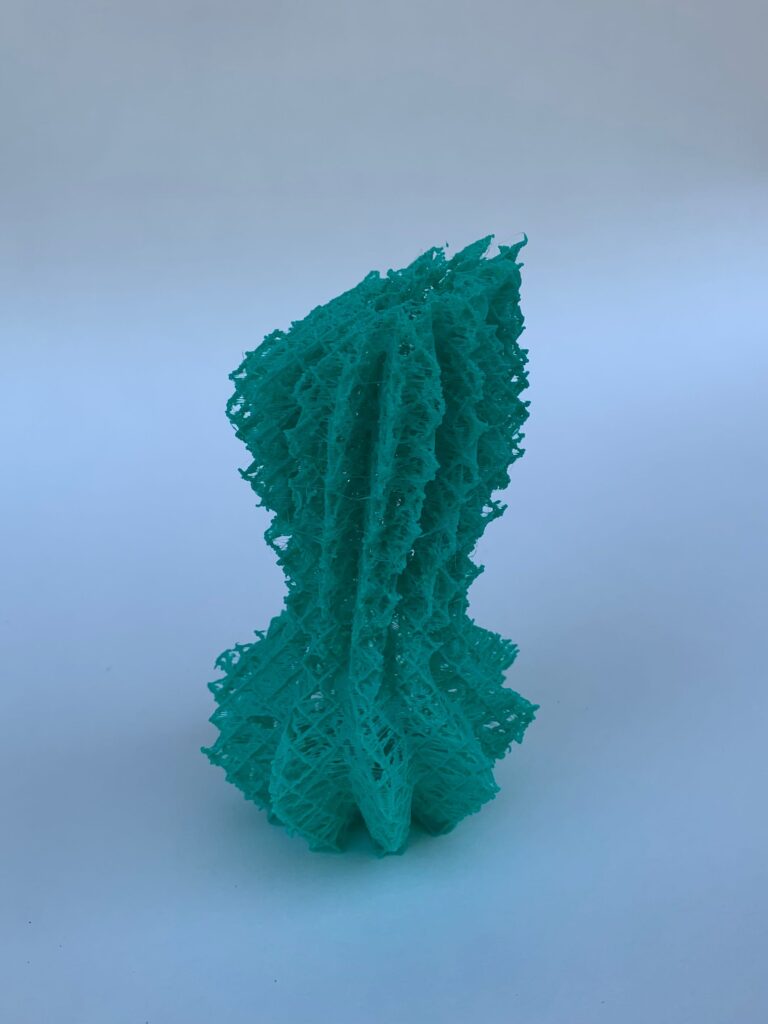
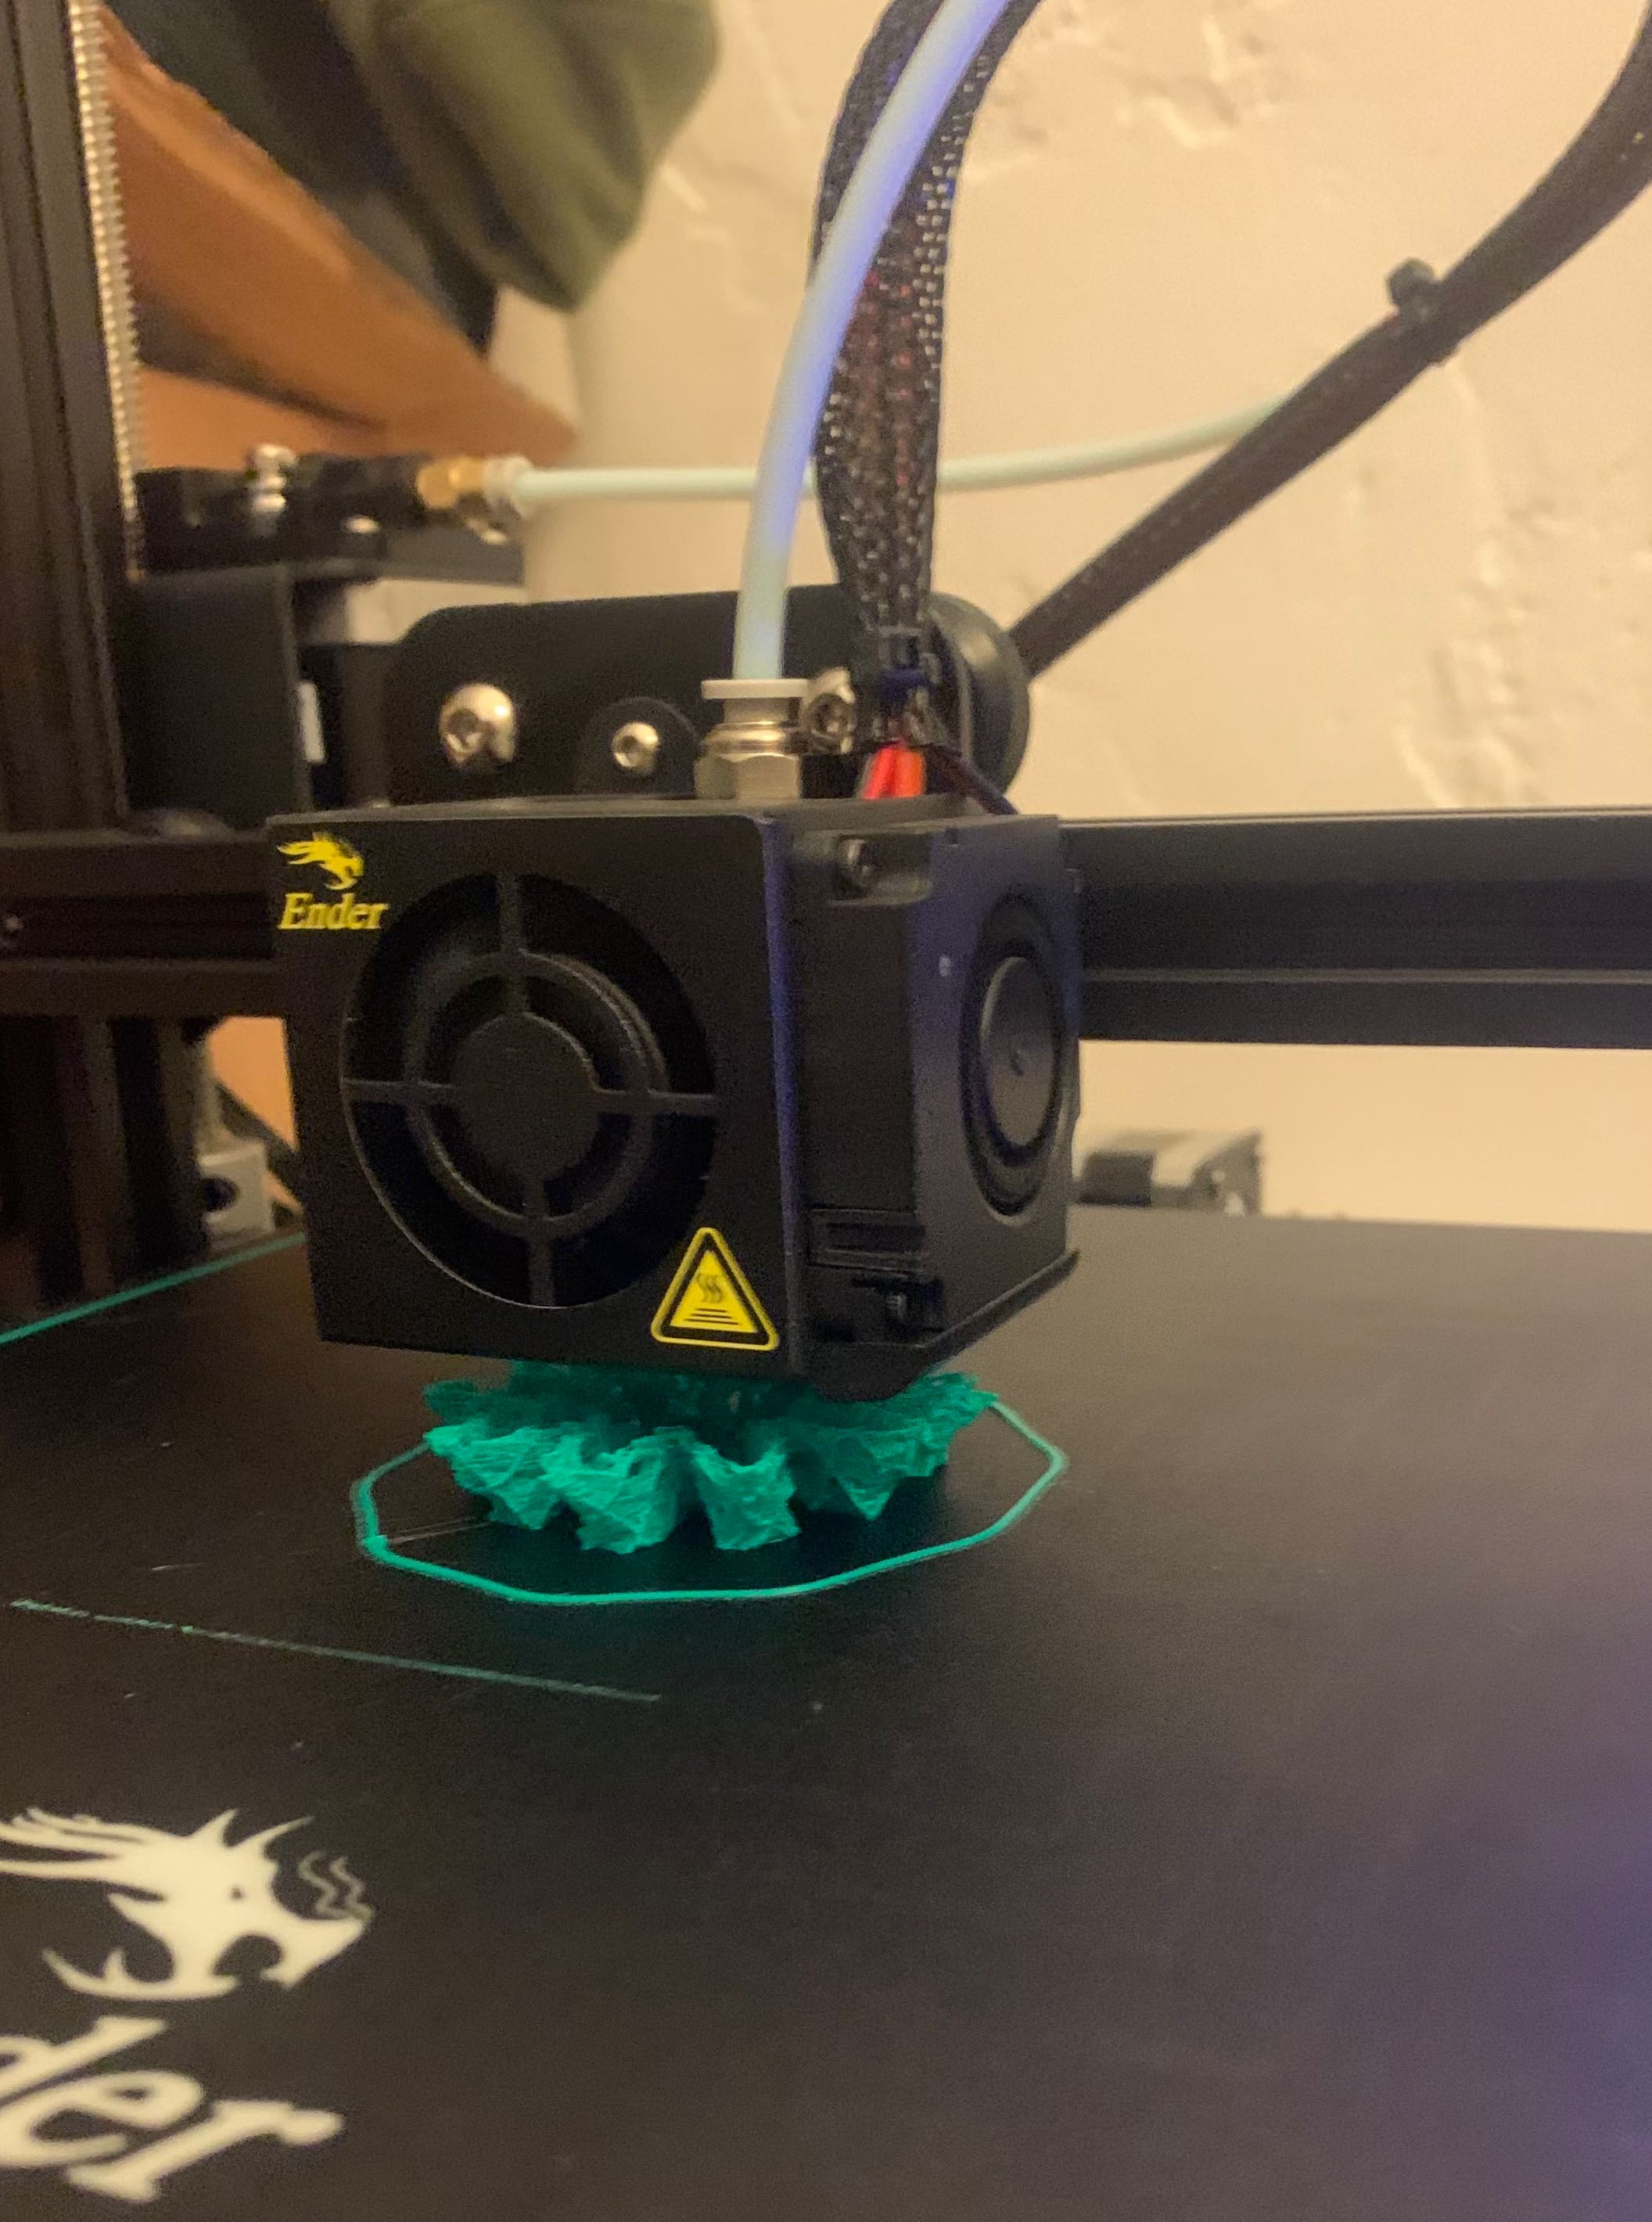
This was my first print. I noticed while it was printing that it was printing a weird pattern and looked geometric. I thought it looked super cool but didn’t think that’s what prints usually look like, so I googled and found that it looked like the infill was printing, and I was thinking that maybe the walls would print later (though I wasn’t sure how the printer would do that). But I let it be and by the time the print was over, it still looked geometric and latticed. I went back into Cura and saw that shell thickness was set to zero, and that’s why no walls were printed. I still love the way it looks though so I kept it in the project. I really like the flow and asymmetry of the piece as well.
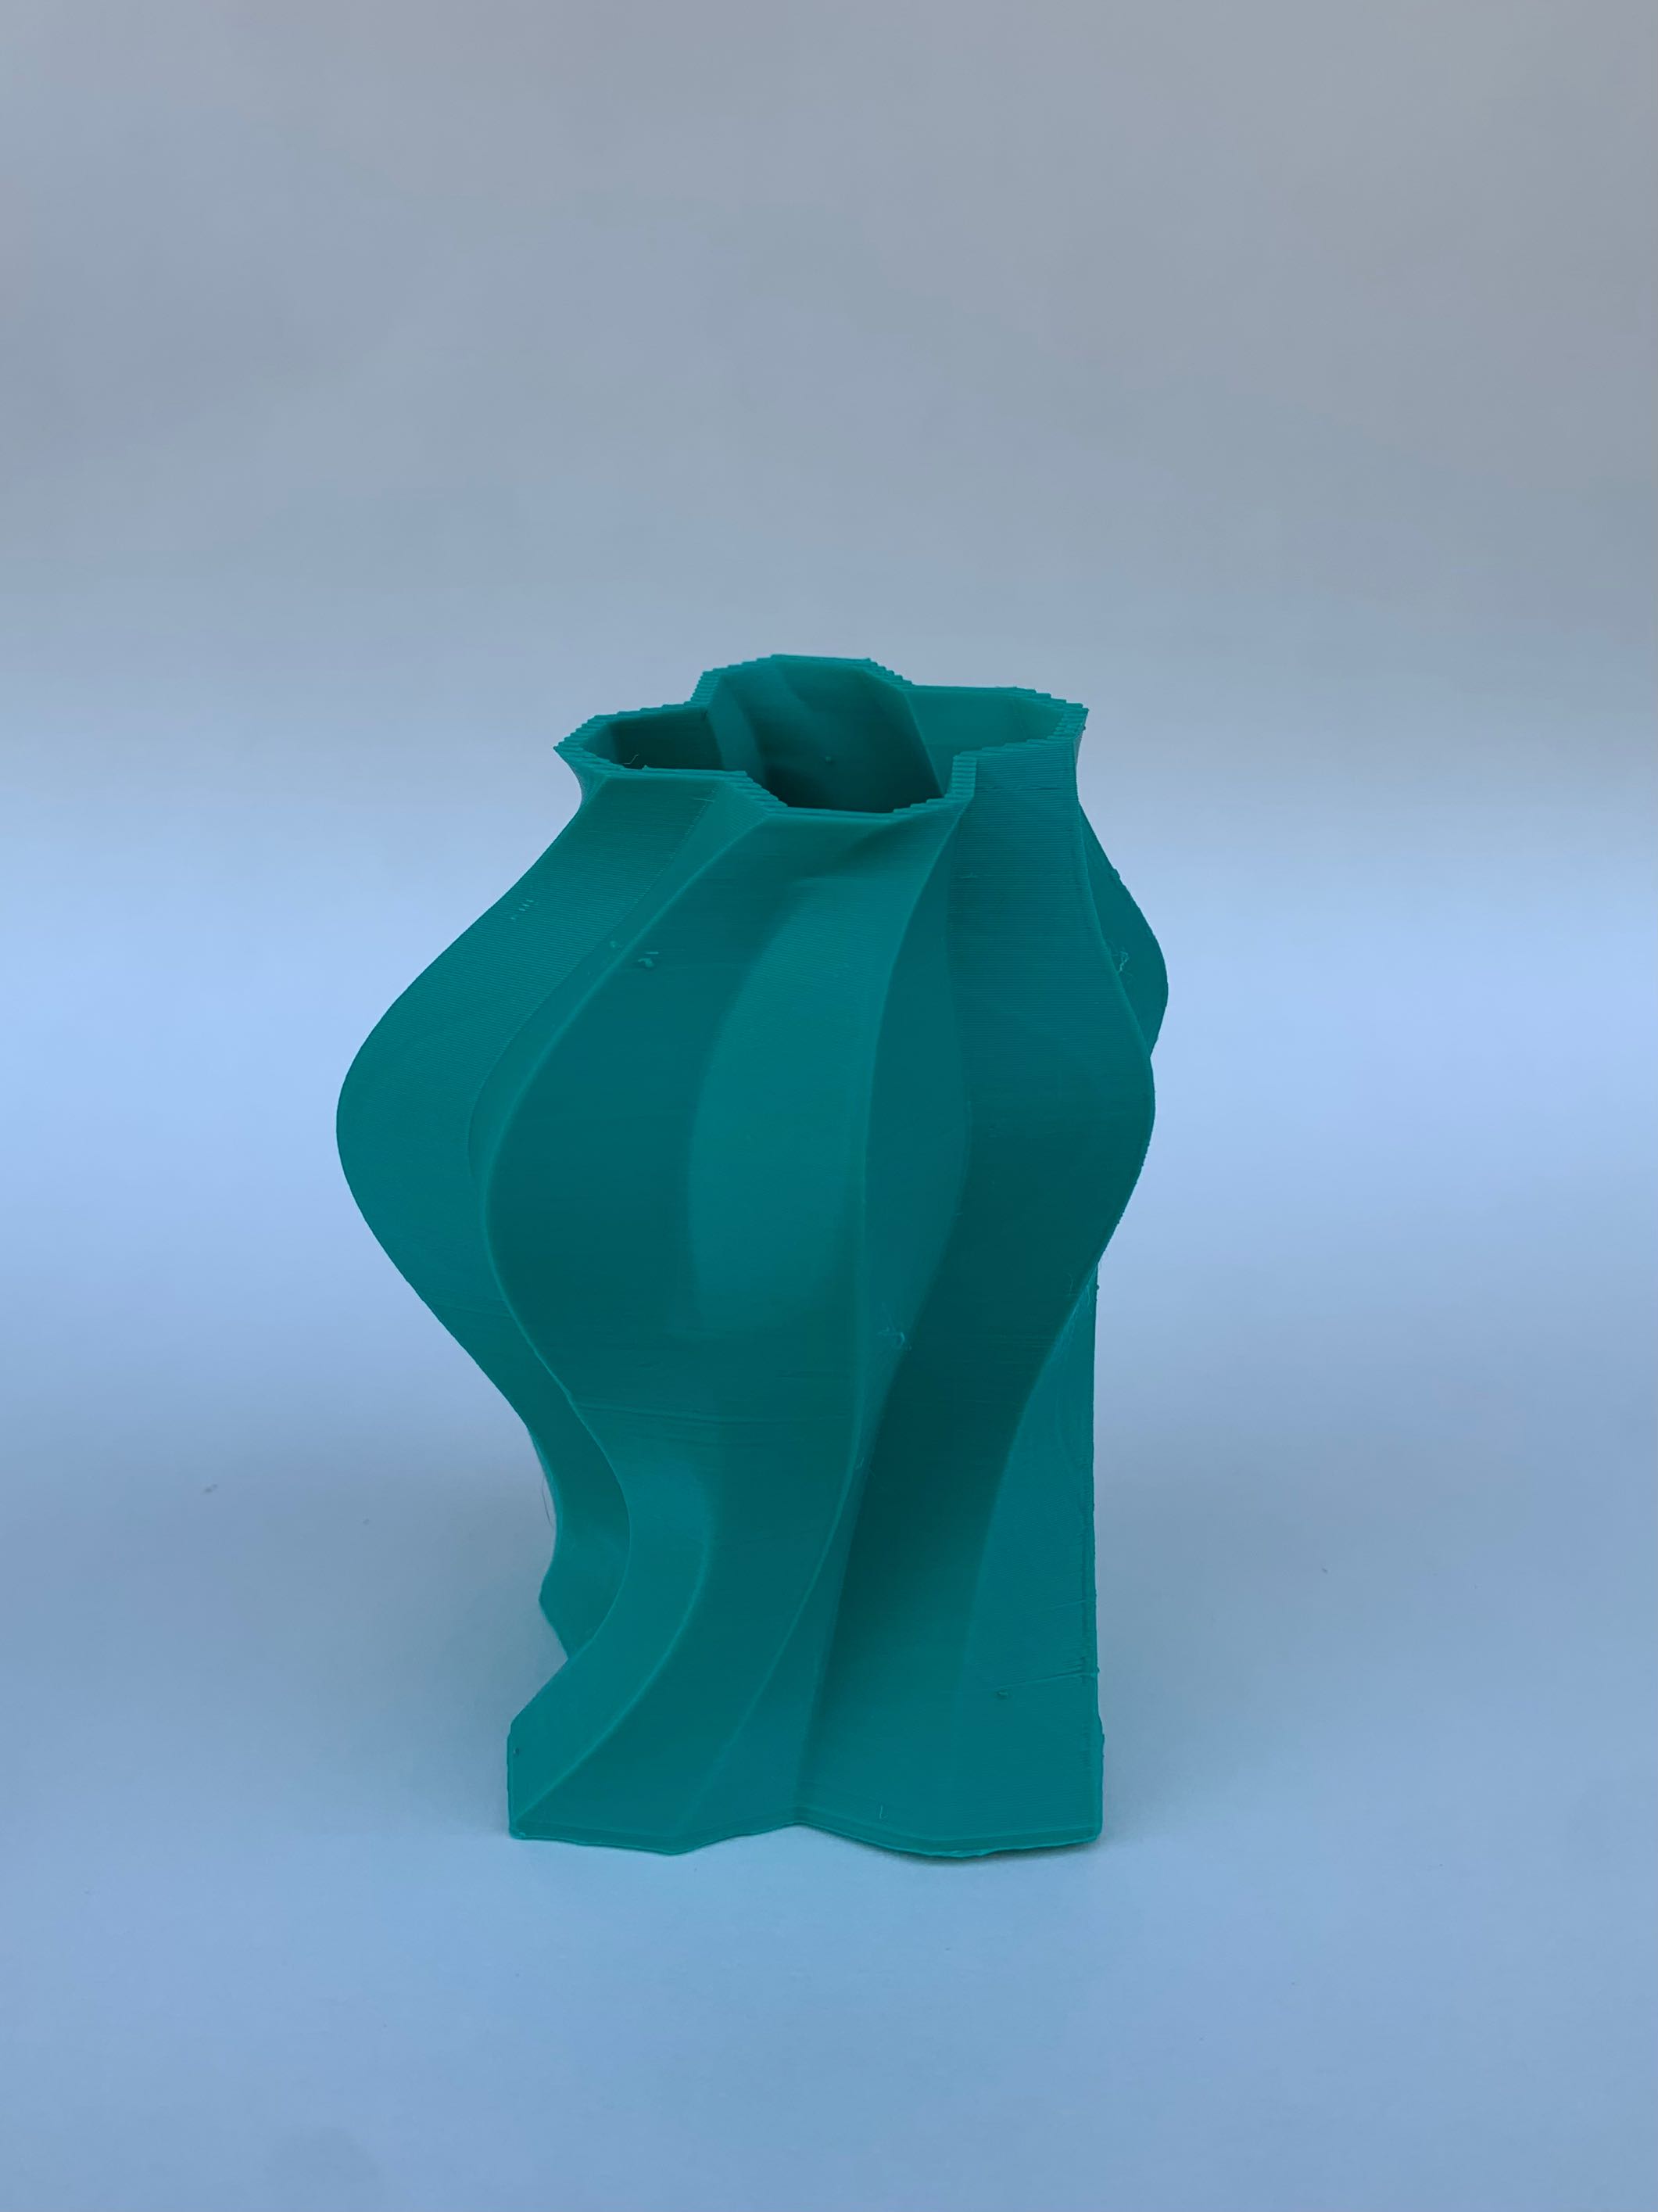
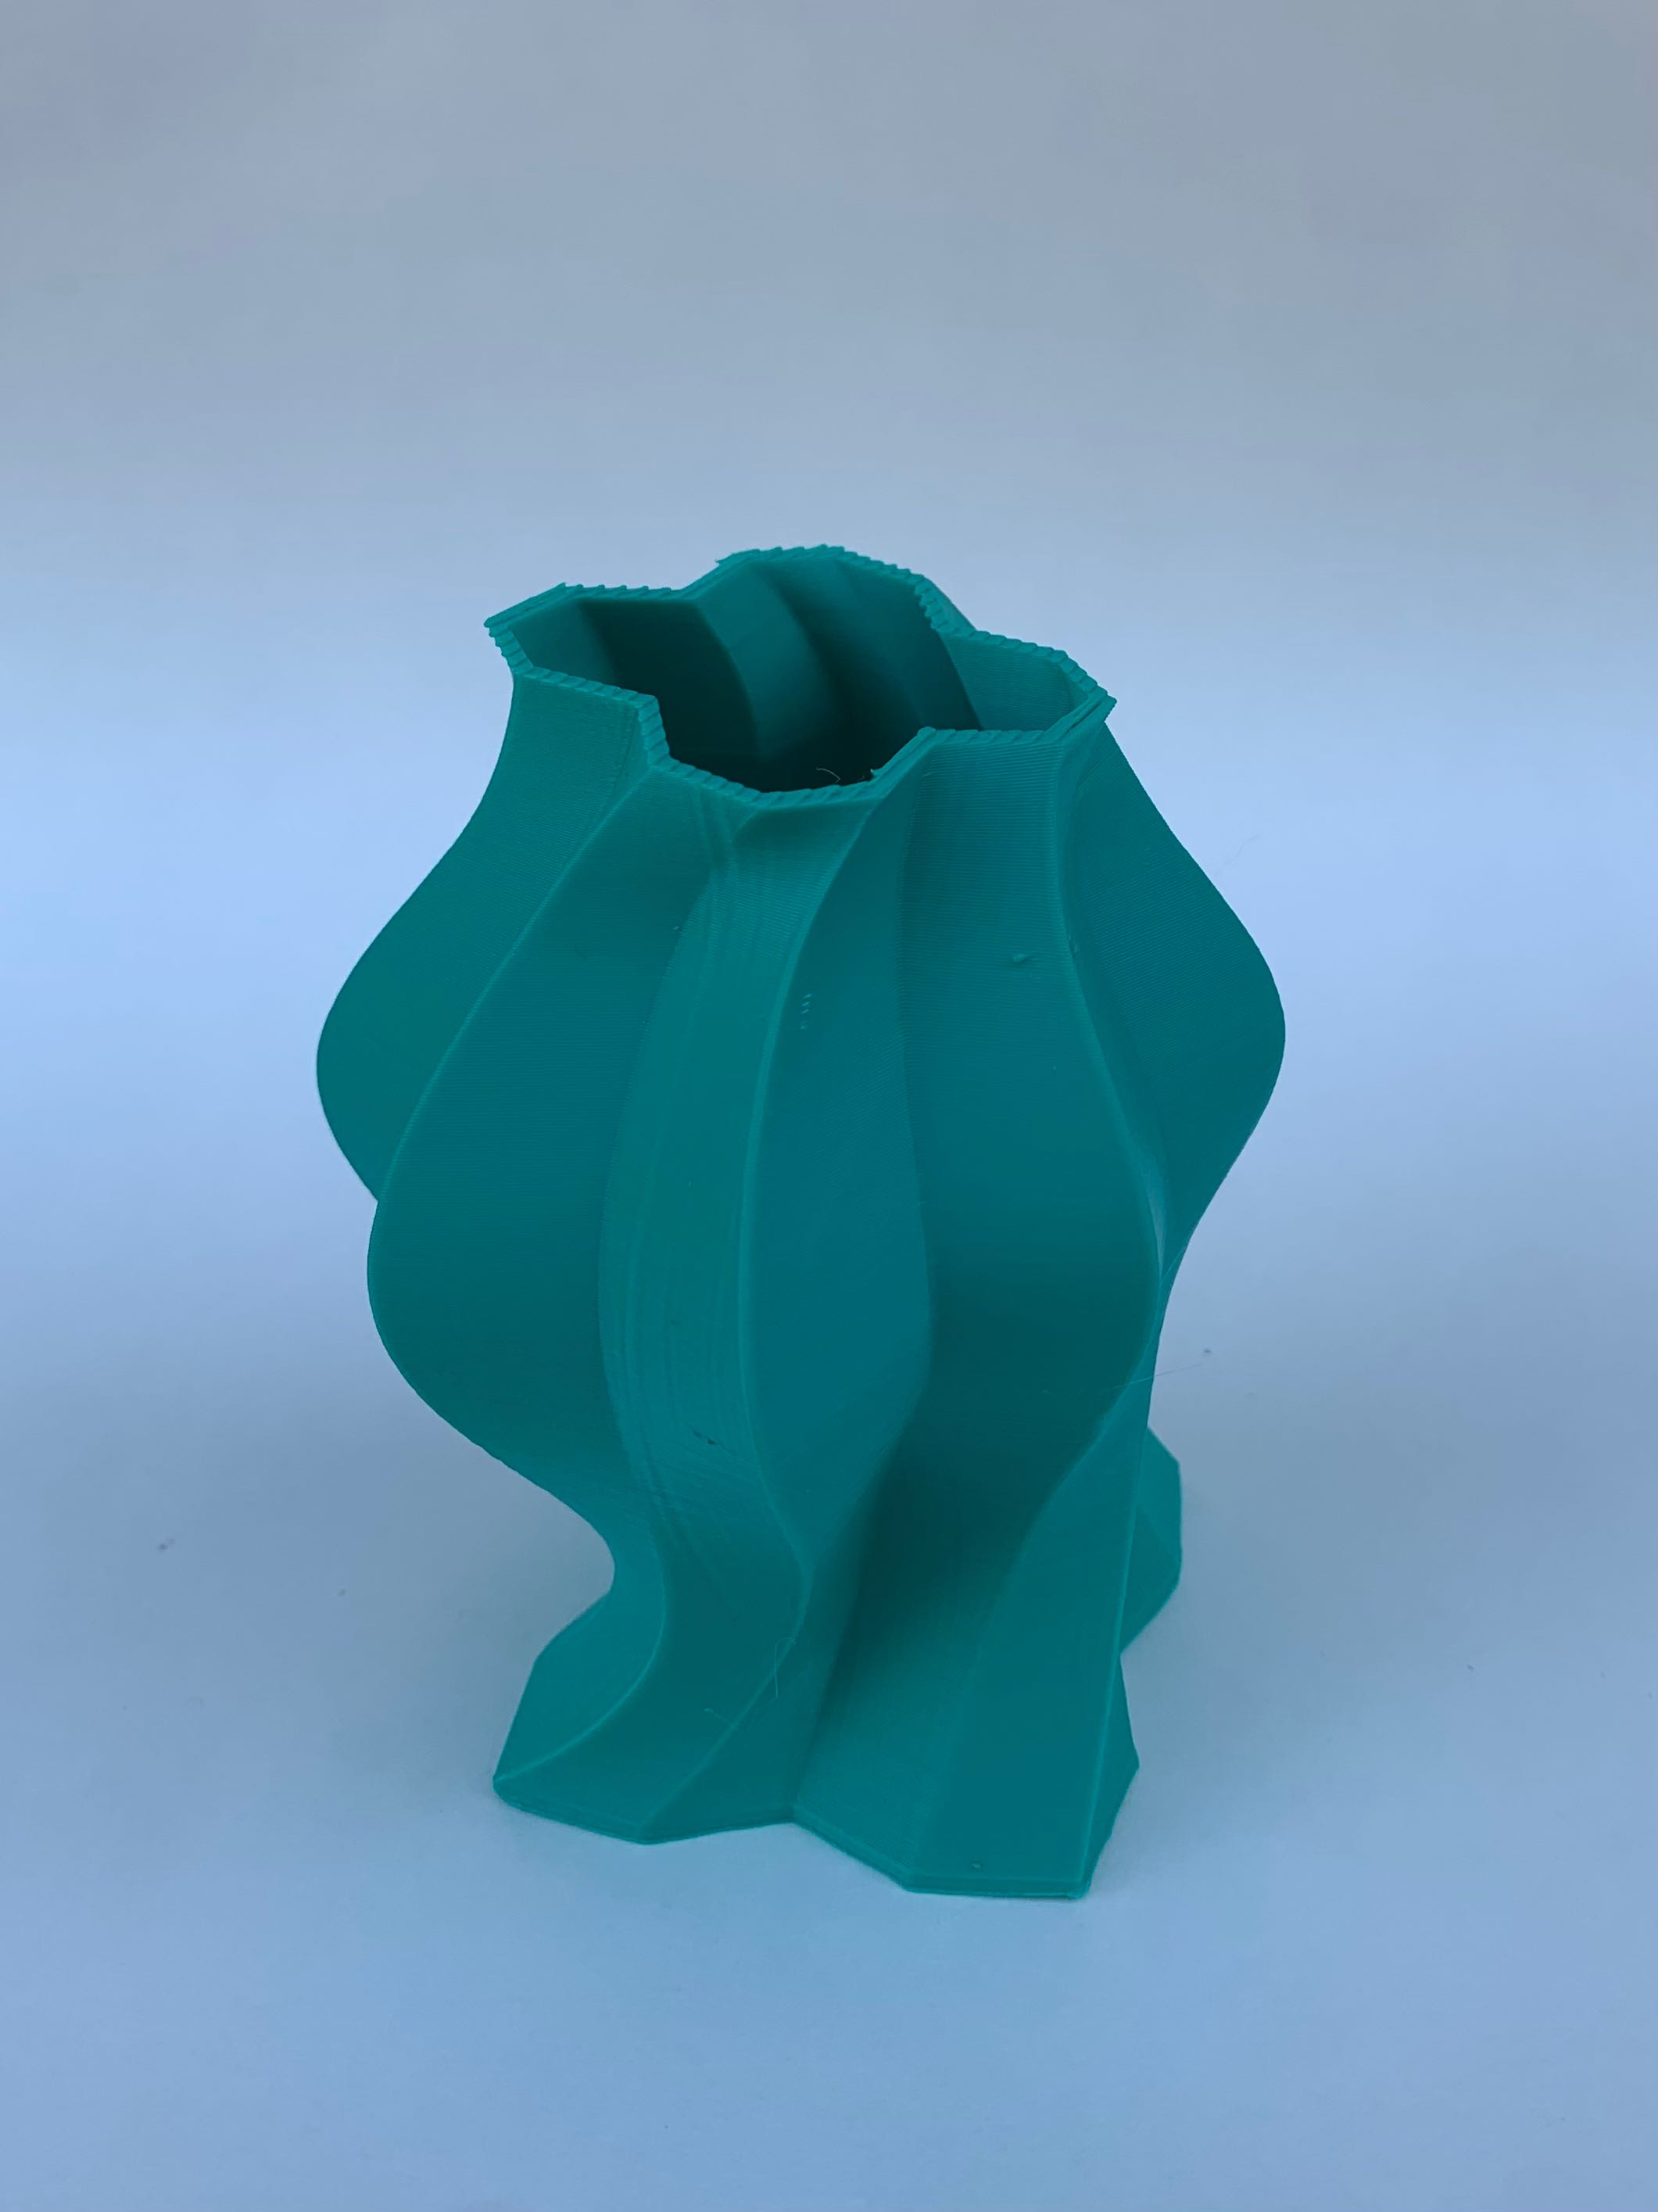
My second print went really well, although I wasn’t paying as much attention to the size and it came out much bigger than I expected. It was really cool to see how smooth the walls print when it actually prints the walls.

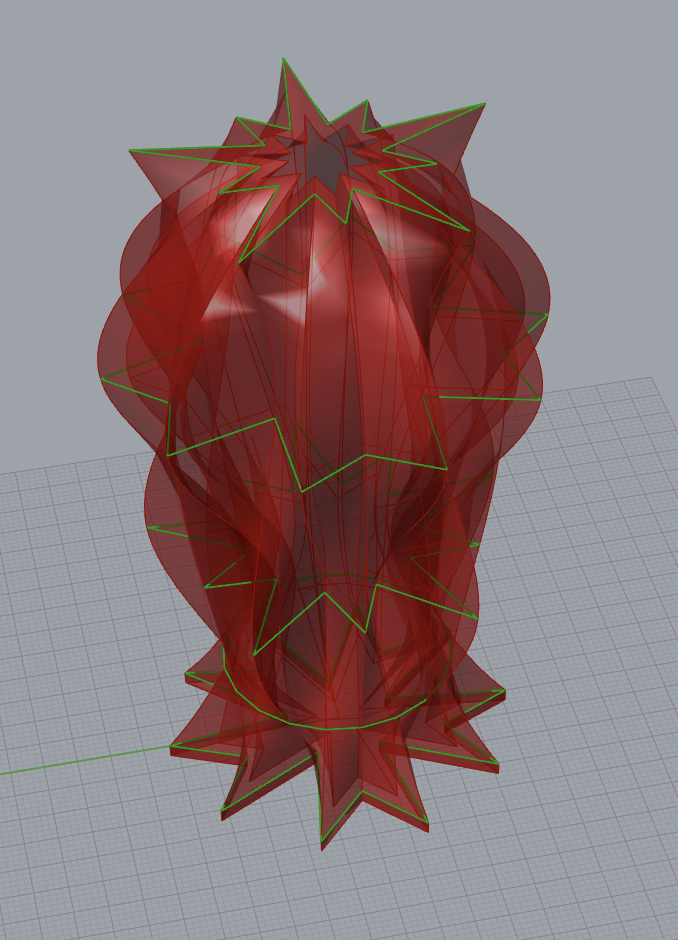
My third model had holes in along parts of the top half, which I noticed in the render and figured were there because of the code “breaking” a little, but thought maybe they’d look interesting when printed, or they’d close up when actually printing, so it was a little experiment. They ended up printing a little sloppily, but I still think it adds extra flair.
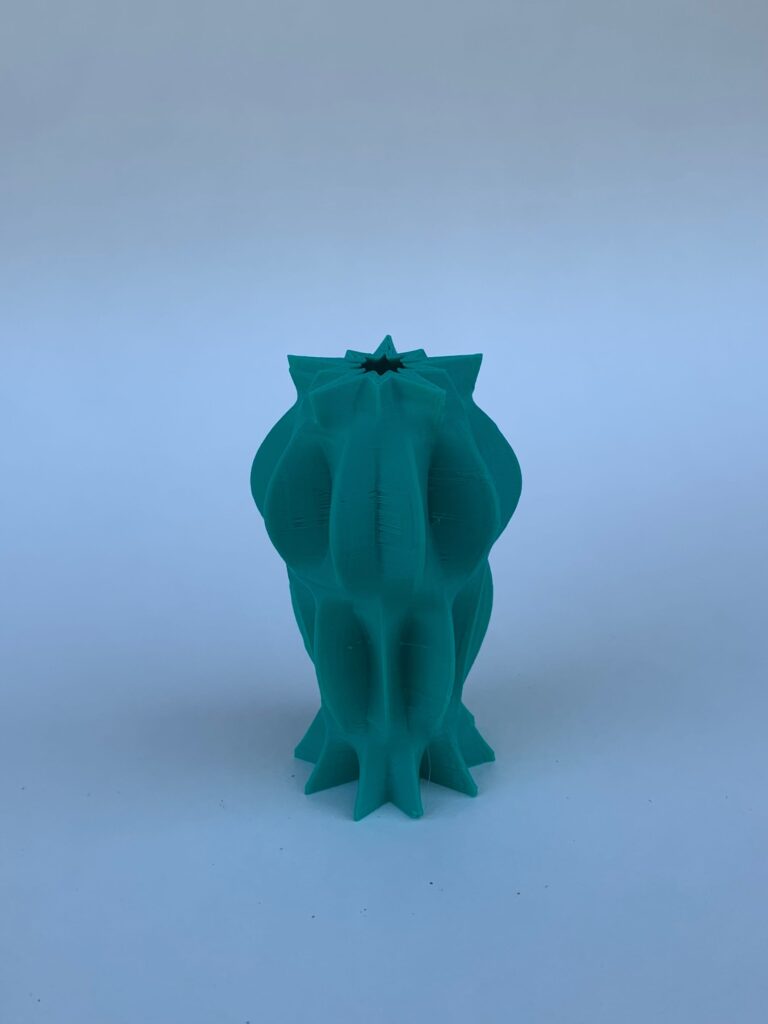
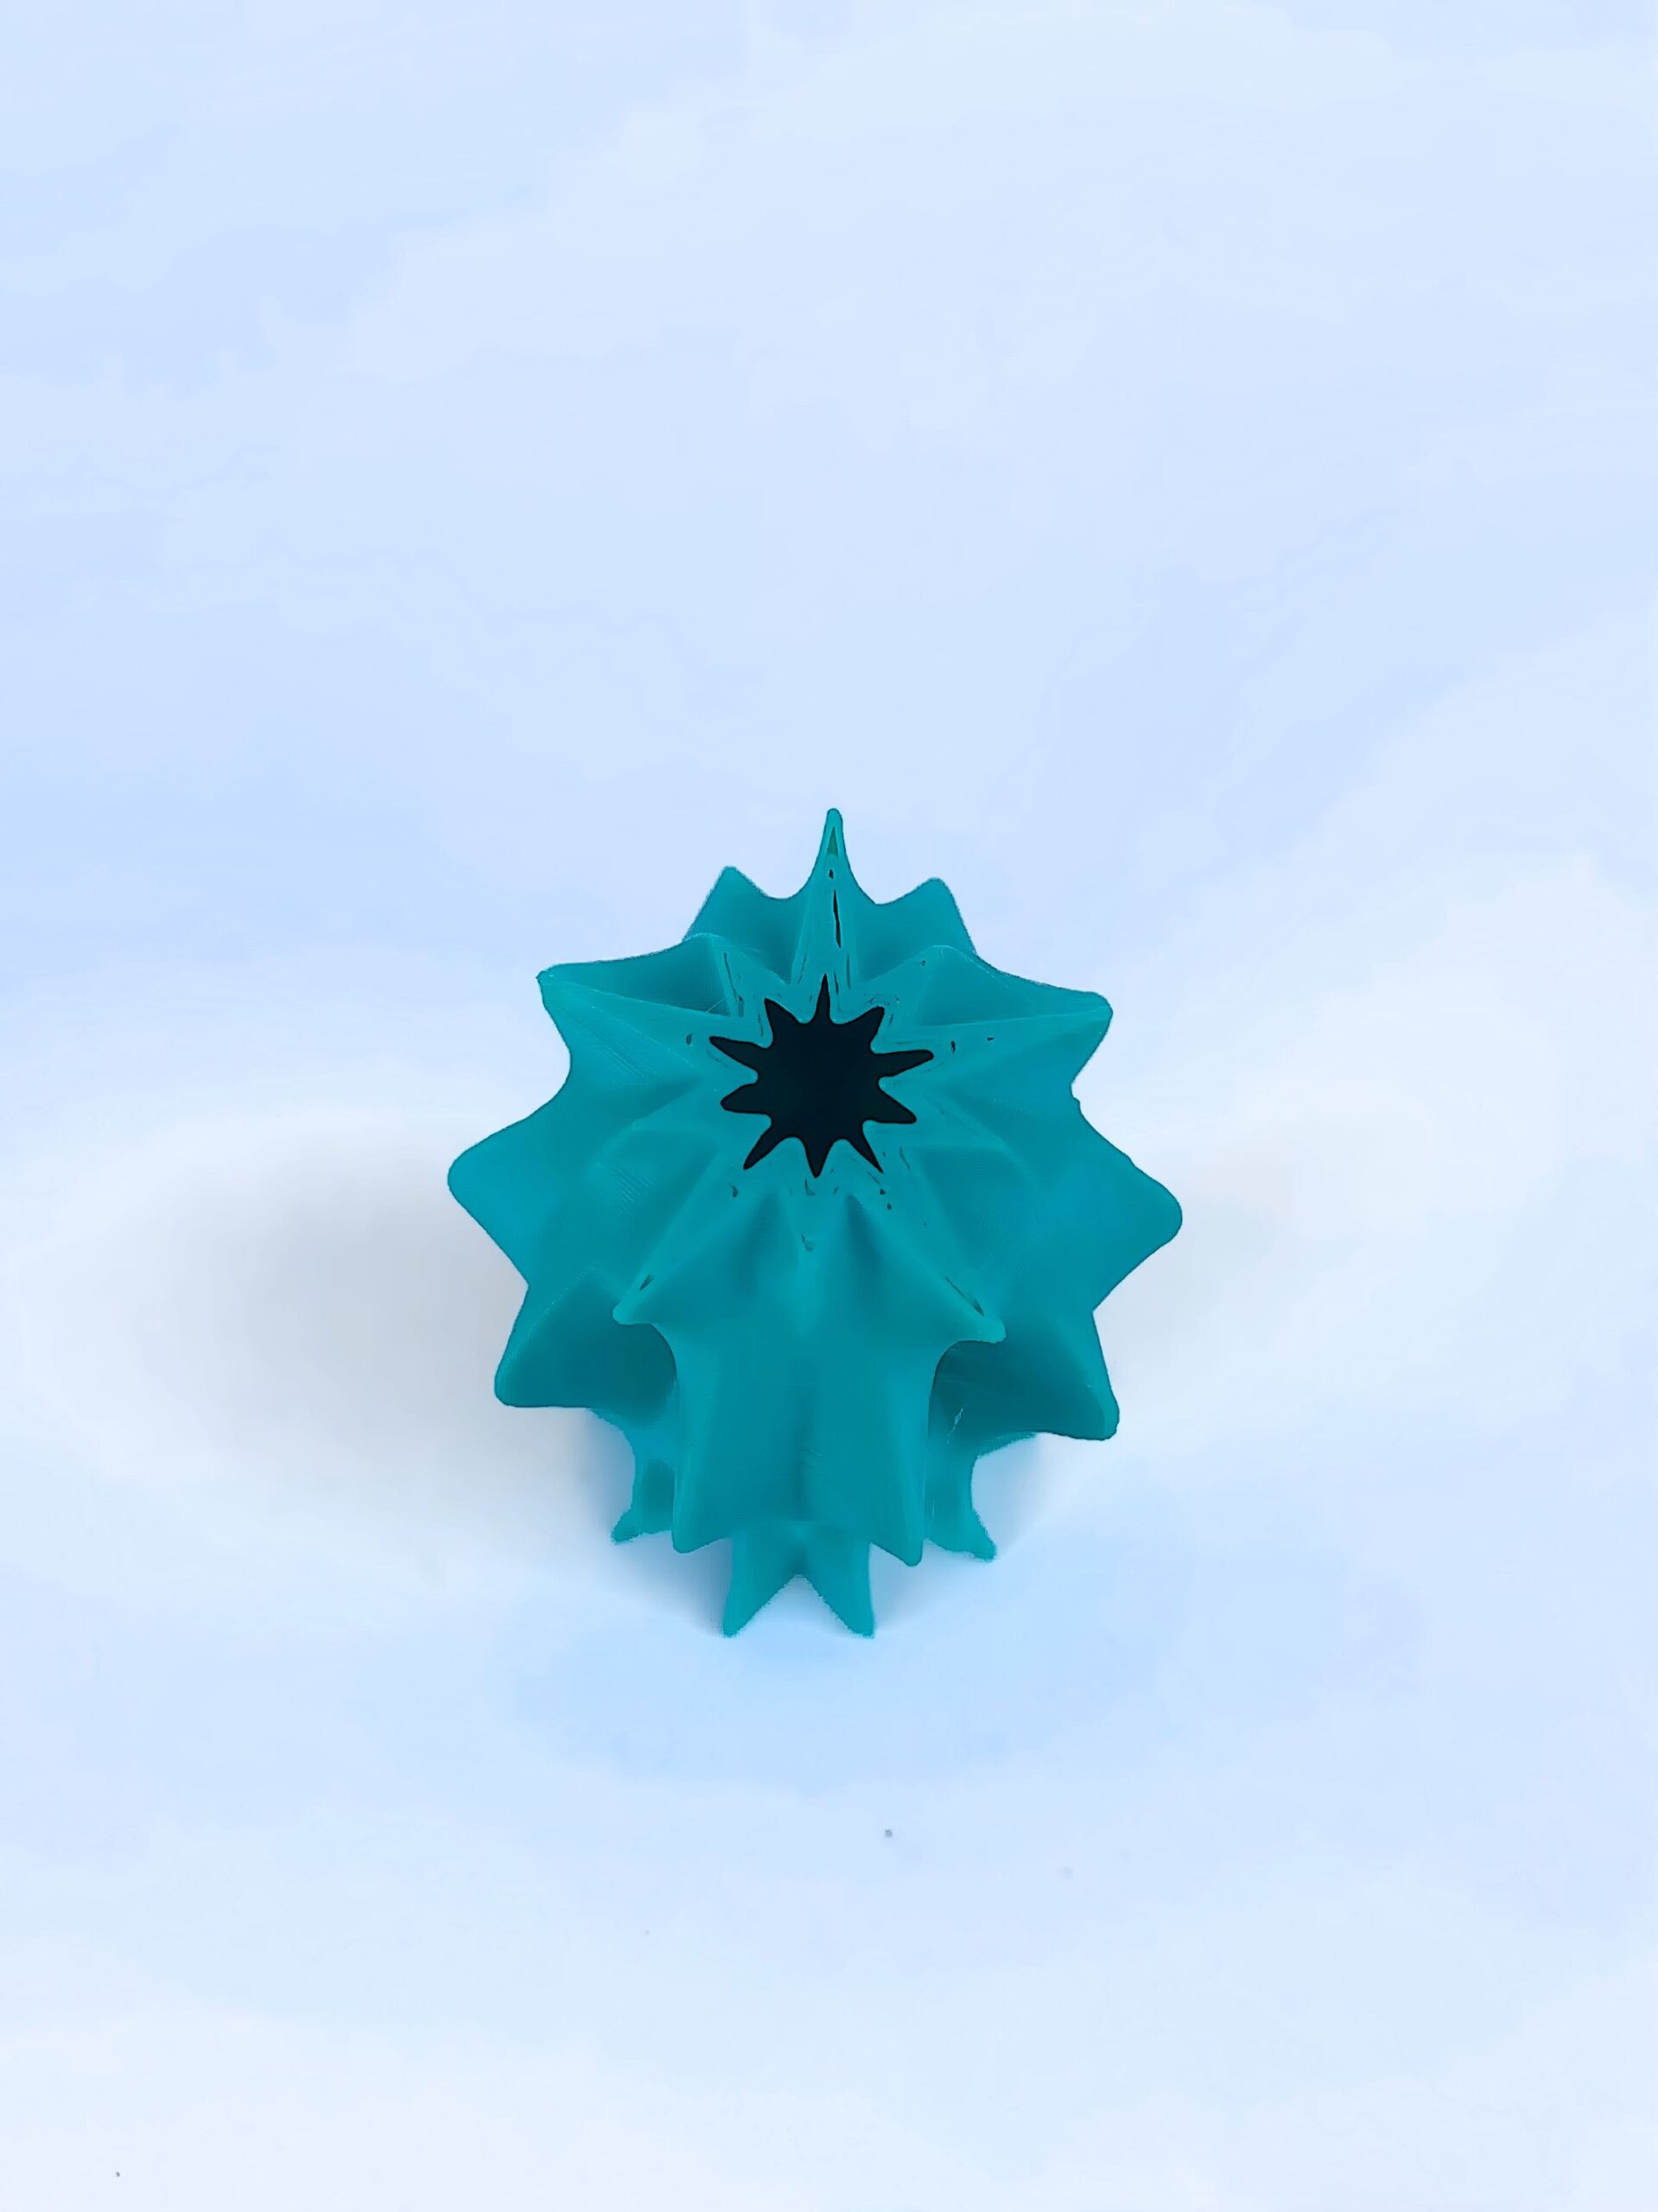
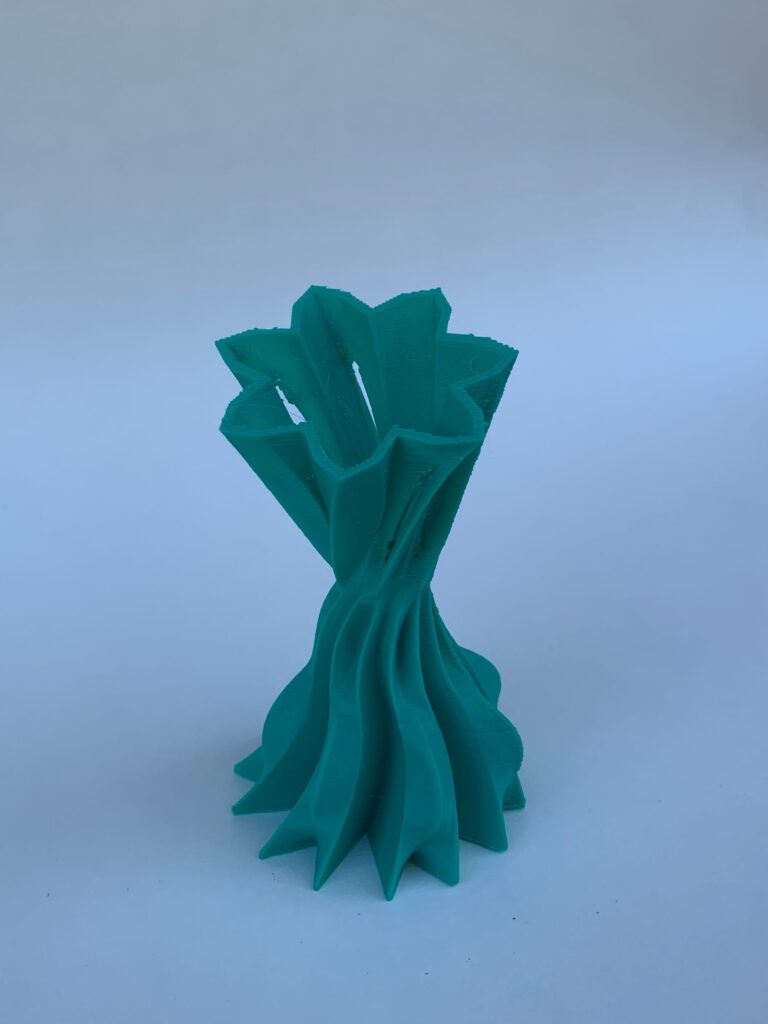
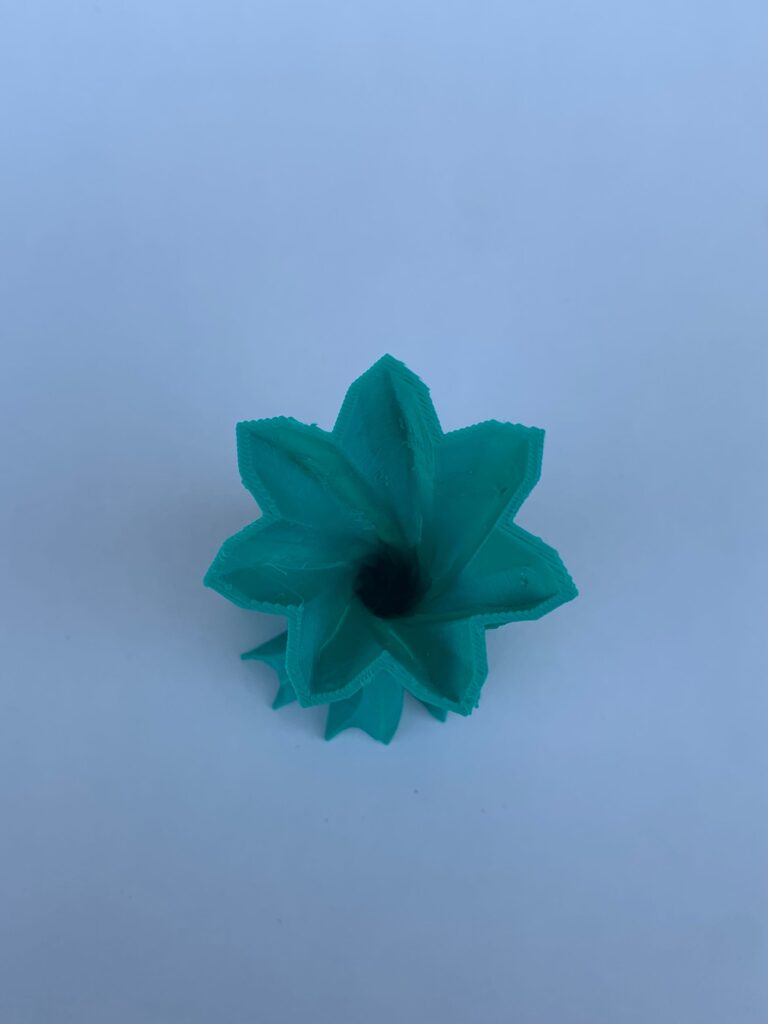
I did a fourth bonus print since my first one technically didn’t print right (even though I really like it). I love the way you can really see the shapes changing in this one, and the asymmetric 10 point star at the top.
The printing process gave me a lot of problems – or rather one problem repeatedly. I kept having to re-level the bed. On the first print, it was coming off, so I re-leveled. But when I re-leveled, even when the leveling print turned out perfect, when I’d go to print the vessel, it would somehow be too high and the extruder wouldn’t get anything out. I ended up leveling the bed multiple times before every print because of this. I’m not sure if there was some problem with my models or if the springs would just move. I will probably look into getting sturdier parts to keep the bed level because it was really frustrating. I completely forgot to take more pictures of the actual print process, which is unfortunate because I spent a long time just watching it print because it was so fun to watch, and would go back and check very often on the progress. The other issue I had was that the Cura would tell me I had too much overhang, so I had to alter the designs many times so that wouldn’t be a problem. Sometimes this ended up with a very different design.
Reflections
The parametric design process is something I haven’t really dipped my toes into before, and it was really enjoyable. I think that the process of programming and modeling through parametric design allows you to test ideas and make subtle or large changes very quickly without having to actually make big alterations in the artifact itself – that is, unless you want to make the changes after you print. But even then, printing can be somewhat fast – I actually went back and forth in my mind thinking, ‘wow, this takes 6 hours? That’s so long’, and ‘wow I got a whole vessel in only 6 hours and it wasn’t even me doing 6 hours of work’. Anyway, I think that the parametric process also allows you to explore and surprise yourself a lot. This can also be done with handcrafted artifacts of course, but it just feels like a different flavor of exploration. I found myself thinking of specific ideas, but also just curiosity of what would happen if I altered certain parameters together. This form of design allowed my ideas to build off of each other quickly, as I could sequentially and swiftly alter the design on a whim – and undo it if I didn’t like the direction. A disadvantage is that sometimes I would think of a shape that I just couldn’t figure out how to code or create with the parameters, and so there are some limitations there by our own minds, even though I would be able to make those same shapes by hand. But that river flows both ways, and there’s individual limitations that can be manifested through parametric design. Overall I thought it was really interesting how complex behavior in form could arise from altering simple aspects.
All of the designs that I thought of in my head and tried to code at the beginning of the project ended with me not being able to figure out how to bring the design into fruition. However, once I experimented and got the main structure of the polygons, I was able to bring ideas of how I could alter the parameters to life. So I kind of stumbled upon the polygons, and then realized how much I could change the shape of each level of the vessel. This turned into having ideas about how I could transition between shapes within the vessel, and what kind of personalities I could imbue in the vessels not only through their shape, but also through the continuity and shifts from polygon to polygon. I also wanted to experiment with the asymmetry, and was able to intentionally alter that aspect.
I do feel like I designed these forms. Of course, I was helped a lot with the code, and the printer printed them, but I still put a lot of effort and creative energy into designing the actual forms. I altered and tweaked the parameters many times to get a feel of what I really enjoyed looking at. I wanted to capture flow and change, which I think came out beautifully in the ways you can see the points of the shapes emerging and receding in arcs and undulations along the vessels. I think that using computation can be yet another tool in an artists toolbox. If I type a story, I still wrote the story even if I didn’t write the words myself, or print and bind the book. If I paint something digitally and print it, I still painted it even if I didn’t program the software, build the printer… Art is often manifested through various tools and is a way of expressing ideas, and I this was a way that I was able to bring those ideas into the physical world. I think that as you get more into using advanced technology for the design and ideas themselves, then it gets a little more blurry, subjective, and circumstantial. But I think at this scale, even if it was all an experiment with no initial intention, we put the creative ideas and work into the pieces. Credit is still due to the help involved, but I don’t think that’s unique to this process. Pottery wheels, musical instruments, even pencils… they’re all tools we interact with to create. So while using “technology” does seem to bring this thought of disconnect and alienation because of the connotations with tech, I think that it’s just another medium in this case. If I were to sculpt these by hand, I think I would still feel a similar sense of artistry, just in different ways with different connections.
Hi Lauren, I really enjoyed your parametric vessels, especially the “funky” one. I absolutely love it. I wish I could figure out the setting to make a piece like that intentionally. I also am super interested to see your code as I want to play around with the different star shapes. Wonderful job on your project and presentation!
Thank you Michaela! You can experiment with it by setting the wall thickness to zero, it’s so interesting that several people in the class had theirs set to 0 automatically while others didn’t run into that, but I think it was a fun happy accident and would love to try playing with it in the future:) And you can totally download the code and mess around with it! I was inspired by some work we saw in class so I’m probably going to play around with it more too 🙂 I loved seeing your pieces as well and especially how you styled then with the halloween decorations, they’re like little potion bottles!
Hey Lauren,
I think that your first vessel (without the walls) is actually really cool design wise. I love that you saw the same thing I did with the cactus flower you included in your cover photo! I don’t think we ever talked about it at all, but I think it’d be interesting to see what kind of prints we could make by altering the infill %, pattern, etc. You did a great job with your vessels!
Hi Christopher, thank you for your comment! I also really love that one, even though it wasn’t intentional – but I think that’s a huge part of art, seeing where things take you and letting the process evolve. I didn’t even realize that it looked like a cactus until someone mentioned it in class, and even then I didn’t realize that with the pink flowers it looked even more like a cactus until I showed my friend the photo yesterday and she pointed it out haha, but I love that! I checked out your works and I love that you modeled them after artifacts in games, especially loved the MarioKart inspired piece!
This is a lovely collection of 3d printed succulents. I really like your “accidental” one, and it reminds me of the skeletal leaf structures that get used in art, or organ scaffolding.
I know we briefly talked about bed leveling after class, but there are so many factors that can go into getting a good print, and a lot of troubleshooting involves eliminating variables. Building enclosures to keep the temperature and humidity even, changing to a direct drive extruder–all of these things can help eliminate frustrations, but I think most of my learning experience comes from troubleshooting and working with what I had.
They make a wood-infused filament and gosh it smells so lovely when printing–you might want to try it out! https://www.hatchbox3d.com/collections/shop-all/products/3d-wood-1kg1-75 They’re really nice to make planters with.