Escher Tiles in Processing
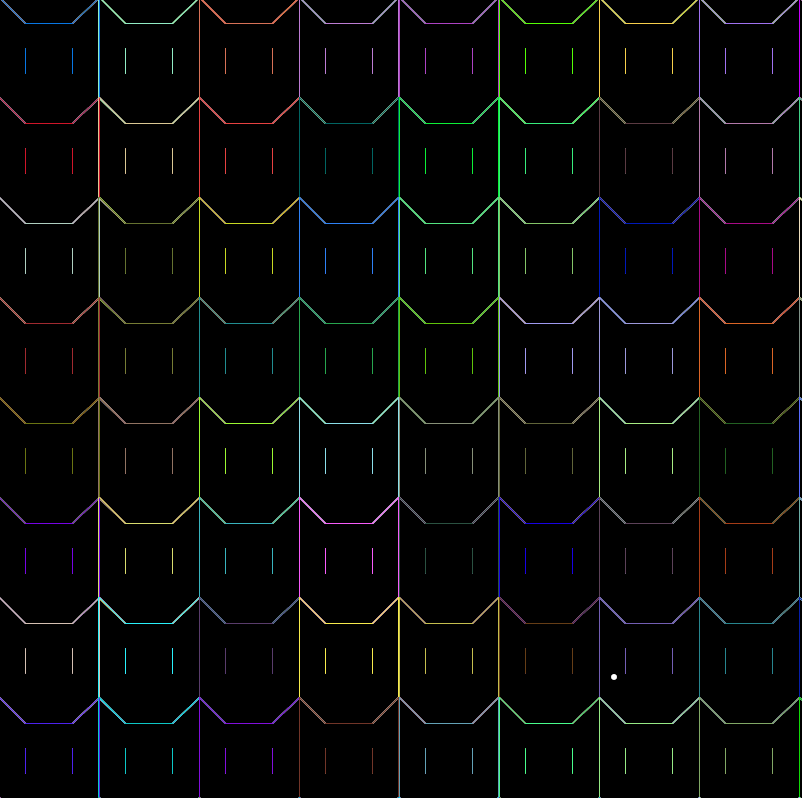
So I started out with what seemed like the simplest of designs the square. I then modified the edges and did all the math required to move the turtle in a way that it created my shape. Then to tile the plane, I simply used two for loops so that the turtle will draw my Escher tile then move over the size of the tile and repeat. It will also then when it reaches the edge of the “plane” it will move down the size of the tile and repeat until the entire “plane” is tiled. The tile I made was designed to be cute and simple. The shape I think is fun and when adding certain colors I think there is an optical illusion that occurs (hard to show in images easier when it the draw command repeats). My biggest issue was creating a tile that I found to be interesting but also I would understand how to tile. So I kept tinkering around with different shapes until I found one that I liked and thought was fun even if it was a bit simple in hindsight.

3D Tiling across a surface in rhino
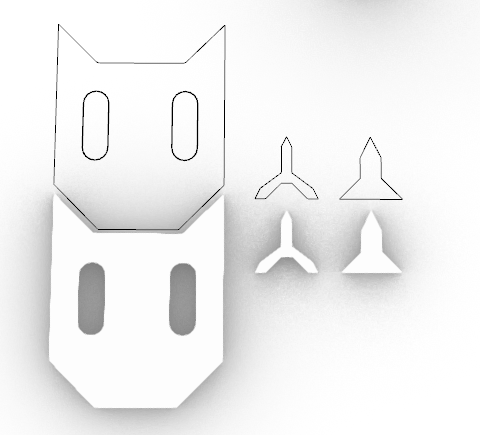
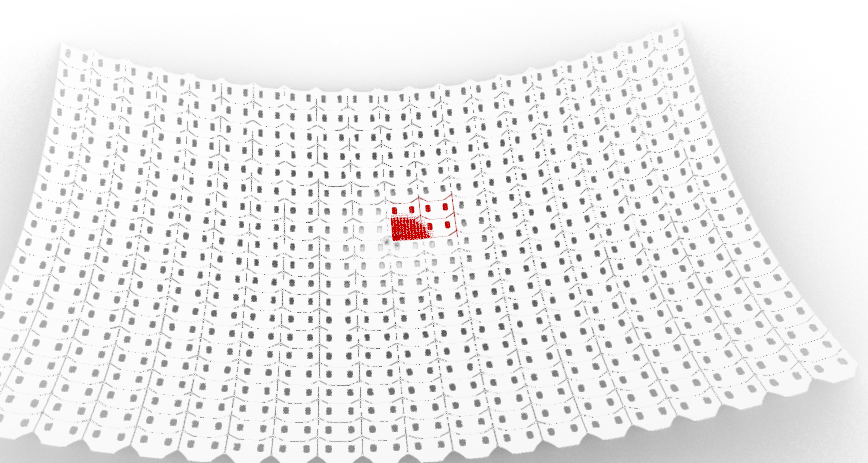
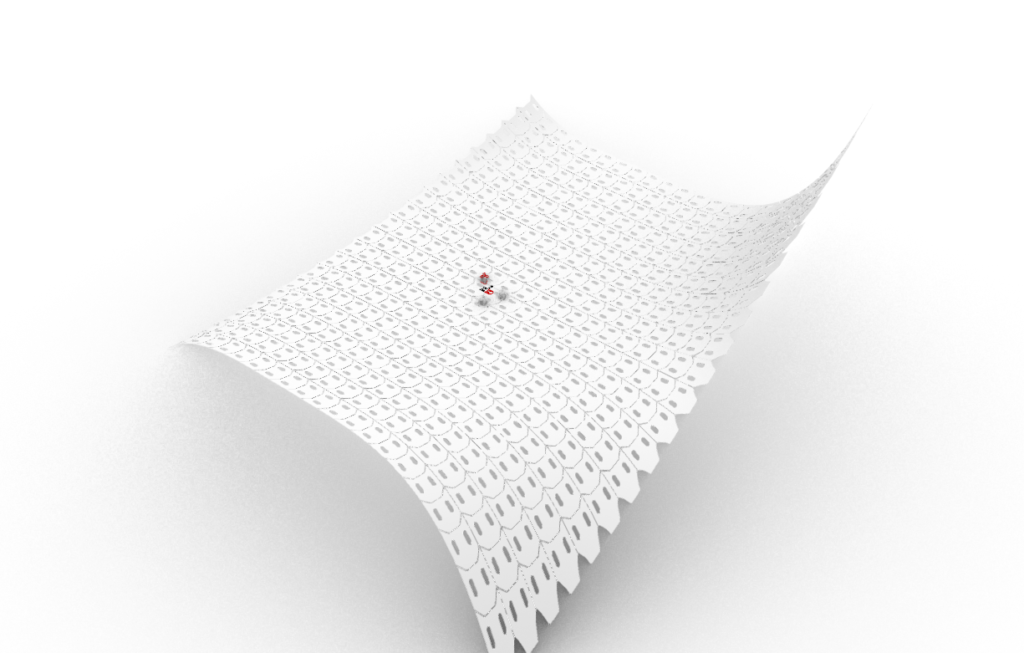
I did try using my Escher Tile and I even used Illustrator to add some width to the lines and make an object with curves that I could use in Rhino. It did work well but I found that it was too simple and would really just be a surface with a bunch of oval holes. Which did have a cool design but I wanted to try something with a little more complexity. So I created some Triangular designs with Rhino and used grasshopper to tile them across different surfaces. The biggest issue for the imported surface was that it wouldn’t keep the surface complete. It would either finish with the tiles not connecting or have the bottom of the object not uniform. First different designs, second PLANAR, third PLANAR, fourth IMPORTED SURFACE

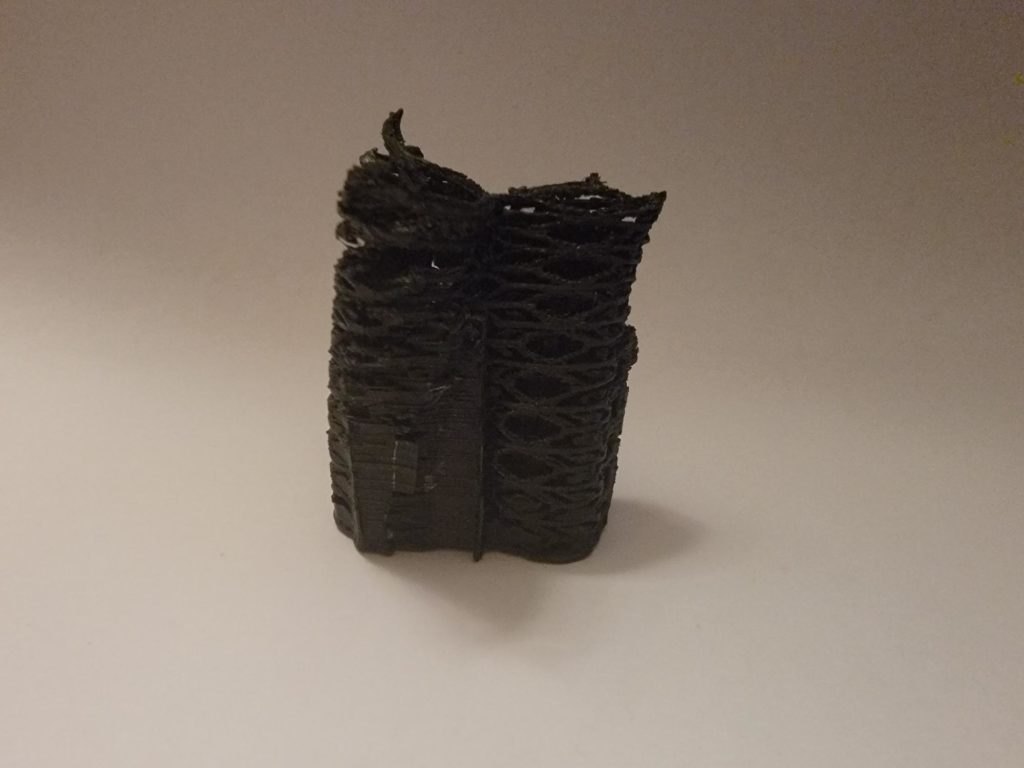
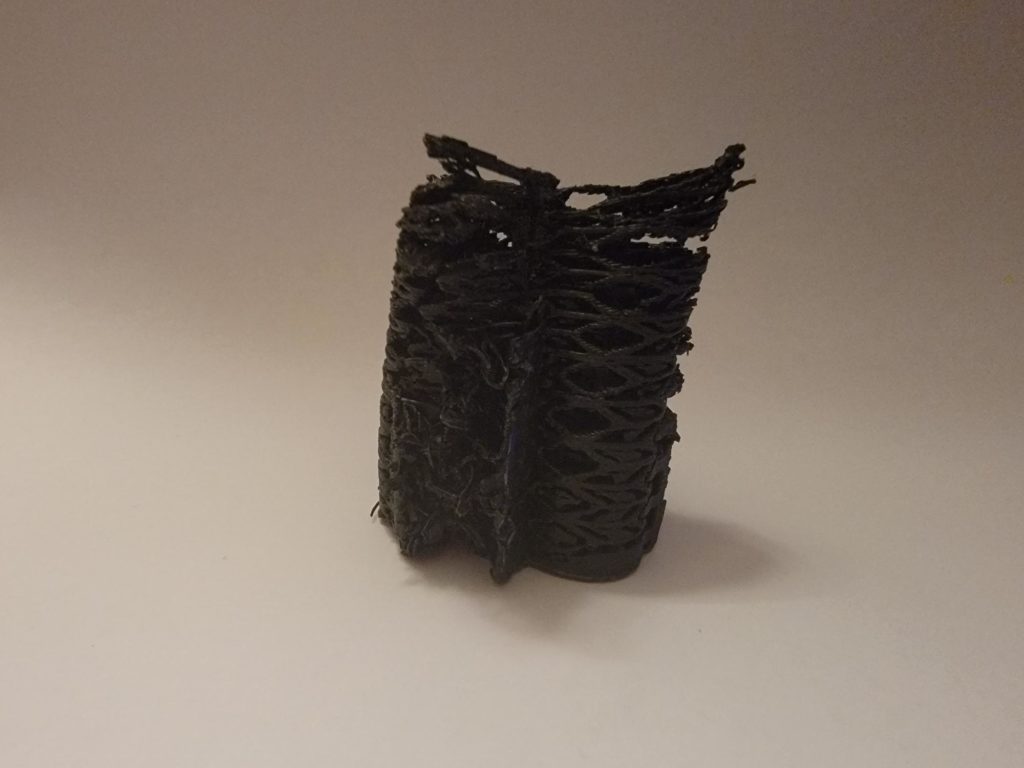
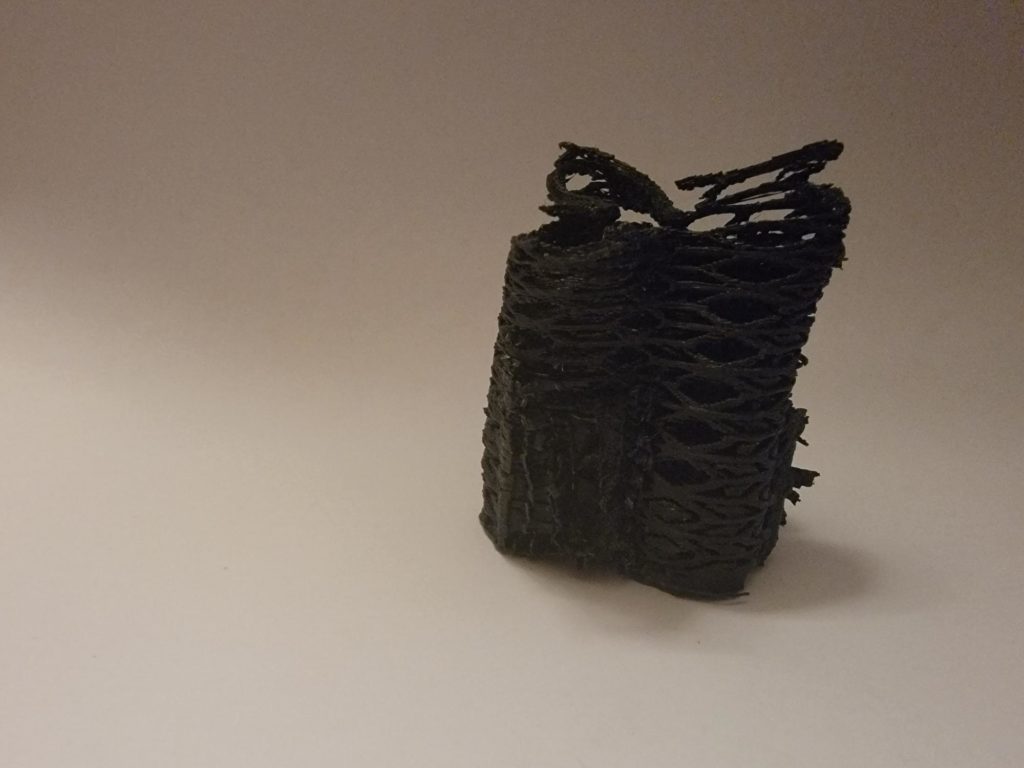
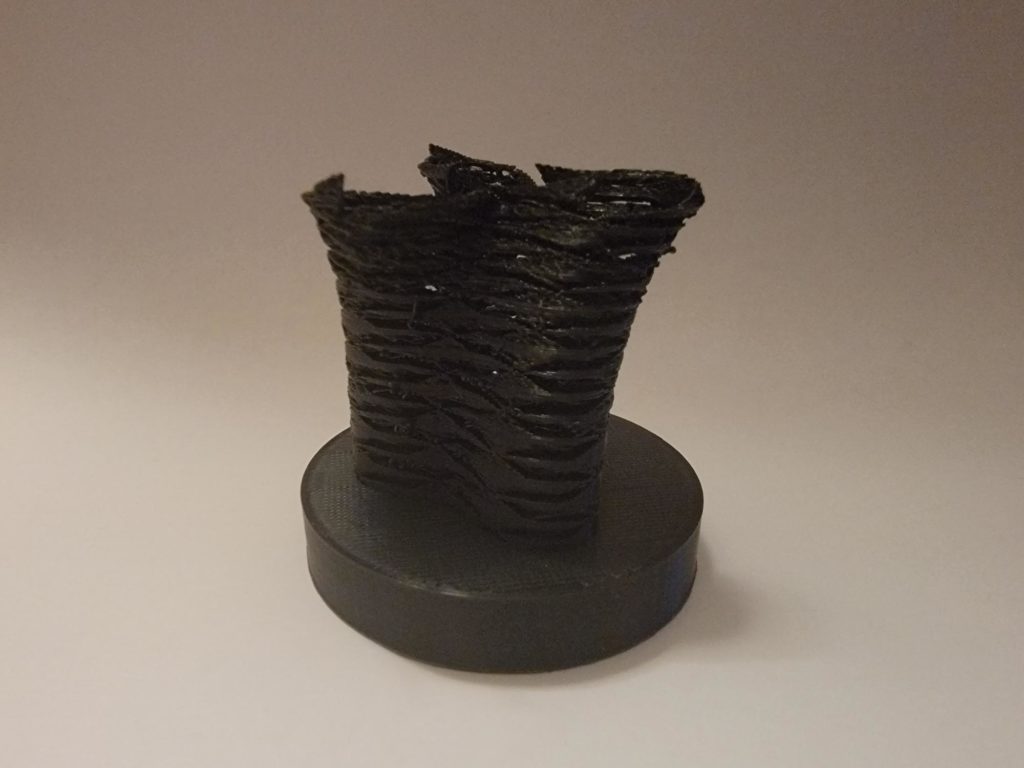
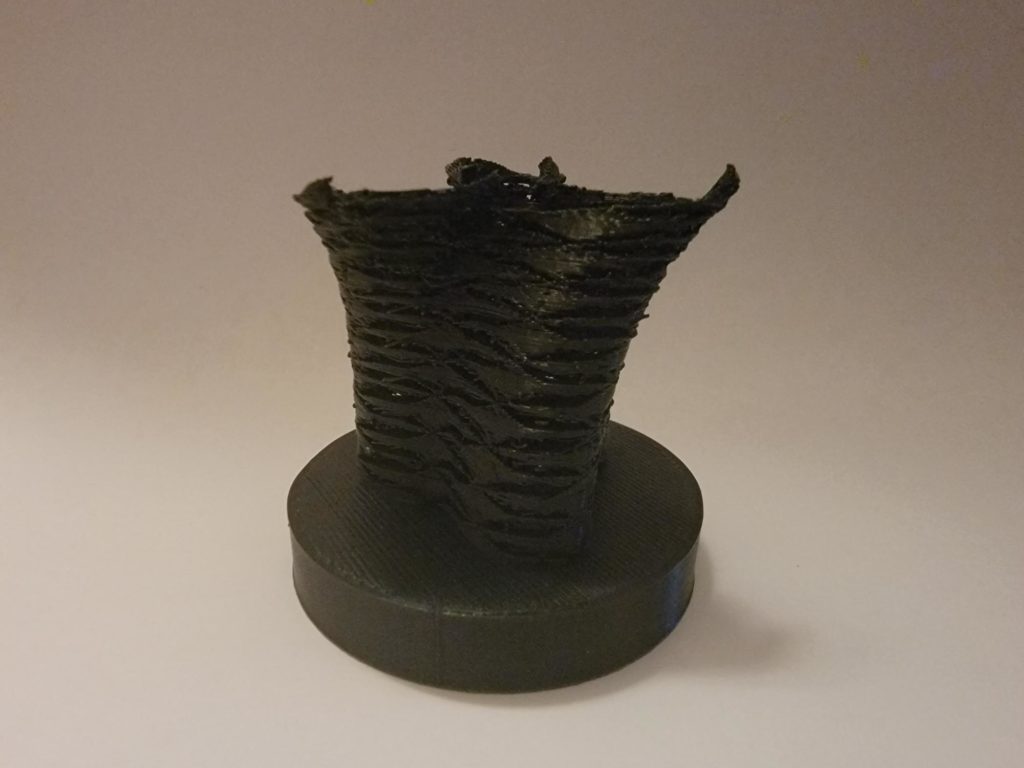
3D printed form (and Struggles with supports)
After baking the surfaces in Rhino I imported them into Cura. The first print I made was with supports because I could not think of a way that it would work without them. After using the supports however the design looked poor. And there were two many supports that I could not easily remove them. I spent about an hour trying to pry the supports off of the design and it just lead to a big mess. Then the second design I used I placed a cylinder into the base of the design so that all of the bottom layers of the tiling would have something to start on, Besides that however I would not use any other supports.

Looks amazing! I really like how you were able to get you Escher tiling from part one, and translated it to the 3D model within part two and three. I also really appreciate the addition of the colors in part one. I know you states it was simple, but sometimes simplistic pieces can really provide the best results. The models and planes you used looked very interesting and it I am very interested on how you got the imported surface within your Grasshopper script. Issues with the imported surface definitely did not stop you from making some great models. Printing could be a pain sometimes and getting the supports off your model is a very tough task. Adding the cylinder base did help bring out the greatness of your model when printed and it looks fantastic because of it. Good work!
The Escher tiling looks amazing! It’s a cool idea that you decided to generate a cat-shaped tiling.
The most challenging part of this assignment was definitely the print itself. Good job trying out a cylindrical design. It looks really good. I am sure it would look amazing if you printed it with a different material.
The black filament looks really nice. It compliments the overall structure of your print. The platform was a good idea. I haven’t thought about adding one to any of me designs. Initially I was having problems with the supports on me designs since I was not able to get them off easily without affecting my print.