Before I did anything, I had an image of what I want to try: a combination of “Disney , Silly symphonies : easter bunny” and “Wintergatan – Marble Machine” where water or marbles can roll between different titles. But I soon run into some roadblocks.
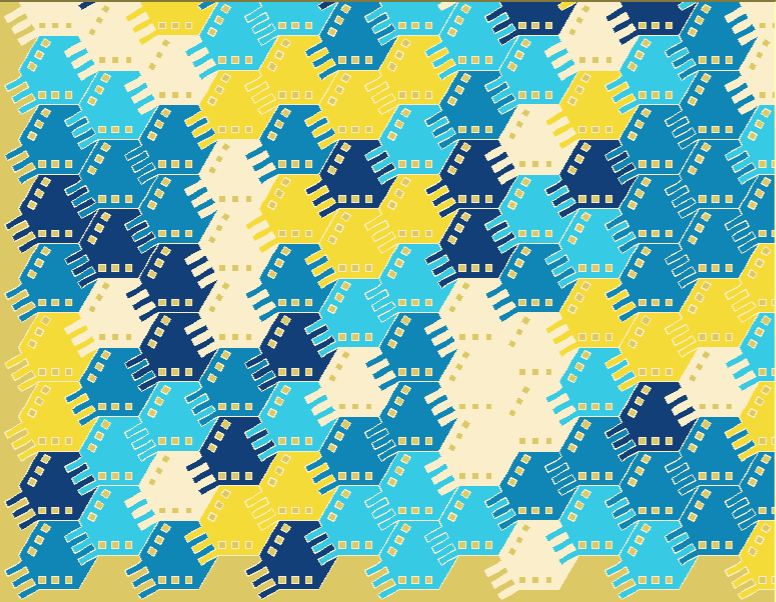
Part 1: Escher Tiles
My process and how my code generated my tiling:
I used python’s turtle module. I first designed my tile as a turtle trail and then the way I tiled the plane is by moving the turtle and draw one tile and so on. I edited the edge of my base polygon using the draw method of L-system discussed in lecture where F means move forward one step, f means move forward one step with pen up, and +/- corresponds to turning left and right by the specified angle.
Challenges:
The difficult part is to understand how to modify the edges in a escher-esque way. I googled it, went through some tutorials but still cannot fully understand it.

Part 2: 3D Tiling Across a surface
My process and how my code generated my tiling:
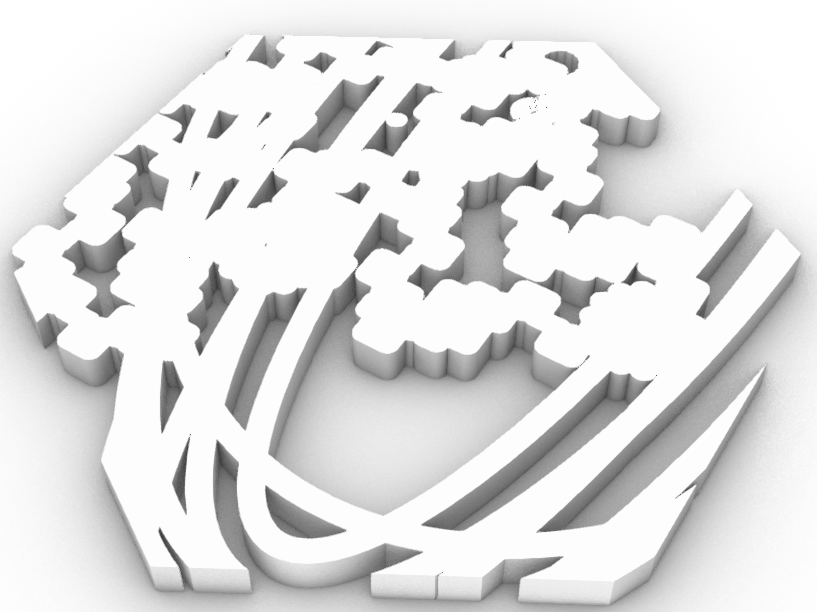
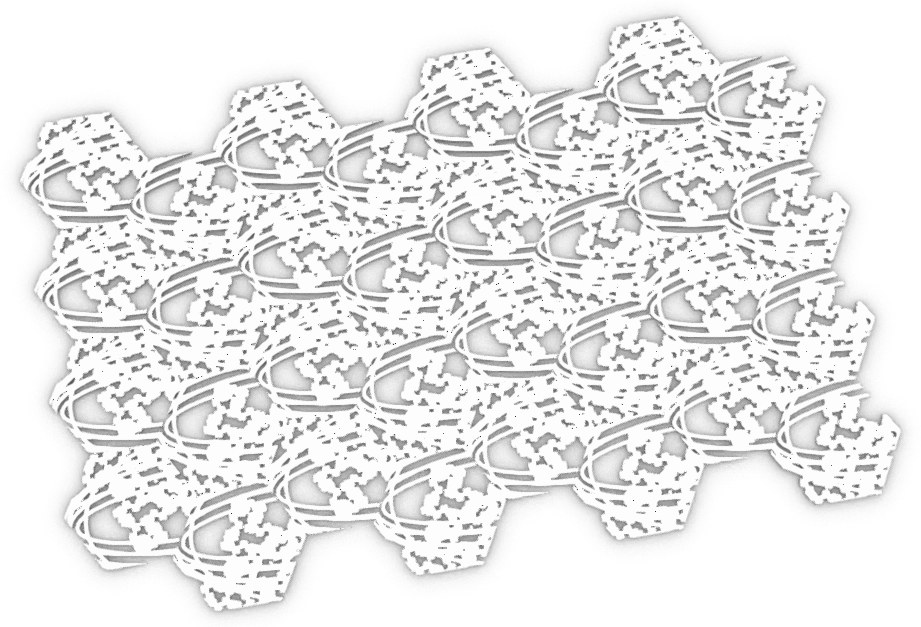
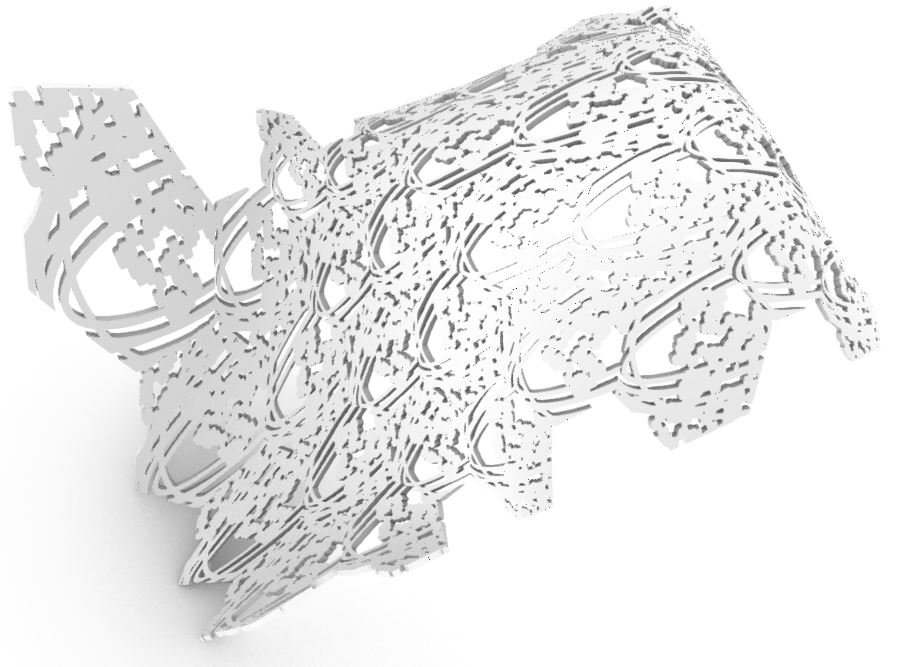
I first imported the vector graphic I created through processing and illustrator into Rhino and then translated and scaled it to select a good boolean intersection with my base hexagon tile. I used this boolean intersection as my tile mirrored it, and use it and the “Surface Morph” grasshopper block to tile my surfaces.
Challenges:
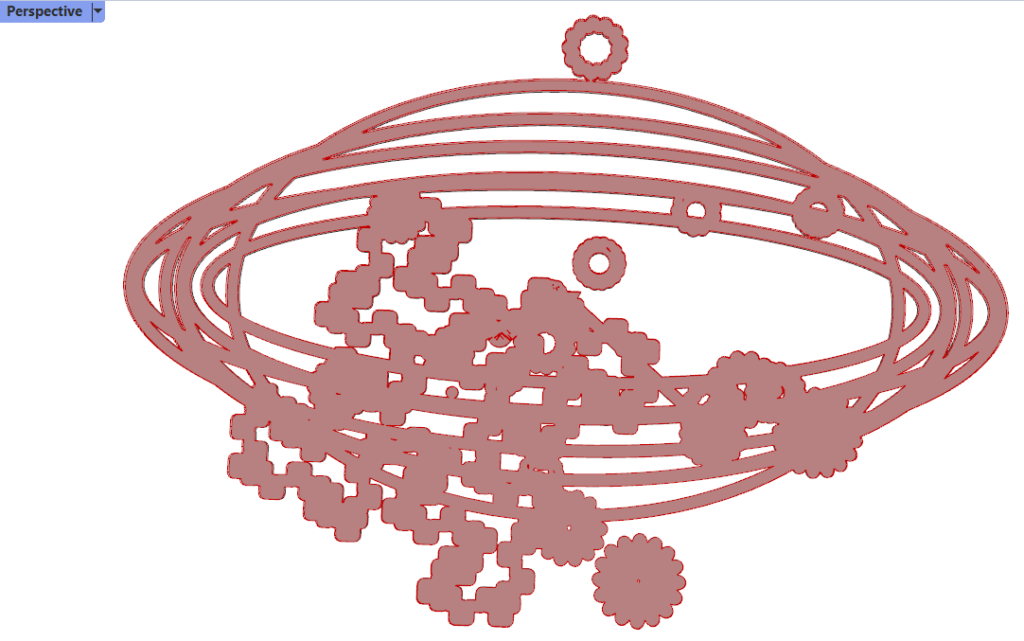
At first I tried to use Grasshopper python to generate my tile. But my attempts failed in the following ways:
In my first attempt, I used hollowed sphere, and the Surface Murph block didn’t distribute my spheres onto the surface but they are twisted and moved far away from the surface. I thought maybe sphere is too thick and maybe I can still try tube. But again the tubes are distorted and moved far away.
I then tried create boolean difference of basic extruded solids. At this step, my challenge is how to use rhinoscriptsyntax methods and Rhino.Geometry methods at the same time. rhinoscriptsyntax methods return Guid (Object ID) and Rhino.Geometry methods takes and returns breps. I managed to use coerce functions (rs.coercerhinoobject, coercecurve, coercesurface) to boolean difference extruded solids. But, then, the morphing result is again obviously not printable with tiles extruded far from the surface and very distorted.
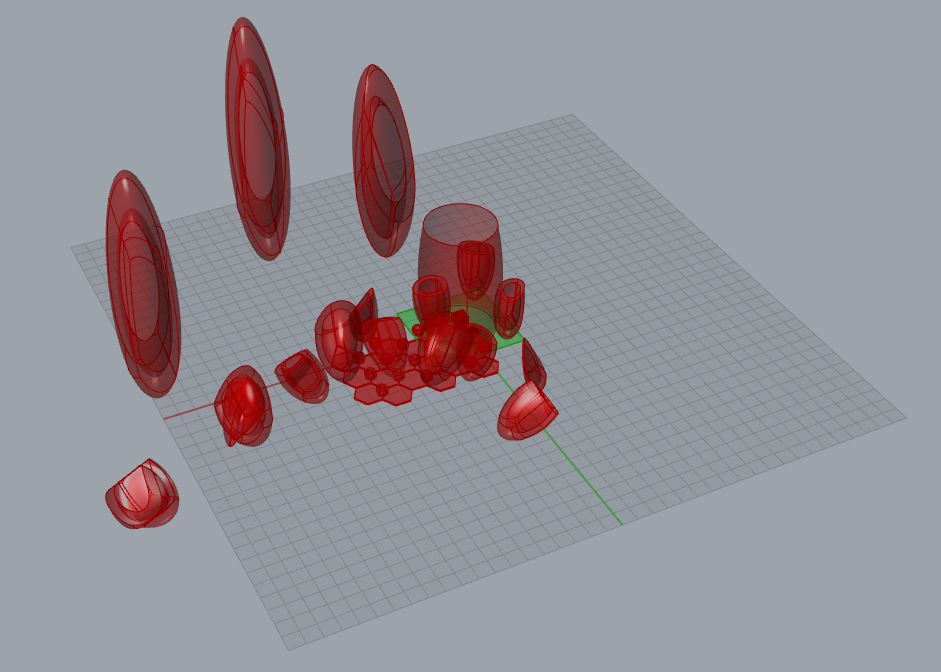
Luckily, artifacts from my SA4 came to my rescue. I was getting desperate running out of ideas to try. I imported the vector graphics for my SA4 bookmark into Rhino, tried boolean intersection it with my base hexagon tile and clicked the data dam. This base tile morphed nicely across the cylinder.
I also discussed with Prof. Leah my failure in generating my tile using Grasshopper python. And Prof. Leah pointed out that the problem actually has to do with how I calculated UVZ values for the surface morph. Really appreciate Prof Leah’s help and I think, from this point, I can continue explore further how make tiles as I originally imagined.
Rhino images
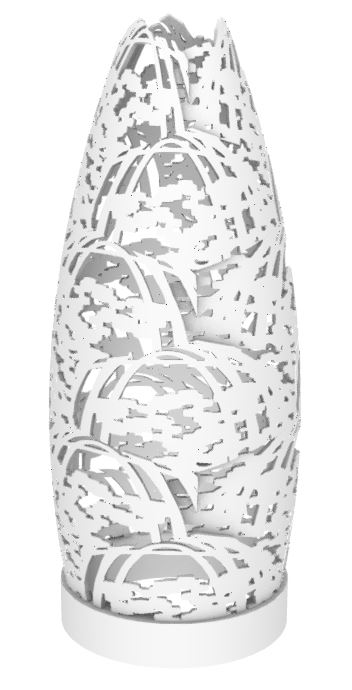

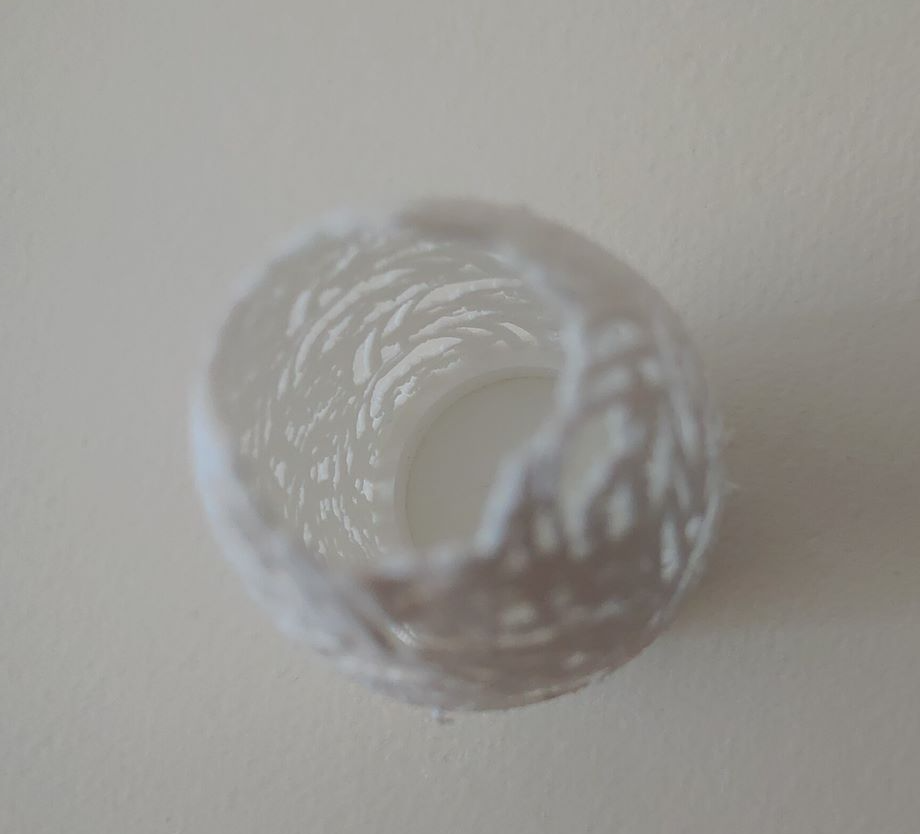
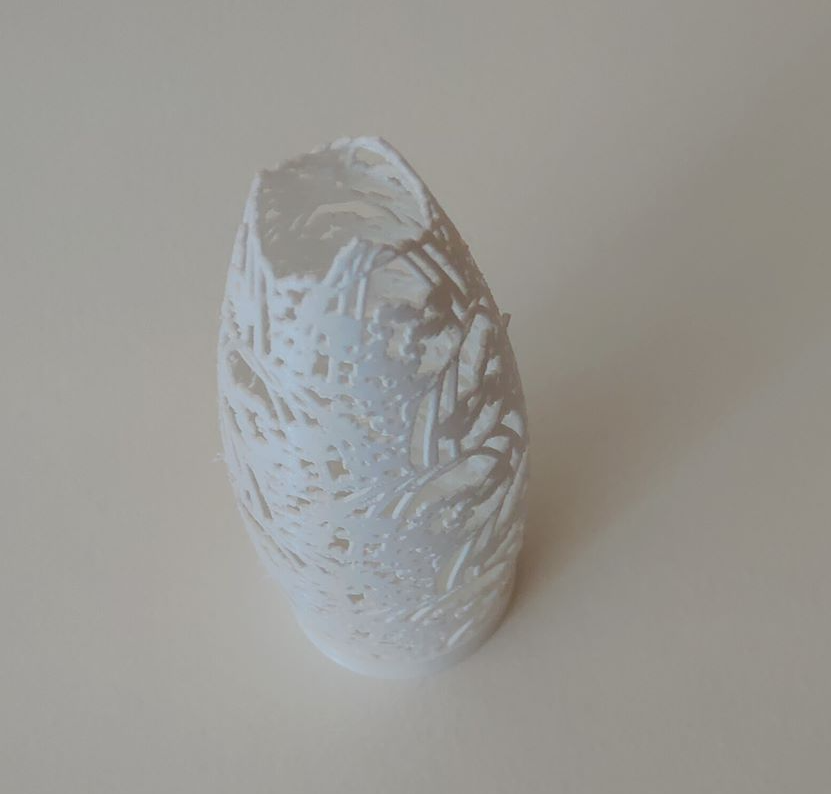
Part 3: 3D Printed Form
Luckily, my 3D printing process went smoothly. I did not use support.
At first, I tried, without any careful consideration, printing a cylinder with plain regular hexagon tiles and found the bottom has too little contact with the bed and the extruded filament just became a random tangle.
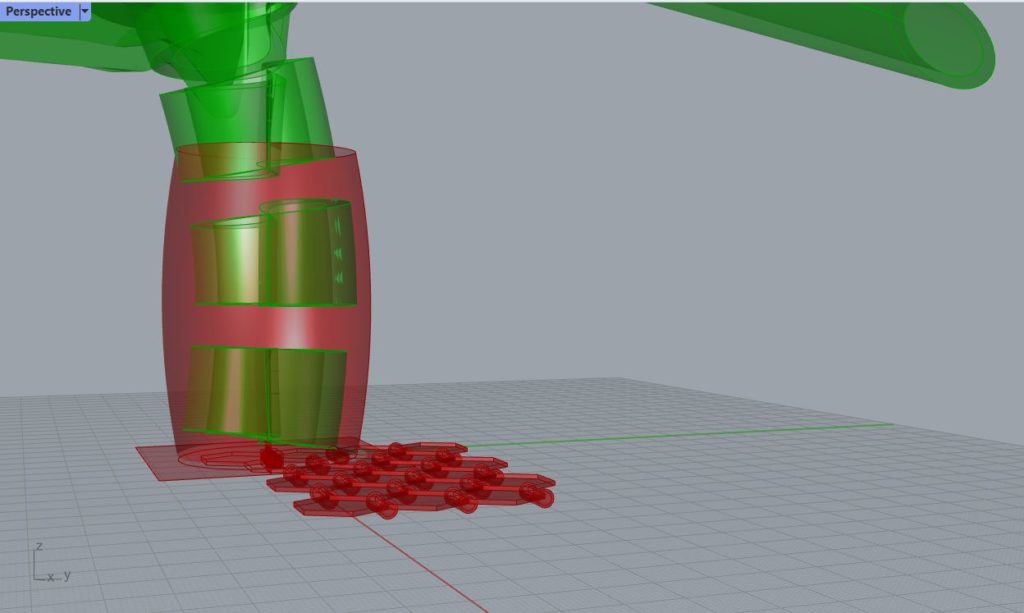
I then boolean difference the bottom of my final form with a box, both in grasshopper python and manually in rhino. Both failed. One of the possible reason is that my morphing result is actually 18 breps, I tried either join or merge them then boolean difference, but failed. I then created a box at the bottom of the cylinder covering its pointed bottom edges and creating a large area of contact with the bed.
After I finished designing part of my part 2 design in Rhino, the printer is still printing the bottom box. Why not save some time and filament? So I first tried hollowed box, then, a thick tube which I have played with for a while attempt making a water clock.
After the bottom ring design, printing is smooth for me. It takes less time than I feared. And the 18 separate tiles (breps) didn’t disintegrate. But I hope the base hexagon can be more pronounced because, to me, it has a nice association with the James Webb Space Telescope!

my code: https://handandmachine.org/classes/computational_fabrication/wp-content/uploads/2022/03/YieshengChenLA3.zip
Hey Yie-Sheng,
This is such a creative and interesting tile shape! It’s nice that you pulled from your previous assignments to make this one. Like Amy mentioned one time, you have a cool way of giving your projects a sense of continuity and distinct style. I wish we could see your Escher tiles! Looks like the pictures didn’t quite come through. Nice work!
Jamini
Hi Jamini,
Thanks! and thanks for the reminder about my escher tile, I just fixed it.
Dear All,
I came across this interesting web page: https://www.jaapsch.net/tilings/mclean/html/hexagon_templates.html
Hi YieShengChen,
Your work turned out very lovely. The shapes on your rendered cylinder look like rainbows and clouds on the sky surrounded the form of the cup. I really love it. Your final 3D print also looks very nice. I’m grad that your printing process went smoothly and that you didn’t encounter a lot of difficulties in this project.
Hi Ruby,
Thanks! Glad you like it.
And I also appreciate your design too. It also actually just helped me solved adjusting the flatten tube of my updated cylinder morph surface! I realized I can make my cylinder slender to avoid my tubes being flattened in the surface morphing.
I think I will post details of how I followed Prof Leah’s suggestion and then your design to maybe get close what I want to try for my final project.