In this assignment we are given three tasks to complete:
- Create Escher-esque tiles using turtle geometry.
- Use Grasshopper and Rhino to create 3D tiling across a surface.
- Print the 3D surface in the previous part.
Part 1: Escher Tiles
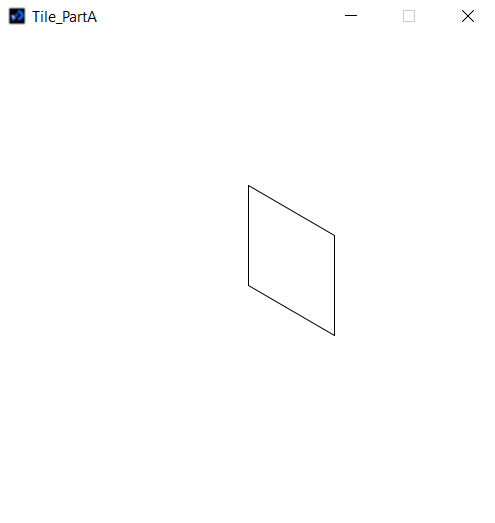
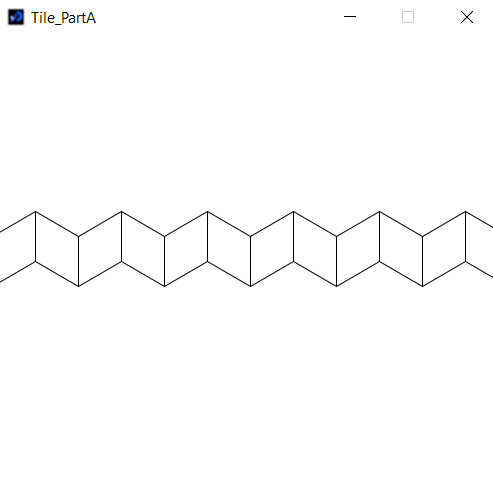
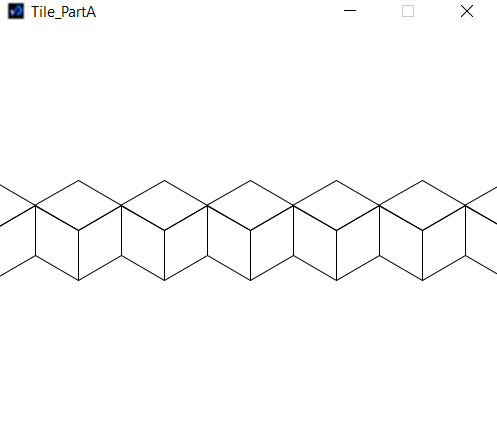
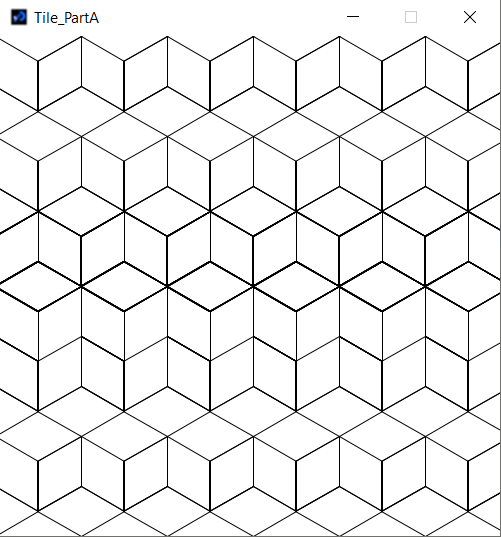
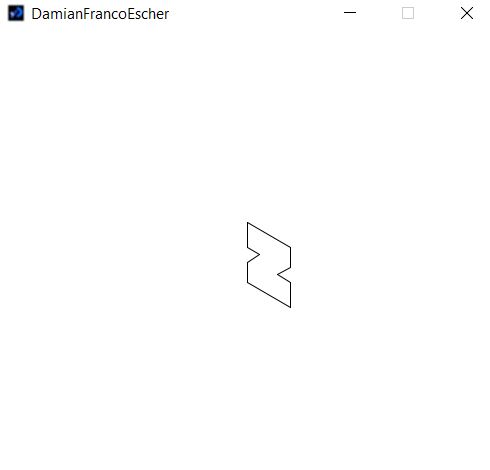
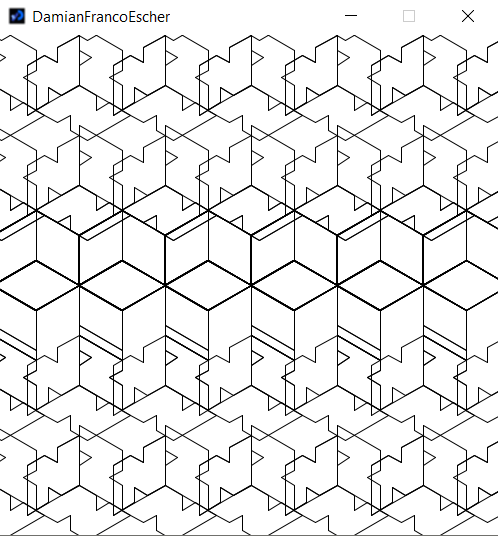
For part 1, I decided on using Processing to create some Escher-esque tiles because I was more comfortable and familiar with the interface of Processing. When creating my tiling in Processing, I started with a singular rhombus. I created this with four simple lines and two different angles. For the smaller angle in the rhombus, I used a 60-degree angle and for the bigger angle, I used a 120-degree angle. Now with one singular rhombus created, I then mirrored and duplicated that singular tile across the x axis of the screen. Next, the layer on top of the created layer was not as simple as a copy and paste of more tiles because to make an Escher-esque design, I wanted to turn and “flatten” the rhombus to provide more of a box-like pattern. So, I ended up flattening the rhombus by turning it on its side and duplicating it across the already existing layer of rhombuses. This now gave a good start of the finalization of the full tiling design. The next layers were duplicates of both layers of the “flat” and regular rhombuses, but with an offset value on the x axis to account for the different values of the x axis where the new rhombuses must be located to give a consistent design. The design was now where I wanted it to be and creates a bunch of box-like objects that give it that Escher-esque pattern.
Trying to implement changes to the original rhombus was giving me the biggest challenge on this part. First, I went to the individual tile and manipulated it by adding a couple extra edges and turtle commands. This made the same rhombus shape but with two specific knots in two edges. I thought that this would be easy to implement into the overall program because it has the same shape as the rhombus, but I kept getting some bad results. Overlapping lines and non-accommodating edges were the downfall on this side. I decided to keep the original design with the rhombus and not pursue this part further, but the attempt taught me a good lesson about turtle geometry because I know where the error occurred. If I have time I will go back and try to fix this, but overall, this was what I came up with.
Part 2: Tiling Across a Surface
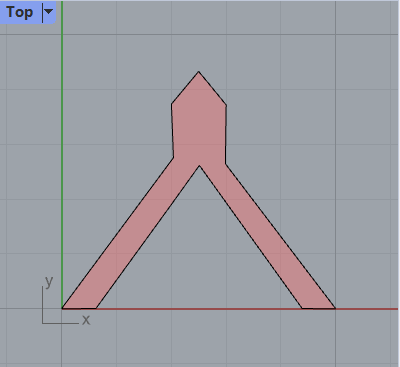
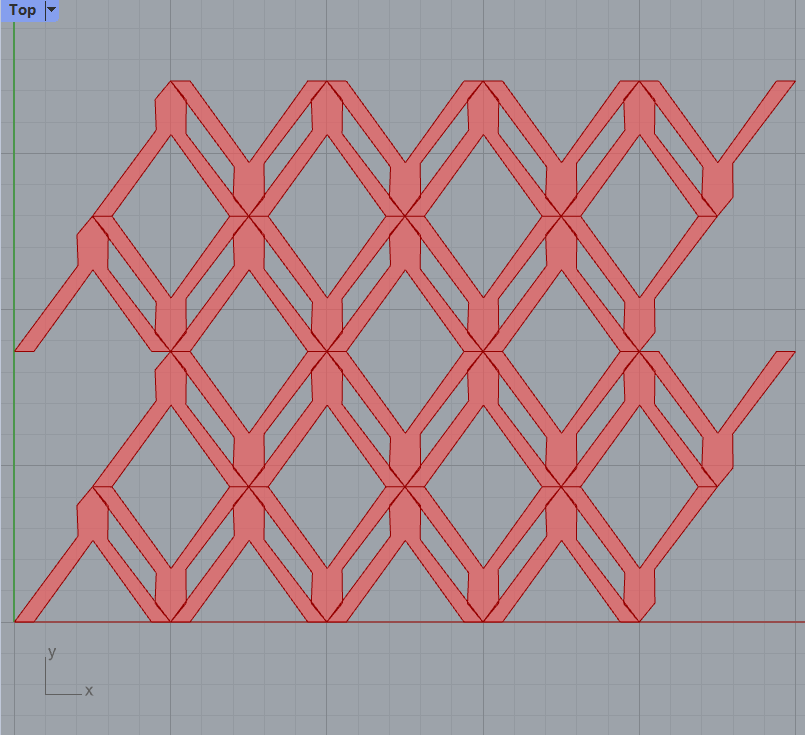
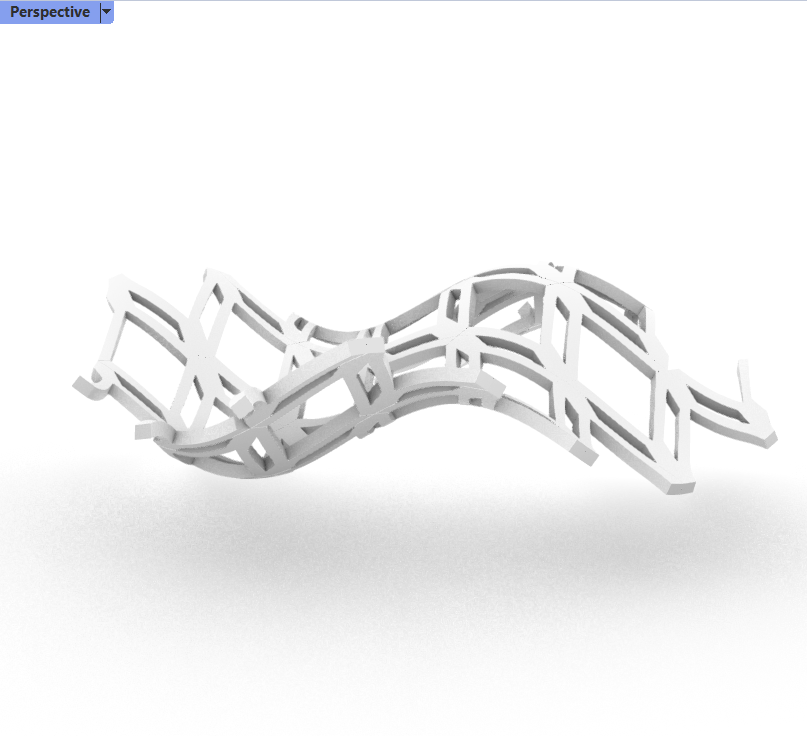
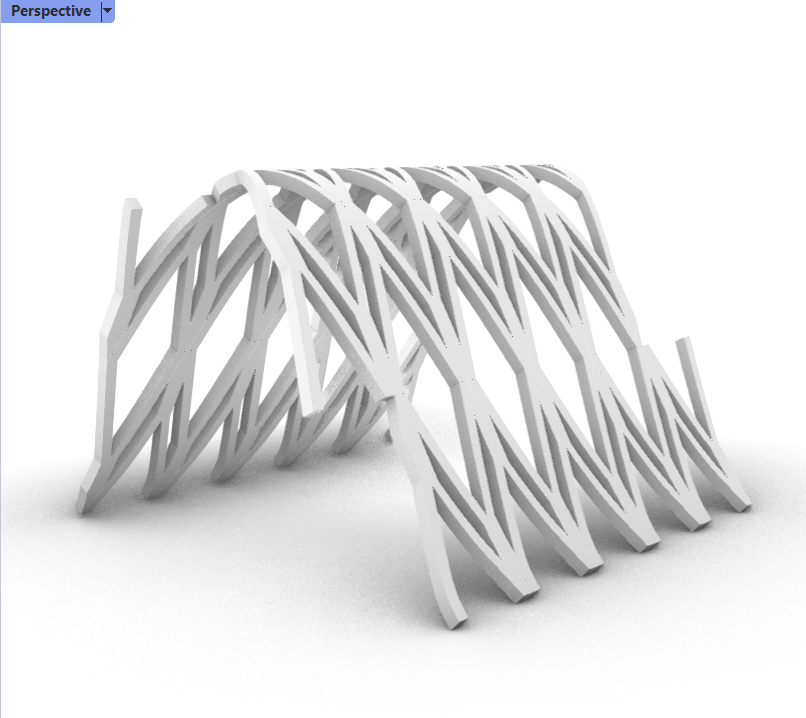
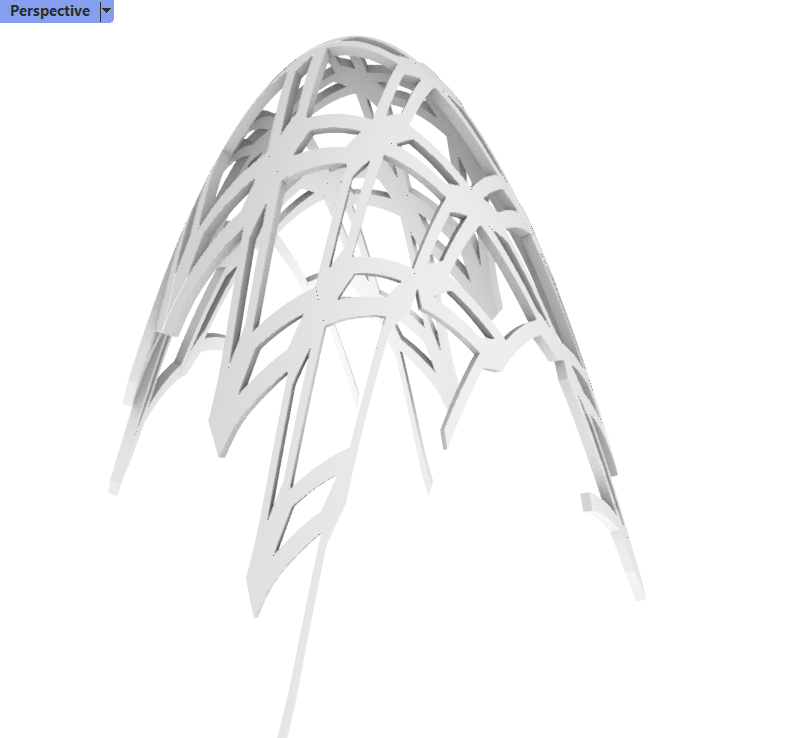
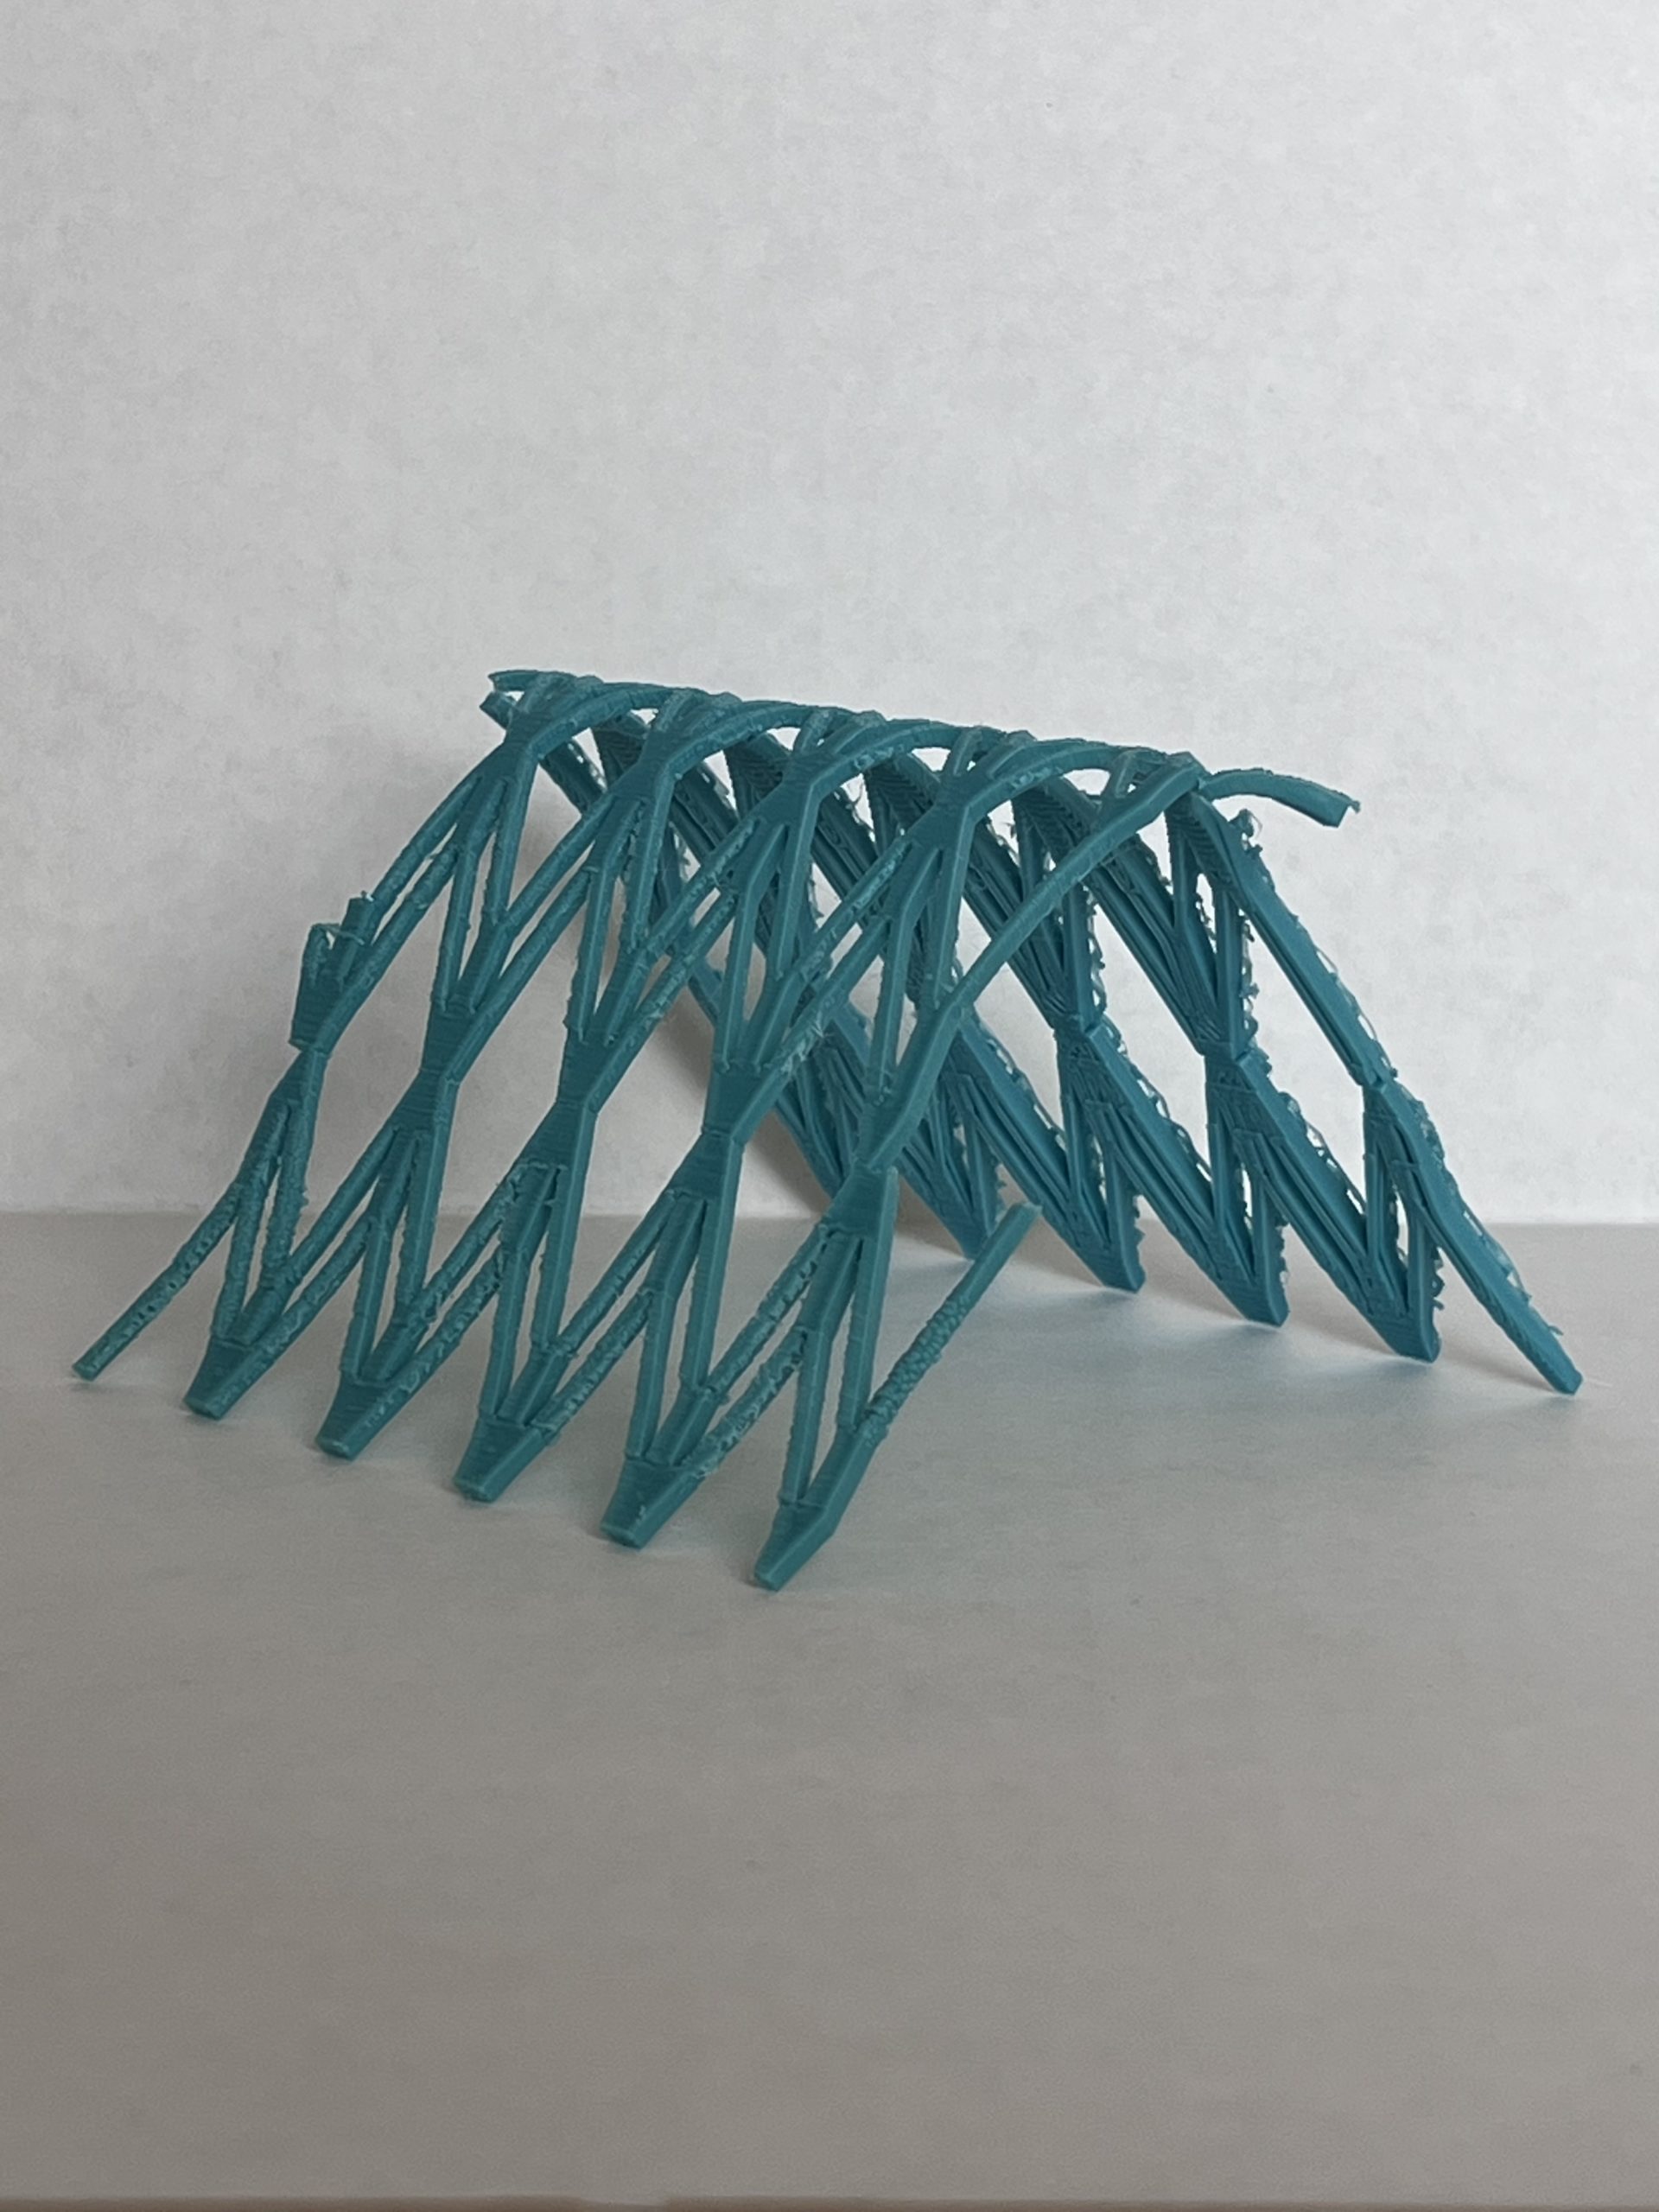
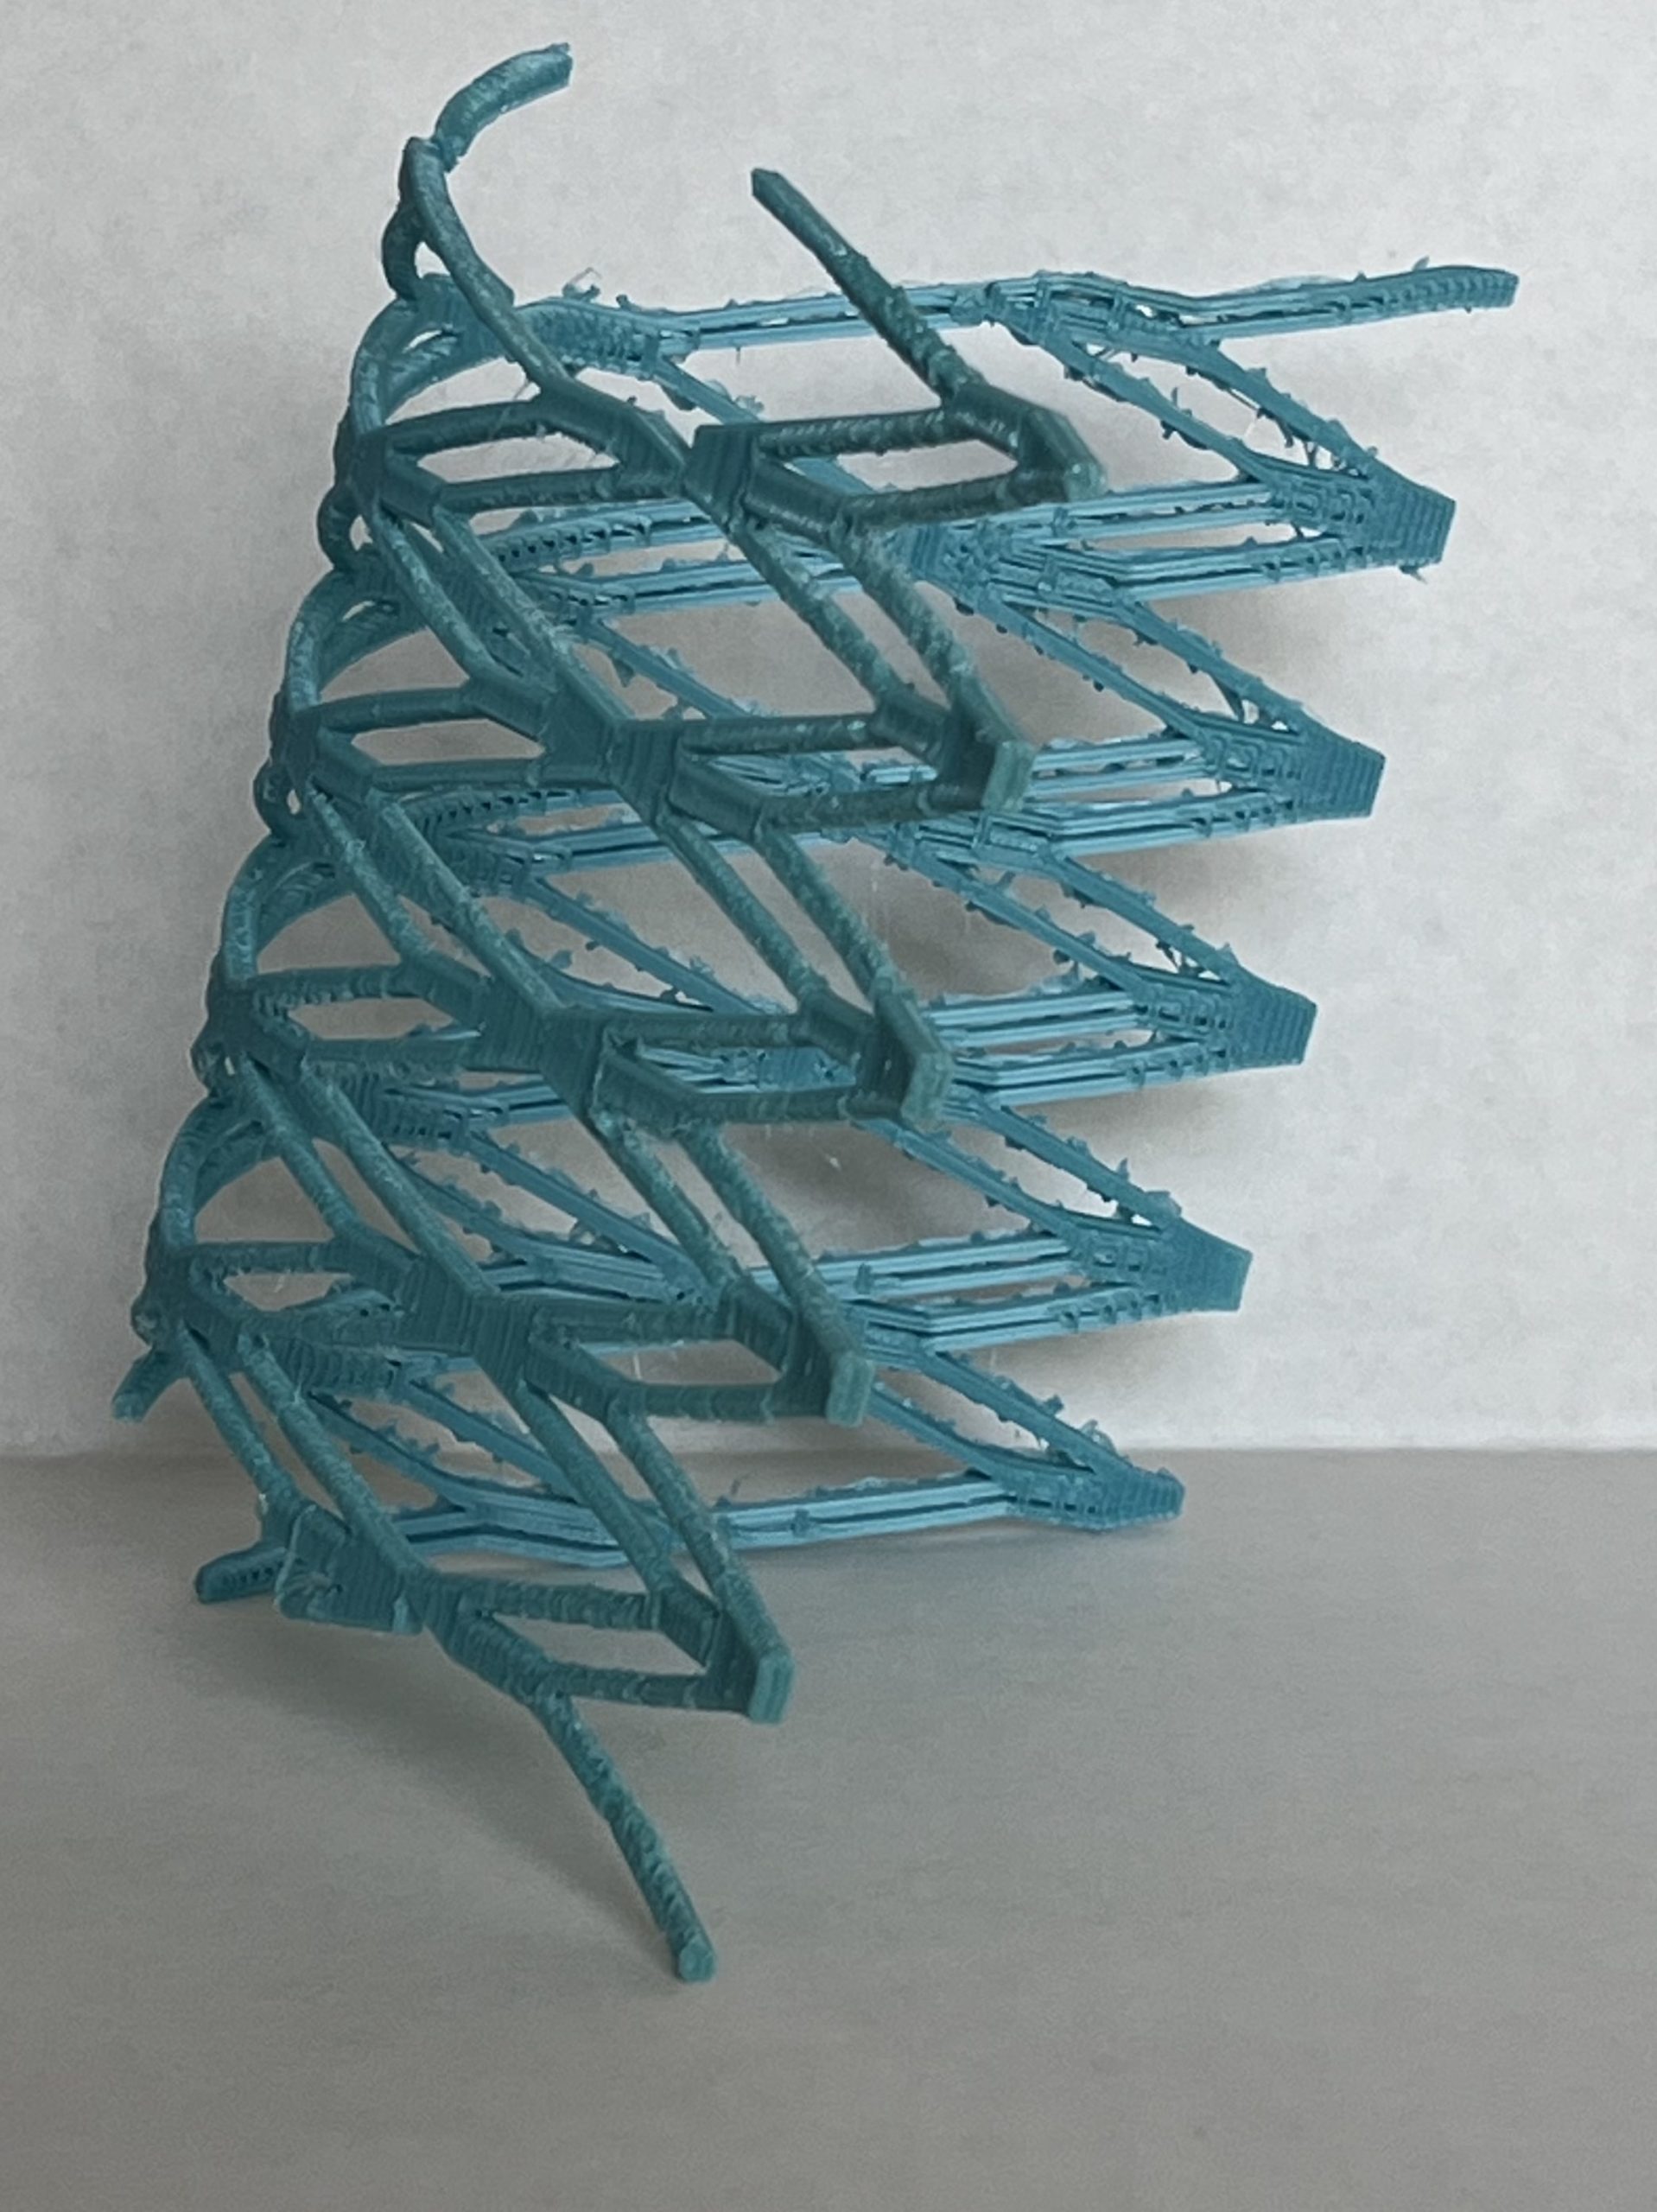
For the second part, I built most of the generation of the tiles through geometry created within Rhino. Dr. Buechley’s instructions and example shown in class is used throughout the generation of the plane and mapping of the tile to that plane in my program. The Grasshopper file is mapped into three groups, the first is the group that makes the tiles, the second handles the making of the plane, and the third is the morphing of the tiles to the plane created in group 2. I decided to not do the same tiling type as I did in Part 1, because I thought it would be better to create more complex geometry to have a better-looking 3D tiling object. This time I started with a triangular shape and manipulated that to create a three-pronged looking object. Thinking this will work, I then linked that shape to a geometry object within Grasshopper. After, I then reversed and mirrored the geometry until I created a 2D plane of geometry. The next goal of mine was now to create a plane that I will be able to map the 2D plan of geometry on. Planes were generated with three different forms, exponential, trigonometric, and cylindrical forms. All the plane generation is handled in the python code and a range and domain control blocks. Cylindrical forms are not the traditional circle planes, but rather dome-like planes. Lastly, the final step before baking objects is the morphing of the created tiles to the surface created. This is done by a divide and surface morph control blocks within Grasshopper. That is how the generation of these planes were made.
The biggest challenge I experienced with this part was the generation of models that had a great structural foundation, but also were unique and different to what we covered in the class examples. Generating the plane was not difficult, but there was a challenge on creating a plane that could be easily printable, but also different enough to consider a valuable plane to morph on. I originally tried a complex rhombus-like geometry that completely failed to create a good enough support structure and taught me what to do next time I try to design. Unfortunately, those prints would fail miserably to the point of a non-savable model. Therefore, I settled on the triangular geometry and manipulated that and came up with a cool design.
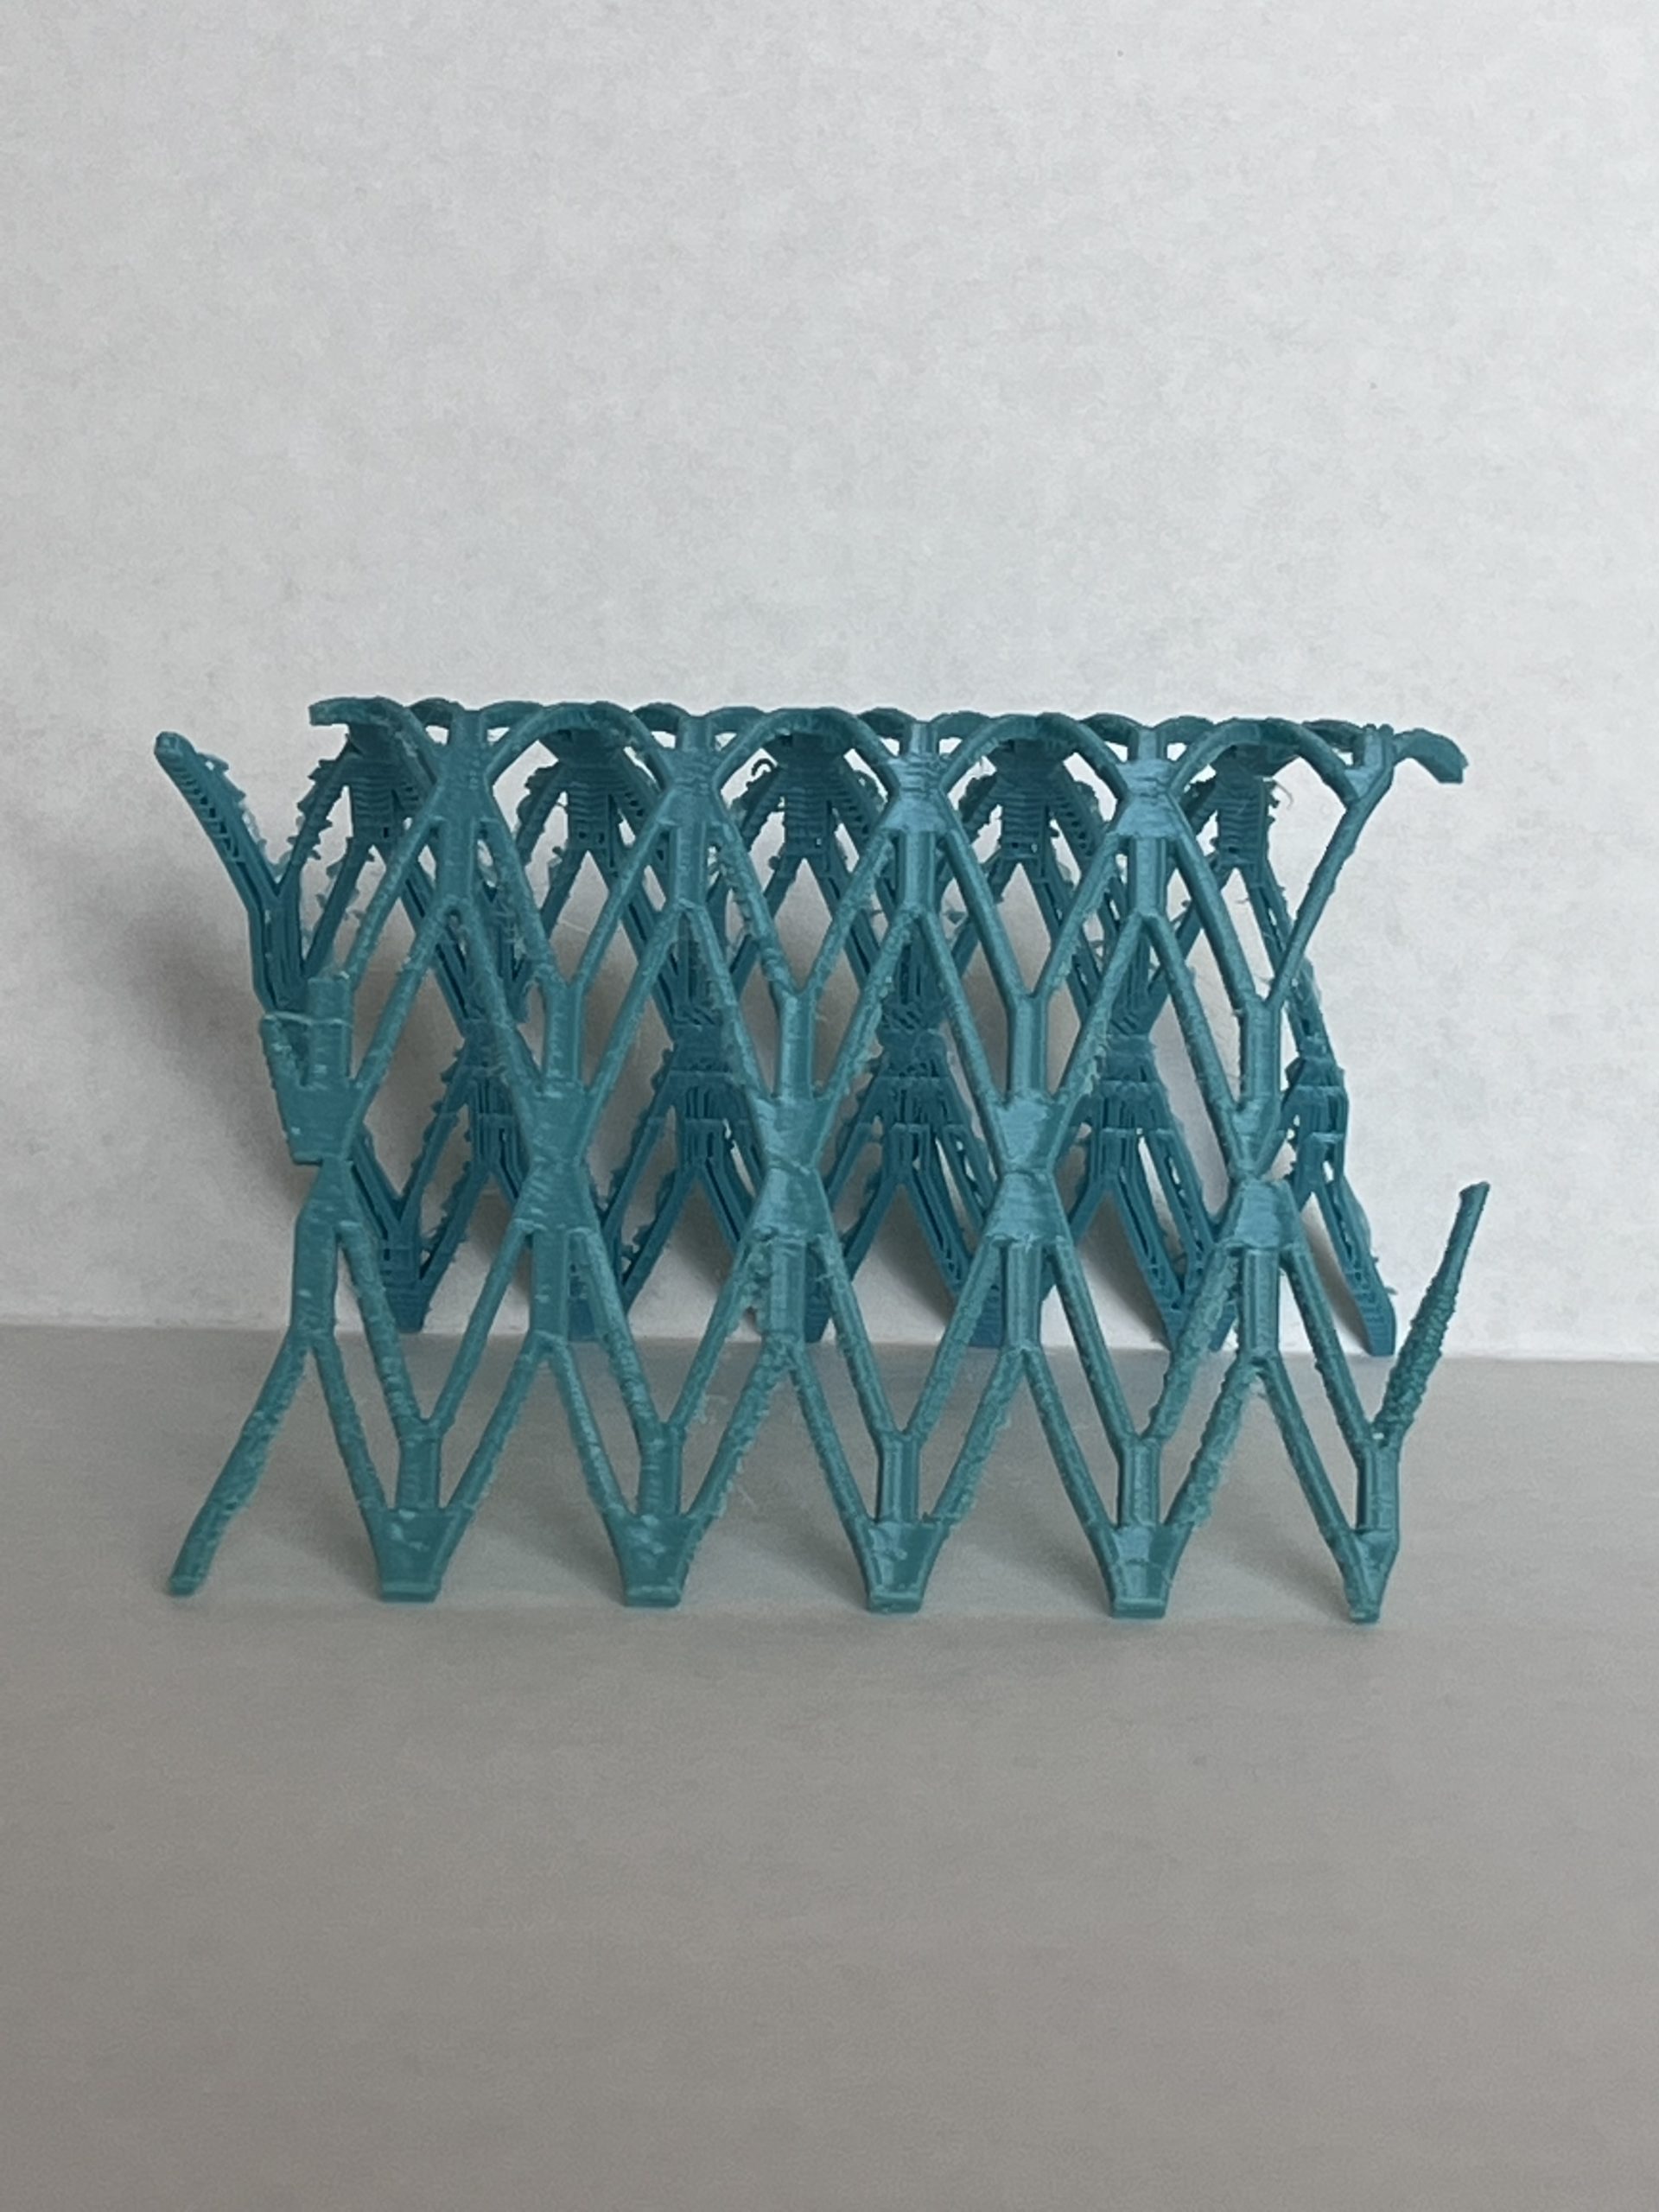
Part 3: 3D Printed Form
For printing, I stated in a previous paragraph that some of my prints would fail which gave me many issues. The problem stemmed from the models that I was trying to print had too little support on the actual model itself. I tried printing them with extra supports generated by Cura, but still came up short which is why I tried a different geometry to print out to create a more structurally sound model. This proved to be very good. I printed out the triangular type of geometry tiling model with ease compared to the other models that I was trying to print. I decided to use Cura to generate tree supports to help with the model I decided to print. This helped the model print efficiently, and only one tree support was generated because of the way I laid the model on the print bed. Instead of printing tall side up on the model, I printed the model on its side which allowed for less supports because the model was a good enough support for the perturbing pieces of the print. The only issue that occurred with this model was that every part of the print that touched the print has a “support” on it which gives it a rough look. This was the least of my worries for the print because I had so man other issues with the other model prints that I was just happy to have a physical object complete.
Overall, this was a great project that taught me much about how tiling can generate some amazing pieces of work. Also learning how to morph objects to a plane is very interesting because that opens a huge door of opportunities for more complex prints. More images of mishaps with the printer and other forms generated are located within the zip file.
Link to my zip file: https://handandmachine.org/classes/computational_fabrication/wp-content/uploads/2022/03/DamianFrancoLA3.zip
Wow, so cool how you made your tiling into a 3D looking one. Was that the only way your tile would tile the plane? It just occurred to me that maybe certain or most tiles can tile a plane in more than one way.
For the tile I did, I made it all the way to the end, doing to the other side what I did to the first and likewise with vertices, and then I could not figure out how my tile tiled the plane. I thought I had messed something up and had to start over. While mapping out my redo tile, I took extra time to make sure the new tile would tile the plane and while doing so, I realized how my first tile tiled the plane! So, I was able to get my first tile to work and thus saved myself a good deal of extra work.
I also had a hard time printing. I had a hard time making it so that what was being printed was strong enough to stay in place during the print. I eventually busted out a glue stick and changed my cura slicer setting to make the extruder move at about half its normal speed. This did the trick and I was able to print.
I like how you carried over your rhombus to Rhino and did another very unique tiling of the plane with that shape again. Nicely done.
I actually tried about two other tiles that I morphed to some planes and all ended up in failures. There was always holes in my design, which made me go with this one. I feel your pain on the tiling. Yours looked fantastic as well! The glues stick does do wonders on printing, cause that is what I resorted to and finally was able to get a good print done. Thank you!