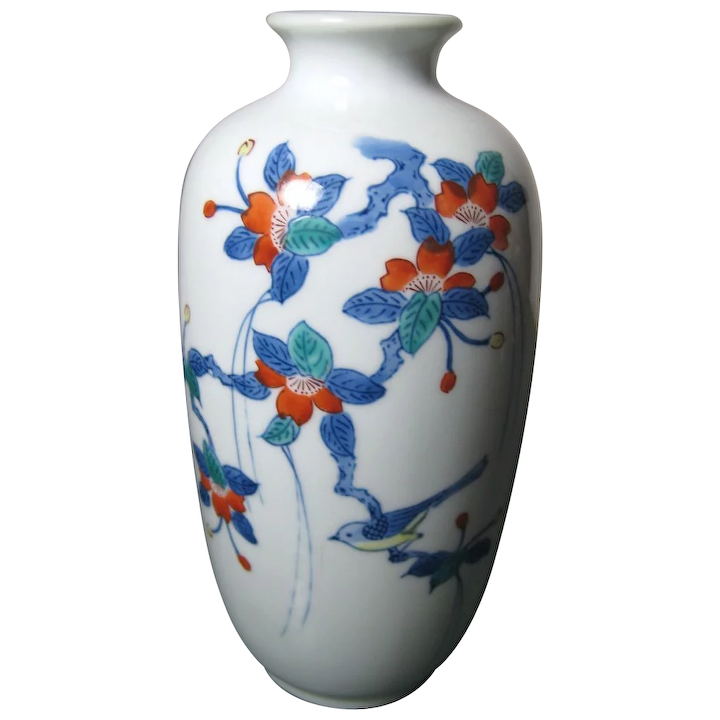
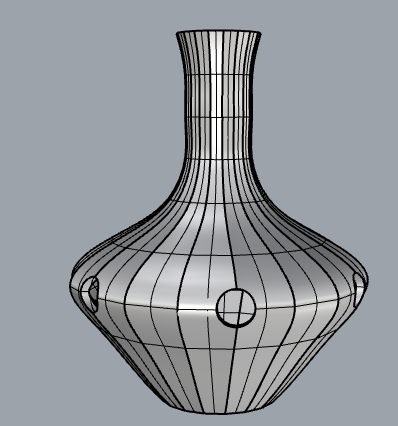
This project is the hardest project for this class that I have worked on so far. Initially, I wanted to create vessels that look simple and elegant like Japanese-style vessels I have seen in the past. I tried to use both methods that we learned in class in lecture 10 (create vessels from curves) and lecture 11 (create vessels based on freehand drawings). After experimenting with many different methods as well as exploring several parametric designs, I found that creating forms using curves and polygons better accommodate my desire of making Japanese-inspired vessels.
Reflection: I think creating objects using programming and 3D printing is very interesting. I’m very surprised that there are actually many different sources from the Internet, the software, to the hardware that can now help us to create 3D forms. This field is very new to me in which I never experienced anything like this before. It’s even crazier that we can use coding to create art. That’s something that I could never imagine. As an art student, I can see that the traditional way of creating artwork and this newly developed way of making art are tremendously different. I have been creating artworks with clay, especially hand-throwing vases, bowls, and cups. Creating vessels with the hand throwing technique is also a time-consuming process. The circular motion of the wheels always gives our vessels round forms. In order to create more unique shapes for the vessels such as straight lines around the outside surface or create some cut-out on the surface. We have to use such tools as shaping ribs or trimming tools to push the clay in to create straight surfaces and cut/trim off clay to make cut-outs. After the thrown works are done and left to dry completely, we then need to heat it at a high temperature in a kiln to remove water from the clay. The works will later be glazed to have more interesting textures.
3D printed vessels on the other hand don’t require firing and glazing. The final works can also be lighter than the actual vessels that are made out of clay. The 3d printing technique also allows us to develop and generate shapes that might not be able to be created using the hand-throwing technique. We can create more unique and extreme shapes using many different 3D modeling tools that are available for us nowadays. A few disadvantages of this process are the limited materials we can use to create our works, the restricted build size of objects, and also the amount of time it takes to print any objects.
When working on this project, I missed the requirement that said the vessels should be generated by the same Grasshopper program with different parameters. So, besides the code for my Japanese-insprired vessels, I also created a few different functions and different ways to create the shapes. I wanted to make vessels that are formed by some geometric shapes. What I intended to do was to stack the geometric shapes to create the vessel. I used some ‘for’ loops to create that but the shapes appeared to not be able to stand by themselves. I later came up with a function that was able to create those geometric shapes like below. I have experimented with many different values for the parameters in my code in order to get the shapes that I liked. I was very happy with the vessels I generated.
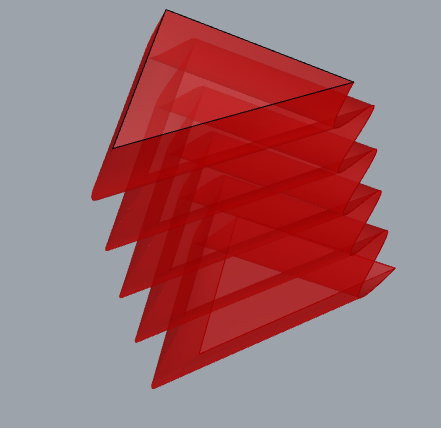
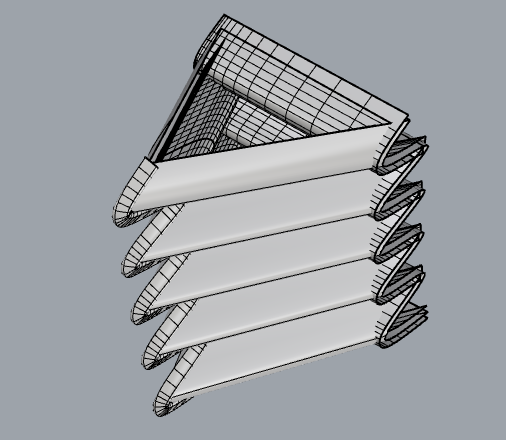
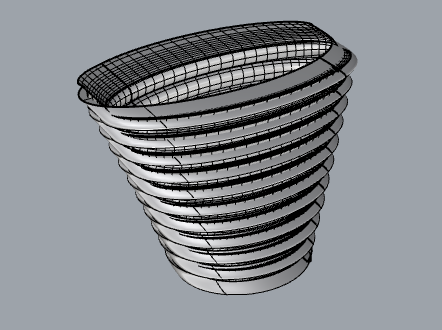
However, when I tried to print them using the 3D printer, these shapes seemed to cause a lot of issues. I did not use the spiralize technique at first so everything fell apart when the vessel was printed. Leah later told me to use the spiralize technique in Cura. I used it but it did not solve my issue. So, none of the shapes I generate using this piece of code can be printed out correctly.
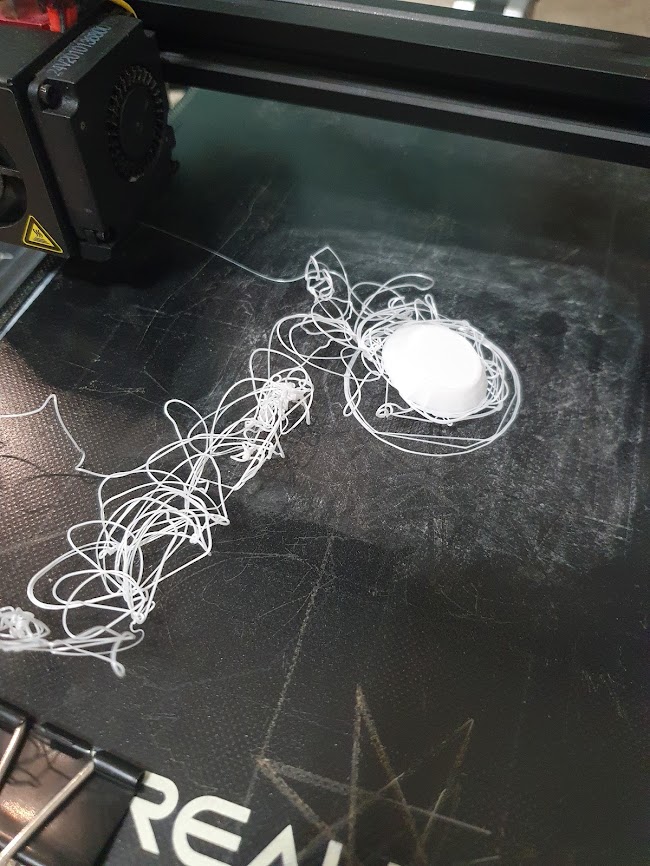
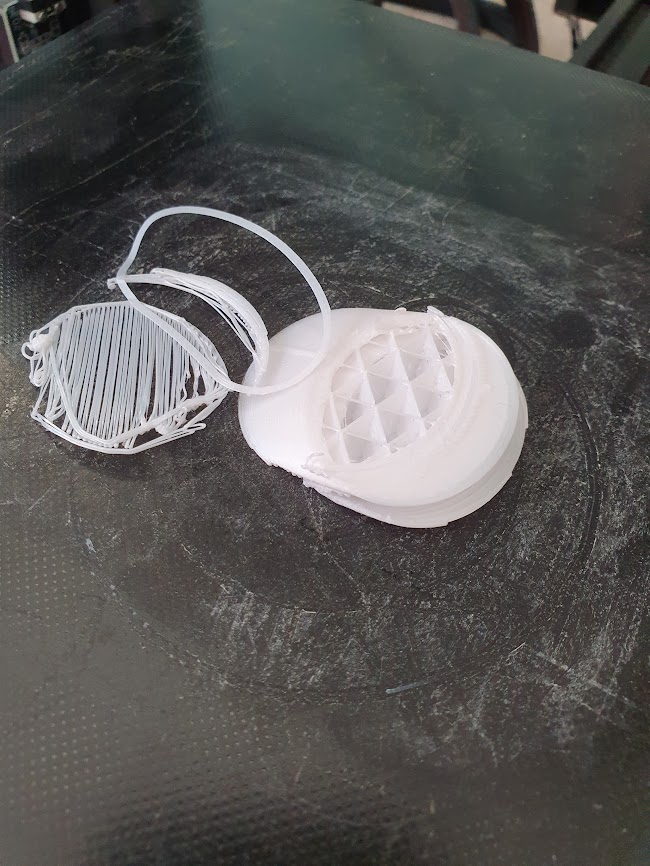
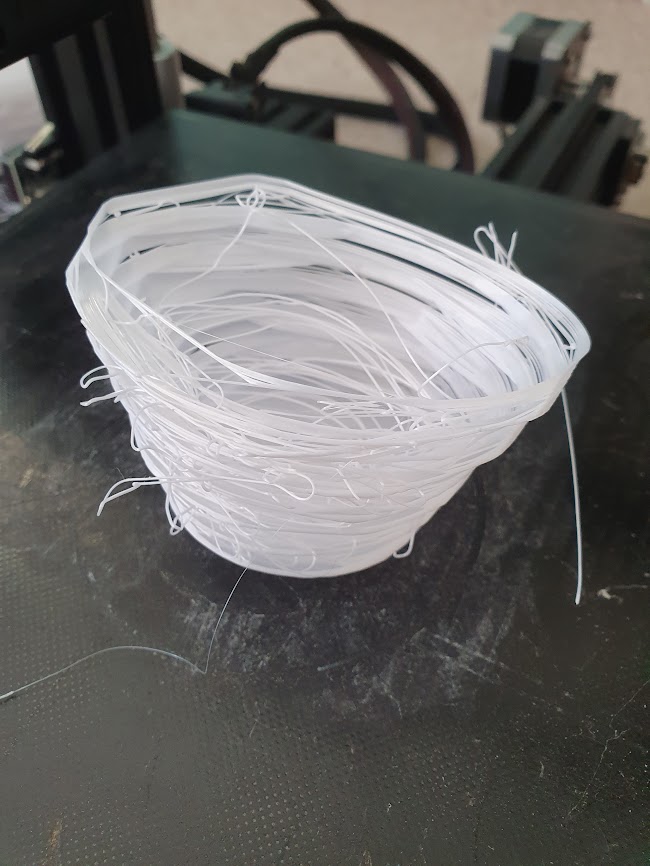

I had to stop the printer, leveled the bed, and started the printing process again so many times and I still couldn’t figure out what the actual issue was. I then decided to print other shapes that I generated using another piece of code I have.
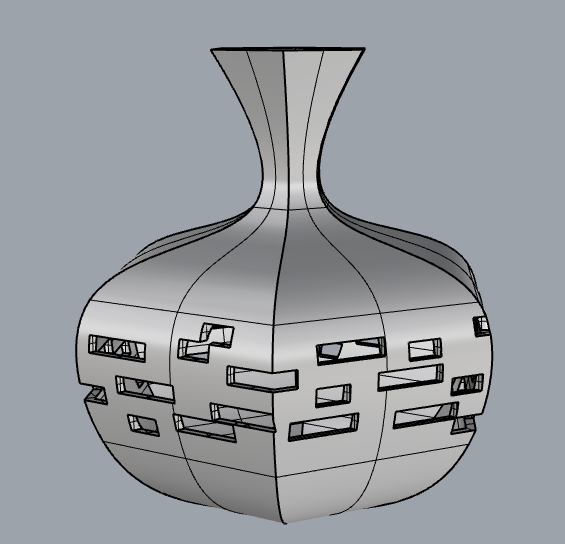
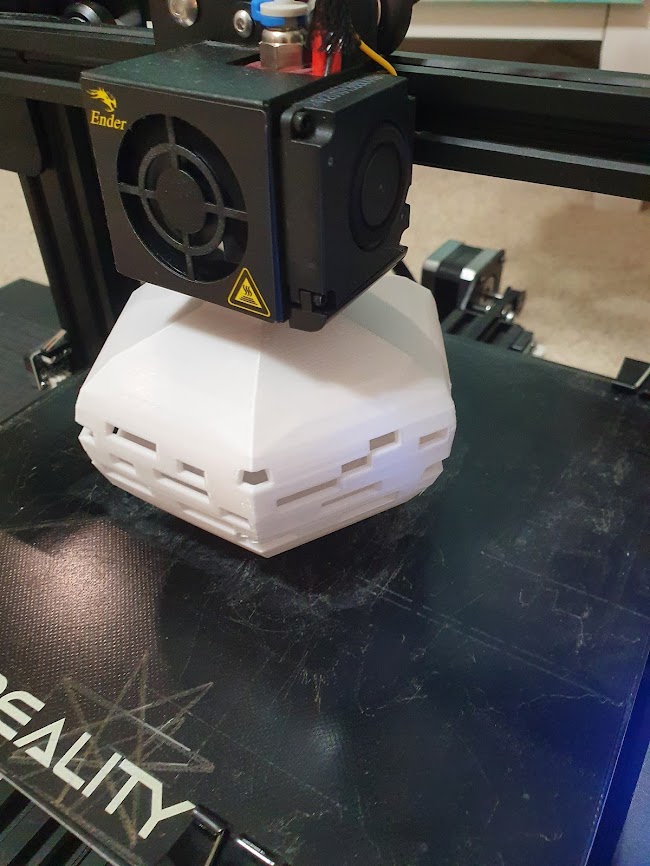
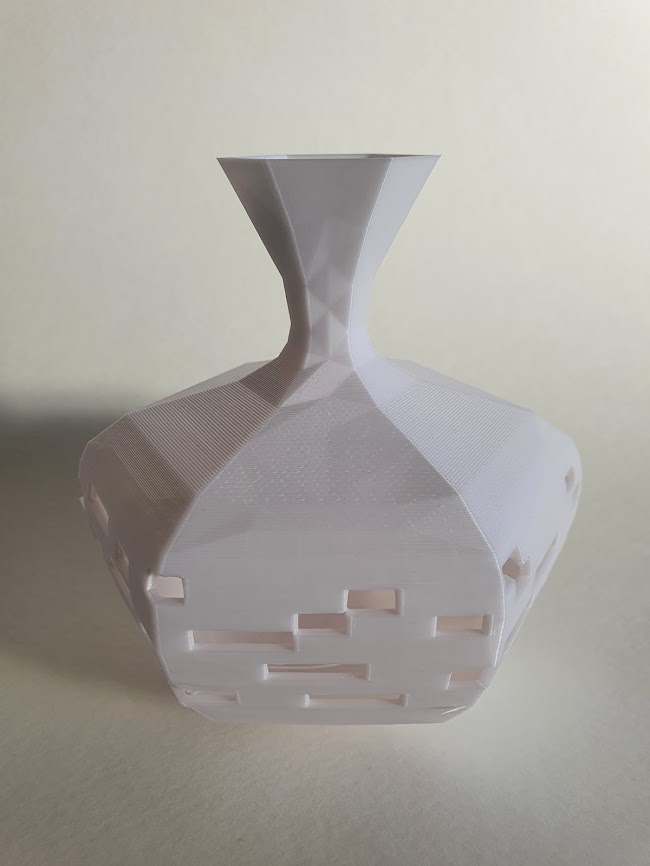
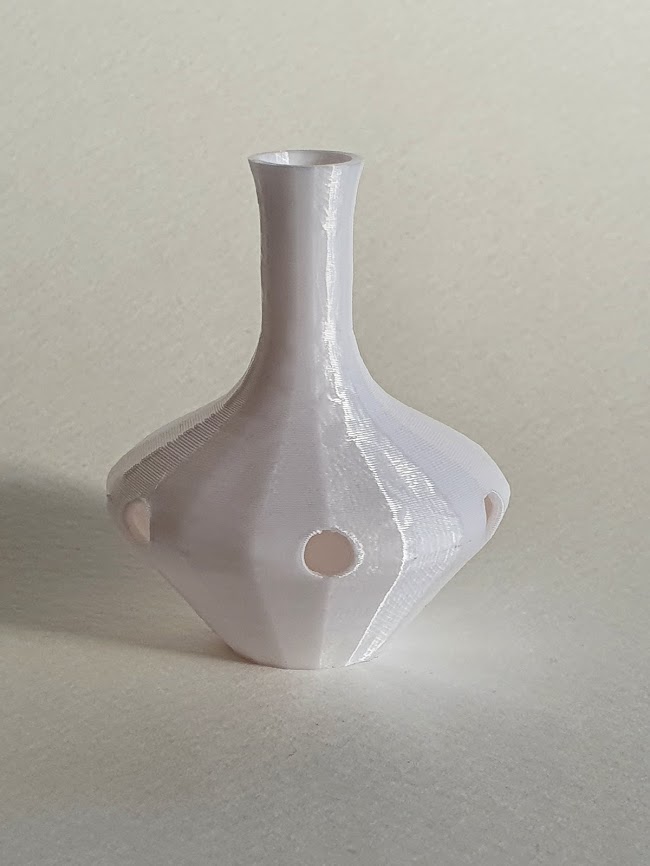
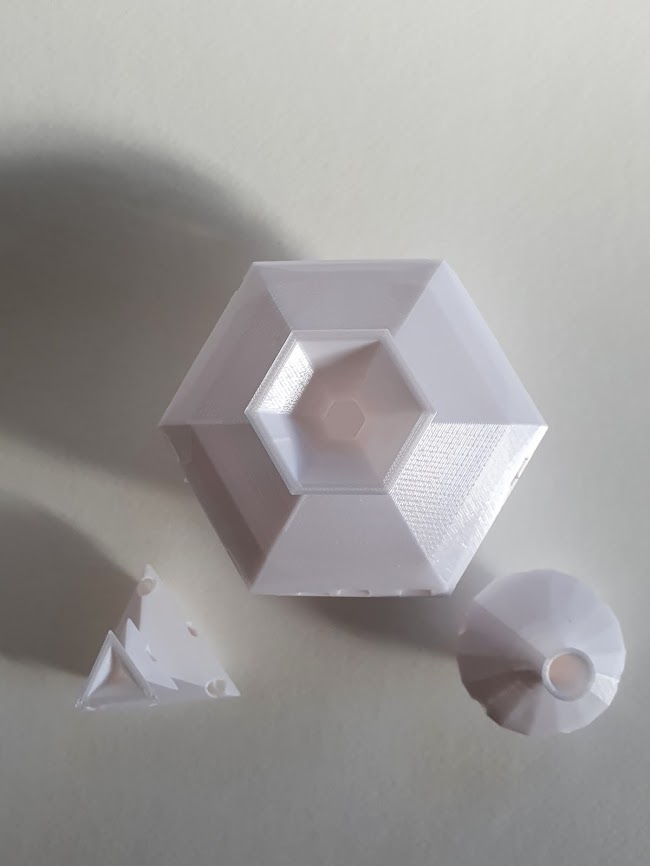
I also adapted the code we learn from class to start generating my own shapes. I created more parameters that allow me to change the shapes of the vessels. I love the simple styles of vessels I got using this code. I also tried to learn from the internet how to create different cut-outs and patterns to apply to the vessels’ surfaces but none of them was able to work with the shapes I created. I applied so many different components available in Grasshopper hoping that I can add some nice textures/ elements to my vessels but I failed to do that. As a result, I called some commands available in Rhino to create my own cut-outs. The results I got from using it were very interesting. I can now create many different types of cutouts, from square to round shapes to cut-through shapes.

There were many different issues I have encountered when printing my vessels. Even though I have the bed leveled very well since the last project, I feel like it didn’t work very well for this project. I had to stop the printer a few times trying to level the bed again when I heard the clicking sound. It was a bit weird when I started hearing that sound around 5 hours after I started the process and the vase was already halfway done. The printer stopped working correctly and the filament didn’t stick to the surface. I luckily was able to fix it by trying to remove some excess fragments and level the bed again. The machine started working correctly again and that small error didn’t show much on my vessel. There were also issues with the way the machine fed the filament into the nozzle, the filament got stuck sometimes and the machine also started making the clicking sound, so I had to stop and fix the printer a few times. The results turned out very nicely regardless of all the difficulties I had met during the printing process.
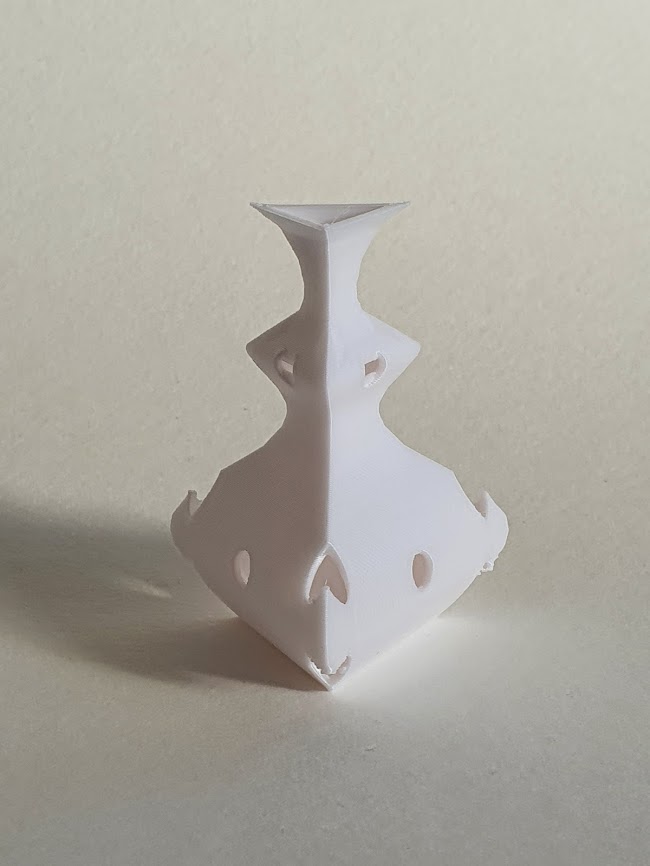
I do feel like I created these forms since none of the code I found from the internet worked with my shapes, so I do feel like I can take authorship credit for the designs.
Code:
Cool, very cool vessels. They look like something you’d find for sale at HomeGoods or Walmart. They’re so nice. They look how I hoped mine were going to come out. I was hoping to be able to put mine on shelves afterward with a few flowers in them and they’d serve as home decor, but I still have a long way to go to get that good.
I wonder what was going on with your printer being unable to print your first designs. Was there supposed to be empty space there where the printer was producing stringy-like side surfaces? In the baked version of the circle vessel, it looks like it does a solid ring, then a mesh ring, then solid ring, then mesh ring, etc. That would make for a nice vessel. There must be a way to print something like that. Hopefully we will all get better at Rhino and GH as we go.
I second the disadvantages that you listed out. For the upcoming small assignment, where we are supposed to print something that we will use, my first idea was something that is too long to print in the Ender 3’s bed space, so yea, I am experiencing the size limitations. The examples Professor Beuchley showed us in class yesterday, the 3D printed objects that were printed with a powder based filament, appears to allow for a more sophisticated artifact; the necklace she showed us especially, because it could fold up, bend, etc and not break. I wonder if there are 3D printers that have multiple nozzles and to each nozzle you can feed a different color, material and stuff and do a single continuous 3D print of various color and texture and material. Probably.
It’s a shame the printer couldn’t figure out those original vessels, those would have been really cool to see. The ones you ended up printing are still really interesting, though, and I like the way you used those shape cutouts as a design pattern.
It’s strange that the designs you made did not work with the 3D Printer at all. While they are quite complex it also looks like it should have been able to create supports so that the overhangs would actually print correctly. I am curious as to the problems the 3D printer runs into. I also had a print that started to fail after about 6 hours and I wish I had tried to just pause it and fix it on the fly like you seem to have been able to.
Hello,
I really like your vases and your inspiration for this project. I couldnt imagine putting designs on the vases and really like the way that it came out in the end. I also ended up with filament loading problems and I was able to tighten and loosen a screw and adjust the printing speed to fix it. Thank you!