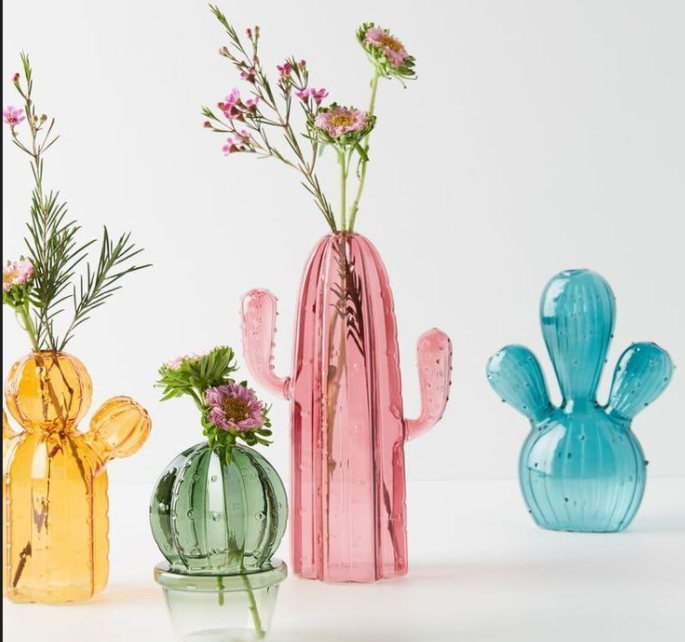
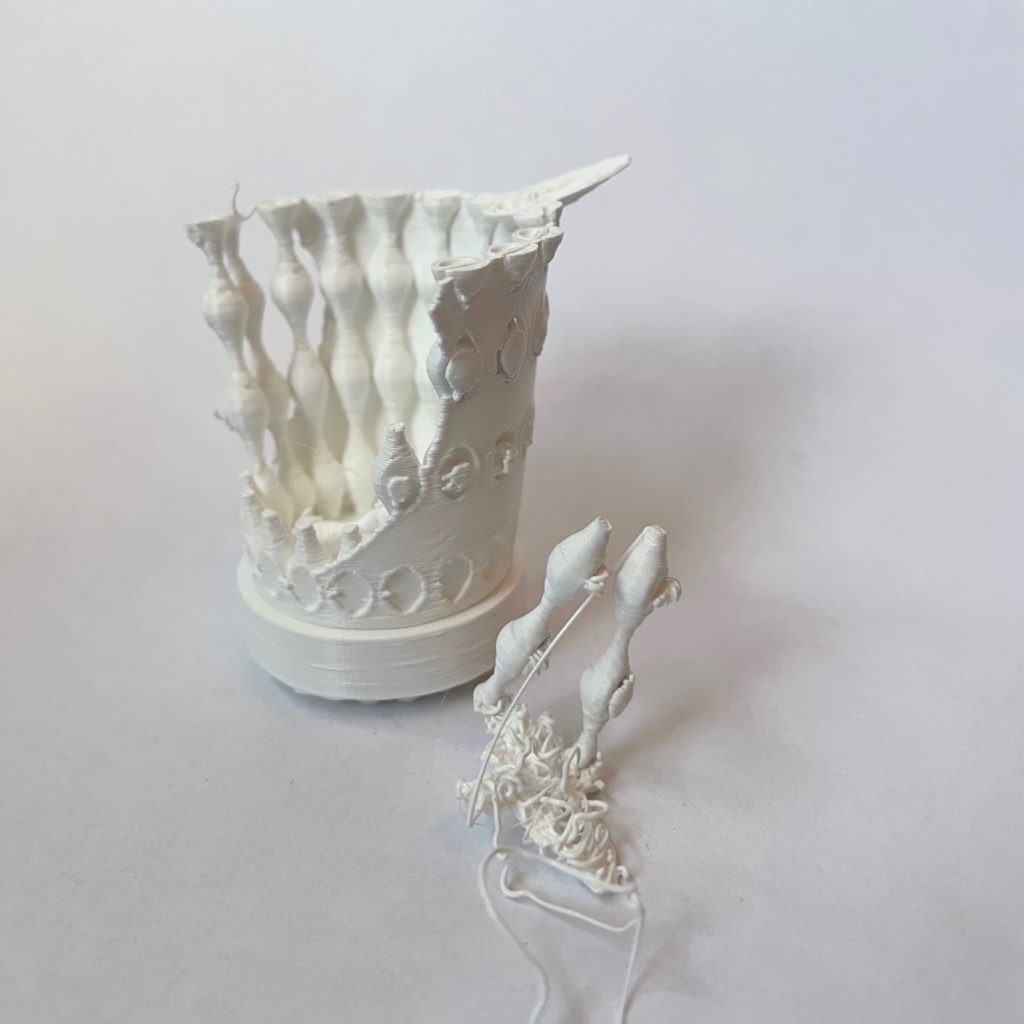
Design process: I started out with a very different plan than the one I ended up successfully executing. My first plan was to make cactus vases, inspired by the Anthropologie vases in the first picture. This started off well with the easy part of creating the curves for lofting. I added some basic arms without too much trouble using curves and connecting those to pipe components. It went downhill when I was trying to add the textures that actually make a cactus. I came up with a few different ways to make the texture on the main body of the cactus, with pipes of different radii like in the second picture. However, I could not figure out a way to apply those same methods to the arms, a task I thought would be simple. I couldn’t find a good way to outline the edges of the pipe components (which are Breps) to do the same kind of varying radius approach. I tried adding cones for spikes and spheres for regular texture along the original curves, but they were never quite at the right orientation. I watched several Youtube videos about creating surfaces and applying them to Breps, but none quite did what I needed and I didn’t figure out how to bridge the gap. I tried using circles and lofts to make the arms, but it just looked like a flattened tube, even with extra circles in between. When I tried printing one of my designs for the second time, without any arm texture, it turned out terrible and I decided to try a different direction.
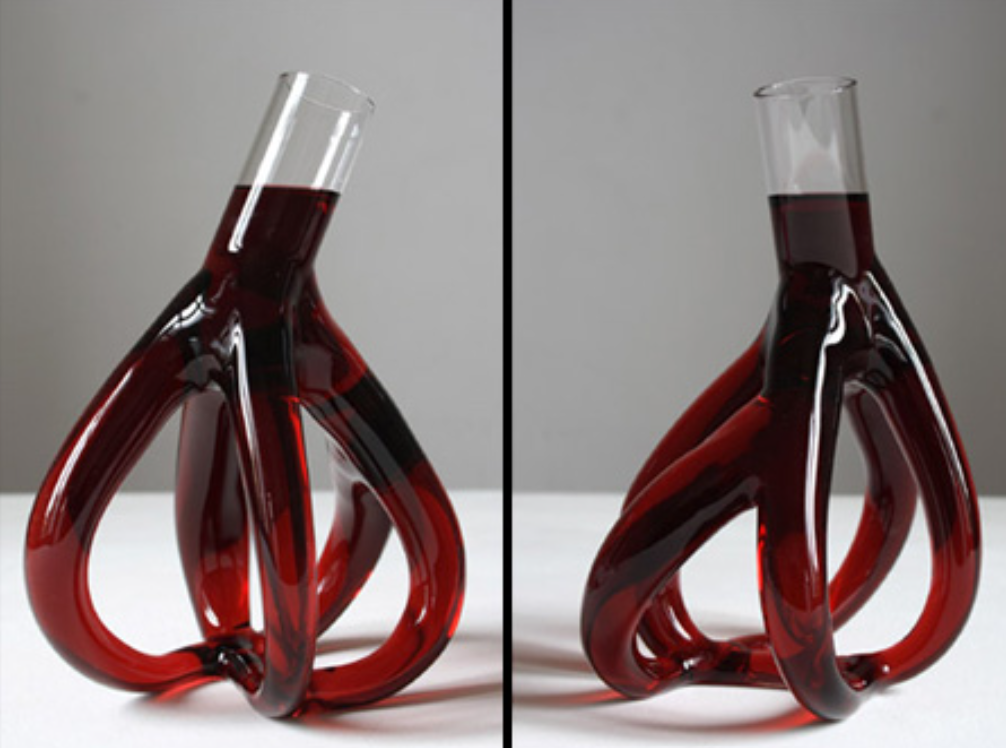
Take 2: I found this picture when searching ‘funky wine glass shapes’ in Google Images. I really liked how it looked and figured I could make the design parametric by having adjustable points that pulled out the curves. The link to her blog is embedded in the caption
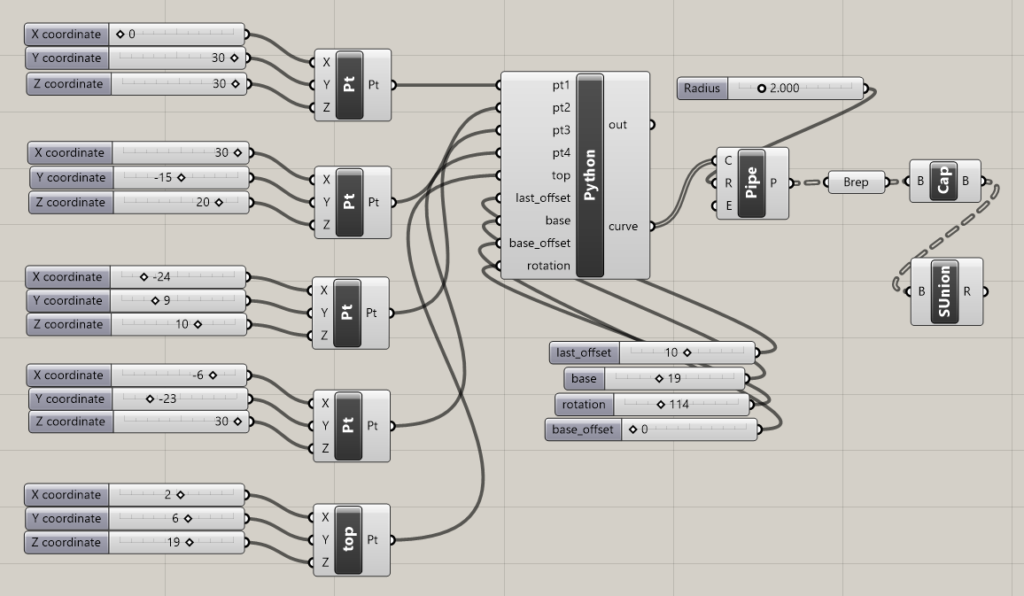
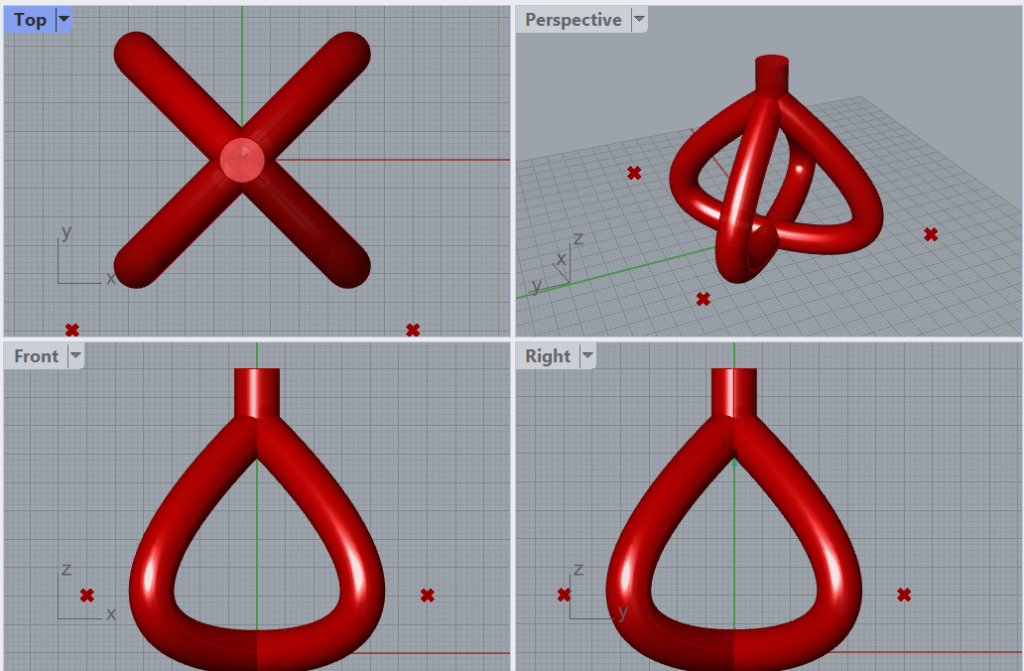
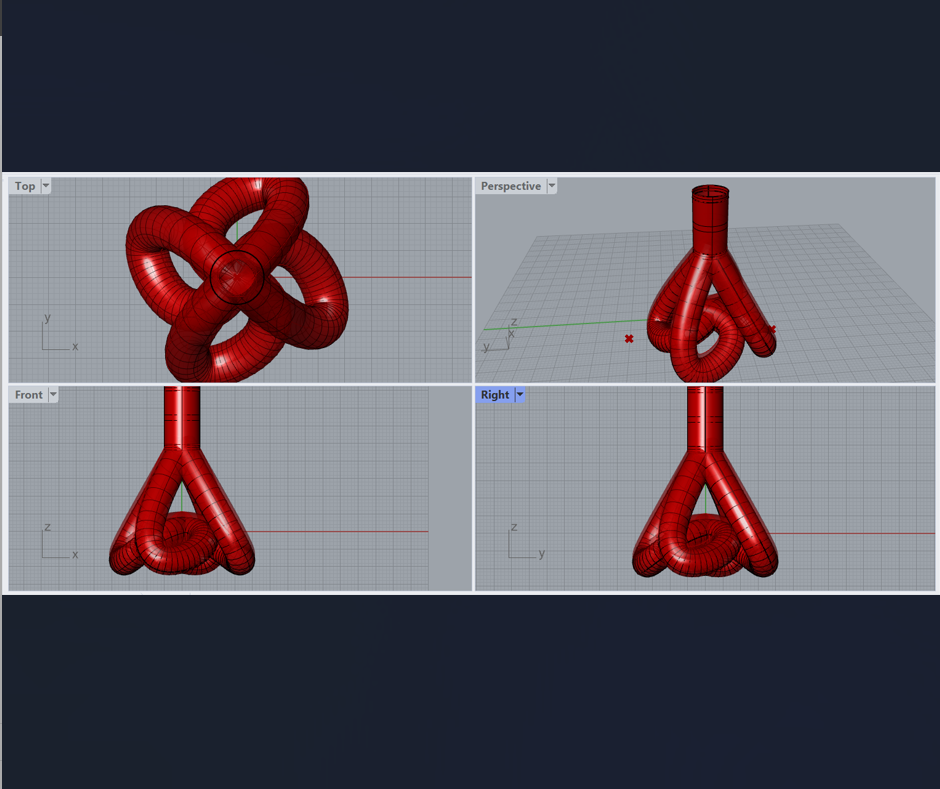
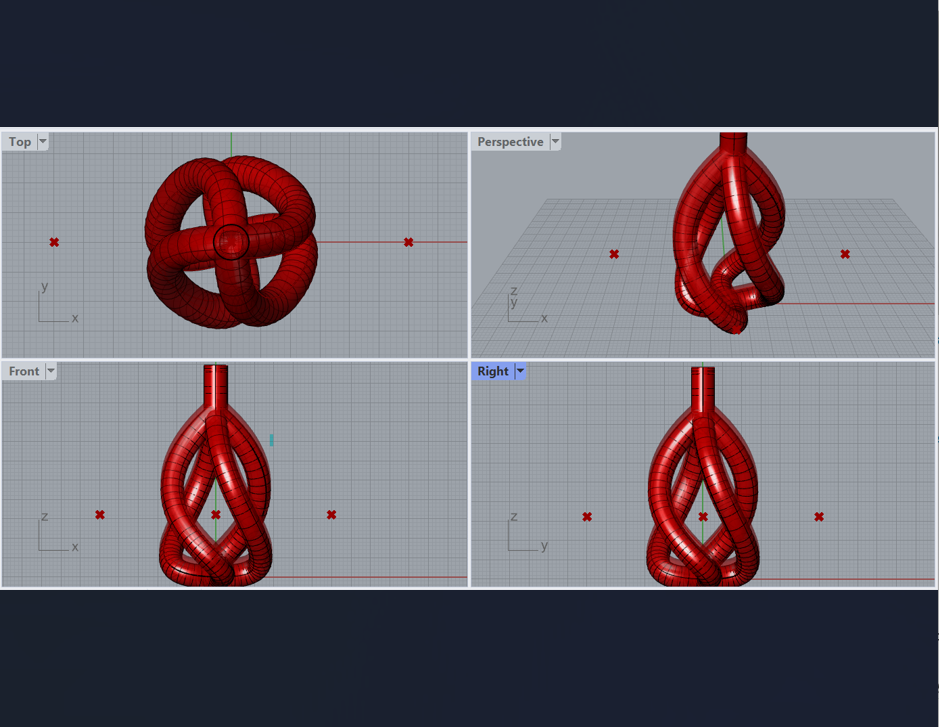
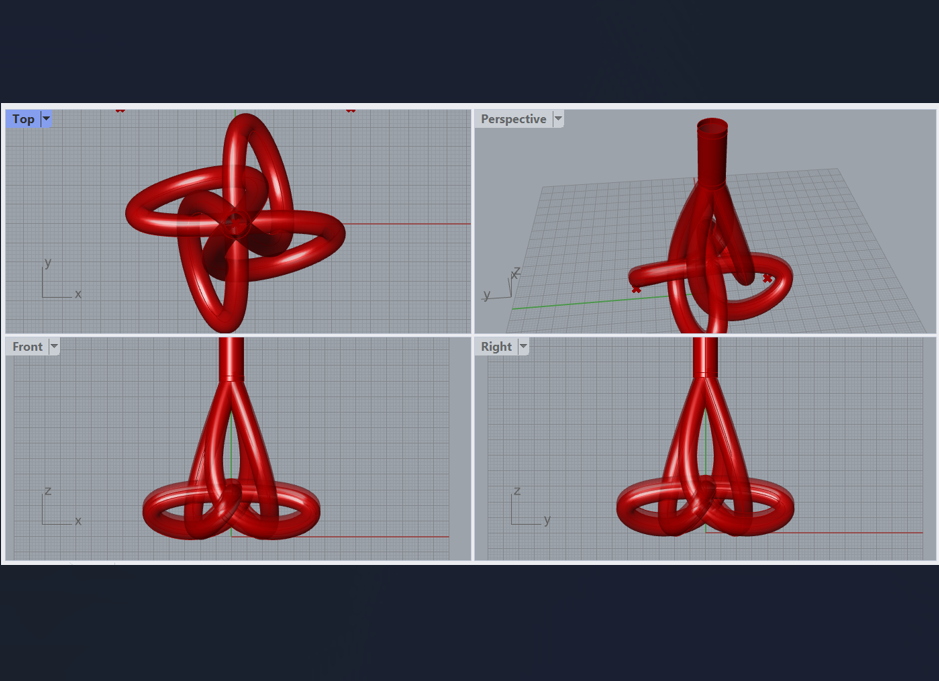
To start, I created a Python block with five input points: one for each of four ‘corners’ and one for the top, center point. For each corner point, I added a curve between the origin, the point, and the top. Aside from the top, the points’ axis ranges are limited such that each one represents/lives in one of the four x,y quadrants. I didn’t like how narrow the bottom was, and it looked a bit unstable, so I added a ‘base’ parameter that added an extra point to each corner at (base, 0, 0), (0, base, 0), (-base, 0, 0), and (0, -base, 0). This made the base much more stable and gave it some more volume at the bottom of the shape. To make it a little more interesting, I introduced a rotation to the base using the code we were given in the slides, and a z-axis variable to lift the center. My last addition was a ‘last_offset’ variable, which was used to make the final spout curve at the top, because I could not get the Shell to work without a separate pipe on top. I used Rhino’s Shell command rather than the Grasshopper shell component, because it never worked quite the way I wanted it to. Here’s how the final Grasshopper layout looks:
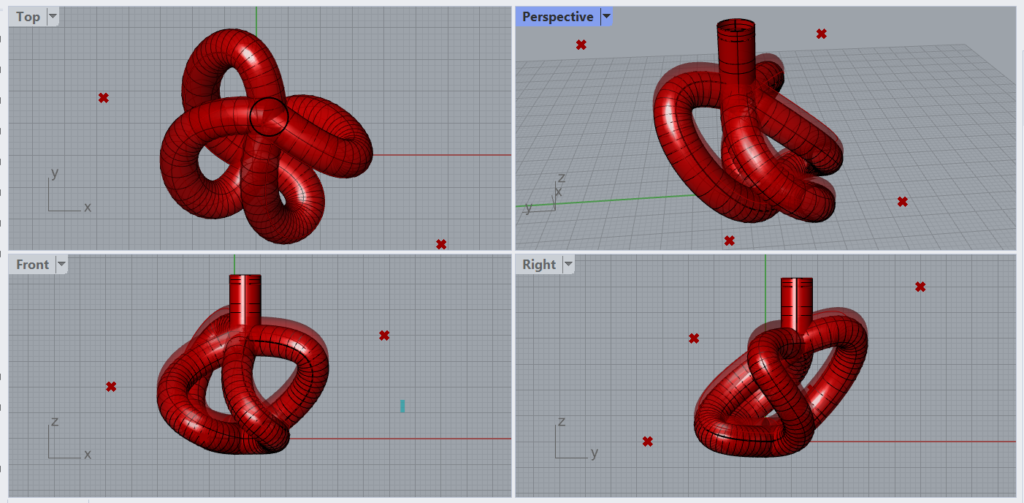
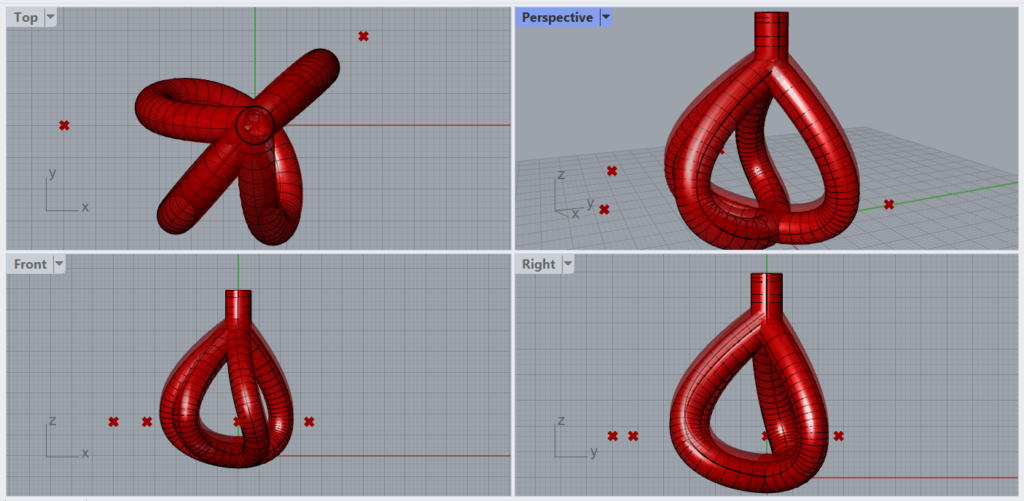
Here are a few that I designed and either didn’t print or didn’t print very well. The first is the most basic form, without variation in base rotation or height. I preferred the look of symmetrical designs over asymmetrical, although the middle picture is my favorite of my asymmetrical experiments.
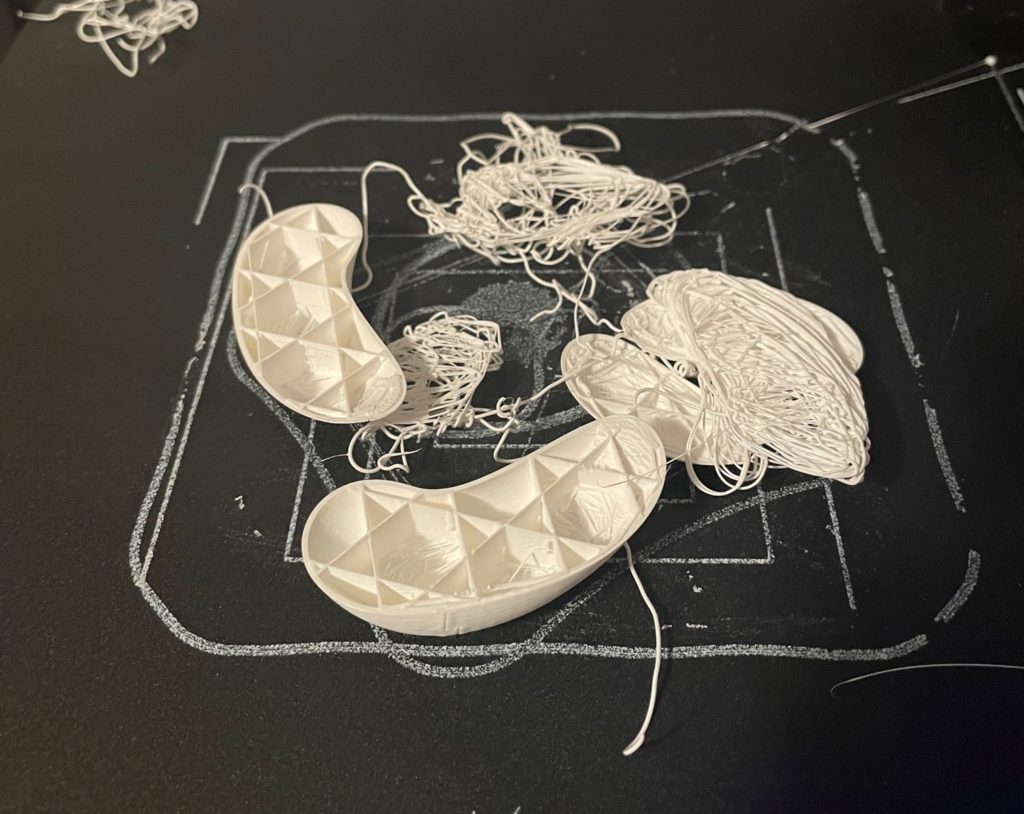
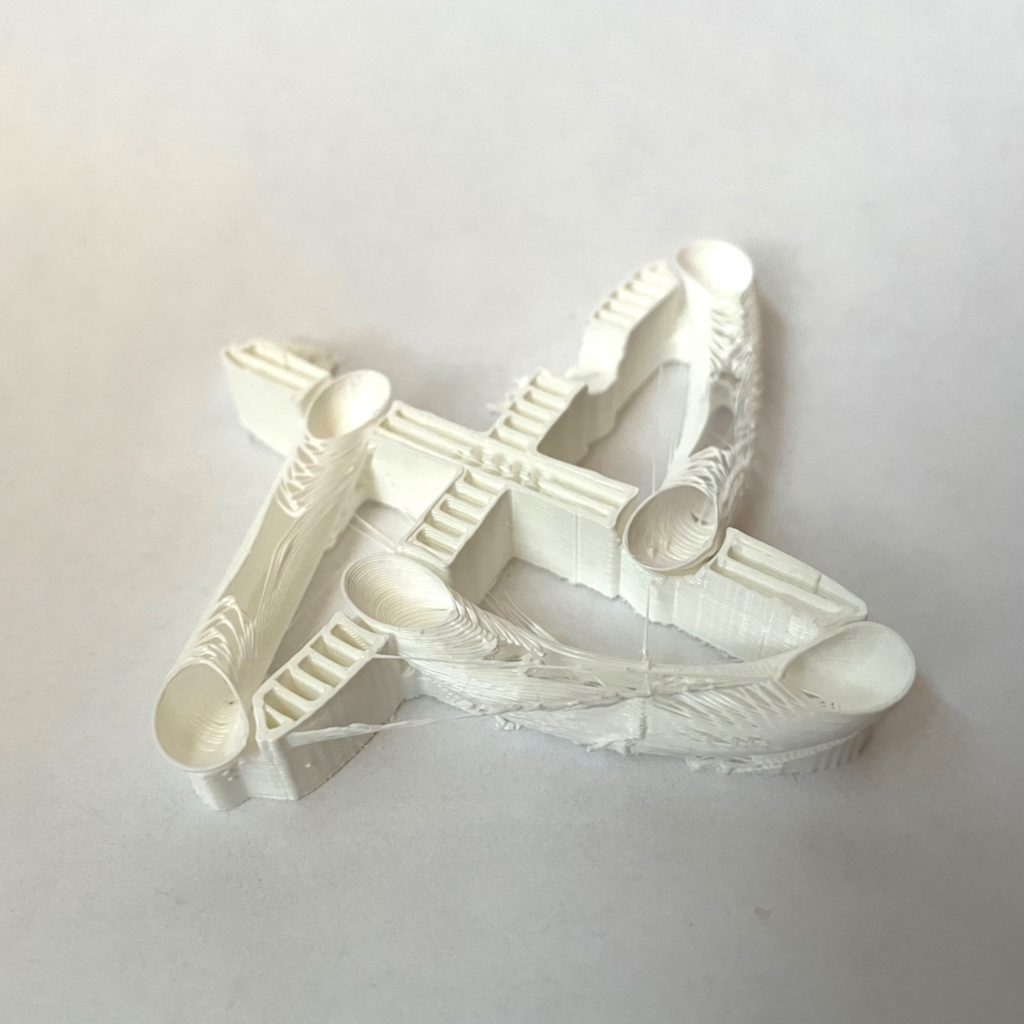
Here are a few of the failed prints. The first was before I started using buildplate support, so the pieces got caught and started moving around with the nozzle. The second is the asymmetrical form above, and it was before I figured out why the final pipe component on top wasn’t printing. I still don’t fully understand what about the union didn’t work because the spout showed in the Rhino view and the first Cura view, but not in the Cura preview. The third shows my attempt at using spiralize to make it hollow before I figured out the Rhino Shell.
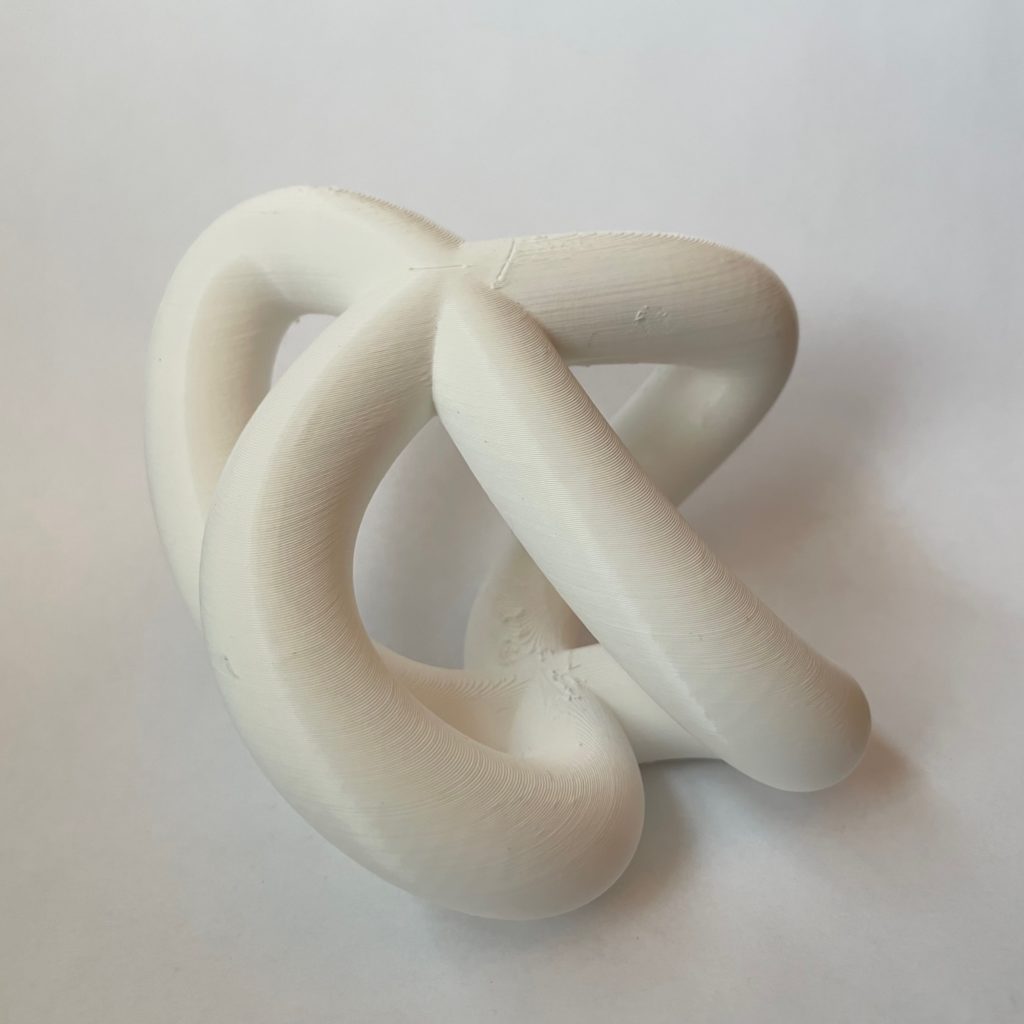
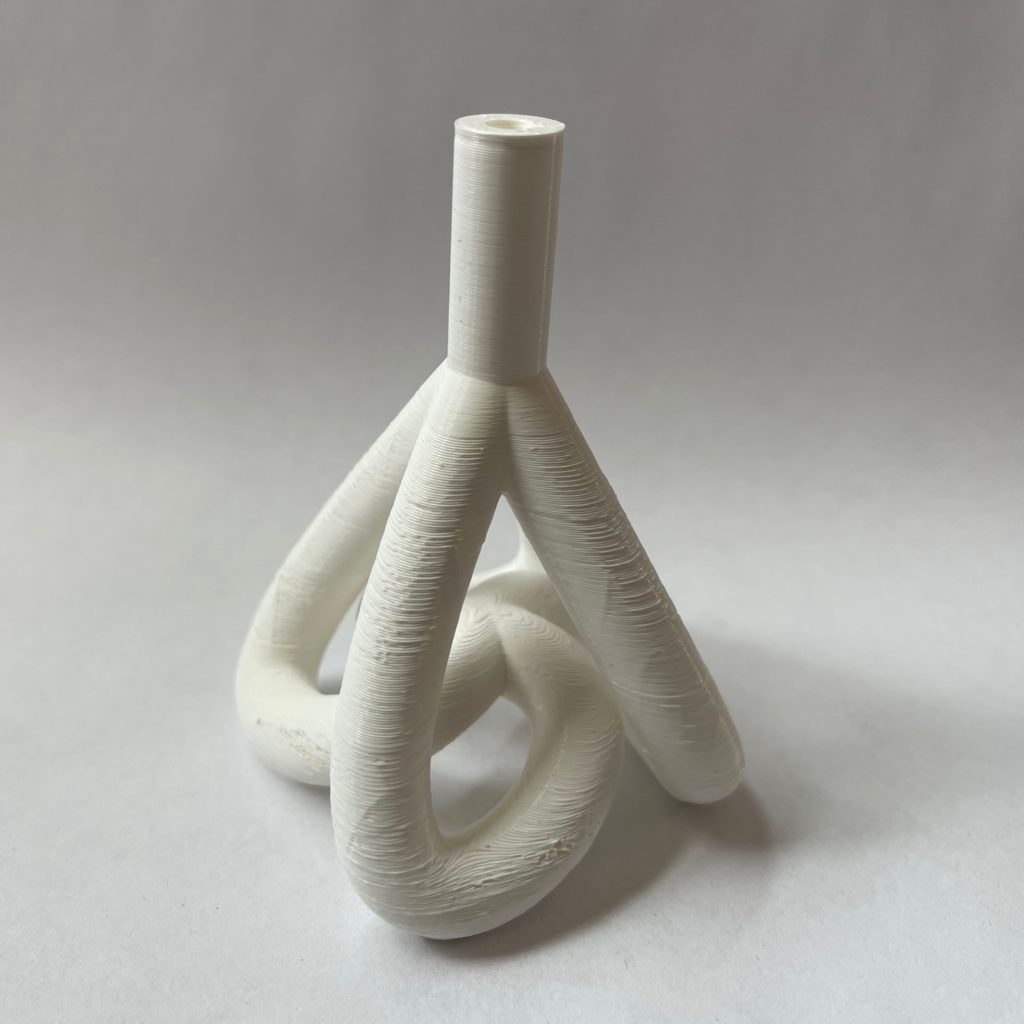
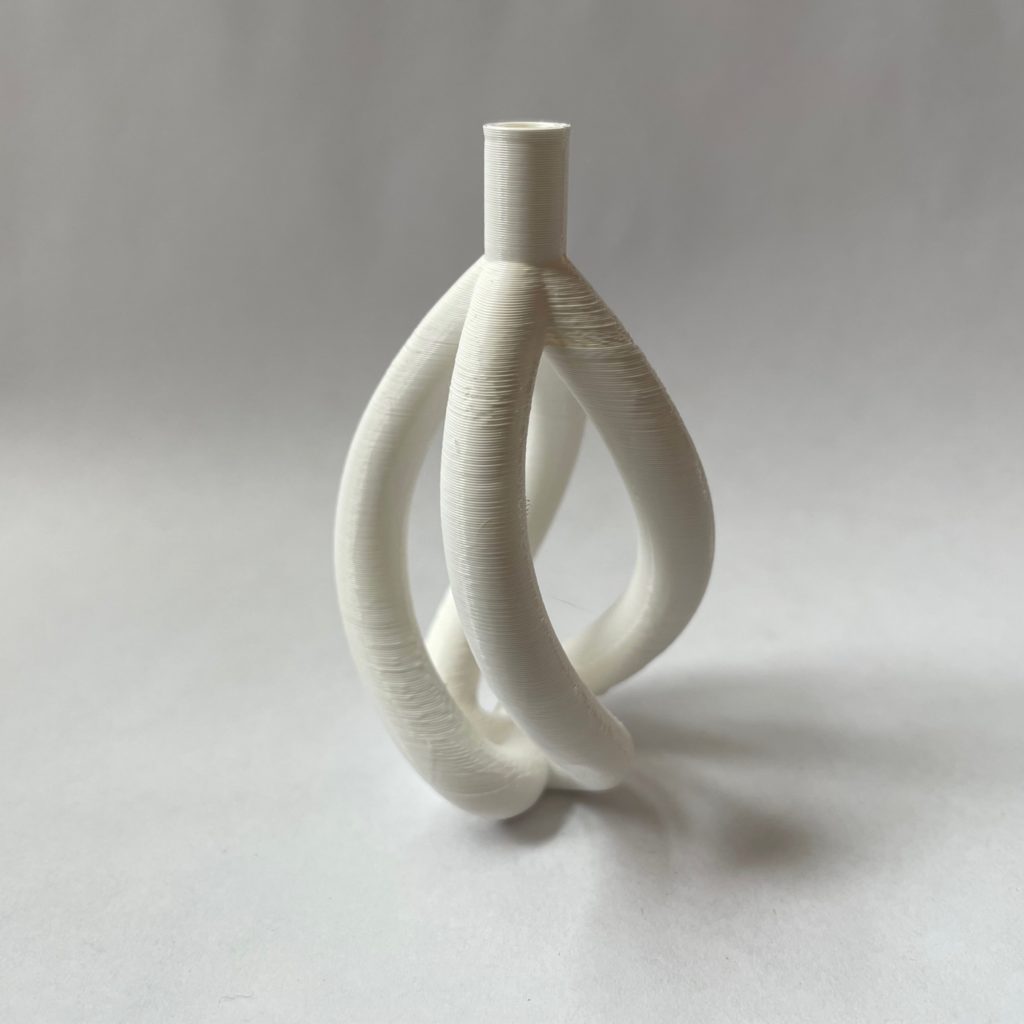
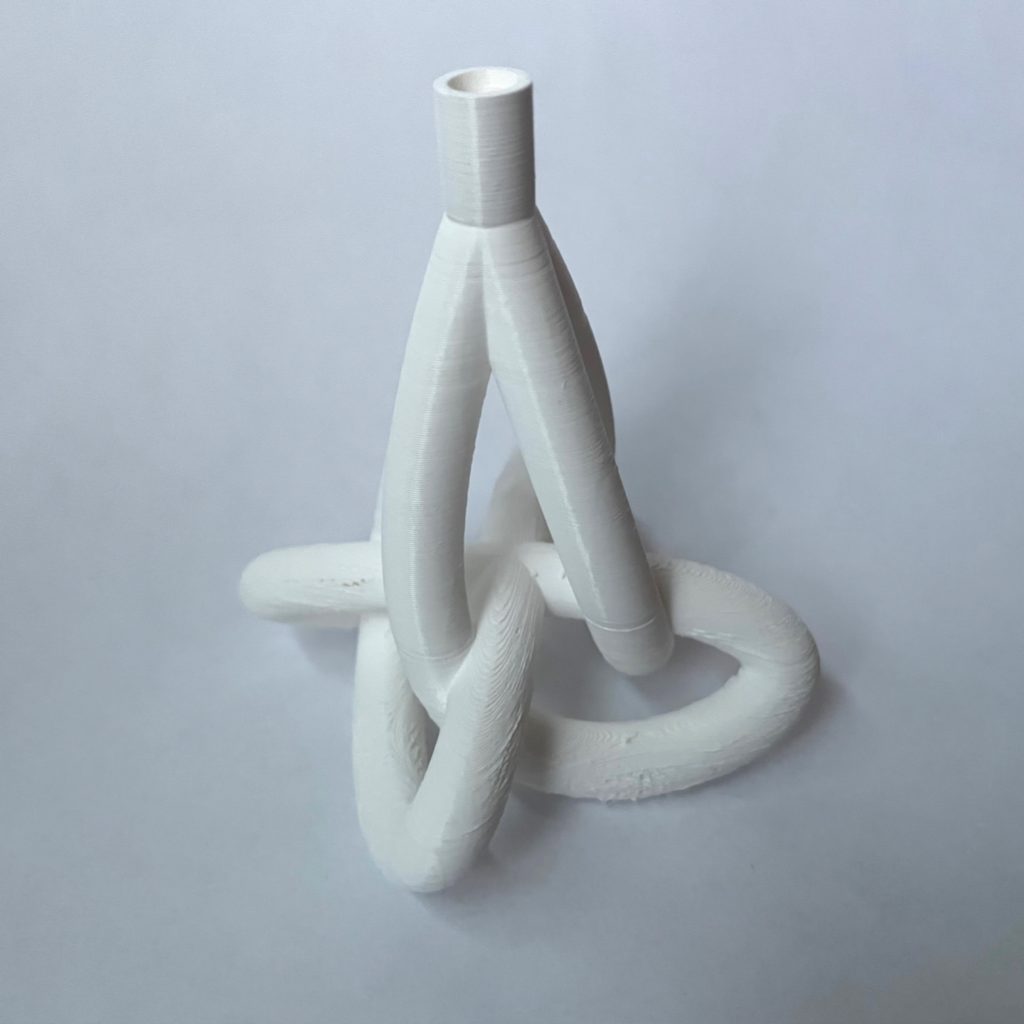
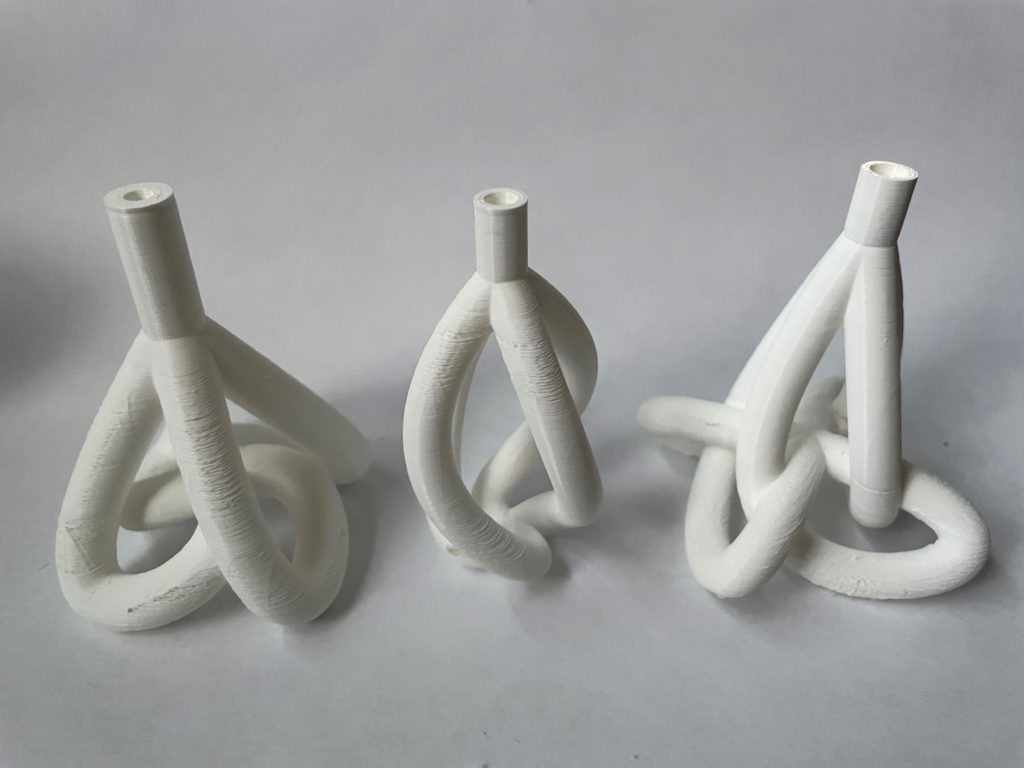
And here are how the final Rhino designs and their corresponding prints turned out.
Reflection on design process: Using programming to generate these designs was definitely an interesting and new experience. The options available in Rhino and Grasshopper open so many doors for creating whatever kind of design you want…if you know how to open the doors. I had such a hard time getting different components to work with each other, and it took so much trial and error to even start to gain an understanding of how to navigate the options. The programmatic nature of the software is a little frustrating, because I know that it knows what it’s doing but I don’t always know how to communicate what I want it to do. This complexity of the program is the biggest disadvantage for me right now, at my current skill level. If I’m making something by hand (I’m imagining with clay for something 3D), I can just put it together exactly how I want it, or at least to the extent that my dexterity/talent permits. Traditional methods give the freedom to create without worrying about whether the shapes are lined up perfectly for the boolean union to work or exactly what math I need to add texture to the material.
Once I can get the components working, then I really love how perfect it makes the shapes and how I can watch the Rhino model update in real time when I make changes to the parameters. It’s also so much easier to come back from mistakes using programming/3D printing methods. This is my favorite advantage of using these programs: if I do something wrong, I can immediately see that and go in and fix it. If I don’t like the size, I can change it in Cura and the entire piece will update in the right proportions. If I did the math wrong, I can just try again without much consequence. I was actually thinking about this the other day, when I was sketching out a drawing for a painting. I didn’t like the position and sizing of the sketch, but liked how it looked, and I thought about how much easier it would be to sketch it digitally and be able to just change those things without redoing the whole thing. This same kind of functionality in Rhino/Cura has been so helpful in the design process.
Reflection on creative agency: Both of my design attempts (the cactus and the decanter) were inspired by other art that I found. I find it easier to get started on creative projects when I start with a semi-solid idea rather than when I start working and try to make something cool comes out of it. Taking the latter approach usually just leaves me unhappy with the product and uninspired, even if it’s considered the more ‘creative’ approach. The cactus vase idea is pretty common, and there are a million pictures of them on the internet from different small creators or big businesses. Because of that, I feel like it’s easier to take credit for the work I did do, because it was meant to be my own implementation of how I thought a cute cactus vase should look. However, even despite all the issues I had with the texture, it felt boring. I realized that when I started playing with the parameters. I didn’t feel proud of it at all, and the changes I was making to the parameters and actual code design didn’t make me like the way it looked. Overall, from a creative standpoint, this one was not my favorite.
The decanter was a lot more fun, even though it was inspired more closely by someone else’s work. I certainly would not take credit for the design because of that. It would be like remaking Starry Night with a slightly different brushstroke and calling it my own because it looked a little different. However, I don’t necessarily feel bad about recreating another piece of art as long as credit is given, because it was still a learning experience to implement it. Even if this did come from my own idea/vision, I think using traditional design processes does make me feel more confident in claiming authorship. I don’t know if that’s because math/coding doesn’t feel like an art skill yet, or because creating things without them feels more personal and unique. On one hand, of course it takes some degree of skill to be able to put the components together and code up interesting shapes and relationships between shapes. On the other, it doesn’t feel like I had as much of a role in the creation of the final product.
I really like decanter design and the work you did trying to implement your own versions. Great job! Could definitely see these concepts used in many ways, maybe medical uses for printing biomedical replacements. Or cool and interesting hydroponic devices. Could even be looked at as some alien creature with multiple legs.
I don’t know where I got this advice from, but basically its totally okay to make a thing that has already been done, because YOU haven’t done it before. You are your own filter, and since there are hardly any new ideas, the freshness must come from new people harnessing those ideas. So I really like your translations of existent forms and I am SUPER impressed that you got them to print.
I really agree with you on the fact that its hard to figure out a way to get the code to make what you have designed in your head. Working with clay or wood or some physical object it’s easy to understand what you need to do to make your thoughts reality. But when you code it you have to figure out all the mathematical equations needed for the shape, then you need to know how to use grasshopper to place a surface between those points, etc… It’s honestly incredible that you were able to figure out what you needed to, do to make your awesome designs.