You should document your work in this class with excellent photographs. The quality of the documentation of your work is as important as the work itself. Smart phones come with really good cameras these days. It’s relatively easily to take great photographs of things by following two simple rules.
- Use a simple background. Use a background of a clean solid color. Your background can be white, gray, or a color. The background should be behind and underneath the object. A curved piece of paper works very well. Get a large sheet of plain white paper from Leah to use as a background if you need one. You can tape the top side of the paper to a wall or box and the bottom side to a table or the floor. See the image below for an example.
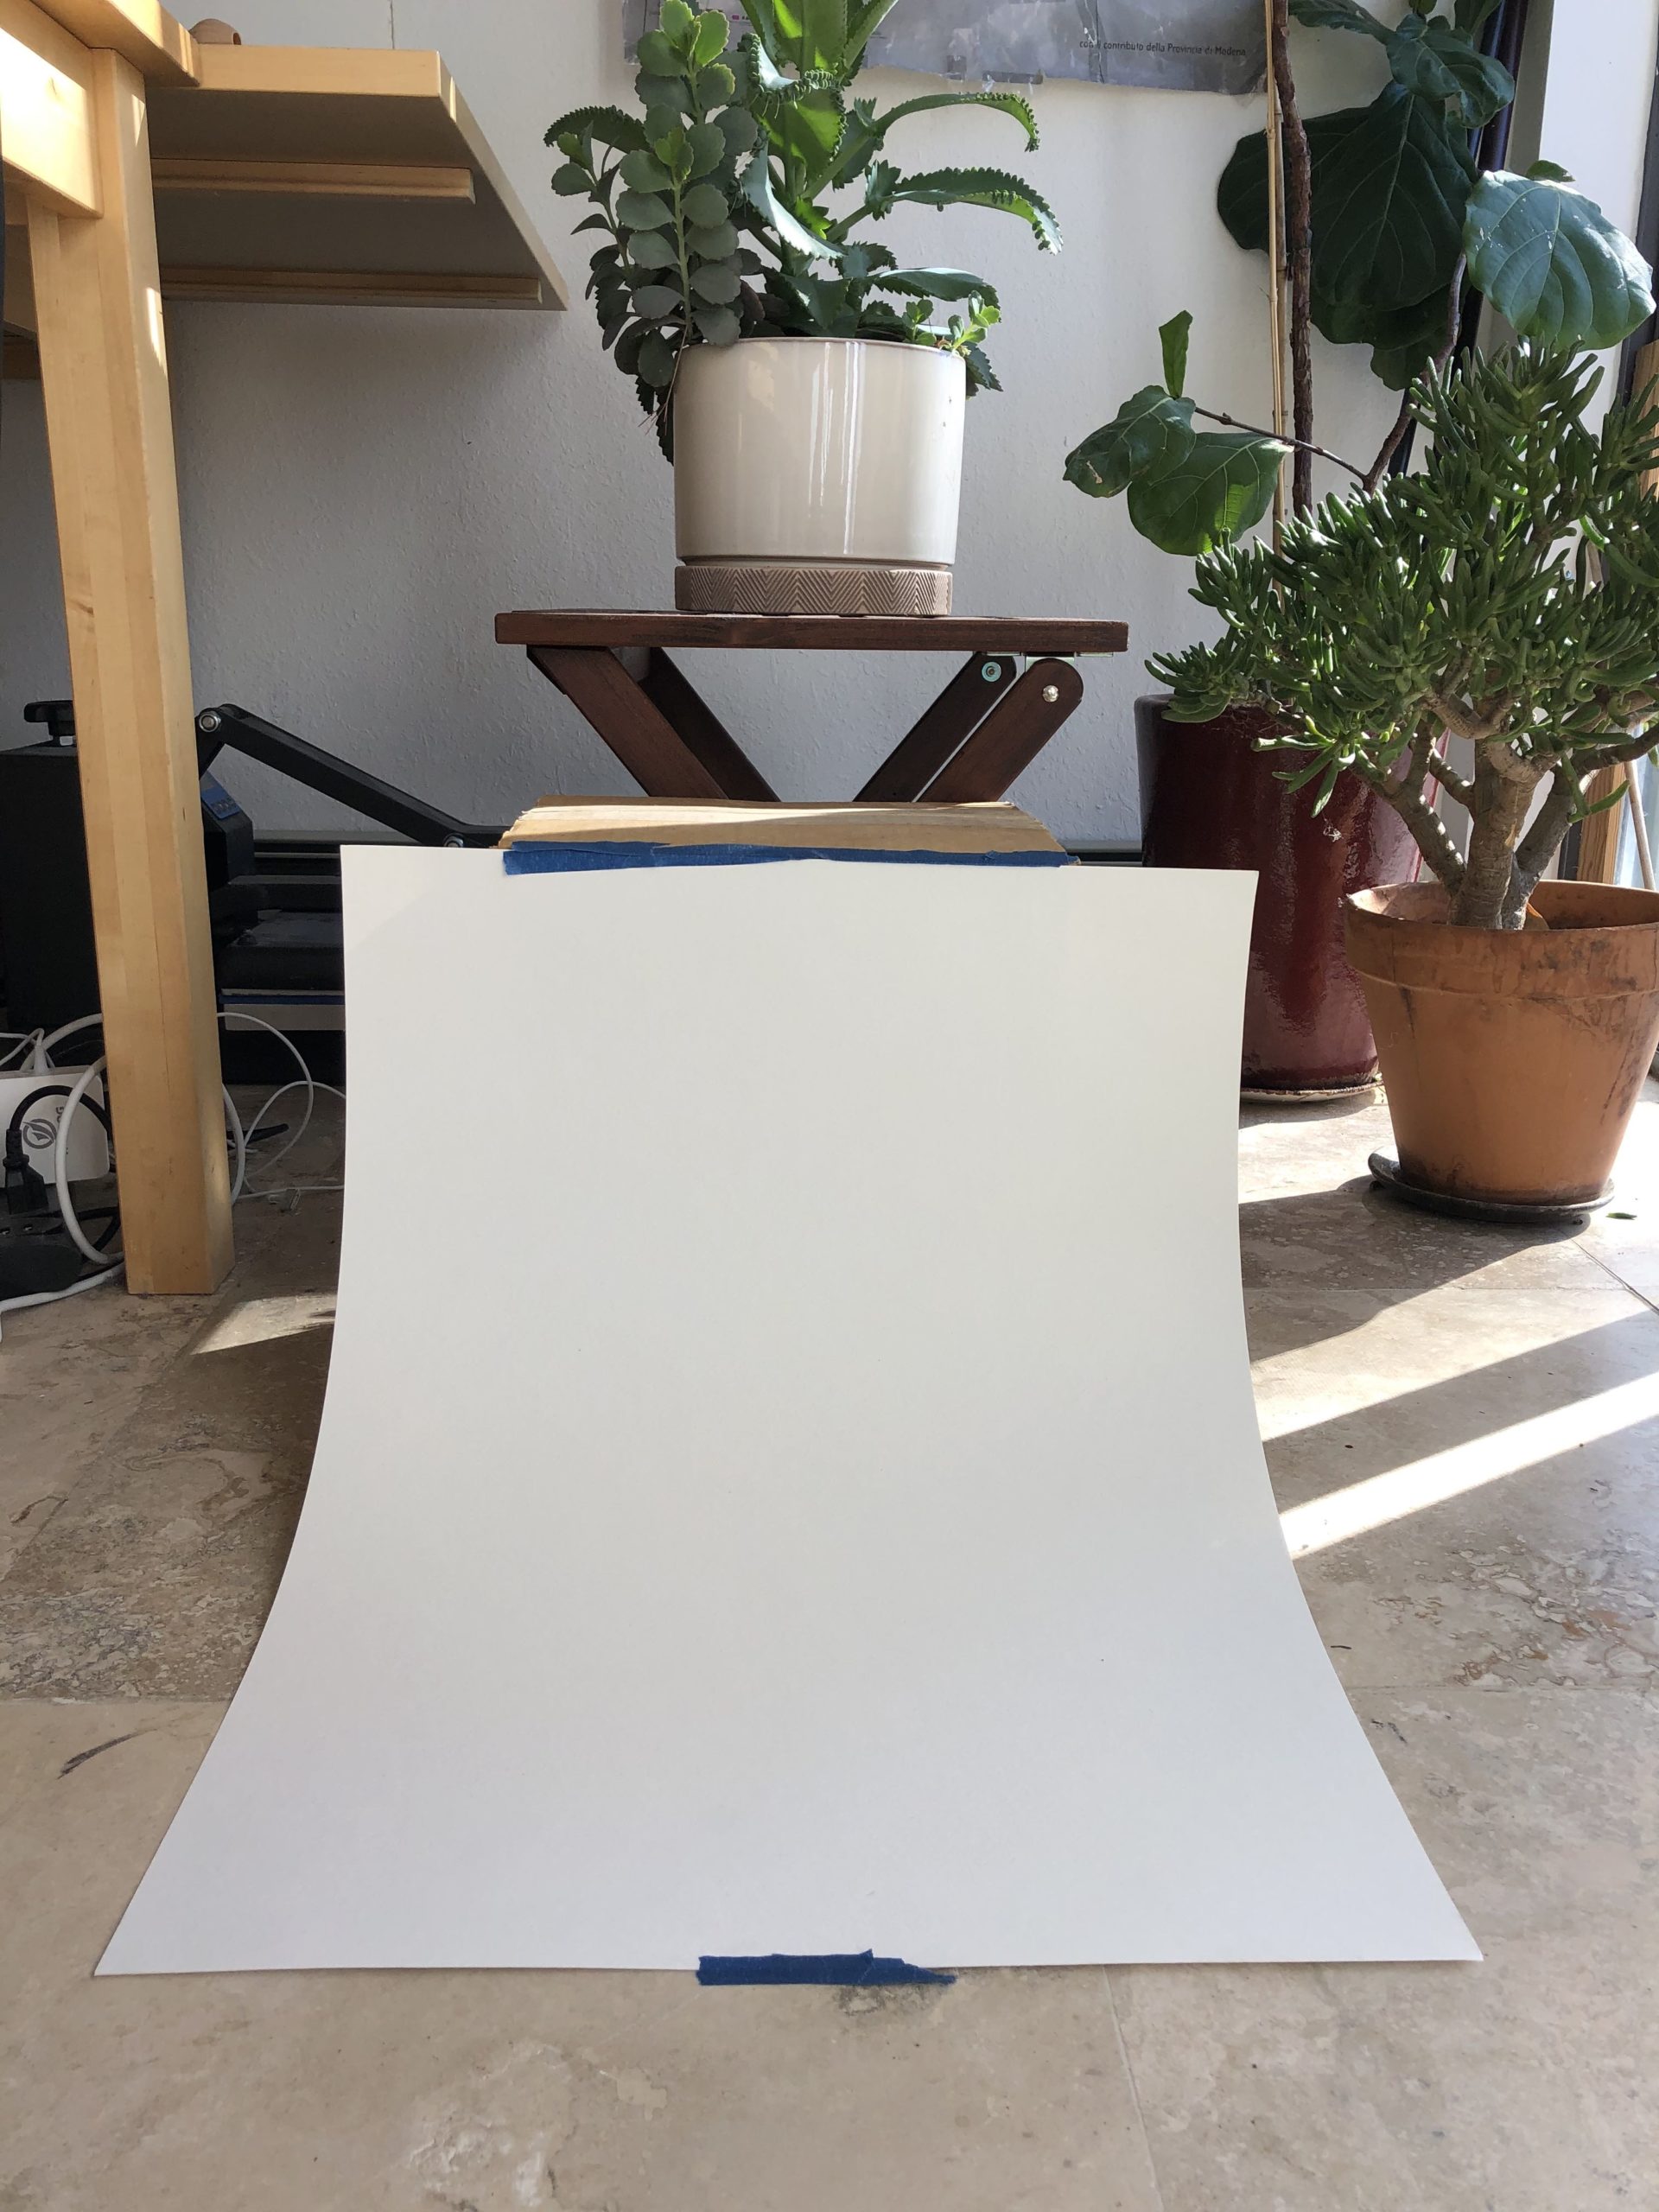
- Use only indirect natural light. Turn off all artificial lights. Turn off the flash on your camera. Set your background up near a window where the light comes from the side and/or the front. Your background and object should receive no direct sunlight. See the image above for a nice set up. Notice that no direct sunlight is hitting the paper.
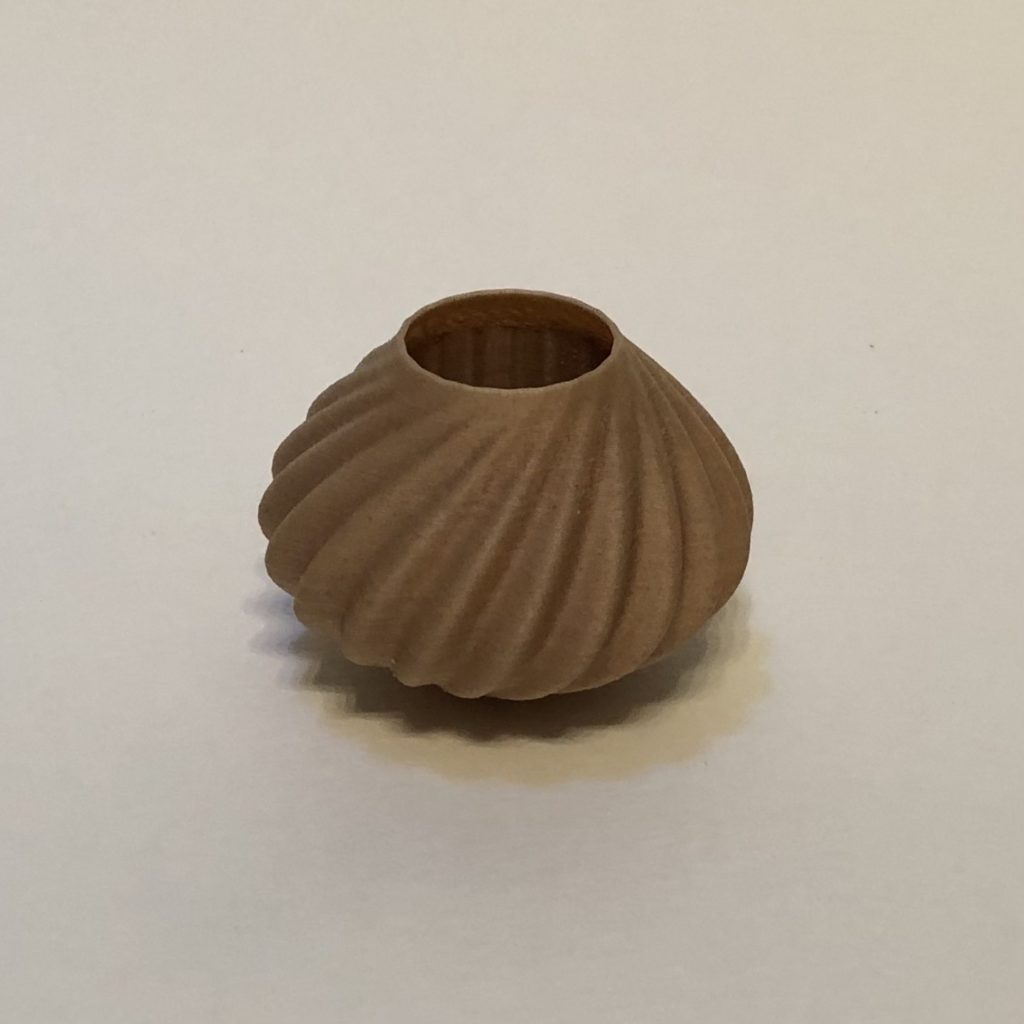
See the image below for a nice example photograph. Shadows are soft, the color is natural, and the object is well lit.
- Crop your photo appropriately. The object you are photographing should be in the center of the photograph. You should crop out any undesired background that might be visible at the edges of your photograph. There should be appropriate amounts of white space around the object. Too much and the artifact gets lost. Too little and the artifact seems squeezed.
Examples of Bad Photographs
Bad background. Below, I have used a busy background. The camera flash is on and I am also using artificial light.
Flash. Here, the background is better, but the camera flash was left on. Notice the harsh shadows and intense contrast.
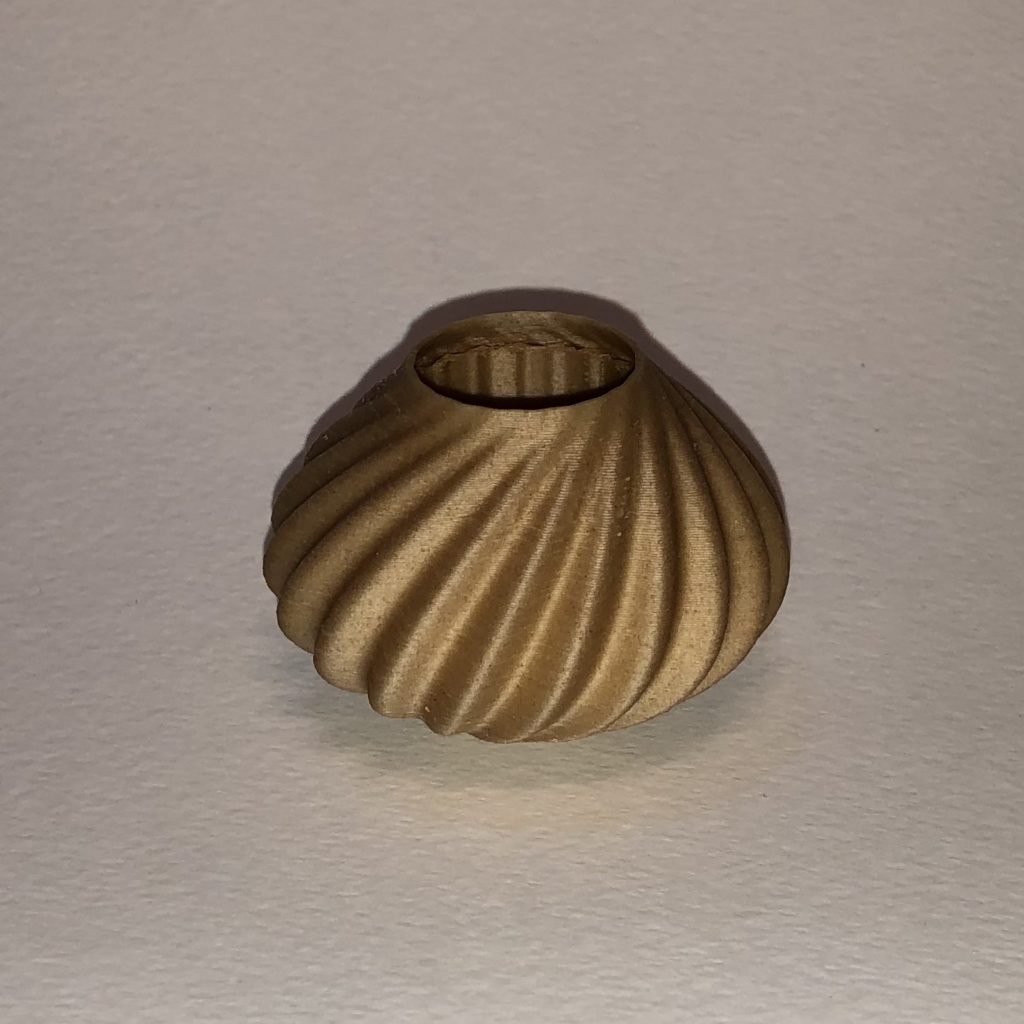
Artificial light. I have turned off the camera’s flash, but only artificial light is used. Notice the unpleasant color, dark image, and weird double shadows.